
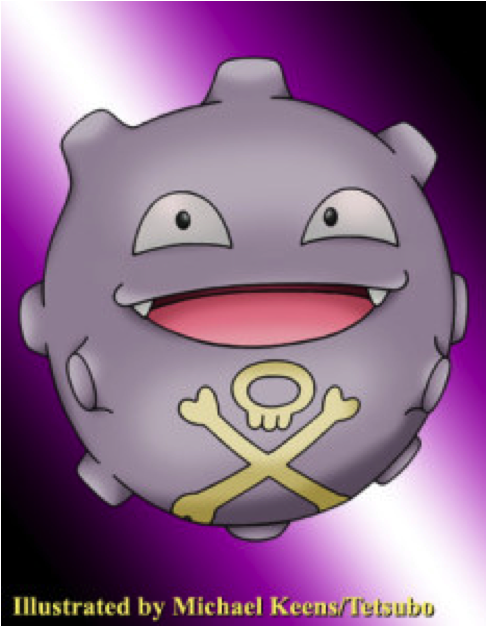
Pokemon(Owned by Nintendo, Game Freak and Monsters inc.) is commonly known as a consol game where you raise creatures called Pokemon, fight with them, and become the strongest trainer in the world. There is also a manga, anime and card game for it. This project focused on creating a life size version of one specific Pokemon: Koffing, see figure 1 below.

Figure 1: Image of Koffing and what final design should resemble.
Link: http://tetsubo.deviantart.com/art/Pokemon-109-Koffing-150789826
Koffing has a diameter of 2ft (0.6m), weight of 1kg (2.2lbs), emits black smoke, can only say the word “Koffing”, and floats. Meeting all of these specifications would be exceptionally difficult and time consuming; thus only size/appearance was focused on for this project.
Need: To make a life size Koffing.
Problem: A full size version is exceptionally large (2ft dia) and it has semi complex shapes (the extrusions from its body).
Design iteration 1: Take old used paper and constantly wrap it up until it reaches a decent size. Then soak the next few layers in a flour/water mix, add them to the ball, let them dry. Use a knife to cut out a mouth hole and remove the old paper stuffing. Cut clear see-through plastic in shape of the eyes and mouth (cut out the eyes with a knife). Paint the eyes and mouth and tape them in. On the side use old paper to create a ring shape and apply more soaked paper to make extrusions similar to the ones on Koffing. One the extrusions have dried, tape them onto Koffing and apply another layer of soaked paper. Next cover the eyes and mouth, begin to paint the body and wait for it to dry. Remove the covers for they eyes and mouth.
Prototype 1: Quickly discovered that the paper could not reach a diameter of 2 ft without forcing me to tape the paper together, as seen in figure 2. This development would require lots of tape and would make extracting the excess paper stuffing difficult.

Figure 2: Prototype 1, it reached slightly less than 1ft before it became too large for more paper to completely envelope it.
Solutions to design 1: It was determined that an inner shell was needed to and several ideas were considered: Using aluminum foil to fill up the inside instead of paper, a 2ft balloon, or a beach ball. Aluminum foil proved to be too costly, a balloon would not provide the sphere needed and would quickly loose shape. A beach ball appeared to be the optimal solution.
Design iteration 2: Same design as design iteration 1, but a beach ball was to be used instead of paper to fill out the frame and soaked paper was to be immediately applied. Then add a few extra layers of paper since the volleyball must be popped before extraction.
Problem: Unfortunately, no beach ball could be found within the time limitations of this project.
Design iteration 3: A ball called a ‘Wubble Bubble Ball’, see figure 3, was discovered and was similar enough to a beach ball that it was used as a substitute. Design iteration 3 was almost the same as design iteration 2, except; it used a ‘Wubble bubble Ball’ instead of a beach ball. Unfortunately the new ball was far less rigid then a beach ball and would deform when any force was applied. This resulted in the creator to be gentler when applying layers in order to not deform the ball.

Figure 3: A Wubble Bubble Ball container.
Prototype 2: It was discovered that applying full sheets of paper to the ball caused large folds in the paper and made it more difficult to create the desired effect.
Design iteration 4: Design iteration 4 was the same as design iteration 3, except that the paper was cut into small strips, soaked, and then applied.
Prototype 3 (layers 1-2): 1 layer of paper was applied, the application of the paper was random and the ball tented to roll as paper was applied. This process took approximately 3 hr. See figure 4 for visual. A large hold was left at the bottom of the ball since it could not be reached until the first few layers hardened. 1 more layer was applied after the first dried (12hr) and it was discovered that when the layers are randomly applied, it is difficult to differentiate layers and spots could have easily been missed.

Figure 4: Ball after the 1st layer was applied.
Manufacturing edits: A small pot was placed under the ball to prevent it from rolling. Also the next layer of paper was applied in an organized manner so it could be distinguished from the last layer. The next layer would only go halfway down the ball before flipping the ball over and doing the bottom. This would reduce the hole size to the minimum requirement.
Prototype 3 (layers 3-4): Layer 3, see figure 5, was applied with a style that had each paper strip extrude from a center point. This resulted in a focal point where copious amounts of paper was stacked on top of each other and took over 24 hr to dry. Layer 4, see figures 6 and 7, was applied perpendicular and did not create a area where paper was stacked and dried within the normal 12 hr span.

Figure 5: Layer 3, all strips of paper extrude from the focal point.

Figure 6: Layer 4, all strips are perpendicular to layer 3 and part of the ‘Wubble Bubble Ball’ can be seen.

Figure 7: Layer 4, all strips are perpendicular to layer 3 and the pot that prevents the ball from rotating can be seen underneath the ball.
Prototype 3 (extrusions): Small pieces of paper were rolled up, taped onto the ball in a circular pattern, see figure 8. Extra tape was applied to avoid any gaps forming before the soaked paper was applied. Then a rough sketch of the face was drawn onto the ball, see figure 9, to ensure that there was enough space for the face. A new layer of soaked paper was applied to the extrusion, see figure 10.

Figure 8: Shows the extrusion on the ball with excess amounts of duck tape used to keep in place and prevent holes.

Figure 9: All extrusions were added to the ball, and a rough face drawn to ensure space.
Figure 10: All soaked paper was applied to the ball, dried and a new face was drawn.
Prototype 3 (Coloring): Once the extrusions dried, the ball was taken outside, placed on newspaper, and the upper have was spray-painted. Once the spray paint had dried, 1hr, the ball was flipped upside down and the bottom was spray-painted. Once the spray paint dried, a rough sketch of the face was drawn on the ball again, see figure 11. Next a layer of white paint was applied to the face, see figure 12. Unfortunately the paint was too see through and would several more layers to achieve the desired result.

Figure 11: A rough sketch of Koffing’s face is drawn on the ball in marker after the spray paint dried.

Figure 12: A layer of white paint has bee applied to Koffing’s eyes. Some purple can be seen through the paint.
Prototype 3 (Re-Coloring the face): Due to the time limit of this project, paint was discarded and old paper was embraced. Paper was torn, soaked and applied to the eyes, mouth, and skull bones. Once the paper dried, a layer of paint was applied to make it appear smoother and whiter. Next, highlighters and black markers were used to apply the appropriate colors to the face, and finally a life size Koffing was created, see figure 13.

Figure 13: The final product, a life size version of koffing.
Results:
I am very satisfied with this project. It took far more energy, effort and work, then expected, but it was worth it. The aesthetic come out fantastic, and is fairly stable. If I hade more time, I would have added a few more layers for stability, used a beach ball, added a layer of cloth on top of the paper layers to make it smoother, made smaller extrusions and used paint for the skull and crossbones. I would have also cut out eyes and replaced them with plastic ones that I had painted. I would have also cut out the mouth, and added a 3D mouth behind it. I would have also created 3D teeth.
My future goals for this prop would be to include a function that lets the Koffing say its name and spew black smoke.
44 Comments. Leave new
I visited a lot of website but I think this one has got something extra in it in it
https://extraproxies.com/buy-proxies/500-proxy-pack
That’s impressive! It looks really good and you did a great job with the painting. You should try making it shoot smoke! That would be really cool!
This turned out really great, looks very similar to the actual figure. Nice use of engineering paper.
I’m completely amazed how far you got with so little paper. Also, it’s so round, so perfectly colored, and so well cratered! Just gotta figure out how to display it
This really turned out well. I think it is one of the better examples of the iterative process within the design loop from our class. Especially in your report, you highlight prototyping really quickly with just paper balled up, which may seem trivial but shows the nuance in the design loop that we may all take for granted at this point. I also really enjoyed the iteration you needed to go through with the paper mache. I’m sure that grew tedious, but it looked like you got better each pass and were able to become more efficient as you learned how to do it, a good example of the spontaneous design changes that always come up. I also thought it was a really good idea to fold paper into circles to make the protrusions but then paper mache-ing over that again to blend all the materials. The only way I would look to improve it is in the painting of the face. I know he’s circular, and so printing a paper stencil for the paint may not work, but even taping off where you wanted to paint and then spraying to create a more even coat may give a really professional looking result. I’m sure you’d had your fill of spray painting at that point though…overall excellent job.
This is a really impressive project. I love that fact that you used your old engineering papers. This truly seems like the only good use for the paper. Maybe just add some more layers for rigidity. Great project overall.
Neat! It came out looking great. Is this your favorite Pokemon? What are you planning to do with it, will you cosplay with it or something?
I’ve always been interested in using paper mache… great explanation on your design process. The final product was well executed!
Impressed with the amount of work that was put into this project. I’ve worked with paper mache and it can be a nightmare! Good work getting the paint to be an even coat and with some shine.
I really enjoy the re creation using recycled paper! It turned out really well!
Great use of old homework! I still have a stack of my old papers, I’ll probably end up recycling them. Is Koffing your favorite Pokemon?
Good use of old engineering paper. It would be nice if the paper mache could be smoothed out more (I know that’s not easy to do). Good work!
Wow the project turns out so great! It looks exactly the same as the original character! Good work!
That would make a great piñata. If those engineering papers don’t lead gainful employment, you could sell these things to birthday parties. Time permitting, it would nice to cover it with dry wall mud and sand it down to a smooth surface.
That’s awesome, pokemon stuff will always strike a note with kids our age.
Where are you going to keep it? If you’re planning on getting rid of it, it could make a pretty epic pinata.
Really accurate model, looks like to took a lot of work!
Alex, as a life long lover of Pokemon, I love this project! I think that the end result is fantastic looking. I really like the fact that you used engineering paper and duct tape (what project doesn’t need duct tape)! Looks AMAZING!!!!!
This turned out looking great! If you could get this thing floating and blowing smoke it would be awesome!
The process of creating it is very interesting and creative. I like the outcome and I also happen to like pokemon. I was a little concerned how durable the base was but you explained towards the end it wasn’t there any more.
Damn that’s a scary pokemon. If you could make it float that would be awesome!
Love the concept of making him out of your old engineering work papers. Do you like the resulting texture?
THIS IS AWESOME. Absolutely epic. This would be an amazing chandelier if there were holes in the craters. Or perhaps an epic fog machine!
This turned out really well. I imagine that doing all of the layers was really time consuming. Are you planning on hanging this up in your room? I wonder if it would be possible to blend paper and glue to make a paper paste. It may take longer to dry, but you could perhaps put on thick layers. Great idea and execution!
That’s super cool! I’m always a sucker to pokemon related things. Good work!
I like that you corrected your errors. How did you get the weight right. Great paint job. Where will this go?
Awesome project! I really love the scale of this and its really well done.
I’m still trying to figure out what a Wubble is. This will look cool sitting on your shelf – or preferably its own stand.
Clever use of old engineering papers. Will this Koffing stay in a place of honor in your home, use it as a Halloween costume, or do you plan to set it on fire?
Looks like a pretty tedious process, it’s a great result though. The protrusions look great, that’s the first life size pokemon I’ve seen and I love it.
The extrusions look excellent you really captured Koffing and transformed your old engineering papers! I reminds me of a piñata but it would be terrible to beat Koffing and destroy your beautiful work!
Nice work with the painting, it was the finishing touch that made this project.
Love the use of engineering paper/ old homework to build something new. Would be interesting to add a bit of dry ice or smoke machine to liven up the project. With the access in the bottom you can add all kinds of detail from the inside out.
Great paint job and looks very similar to the real thing. I also like that you reused engineering homework to create something new. Very innovative on creating the extrusion. You put a lot of time into this and it paid off!
What was your specific reason for choosing Koffing vs. a different pokemon – was Koffing going to be easiest because of its primarily spherical shape?
Not sure why, but I’m very curious if this bounces. Besides the paper what other materials did you upcycle? This would be a cool in the light disco ball that you could hang in your room.
I like how you made him life size so that it is similar to what it would be like if you were in the show. Another way to tell the different types of layers of paper mache could be to use 2 different types of paper and alternate layers. It would be extra cool if you made it shoot smoke from it as well!
this is quite amusing. I like that you used your engineering papers 🙂
I absolutely love how you used your old engineering papers to make this pokemon character! Your pokemon guy could make a great lamp if you wanted to hang him from a ceiling then he would also sort of float like you said he does.
I really like that you used your old papers for this project. It is a great way to recycle paper and I like the idea of the wubble ball you used since you couldn’t find a beach ball as well as the paper mache tactic you used.
Oh man, such nostalgia! Your Koffing looks exactly like I imagined it when I was watching Pokemon when I was little, and would make a great decoration for any occasion.
Wow dude, you must really like Pokémon.
I really loved the material you used to make your paper Mache Koffing. Old engineering homework and papers, great way to use old anxiety to build a fun art piece.
cool idea and looks very similar to the original character