
Neo’s Parasol As An Umbrella

Note: Most of this is from my previous post as I already planned out my report as of last week!
The inspiration behind this idea is that I am planning on making this character’s entire outfit anyways for NDK. As background, this character is from the show RWBY and her name is Neo (short for Neopolitan, yes, similar to the ice cream). The parasol will be the most difficult part of the entire costume. However, I have no use for a parasol outside of it being a costume, so I’d rather be able to use it like an umbrella. Therefore, my personal touch would be to turn this parasol into a duo-parasol-umbrella so I may use it all year long. (For clarity, a parasol blocks sun and an umbrella blocks rain.) This means that I need it to also be able to repel water like a regular umbrella (unlike the show’s parasol). Because I also want it to function like a regular umbrella, it will be a bit bigger than how it is pictured in the show. Additional, the lace colors/design/attachment to the frame need to be waterproof or at least be able to handle getting wet, even if it isn’t directly in rain.
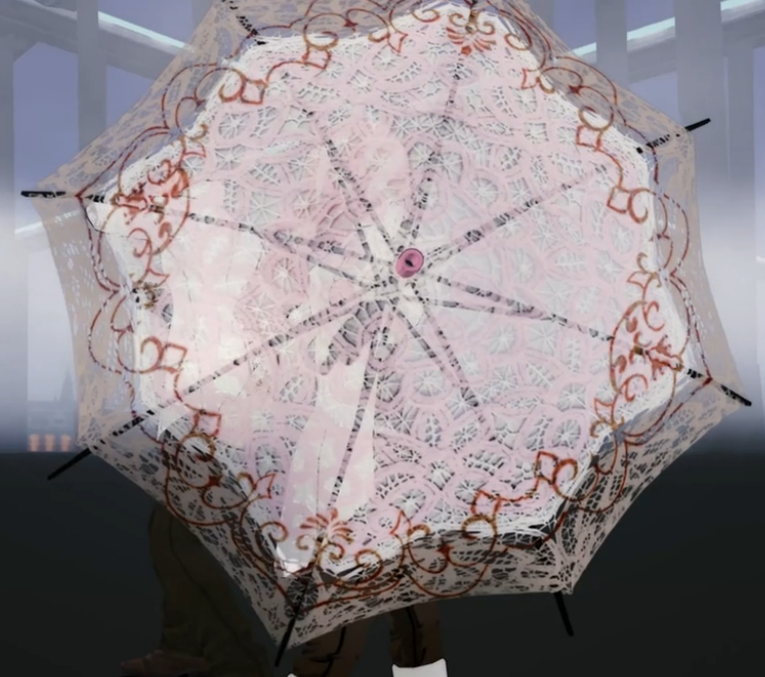
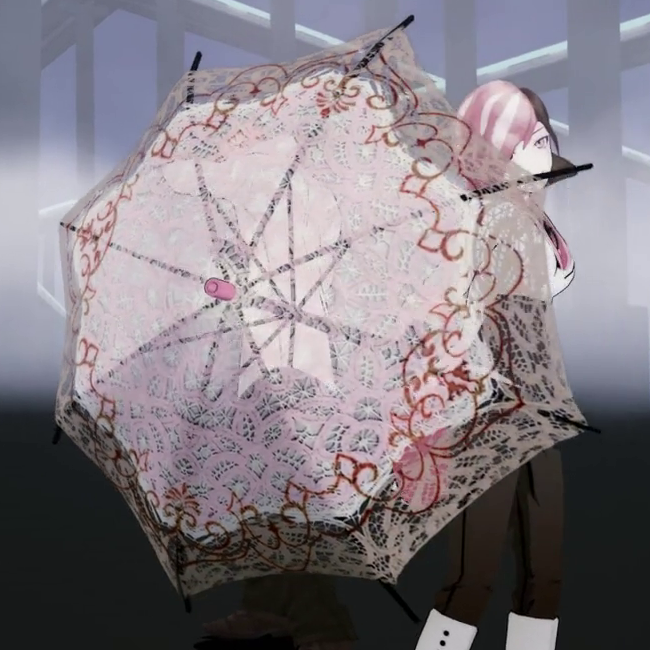
The aesthetic of this parasol is very romantic, feminine, and a bit Victorian. The colors on the parasol are white, pink, brown, and maroon. The lace design is also very Victorian in nature as it contains several Fleur de Lis shapes, not to mention lace itself is very romantic in nature. This parasol gives the impression that it is delicate, vintage, and very feminine. However, unlike its delicate impression, I want my umbrella to be able to withstand rain (and not just sunlight!)

Trickiest Component: The trickiest part of the parasol is attaching the lace (and water repelling plastic) to the frame. I will likely be purchasing an umbrella and then remove its fabric and replace it with the lace. Making the parasol close properly after this fabric change will be difficult as well. Additionally, I want my cane umbrella to be automatic – I need to make sure that the lace doesn’t rip off from the force of the automatic open.
The trickiest non-critical component: In addition to looking like Neo’s parasol, I actually want this parasol to be able to function like an umbrella. My current idea is to apply an additional clear layer on top of the lace (reason being that I don’t want the lace color or design to get ruined from weather) and be able to repel rain while also be usable as a parasol under the sun! On top of that, I want to make sure that the color on the lace components will not get ruined if it gets wet. I cannot sew a plastic layer onto the lace since I cannot poke holes in it, but I also don’t really want to just glue the plastic onto the lace. This is why this part will be trickier than it may sound.
Cost Estimate:
- A cane parasol: an auto one is $20 on Amazon
- Lace fabric: probably about $8/yd at Joanns and I’ll probably need two yards of it maximum (there are two layers of lace), so about $15
- Brown fabric dye/spray paint: about $5
- Red/maroon paint: $5
- Paintbrush: I have several
- Black spray paint for the cane: $3
- Fabric glue: $3
- E6000 glue: I have some
- Sewing thread (optional): I own plenty
- Plastic layer (?): $10
- TOTAL = ~$61
Timeline (Critical Due-by Dates):
Only the parasol will need to be ordered online, unless I get lucky at Goodwill. Everything has a full week in case of need for revision.
3/1/16 – Order the parasol (with Prime shipping) [complete]
3/4/16 – Remove the existing fabric from parasol. Examine the fabric dimensions and determine what the lace dimensions need to be to fit this umbrella. Figure out all dimensions for color. Draw out the red pattern and make a sheet to basically overlay what it will need to be on the parasol.
3/12/16 – Purchase cut lace from Joanns, purchase all paint. Using the dimensions from last week, cut the two lace pieces. Paint the brown section of the larger lacy piece and let dry.
3/19/16 – Attach the small all-white lace to the bigger lace with the brown outline and let dry. Spray paint the umbrella frame with black coats of paint without damaging the auto-close button.
3/26/16 – Attach the lace to the cane parasol frame. This will need to be a mix of glue and sewing to ensure that the lace stays in place. This will need to be while the parasol is open. Let dry.
4/2/16 – First using thin marker, carefully trace the red/maroon pattern onto the parasol. When it looks good, brush on red paint over design. May need a few layers.
4/9/16 – Now that the umbrella is dry, use this time for any touch ups on red paint or troubleshoot if any of the top steps went wrong. Let dry. Attach the final plastic layer or whatever I’m choosing to make this parasol into an actual umbrella.
4/15/16 – Everything should be complete!!
Source of Photos: They are all directly from the show RWBY created by Monty Oum and from Rooster Teeth.
Here’s the video from the class presentations: https://www.youtube.com/watch?v=apbWDnr3ouk
4 Comments. Leave new
[…] My Final Project Summary (3/2) […]
Hi! I’m currently doing something similar. How are you getting on? Any advice on the waterproofing part? Thanks!
I’ve been following this whole project so nothing new 🙂 but it looks great. I think you should definitely use another umbrella cover just to know exactly what size to use. Otherwise, I love the aesthetic and idea of this
I’ve watched RWBY, and it’s a pretty neat source of inspiration. It might be pretty tricky to incorporate all of the intricacies of the parasol in your design. Good luck!