
My final project was a geometric pine and LED desk lamp. My final project was originally slated to be a different variety of desk lamp but due to manufacturing failures the final design was iterated upon until the final selected design was chosen. The original design was to be made using thin sheets of pressed maple and bent into a circular shape. This didn’t materialize as when the final product was rolled into its shape and dried the wood splintered due to the dry climate of Colorado. This is how the geometric version came around. A sketch of the original design can be seen below.

The aesthetics of the geometric version go along with the Danish idea of hygge which blends the idea of modern design with the nature that surrounds us and the comforting feeling that this provides. I feel that this desk lamp achieves the feeling of a clean modern design with the sharp angles and tight joints but gives a warm inviting feeling from the light wood which was selected in the design. The first two sketches of the potential new design can be seen below with the chosen version on the left. The chosen design was picked due to the functionality compared to the other options. There was no prototype made for this design as this was made for the original design.


The selected materials for the final design ended up being a 5 foot piece of 0.75 x 2.5 select pine board from Home Depot, a goal zero USB portable LED strip, a 10 foot male to female USB extension cord and an apple iPhone charger wall adapter. All of these materials could be easily sourced and filled the need which they were selected for.
Manufacturing the actual desk lamp took approximately 10 hours of time in the itll shop and at my house to add the final touches. Some of this time accounted for my making mistakes while manufacturing and having to start over. I used a chop saw to cut each piece to length and then marked where i wanted my notches in each board to go. I was able to cut the square notches with 90 degree angles on the band saw by feeding very slowly and then sanding each cut to a nice square finish. For the notched joints i had to use the chop saw and cut halfway through the board at a 30 degree angle. I then had to finish this cut on the backside of the board with a hand saw to get each side to the appropriate depth of the desired cut. From here i used a chisel to remove the wood which was left in the middle of the soon to be joint. This was subsequently filed to ensure the correct cut dimensions were achieved and then sanded for a smooth finish. The final manufacturing step was to mill a slot down the underside of the top arm of the lamp. I did this using a mill and a 1/4 inch end mill with two passes to ensure my LED strip would be able to fit in the desired channel. The pieces can be seen below post manufacturing.


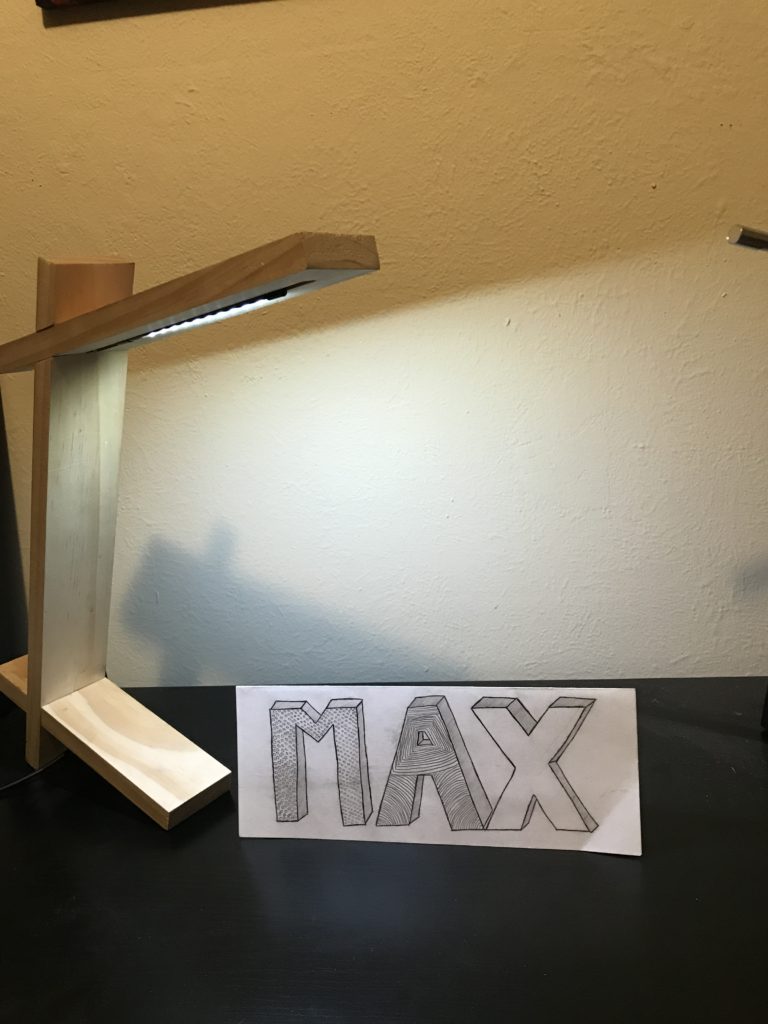
To assemble the lamp you simply slide the LED into the channel on the top arm and hold this into place. This arm is then connected with the vertical arm at the angled joint. The bottom support leg can then be slotted into the lamp and it will now stand on its own. From here the USB extension cord is attached to the extruding light cord and plugged into the wall. The set up takes approximately 30 seconds while disassembly takes around 10. The final product can be seen below.


The budget for this project was as follows.
Wood $6
LED $9
USB extension $6
Total $21