


For this project, we were instructed to take a material that would be thrown out and “upcycle” it into an artifact. This project was an opportunity to take my love for reusing materials and apply it in a more structured way than I ever have. Beginning the process of brainstorming was a little difficult. The only initial specification I was given was that it must be upcycled material and it must have an aesthetic. Based on projects I’ve done in the past, I know that it can be easy to make something that looks cool but serves no use. I much prefer to create something that will be useful or have a purpose that goes beyond sitting dead on a table. This is why I made a constraint right away that I want this artifact to serve a purpose. From here, I was able to brainstorm things that I need. Some categories of things I needed were bike accessories, camp gear, and organizers. Since I had a flow going, I decided it would be good to list the materials I already have which included styrofoam, cords, pill bottles, and scrap metal. I paired some ideas with materials to see what I could come up with and I thought of a pill bottle organizer and a cord net for hanging my backpack while camping. While good for pushing my flow, these ideas wouldn’t achieve any nice aesthetic that I would want to interact with. I wanted my aesthetic to match things I already have.


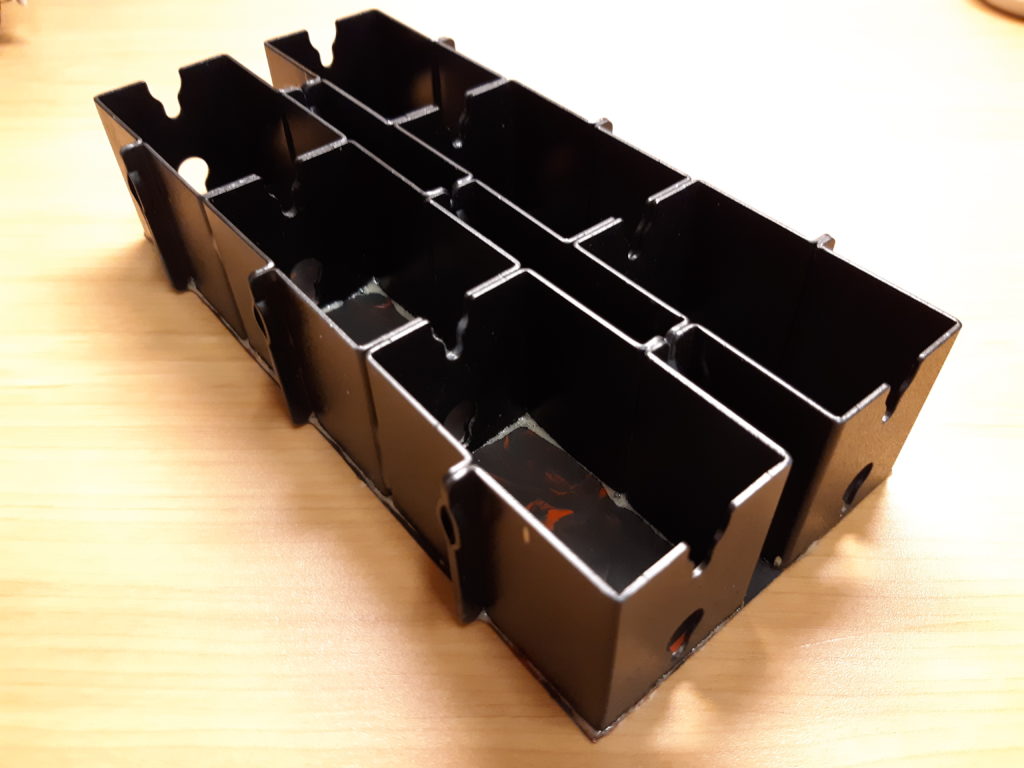
Up until this point, there were no physical representations of what I wanted to achieve with my project. I didn’t look up anything for inspiration, which can sometimes hinder the creative process. Since I’m pretty hand-on, I took the scrap metal I had in my possession and began playing around with different configurations. This material came from my work in dining services and each individual piece is used to attach our old food temp measuring devices to the wall. Since we were going to bring these extra materials to CHaRM anyway, I knew this would be perfect.


The black metal aesthetic was really appealing to me given that I have a black metal bed frame and black wooden desk and this would go well with those. This phase was iterative in the sense that I circles around a bunch of different configurations for the metal, but it didn’t take long for me to be really inspired by this idea and material.
With this product, I was going to organize my hair clips and other items, so I wanted to make sure everything would fit. My final configuration allowed me to securely fit my hair clips and headbands while leaving room for other things.
Since I had my layout figured out, I began planning my assembly. I started with trying a hot glue gun on the metal. This didn’t work at all. Hot glue is basically a melted polymer meaning it is just plastic. This didn’t bind the metal together, it wound up just peeling off right away. I moved onto solder and rapidly realized that treated metal won’t hold solder. Feeling a little dismayed by the lack of success, I searched the lad I was in for any material that would work. In the sewing station, I found some thread. The pieces of metal have holes where the screws go, so this was a decent option to pursue. I also found mag wire (thin wire) and decided to try that out too. Results of these endeavours can be found below.


Based on these pictures, it seems like the magwire worked well. It did work well, until I dropped my project and all the wire broke off. My next step was to use an epoxy adhesive that my roommate suggested to me. This is what worked for me. I mixed 1 part part A and 2 parts part B on a little piece of cardboard. I cut the head off of a Q-tip and used the narrow end to precisely apply the epoxy to all places where 2 metal surfaces meet. This worked very well.


While in the process of assembling, I realized that I wanted to adhere the compartments to a bottom so my product could be mobile and nothing would fall out. I figured a piece of tough paper would do the trick and wouldn’t give me too much of an issue to apply to my project. I took a piece of recyclable paperboard from work and used a straight-edged paper cutter to cut a perfect square. The base was the same length and width as my compartments. The plain cardboard aesthetic didn’t look good with the metal, so I painted both sides; one side was all black and the other side was mostly red with streaks of black. After I let the epoxy cure for about 12 hours, I used super glue to glue the base to the metal. I used the same technique that I did with the original assembly. I laid a heavy textbook on top to ensure proper dispersion of weight. I let the entire thing sit for 24 hours before messing with it.


My end product is highly functional. It fits my hair items nearly perfectly and is durable. It’s pretty heavy, but the weight adds a tactile layer to the aesthetic. We expect something made with black metal to be heavy, so it would take away from the experience if it was lightweight. The visual aesthetic of the metal was done well and the epoxy adhesive is nearly invisible for the most part. The glue connecting the paper to the metal bubble during the drying stage, so that takes away from the aesthetic a little. The red paint also scratches really easily, so it would’ve been nice to layer a varnish on the paint. Right now, I am using this product in my bathroom. I see this being useful long term and may even use the rest of the scrap metal to make more organizer or shelving units.


9 Comments. Leave new
Jordan, I really liked your aesthetic with the use of scrap metal. I’m glad you were able to finally hold it together. I also really liked the red and black paint you added to contribute to the “scorch” theme.
Your use of those metal compartments was a good idea, both for recycling materials you already had and committing to work with a unique material. If you were to pursue this idea further, it might be a good idea to physically attach the individual compartments together to increase the strength of the structure, maybe with rivets or nuts/bolts. The “scorched” aesthetic was a nice touch as well, adding a little color to the piece as a whole.
That’s a really good and useful design. I think you can use it organize many different stuff such as jewelry. Also, the adhesive you used made it look like it’s welded, great job!
Hi Jordan,
Nice project and presentation! I really liked the idea of using materials that you found around work and creating something useful and aesthetically pleasing.
Pretty unique idea! The aesthetic looks good and really matches the material you used. Good job and I’m sure you will be able to find a bunch of different uses for it!
I like that you used needs in your life to help you come up with an idea for this project. The ‘scorched’ aesthetic was very cool and modern looking.
Really great use of things lying around and solving a problem that you have. Good to learn what different adhesives work on different materials.
I like the functionality of this project! You could use this for so many different things. It would have been really cool if the entire piece was that red color, it looked awesome! Also, great idea to use scrap metal, there is plenty to be used. Great job!
Hello Jordan, you did a great job with your presentation. I think it is really cool that you were able to actually make something useful for your project. It sounds like you had to overcome a lot of challenges to create this item. Your final product came out great!