
Despite having some major setbacks due to COVID-19, decreased access to on-campus resources, and shelter-in-place orders, I am really proud of the progress I made on this project. Due to lack of access to a machine shop, I ended up overhauling my design such that I could make it with what I have. It took some re-design and research, but I managed to get the structure of my wedding arch built. I am awaiting the arrival of some of the decorative, aesthetic, elements and had to descope some of the electronic elements until a later date.
I ended up choosing to not use copper piping since I have no way of cutting or welding it. Initially, I thought PVC spray painted copper would suffice, but I found that foam-core ABS was cheaper and lighter. It was more difficult than I initially thought to find pipe fittings that are 60 degrees for PVC and ABS pipes, but I eventually found some.
I also redesigned the structure to accommodate what I could find in terms of fittings, ABS pipe, and to minimize the amount of cuts I would need to make. I originally wanted a double hexagon (i.e. two hexagons offset from one-another), but the options for pipe fittings were not as good for non-copper pipes. I ended up ordering all of my supplies from Home Depot for just over $50. I got:
- (3x) 10 foot long ABS foam-core pipes (1.5″ diameter)
- (4x) 60 degree ABS pipe fittings (1.5″ diameter)
- (4x) 90 degree ABS pipe fittings (1.5″ diameter)
- (2x) Tee ABS pipe fittings (1.5″ diameter)
- Copper Rose colored spray paint + primer
- Pipe cutters for plastic pipes up to 2″ diameter

I then got to work constructing my arch. I wanted to know right away if my re-design would actually work structurally or if it was back to the drawing board. I cut the ABS foam-core pipes into nine piece (3 foot increments, with some leftovers) using a tape measure and chalk marker:


I then assembled the base of my arch:

Then I assembled the hexagonal part of my arch:

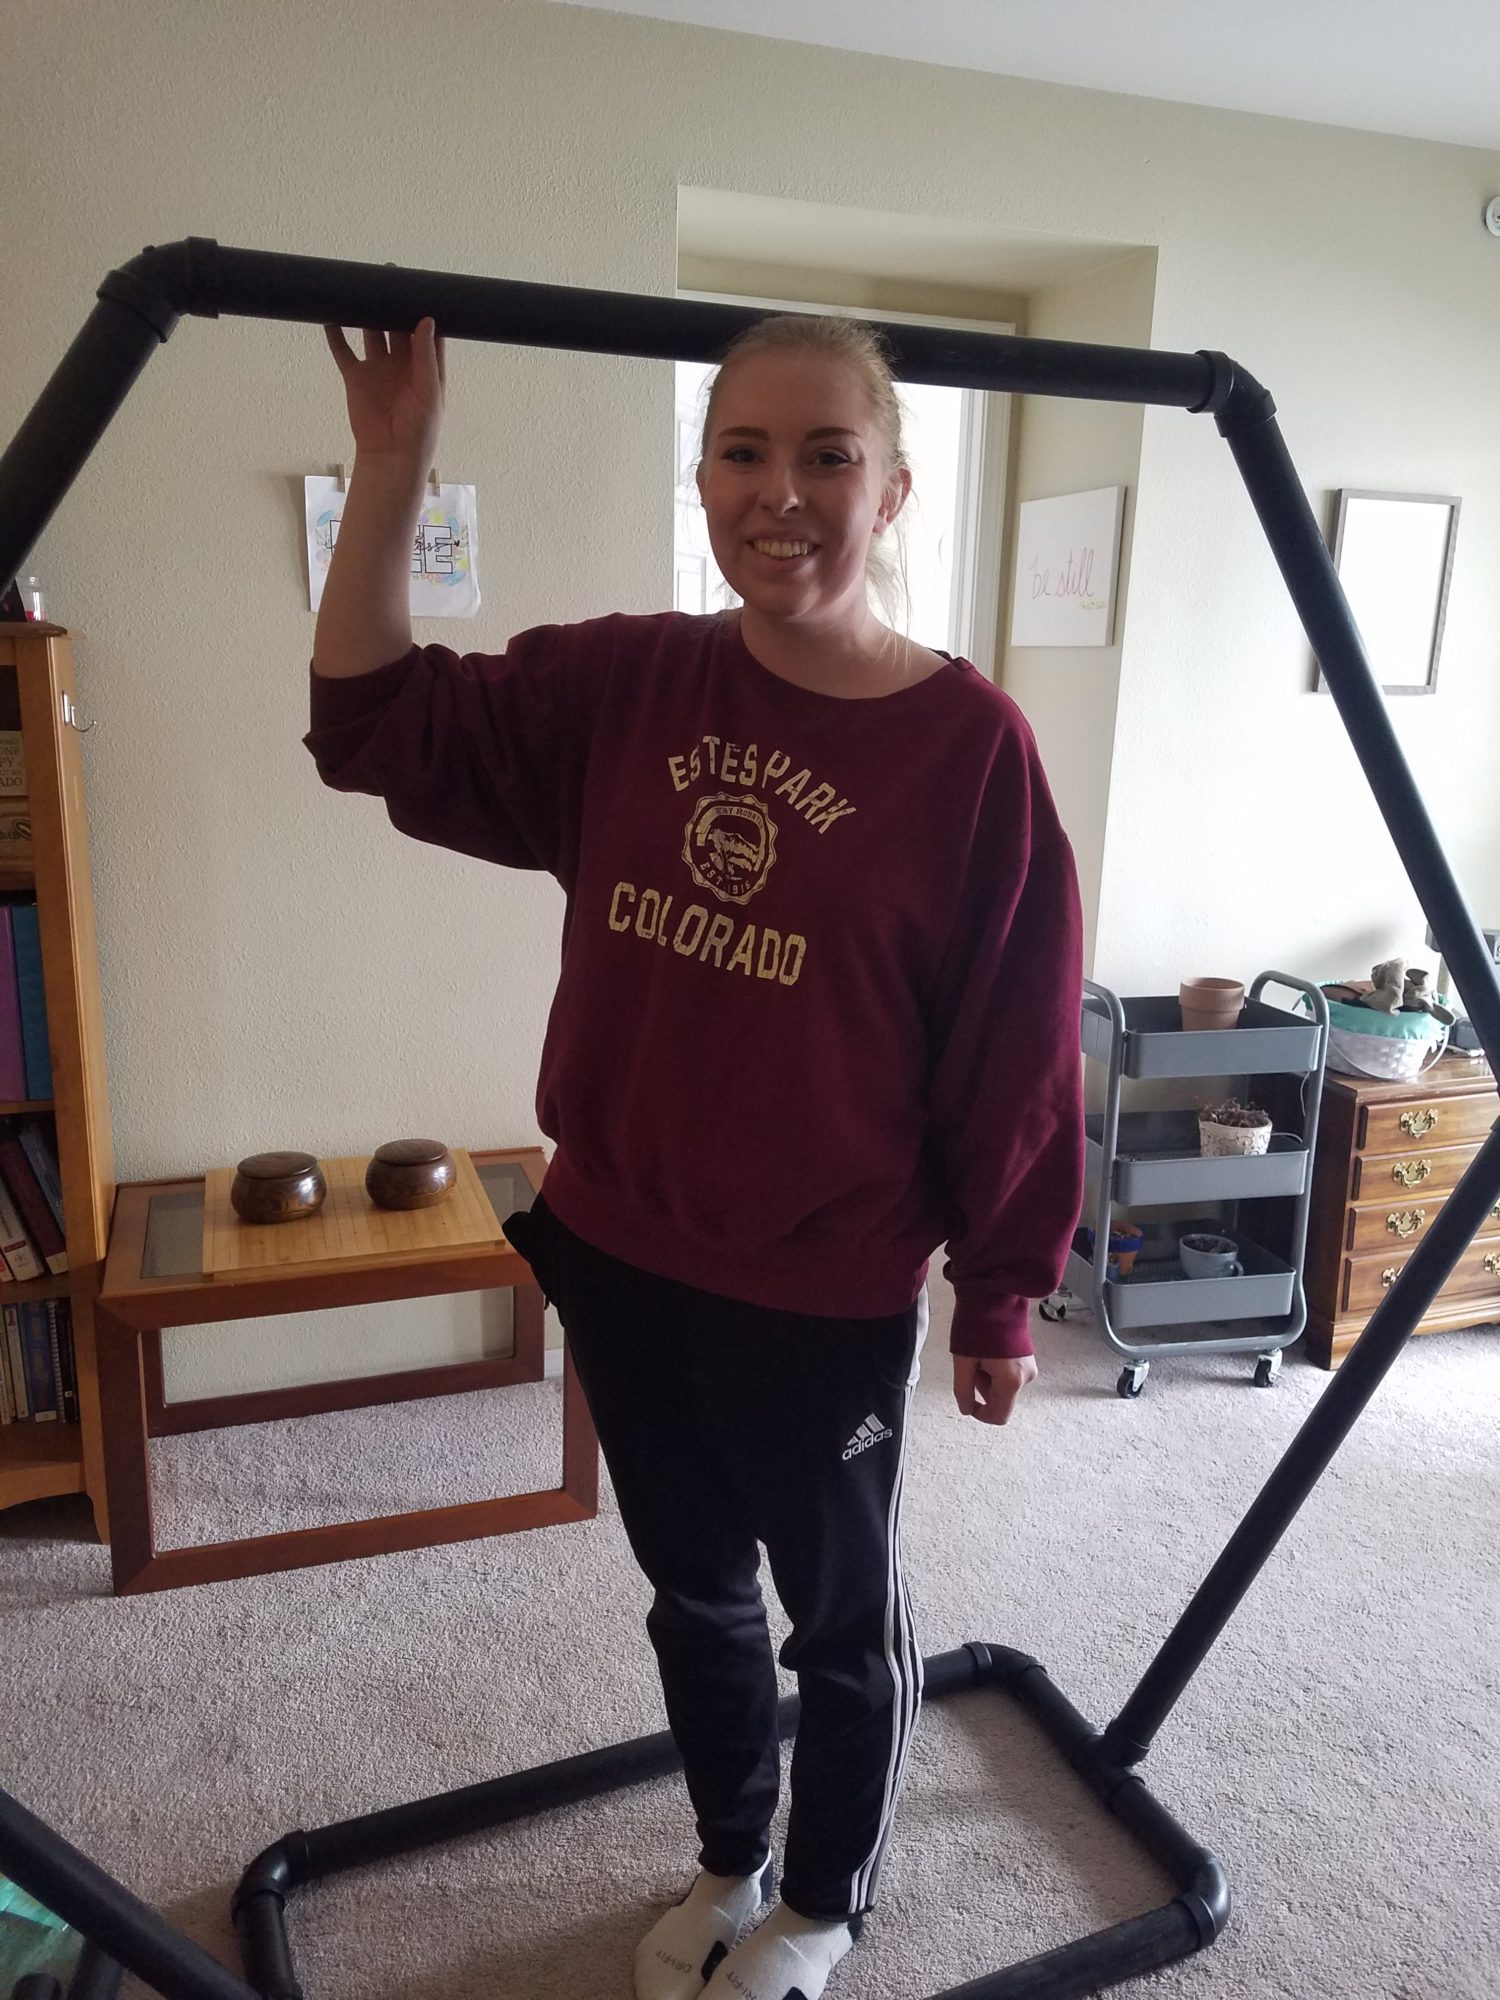
I thought that the base looked kind of weird and too large. I wanted it to be smaller and only big enough to support the structure. So I cut the base pieces down so that the width of the base is 1 foot instead of 3 feet:

This looked much better to me and I was pleased with the overall scale (I am 5’8″ for reference):

My next steps are to paint the structure and add the floral and lighting elements. I wanted to personally arrange the greenery and flowers, but unfortunately, craft and flower stores are closed. I settled on ordering some wisteria garlands.
I also wanted Edison bulbs that are programmed to dim randomly. However, I am having trouble finding what I need that is within my budget and will dim and brighten autonomously. Originally, I wanted to program this part with Arduino, but without access to on-campus resources like wires and solder, I decided to try this using string lights that have a built in dimming/brightening feature.
Also, I want to make this arch easy to assemble and disassemble. I would like to create a nice assembly manual with animated images. I think it would be most helpful to use ABS cement to cement together the base, which is 1′ by 3′, since the Tee fittings are actually oriented at a 60 degree angle to the floor. Getting this angle just right took a little effort and every time I tried to adjust it, other fittings tried to wiggle loose.

1 Comment. Leave new
I really like the idea you have for this and am really impressed that you’re able to make this. I like the adjustments you’ve made. I think painting the PVC copper is going to look well against floral decorations and lights. At this point Im just impressed that you are able to complete your project.