
Chess Board-Benjamin Fried

Project Description
This is an Asian inspired chess board that was created using maple and walnut. Below, I will highlight what the contemporary Asian aesthetic is. Square and contemporary shapes are visible in this aesthetic. There are not a lot of rounded edges or wild colors. The wood is not shiny, but instead has a matte, natural look. The wood is normally a lightish color, but sometimes is offset by darker shades. Often, bamboo is seen with this aesthetic. If there are any plants or flowers, they are often not bright colors, but instead are green or brown.
This aesthetic was applied to the chess board that I built. The build process can be seen below.
Project Posts/Timeline
Main Project Inspirations
For my main project, I would like like to build a fully functional object that I am able to keep and use for the future. As I mentioned in blog post 1, I believe things I own should have a specific function, even if it as simple as a relic that jogs a memory or makes me wonder. I don’t need any useless items, and I want everything I own to have value. With that said, I have been thinking about things that I use everyday, which I may be able to redesign with a new, aesthetically pleasing look. For me, finding an aesthetic is not the difficult part, it’s the need-finding process which I struggle with. I believe I can build anything and add an aesthetic to it with ease.
Below is a list of items I have considered making for the final project.
Everyday items:
Water boiler
Coffee Grinder
French Press
Lunch-box
Laptop/Laptop Case
Dining table
After I considered the core items I use daily, I thought about random items that I don’t own, that would be “nice to have”:
Chess Board/Cribbage board matching set
Thermometer to hang up outside (digital or analog)
Cell phone charger stand (elegant)
Bamboo ski poles
Lamp/Light assembly w/ charging station
Coffee Bean storage container
Military coin holder
In the ski world, another trend that has grown lately is bamboo poles, and the look of bamboo on other things, such as composite poles, or skis. 
https://www.wildsnow.com/wp-content/uploads/2013/02/IMG_5893-soul-poles.jpg
I currently have a great pair of adjustable poles,

(http://images.evo.com/imgp/enlarge/60334/301040/black-diamond-traverse-adjustable-ski-poles-2013-bd-orange-front.jpg)
and really love them for the versatile things I do. With bamboo increasing in popularity, I thought it might be a challenge to create a pair of height adjustable bamboo ski poles. There is nothing like this on the market, and I believe there may be an interest for them (at least amongst my friends). Whenever I am out skiing, I pitch the idea to my friends and see what type of interest is out there.
The big challenge is the engineering behind the adjust mechanisms. This poses a challenge that I’ve yet to overcome. I’ve been drawing and sketching thoughts and ideas, trying to figure out how to make these, but if I cannot overcome this design soon, I will probably be forced to find another final project.
Right now, my next choice would be a matching chess/cribbage set. The aesthetic I would probably shoot for would be a fancy wood/marbled wood, or a natural tree ring look, something that looks like the image below.

(https://www.fractalus.com)

(https://summitvoice.files.wordpress.com/2012/02/800px-tree_rings.jpg?w=300)
I like the aesthetic look of wood, and I also enjoy woodworking, finding it relaxing. With the MakerSpace on campus, it is also a great space to learn.
Top 5 Design Constraints
For my final project, I have narrowed down my idea to a few items, each of which are made of wood. For me, woodworking is the most practical type of construction which allows me to exercise my construction skills, and also creates an appealing aesthetic that I enjoy.
I have narrowed my ideas down to 2 items:
Chess set-complete with draw/storage for pieces
Nightstand alarm/charging station
For both of these items, I have created a few technical and design constraints and requirements that I am holding myself to.
Technical Constraints
- Use at least 2 different types of wood.
- No larger than 36”x36”x24”
- Shall not weigh more than 10 lbs
- Drawer and sliding mechanisms shall easily slide out and not jam
Aesthetic Constraints
- Woods shall be 2 different types
- Shall utilize symmetry on at least 2 sides. All sides shall not be different.
- Woodgrain pattern, knots shall be the highlighting aspects of the wood. It shall be polished, sanded, and looking authentic.
- No writing or logos will be present. It must have a natural look with no artificial additions.
- Pieces must blend together and should not be too different. The whole piece should blend together smoothly.
I want the look to be all wood. I have thought about introducing bamboo into the wood design as well, possibly create the look of “columns”. Often, bamboo isn’t combined with maple or walnut, so it could be a cool look if done correctly.
After a little more thought, I found this image of an example which I could incorporate into my aesthetic. It is a contemporary Asian vibe, with bamboo that is colored a certain material.

http://asiasociety.org/files/13Shochiku.jpg
I enjoy the look of bamboo added to this design, which is popular in contemporary Asian culture, as seen in the images below:


Houzz
Here are a few images of my thoughts:

Michael’s Wood Craft

https://
i.ytimg.com/vi/gliOZyHkdps/maxresdefault.jpg
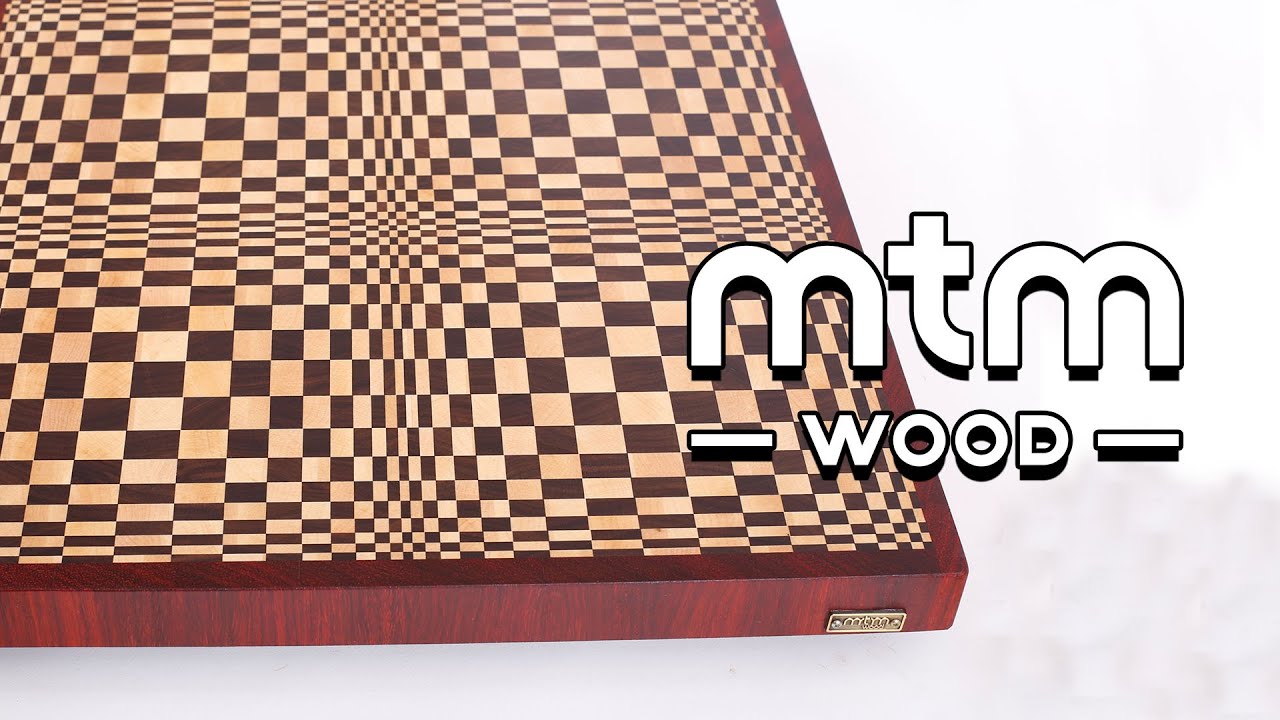
Youtube-I like this because there is a wood pattern in the middle, with a nice polished border on the edges. I could do something like this for my item.

http://www.danielsstudios.com/Includes/Photos/Products/Photos/124-2.JPG
I like the color scheme on this.
Overall, I like the combination of woods, with a little flavor of Contemporary Asian.
Chess Board Prototype
For my final project, I have decided to create a chess board, complete with a storage unit, and possibly a matching cribbage set to go with it.
I began by exploring some ideas, considering a nightstand charging station, or a pair of bamboo ski poles. I discovered that I liked the wood aesthetic the best. After more research, I found that the clash of contrasting colors, such as light and dark woods, looked the best. This is what I wanted to pursue.
Because I value function, I also wanted an eye-pleasing product that would also work and that I could use for something.
The Aesthetic
I want the look to be all wood. I have thought about introducing bamboo into the wood design as well, possibly create the look of modern/contemporary “columns”. Often, bamboo isn’t combined with maple or walnut, so it could be a cool look if done correctly. In a way, I am creating my own aesthetic, which is subject to change as I figured out what is feasible to build.
After a little more thought, I found this image of an example which I could incorporate into my aesthetic. It is a contemporary Asian vibe, with bamboo that is colored a certain material.
http://asiasociety.org/files/13Shochiku.jpg
I enjoy the look of bamboo added to this design, which is popular in contemporary Asian culture, as seen in the images below:
Houzz
Here are a few images of my thoughts:
Michael’s Wood Craft
https://
i.ytimg.com/vi/gliOZyHkdps/maxresdefault.jpg
Youtube-I like this because there is a wood pattern in the middle, with a nice polished border on the edges. I could do something like this for my item.
http://www.danielsstudios.com/Includes/Photos/Products/Photos/124-2.JPG
I like the color scheme on this.
Overall, I like the combination of woods, with a little flavor of Contemporary Asian.
Build Process:
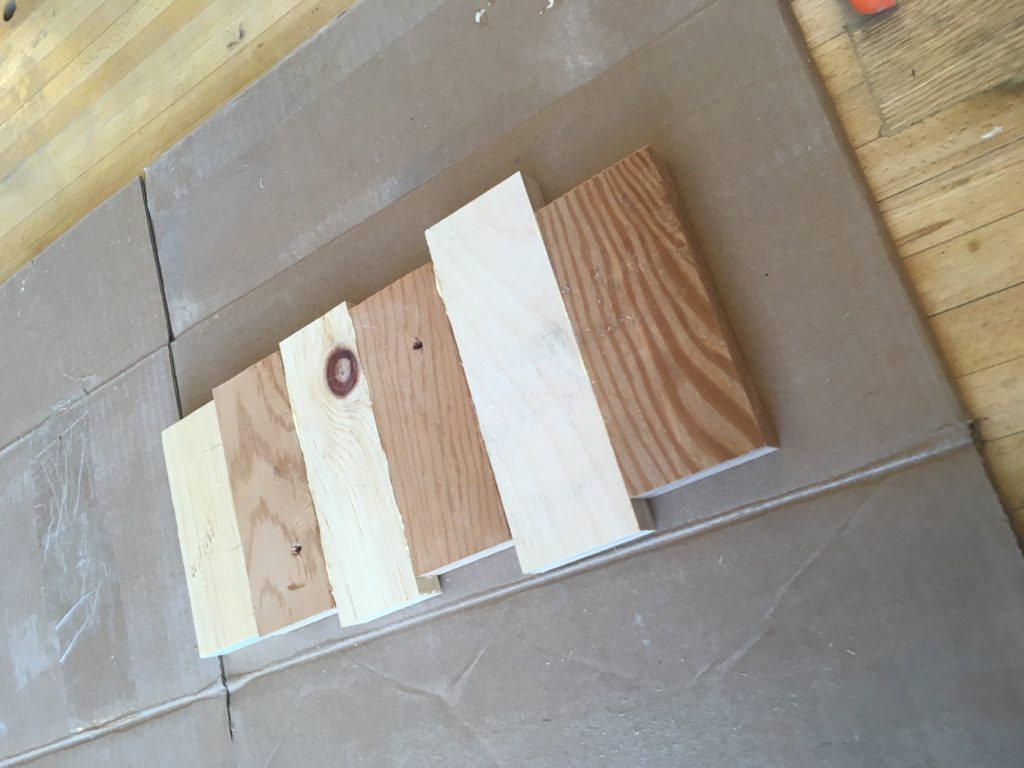
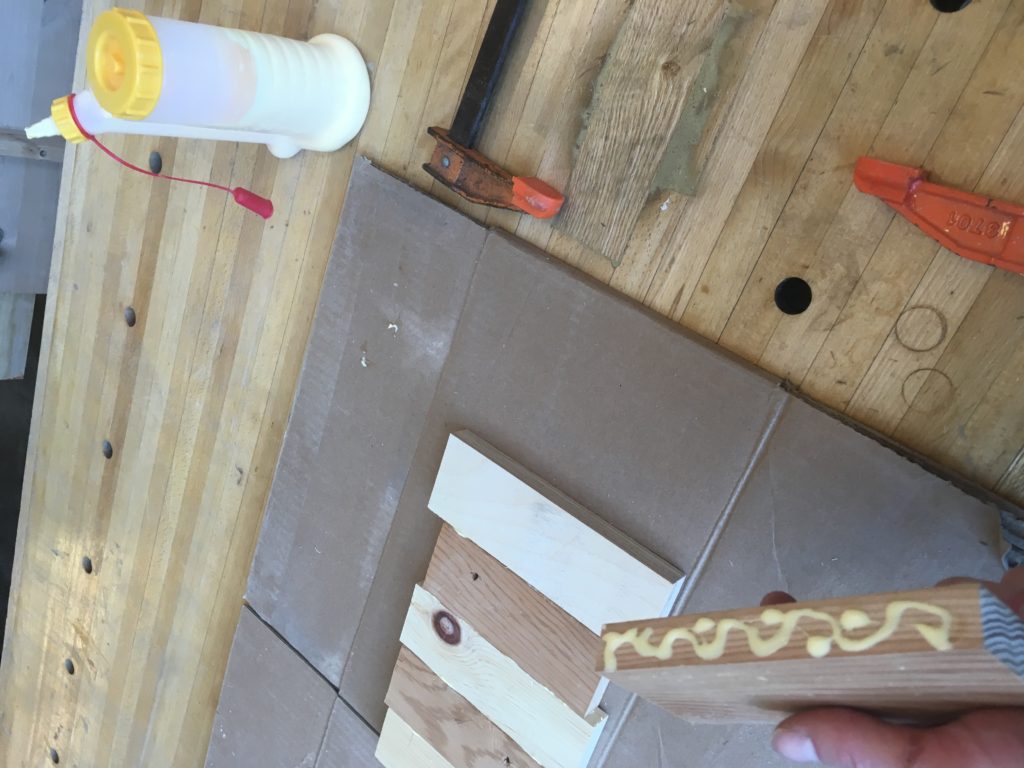
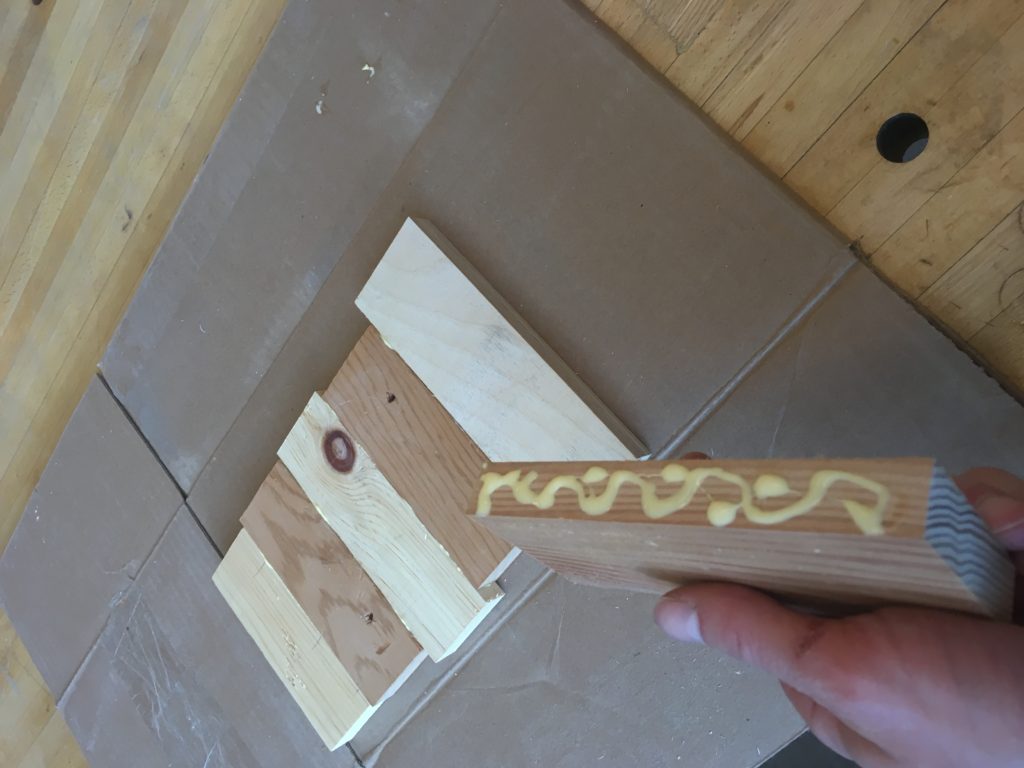
To demonstrate the aesthetic and learn about the build process, I decided to make a mini checker pattern. This allowed me to learn what types of wood worked best and looked nice. I started by going to the Makerspace to see what kind of scrap wood I could find. I found some contrasting colors and began to glue them together, using vices to secure them together while the glue set.

I did not worry about the wood being different sizes, as I could cut it down later on.
After it was glued together, I let it set for approximately 24 hours.

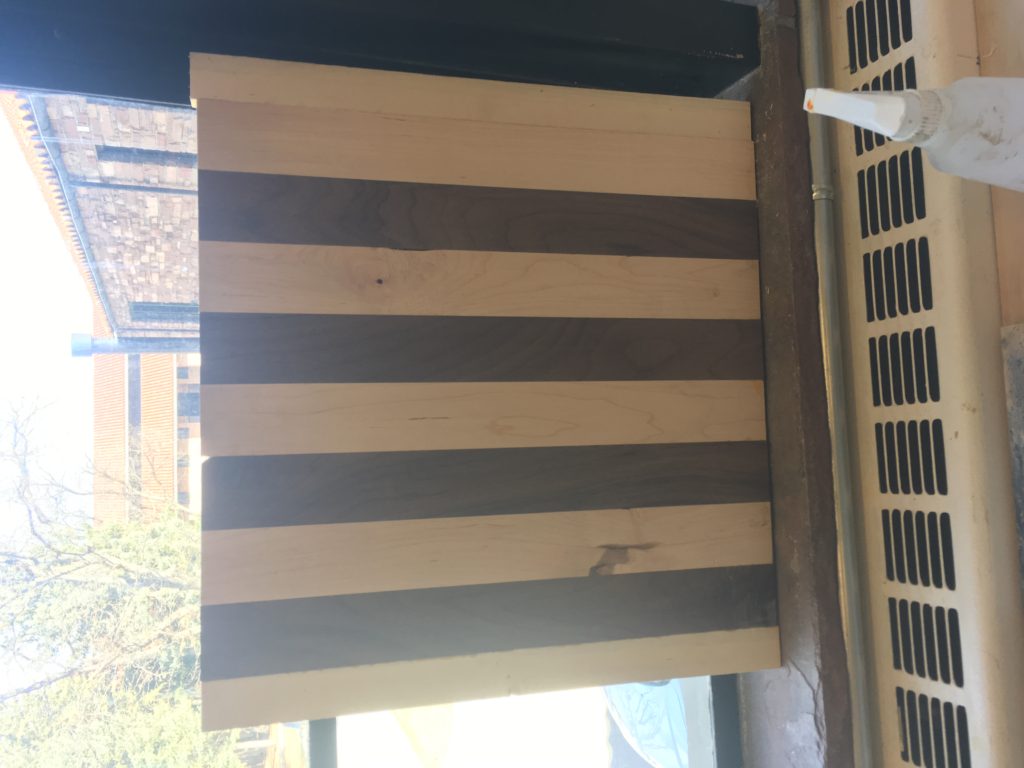
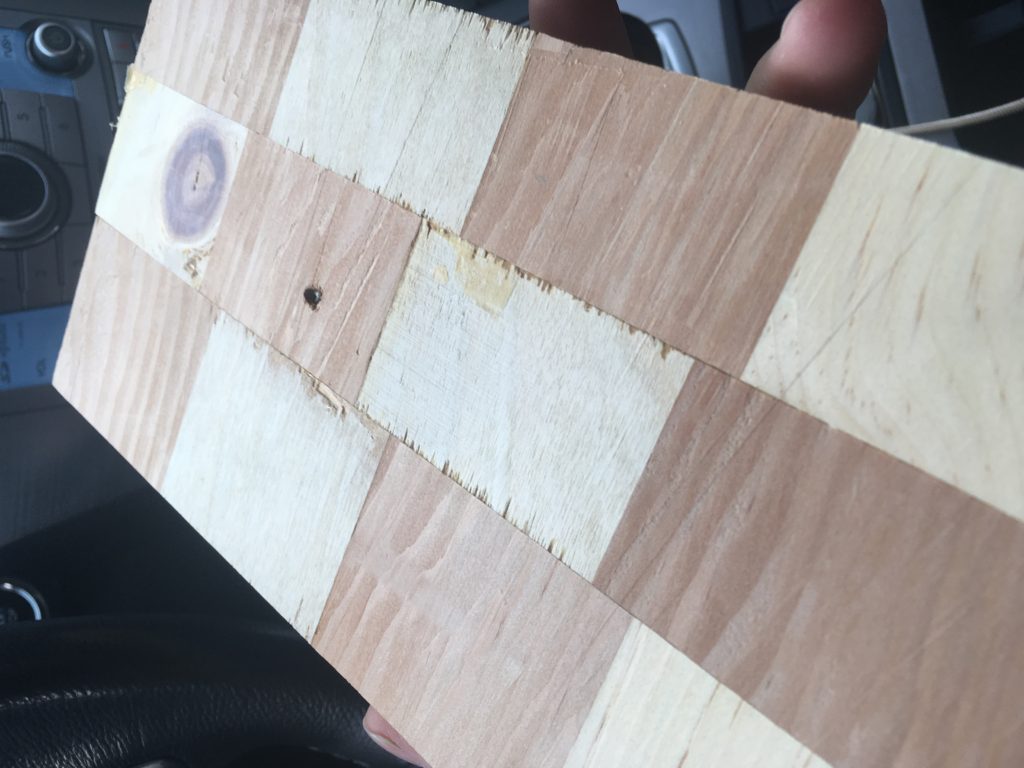
I then removed the vices and was left with this product:

From here, I cut the wood the long way to get 3 equal size pieces that I could then use to create the checker pattern.
I reglued them together, and let it set for 24 hours again.


Following this step, I used a hand planar to level all the surfaces and ensure they were even and smooth.
Lessons Learned:
- Experiment with the grain patterns and directions the grains face
- Find wood that is the same thickness
- Leave extra on the ends, you may need to cut it in the end, which isn’t a problem
- When planing, ensure you have the correct tools
- Glue the wood together on a flat surface
- Use the same kind of wood, don’t use scrap wood that I find
Here is the link to my in class presentation: https://youtu.be/ACQeEr3nMVw
To see the slides, click this link: click here
Design Compared to 20th Century Aesthetics
For my current design, I plan on using a “contemporary Asian” aesthetic, which involves a lot of nice stained wood, with a hint of contrasting bamboo colored wood. I’ve started to notice that the shape of this aesthetic is very “sharp”, and does not have a lot of rounded edges. Corners are squared off, and the rectangular shape seems to be most dominant.
In exploring other aesthetics, I wanted to find a few that were totally different than the current, anticipated design, and so I found the following:
- Radical design
- Streamlining
- High Tech/Matte
I considered the “organic design” aesthetic, but decided that it was too similar to contemporary Asian, sharing the woodgrain and elegant feel.
Below are various sketches that I believe portray various aesthetics of my design.


- Radical Design/Funky

http://www.craftster.org/pictures/data/500/medium/185232_06Jun10_102_1820.JPG

https://s-media-cache-ak0.pinimg.c
om/564x/94/2d/fd/942dfd81d56f9392df004b9d6b6d3d02.jpg
https://s-media- cache-ak0.pinimg.com/736x/11/d7/22/11d7221de004daaae52fb6ae51e54154.jpg
These images above have a funky feel to them, feature bright and unique colors, and have non-traditional pieces to go along with them. This is an interesting aesthetic. My takeaway is that I can try using different (non-traditional) colors of wood, and maybe even stain them to achieve a custom color.
- The second aesthetic is streamlining. For a 2d object that is mostly stationary, this may be challenging. I want to acheive a rounded shape, similar to that of this aircraft and of an airfoil. I can visualize everything having an airfoil on it.

https://upload.wikimedia.org/wikipedia/commons/1/10/WingRoot01.jpg


https://s-media-cache-ak0.pinimg.com/236x/17/bd/e6/17bde66297576a9e4f11c9c4c10190a9.jpg
http://www.chessusa.com/mm5/graphics/00000001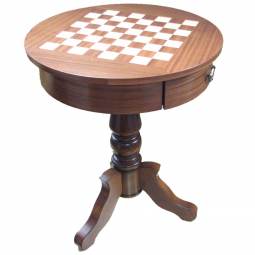 /35-P05/35-P05_1_large_255x255.jpg

http://www.regencychess.co.uk/images/large/RCC001_04_LRG.jpg
A common theme here is that most of these pieces and boards are rounded and look sleek. This isn’t exactly a look I want to achieve on my aesthetic.
- High Tech/Matte
For this last aesthetic, I found high tech/fancy marble/shiny items.

https://www.revolution.watch/wp-content/uploads/2016/08/UR202AlTTiN_FACE.jpg

http://www.quincymemorials.com/images/Deluxe_Granite_Marble_Chess_Set_Quincy_Memorials_2.jpg

http://pebblez.co
m/pictures/alabaster-marble-chess/Alabaster-Marble-Chess/705/96016BT-1.jpg
http://pebblez.com/pictures/alabaster-marble-chess/Alabaster-Marble-Chess/705/NS155RB.jpg
The common theme with all of these is that they are very shiny and glossy. My takeaway for my project is that I should have a little bit of shine to my parts, but nothing outrageous.
These crazy aesthetics are not exactly what I want to turn my project into, but here are the takeaways that I may be able to apply to my project to create a unique look and feel:
- Using different (non-traditional) colors of wood, and maybe even stain them to achieve a custom color.
- I should have a little bit of shine to my parts, but nothing outrageous.
Project Timeline
Below you can see a schedule of events that I need to complete. I have done this process before for the prototype, so I am familiar with the materials and tools, and know what type of aesthetic I am trying to aim for. This should take no longer than the time I have allocated to each task. I have not added any time for any signification issues, like improperly cutting the wood. Because I have done this before, and because there is a helper in the Makerspace, I should not have any large problems.
Dr. Hertzberg mentioned the rule of 7, so I have factored that into the 3rd column. However, I do not anticipate it will take that long, I will allot that much time on my schedule to do each task.
| Name | Time | x7 (margin) | Complete by Date |
| Acquire Wood | 1 week | 2 weeks | 6-Apr |
| Acquire Bamboo | 2 weeks | 4 weeks | 15-Apr |
| Measure wood | 20 min | 140 min | 7-Apr |
| Cut Wood Into Strips | 25 min | 175 min | 7-Apr |
| Glue Wood Together | 30 min | 210 min | 7-Apr |
| Let set for 48 hrs | 48 hrs | 48 hrs | 10-Apr |
| Measure wood | 20 min | 140 min | 10-Apr |
| Cut Wood Again | 25 min | 175 min | 11-Apr |
| Glue Wood Together | 30 Min | 210 min | 12-Apr |
| Let set for 48 hrs | 48 hrs | 48 hrs | 14-Apr |
| Trim Edges | 30 min | 210 min | 17-Apr |
| Add Bamboo Edges | 1 hr | 7 hrs | 19-Apr |
I am planning to be done on 19 Apr, which gives me a few days of slack before the final project is due.
Design Progress: Checkmate!
The chess board is in the initial stages of the build. I have acquired the wood, brought it to the Makerspace, and have started to build my product. I began by inspecting the maple and walnut wood for any imperfections, ensuring it would suffice for my chessboard.
Next, I verified my drawings with an external party to ensure they made sense (measure twice cut once).
I discovered I needed to leave an extra 1/8” per cut due to the thickness of the saw blade. This adds up to 1” for all 8 cuts. I am happy I learned this before I started cutting, because I had to add an extra inch to my design.
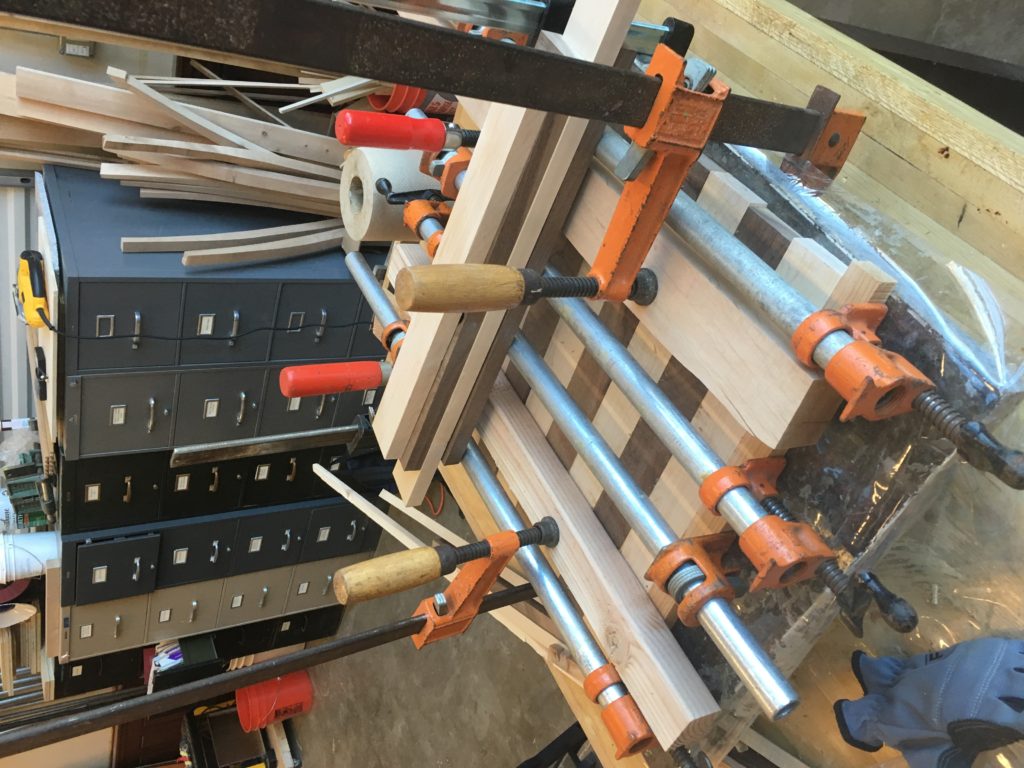
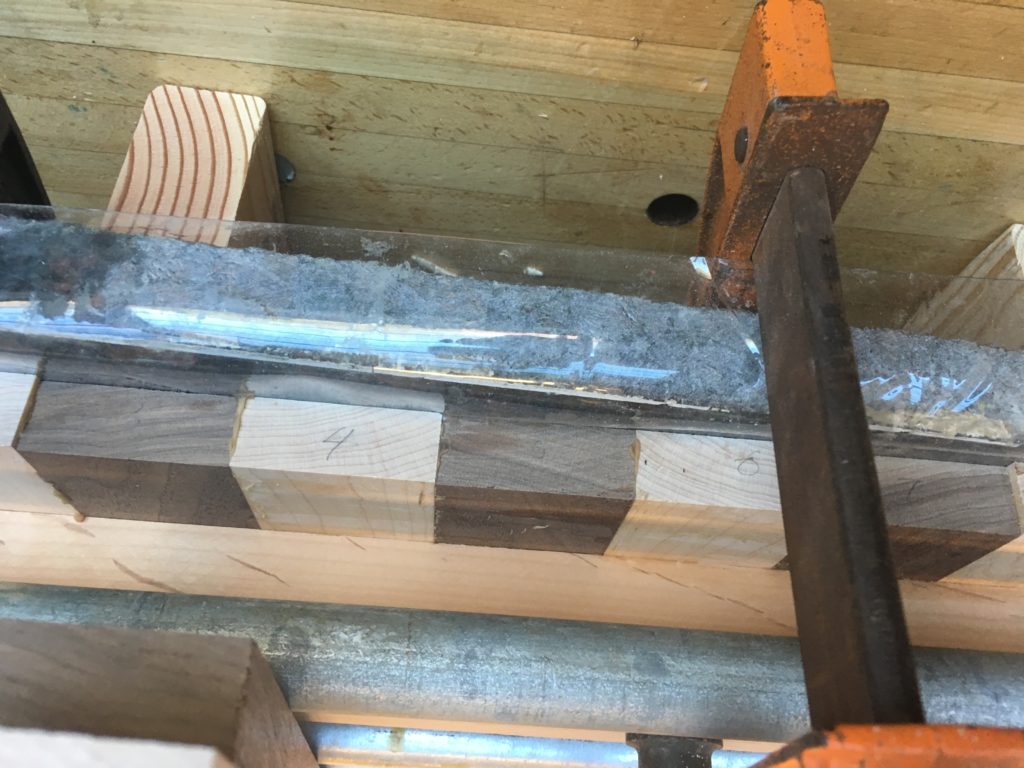
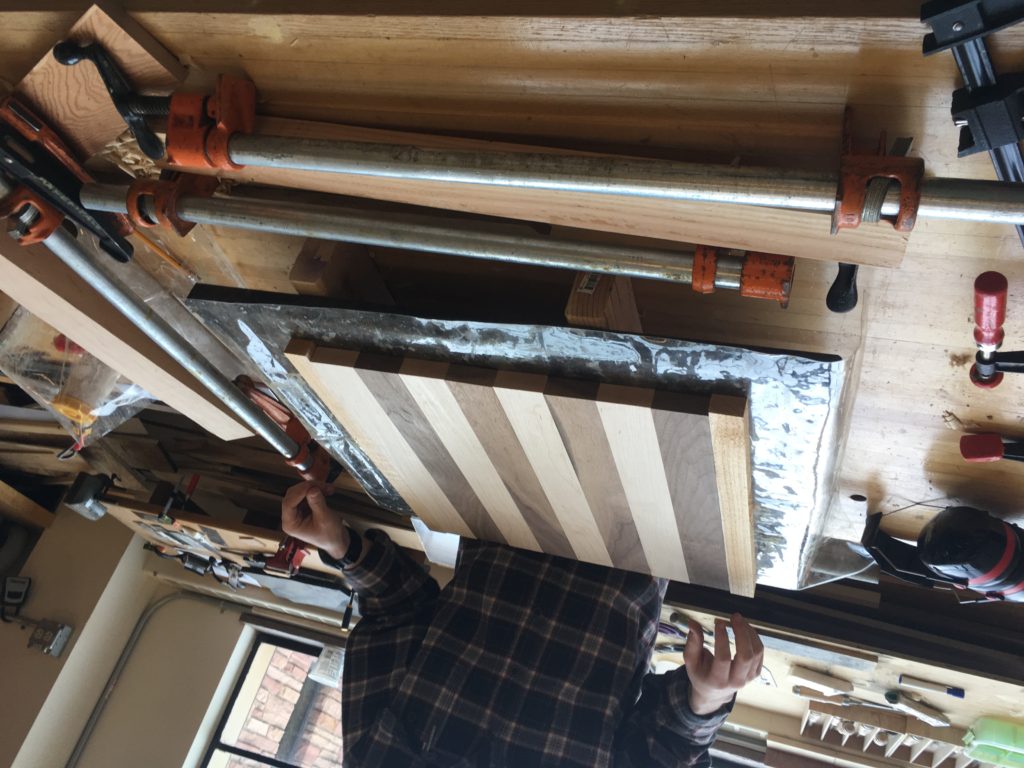
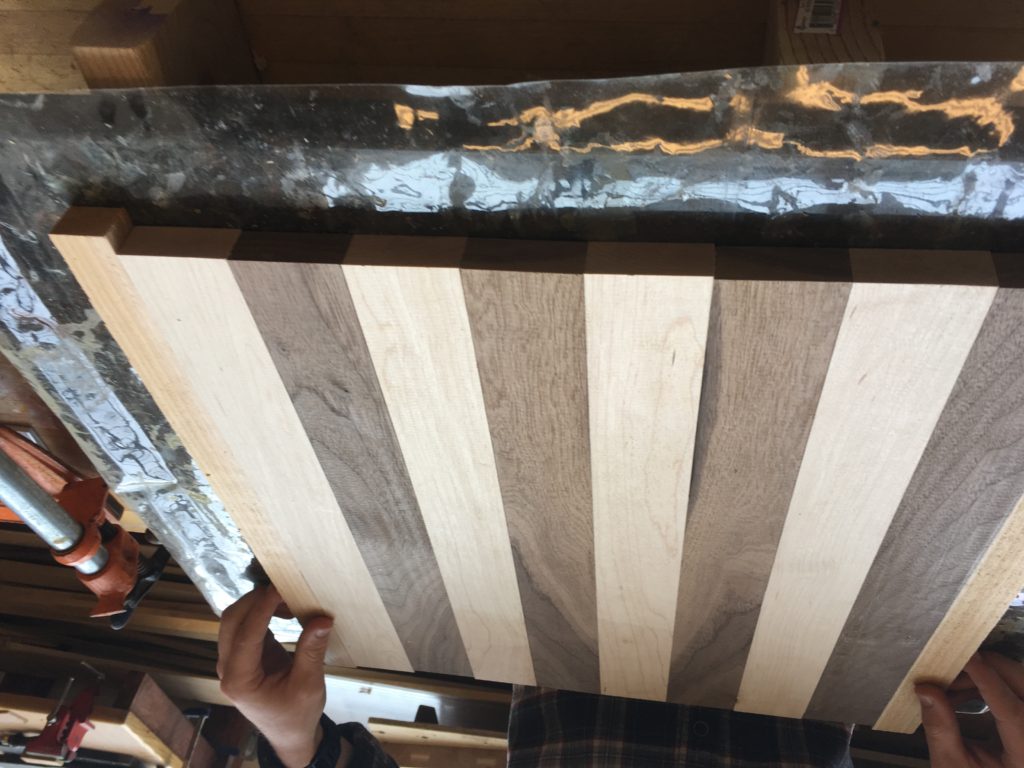
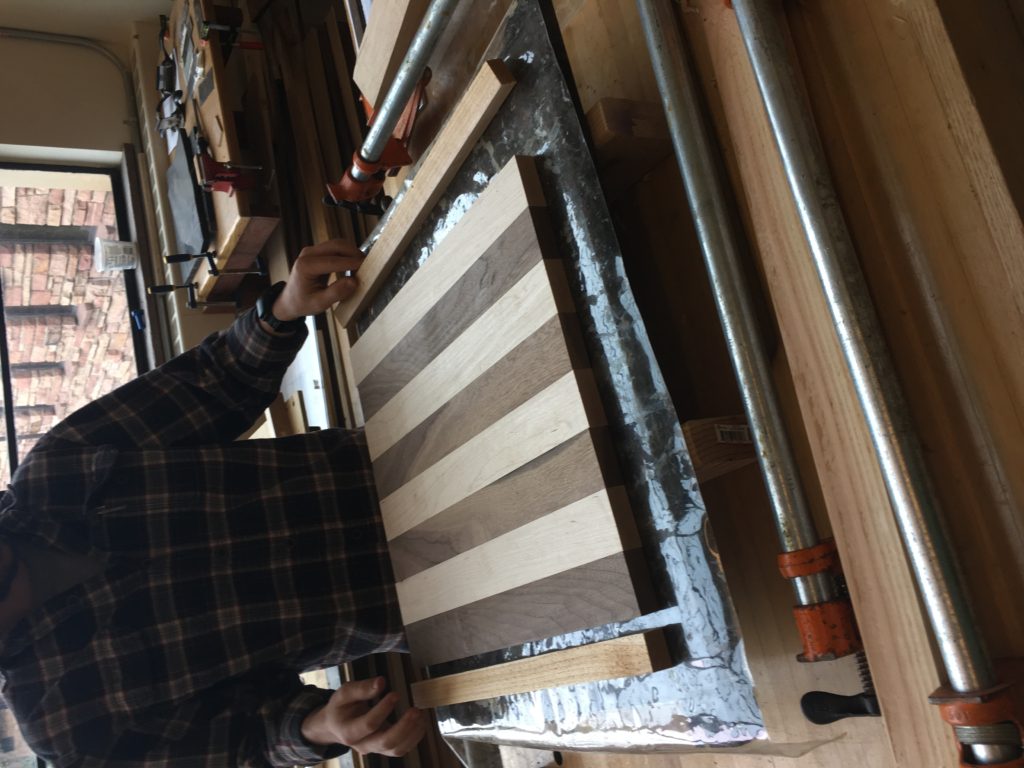
I began by resizing the boards to 2.1×18 inch. Then I used a table router to ensure my edges were straight and had a uniform width. This was challenging, as maple can be difficult to work with. Next, I glued them together in an alternating pattern and let them sit for 24 hrs.
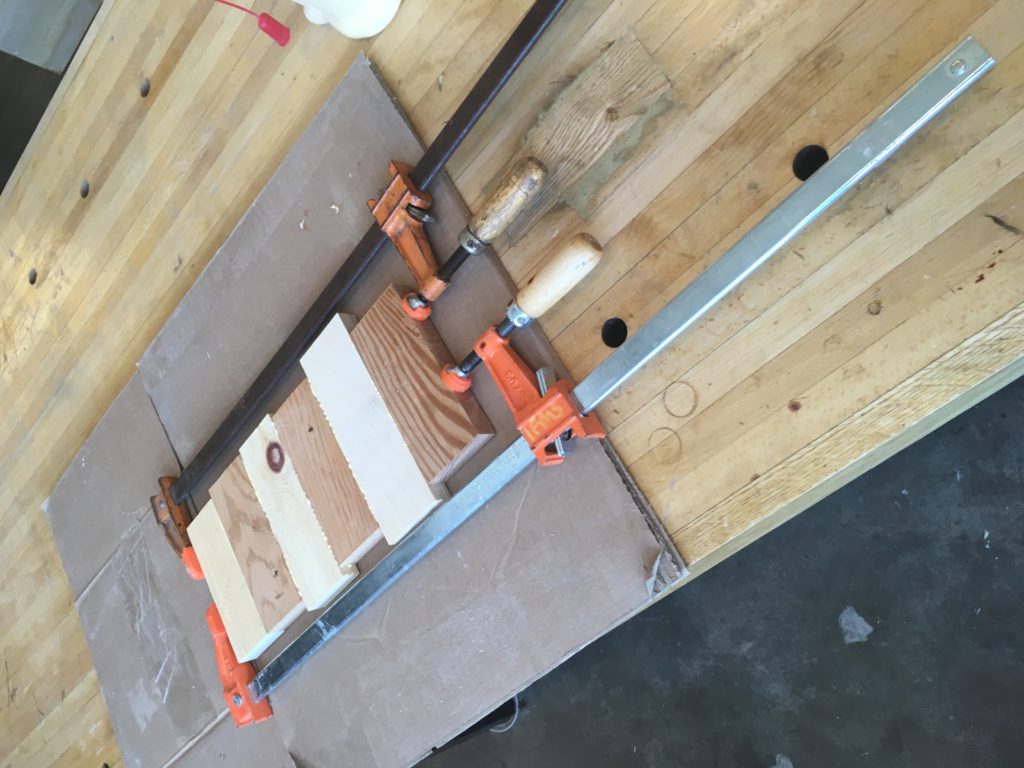
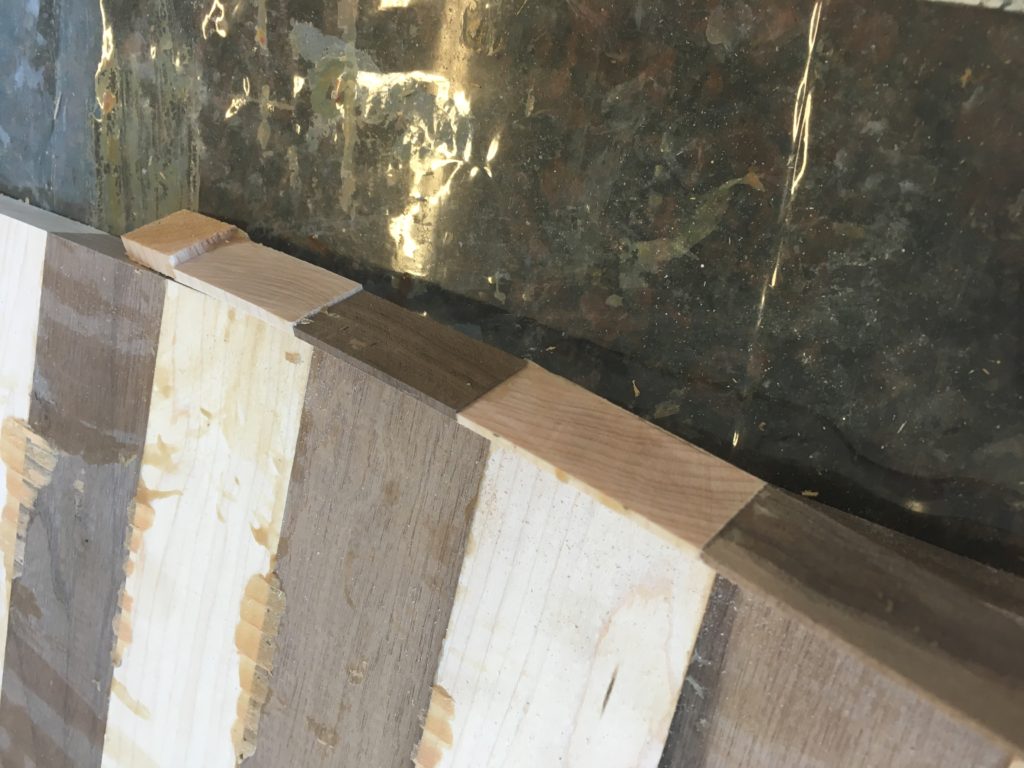
I used enough clamps to ensure all surfaces would be flat and perpendicular. I used a flat granite surface to ensure the playing surface would be flat. This can be seen in the pictures below:

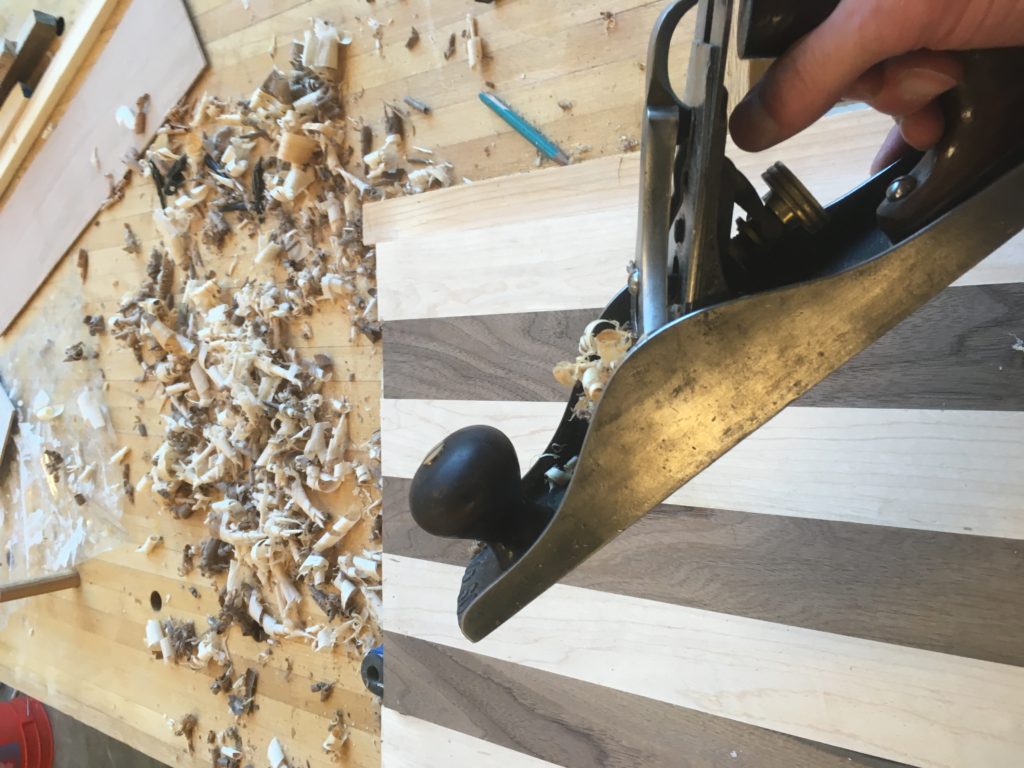
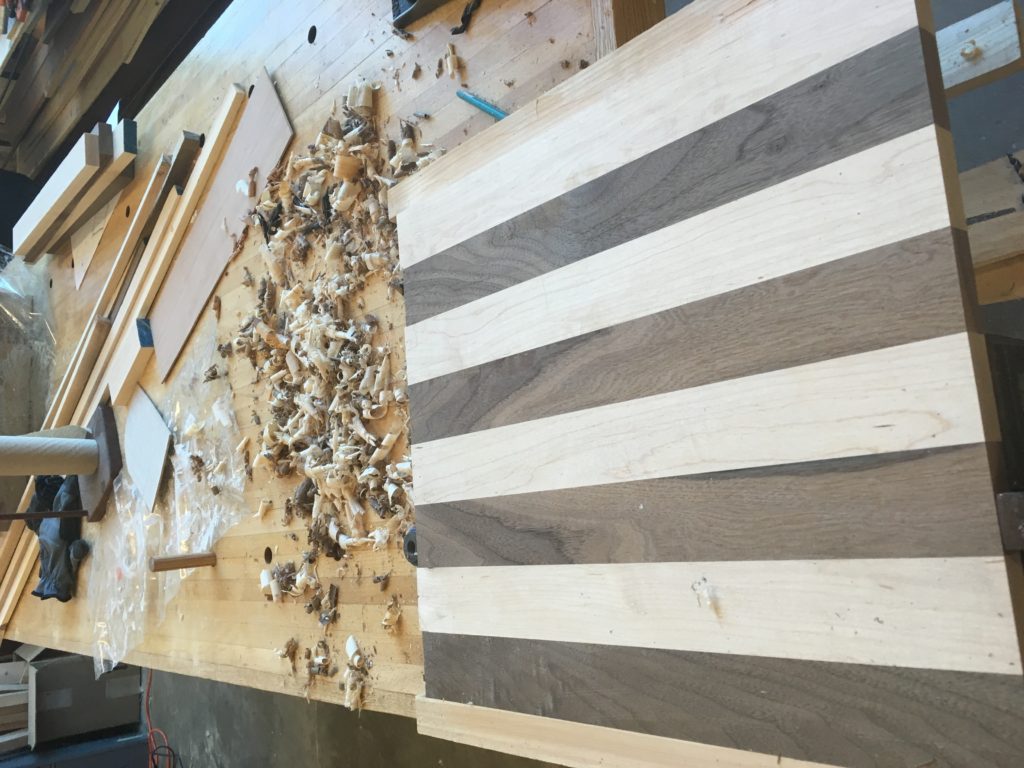
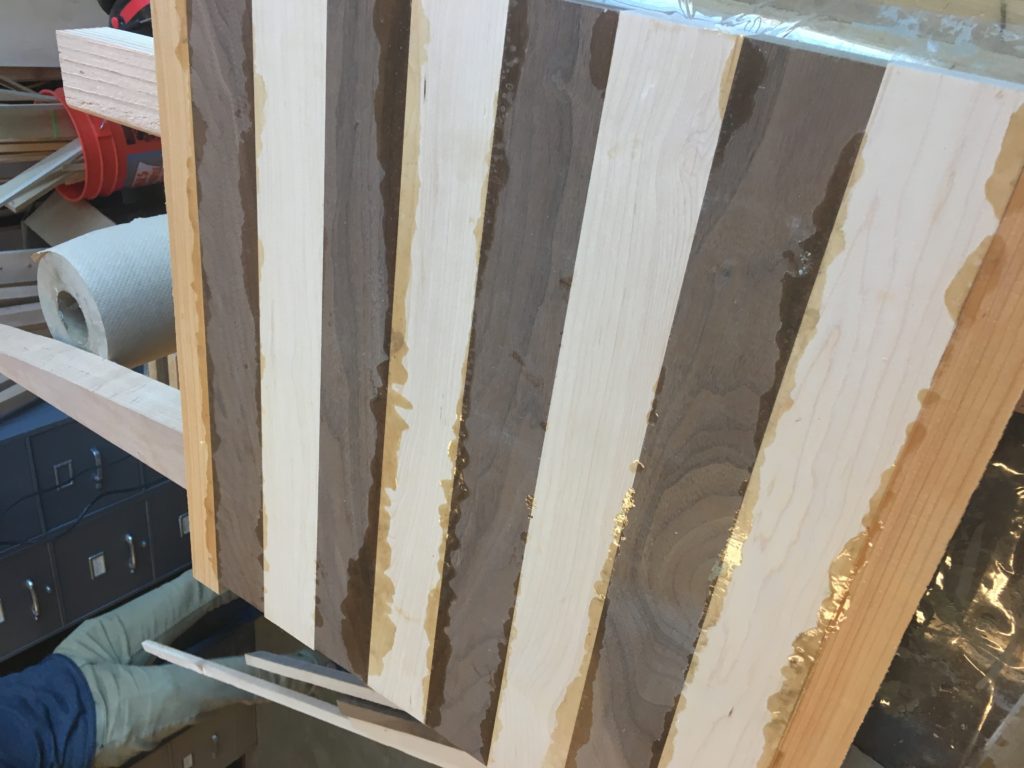
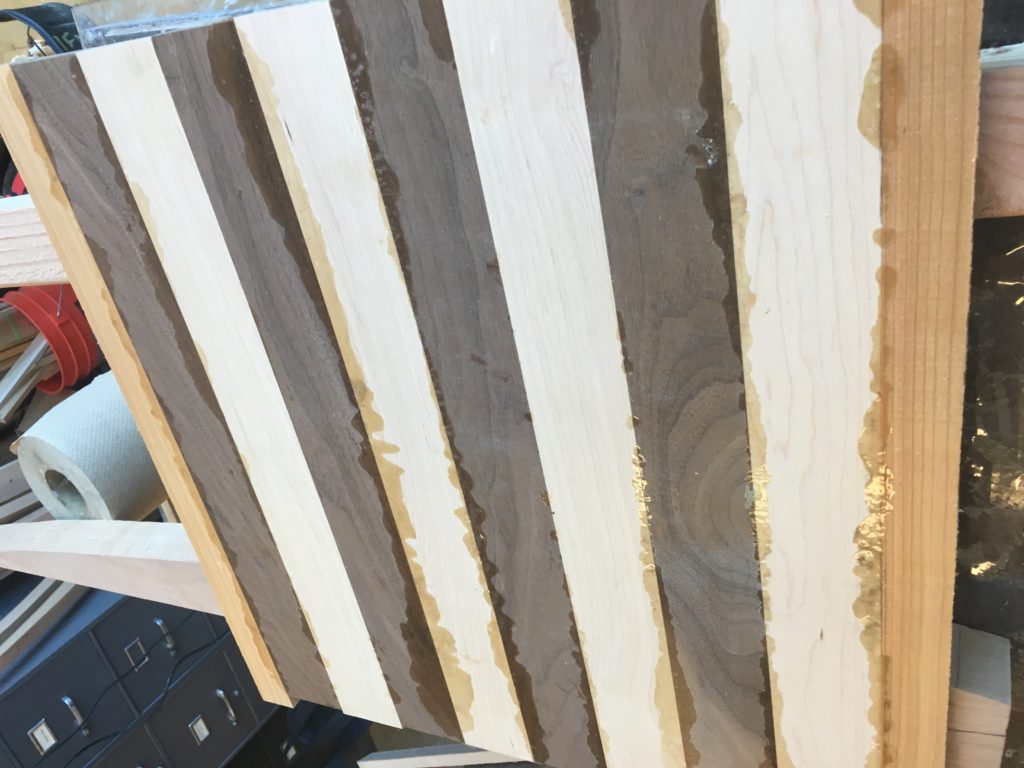
Next, I returned in 24 hours and removed the clamps. I used a hand planar to remove the excess glue and make sure all the surfaces were even. This was a tiring job. See the images below.


After a lot of hand planing, it is starting to look good. I will have to do this process again during the next glue phase.

Main Project Report Part 1
On the first day of class, during some brain storming for my upcycle project, I stumbled upon a chess board, which I started sketching.


 As I thought more about it, a chess board seemed like an timeless art piece, seen at home in many diverse environments: City parks, fancy hotel lobbys, living rooms, and more. As I look around my living room, I see an empty space on the wooden table, and figured that a chess board could change the dynamic of a room. My original idea at the time was to make a matching cribbage board, but this had to be put on hold due to time and budgetary constraints.
To begin this project I needed to create a project scope, requirements, budget, and schedule. These are all seen below:
Project Scope: Create an 8×8 tile chess board using decorative and contrasting wood for under $50.
Requirements: 
Budget: Less than $50. The wood purchased was $40
Schedule: 
This schedule shows the original project schedule with slack time added. Also, the actual completion lengths were added to show how they differed from the original times. I needed to do some tasks twice (hand planar, table router), and the learning curve was evident when the time decreased.
As we explored more aesthetics in class , I explored more ideas, and eventually narrowed my aesthetic down to a contemporary Asian aesthetic. For my upcycle project, I chose a rustic cabin look, using old and weathered barn lumber. I discovered that wood itself is NOT an aesthetic, but instead is a material. The wood must be arranged properly, colored correctly, and shaped uniquely to be considered part of an aesthetic.
Below, I will highlight what the contemporary Asian aesthetic is. In my research, I noticted very square and contemporary shapes. There are not a lot of rounded edges or wild colors. The wood is not shiny, but instead has a matte, natural look. The wood is normally a lightish color, but sometimes is offset by darker shades. Often, bamboo is seen with this aesthetic. If there are any plants or flowers, they are often not bright colors, but instead are green or brown. Below are images that highlight this aesthetic:


To try and demonstrate this aesthetic, a mid semester prototype was made in the makerspace at CU Boulder.
Build Process:
To demonstrate the aesthetic and learn about the build process, I decided to make a mini checker pattern. This allowed me to learn what types of wood worked best and looked nice. I started by going to the Makerspace to see what kind of scrap wood I could find. I found some contrasting colors and began to glue them together, using vices to secure them together while the glue set.
I did not worry about the wood being different sizes, as I could cut it down later on.
After it was glued together, I let it set for approximately 24 hours.
I then removed the vices and was left with this product:
From here, I cut the wood the long way to get 3 equal size pieces that I could then use to create the checker pattern.
I reglued them together, and let it set for 24 hours again.
Following this step, I used a hand planar to level all the surfaces and ensure they were even and smooth.
Lessons Learned:
- Experiment with the grain patterns and directions the grains face
- Find wood that is the same thickness
- Leave extra on the ends, you may need to cut it in the end, which isn’t a problem
- When planing, ensure you have the correct tools
- Glue the wood together on a flat surface
- Use the same kind of wood, don’t use scrap wood that I find
Having learned a lot about the wood working process, and researched more about the chosen aesthetic, I began my material selection. I chose maple for my light color and walnut for my dark. These woods are often used in my aesthetic. I decided that I needed to keep all corners as sharp as possible, not creating any fillets or chamfers.
The build process is highlighted below, with the final images at the bottom.
I began by inspecting the maple and walnut wood for any imperfections, ensuring it would suffice for my chessboard.
Next, I verified my drawings with an external party to ensure they made sense (measure twice cut once).
I discovered I needed to leave an extra 1/8” per cut due to the thickness of the saw blade. This adds up to 1” for all 8 cuts. I am happy I learned this before I started cutting, because I had to add an extra inch to my design.
I began by resizing the boards to 2.1×18 inch. Then I used a table router to ensure my edges were straight and had a uniform width. This was challenging, as maple can be difficult to work with. Next, I glued them together in an alternating pattern and let them sit for 24 hrs.
I used enough clamps to ensure all surfaces would be flat and perpendicular. I used a flat granite surface to ensure the playing surface would be flat. This can be seen in the pictures below:
Next, I returned in 24 hours and removed the clamps. I used a hand planar to remove the excess glue and make sure all the surfaces were even. This was a tiring job. See the images below.
After a lot of hand planing, it is starting to look good. I will have to do this process again during the next glue phase.
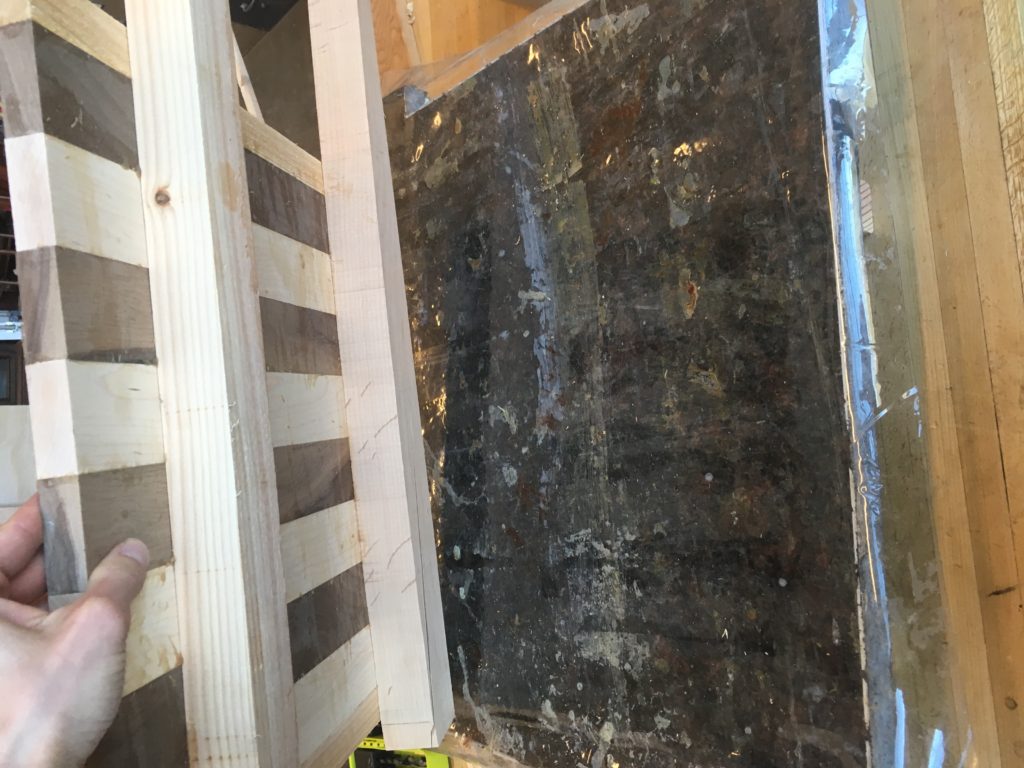
I then cut this up into 8 pieces, used a table router to ensure all edges were even, and then glued them together. The process can be seen below, and is similar to the process shown above.

Wood was put into the checker pattern. Care was taken to ensure there were no gaps. Some strips needed to be rearranged (like Tetris) to make sure they were all flush and level. Next glue was added and the cure process began again.


Finally, I took it out of the clamps and began planing it until it was flat, and until the knots and woodgrain showed how I wanted it to.


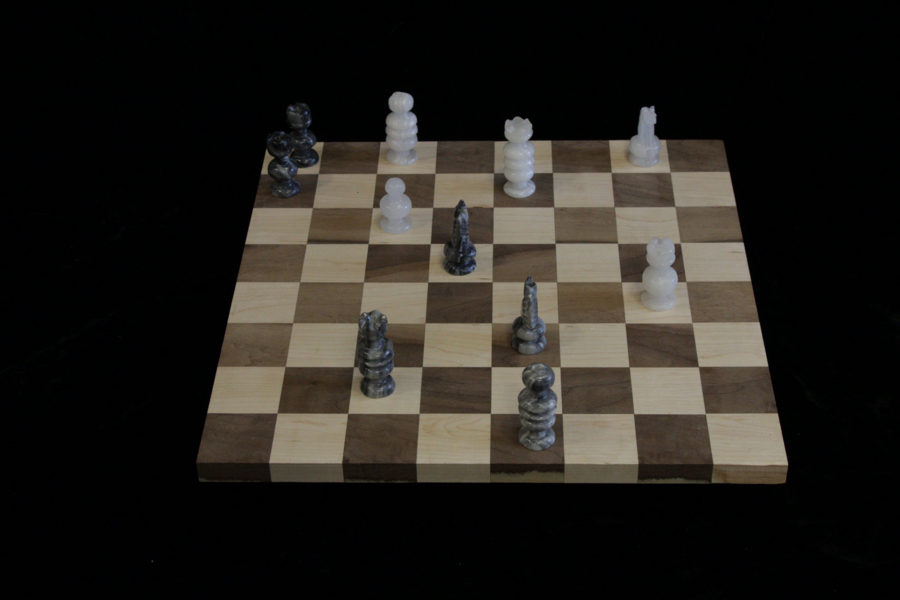
Below is the final product.

Main Project Report-Part 2
Chess is the ultimate game of planning. From the very first move, one must be thinking about the next move, and your opponents’ next move. As the famous hockey player, Wayne Gretzky, once said, “ A good hockey player plays where the puck is. A great hockey player plays where the puck is going to be.” This quote certainly applies to the game of chess.
This same principal applies to chess and to engineering. For this project, I needed to plan each move precisely, calculating the time and cost, and allocating a little bit of buffer time to help lower my schedule risk. Whenever I decided to start machining or cutting wood, I took a calculated risk, just as a chess player does when he moves his queen into a risky position on the board.
Enough with the cheesy chess analogies, now time to summarize the project.
Intent Vs. Actual
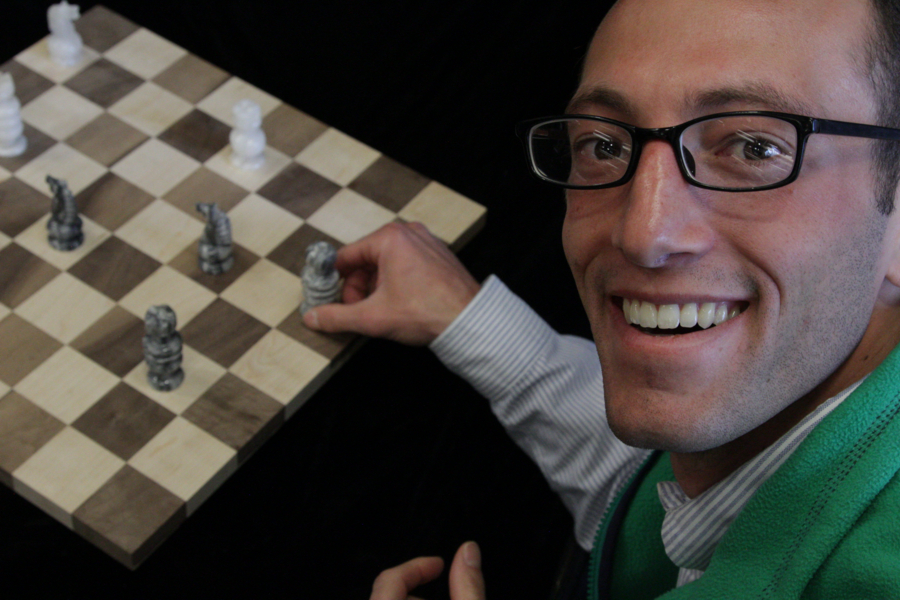
From the beginning of the semester, I had an idea to create a fancy wooden chess set, something that could sit on a coffee table and act a conversation starter. Additionally, it could have function. Through my ideation and brainstorming, I thought it wood be neat to make a storage drawer under the board. However, as I discovered, woodworking can take years to master, and I certainly did not have the experience. With that said, I had worked about 60 hours in a woodshop before, so understood the basics, which would help me to create the chess board, seen below.

Due to the advanced nature of it, I did not create a storage drawer under the board. This is the next step I would like to take, but first I need to decide if it is feasible and within my budget. Using walnut and maple wood fulfills my contemporary Asian aesthetic, but ended up costing quite a bit. If I used this type of wood for the drawer, the total cost may rise to $150+. If I can find another type of wood that would work, I will consider it as my summer project.
The next step would be to put a clear protective coating on the wood to prevent unnecessary wear and preserve the colors. I do not want to make it shiny, but I want to put a clear coat on top. Something like a Polycrylic protective finish.
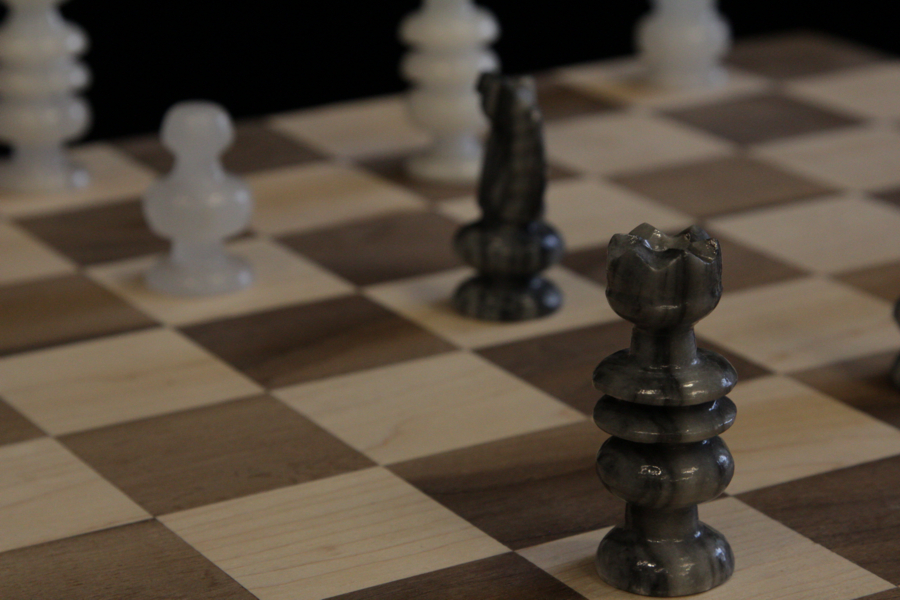
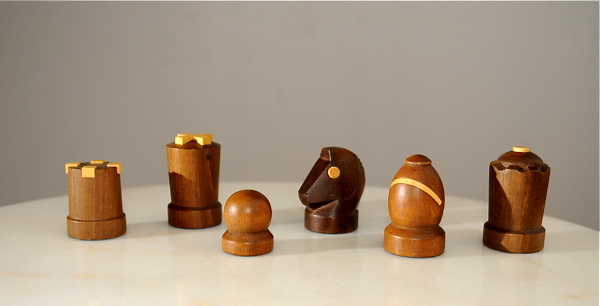
Additionally, I would like to acquire more chess pieces that will fit with this set. The marble ones that were used are nice, but may be a little too bland for this. Ideally, the pieces I would find would look something like this. These all have a contemporary look to them, are made of fancy, contrasting materials, and would fit the overall aesthetic. I have not decided if I want to make these pieces or purchase them.

(https://www.regencychess.co.uk/images/large/RCPB310_04_LRG.jpg)

(http://www.chess-museum.com/uploads/4/8/4/6/484601/389781_orig.jpg)
How Did the Public React?
During the symposium, I received some great reactions and feedback from viewers. Particularly, people took interest in the chess pieces, which were not built by me. People of all ages, including a 5 year old, offered to play chess. It is a timeless, classic game that most people know and love.
People also commented on the perfection of the board, and how the pieces were placed so precisely, eliminating any gaps or inconsistencies. People would run their fingers over the top to see how flush it was. I made sure this was addressed during my build process.
To help cater to this feedback I received, I would like to make my own pieces that fit my aesthetic. This could be impressive and impress people even more.
Class Impressions
Overall, I am extremely satisfied with my final product, and with what I learned this semester. I now look at items with a new view, something that I really appreciate. Instead of just seeing a chair, I now see a type of chair with a designer and story that influenced it. This approach and vision spreads to rooms, tables, buildings, cars, or any other functional items that I use on a daily basis.
Being able to engineer something that functions and operates correctly is a challenge, but building something that looks good and that people are willing to pay money for is a different story.

Photo Credit: Dr. Hertzberg


