
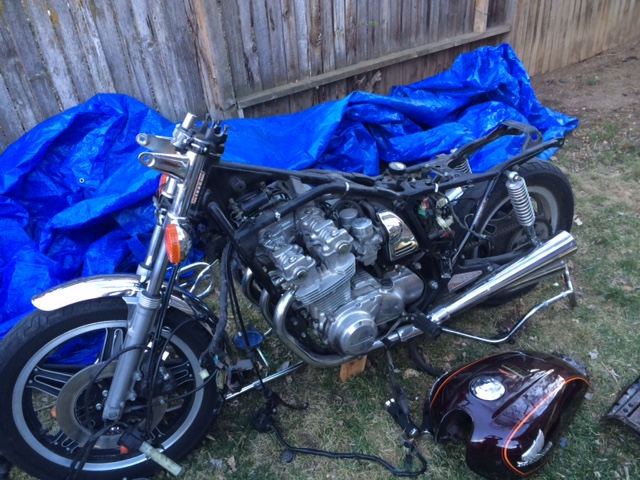
So far my cafe racer project is off to a good start. I have completely stripped the bike including the electrical system.

Since the above picture was taken, I have also taken off the carbs, stock airbox, and hack-sawed part the back frame off. I also bought some sweet renthal ultralow handle bars and placed them on the forks giving the bike a nice trcaker/brat look. I bought paint stripper and some high quality spray paint in order to paint the gas tank. I plan on stripping the paint down to the metal then taping up a sweet diagonal stripe similar to the build below.

I will be working on the painting if the weather is good before I leave for spring break. Upon my return, I plan on cleaning and de-greasing the entire bike and engine. I ordered a custom brat/cafe style seat that will hopefully be here by then too which I can mount on giving the bike it’s base look. I might need to design a flat seat pan in order to bolt the seat on as well. This would also give me options to mount and hide the battery, wiring, and brake lines. I really want to try and keep the triangle of the bike frame open giving the bike a lighter, and simpler look such as the bikes below.


I really like the metal and black look or might even try and incorporate some white into it too but want to make the seat and handlebar grips tan in order to add eye catching and classy accents to the bike.
Another part of the bike I originally did not plan on tackling until summer is the electrical system. The wiring harness was overly comlicated and very bulky so I plan on rewiring the entire bike down to the bare minimums of what I need. Below is a diagram I found that will help me with the rewiring process.

Below is what the original wiring used to be.

Definitely going to be a challenge but it will pay off tremendously in the end. I also purchased a battery I can mount in any direction meaning I can hide the battery by mounting it on the swing arm or under the bike as opposed to dangling in the triangle I want to open up.
The last task I need to tackle is taking off the wheels and giving them a nice coat of black paint. While the wheels are off I plan on dropping the forks down an inch or two to give the bike a flatter, more aggressive look. I hope to find some affordable rear shocks to update the suspension as well and will be looking after spring break to swap the stock ones out also raising the back off the ground an inch or so.
Overall, the bike is coming along nicely along I have realized this will be more challenging than I expected. I expect to finish the aesthetic portion of the project before the end of the class but am still worried about finishing the electrical portion in time. Although it is not crucial to the project scope of this class it would still be nice to be able to drive this baby to classes during the end of spring and show off my hard work.
3 Comments. Leave new
Great job! This will be one of the better projects in this class if you are able to pull off both the aesthetic and electrical portions.
I’m digging the third image you have up there. There’s something about silver, black and dark brown that works well with motorcycles, so I hope you pursue this color scheme. I also like the low handle bar look. Are you making any performance upgrades in the future?
Looks like you’re on the right track, I can’t wait to see how this progresses!