
Inspiration & Vision
I was inspired by the crafted art found in my family’s lake cabin. This led to my decision to utilize a rustic aesthetic that fits hand-in-hand with the inspiration. This means I wanted a subdued hue, natural materials, rough texture, aged appearance, and casual fabrication. My vision for the project’s form is for it to be made from a single block of wood consisting of two uniform chain links and designed to be as large as possible. My vision for its function is for it to have frictionless motion.
Ever since I was a little kid, I have wanted to attempt this project but it takes a lot of practice and skill to recreate his chains. Since my skills are limited and not refined, I will be making a two-link chain. In order to complete this project, I simply needed a decent-sized block of basswood, some carving tools, a straightedge, and a saw. Technically, this project could be completed with just wood and a few carving tools, but in order to make it more suitable for beginners, I have decided to start removing a majority of the wood with a saw. This last week I gathered the necessary supplies for this project. Fortunately, I have not had to purchase anything for this project since the basswood block was leftover from another project and I am borrowing the carving tools and saw. The pictures below show my supplies.


Fabrication Process

Just for some context, I would barely consider myself a carving novice. I have only had two opportunities to try wood-carving in my life and it was roughly ten years ago. So, when I decided to attempt such an ambitious project, I knew I had to be honest with myself about my abilities. Thus, throughout the fabrication process, I used techniques that would not necessarily be required, but helped me successfully “find the missing links.”
To start, I began by measuring the scrap wood at its smallest cross-section to determine the maximum width of my links. Then, I used my straightedge to mark centerlines on all six faces of the block. Next, I used the straightedge again to draw guidelines approximately ½” from both sides of the centerline. These outer parallel lines show the maximum diameter of the link’s loops. After drawing the guidelines on all of the faces, I clamped the piece of wood to my kitchen counter as shown from the image below.

I then used the saw to carefully cut the four corners of the long edges to create a cross-shaped cross-section. The cross-shaped block of wood can be seen in the image below. One chain link will occupy the vertical wood section and the other will occupy the horizontal wood section.


Finally, I made a link template out of an index card. Again, I chose the width of the chain to match the dimension at the smallest width of the woodblock. With the template, I folded the index card in half and placed it on the surface of the section of wood I just cut out. I outlined the template with a pencil and then repeated this process until I had the outlines of the two links. These outlines will serve as my guidelines for when I start carving.


To begin the actual carving process, I used the largest chisel tool to remove the wood from the outer surfaces of the chain links. As you can see from the picture below, you can see the shape of the chain links begin to form.


Outer formation of chain links.
Now, I removed the wood in the center portions of the chain links and carefully separated the two links. Using the carving tool shown below which has a small curvature allowed me to chip away the center of the links on the unshared portion.

Once I removed the center wood up to the outer edge of the other link, I began to carve grooves around the outlines to thin the block of wood where the links would eventually be separated. This process took a very long time since I had to be careful not to remove any of the wood belonging to the final chain. If I made any mistakes, my chain links would have to become smaller to account for the errors. When the gaps between the links were sufficient, I was able to pierce through the would using the smallest tool I had which is shown below.


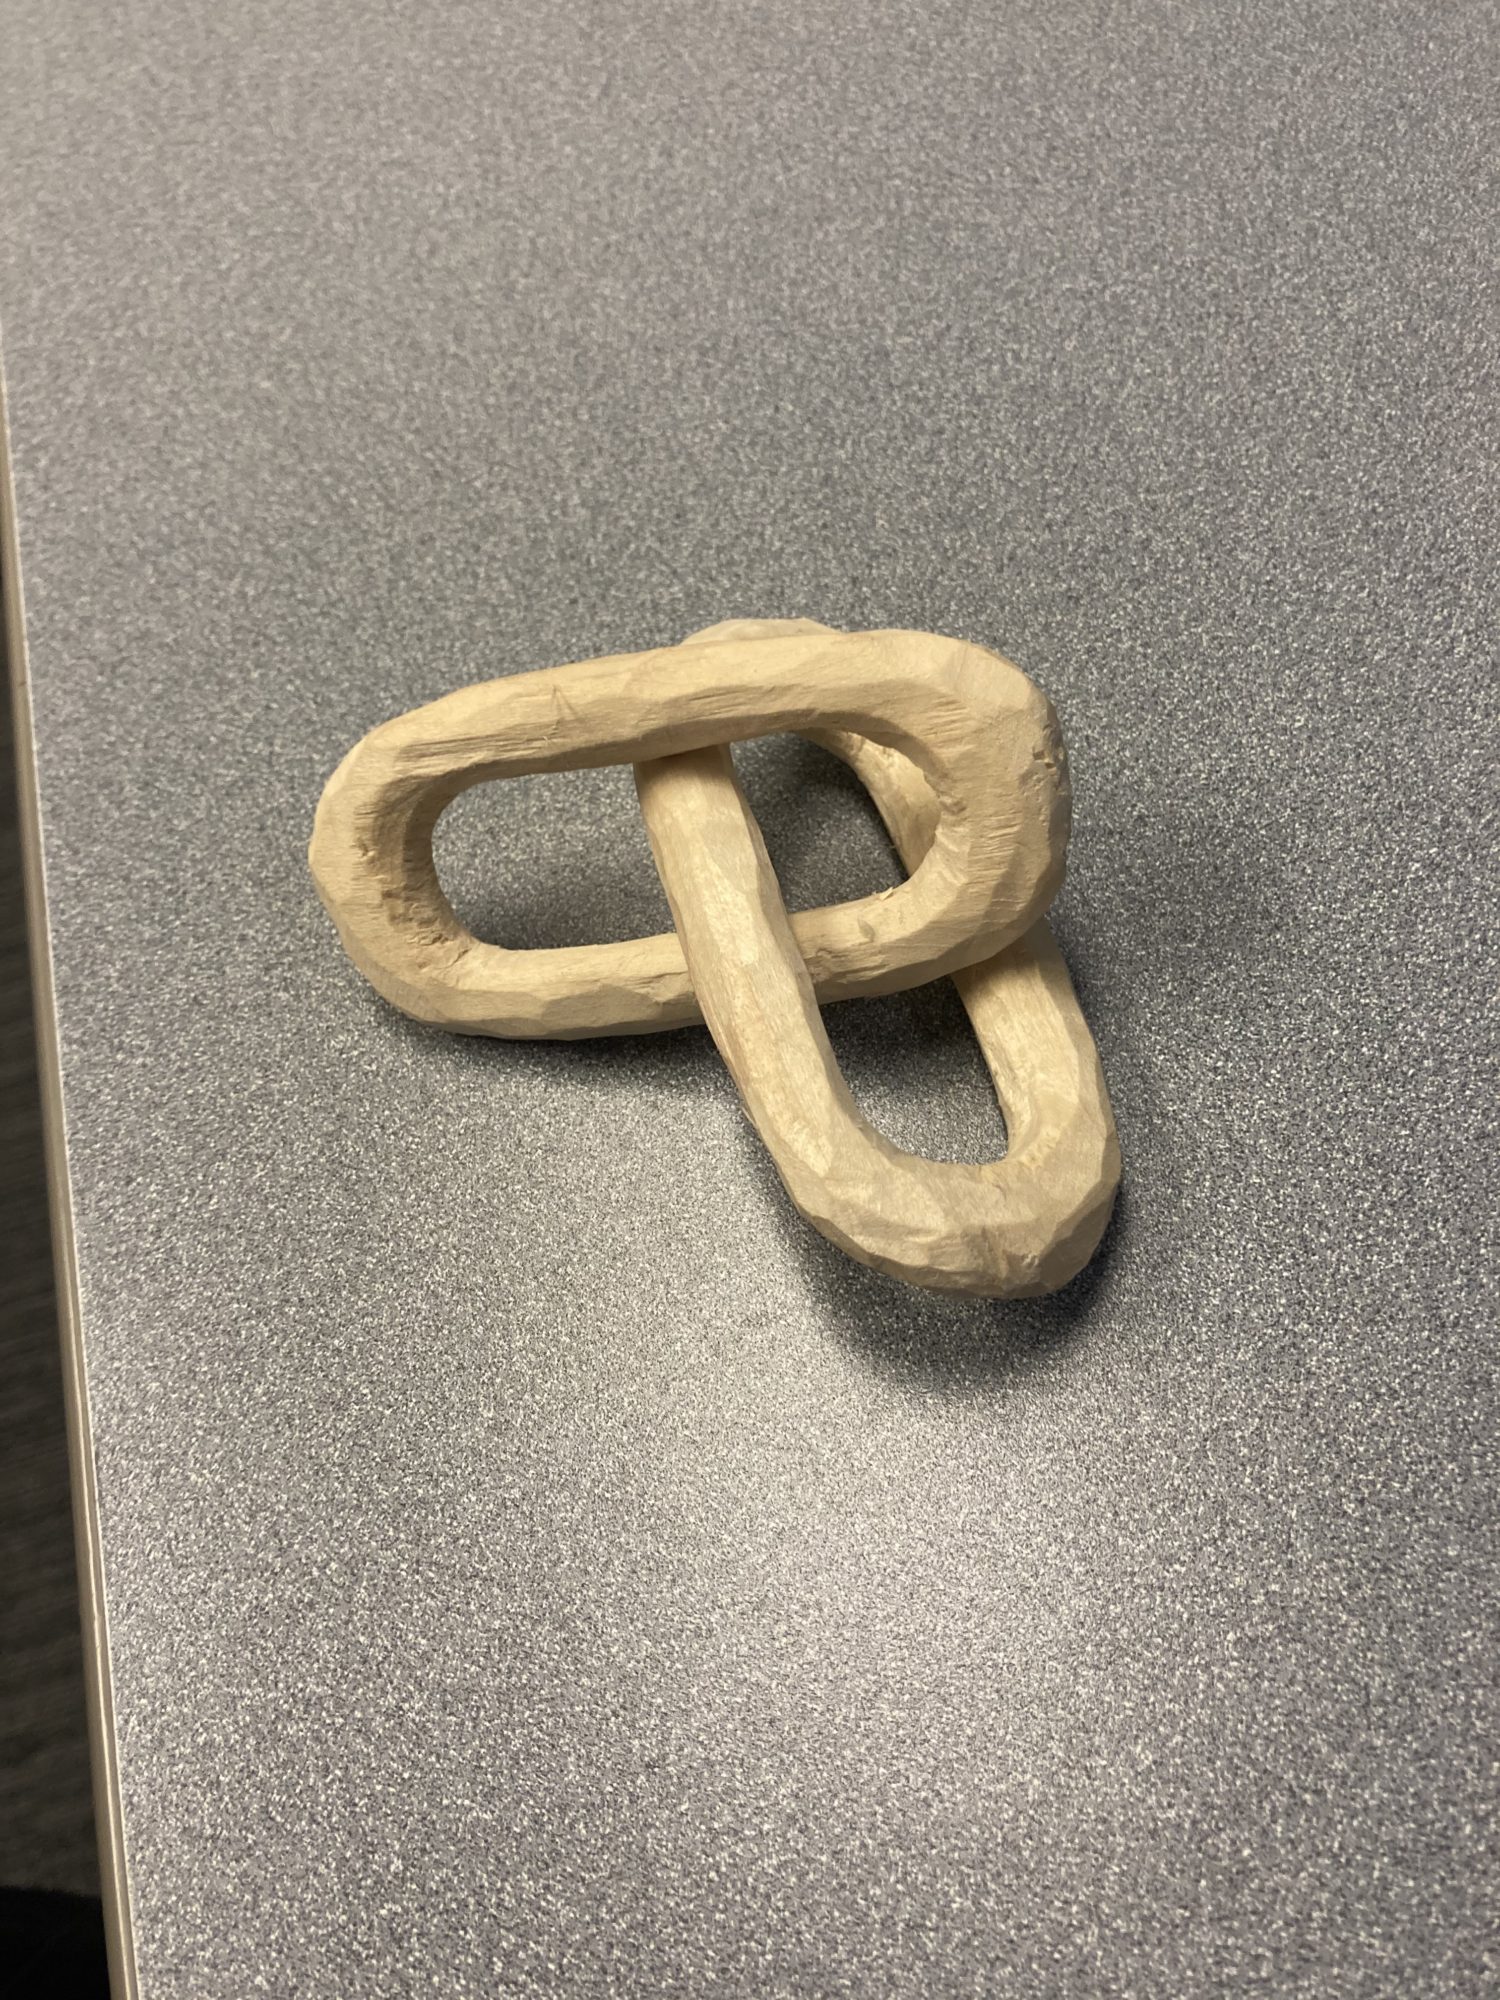
Finally, after the chain links were separated they still had a rectangular shape and could not freely rotate. Thus using the carving knife, I slowly whittled down the diameter of each length to create enough room for the motion. I chose to make the lengths cylindrical which was an aesthetic choice I made to resemble the chains from my inspiration.
Final Artifact

Typically, the surfaces of the chain links would be sanded down to create a smooth surface. However, I decided to keep the rough texture because it better encompassed the rustic look. As stated in my vision, I had hoped the links would be identical but one became shorter than the other. Regardless of my attempts to make them the same size, I eventually had to accept that the mistakes made in the initial cutting would prevent them from ever being identical. I would argue that this flaw in fact improves the rustic effect. Thus, I was able to create a seemingly impossible feat with a single block of wood. My future plan with this artifact is to put my initials and date on the chain link and add it to the current collection at my family’s lake cabin.
My presentation and review video’s link is below: