
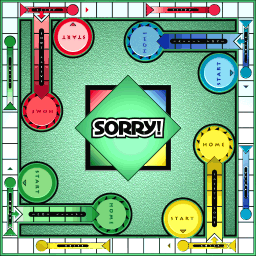
For my Upcycle project, I will be recreating the board layout used in the board game SORRY. This idea came about because I like the idea of converting scrap wood from a previous project into something useful. It sucks when you can’t use small sections after cutting up the main piece! Additionally, I have an Uncle who actually does a lot of upcycling by turning trash or various simple objects into tools, games, or even things which he sells as decorations.
Initially, I was thinking about turning scrap wood into a nice walking/hiking stick, but then I changed my mind when I started wondering about fabrication. Upon thinking about the laser cutters in the ITLL, I decided that I wanted to involve some wood engraving with those machines.
Why? Because I greatly enjoy the aesthetic of wood carvings and engraving! I find these types of work pleasing and easy to appreciate.
With this decision made, next came the choice about how to redesign the board. Initially, my idea started out as applying the aesthetic of “nature” to the board. This could have looked really nice because the tall towers could have been turned into trees with cool root systems and…that is where I stopped with the nature design because a bigger and better theme popped into my head. SPACE. Here are some great pictures that portray space and that I knew I immediately wanted to use:


These are ideal space pictures in my mind! Personally, I define this specific space aesthetic as “childhood outer-space imagination”. When I was a child, these rockets and spaceships are the first images that came to mind when presented with the idea of outer space.
Before jumping onto the laser cutter, it was necessary to start my virtual design…Oooof! What a time suck this has been! Fun, but quite time consuming to practice with SolidWorks and CorelDraw (which is the program that talks to the laser cutters).
Here is an initial view of the 12″ x 12″ board (not done):

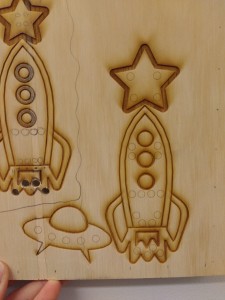
The two pictures below show my first wood piece in a laser cutter and ready for the first test cut, along with the result:
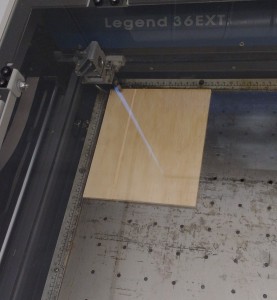

What did I learn from this first cut?
- The final board will look sweet with all the engraving 🙂
- 50/50 power/speed settings look good
- Change the windows of the rocket, and make the flames of the rocket longer to allow for room for the (eventual) pegs
- Expand the star on top to allow for room for the (eventual) pegs, and reduce the size of its engraved line
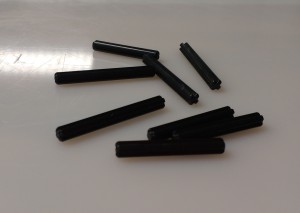
Next Test: Decide on pegs that are small and won’t ruin the aesthetic of the board.
Solution: Lego axles with 3/16″ holes (first tried the next smallest drill size and it was too tight)
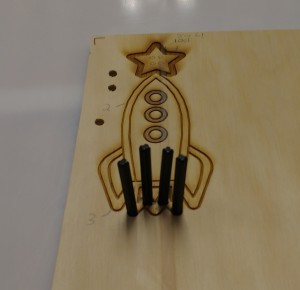
After this was the next laser cutter test, including changes made to the design! The small circles left are the peg-locations which require separate drilling (unfortunately…because the ITLL laser cutters aren’t used for cutting through wood).
Next Steps:
- Finish virtual board design
- Decide on final space aesthetics and decals
- Finish placement
- Prepare final piece of wood
- Acquire all Lego pieces
References:
Title picture from user Gonnagan: https://gonnagan.wordpress.com/2011/05/20/sorry/
3 Comments. Leave new
Nice! Have you considered using stains? They come in a lot of surprising colors
Also a good varnish can protect your work for years. Let me know if you want a bit of urethane.
Yes it would probably be a good idea to put some type of coat on before handing this over to my mom! I was afraid to experiment too much with it after finishing because I didn’t something to go wrong before presenting.