
As a personal fan of the contemporary industrial aesthetic I wanted to capture it within my upcycling process. I appreciate the simplicity of this aesthetic, but also how it doesn’t sacrifice strength or quality. I wanted something that would be useful in my life, but also add a subtle intricacy that was not immediately evident. I chose to make a common household item, the drink coaster.
Not immediately certain of my final design intent, I scavenged through the Manufacturing Center and machine shop in the ITLL. I couldn’t find any pieces of metal in good enough condition or large enough, but I was able to stumble upon some engineered wood. This wood had a slightly rough surface, but a soft grain. Next I found scrap acrylic that was in great shape. I decided to use this to give the wood a finished appearance and also level it better. With materials in hand, I planned to laminate them together to complete the process, but as I was leaving I found the perfect material to bring the design together: matching black bolts.
Supplies in hand I began to process of manufacturing. I created a 3D model in SolidWorks in order to create a pattern for the laser cutter to follow. I also used this to engrave to circular geometry into the wood so that it could be cut with a band saw and mill. The overall process was fairly simple and the pieces fit together with little trouble. With it assembled I realized that I had plenty of room in the base to add some intricacies and keep them hidden to maintain the overall simplistic look.
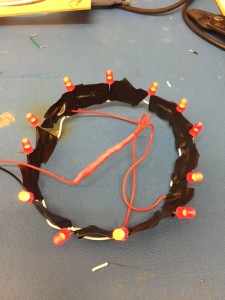
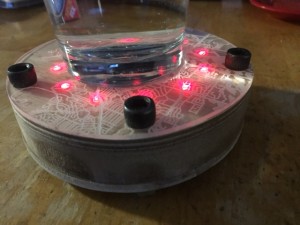
I chose to inset a ring of LED’s that I found in the ITLL. The only color options were red or yellow. Hoping to add some warmth, I chose red. I wired the LED’s together, soldering the joints, and connected them to a 9V battery that I found a handy case with a switch for. I had to put a resistor in the circuit to drop to voltage to an acceptable level for the LED’s.

Once I had it all wired I placed electrical tape around the connections as I knew the space would be cramped and I didn’t want any wires to short.
With the LED assembly complete, I had to use a hole saw to remove the core from the large center laminate of wood. I also cut 10 holes in the top laminate layer to allow just the top of the lights to shine through, preserving the sleek aesthetic. Each light has a small amount of superglue holding it in.

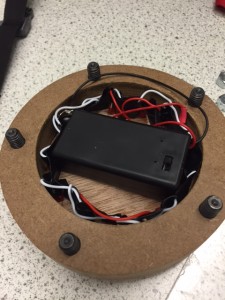
With this complete, I had to cut another piece of acrylic to hold the electrics in. I found I had to make a spacer to give enough clearance, but this all resulted in a very tight fit. So tight, in fact, I did not even need to use the slots to zip-tie the battery pack down as it was held in purely through compression. With the bottom on, I bolted it all together and tested the fit. It all fit!
To hide the wires a bit better and remain true to the aesthetic, I chose to engrave the bottom with an edgy design.
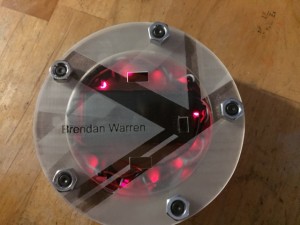
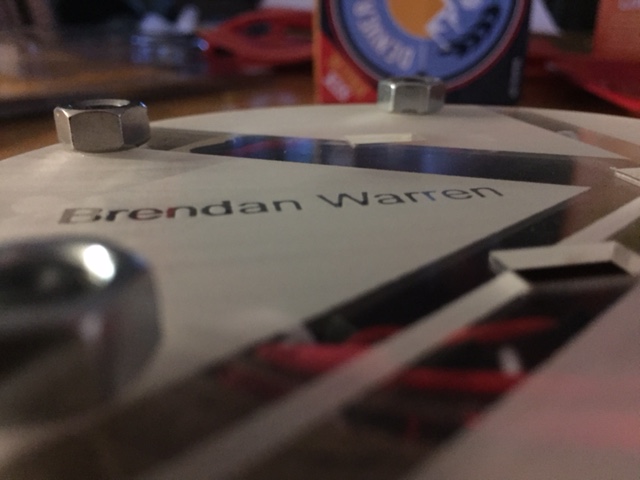
However, once it was assembled, I found that the top surface didn’t appear sturdy. Therefore, to hide some of the imperfections, I chose to engrave the top with a personal effect as a graduating senior at CU. The top has a low quality image that, at first, appears to be random lines, but upon closer inspection is actually a map of Boulder.
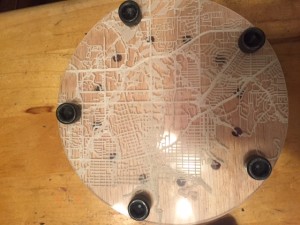
While I recognize that this detracts from the goal of simplicity, the desired look couldn’t be achieved with the materials available to me.
To finish, I sanded the entire assembly together, making everything align properly as circular cuts are hard to make accurately with wood.
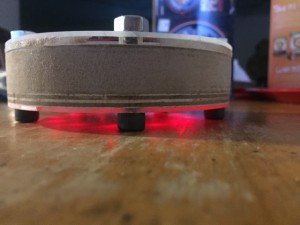
If I were to do the project again, I would probably use more lights and put them facing down onto the table. This lights up the table and gives a really cool aesthetic by expanding the size of the product without making it physically larger. I would also use glass instead of acrylic and much higher quality woods, possibly even metals.
Ultimately I was able to make the coaster completely free of cost, from all recycled materials. I learned a lot about stylistic choices throughout the process and it helped refine my personal style. Plus, I now have a great place to put my drink!
3 Comments. Leave new
Dude, this looks awesome. The map idea seems like a fast way to add a layer of coolness to your work without having to draw something from scratch. Very nice.
Good works! I like how your project is aesthetically appealing and practical at the same time.
Nice project! I like the look with the map even if it detracts from your original intended aesthetic. I think you’ve just translated it to a map art aesthetic which I am personally a fan of!