
Goal
My goal for this class was having an integrated project of engineering and aesthetics. This goal was pursed by making a Piet Mondrian inspired LED dress. Piet Mondrian is known for his work that shown in figure 1. The white, red, yellow and blue colors are very attractive and actually were made into dresses as shown in figure 2. Thus, I concluded that I wanted to make a modified version of the Piet Mondrian using the original design and pattern but to use colored LED instead.
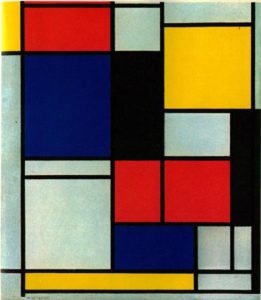
Figure1: Piet Mondrian’s design
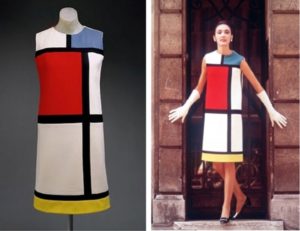
Figure2: Piet Mondrian’s inspired dress that I prused
Designing Process
At the beginning I bought a black ‘bell’ cut dress as shown in figure 3. Soon after, I discovered that it was hard to hide the batteries in such a dress and having them outside seemed rather unappealing. My other options were either to wire the batteries from the inside which can be uncomfortable or use a conductive thread which again might not be visually appealing (i.e. have to put the battries at lower half and wire/power them all the way at top half). Another challenge was powering the LEDs, I chose the normal 3mm LED because I believed they will enhance the aesthetic. However, I was planning to use about 100 LEDs in which powering them proved rather challenging and unsafe. Finally, in the ‘bell’ dress cut, the bottom was very wide and with twists which would have required huge amount of LEDs when I was already running into many problems, and also the LEDs were flexiable to certain extend only.
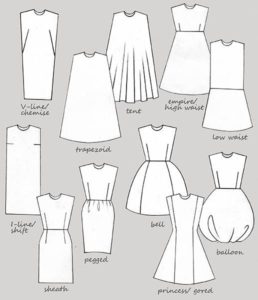
Figure 3: Dress types used as reference
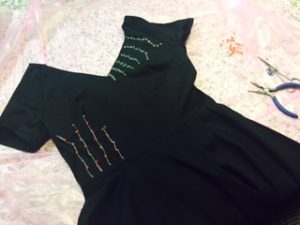
Figure 4: The first prototype dress
This brings me to the next step where I bought a white dress which seemed more of a Mondrian dress. Although, I did substitute the ‘blue’ with the ‘green’ due to the time constrains and the unavailability of blue 3mm LEDs online. I did the math and decided to use a 9V battery for every 24 LEDs as each LED consumed 2V and 20mA (minimum and maximum, respectively). I was able to have each 4 LEDs in series and 6 of these in parallel as a set and thus each set was a color and powered by a battery (expect for the yellow which consumed two sets and batteries). I tested the sets and everything seemed fine thus I went ahead and sewed them into the dress after marking where they should go on the dress with a pencil. Afterwards, I added switches and resistors (e.g. to limit current and protect LEDs from burning) and secured the batteries in the lower layer. Additionally, I substituted the conductive threads as a safety measurements with wires that connected to 9V batteries connectors (under the dress). Finally, I did add black strips around the ‘blocks of color’ as a final touch in imitating Mondrian’s designs.
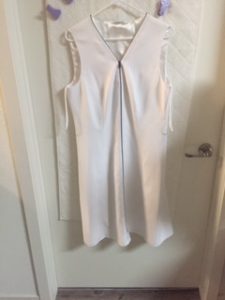
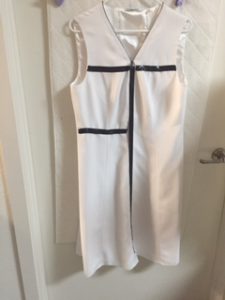
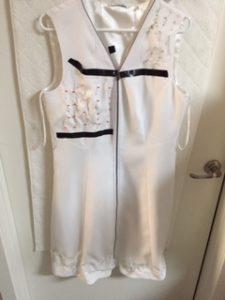
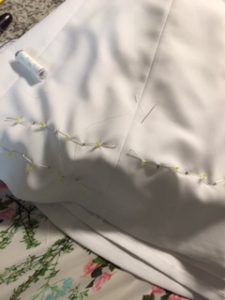
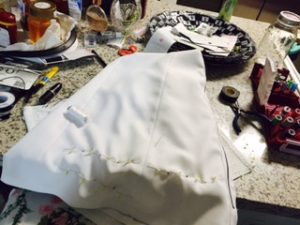
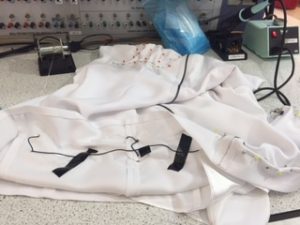
Figure 4: The process of making the white dress and peak at the lower layer
Results:
As shown in figure 5.
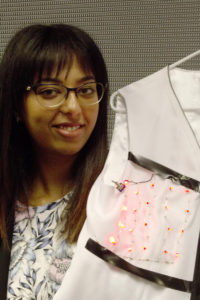

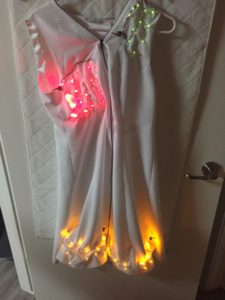
Figure 5: Piet Mondrian’s inspired LED dress I made and me 🙂
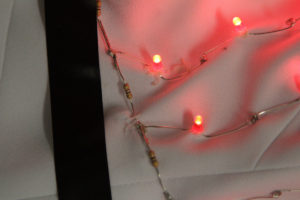
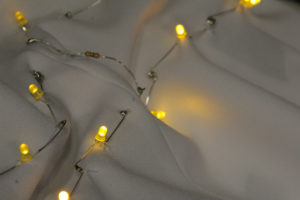
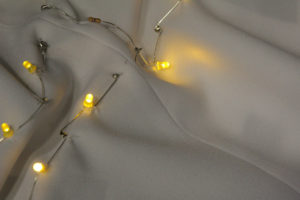
Figure 6: zoomed pictures of the LEDs on the dress
The Math:
Each LED needs about 2V and 20mA thus every 4 need 8V and if you put them in series you can power up to 6 of 4 LEDs (in series) in parallel. The 9V battery provided enough voltage and it can provide up to 500 mAh. Then, (9-8)/0.020 = 50 ohms so I used 47 ohms resistors to limit current at the end of each series.
Lessons Learned:
Smart garments (aka e-textiles) are very fashionable and cool products. Thus, I plan on taking this project further especially now that I have some experience and constructive feedback. This a list of lessons-learned and future improvements:
- Normal LED are demanding in power, harder to make symmetrical and fixable to an extent only. However, LED strips which are more flexible, better concealed and very demanding for power are better and safer (e.g. they are concealed and you cannot short them which can result in fire hazardous).
- Lily products are wearable (sometimes washable) electronics which include LEDs that might be considered for future designs.
- Having the LED in the lower layer or having holes they can peak from might be more appealing whereby you hide all the wires (Although at the beginning I deliberately had them out, thinking that they’ll look ‘cool’).
- Using voltage regulators might help with heterogeneous luminosity of the LEDs (e.g. first raw is more luminous). Also, using different resistors values to control current might help with the same issue.
- Solder everything before sewing, I had to solder battery connection at the end but I burned the dress in two places. Also, wires got hot and made the dress brownish, as in it is beginning to burn :$! Note, for this design there was not a way around this, but if smaller battery was in use then connection can be made via conductive threads.
- Avoid soldering!
- 9V batteries are heavy and they pull on and crumble the dress, harder to secure and less safe. Again, other batteries can be considered if the LED type is not demanding in power
- Having a I-line for this design specifically would have worked better, but dresses obtained were suitable for their prices and I did not have other options at the time.
Budget:
Item | Price
Dress | $20
LEDs | $40
Wires | $5
9V battries | $13
resistors and equipment are for free using the available resources at the Integrated Teaching & Learning Program and Laboratory, ITLL. Note, I did buy other things that I ended up not using and will donate it to project-depot at the ITLL.
2 Comments. Leave new
I love the aesthetic to this light-up dress! I think a great addition to really make the LEDs pop would be to add glitter or sequins to the dress to allow dispersion of the light. I am curious to how safe this dress is to wear (if all of the wires are insulated or there is danger of overheating the textile), but I would love to see it on person!
From the looks of it , E-textile projects are pretty challenging. You have to balance the technical portion of the project with aesthetics and the comfort of the wearer. A good approach for next time might be to use addressable led tape, which allows you to power and control the color of dozens of leds using only 4 wires. However, it is still difficult to drive large numbers of LEDs. Long led strips are usually driven at 12V with high amperage. I’m not sure if there are design recommendations as to a safe amount of current in e-textile designs. Best of luck on your future designs & have a good summer!