
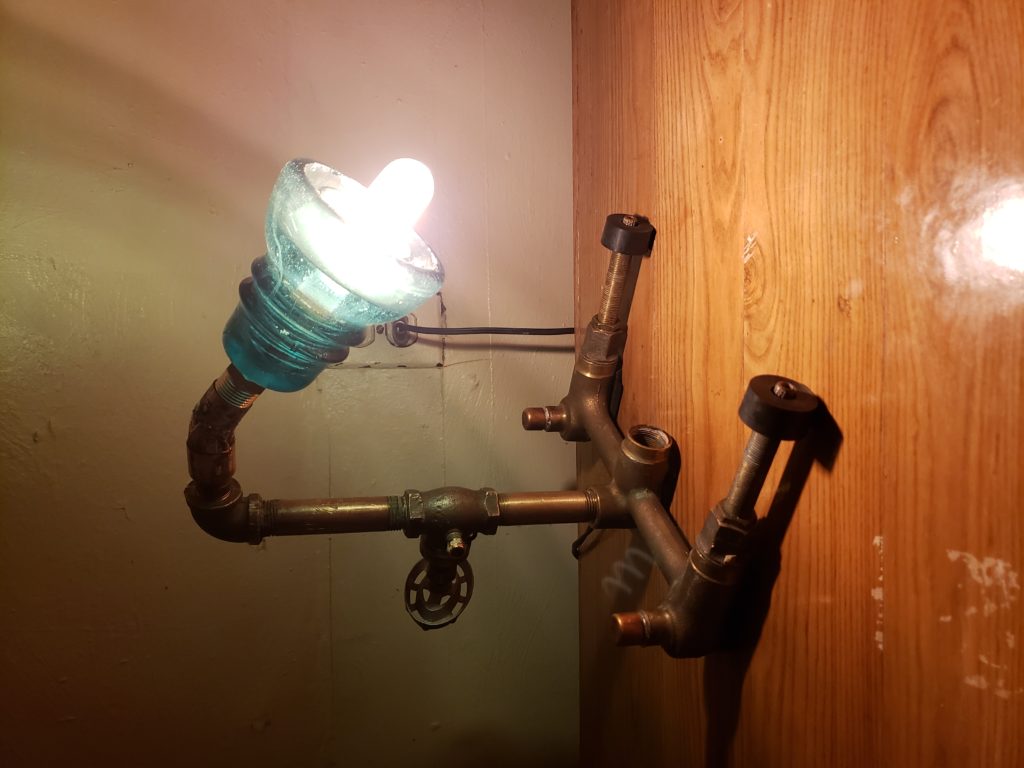
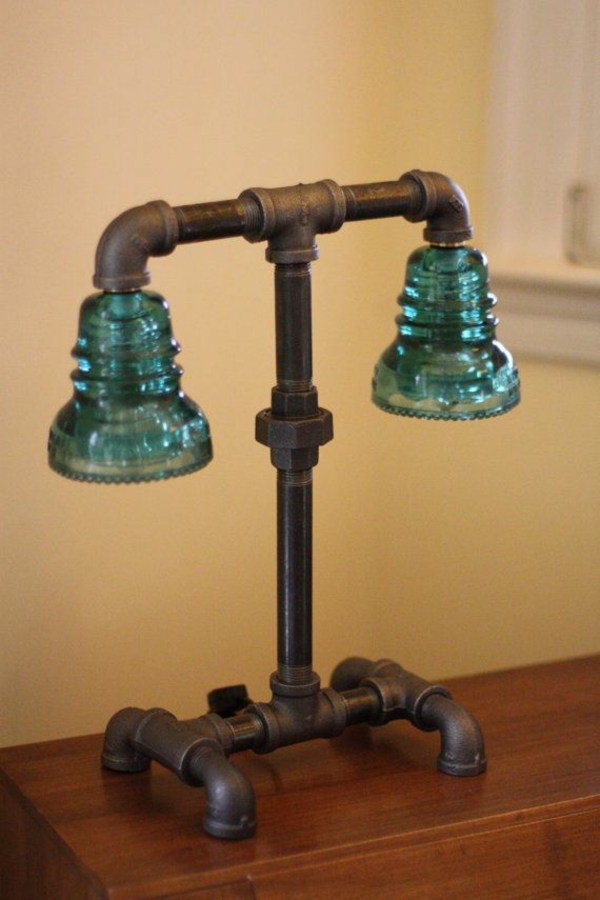
For my up cycle project I chose to make a desk lamp centered around a power line insulator. An image of the final product is included below

As stated in the title, my main inspiration for the project was to use a power line insulator in a novel way. Due to my grandfather amassing a collection of them during his time working in the power industry I have grown up with a knowledge of these and their unique look. When presented with the prompt for the upcycle project I instantly gravitated towards centering my project around the insulator due to my ease of access to them. The two materials most commonly used to produce the insulators are colored glass and clay usually porcelean or ceramic. These two materials portray different but equally as interesting aesthetics. Additionally, the aesthetic varies greatly based on what material you surround them with. The two genres of insulators can be seen below.
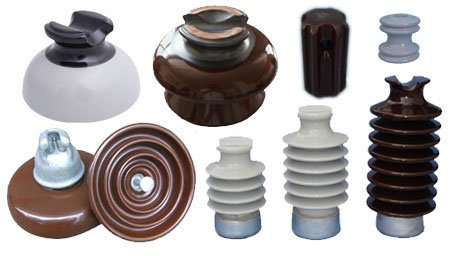
[1] Ceramic/Porcelean Insulators 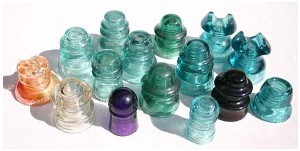
[2] Glass Insulators
With the upcycled component selected my next step was to chose what to actully make. To decide this I began researching how poeple have upcycled insulators in the past. during this research I found multiple examples of lighing pieces and planters. Some examples of thes applications are included below.

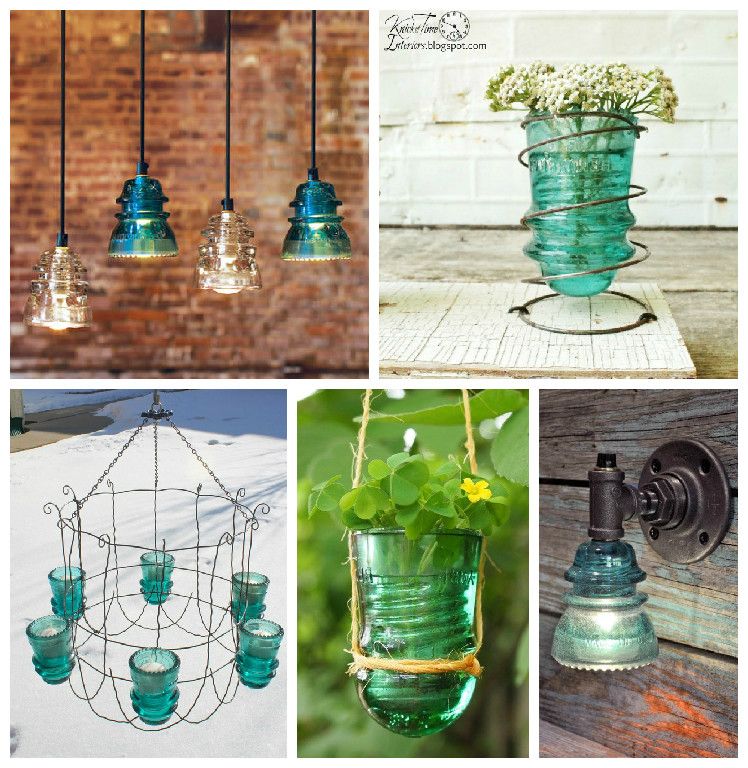
The idea of creating a lighting piece was very intriguing to me. This intriuge was in part due to the larger utility of a light than compared to a planter becuse of my need for additional lighting in my room. Additionally, I felt that a lighting piece opened up more doors when it came to possible aesthetics. With the functionality of the piece determined I then began detaiing basic specifications to aid in my concept generation. These specifications were as follows:
- Functional light source
- Able to be utilized as a desk lamp
- Make use of a base, not a hanging light piece
- Does not use switch on cords or socket, but rather a unique switch integrated into design
The last specification was more of a stretch goal than a rigid requirment. I felt that this could be a unique functional feature that would contribute to the overall product, but it was very dependent on the design and strructure of the lamp body. For this reason coupled with teh potential dificulty of integrating a switch into the body I did not want to commit to this secificiation until i had a mre fleshed out design.
The next step in my design process was to begin developing peliminnary concepts. To do this I created three sketchs each utilizing the insulator in a different way while still acomplishing the specifications. The first iidea i had was centereed around a porcelean insulator acting as the body of the lamp. The light bulb would then be housed in a traditional style lampshade. The next idea used a glass insulator as housing for the bulb, while a piece of word or a stick would be used as the body of the lamp. My last idea once again used a glass insulator as the housing for the bulb. An easy to work with material such ass pipe was then to be used as the bdy of the lamp. Sketches of these three options are included below.

Option 1 
Option 2 
Option 3
These three options all came with some versitility in design and potrayed the diffring aesthetics. Option 1 lent itsef to a more traditional aesthetc with vesitility in what the desigh of the shade would be. I planned to try to portray a more western aesthetic with this option. Option 2 had a much more natural aesthetic due to the wooden body. Option 2 employed a very industrial aesthetic due to my plan to use piping as the body material. Additionally, due to the ease of working with the threaded pipe, it opened u the door to use multiple insulators.
Ultimately I chose to further develop option 3. This choice was made due to my attraction to the industrial aesthetic. In addition to this, I knew I had access to a salvaged pipe that my dad had in his grage at home. A final render of my fleshed out design for this option is included below along with a piece I drew inspiration from.

[5]
This design used five pieces of black iron pipe as the body of the lamp. The pipe was then to be secured to a wooden base. I planned to use a flip switch I salvaged from an inoperable surge protector. This switch was going to be secured to the wooden base.
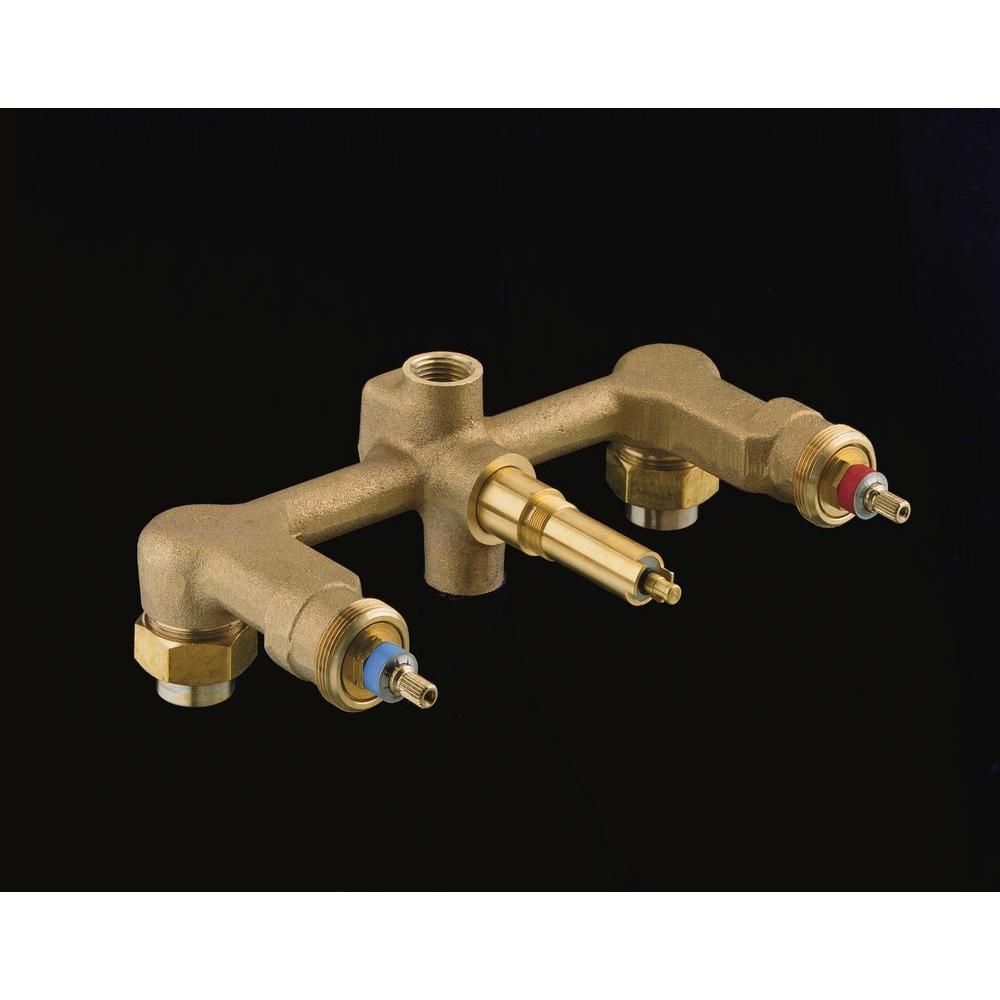
While looking for a piece of wood to create the base, I found an old brass three handle shower valve. I found the shape of this piece to be perfect for a unique base. Additionally, I felt the brass looked better with the aqua colored glass insulator I chose to use. A similar piece is pictured above. This spurred a total redesign of the lamp. Rather than utilizing sketching as a tool, I simply pieced pieces together until I created a lamp body that I liked. In creating the body I used a two-way valve to join 2 pieces of pipe together. This valve gave me the idea of using a rotary switch with the vauvle handle as the powere switch for the light.
With the body planned out, I began making the lamp itself. The first step was to drill a hole in the insulator. Next, I used a hand-held grinder to grind down the central inlet to the shower valve. This was done to make the base of the lamp level. I then used the grinder to widen the hole that the valve handle screwed onto. This was done to make room for the rotary switch. I then began to fashion a 45-degree angled piece to achieve the desired angle of the light. This was done by sodering two piceces of copper pipe together and bending the soldered pipe to 45 degrees. To do this I had to cut out a notch, bent the pice then fill the resulting hole with solder. The last step in fabricating this piece was to thread both ends to allow for it to be joined with the rest of the frame. This was by far thee most challenging part of the build, but with some persistence, I was able to achive the outcome I wanted. The last steep in building the body was to soder on copper caps the open outlets of the shower valve. Images from the build are included below.


The last step was to wire the lamp. I joined all the wire using wire nuts and forced the strands into the piping. This was surprisingly challenging. If I had had more time I would have chosen a different method than wire nuts. I chose to use ligthbulb with a decrotive filament. Although this was not an up cycled material and had to be purchesed I am happy with the descision as I feel it greatly contributes to the industrial aesthetic. A close up photo of this bulb is included below.

Overall I am very happy with the final product. I was able to achieve all my functional specifications including my stretch goal. Additionally, I believe that my final product perfectly embodies the industrial aesthetic I was aiming for. As stated earlier if I was to iterate on this project I would revisit the wiring to create more room in the piping. Furthermore, I would like to reinforce the interface of the rotary switch and valve handle. In its current rendition, I am using an aluminum standoff to join the two together. This joining feels a little flimsy and I would like to redesign it. In the future, I would definitely like to create more lamps. I felt this provided a perfect canvas for experimenting with aesthetics while resulting in a useful item. A picture of the working final product is included below along with a video of my in class presentation.

Citations
- https://steemit.com/science/@asbonclz/power-line-insulation-using-ceramic-electrical-insulators
- https://www.justcollecting.com/glassware/antique-glass-insulators-glossary
- https://homesthetics.net/30-delicate-methods-repurpose-old-glass-insulators/
- https://www.pinterest.com/pin/571816483914487856/
- https://freshideen.com/moebel/industrial-design-moebel.html
- https://www.homedepot.com/p/Widespread-1-2-in-Ceramic-In-Wall-3-Handle-Valve-System-with-Integral-Diverter-and-8-in-Centers-K-303-K-NA/100073795
11 Comments. Leave new
Nick,
I really love the pipe/valve aesthetic you ended up using for the lamp, especially since it makes its own stand. It was interesting to see your thought process with the different options and how you were thinking of the different approaches. The execution turned out really good. Would you say using the shower valve is a big part of your aesthetic?
The aesthetic of this lamp came together really nicely, you can clearly see the theme throughout the process. Could there be a different way to approach the creation of some of the custom parts as copper can be a tricky material to work with?
I really like how this project turned out! It definitely achieves your steampunk aesthetic, and it looks like it will last forever and be useful as a lamp. The plumbing parts was a good choice of material as its easy to assemble and to run electrical parts through. Nice job!
The way the switch works is super cool! Also I like that you used some pretty obscure materials to make this. I think in the future if you want to build on this it could be cool with multiple bulbs using the same covers.
This is one of the best projects I have seen. I really like the way it came out, and the aesthetic is awesome. I really like that it is also functional.
Awesome design and you hit your aesthetic spot on. A great design feature is the valve being the on/off switch. Can’t wait to see your next model.
You were very well spoken in you presentation. You documented you brainstorming, reasons for choosing this project and how you proceeded to build your lamp. The drawings and reflection you included in the presentation really helped me follow your presentation and understand how you felt about it. I would have liked to see your project in person, but you did a good job at presenting it to us.
Looks like a great final piece and it was accompanied by a professional presentation. It is awesome how you integrated the power switch into the valve. I would be curious to see how this aesthetic is revisited in the future.
Using black iron pipe, glass insulator, and a shower handle valve is something that I would have never assumed could make a lamp. The lamp overall has a very steampunk aesthetic. I wonder what the lamp would look like if it were polished and different feet were attached.
I like the industrial aesthetic that you created. I also like that your product is functional and that you used engineering principles. The valve for the switch was a brilliant idea and it’s nice that you met your stretch goal. Well done with your hands on project.
Industrial aesthetic is one of my favorite aesthetics when paired with repurposed wood. I think this project was very inspirational and I hope to make something similar too one day. Maybe add a copper cone around the bulb to redistribute the lighting so it’s not such an in-your-face bulb.