
Inspiration
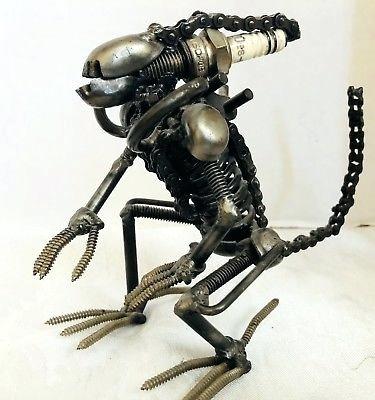
My inspiration for my upcycle project is two-fold; I first got inspired over Christmas break of 2019-2020. I was reading The Hobbit by JRR Tolkien and I loved his description of all of his characters and the setting of middle earth. I could almost believe that I was actually there. The second came from being in the Idea Forge so much at school, I walk by piles of scrap parts that can be used for Component Design class for their electric powered bikes, though many of the parts in the scrap are unusable do to the wore conditions of all the parts. When time came around to refurbish/ upcycle old material, my mind immediately went to the scrap piles in the DIDL that will never be touched. And then I had to think about what I wanted to do with scrap parts. I remembered some cool IG posts over the summer of people making sculptures of people, creatures, and machines out of scrap parts so I decided to pursue that route. Below is a picture of a monster made out of bolts that was an inspiration to follow for my project. The picture is created for Bagitau.net which is a creator’s website. Going back to JRR Tolkien, I decided to attempt to make a sculpture of a middle earth warrior.
Design Process
My design process for this project was quick linear till the fabrication part of it, when I iterated designs while I was building my sculpture. Admittedly, I have zero sculpting experience or any sort of art skills in general. So for my design, I just looked at a bunch of viking warriors as well as dwarfs from LOTR. Also, the design was dependent upon what scraps I attain from the idea forge. So after I decided to do this project my final design will be entirely compromised of scrap from the Idea Forge/ DIDL. So for my vision I was thinking about a scuplture that is approximate 1×1.5×0.5 ft for the envelope. Though that is subject to change depending on what I got from the idea forge.
Materials
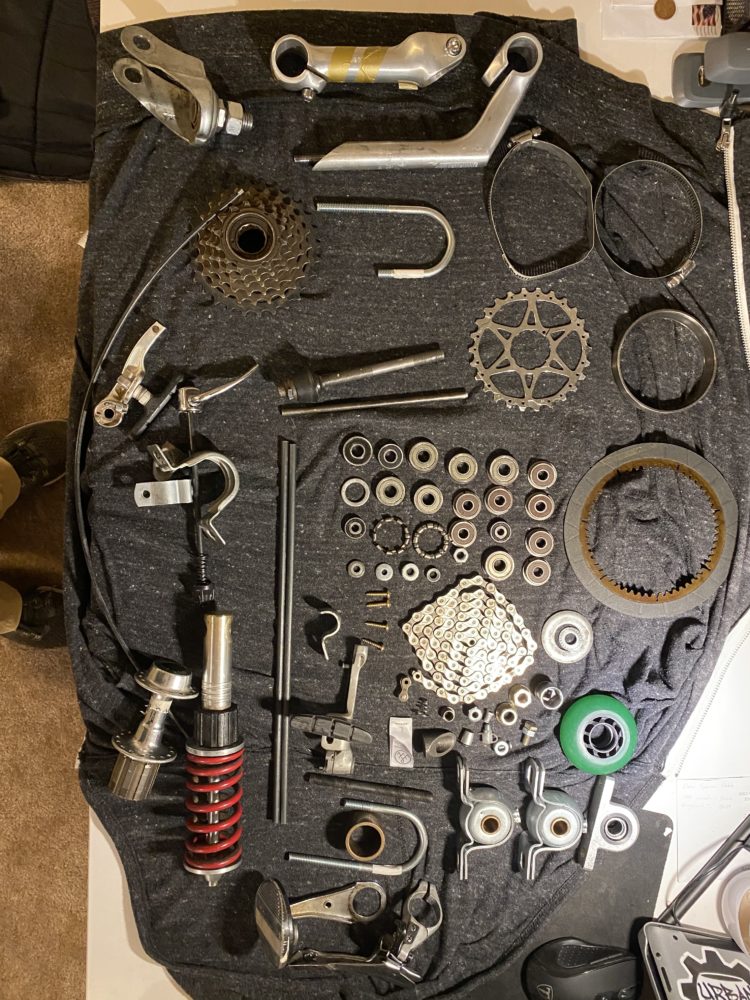
Once I visited the scrap piles, there was plenty to chose from, though I was vigilant to make sure I only took scrap that would not be used for the component design bikes and that would not be too large for my projects scale. At the time I was not sure how much I needed or what parts specifially I needed, so I just browsed through all the scrap looking for parts that I found interesting and that had a potential to be used in project. In the end I picked up a large amount of scrap for the project (about half of the scrap I ended up not using). Here below is a picture I took once I got back home from the DIDL and clean off all the material that would potentially be used for the upcycle.
Fabrication
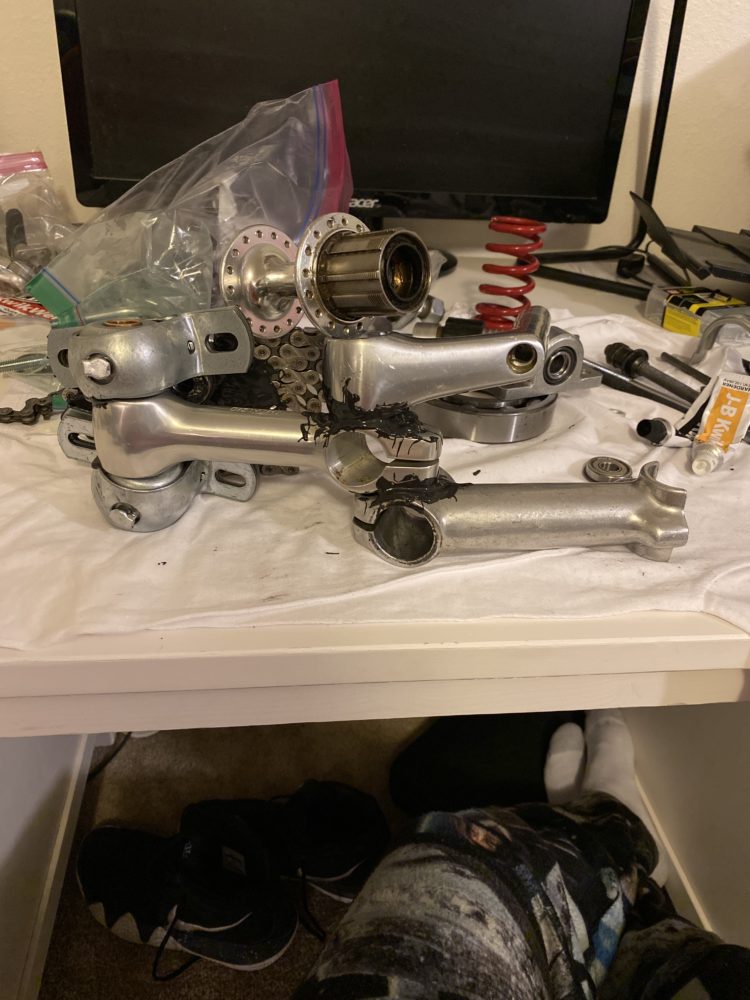
The most challenging part of this project was actually assembling the sculpture form all the scrap. I thought about welding it, but there was a lot of different types of metal being used and that would not be good for welding. So I decided to use JB Weld instead. The downside to not welding is that there is a “setting time” for any sort of adhesive to ensure a good bond and to make sure the sculpture would not break apart which would be bad! The main thing that I did not realize before hand is actually how long of a time it was. The JB Weld had about a 20 min setting time, so after I placed any part together I had to make sure that it was held in place without moving for at least 20 mins. Also, my work space was my desk in my basement and it was very small so I could only “weld” up to two parts at once. The process took much longer than excepted. Also, I did not realize how much JB Weld I needed and ended up running out when I had only a couple of parts left to put in place. Luckily, I also had a bottle of super glue so for the smaller parts that are not load bearing, I used Super Glue. Below is a picture of my sculpture about halfway completed on its side while it is being glued together. The second picture is towards the end of the fabrication process where I was making sure that the sculpture was able to stand by itself.
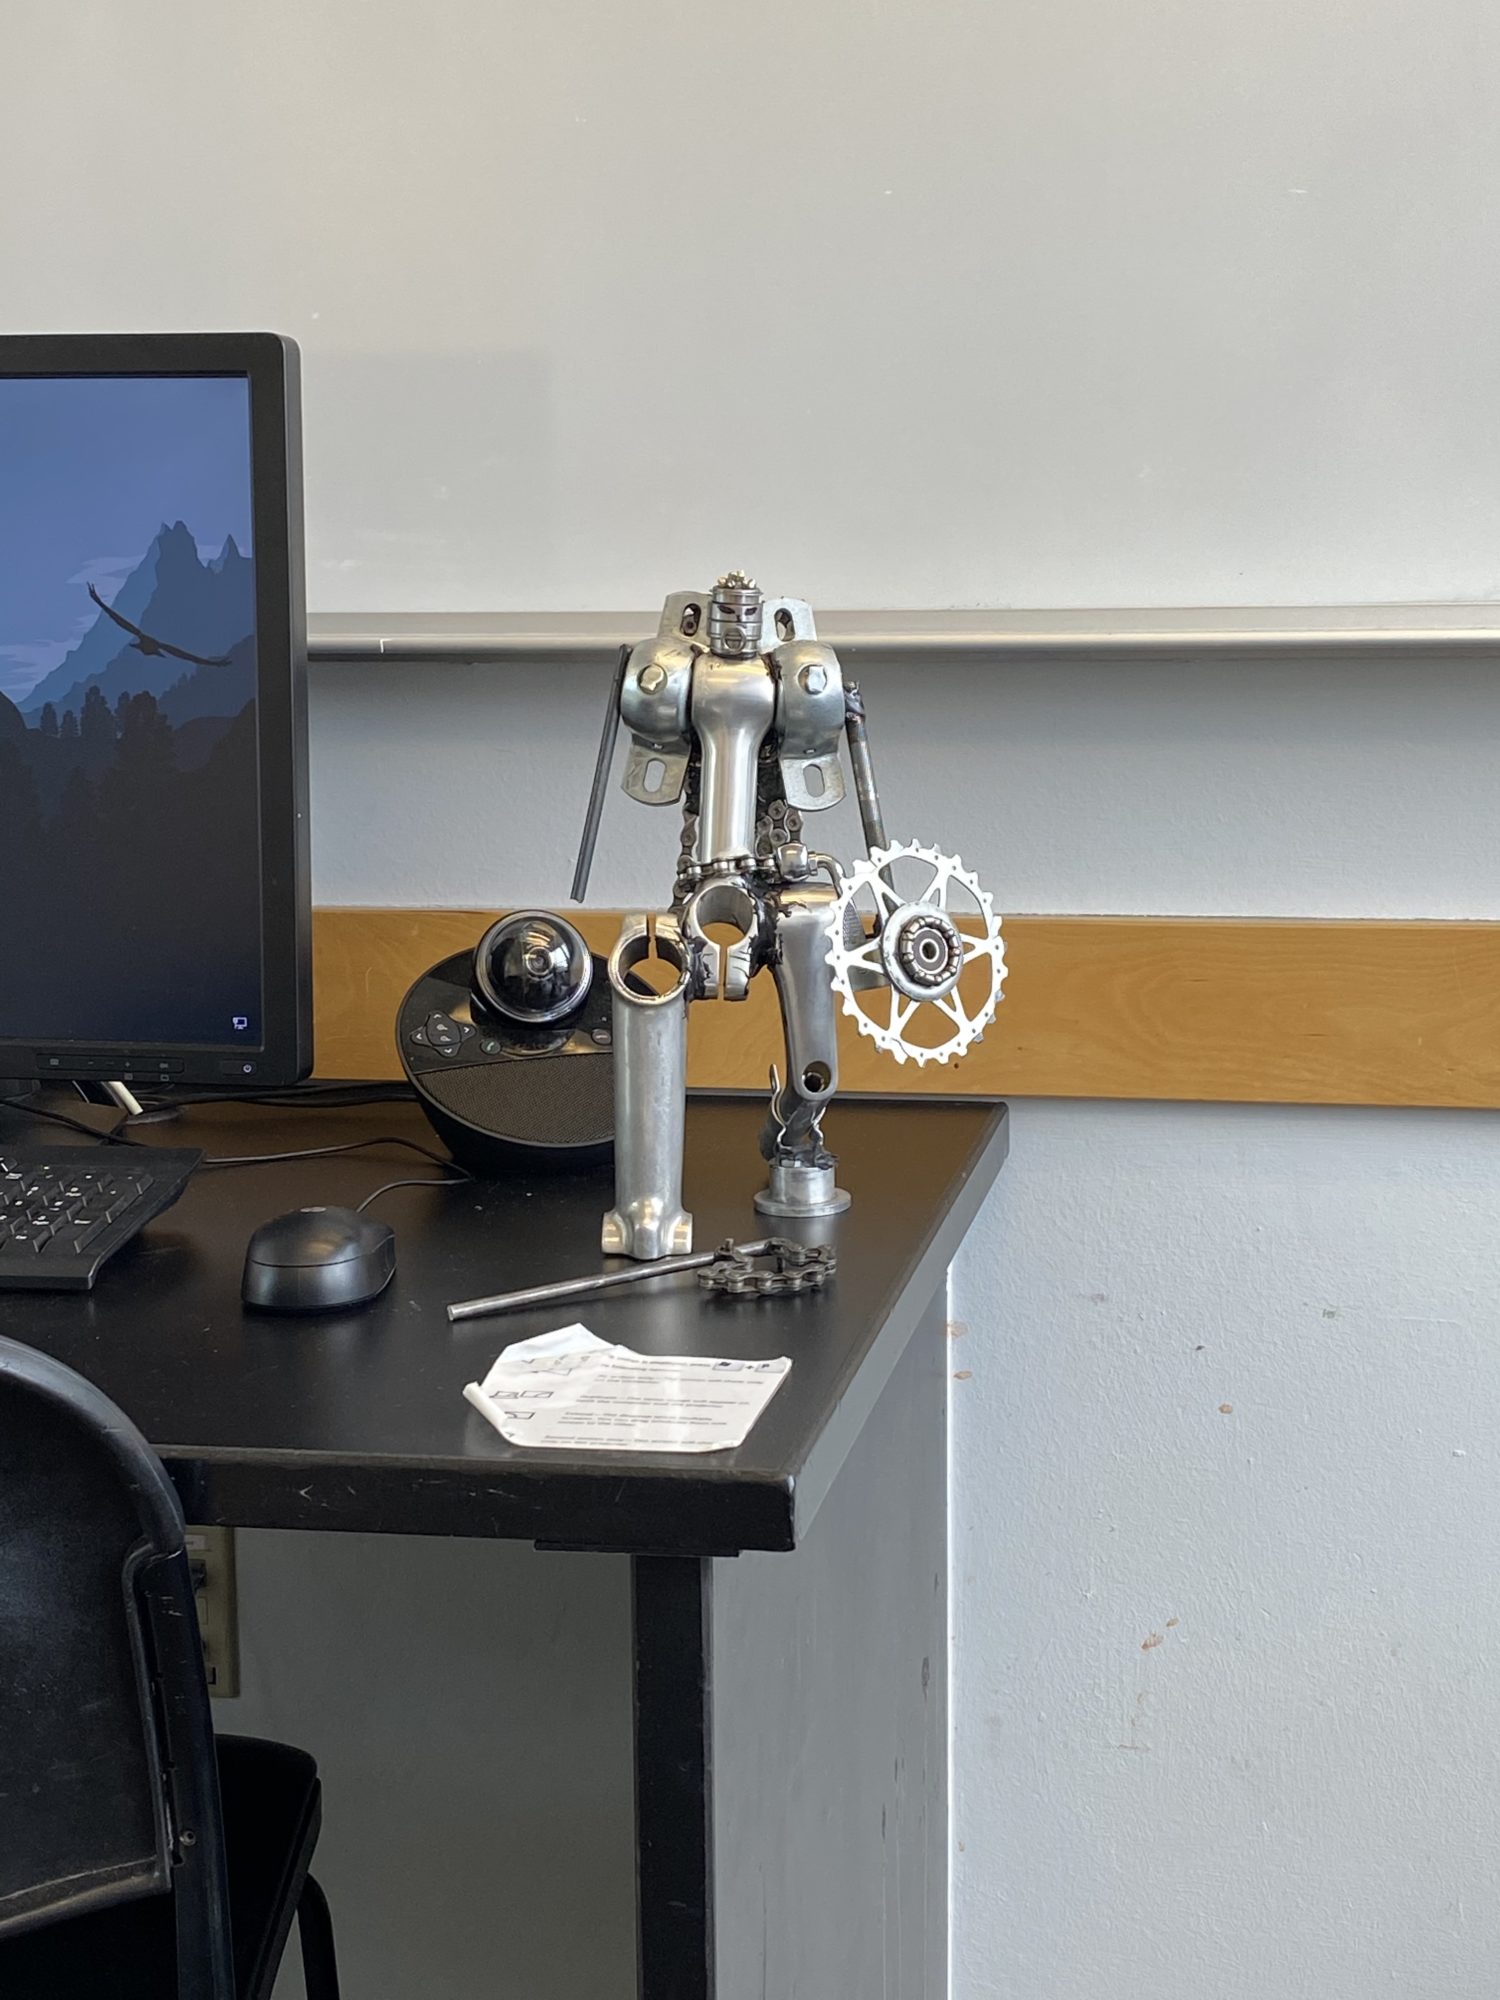
Final Product
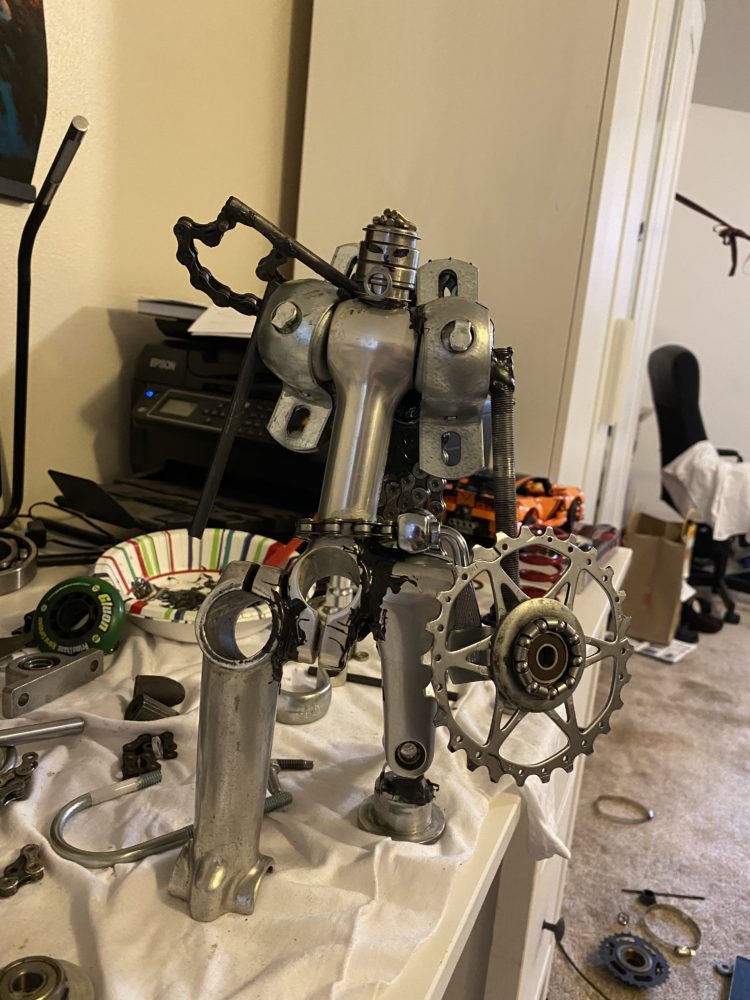
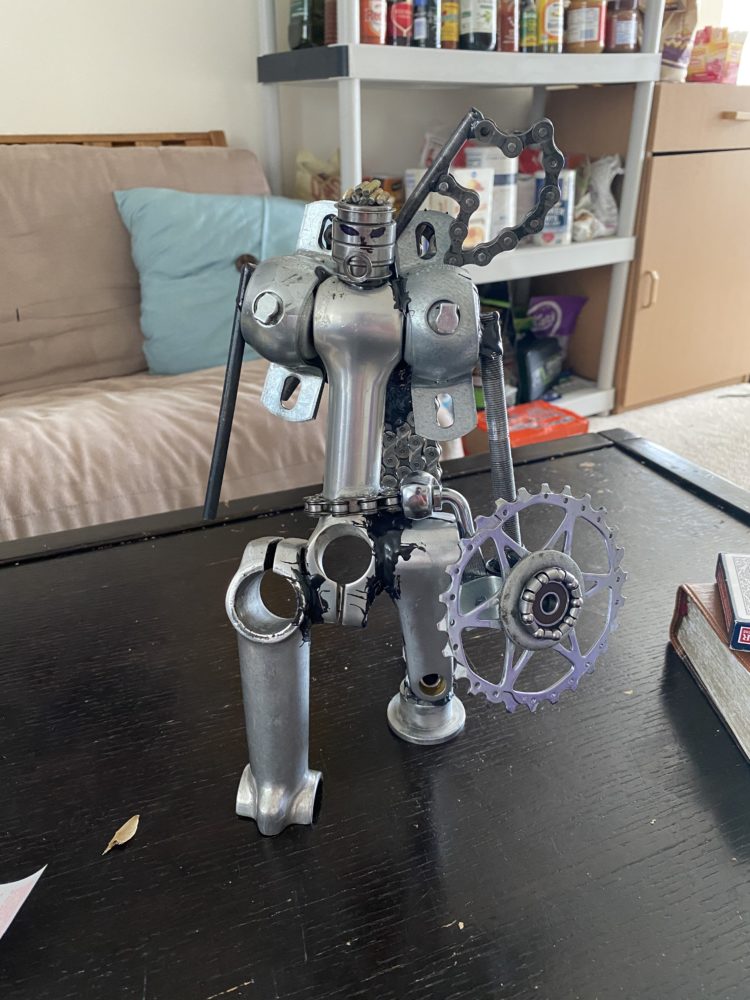
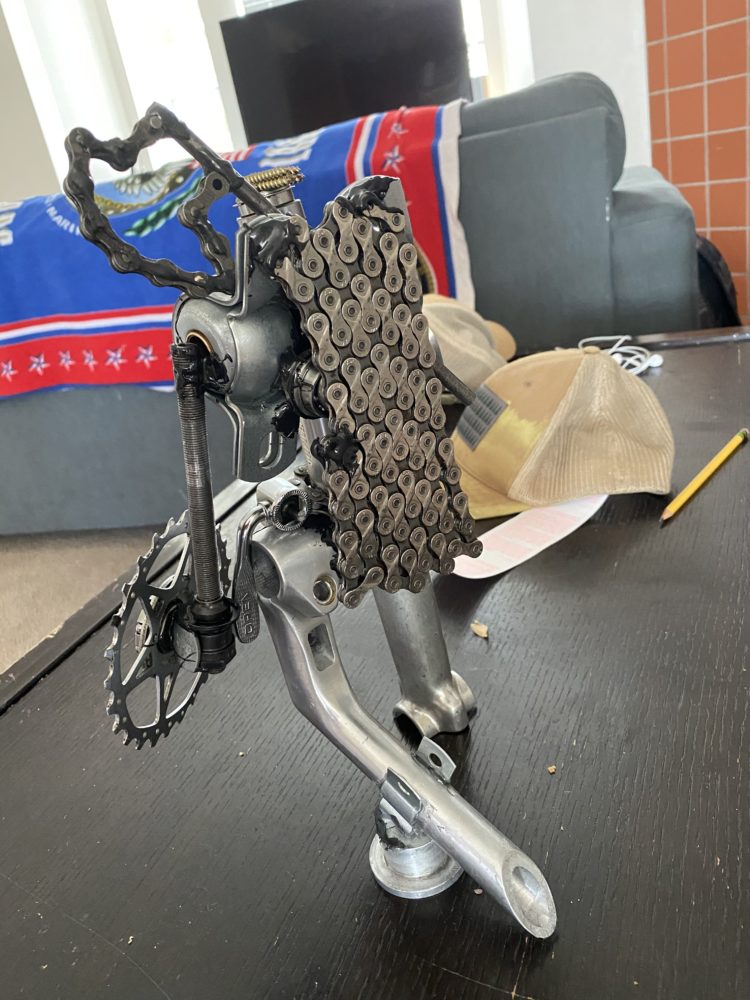
In the end I was fairly pleased with the result I achieved, admittedly time final product looks very similar to Marvel’s Iron Man Mark 1 suit. lol. I was not able to put much detail in the product due to time constraints. The figure has a shield and a bike chain axe slung over his shoulder which is removable. He also has a cape that the bottom is able to swing side to side to have a more dynamic effect. The figure is on one knee but is able to stand by itself which I consider a big win since the final product is not very balanced at all. Pictures are provided of a close up of the front and back of the “scrap warrior” that I built.
Goals
In the project, my goals were to learn how to make a sculpture, make something that was cool, and achieve a result that I set out to in the beginning of the project (viking/middle earth warrior). Reflecting on my goals I definitely achieved the first two. I learned a lot on time management for the fabrication process and how parts come together. As well as making a cool looking sculpture (in my opinion). The goal, I feel like it is up to debate, my roommates all thought it looked like iron man which is NOT a viking, but I think it is really challenging to use a bunch of gears and modern bike parts to display someone who never existed during the same time with the material it is made out of. But overall, I am very pleased with my results.
What’s Next
Moving forward, I have gained so much more appreciation for artists, especially sculptures. As for iterations with this design, I believe I can a lot more detail, but that would require many more hours of work. So I may have to wait till a break from school to return to this project again. Overall, I really liked the purpose of this upcycling project.
Link for Presentation:
3 Comments. Leave new
This looks awesome. I want one for my desk! It has a steampunk aesthetic to it. I do agree that it looks like Ironman. I do not know the Hobbit movie that well and don’t have that reference. My only critique would be to disguise or hide the JB Weld a little bit better to give it a cleaner look. I like the size, although a bigger and smaller version would be great to see as well. Great job!
Thanks Daniel! I agree with your comments, I was not sure how much JB Weld I needed to use and also I did not the the upmost care when I was applying it so I ended up having the final product being a little messy. But in the future I will totally make sure that I take more time!
Hello Joseph from Pod B! I chose your final upcycling report for an in-depth critique because I was struck with a pang of nostalgia upon seeing your featured image. Initially to me, your sculpture was reminiscent of the titular character from The Iron Giant (1999).
Following Liz Lerman’s Critical Response Process, as a statement of meaning, while your roommates may have initially pegged this statue as a representation of Iron Man, to me the shield and axe definitely make it stand out to me as viking-like warrior, so those were great design choices to advance your initial goal.
Please let me know if you have any questions for me regarding your final product to fulfill the “Artist Asks Questions” step of Liz Lerman’s critiquing methods.
As a neutral question: How did you decide to have the warrior be on one knee, and what influenced the decision?
Finally, I have an opinion on how you might be able to better cement the final product as a viking warrior, rather than a “Iron Man”-ish figure, if you would like to hear it.
Excellent application of upcycling to create a great sculpture, Joseph!