
Timeline
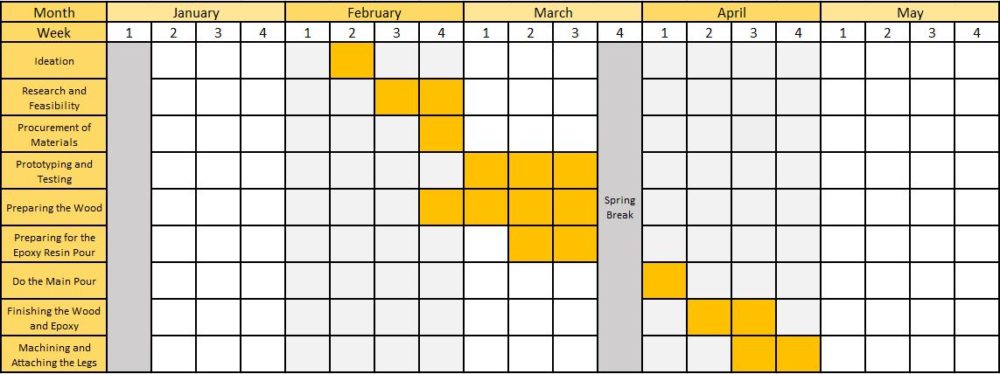
The screenshot above lays out the overall timeline for this project. I will discuss each task below.
Ideation, Research, and Feasibility
The initial part of the project was to figure out what I wanted to do, how I was going to do it, and asses the overall feasibility of multiple projects. Ultamitely I chose the river table for my final project.
I did research and found multiple sources online that showed how to make them, the materials you need, along with other tips and tricks. This is how I got my materials list together. I put it all in an excel sheet, did research on sellers, and priced everything out. Money is an important aspect of every project, so I needed to make sure I knew exactly how much I was going to need to spend as well is where I use resources that the school had. I have some woodworking experience so that was not an issue.
After much research I concluded that the project was feasible in terms of scope, money, and time. That is when I was comfortable making the purchase of all of the materials.
Procurement of Materials
Initially, I gathered everything that I could use from the school as well as from around the house. Once I had all those, I knew what I needed to buy. The first thing to buy was the piece of wood, as everything would be based off of this and I cant really design a piece of wood. I went to TC Woods in Ft Lupton and procured a lovely cut of olive wood. I then got the rest of the supplies from Home Depot and Amazon. Everything arrived by the first week of March and I stayed within budget.
Prototyping (Testing)
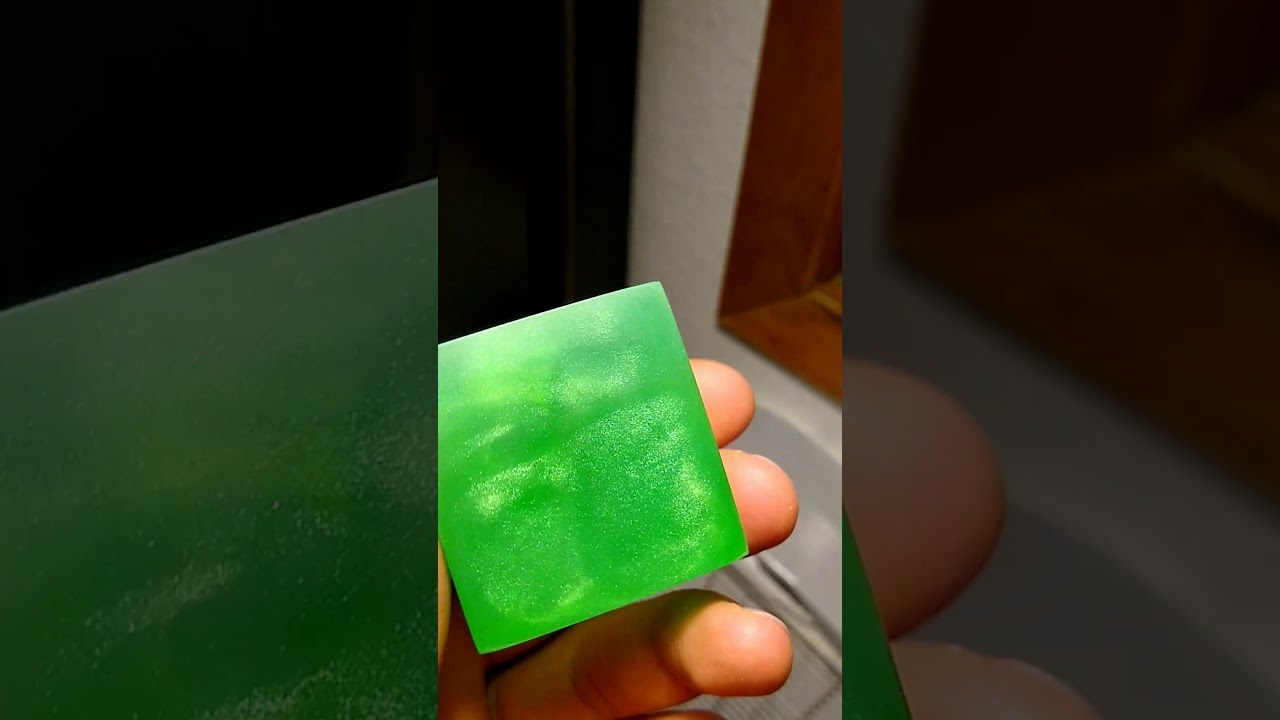
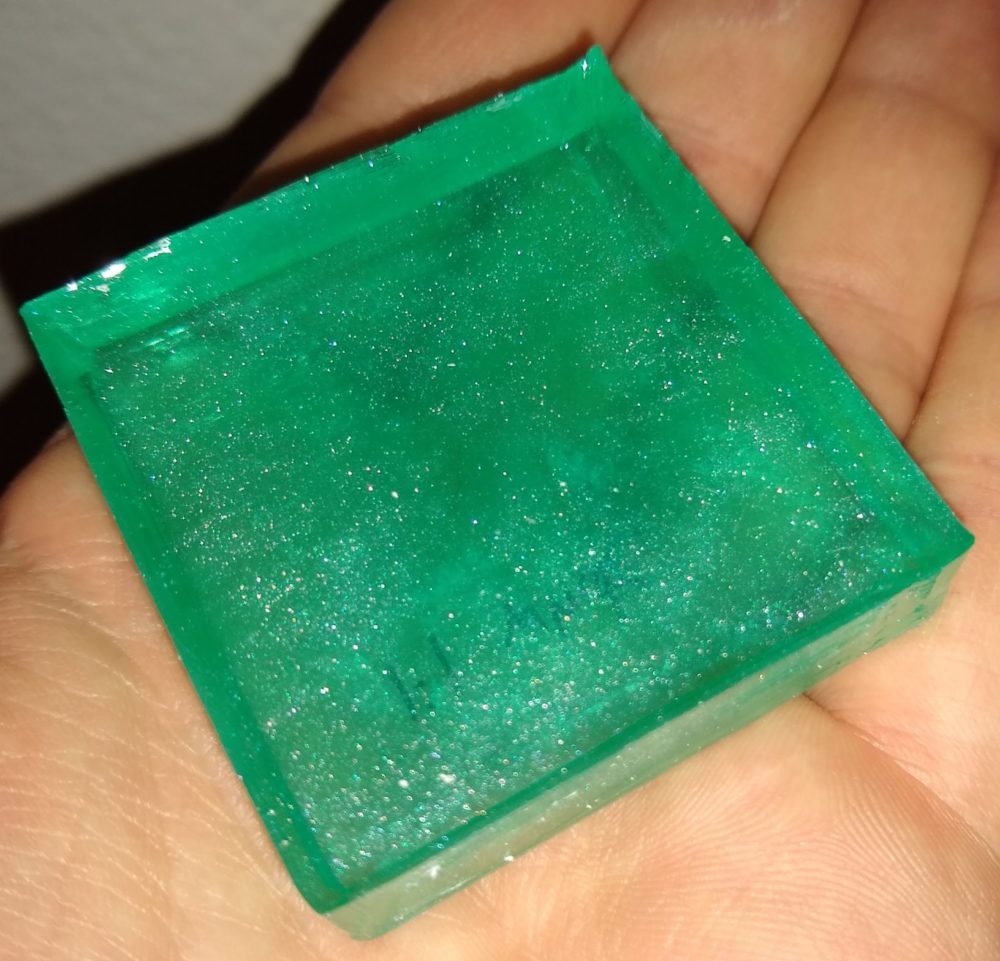
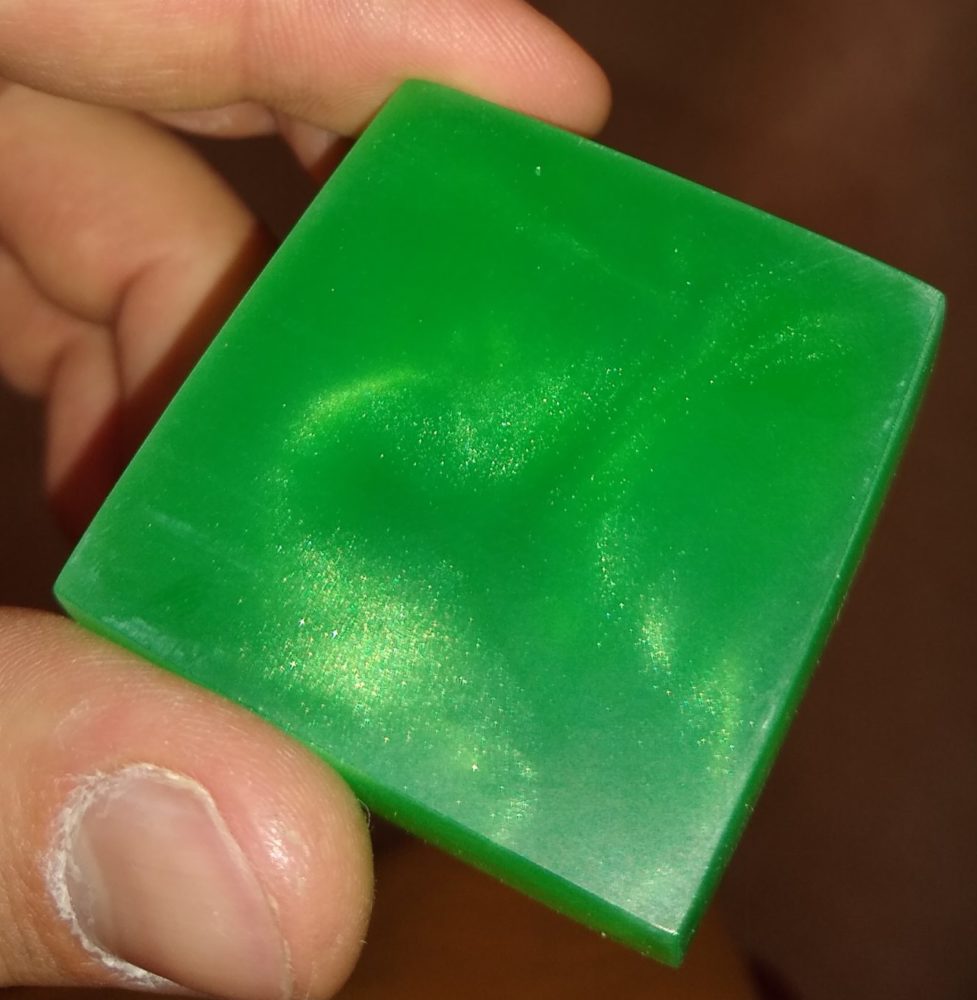
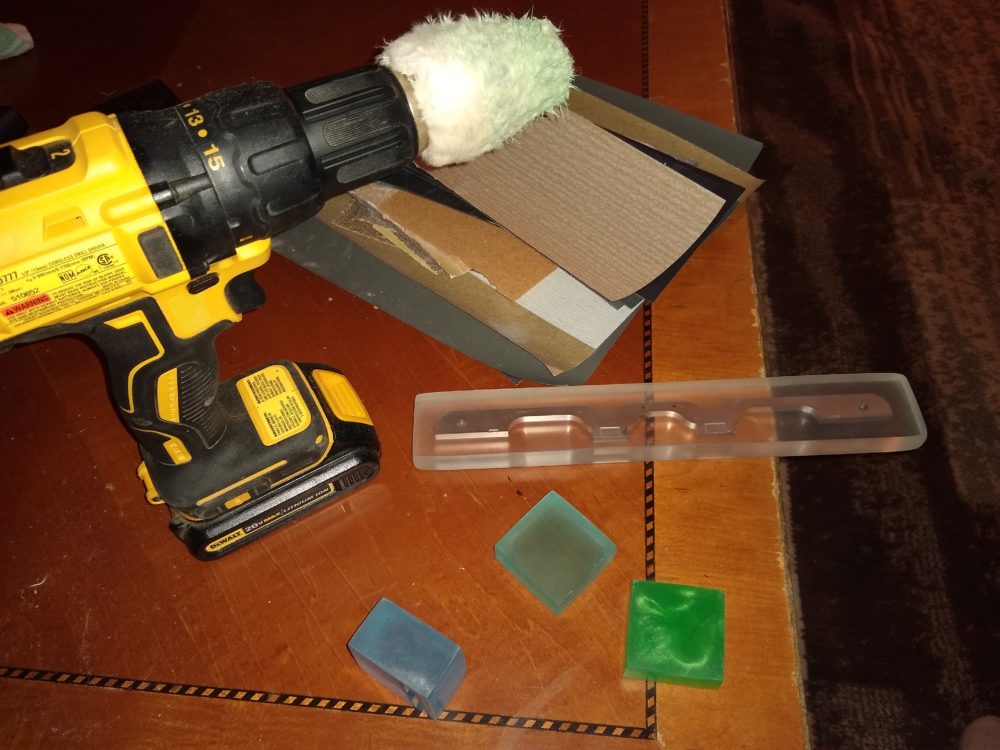
Now the first things I had to do was prototype the shape of the table, cuts on the wood, and colors/techniques used with the epoxy. The pictures below show two of my favorite color combinations that I want to use for the table. I created these by making tiny little molds, sealing the corners with silicone caulking, pouring/mixing the resin, and then adding color. The resin takes 48 hours to cure, and then I could practice sanding and polishing the pieces. The picture with the drill shows the polishing wheel I used as well as the samples that I practiced with. Make sure to check out the video too becuase the photos of the resin and colors just dont do it justice.
Preparing the Wood
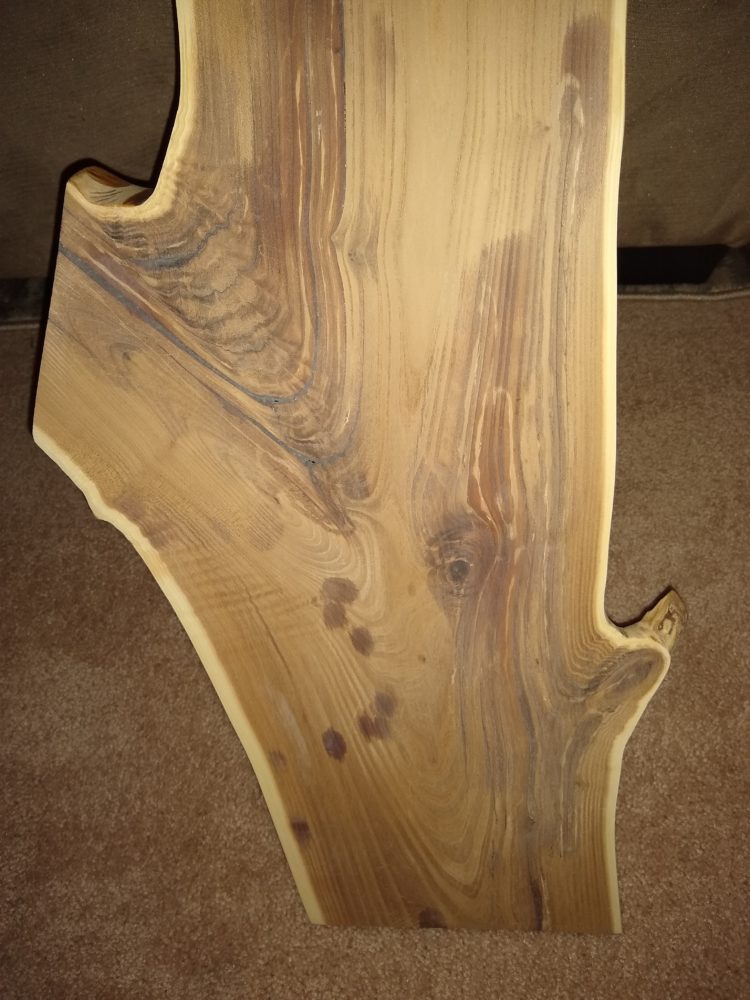
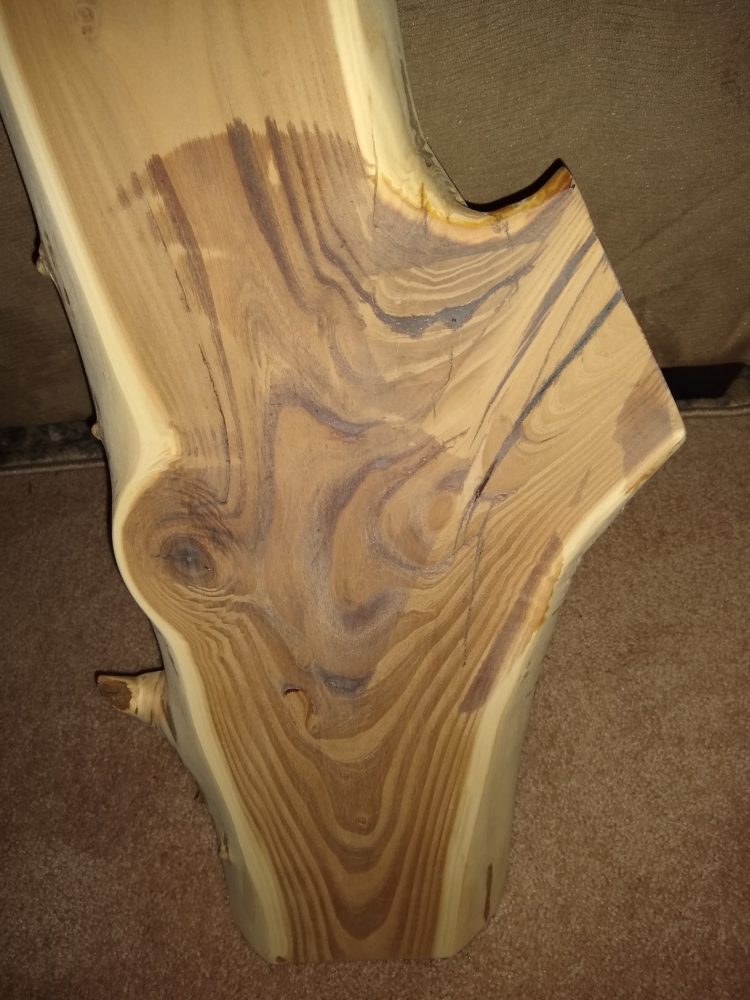
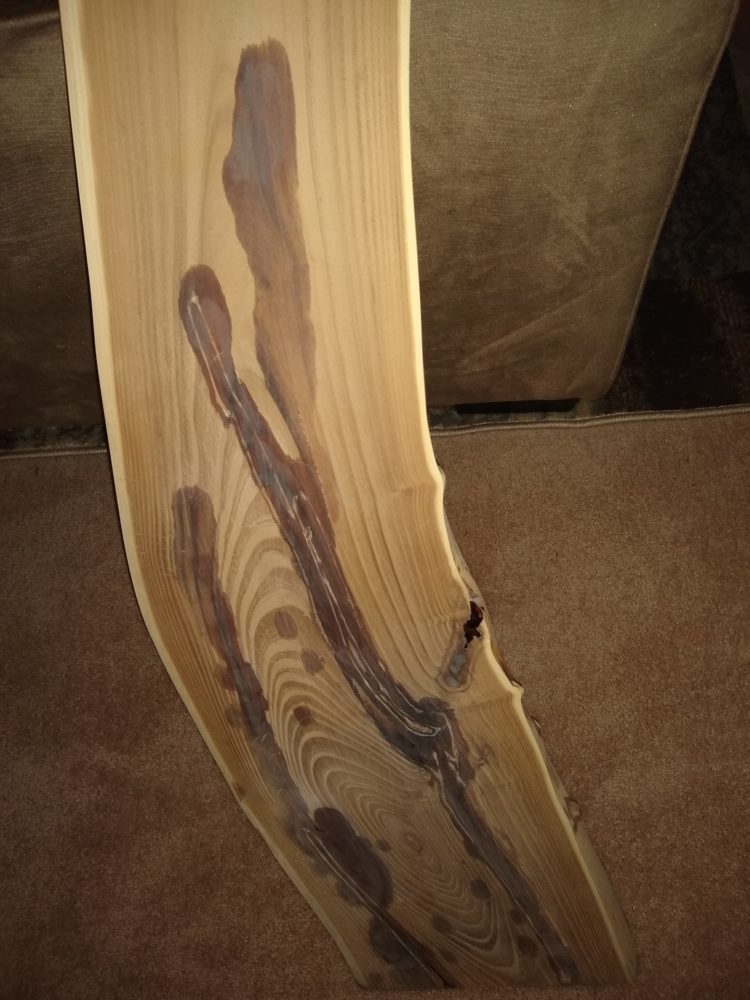
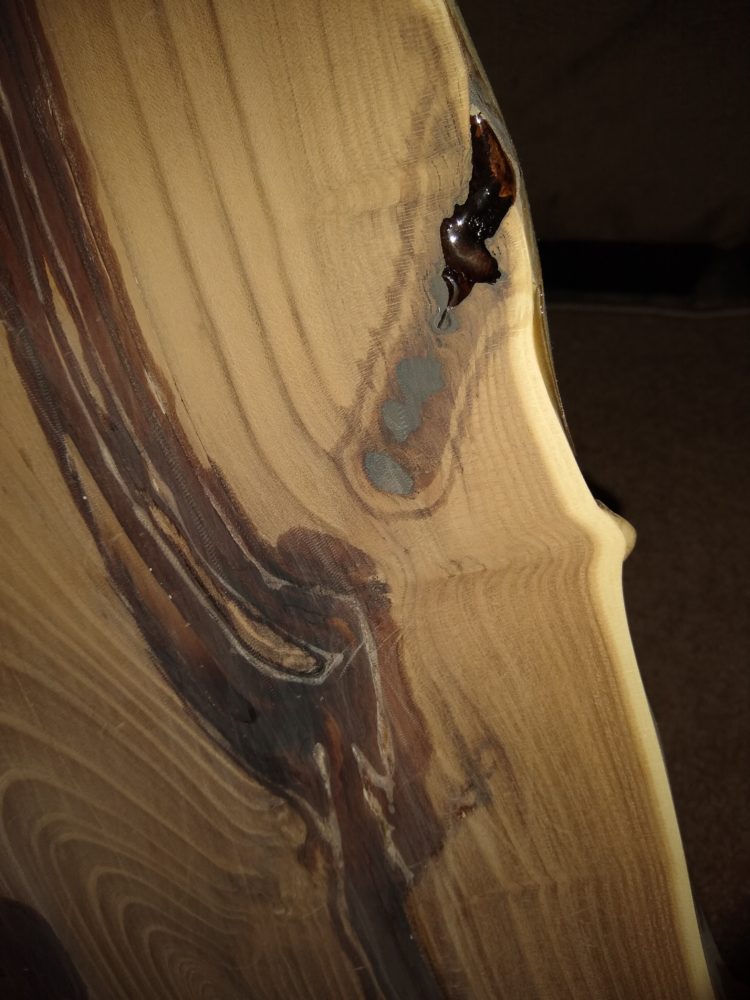
The first steps in preparing the wood were to cut it to length and in the shape that I wanted it, plane it to a contant thickness, remove bark, sand down, and fill and gaps in the wood with resin before doing the main pour. The images below show the pieces of wood after I did all of that. Several operations were done in the machine shop at the ITLL as well as at my house. The only thing left now is to put one coat of resin over each piece of wood in order to seal all of the wood before the main pour.
Preparing for the Pour
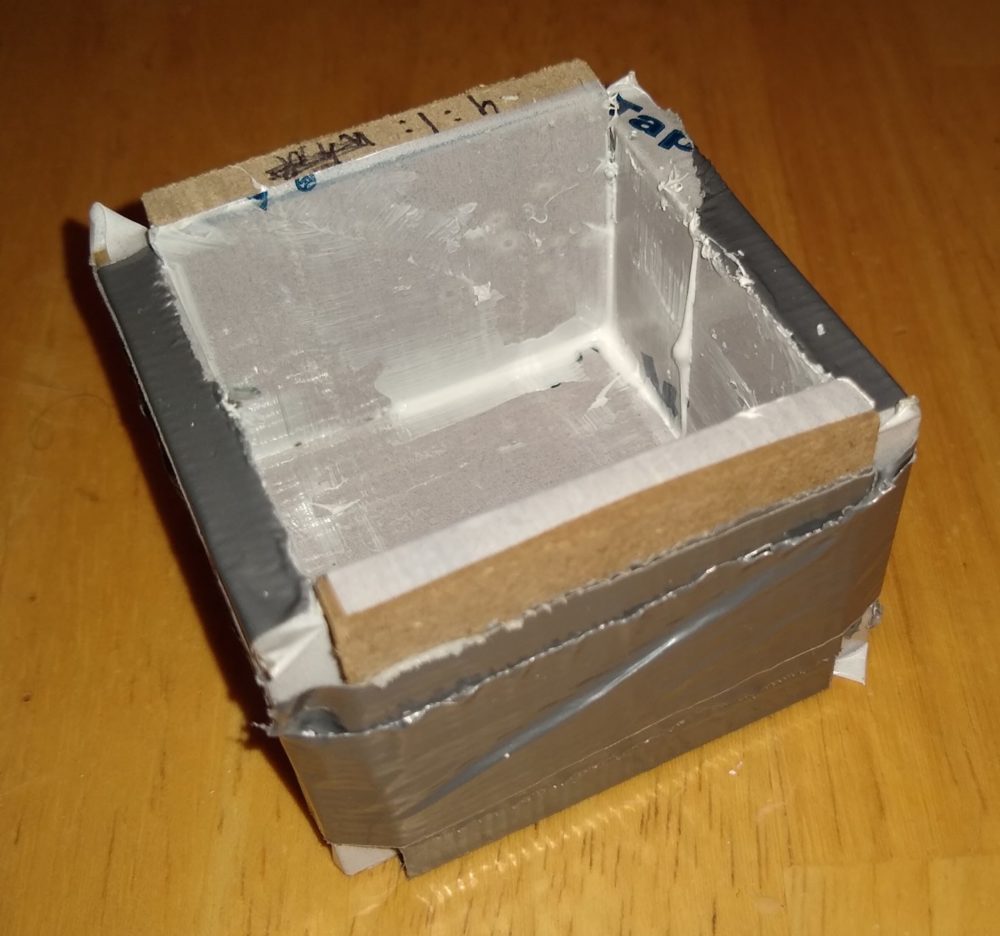
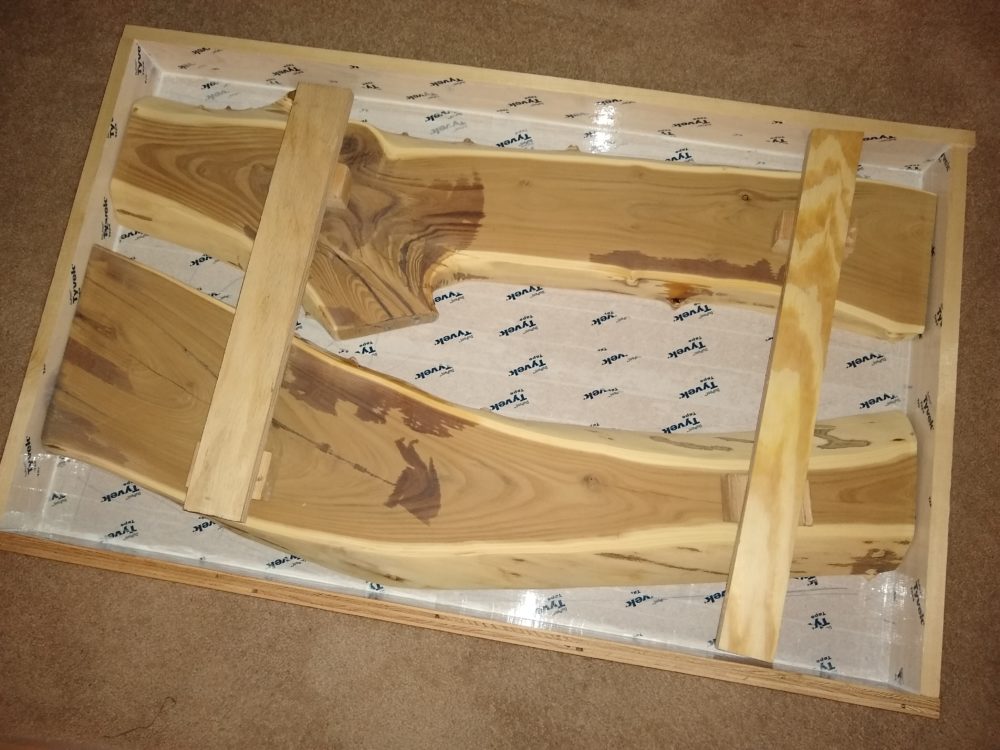
In order to further prepare for the pour I needed to create a mold out of MDF boards and seal it with tape and silicone caulking. Then I needed to cut pieces of wood to sit ontop of the olive wood in order to clamp down and ensure that the pieces of wood dont float ontop of the resin when the main pour is done.
Doing the Main Pour
The main pour is the most important part of the entire project. This is where I will mix up all of the epoxy resin, color it, and pourt it in between the pieces of wood and around them. It is critical to do the proper procedure when doing this otherwise you can ruin the entire table in one setup. This is why it was so important for me to work with the epoxy and practice/prototype initally, that way I could learn any other things that I might not have otherwise found online. The main issue is that the room needs to be 70-85 degrees F and in a Colorado winter, it is difficult to maintain a constant temperature inside an apartment. I will wait for a couple of sunny days in a row that way I wont have the great fluctutations in temperature seen when it is freezing outside.
Finishing the Table
After the resin cures, it is time to sand down and finish the table. I will also need to pass the edges through a jointer machine in order to square all of the edges and use a router to cut the corners and possibly cut the table flat. Then I will sand the wood from 60-400 grit and the epoxy from 60-1200 grit. The epoxy will need to be polished and the wood will need to be stained. Once this is done, all of the woodworking is done and then I must move on to the metal machine shop in order to create the legs of my Rustin Ocean River Table.
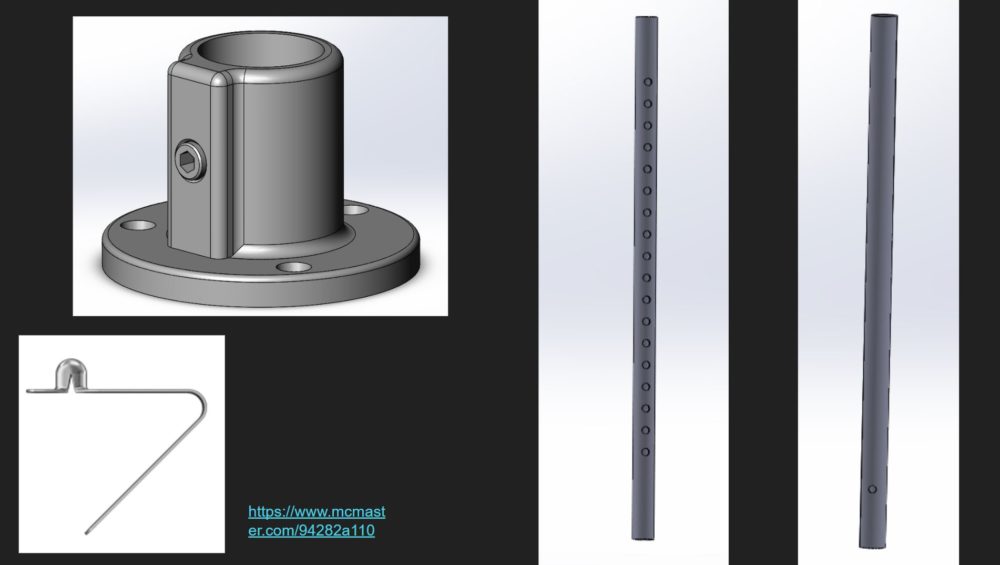
Machining and Attaching the Legs
The final step is to machine the telescoping aluminum tubes in order to create the legs. This requires me to drill multiple holes in all of the aluminum tubes. Once that is done I will attach them to the table and the project will be complete. This should be done around the last week of April.
4 Comments. Leave new
George,
Awesome project, looks like you have everything you need to finish your project in house without having to use campus. These kinds of tables are super cool, and I feel like there is alot of room for artistic interpretation when it comes to the resin fill. Have you thought about maybe mixing solid particles in the resin so it has this trapped in glass kind of look to it? Like the mosquitoes trapped in amber in Jurassic Park? Overall I think this table will be awesome and I look forward to the result.
I have thought about it and am not sure if I like that or not. As of right now, I do not plan on putting anything in there, but if I do find something that I do like, I will definitely consider it.
This looks really great! I like your interpretation of the “dynamic” element of the final project – although it doesn’t really meet the traditional definition, I would certainly agree water is one of the most dynamic elements out there.
Do you happen to have any photos of the starting point of the wood? Maybe even just from the shop’s site if you forgot to take one yourself? I’m betting you put a lot of time into prepping it, I saw you sanding away in the manufacturing center for quite a while. I’m excited to see how the resin pour turns out, I’m sure that’ll be really stressful because it’s really just one shot you get, good luck! One last question, what depth do you think you’ll pour up to? Do you want the resin to be level with the top of the wood? It could be another interesting “dynamic” aspect to the table if you had varying heights to the “water,” although it would be a lot less practical depending on the width of the streams/wood.
Hi Thomas. I have some in my previous posts if you want to go check them out. It was already pretty flat when I got it. I got it from TC Woods, check out their website. After I got it, I took off all the bark, sanded the whole thing down, but it in half, filled the cracks with epoxy, and then re-sanded everything down. I was in their for so long because I was sanding the epoxy off, which takes way longer to do. Im going to pour it 1.75 in deep. I do want the pieces of wood to be the same level and I am going to pour epoxy over the entire thing at the end.