
For my project I ended up creating a set of interactive psychedelic kaleidoscopes, all from repurposed material. The ‘aesthetic’ direction would be described as psychedelic rainbow as well spacecraft/future.

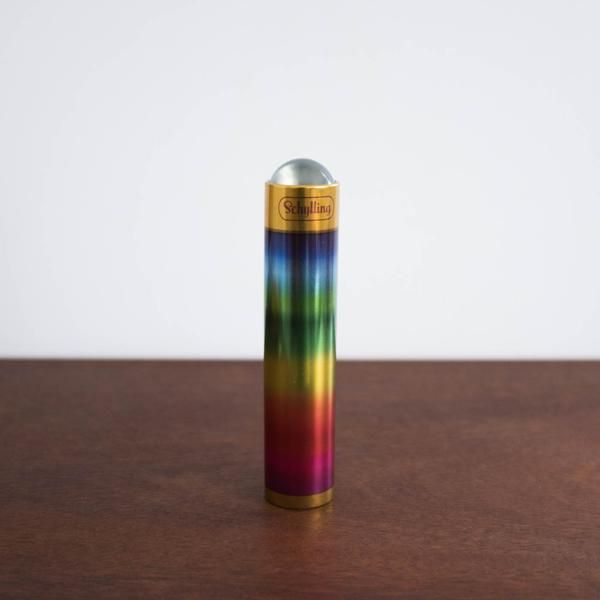
This idea from the beginning was to make a spectacle worth experiencing, it was only a matter of time before I stumbled into what I would unknowingly fall in love with. For me, a $7 rainbow kaleidoscope from a toy store, I couldn’t resist the pretty colors. At the beginning of the semester, I joked to myself I would take my small kaleidoscope and make it bigger and more elaborate. The original aesthetic of the first kaleidoscope was reflective rainbow and gold trimming, given the nature of that object, I felt that I wanted to continue that aesthetic.
With Corona affecting everyone, I had to decide how I wanted to shift and what I could manage given the new adjusted circumstances. In this case, create something with little shop access, low shipping dependability, and ultimately a much lower budget. Making a shift was easier than expected given my ability to scrap together ideas on changed circumstances.
I simply decided to translate my ideas of incorporating mirrors, lighting, and sound into a different one. This change was also a good opportunity to challenge myself in creating something unique versus something already made by someone else. Ultimately this allowed me to follow a path that I wasn’t entirely certain about, giving me the chance to learn about my own process better.
This project was a fun continuation of my interest in upcycling and reimaging what is considered “trash”. If you take away the purpose of any object it is reduced to a material form. With a little bit of imagination, anything can be made and hopefully serve a newly discovered purpose. As students continued to leave campus they left behind material galore, a perfect opportunity to stretch this concept.
This project was a fun continuation of my interest in upcycling and reimagining what is considered “trash”. If you take away the purpose of any object it is reduced to a material form. With a little bit of imagination, anything can be made and hopefully serve a newly discovered purpose. As students continued to leave campus they left behind material galore, a perfect opportunity to stretch this concept.
The overall plan was to create a large dynamic lighting spectacle, something that would invite the user to enjoy the experience. From an aesthetic reference, I wanted to mash as many colorful material as I could, as well as playing with colorful optical lighting.
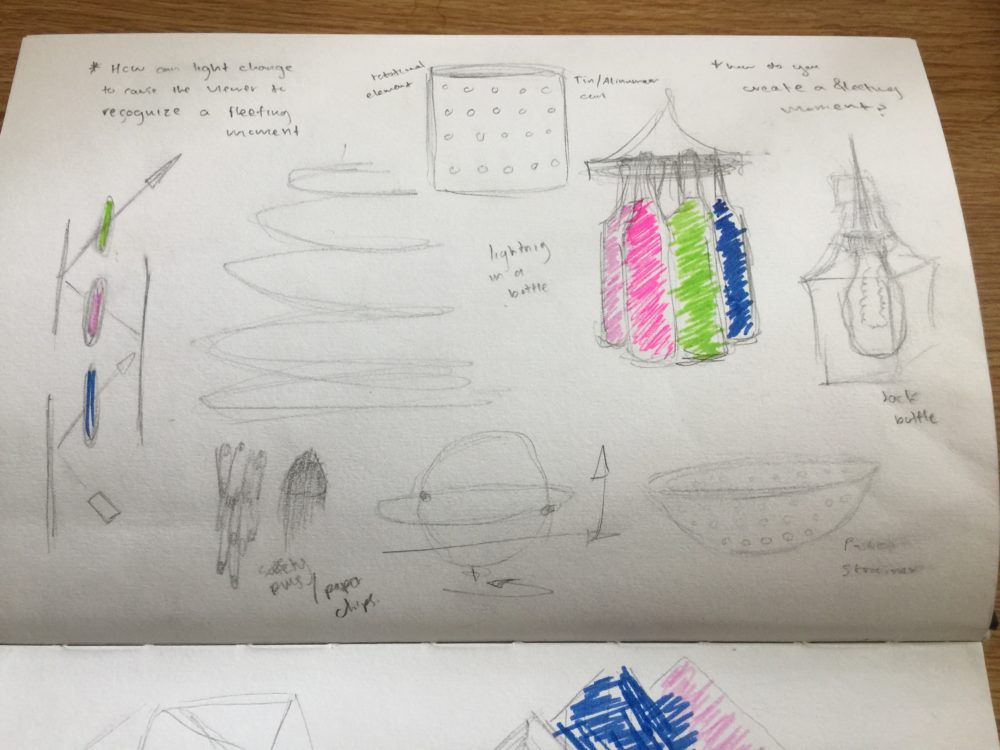
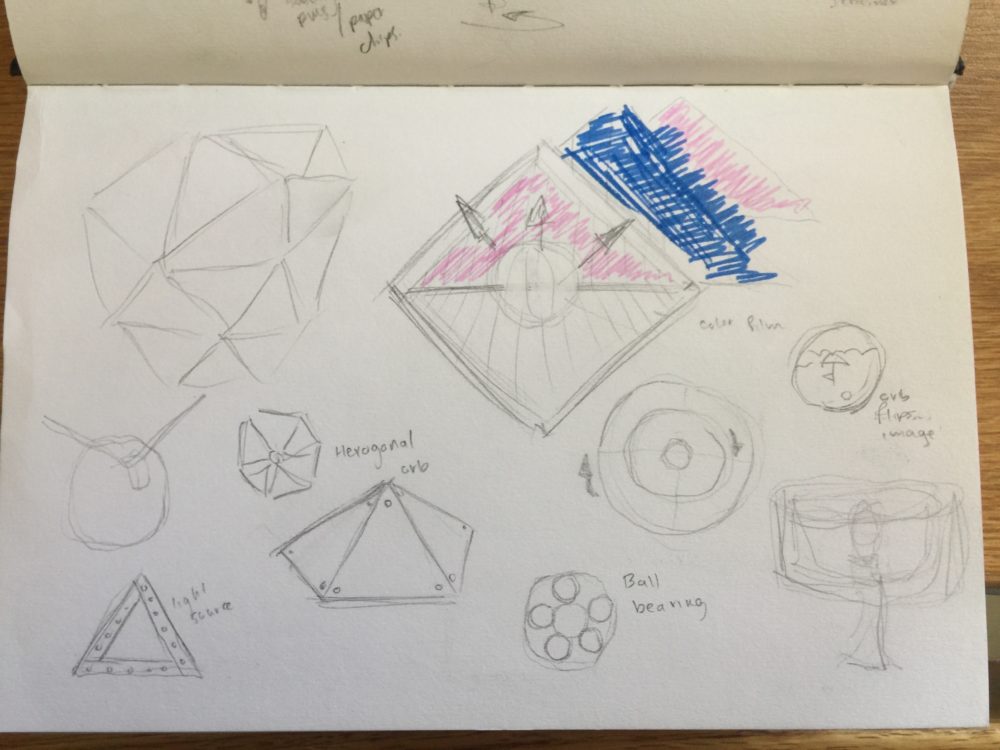
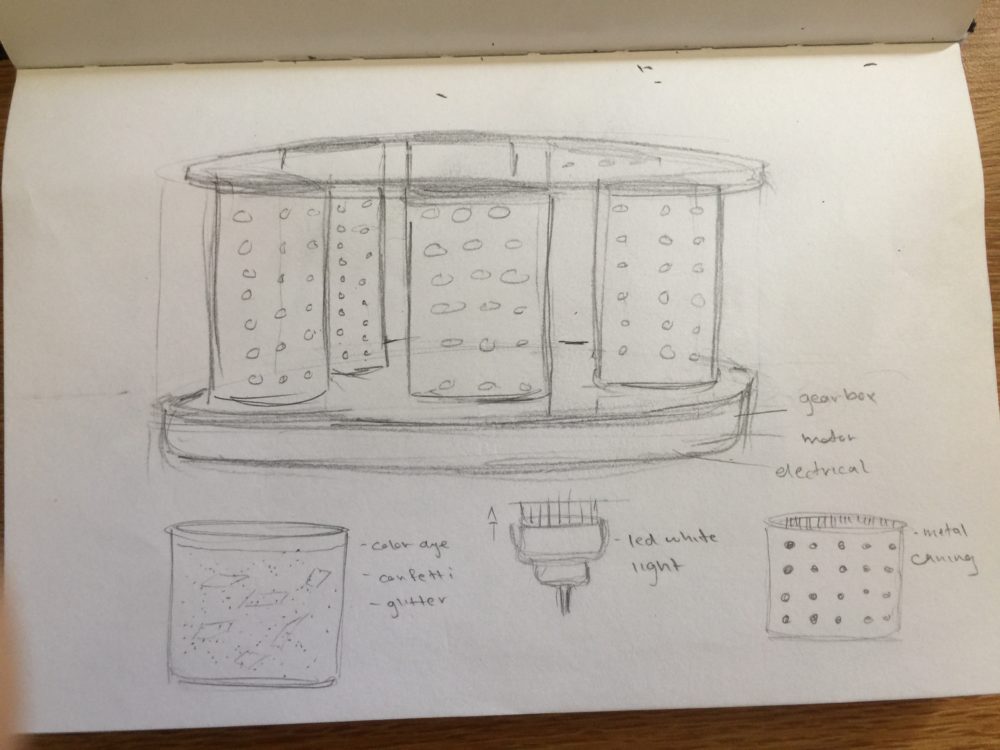
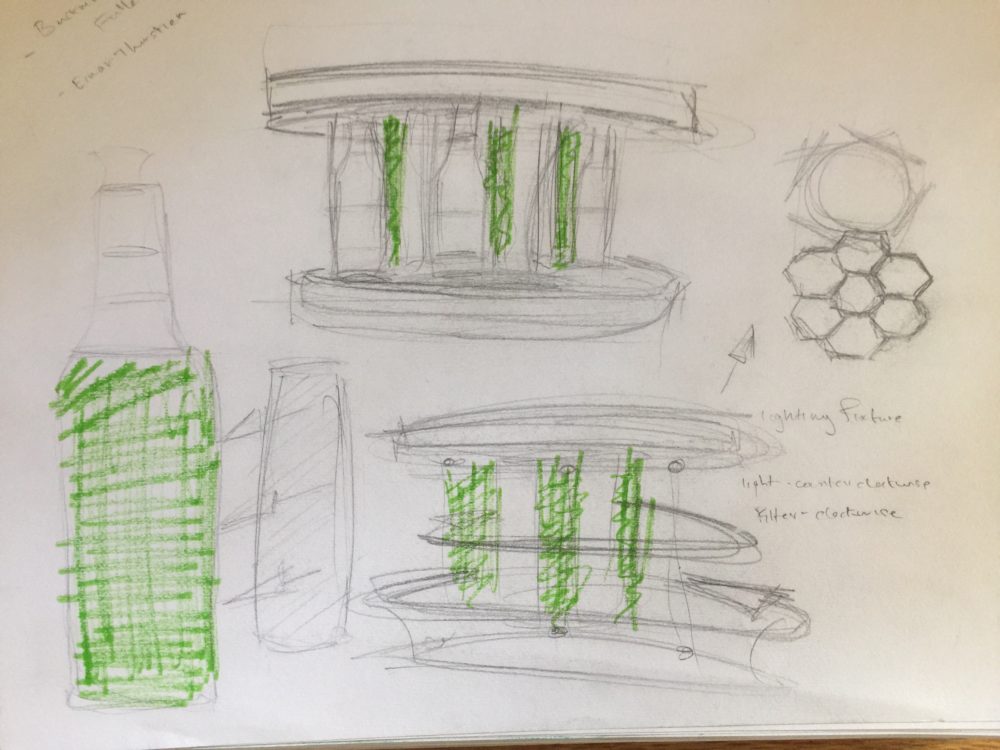

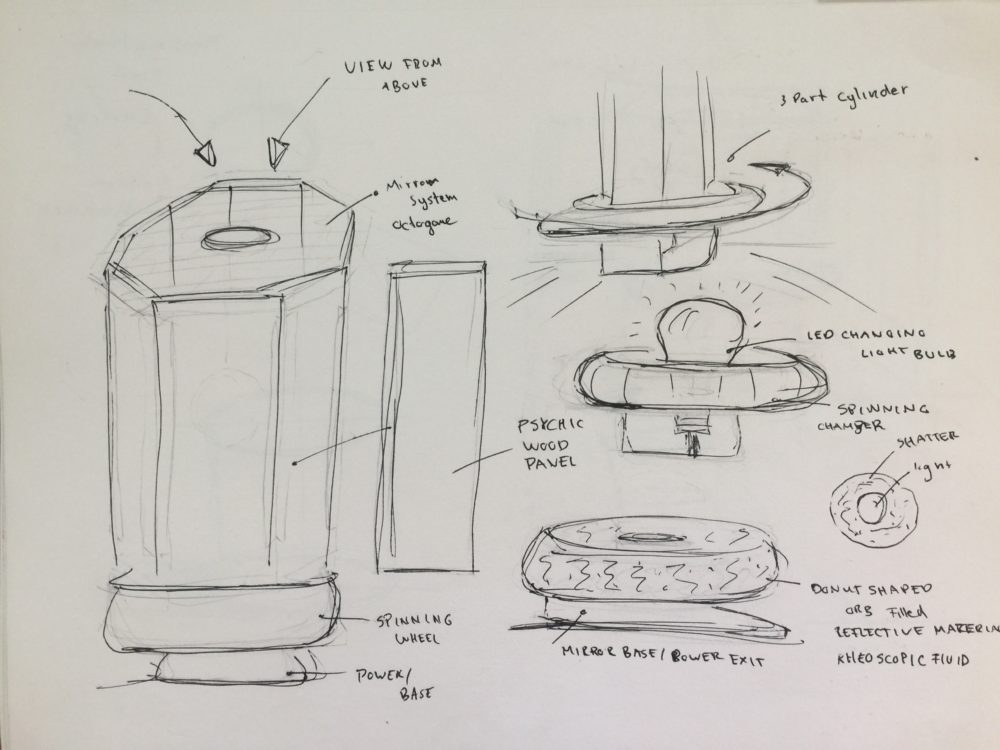
Initial concept sketching from the entire semester. This project became a mishmash of them all.
Construction Phase:
My material collection was more a scavenger hunt than a shopping experience. With the Campus emptying, it was easy to find the right scrap material needed to supply this project.
Beyond scrapped goods, I did purchase a RGB light system, and some basic assembly tools.
- 2 Mirrors
- 2 Mirror Trim
- 1 Kaleidoscope Orb
- RGB Fairy Lights
- 1 Disco Ball
- Assorted Tapes
- Assorted Glue
- String
- 1 Lazy Susan Bearing
- 1 Square Wooden Dowel
- Assorted Cardstock
- Garbage Bag
- Border
RGB fairy light strip -15$
Mirror -free
Psychedelic Mirror Trim -free
Magic Disco Orb -free
Kaleidoscope -7$
Assembly
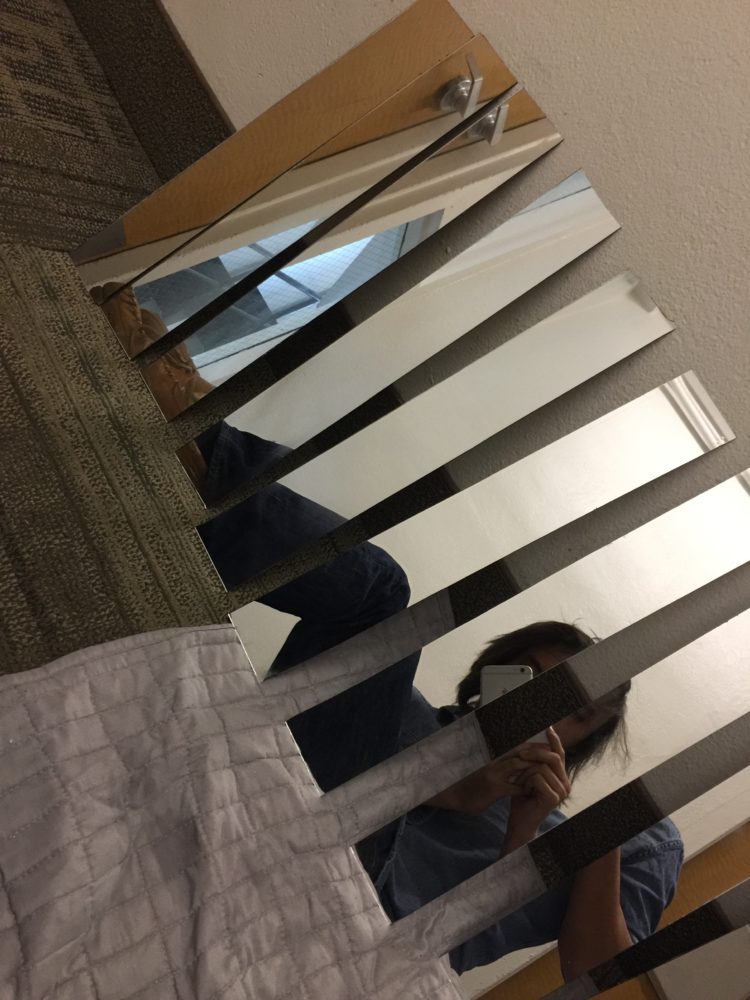
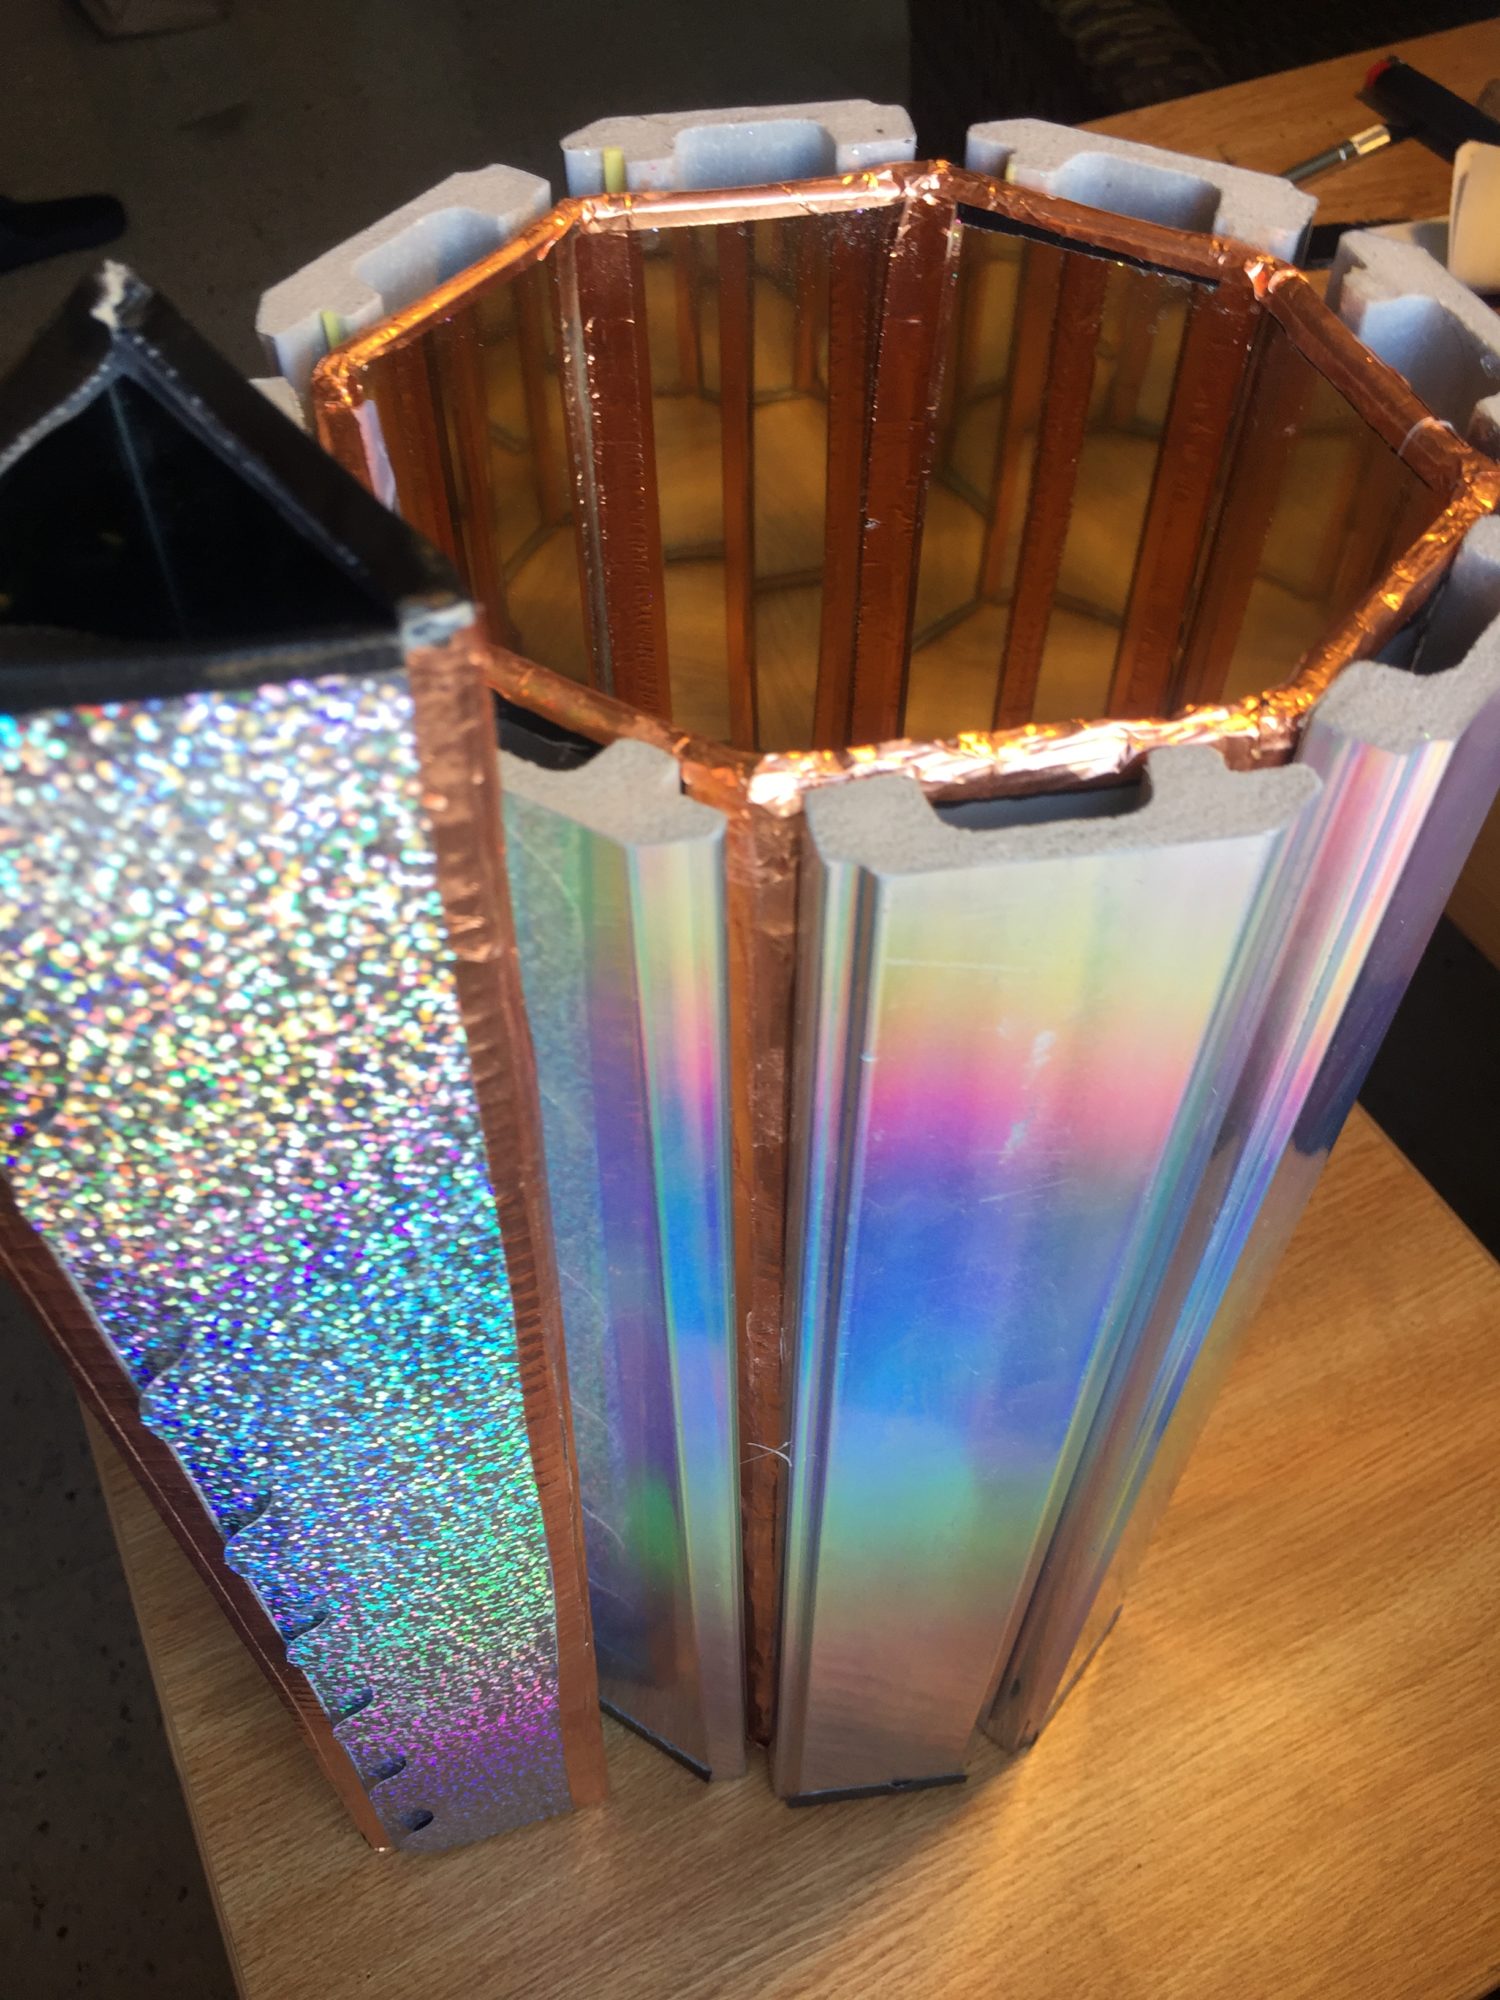
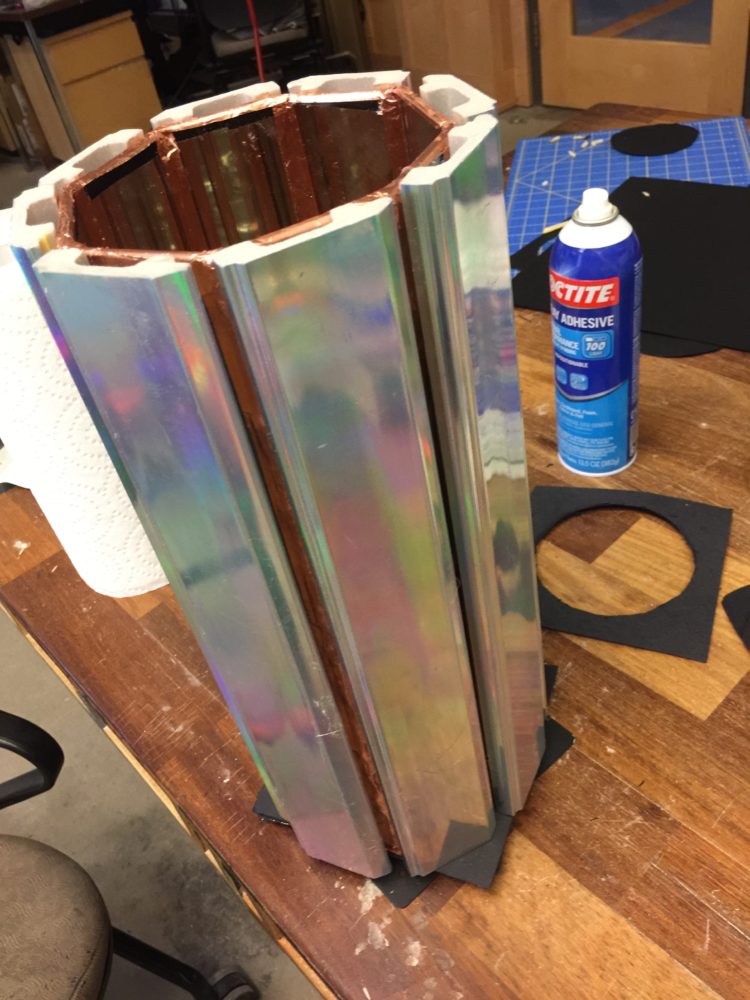
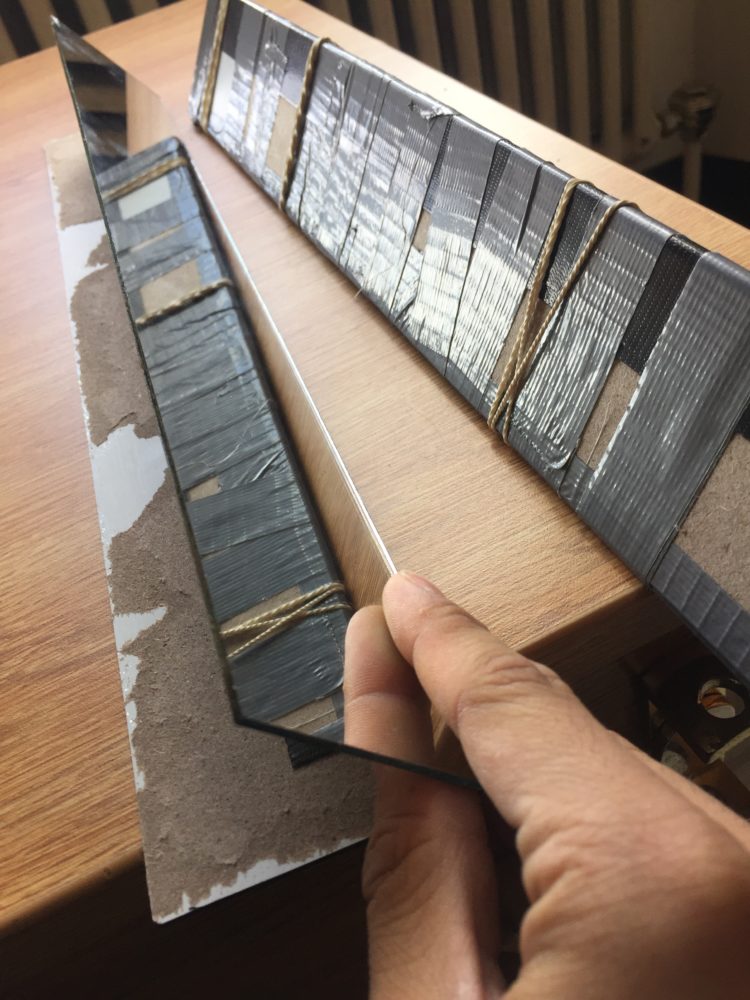
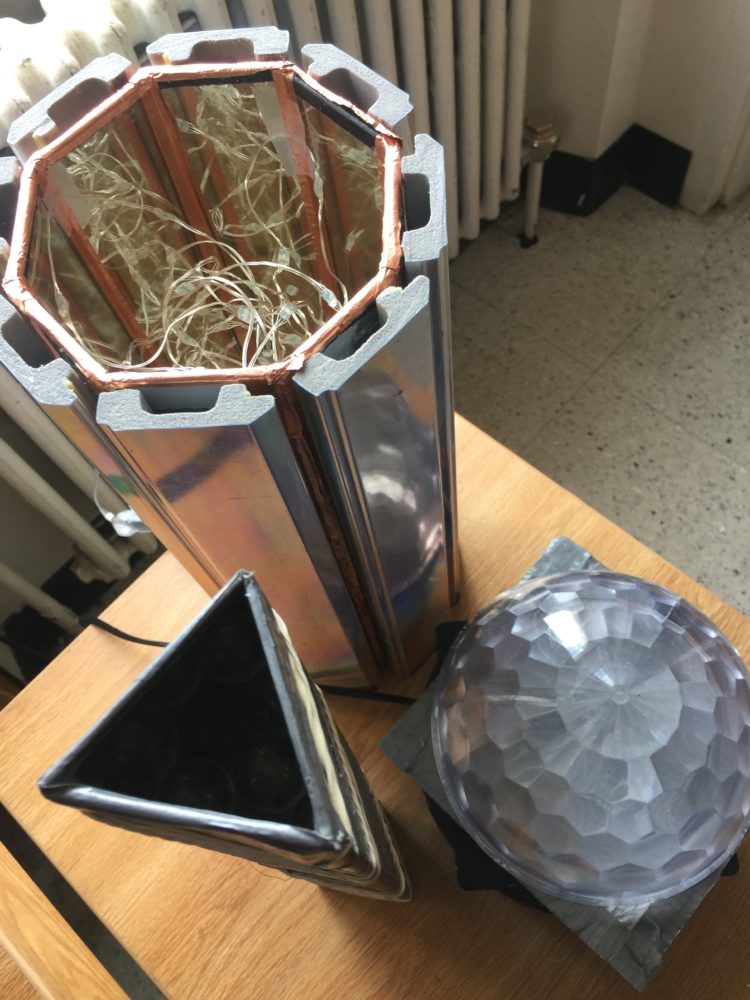
Using a glass cutter, I cut the mirrors down to 2in planks, I ended up using a total of 11 pieces. These would be used to create the kaleidoscope itself.
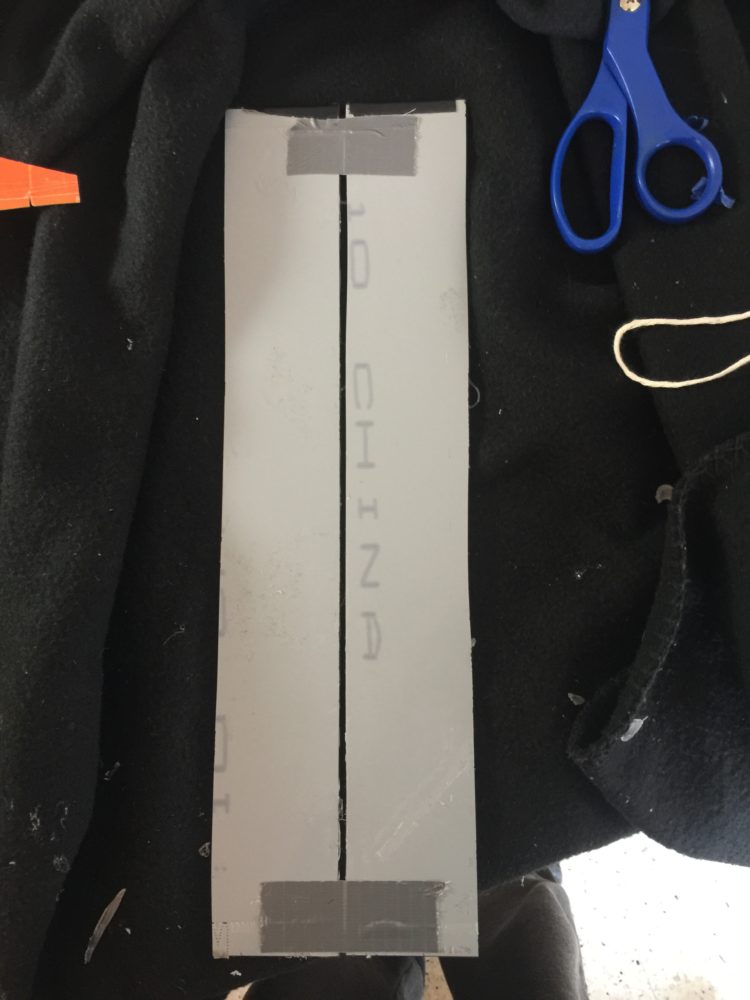
I would then fuse them together on the backside with tape. I left just a small enough gap to bend and fill later on.
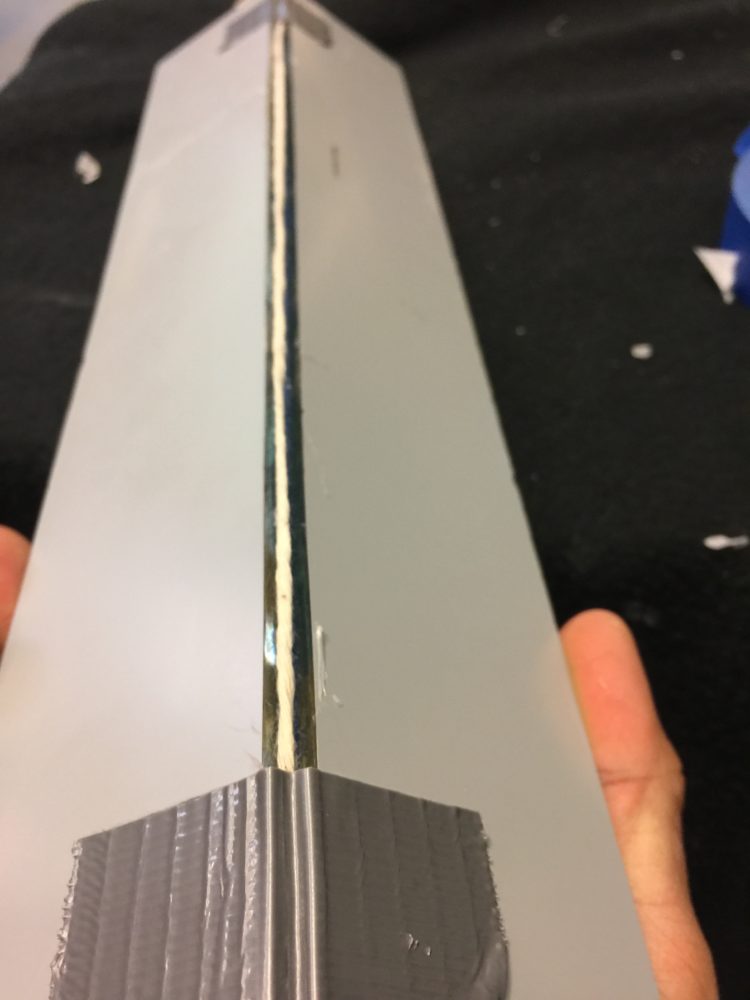
I then would make a 135 degree angle on the inside and then fill the gap with string and hot glue, this way the mirrors don’t rub harshly on each other. This also provided structural integrity.

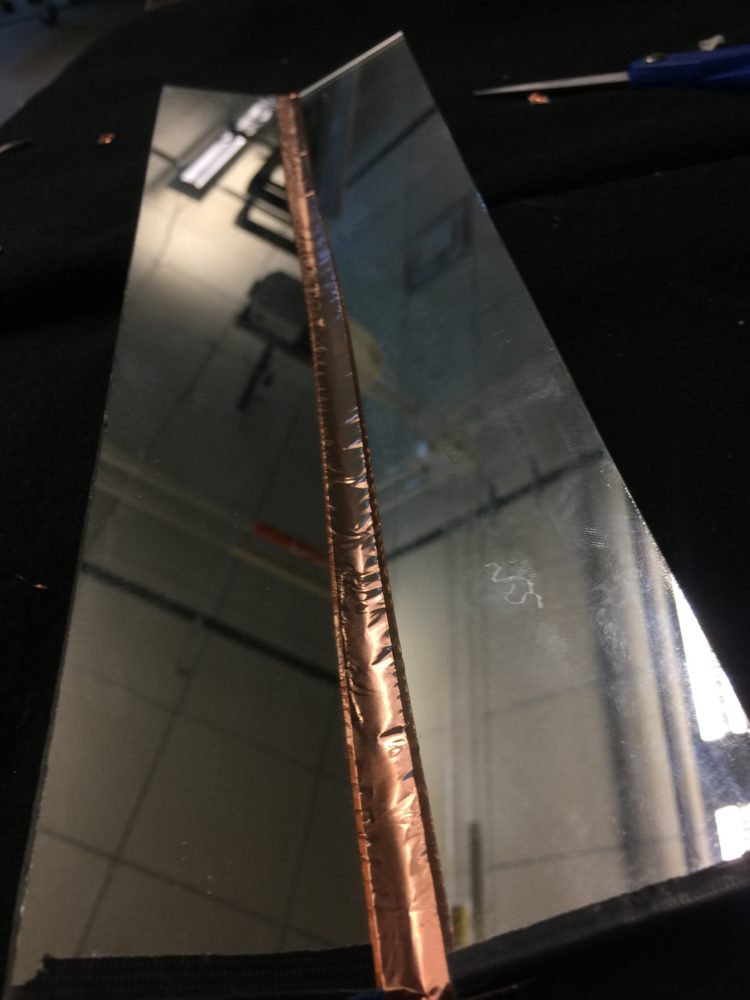
Finally I used a sodering copper tape to line the insides and outsides. I liked the aesthetic quality of the tape and its rigidness so I found it a nice finishing binding agent to hold the mirrors together.
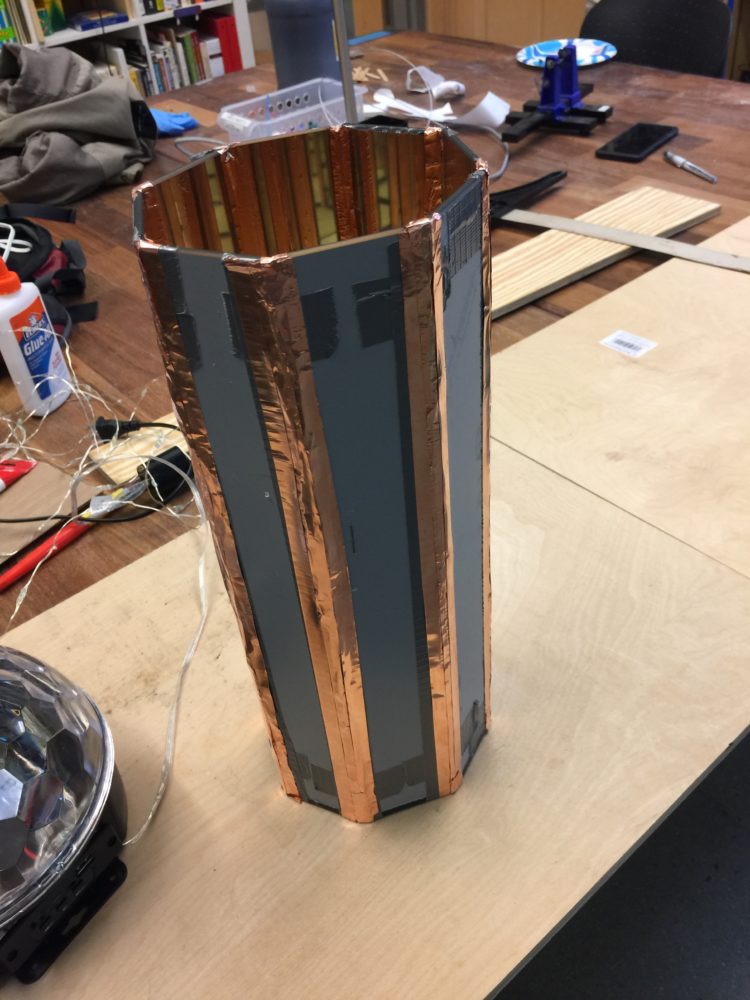
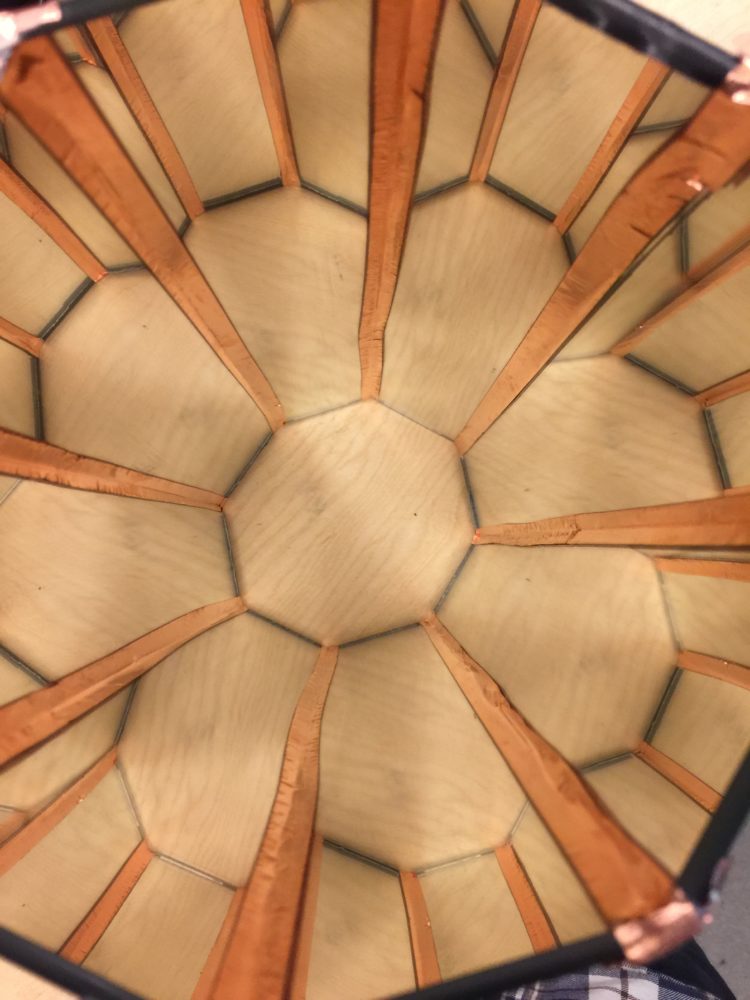
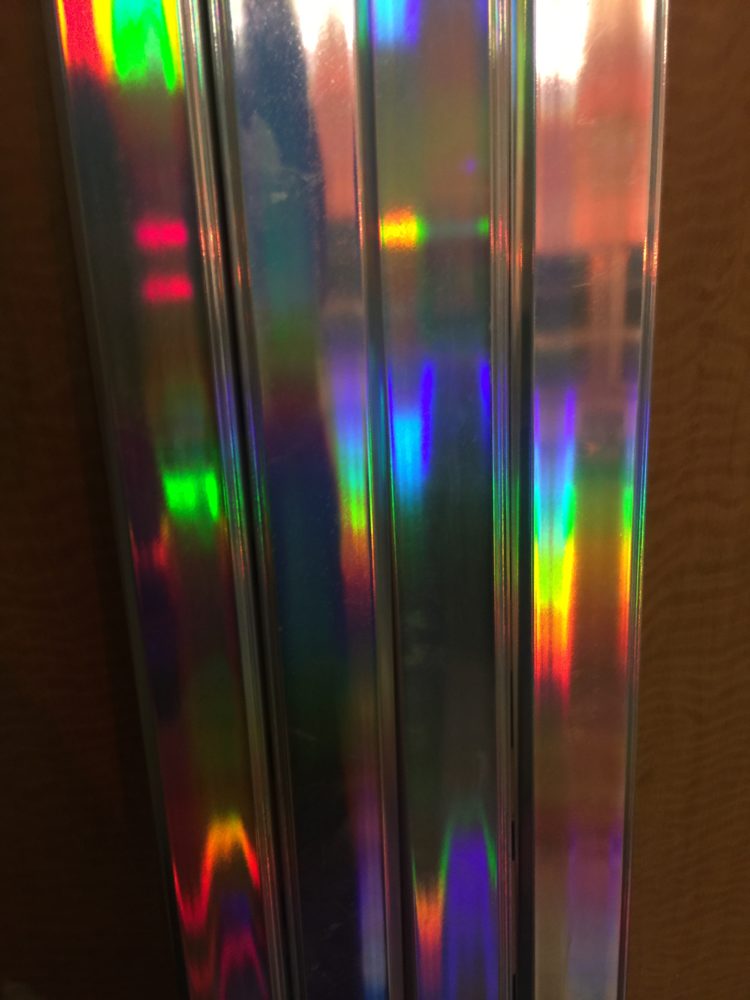
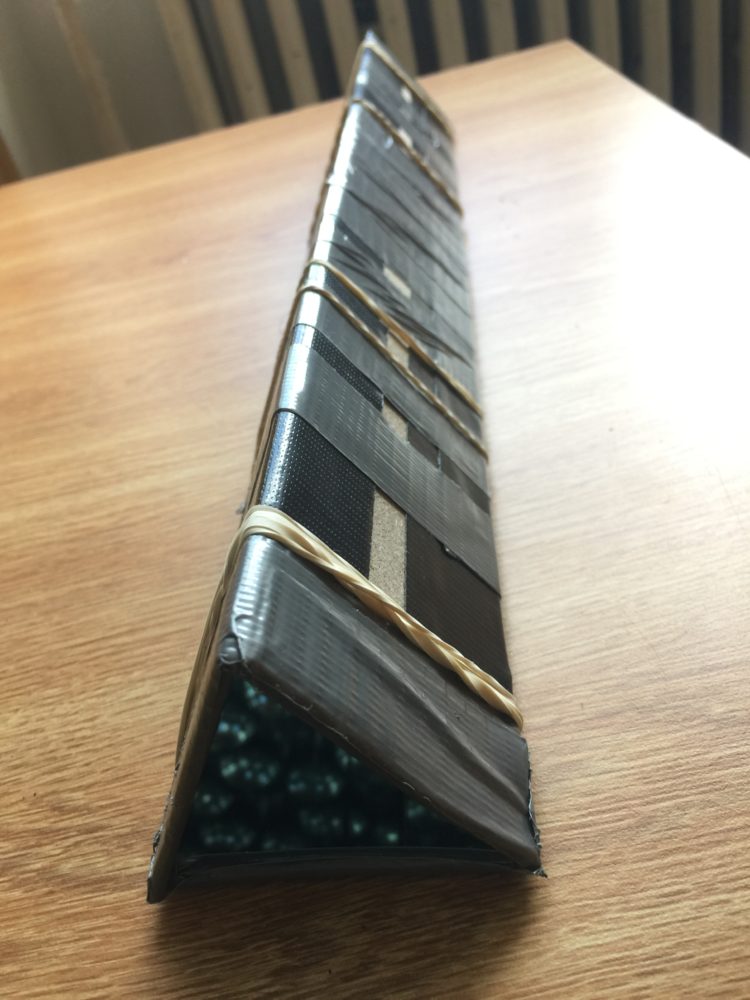
Once I made all the sections I had to mange to put it together without breaking it. Sure enough it was very sturdy and rigid when I finished. I really enjoyed the overall construction of the object, it reminded me of things you would see in sci-fi space movies, it had a spaceship-esque quality to it. And the inside also looked amazing, ultimately I was happy I was able to get it together in one piece.
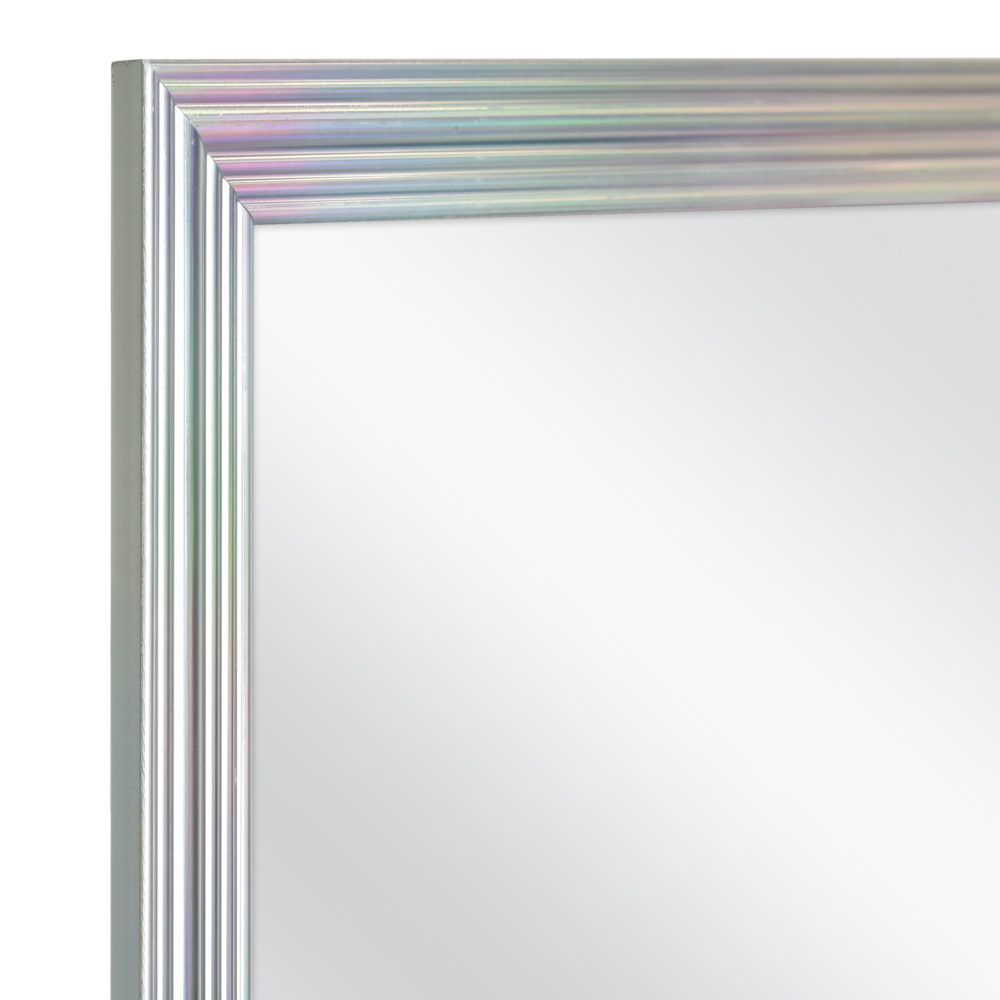
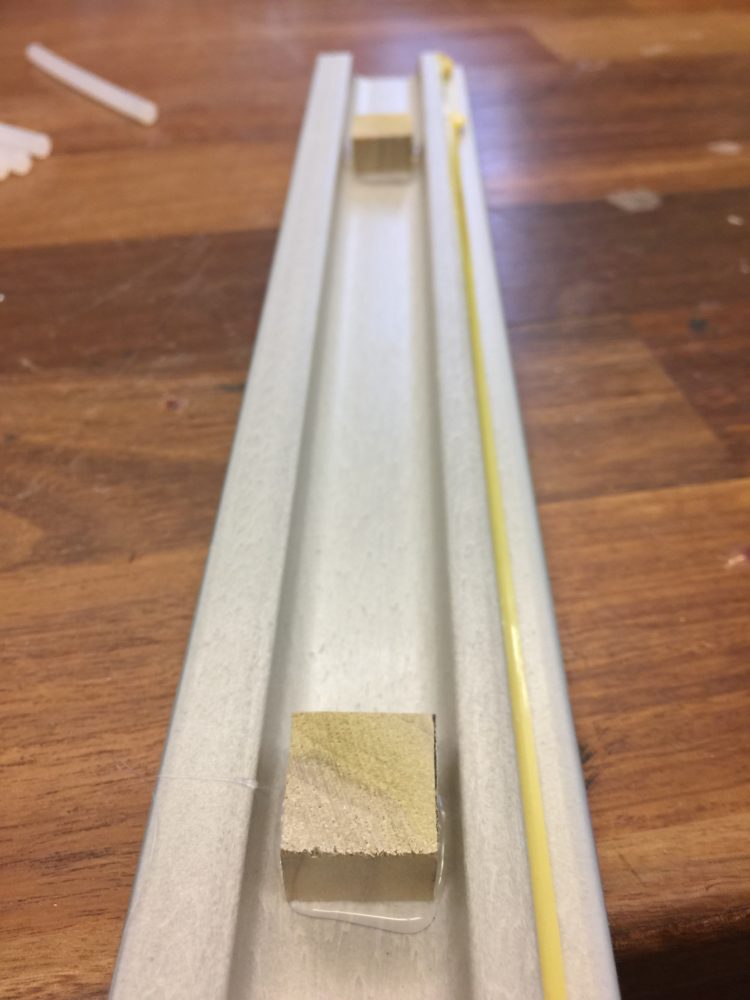
Next was the side trim pannels, this was simple. I trimmed the frames down to a matching size then I cut a wooden dowel to connect the frames to the mirror with hot glue.
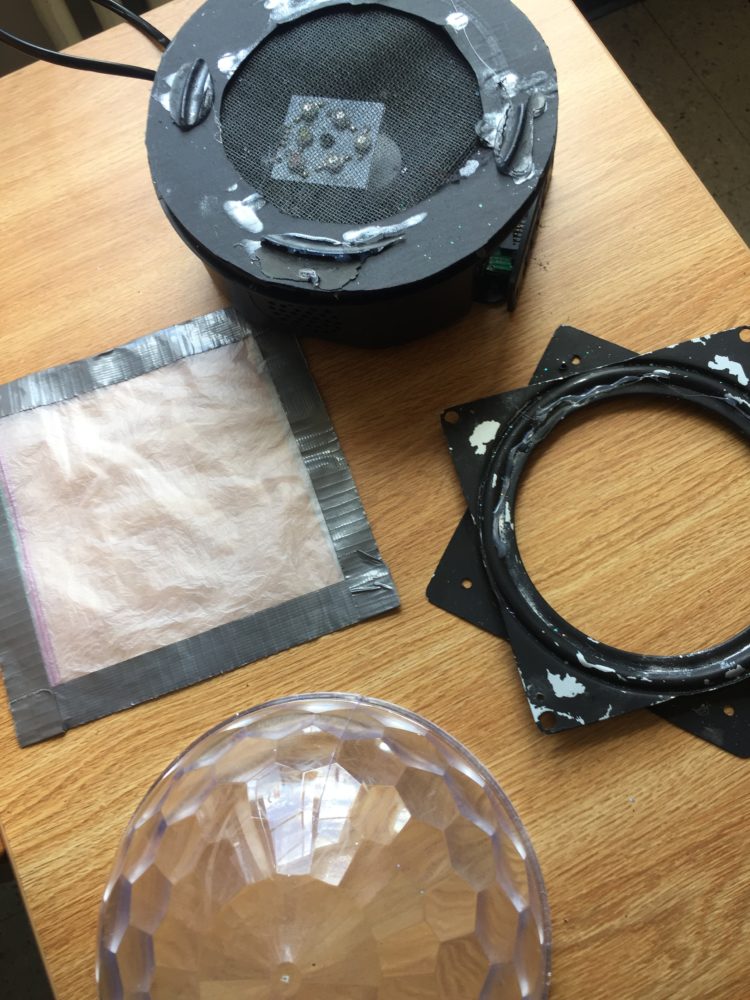
Next was working on the base. I ended up attatching and painting a lazy susan bearing onto the top of the disco light. Then between those I also attatch a garbage bag filter to screen some of the light coming from the disco ball, from a direct viewpoint it was quite harsh on the eyes. Then finally, I managed to pack 30ft of RGB fairy lights into the disco ball and ensure they would not get tangled when the base is rotated. This function was tricky getting everything placed so that electronics would be damaged when the object is being interacted with.
The Pairing Kaleidoscope
I worked the same process as before with scrap mirror shards I had from my prototype and sure enough I was rewarded for this pairing. The object itself was easy to make, simply take 3 mirrors and tape them together tightly, securing all light from the outside. From here I had something amazing happen..
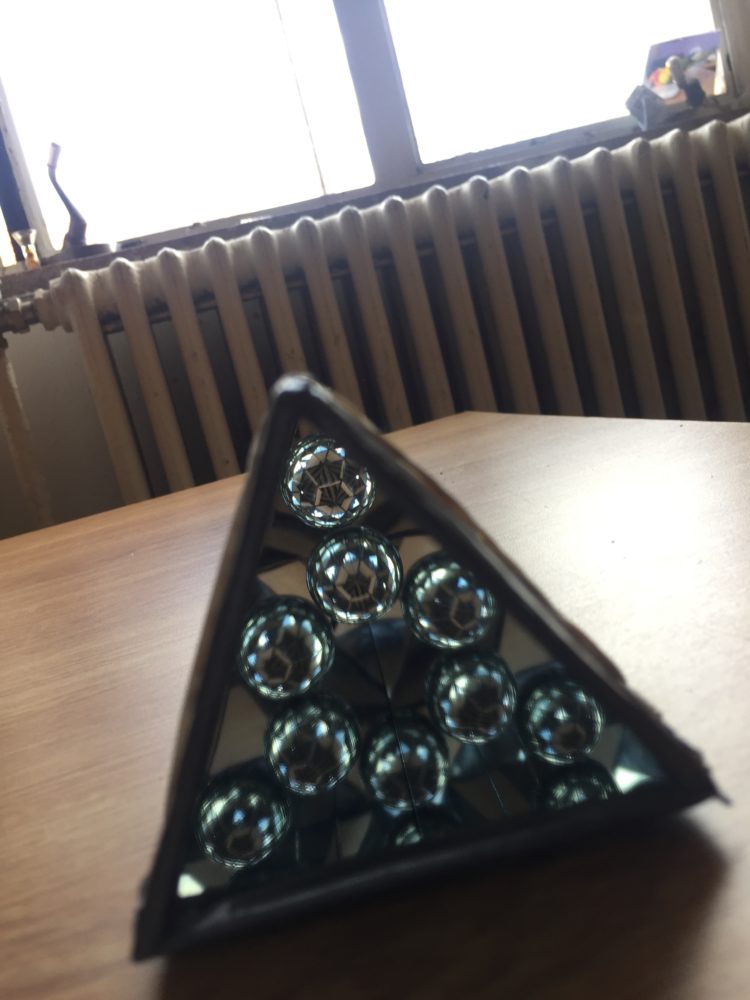
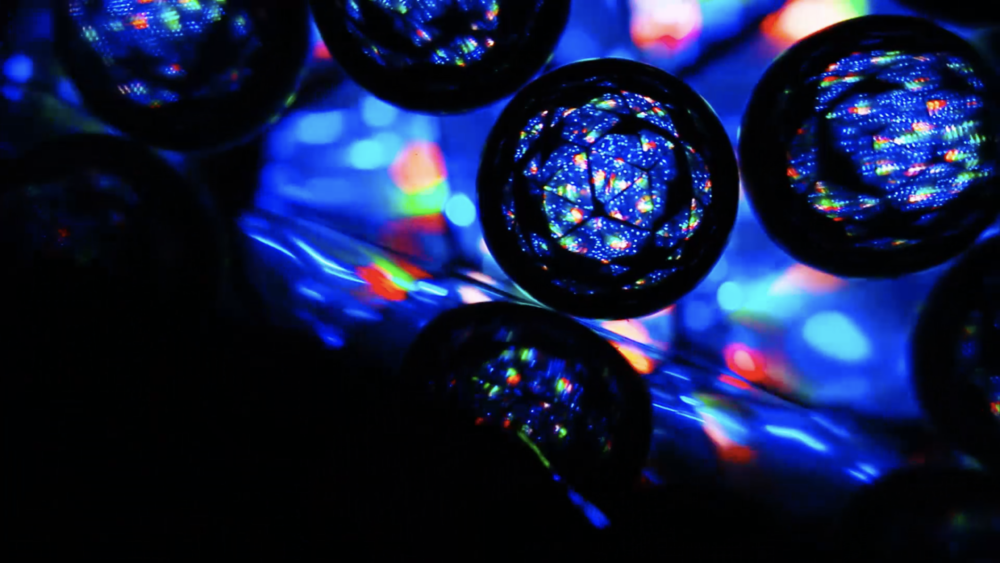
I had an orb from my original kaleidoscope sitting around, and I decided I wanted to mount it somehow. In that process I couldn’t find a good position, then by accident I dropped the ball straight into the kaleidoscope. When I looked in I was greeted with a beautiful orb optical kaleidoscope world!
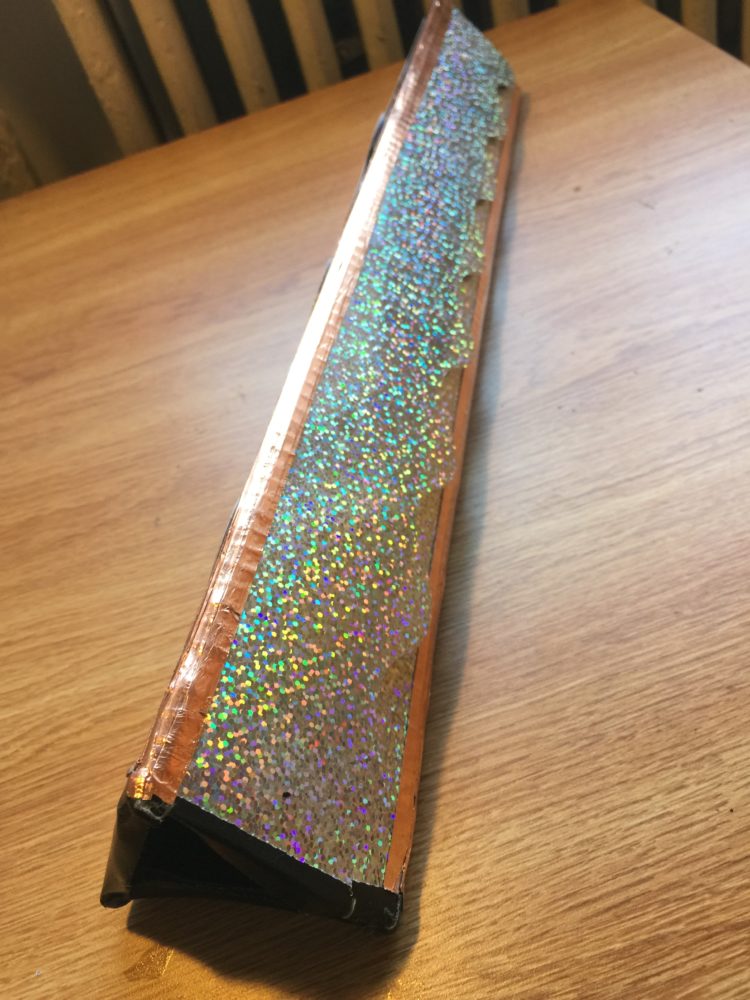
From here I added an exterior to match my first kaleidoscope. I found some rainbow holographic borders used to make bulletin boards sitting around and said why not. I attatched them using hot glue and tape, and arranged them to fit a wave pattern. I also used the exact amount left of copper tape I had. This project I had JUST enough of everything, and it all paid off in the end.
When assembled together.
View from using:
Video Links of Use:
https://www.youtube.com/watch?v=kX5CPRdgOQs&t=13s above with the main kaleidoscope
https://www.youtube.com/watch?v=xd-7Lj6aLtw view with both kaleidoscope
Overall:
This interactive piece is awesome to play with, its colorful anyway you play with it and the picture and video don’t do justice. The process from start to finish was very fun and ultimately rewarding as a final senior project. Im glad I was able to make it and I get to enjoy the colorful views and think back to the good ol days.
1 Comment. Leave new
Benjamin, great work this semester. I have been following this project for most of the time you have been working on it. Although I am sad that you couldnt finish the intial idea as planned, I really love what you produced. You even made more than one thing. What was your favorite part of the entire process? Were you able to learn anything from COVID-19 that you didnt mention? Overall, I love the aesthetic. Pastel like lights are always very comforting and beautiful. Were you able to find any wire or electronics in the trash left by the many who fled the dorms? Or was it just those mirror pieces?