
For my upcycle project I wanted to bring plants inside in a minimal clean style that can be multifunctional. I decided to make small air plant holders that also act as refrigerator magnets because I never seem to have enough magnets on the fridge. Since I am still working on decorating my house, I did not want to choose an aesthetic that would be hard to repurpose if my style changes as I find new things. I was hoping that by using a modern design approach that I’d able to bring in neutral colors and fun geometries to create a design that could always be restyled as my aesthetic tastes grow.
Now that I have created my project and as a class having gone through the design movements I am unsure if I truly used a modern approach. I feel more comfortable saying that I used a natural and mostly neutrals pallet with some pops of color. The recycled materials I used are wine/cider corks, magnets, copper wire, and old beaded jewelry. In the update post it was suggested to me that rather than just using the jewelry I should also consider just trying to mimic the theme across the magnet designs. To do so I ended up choosing one piece of jewelry I really liked then used acrylic paint to match the colors I wanted to use.
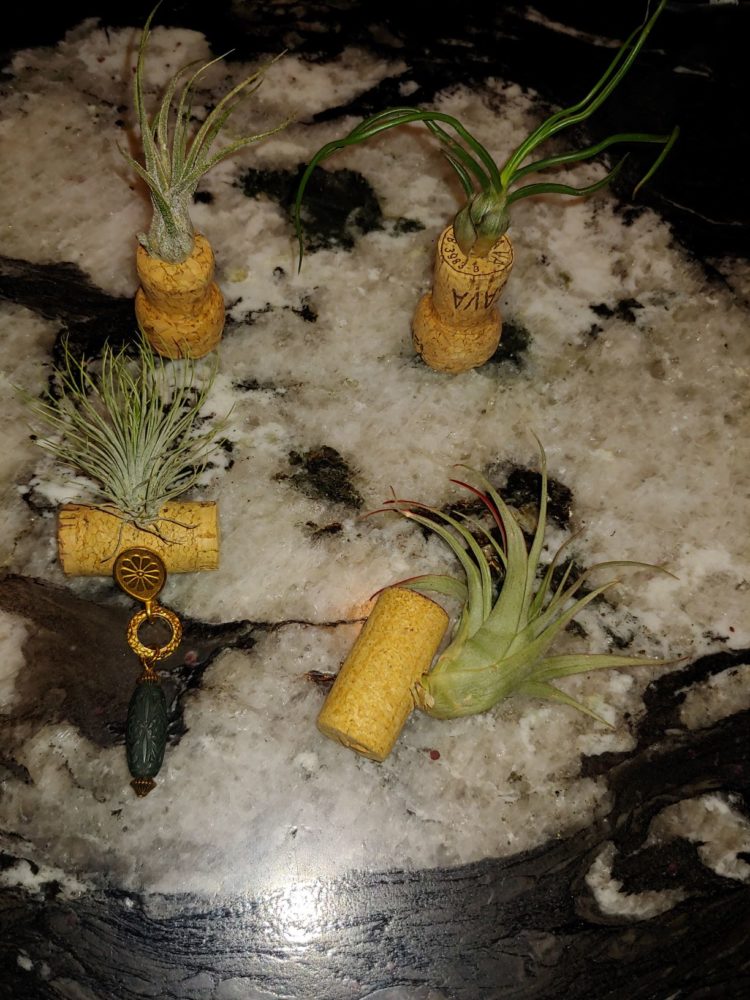
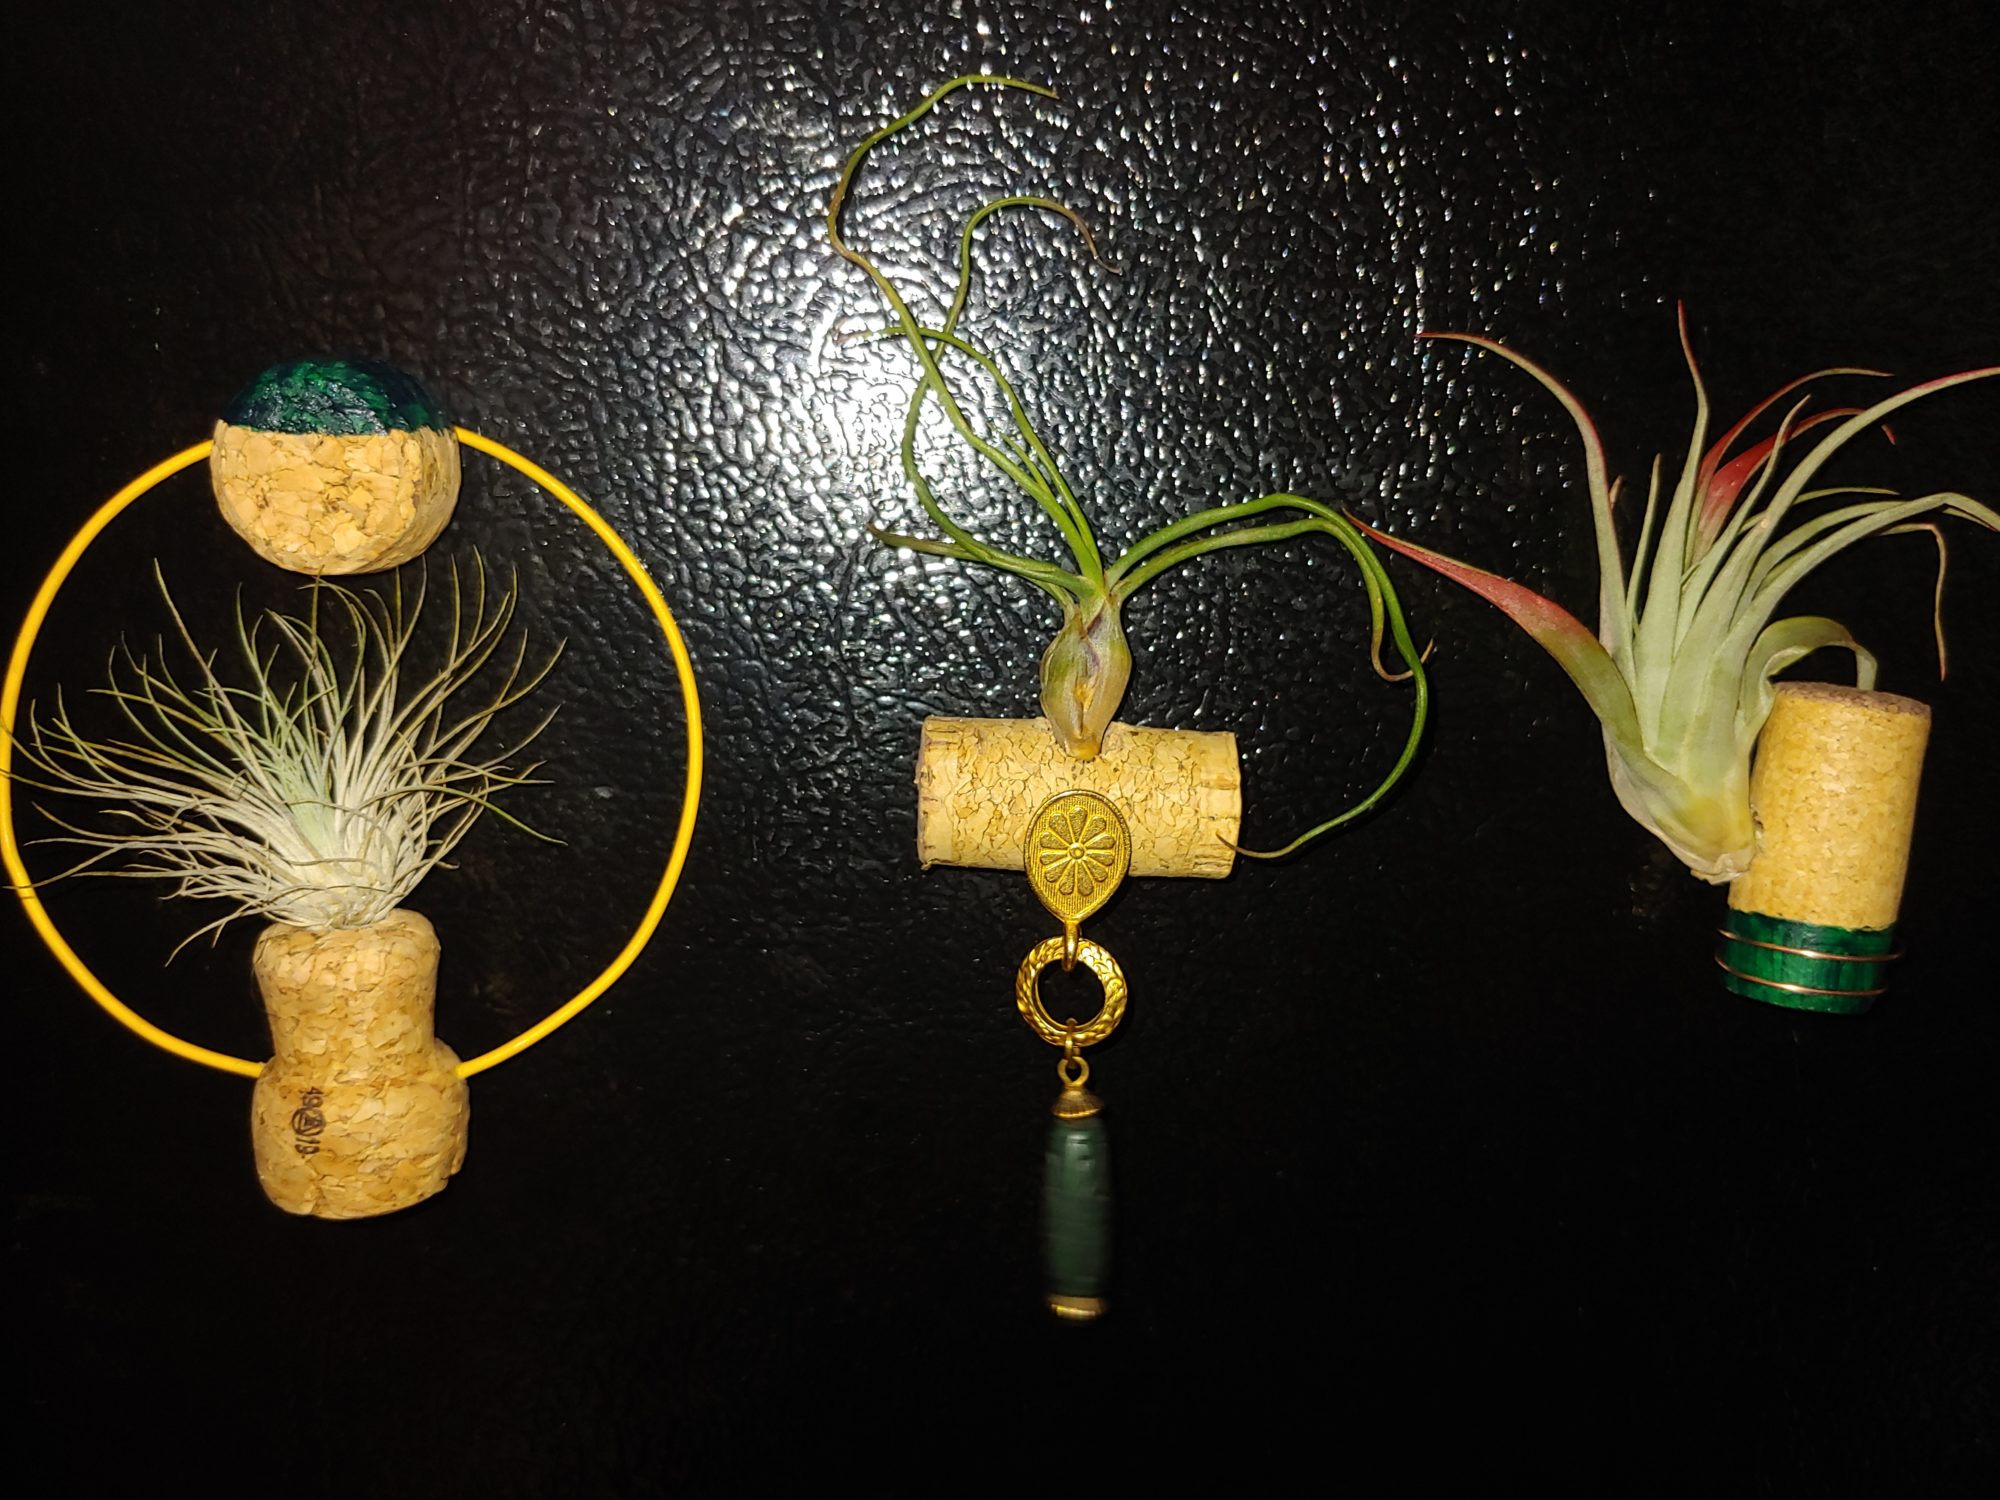
Image 1: Picture from Project Update
The very first step in this project was to sit back and enjoy whatever you are drinking to get the corks. It was then necessary to decide where you would like to make a hole for the air plant to sit in. Once deciding a placement, use a drill bit and by hand turn it to make a hole. By doing this I was able to better control how deep I truly made the hole. It also helped with trying to limit the amount the drill bit would deflect into the hole that was already made keeping me from making it wider.
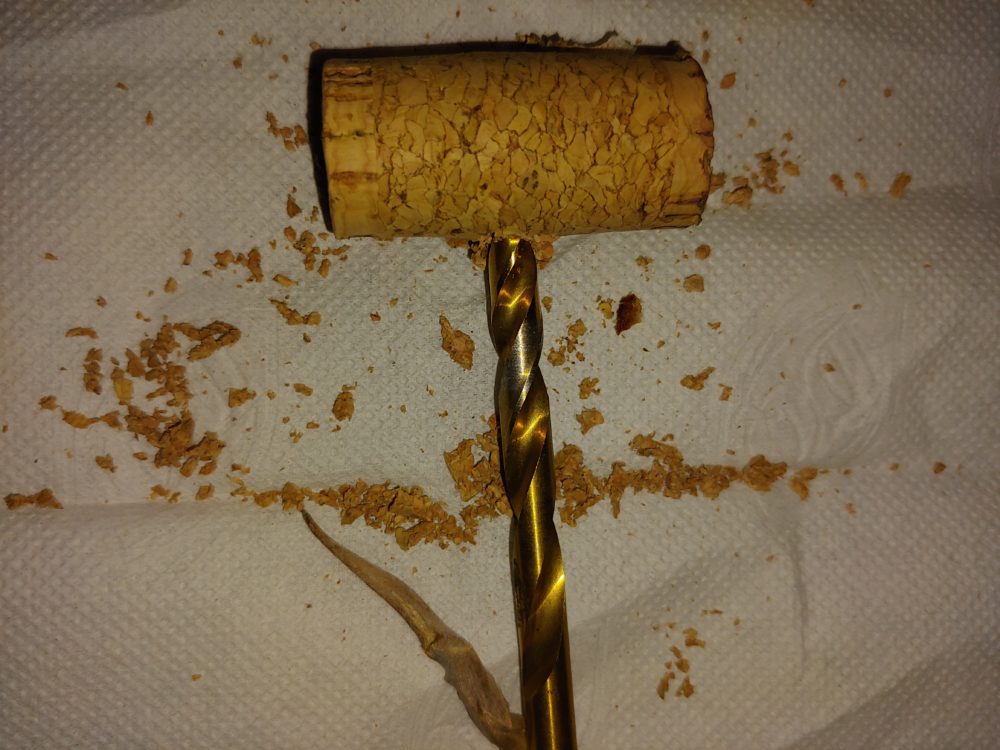
Image 2: Using Drill to Make Hole for Plant
In total I designed 3 different type of magnet styles. One of the least complex designs I made used a wine cork with a hole, a magnet, and a piece of old jewelry. The jewelry chosen was used because of its simple yet elegant shape as well as the nice coloring. This particular piece is what is known as a post earing, so on the back is a small sharp post that can be poked into the cork. For this magnet I decided to make the wine cork be horizontal and then poked the earing post into the center so that it creates a T-shape with the cork as shown below. Gorilla glue was then used to attach the magnet to the cork side without the earing.
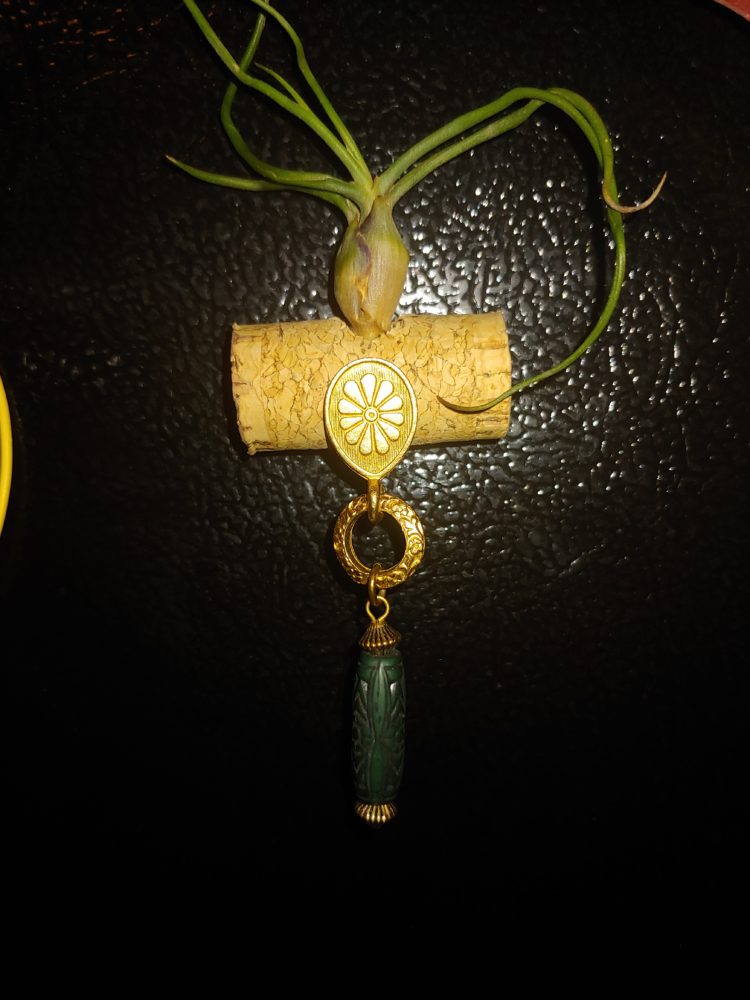
Image 3: Final Design 1.
For the second design I used copper wire, one wine cork with a hole, one magnet, and green acrylic paint. This design used a cork placed vertically with a plant coming out the side of it. Green paint was used to paint 1/3 of the cork on the end to incorporate the same color theme as the first design. I then used a finger to twist the copper wire around my finger twice to a size similar to the diameter of the wine cork. Once the paint was dry the copper wire was then placed on top of the paint to add a pop of color.
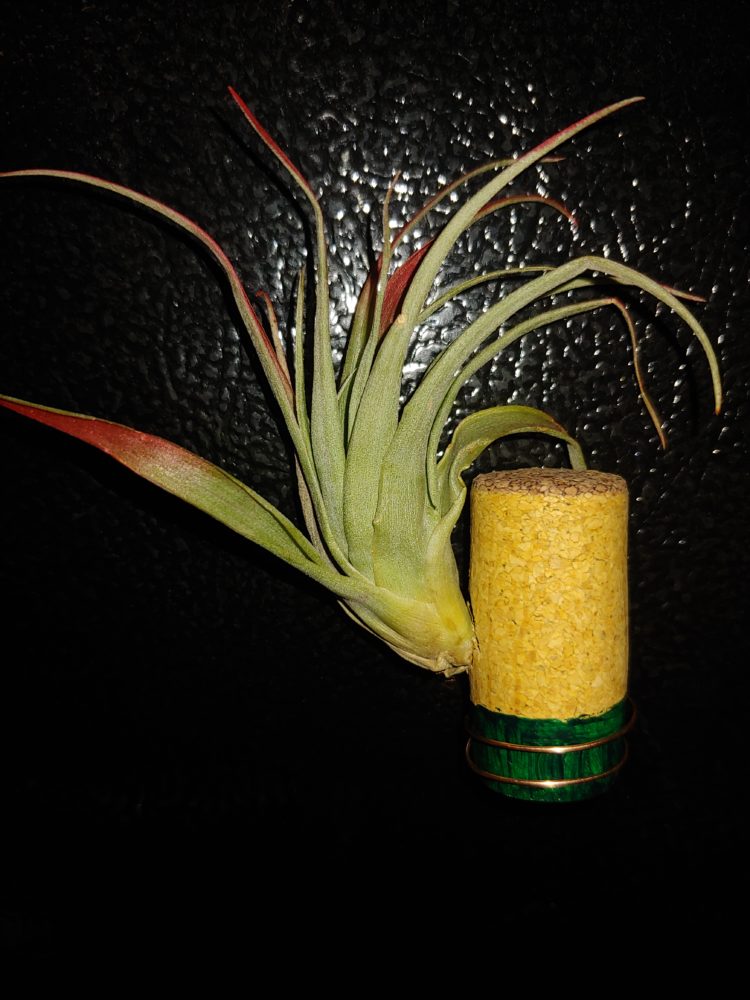
Image 4: Final Design 2.
The most complex design one used wire, a wine cork cut in half, one cork with a hole in it, two magnets, and green and gold paint. I first shaped the wire into a circle with the open ends fitting on opposite sides of the wine cork with a whole in it. I then attached the wire ends to each side of the cork respectively using a tiny amount of gorilla glue. To get half of a wine cork you first steam the cork for a few minutes without the water touching the cork to ensure that the cork won’t crumble. Once done steaming take the cork out and cut in half. I then used gorilla glue to again attach a magnet to the cut in half cork and the cork with the hole in it. The yellow wire circle was then painted the gold color to tie in the same theme, and green was added to the cut wine cork to add contrast.
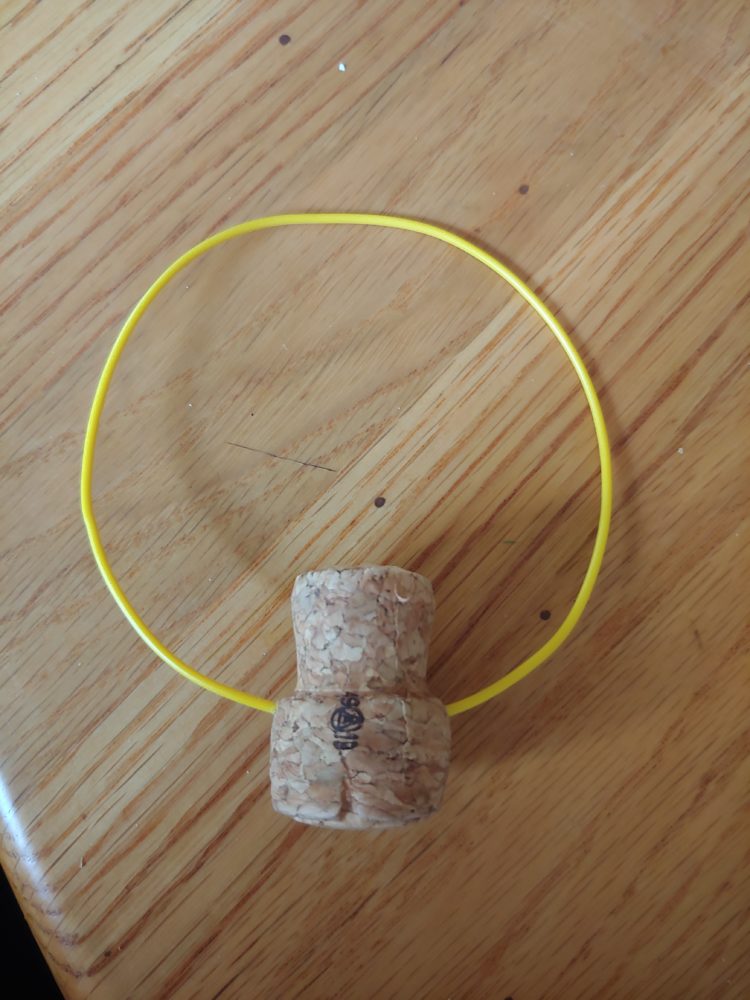
Image 5: Attaching the Wires.
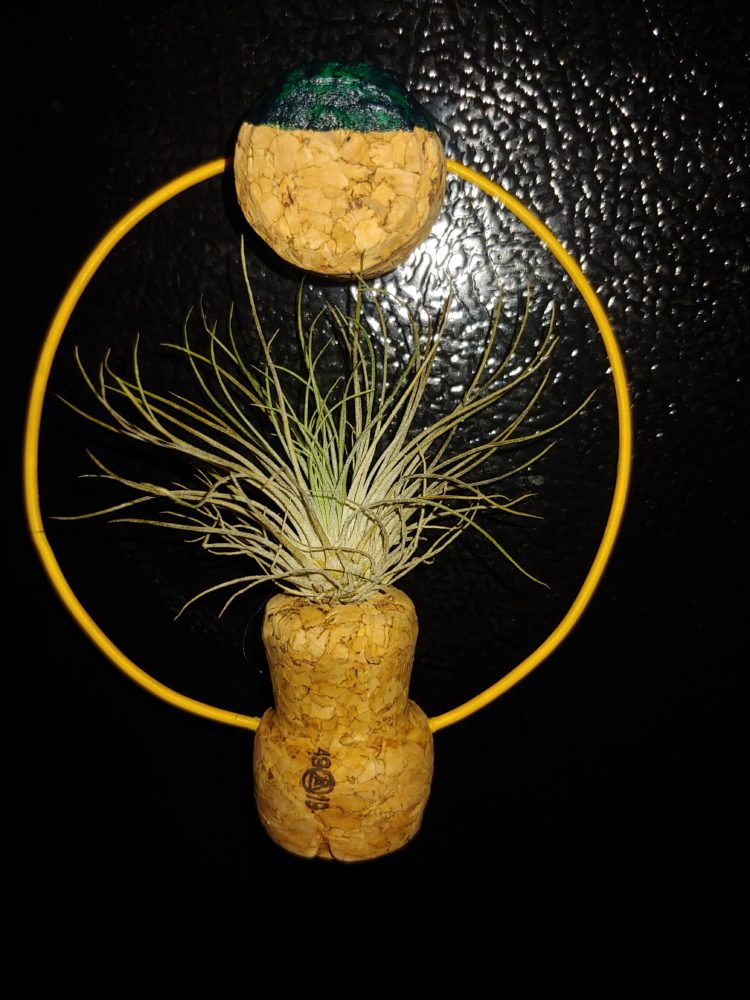
Image 6: Design 3 Final.
Overall, I am very happy with the final out come both aesthetically and purpose wise. The advise that I got along the way really contributed to the designing both Design 1 and 2. That being said, I did not really follow my original aesthetic as the project progressed and most likely should’ve stuck to it more by using more matte colors for the paint. That being said this was a fully recycled design that I had all the pieces for already without realizing their potential. If I were to go back to change the design I would want to spend a bit more time on getting each plant to correctly set in the corks a bit more snug since as of now they do occasionally fall out.

Image 7: The Plant Holder Set Together.
4 Comments. Leave new
Hannah, it looks like your project came out very well. The colors of the materials and paints you chose definitely highlight the natural looking aesthetic that you mentioned—they do work well together. It’s impressive how much can be done with such small components to create a unique and visually captivating set of designs. They look like a great addition to your fridge!
Thank you, it was great to actually be able to find everything I needed to make this project already at home considering it isn’t something I would have considered doing before this course. Thank you for taking the time to read my report.
These plant magnets came out really well! It’s great that you were able to completely use upcycled materials for this project without having to purchase any extra components. I do think the final product ties in to a modern and natural/earthy aesthetic. The use of green and gold give a nice pop of color over the matte wine corks. It’s great that you stuck with the same color scheme for all three magnets – this help tie into the modern aesthetic. I would say, though, that the dark green color kind of blends in to the black background of your fridge. A lighter color may have been nice for a but more contrast. I’m also curious if you have other magnets on your fridge? How do the magnets you made tie in with your existing magnets? Finally, I’m wondering how you plan on getting the plants to better stick in the wine corks, and are the plants difficult to water? Again, the final magnets look really nice!
I do have other magnets on my fridge, and unfortunately they do not match at all. That being said they are all free ones like numbers for poison help and such, so I might end up making more and throwing the other ones in a drawer. In order to better fit the plants in the holes I think I will be making the initial hole bigger then making a clay insert that is formed to each individual plant so I know they will stay in place. Air plants do not need much water in fact many people say misting them every few weeks is all they need.