
For my final project I am creating a digital picture frame as a gift for my father. My father has been asking for a digital picture frame for christmas or his birthday for years now. For some reason each year we neglect his request and get him something else. Why? I have no idea. But delay no more I will now be custom making one for him. As I was trying to find inspirations for I came across many open source designs and in parsing through them I couldn’t find one that I truly liked. What I was able to do, however, was formulate some sort of idea of what I needed to create my own, and how I could construct it. Of course digital picture frames are available commercially for pretty cheap these days, and my one off version likely won’t be as powerful, or inexpensive one from amazon. But creating my own picture frame from scratch will allow me to personalize it to my father in ways that a commercial product simply can not. In my mind, the digital picture frames that are on the market today aren’t particularly aesthetically impressive.
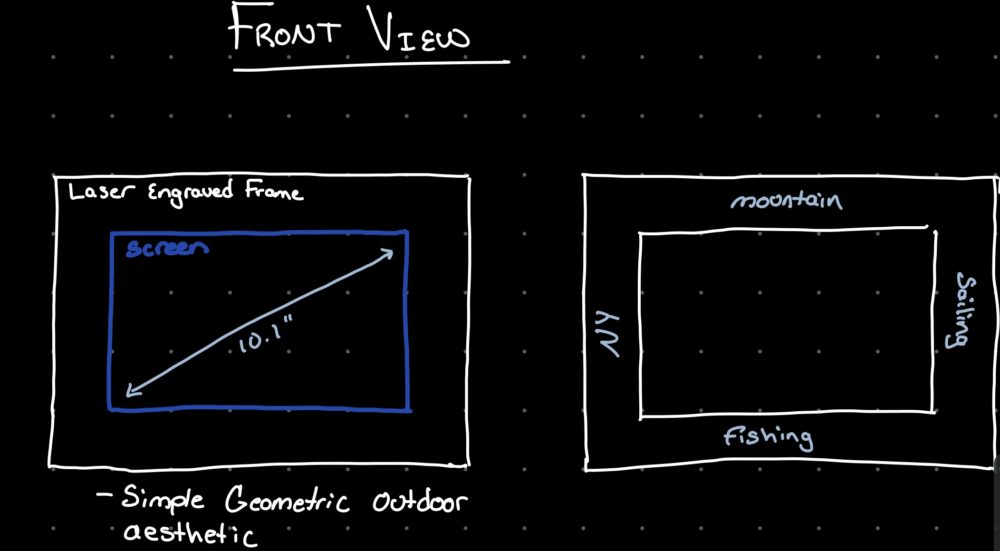
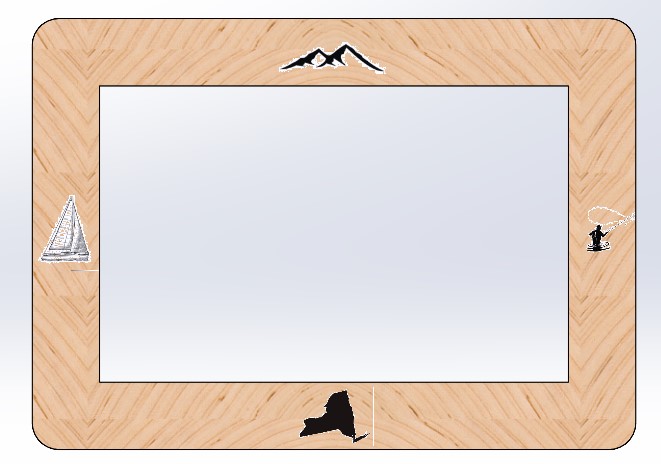
For this project functionality is important to me but so is form. I have decided to go with a simple natural aesthetic that speaks to my fathers personal outdoor oriented aesthetic. The frame will be engraved with images of meaning to my Dad, three activities that he loves and one place that he has spent most of his life. The specifications I have set for the function of this digital picture frame are the following:
- Must be able to display pictures in still or slideshow format
- Must be able to upload pictures wirelessly
- Must have at least 4 hours of battery life
- Must have a simple and intuitive/ familiar user interface
- Must reasonably fit on a desk or side table
- Display must be ~ 9″ diagonally
- Must be able to load pictures from Google Drive or Dropbox
- Brain unit must be accessible for repairs and upgrades/ re-programming
The specifications I have set for the form of this digital picture frame are the following:
- Brain unit must be contained
- Frame will be made of maple wood
- Images will be laser engraved into the wooden frame
- Frame will be finished with a natural stain or sealant
- Rapid Prototyping is acceptable for electronic interfaces
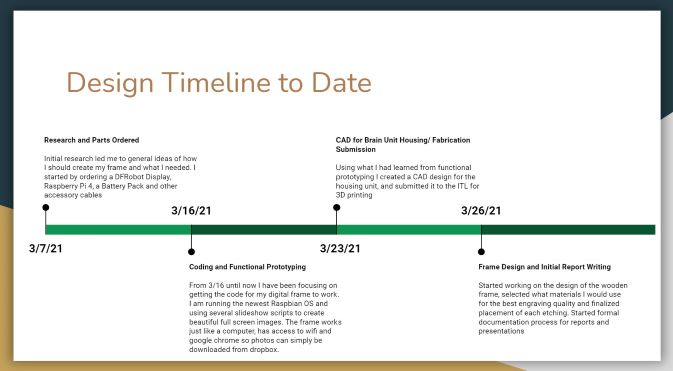
My initial design sketches were very basic, but I have gone through some rounds of prototyping to help me get a good sense of what my final design is.
Initial Design Sketches:
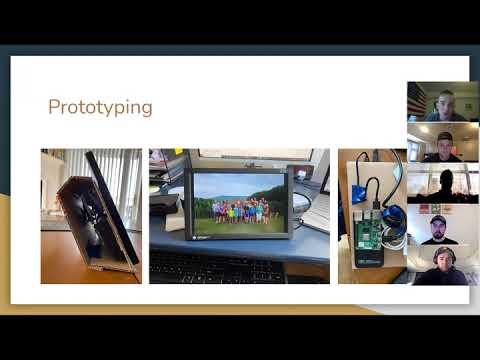
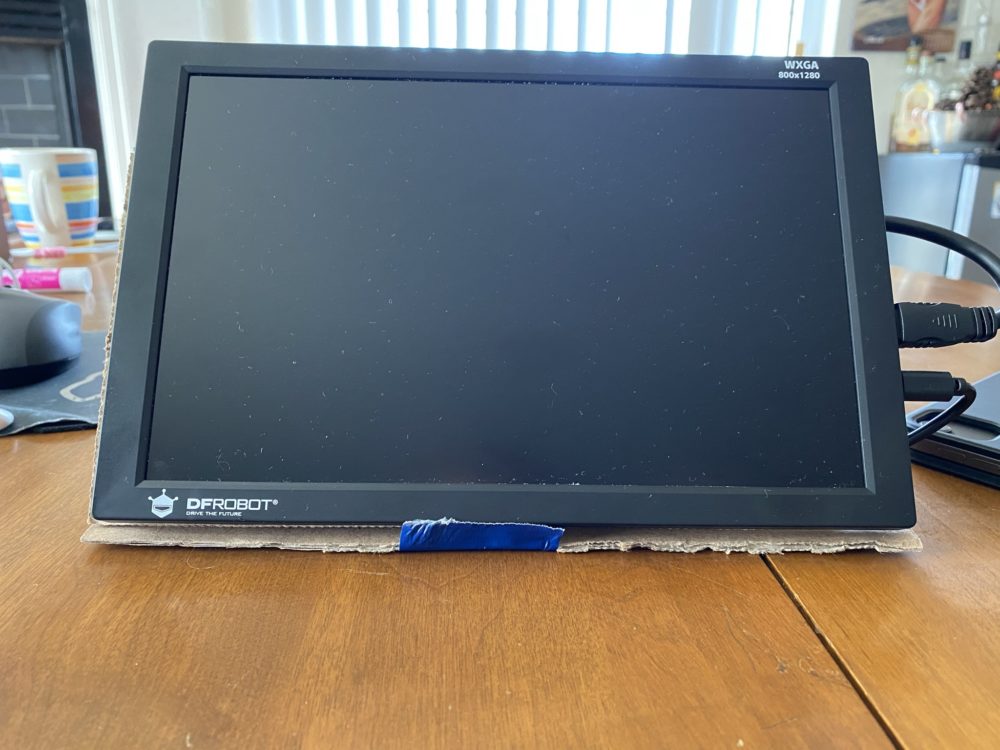
Functional Prototyping:
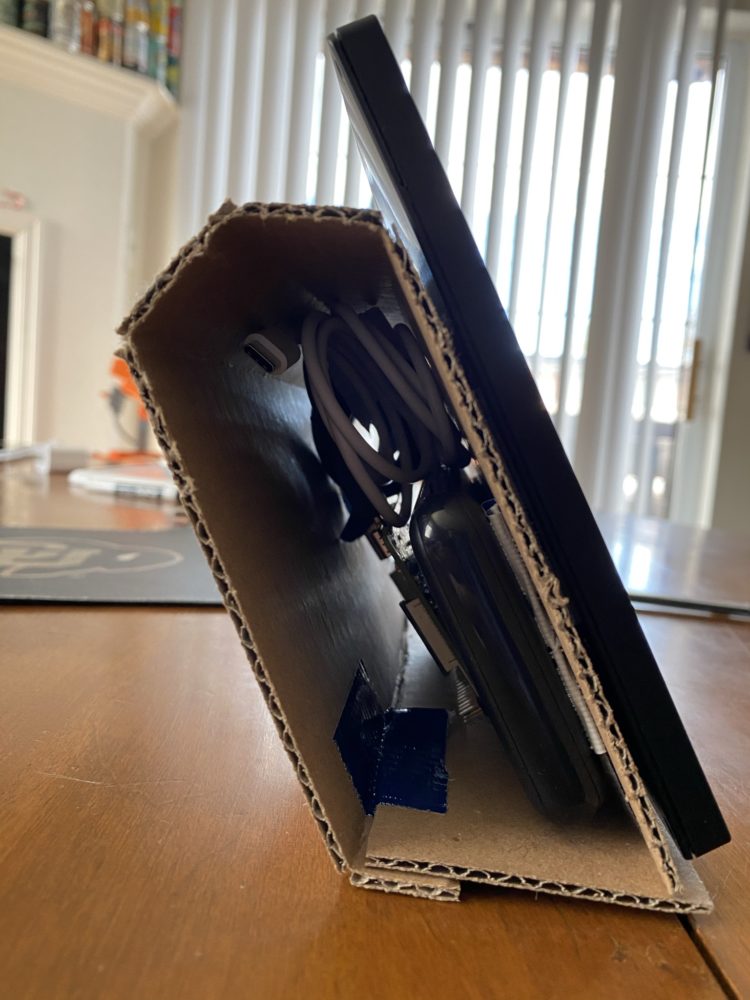
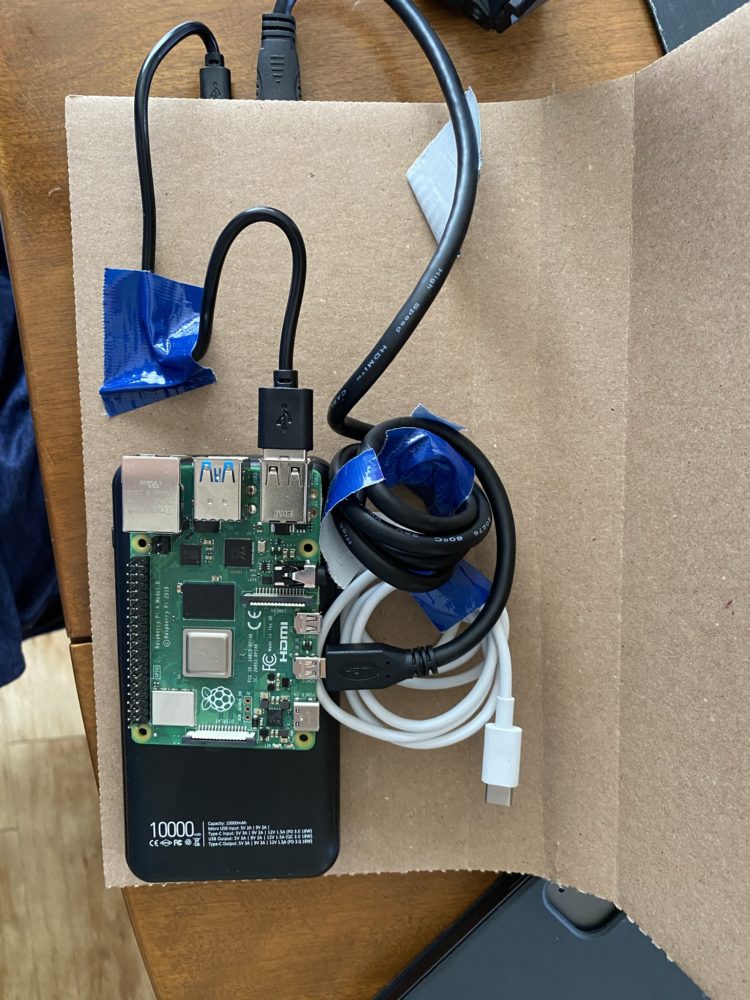
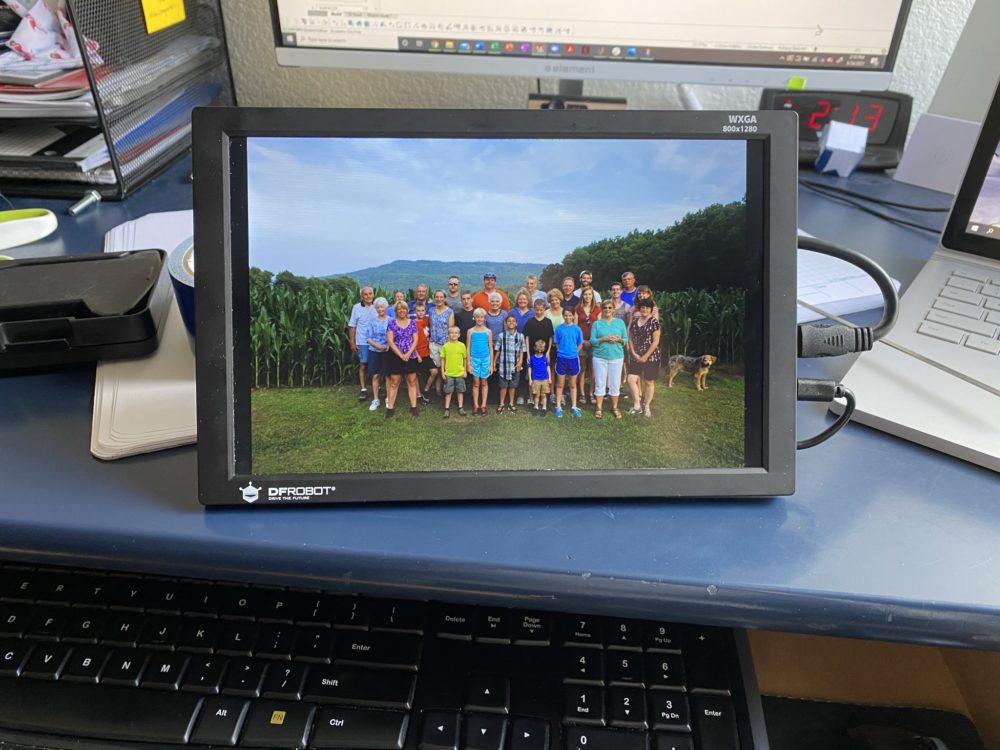
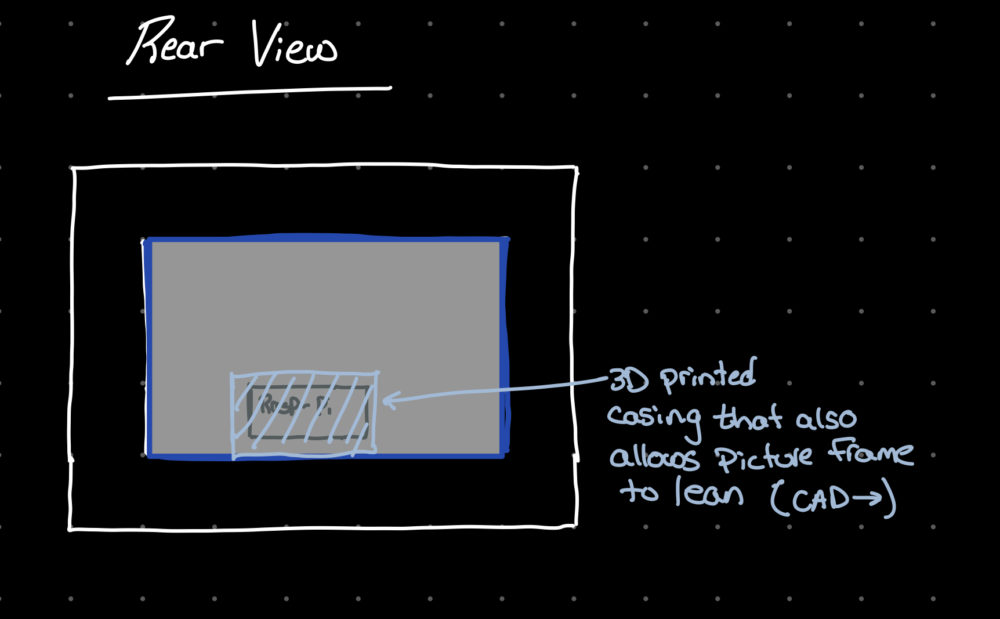
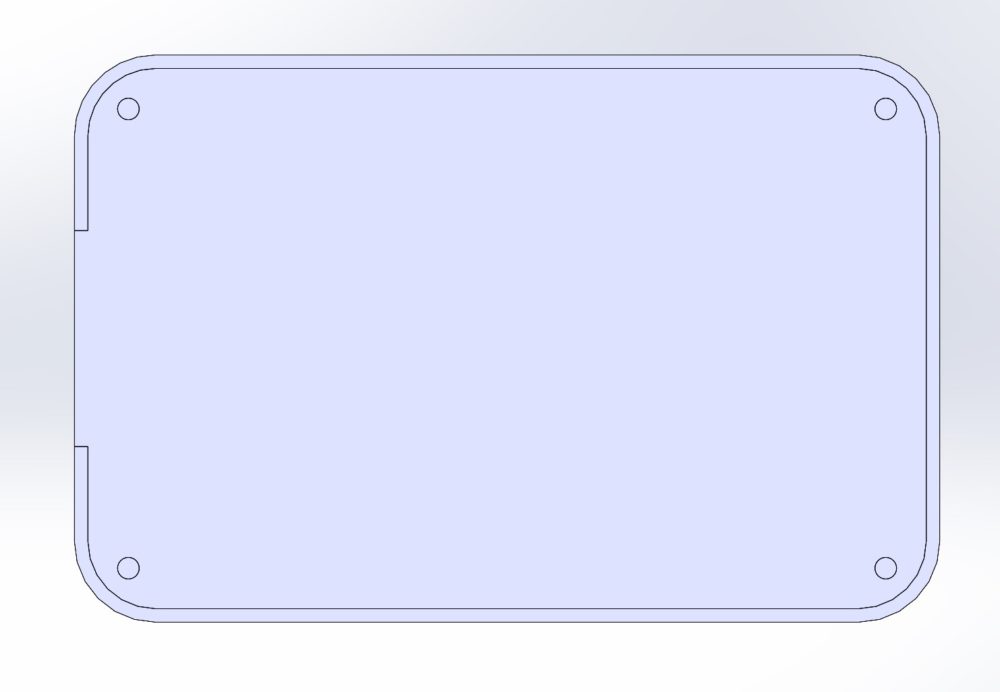
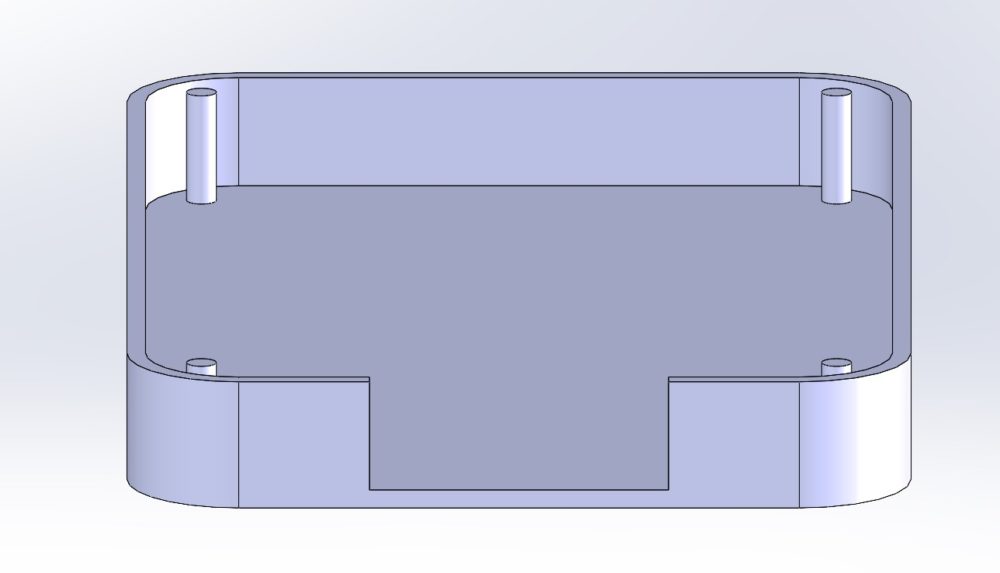
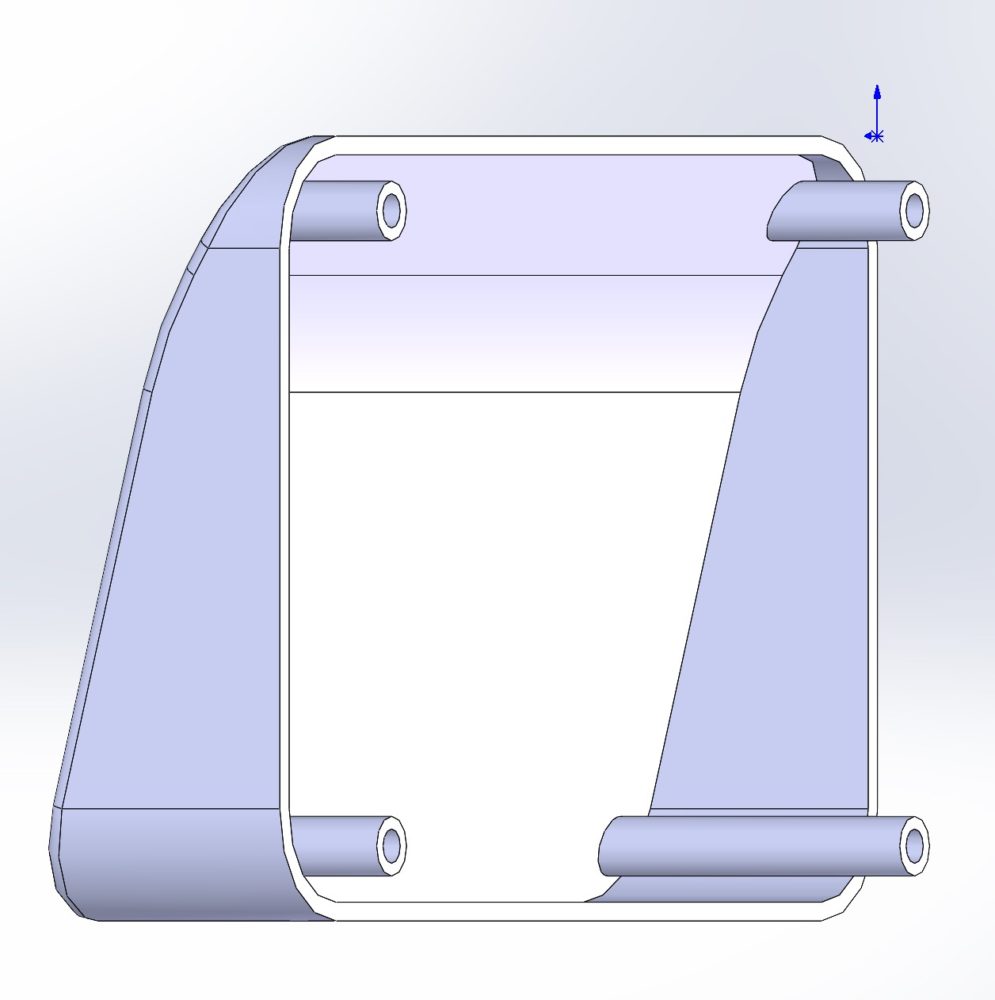
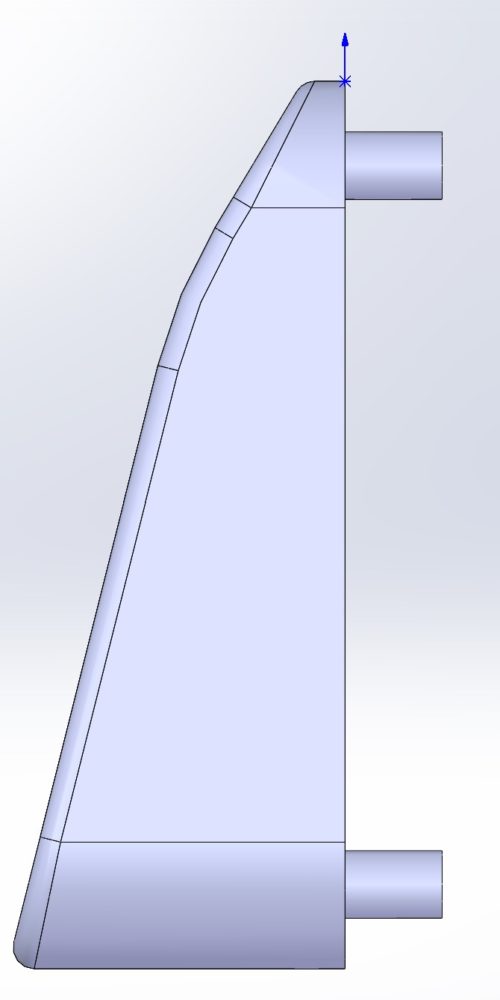
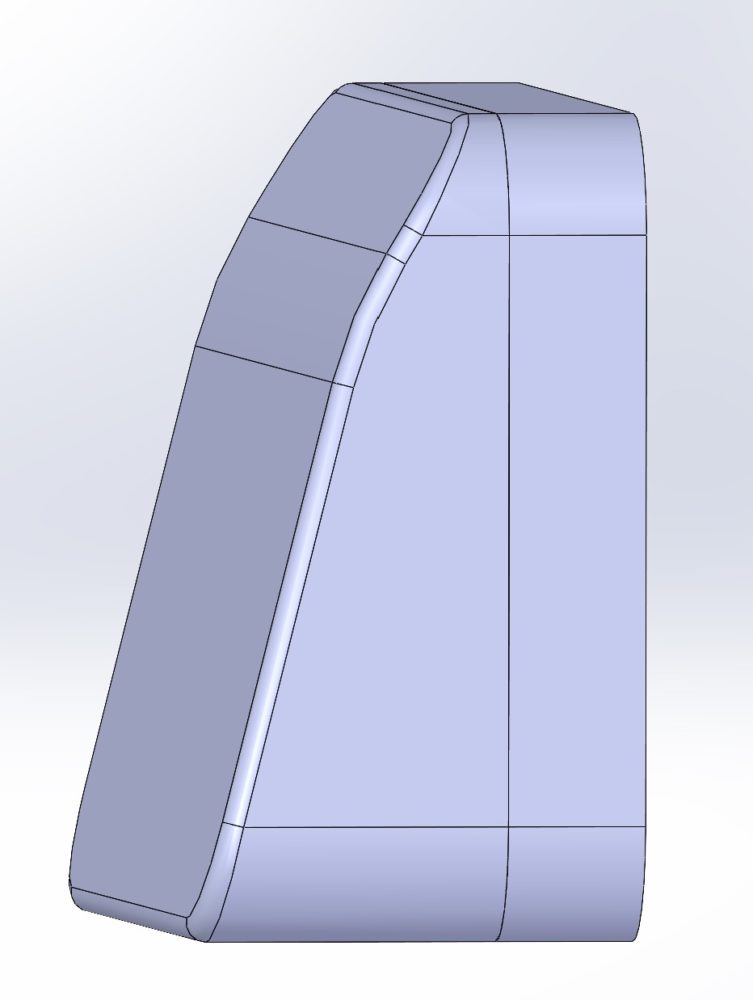
The prototypes for the Brain Unit housing were by far the most informative, and led me to the following design which will be 3D printed and attached to the rear of my DFRobot Display. In my prototyping I decided that using the electronics housing also as the frame’s stand would be an effective way to save material, and would give me an opportunity to add aesthetic elements to the housing. The housing remains simple and sleek and does not (in my mind) distract from the true aesthetic piece which is the front of the frame. Many of the electronic components will secure to the housing with velcro so that the frame is modular and easy to repair should I need to rework anything that isn’t functioning properly.
Brain Unit Housing CAD:
The wooden aspects of the frame are shown here with their respective engravings. Please do note that I don’t have the proper software to make nice previews of engravings on my computer so I had to use Solidworks to make this visualization. The shape of the wooden part of the frame will be laser cut out of a 1/4″ sheet of maple plywood and then will be laser engraved after that. All of these things will need to be done with Corel Draw that is available at the ITL.
The front half of this project has required a lot of coding and troubleshooting to ensure that the frame is functional. I have had to teach myself to code with a Raspberry Pi, and have spent a good amount of time on internet forums trying to get my code to do what I want it to. The following timeline represents my design process so far, and details where I will be going from here.
Design Timeline:

VIDEO:
3 Comments. Leave new
Jake,
This looks like a challenging project. It’s great that you’re making this for your dad, and the engraving with the activities render looks fantastic! I think you’ve really thought out all the aspects of the project. I think having a battery pack attached to the back would take away a lot less from that outdoorsy aesthetic than having a wire sticking out the back. I’m excited to see how this turns out!
Hey Jake,
I have to be honest, any time I see digital picture frames they’ve never really interested me. Not sure why, they just haven’t. But after reading through your post, I could genuinely see myself being interested in something of this caliber. I think the wireless aspect is a great idea that allows this to be placed anywhere without being bogged down by cables. I think how you plan to hide the electronics is effective. Not to say my idea is better, but if I were to do it I would probably put them in some sort of base that does not look too bulky or distracting from the frame. However, I think your design is much sleeker and more effective at the “illusion” you are going for but just thought I’d throw my ideas out there.
Hey Jake, very cool project! I like that you chose to use this project to make a gift for your father. I also like the choice of engraved maple for the frame, I think the dark engravings will give you a nice contrast with the white maple wood. I was wondering about the power source for this device, will it need to be constantly plugged into the wall or can you put in batteries and leave it for a few months?