
For my project, I built a ‘tensegrity’ base for a coffee table. A ‘tensegrity’ design is a tension-based structure that creates a sort of floating illusion. These designs operate on the principle of opposing tension to create stability. A lot of the designs that I have seen out there seem to be very wobbly and/or crudely but together. To a certain extent this wobble helps to sell the illusion of the floating top, and for the purposes of this project, this is what makes the design dynamic. That being said, my intent was to create a high-strength, high-tension design which maximizes stability, while remaining elegant and refined, and also retaining this floating aesthetic.
Inspirations and Design
I originally came across this idea of a floating table base about a year ago when I saw a tensegrity structure in a video and became very interested in how this principle could be extrapolated. After doing more research I found a lot of examples, on Youtube and websites like Etsy, of tensegrity style tables and sculptures. However, I really did not like the aesthetic execution of most of these designs. Another issue I observed is that most of these designs seemed very fragile/wobbly. This is how I became inspired to create a more stable, and better looking, version of a tensegrity table. I had plenty of time to think about materials and design prior to this class and so all I had to do this semester was finalize the design of key mechanisms and source exact materials before starting the building process. This was a nice head start, but I still ended up being pressed for time during manufacturing.
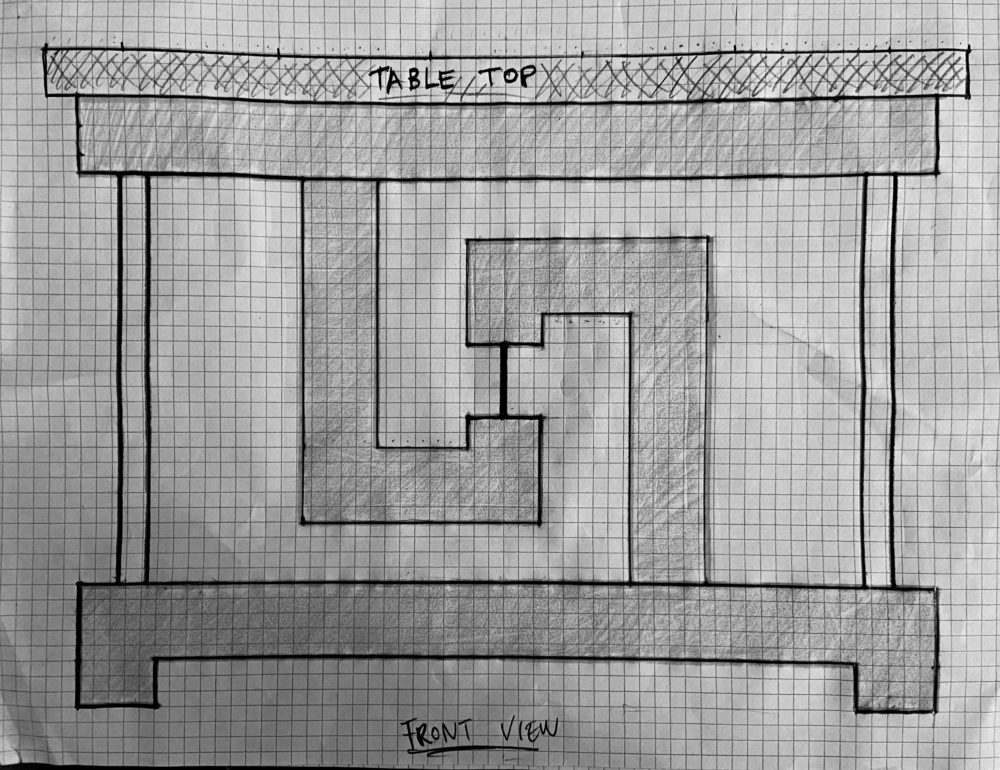
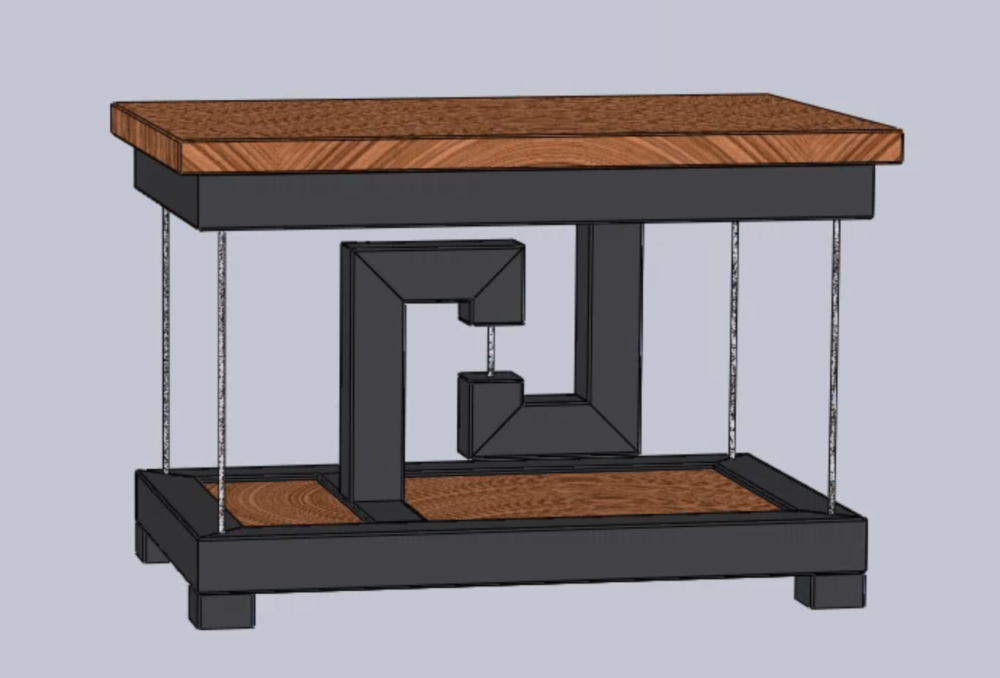
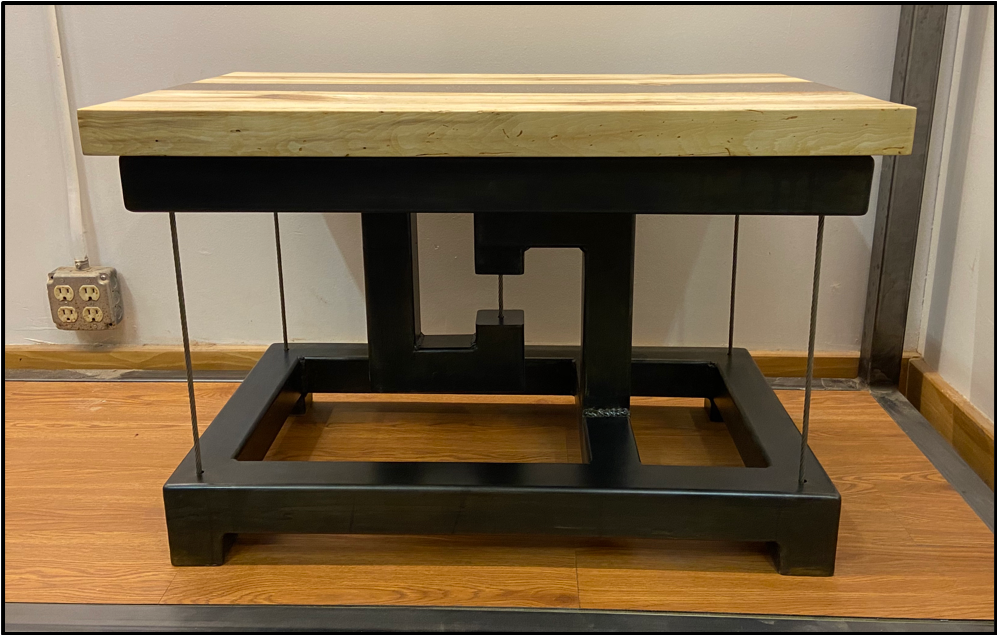
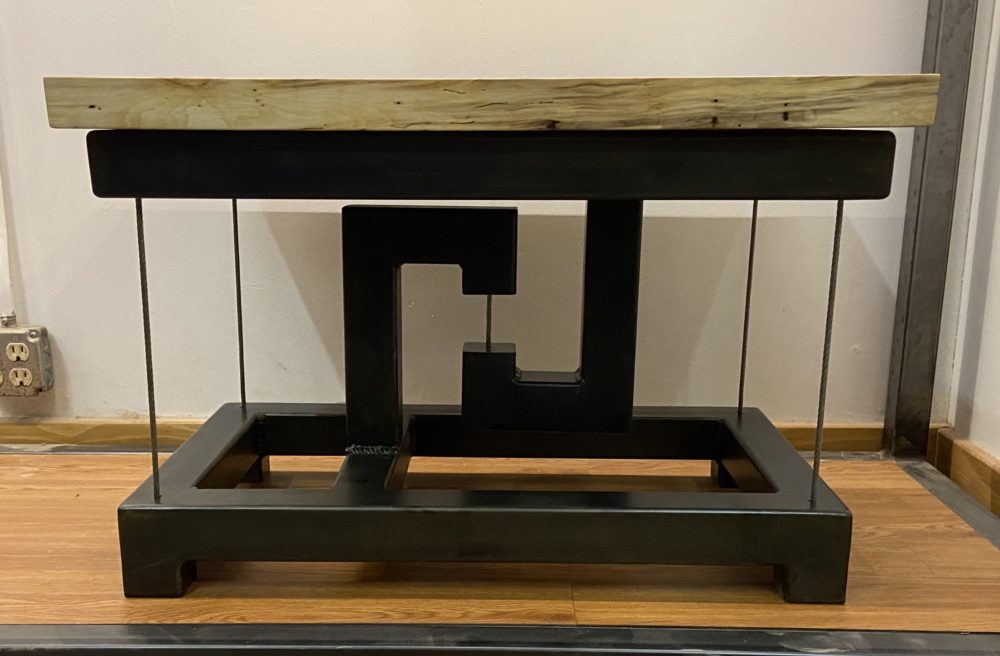
This is the design that I came up with for my floating table. The aesthetics that I was aiming to demonstrate are industrial and modern. This was accomplished by using tube steel / steel cables and sticking to a very straight-forward form. Besides these two, the overall aesthetic revolves around the floating illusion created by the tension based stability of the structure. This weird ‘floating’ aesthetic is meant to make the viewer think for an extra minute about what exactly they are looking at.
The specifications that I set for myself were mostly designed to ensure that all of my dimensions were achieved with precision and that the structure remained square during the construction and tensioning processes. I am very happy with the results for the most part. The final height of the table is off by a bit because the cables stretched more than I expected, but the height is still within the normal height range for coffee tables. The rest of my dimensions seem to have come out within tolerance. I am very pleased with the overall stability of the table after getting all of the cables properly tensioned. There is still enough lateral movement to give the table a floating effect, but the table top is extremely rigid in the the vertical direction, always staying parallel to the ground. This was tested by sitting on the top and moving the table around by grabbing the top. It was actually a pretty interesting feeling to sit on the table top, and it has made me think about using this type of structure for a bench design in the future.
Construction Process
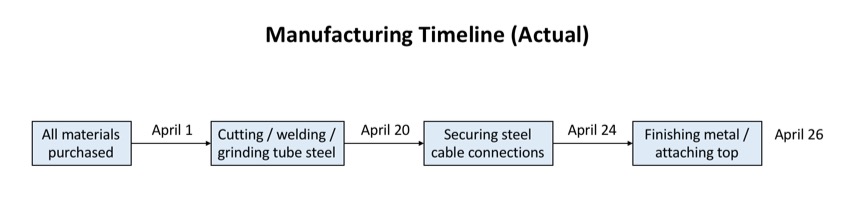
By mid to late March, I had a finalized design for the table base and had ordered all of the materials that I would need. Here is the basic manufacturing schedule which I ended up following after I received all of my materials :
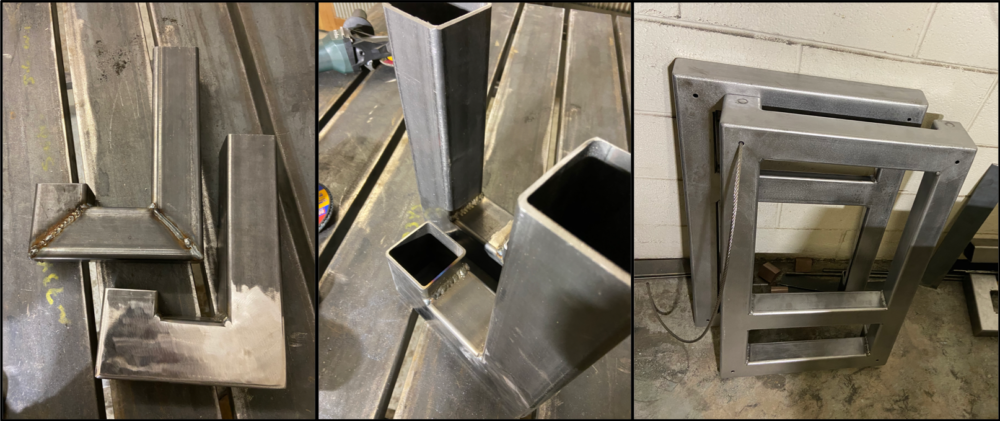
The first step in the manufacturing process was to build the main tube steel structures. I began by using my CAD model to cut out all of the individual tube steel segments needed for the design. This was done using a metal bandsaw (I have access to a metal shop where I work). Then I used a MIG machine to weld up all of the joints before grinding the beads flat with an angle grinder. I decided to leave the welds on any inside corners of the structures, since they are more difficult to get to, and I thought they added nicely to the industrial aesthetic I was going for. Since this was only my second time using a MIG welder, this process ended up taking a very long time and many of my welds came out a bit wonky. However, I learned a lot during the process and I think I could do this stuff a lot more efficiently in the future. Here are some examples of this process :
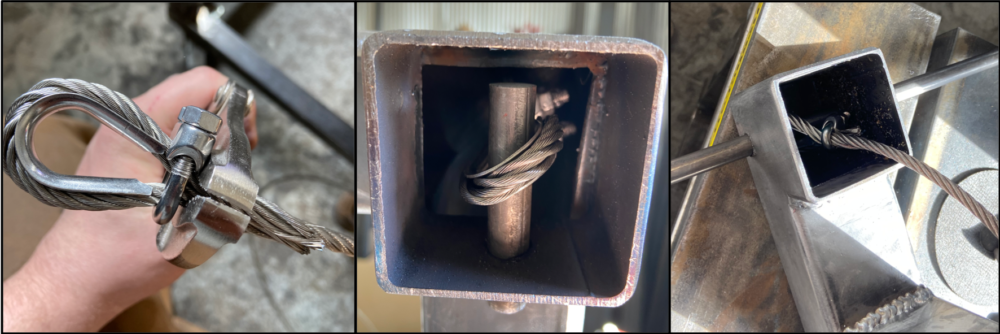
All of the cable connections, except for those which were attached directly to the turnbuckle tensioners, were secured using 1/2″ steel pins, cut out from 1/2″ rod stock. You can see this simple construction in the pictures below. All I had to do to make a connection, was drill all the way through the tube steel, and then insert a steel rod segment through the holes and through the loop in my cable. Finally, I could just weld the rod in place on both sides and grind the surface smooth to create a strong connection which is completely concealed.
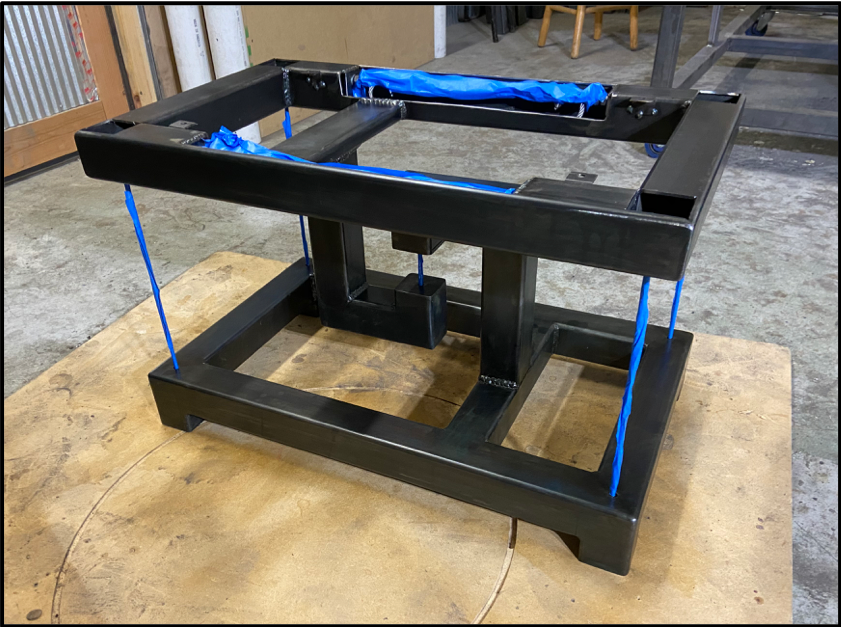
Assembling the structure was a bit tricky. I made sure that every thing was clamped square and added tack welds to make sure everything was aligned properly before fully welding the central arms in place.

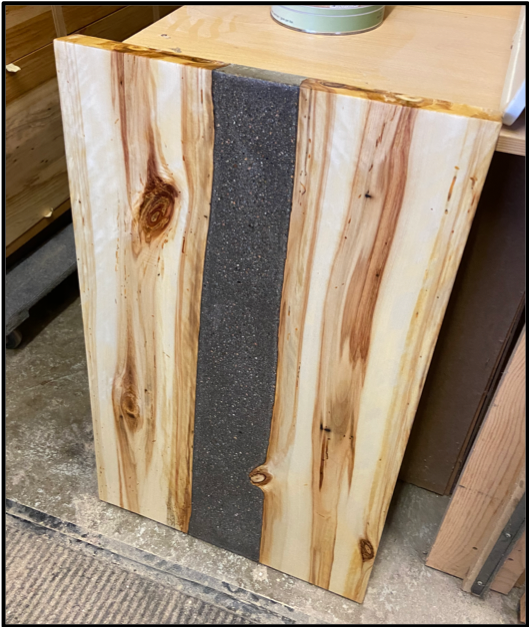
Once the structure was assembled and tensioned, I used a chemical blueing agent to turn the steel black before sealing the surface with clear coat. Since I anticipated being tight on time, I built the base to fit a top that I made last year which has been lying around. This top was a sort of experiment that I did with two live edge boards of aspen and concrete. I filled the concrete in between the two live edge faces, similar to what a lot of people like to do with resin in ‘river tables’. I will most likely end up swapping the top out later for a larger walnut top, but I do think the polished concrete ties in nicely with the industrial aesthetic.
Here is the final product after attaching the top to the finished base :
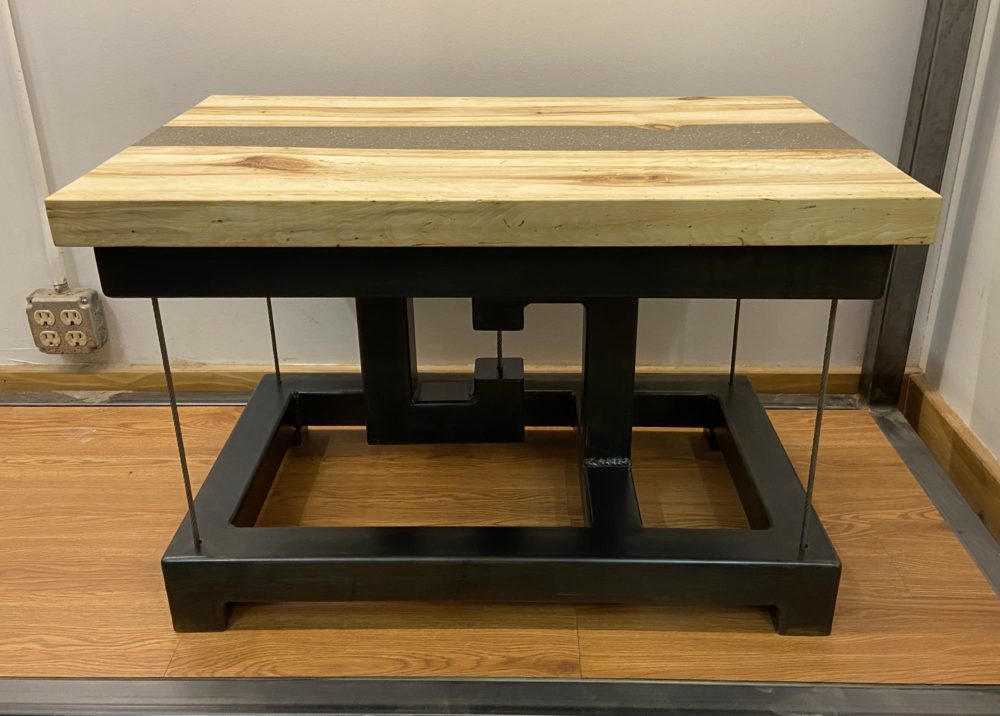
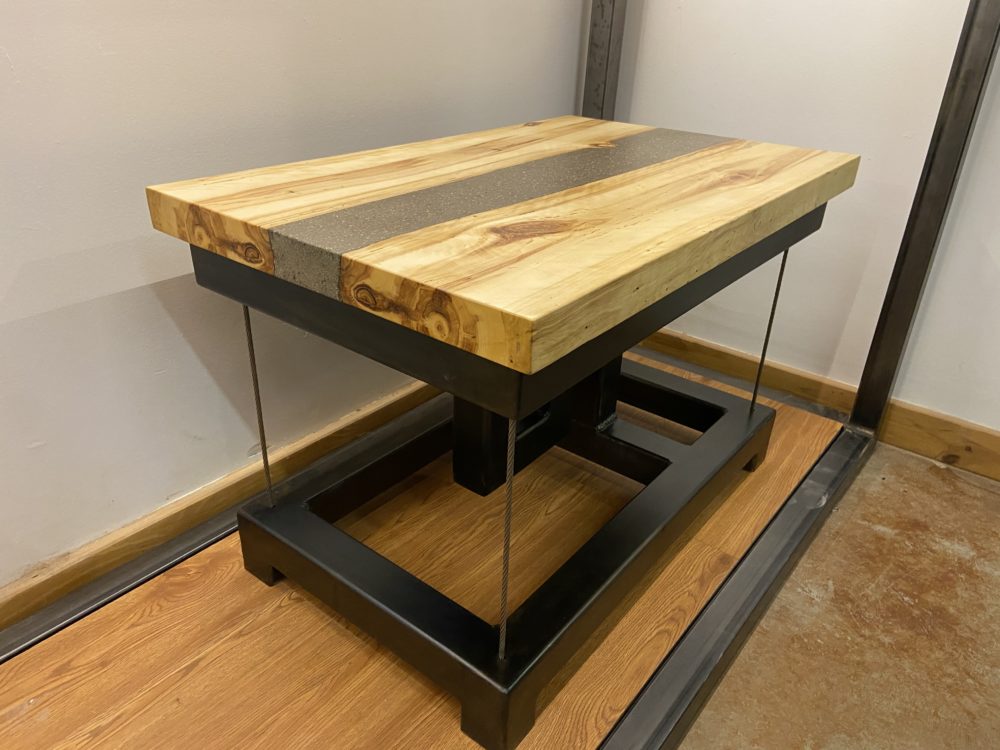

Overall I am very happy with the results. I think the base fits the modern industrial aesthetic that I set out to achieve, and the floating effect is fun yet quite stable at the same time. I would like to continue exploring this type of floating design concept in the future, but I think this style is better suited for benches and chairs as opposed to large scale tables where you will be placing food and drinks which could potentially spill if vibrations are mismanaged. I am pleased with the results of this project and excited to see where exploration of these concepts leads me next.
Link to video presentation : https://www.youtube.com/watch?v=98j_BuJ0Q1g
4 Comments. Leave new
[…] Resources:1. https://www.aesdes.org/2021/04/29/floating-coffee-table-final-report/ […]
Erik,
This is a very challenging project. From the planning/design phase to the fabrication, the scope of this project is quite massive, and it’s impressive how well thought out the project was. I think the final product turned out amazing! You also did a great job of documenting each part of your fabrication process. You’re right, this fits perfectly for your industrial aesthetic that you were originally going for. I know you said a downside of most of the designs that are out there for these tables is that they are wobbly. I’m curious how your final product compares to these tables and how much weight could it possibly handle? I agree with Alex that this project looks very professional and extremely well done.
This is a very well done project! It looks professionally done. I could see this table being a thing in the idea forge haha. The aesthetic was very well captured and this project was very thought out. I am curious, did you treat the wood for a polished surface finish? I love the concrete finish in between the two though! Very creative to use that from a previous experiment.
I think your project looks amazing. I think it looks extremely professional and also fits very well into the industrial aesthetic. One question I have is how stable did it turn out. You mentioned you wanted to have high tension and I was curious about the final result. Overall great job.