
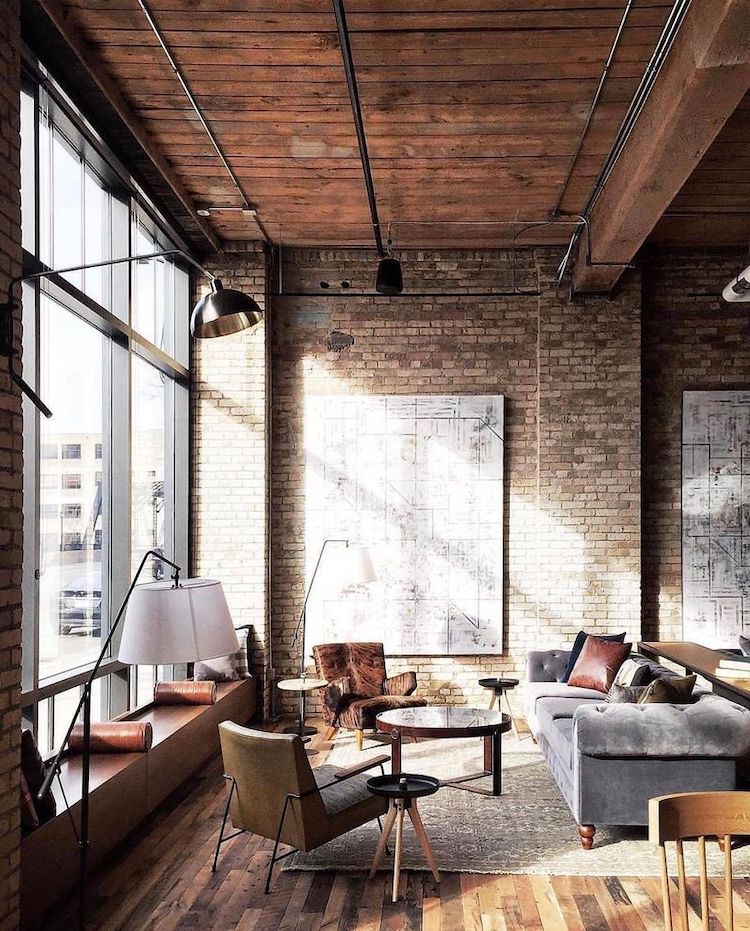
My inspiration for this project was the aesthetic of repurposed Industrial living spaces. I drew largely from a Pinterest Board that I had started recently. The board centers around the industrial aesthetic. When contemplating materials for my project I cross-referenced a lot of the pins and looked for common aspects. Those common aspects are exposed metal (often black), dark and muted wood tones, and generally exposed utilities, alongside warm lighting tones. Plants and greenery are also used frequently to offset the mechanical nature of these aspects.
When I was searching for an idea to start this project, I googled “upcycling ideas” and scrolled through the images. I noticed that many of them included plants and since I had wanted a plant in my room for some time I figured now was a great opportunity to implement a personal desire into the project. I eventually came upon an image that had some aspects of the industrial aesthetic in it and I went from there.

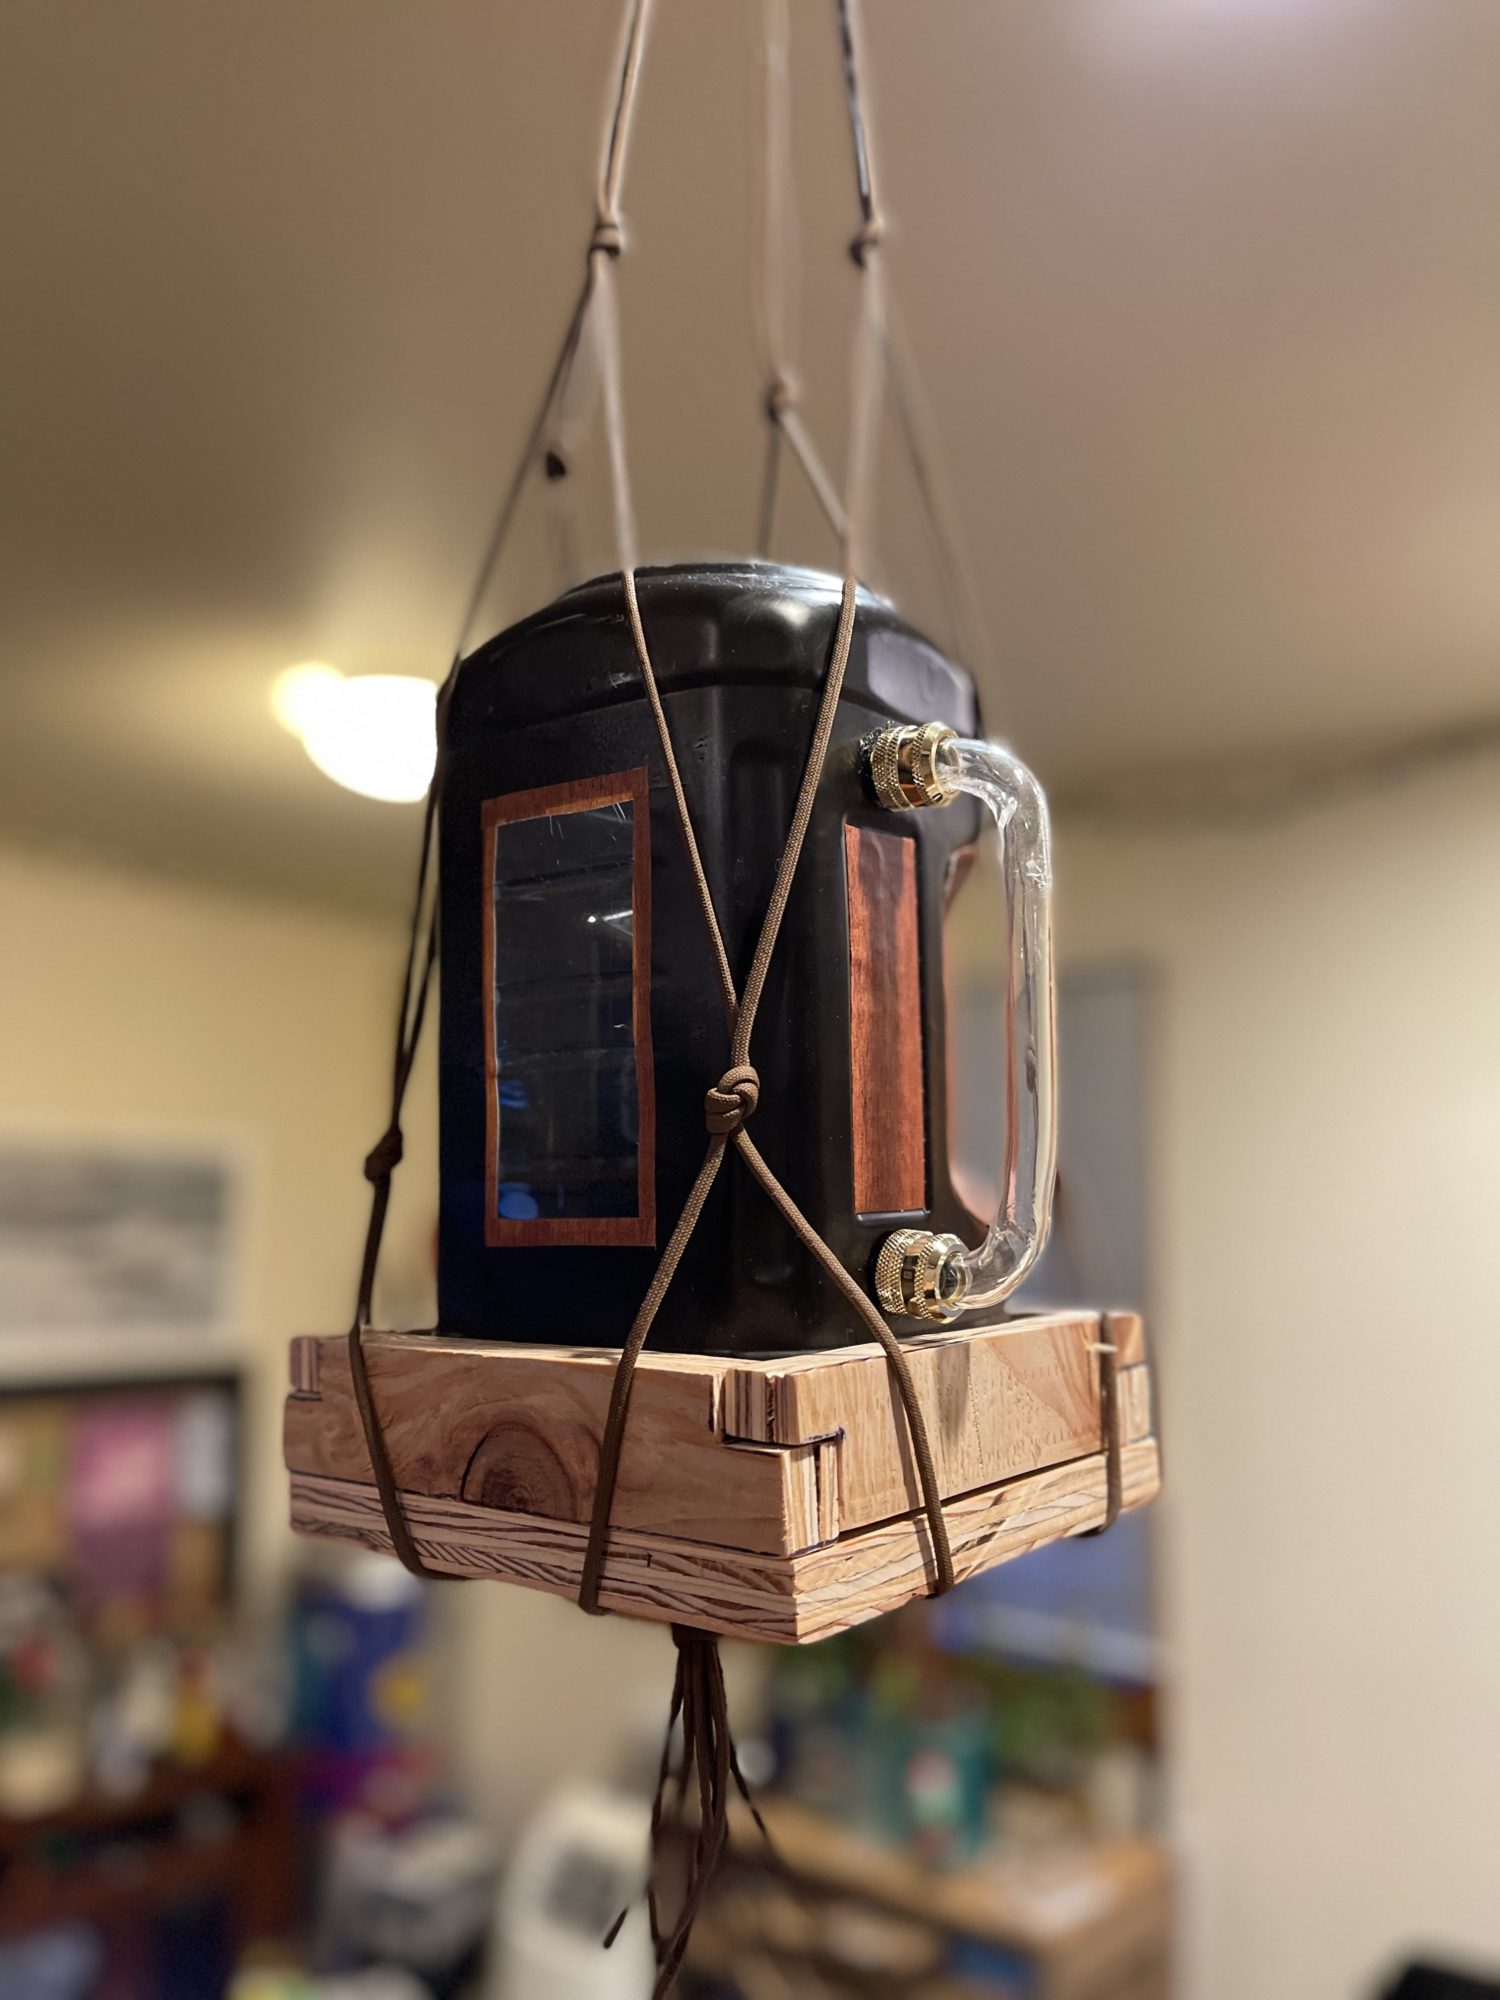
My initial vision for the project was mostly just to incorporate design elements from the aesthetic into things that I scrounged from my own home. The project mainly consists of plywood, an empty (and otherwise trash) food container, tubing from a roommate’s old project that was useless to him now, and paracord that I already had far too much of. This allowed me to keep the price at a minimum for an aesthetic that usually takes a considerable amount of money to experience.
When I was brainstorming the project I considered reusing a scrap piece of concrete that I would partially hollow for the base. When I realized that I didn’t have any kind of stone working tools to shape it, I decided wood would be a more practical option. I also considered using some kind of wire to create a “railing” along the top of the container reminiscent of a metal tubing railing found in many industrial applications. I decided that this was excessively complicated for a planter though.
For the functional aspect of the project, I incorporated a tube into the side of the planter. The hope of this addition is that with the rather intense afternoon sun that my bedroom receives combined with the black paint on the main planter body, that condensation will be visible in the tube and will help inform me of when the plant needs water by observing the amount of moisture in the tube. I also masked off a section of the main body in an attempt to provide a window into the soil and the roots, which I think will help balance the industrial nature of most of the lower 2/3 of the project.
I also inlaid several pieces of wood texture “repair tape” to add more wood grain into the rest of the project without having to invest in learning advanced woodworking techniques to complete the project. The tape also aided in adding depth to the project by utlizing the shape of the original container and contrasting the satin black paint.
Fabrication
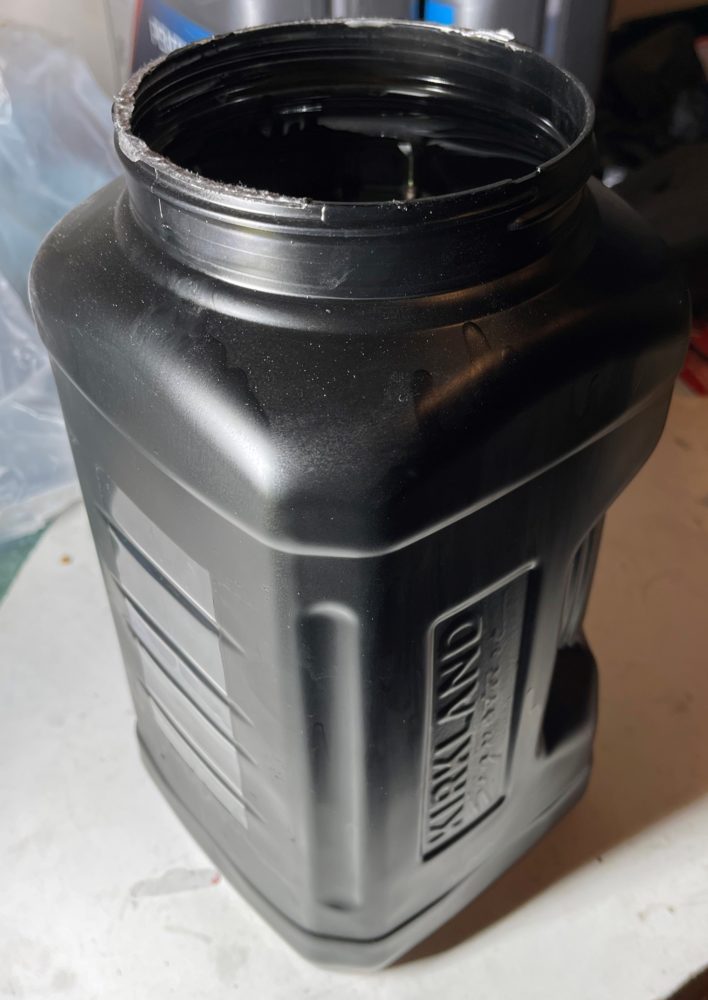 The fabrication process for this project included many things that I had not done before, or had not done much of within recent years. I started with the empty container of peanut butter pretzels that I had just finished eating. I first removed the labels carefully with a knife, although I realized later that a heat gun would have been helpful with this. I then masked off the window and painted it with paint I already had in my garage.
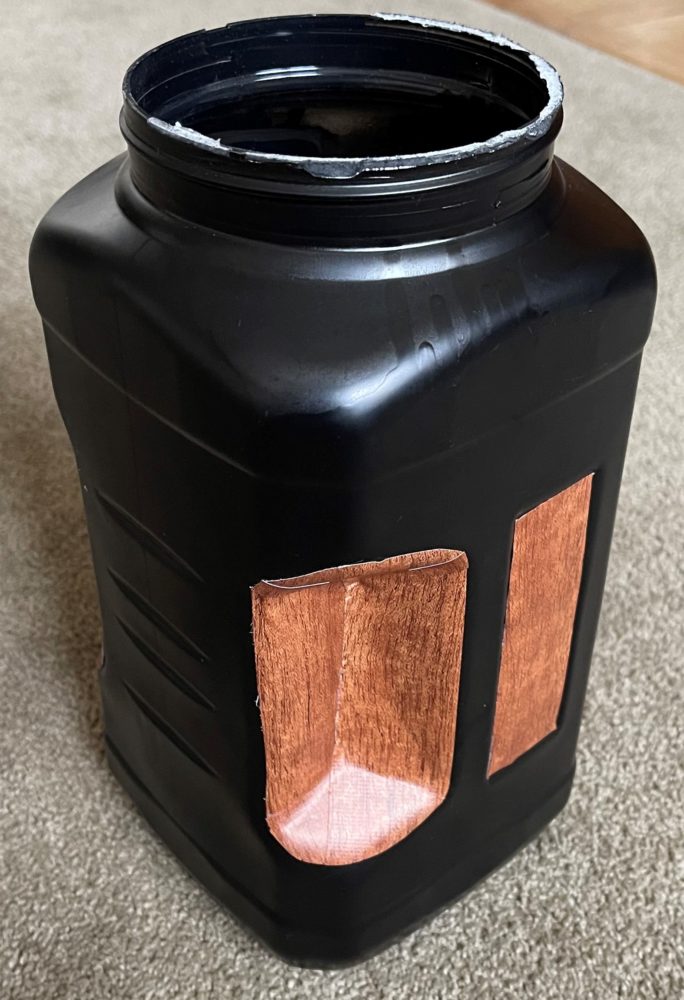 I then added the wood tape by placing large strips and trimming them with an exacto knife. I used large pieces, to begin with and then added smaller sections where necessary to complete the shape and keep the grain moving in a consistent direction.
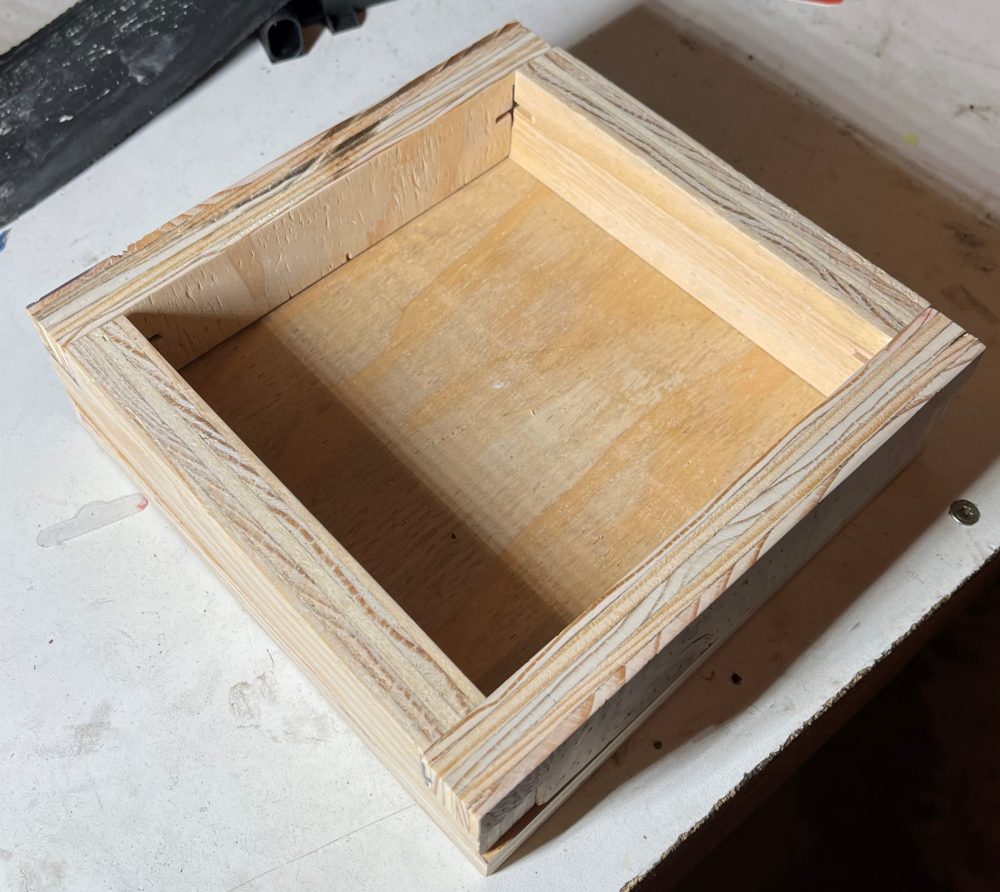
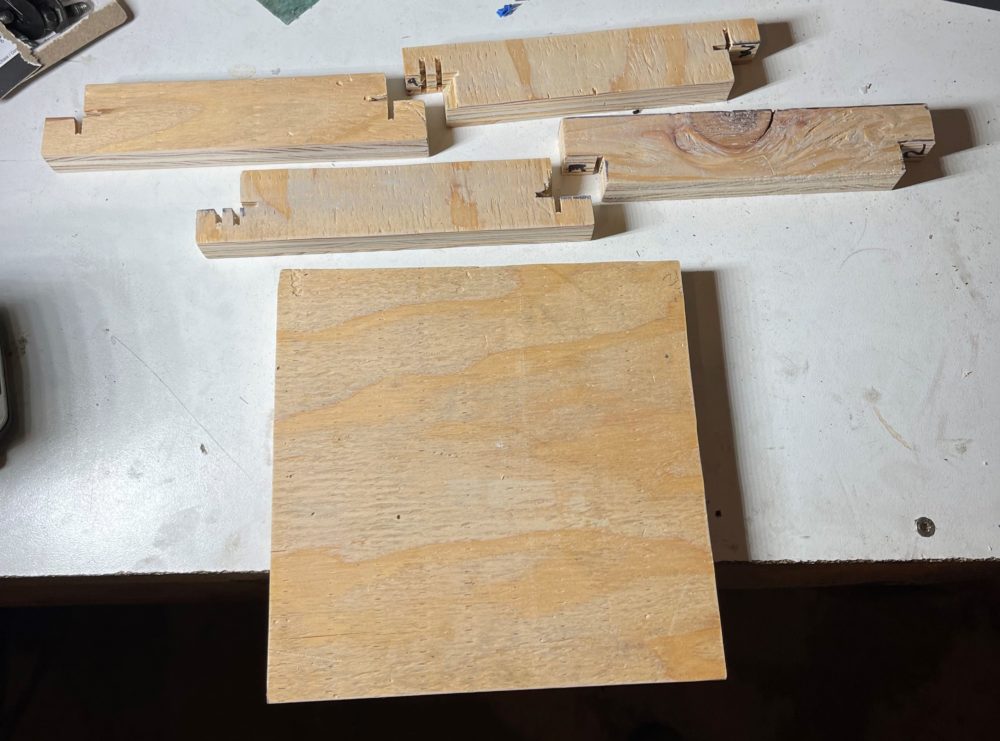
I cut the base sections out of a sheet of 1″ plywood that my roommate had also gotten for an unrelated project and no longer had a use for. I drew some rudimentary dimensions in a notebook and cut the pieces to size. I secured them together with a screw in each corner through the base. ![]()
I found a Youtube tutorial that taught me how to create the “harness” to hang the planter. It was more simple than I had thought from seeing pictures of the harnesses before, but it still took quite a bit of effort to determine the lengths of sections that fit the application and the look I was going for.
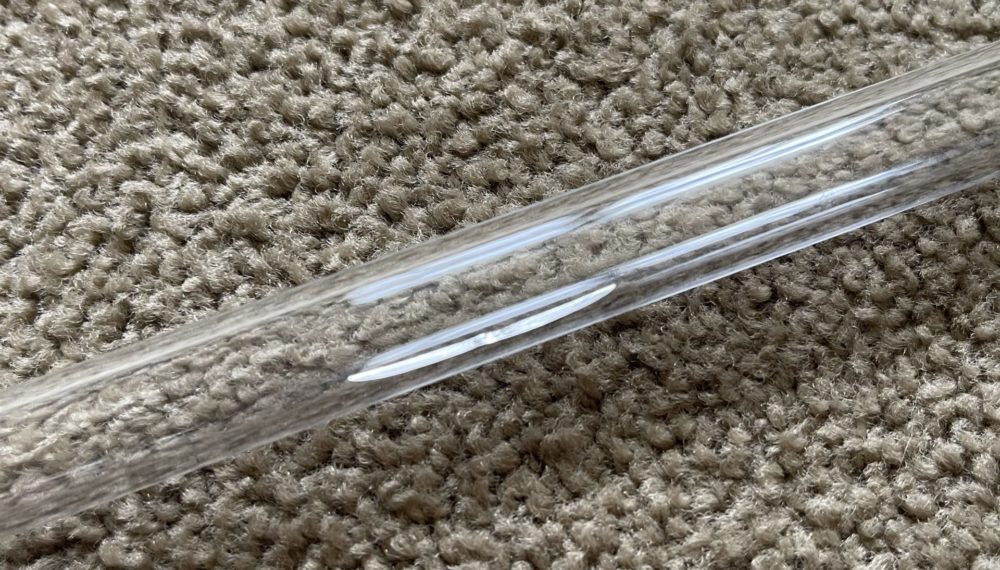
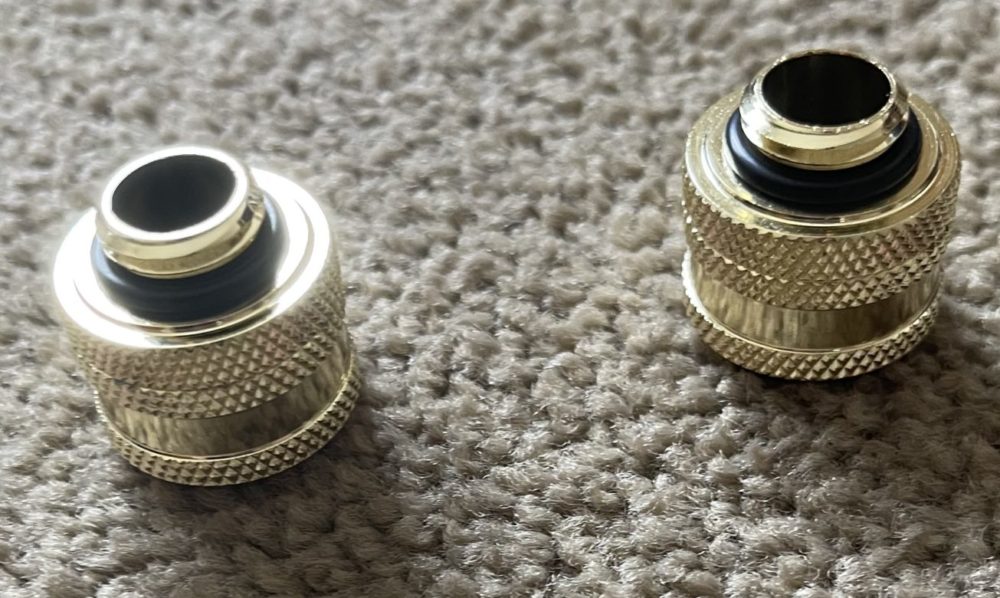
By far the most difficult part of the project was bending the tube. The tube is made from acrylic and was originally intended for use in a water-cooling setup for a PC. The section of tube that I started with had a crack in it though, and was therefore too short for, again, for my roommate to use. The acrylic needs to be heated to be bent, and a heat gun is the tool of choice. The trickiest part though is evenly heating the tube and then carefully bending it not to collapse it or deform it unintentionally. I got it after a few hours and fitted the pressure fitting to the tube and the planter with silicone through a hole I had drilled in the side.
Future
The first thing I am going to do with this project is redoing the tubing. It was the first time I had worked with acrylic and under close inspection, it was a butchered job. It is very inconsistent and very uneven; I would even consider it janky. I have acquired another piece of tubing and I am going to attempt again with a longer piece to start with and hope that that solves the issues I ran into initially with the acrylic fighting me and a failed seal on the top fitting from a bend too close to the end of the tube section.
I was on the fence about staining the base until now. I asked my pod what they thought about the bare wood and it seemed like a unanimous consensus that it would look better stained, and I’m inclined to agree.
I will also likely create a standoff in the base and put a few holes in the base of the box to allow for better drainage for the plant.
Once these issues are resolved I will finally put the plant in the container and create an update post for the “finished” project.
Link to video presentation: here
2 Comments. Leave new
Hi Derek
I really liked your final product of the industrial hanging planter, it also has a retro look, and it is apparent the amount of effort you put into this project.
It’s impressive that you tried out different fabrication techniques for this project and learned new skills, such as painting, masking, and using wood texture “repair tape”. It’s always a challenge to learn a new skill, but it’s worth it when you see the final result.
One concern that I had was, using the black paint, I hope the planter does not absorb too much heat as some plants can be very delicate and react to the excess warmth.
But overall, a great final product!
Hi Derek, you did a great job with matching the industrial aesthetic with your project. I agree with your pod that the base wood would loom better stained, especially since the wood type has a darker tone. You may also benefit from a glossier black paint, which would more closely match the blacks I see in the reference photo you provided. The metal water-cooling fixtures really add to the industrial look and I think the metal together with the wood is very aesthetically pleasing. I hope in the future you update this post with whatever plant you choose to add to the planter.