
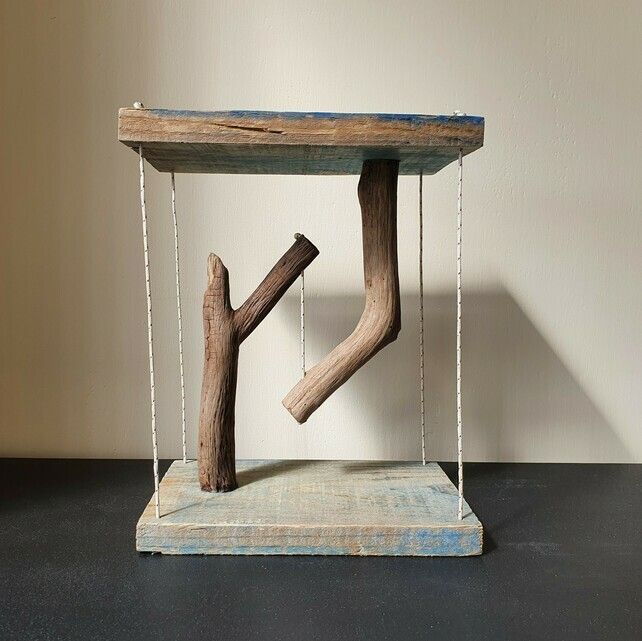
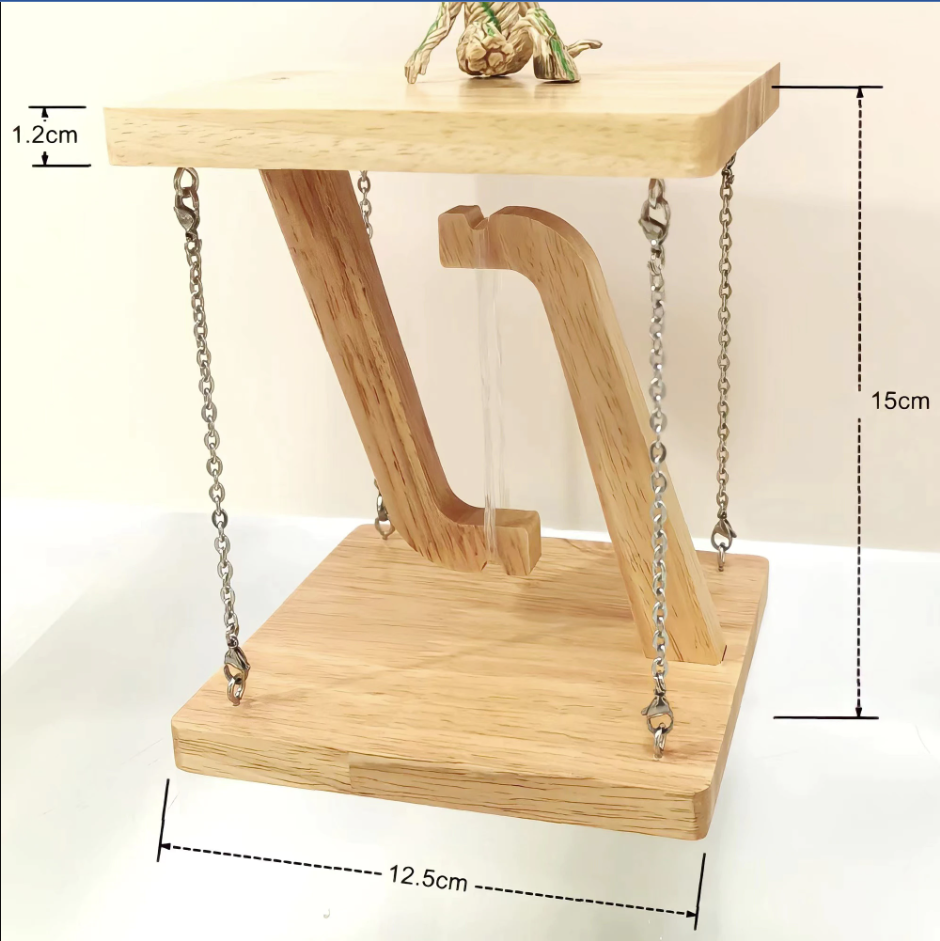
Background and Inspiration:
My inspiration for this project was the many tensegrity tables others have built. I have come across many of these like the ones below, many use wood but some metal for the surfaces, and rope, chains, or rubber bands can make up the tension strings to uphold the upper half of the table. I thought this would be a great idea for my project because these double as a practical piece of furniture to be able to hold things on both surfaces of the table, but also has a great aesthetic with the ‘floating’ or suspended upper half, prior to looking closely at it to be able to figure out how it is supported without rigid attachments.
Materials:
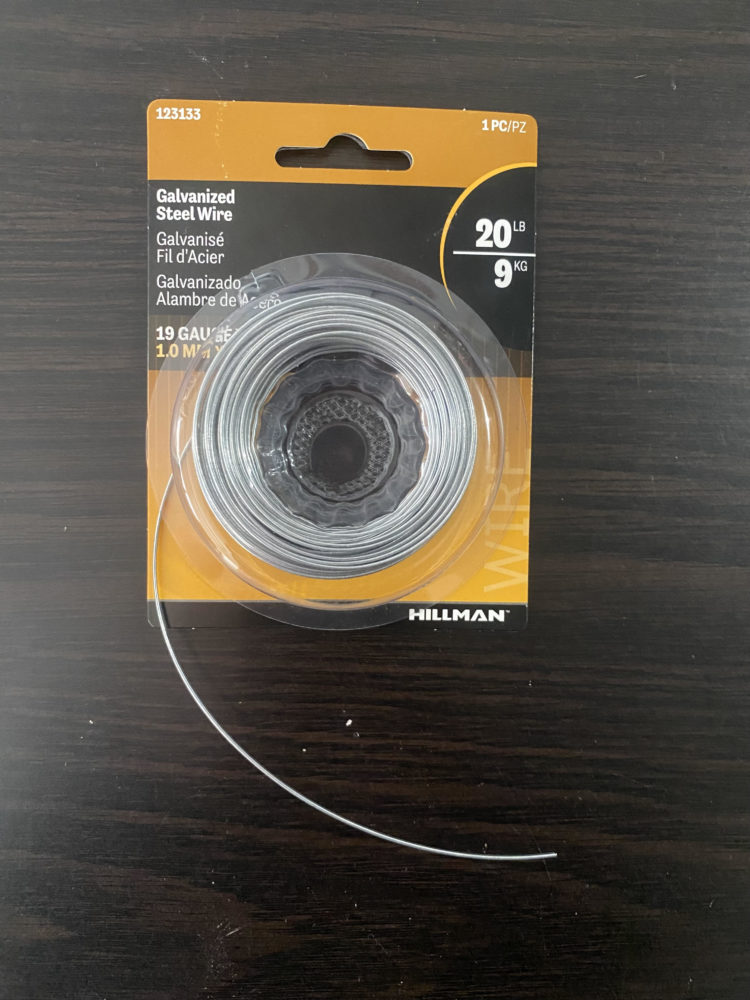
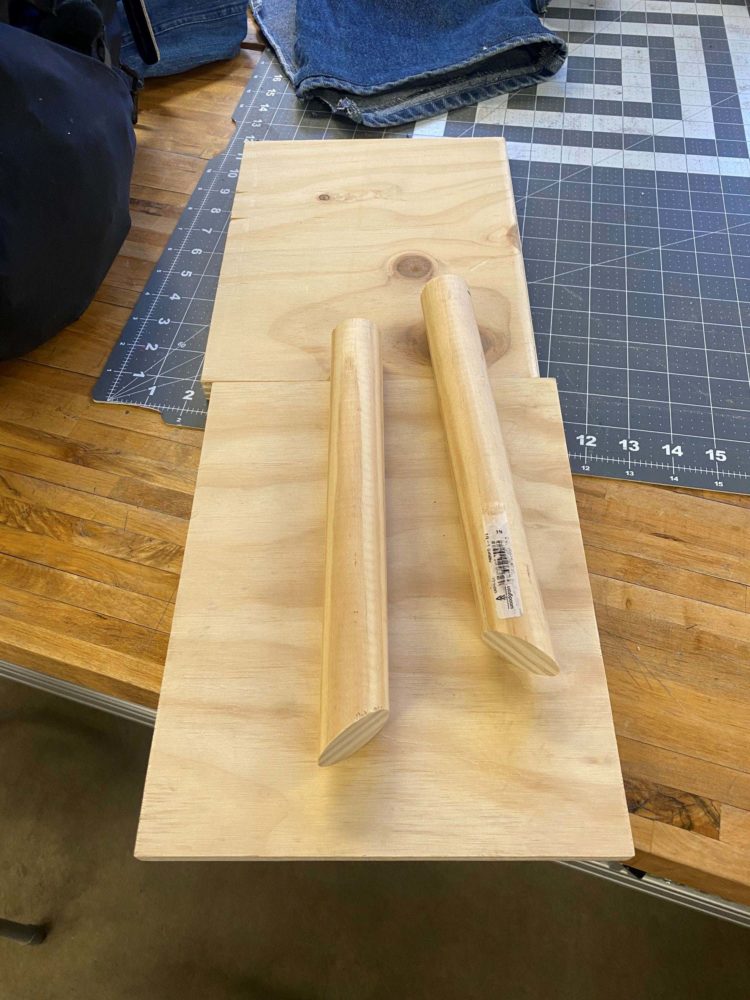
I was able to gather my materials for this project for $7 total. I went to the maker space in the Idea Forge on CU’s campus and was able to find and keep the top and bottom halves of the table, and a four-foot rod for the supports from a scrap wood pile. I was also able to get paracord and the same wire shown below except half the strength for free but chose to buy higher quality and strength wire and paracord from Mcguckins.
Fabrication:
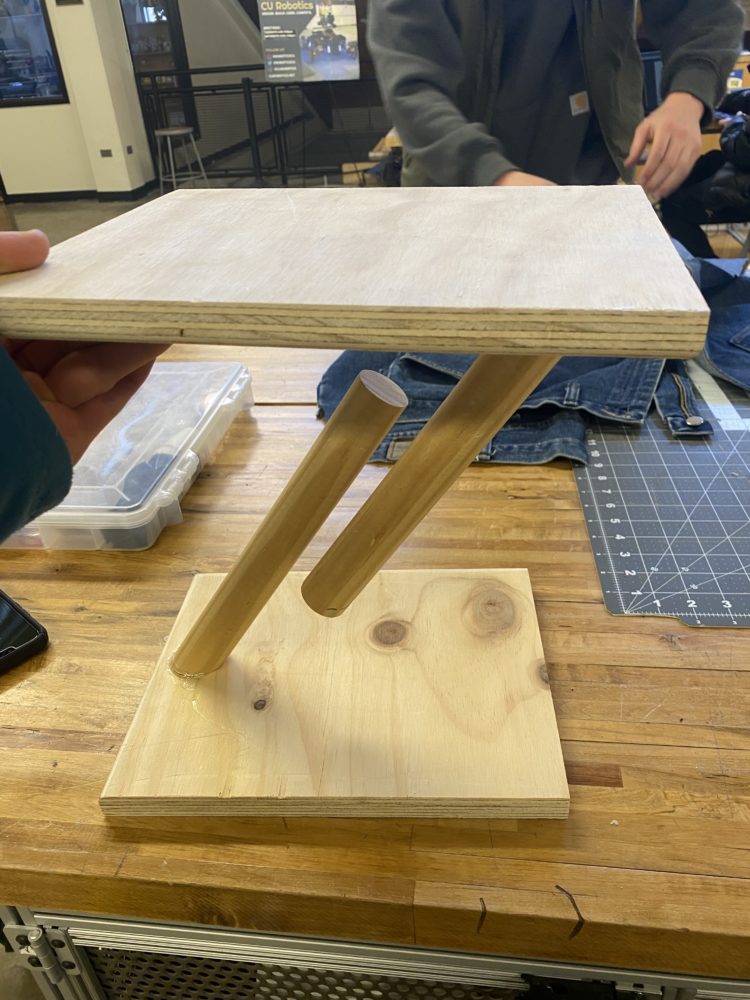
To begin the build on my table, I first had to get my dimensions and hole locations right for the overall height I wanted. I did this by using hot glue to temporarily attach the two rods to the top and bottom as shown in the photo below and moved them around until I found the placements I liked. I ended up taking an additional 2 inches off each rod and cut another angled cut to make the top and bottom of each rod parallel.
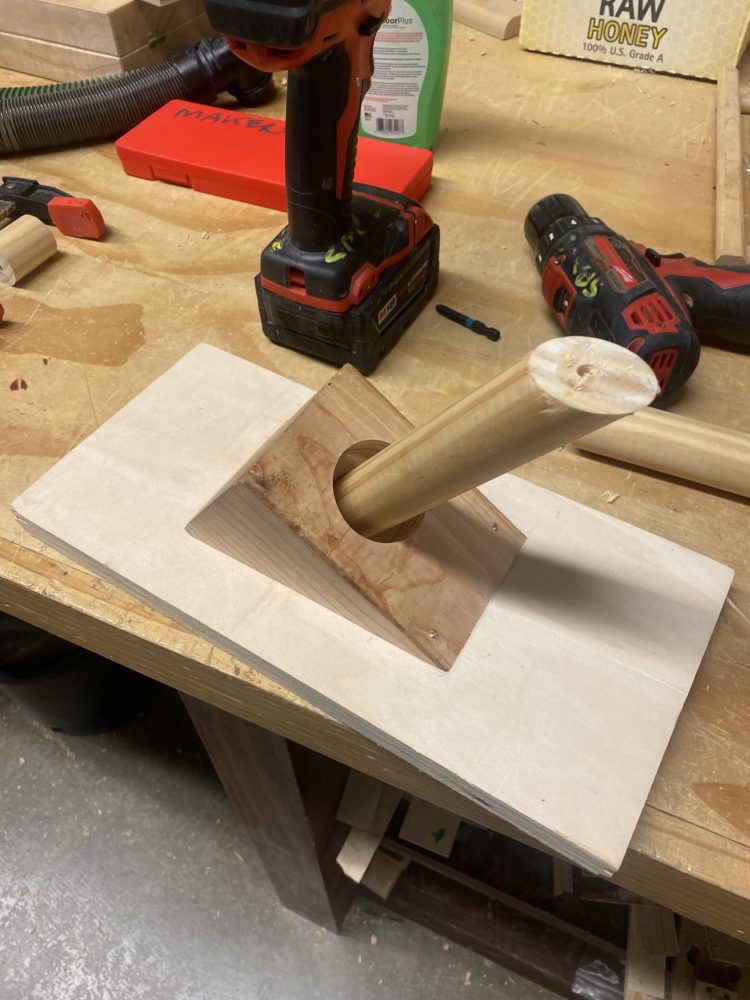
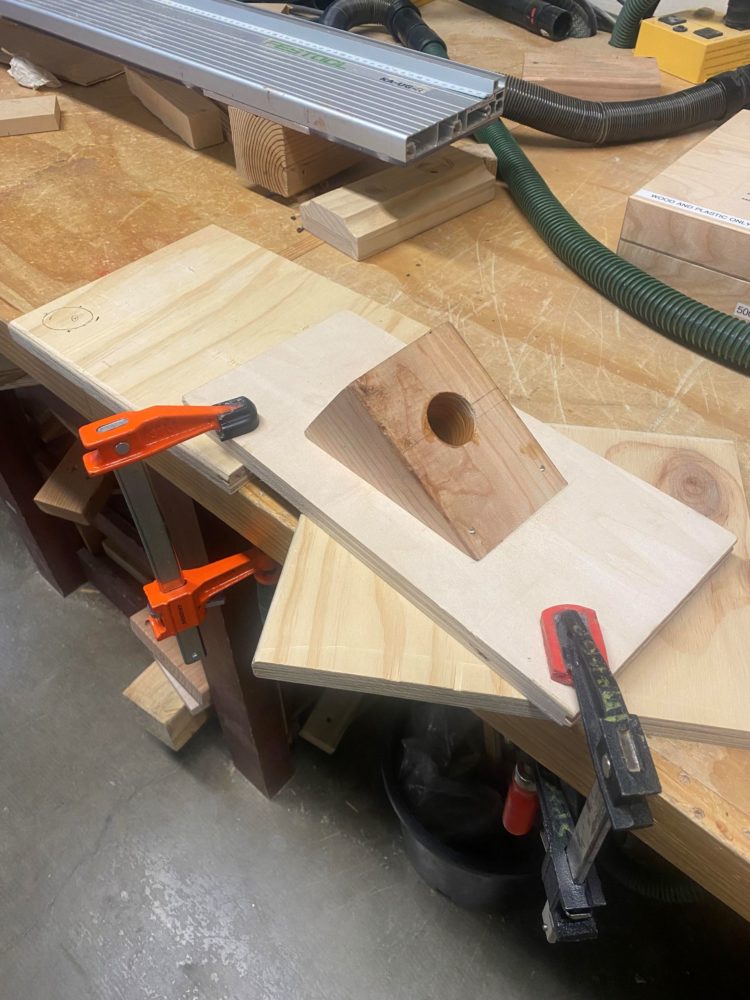
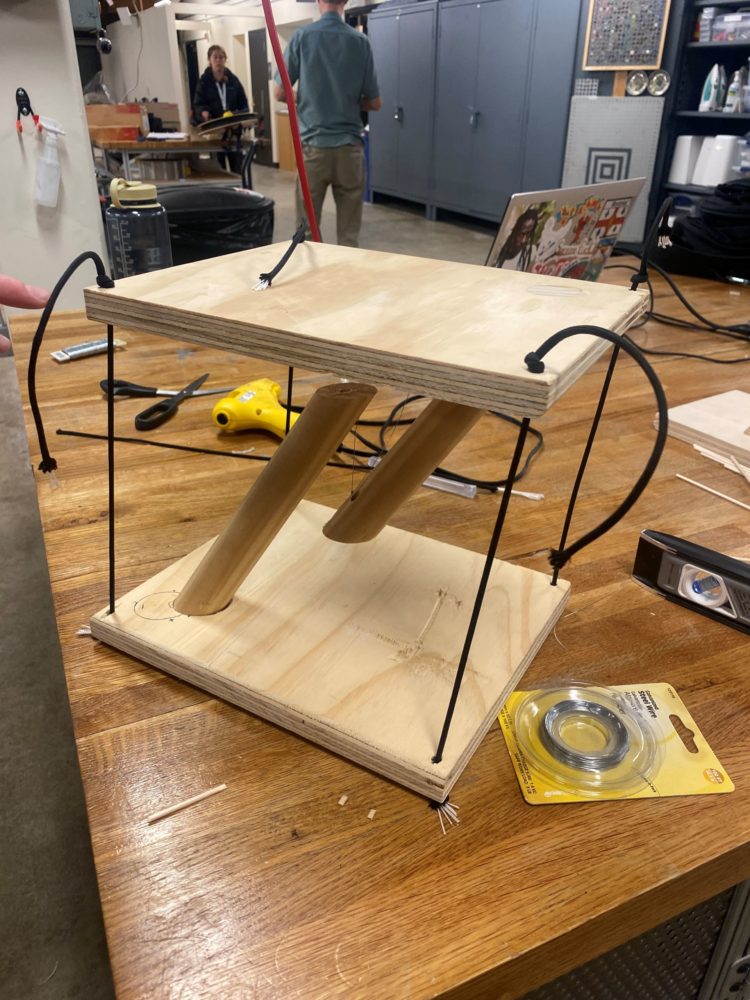
Now that I had my hole locations and rods cut to size, I needed to drill an angled hole in my top and bottom surfaces to fit the rods into them. I chose to make these holes rather than drill a wood screw through the table surface and into the rod below it to maximize the strength of the connection and table itself. This proved to be a good decision because the final table is very durable and strong, with the weakest points being the string/wire. The solution to this issue was the jig shown below. I made this with another two pieces of scrap wood and a few different drill bits. The photo below in the middle shows the jig in place clamped to the top surface of the table. By using the hole to guide my drill bit I was able to accurately drill a 35 degree hole in both surfaces to match the angle of the rods. The photo on the right shows the top view of the surface following the rod being wood glued into place.

First Build:
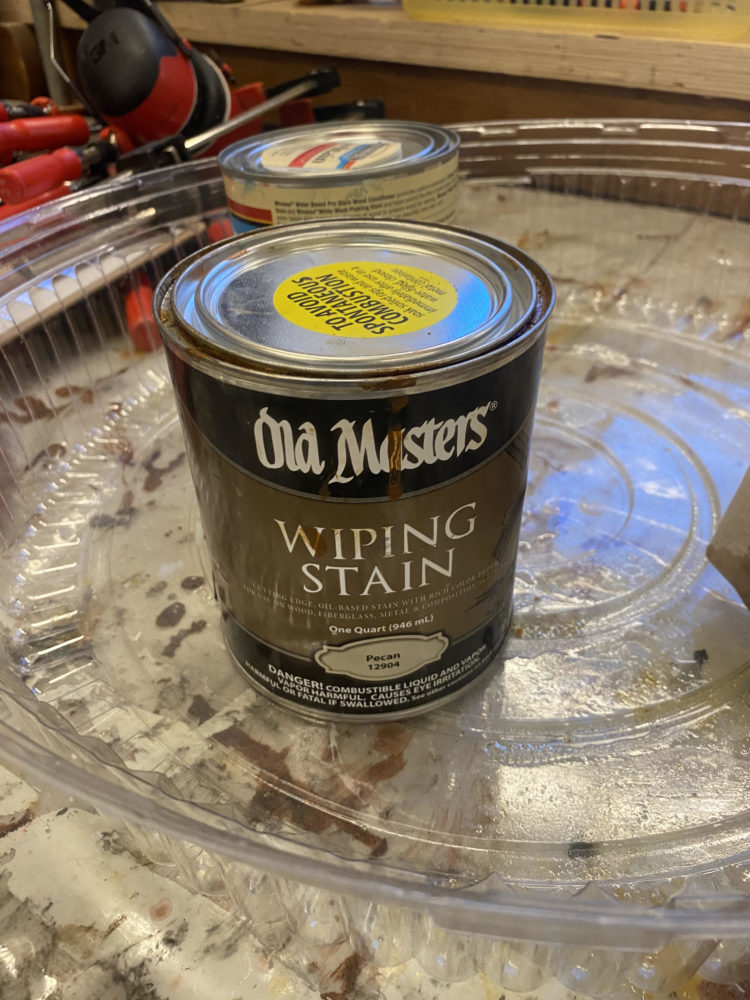
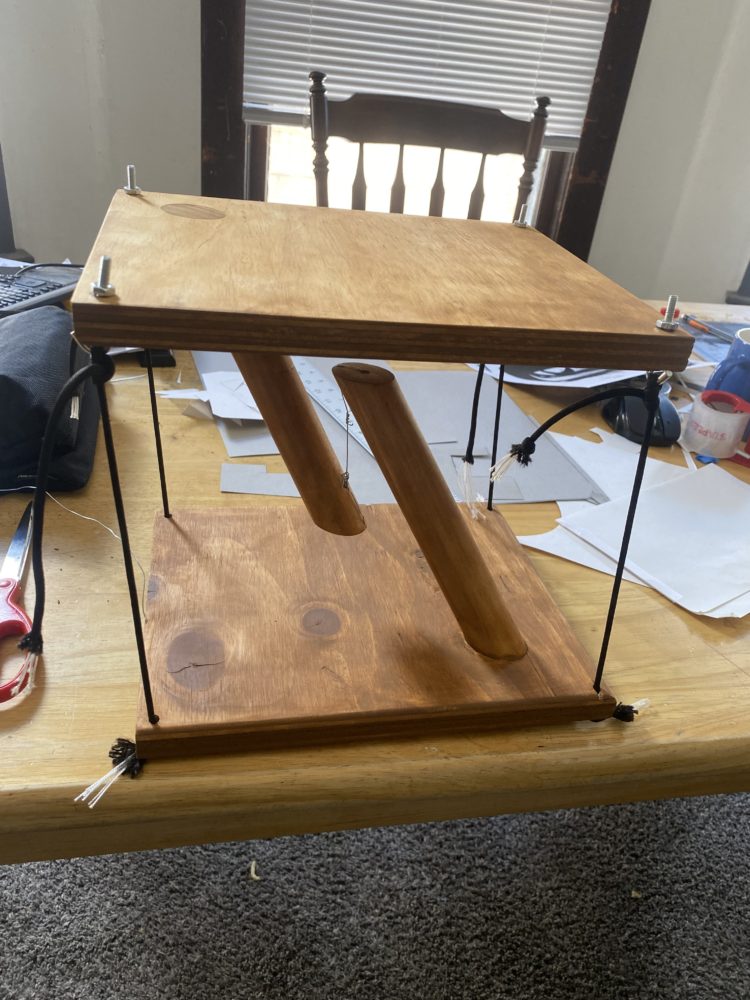
After I glued the rods into the surfaces, I sanded down the surfaces of the table to create a flush face without the rods peeking through. I then made a quick first build to see if my dimensions worked. The first build is shown below on the left. However, I also wanted to stain the wood to emphasize the wood grains for a more aesthetic look. I used the wood stain shown in the middle and the result is on the right. In addition, I also added eyebolts to add more tension into the strings. The higher the tension, the higher the stability.
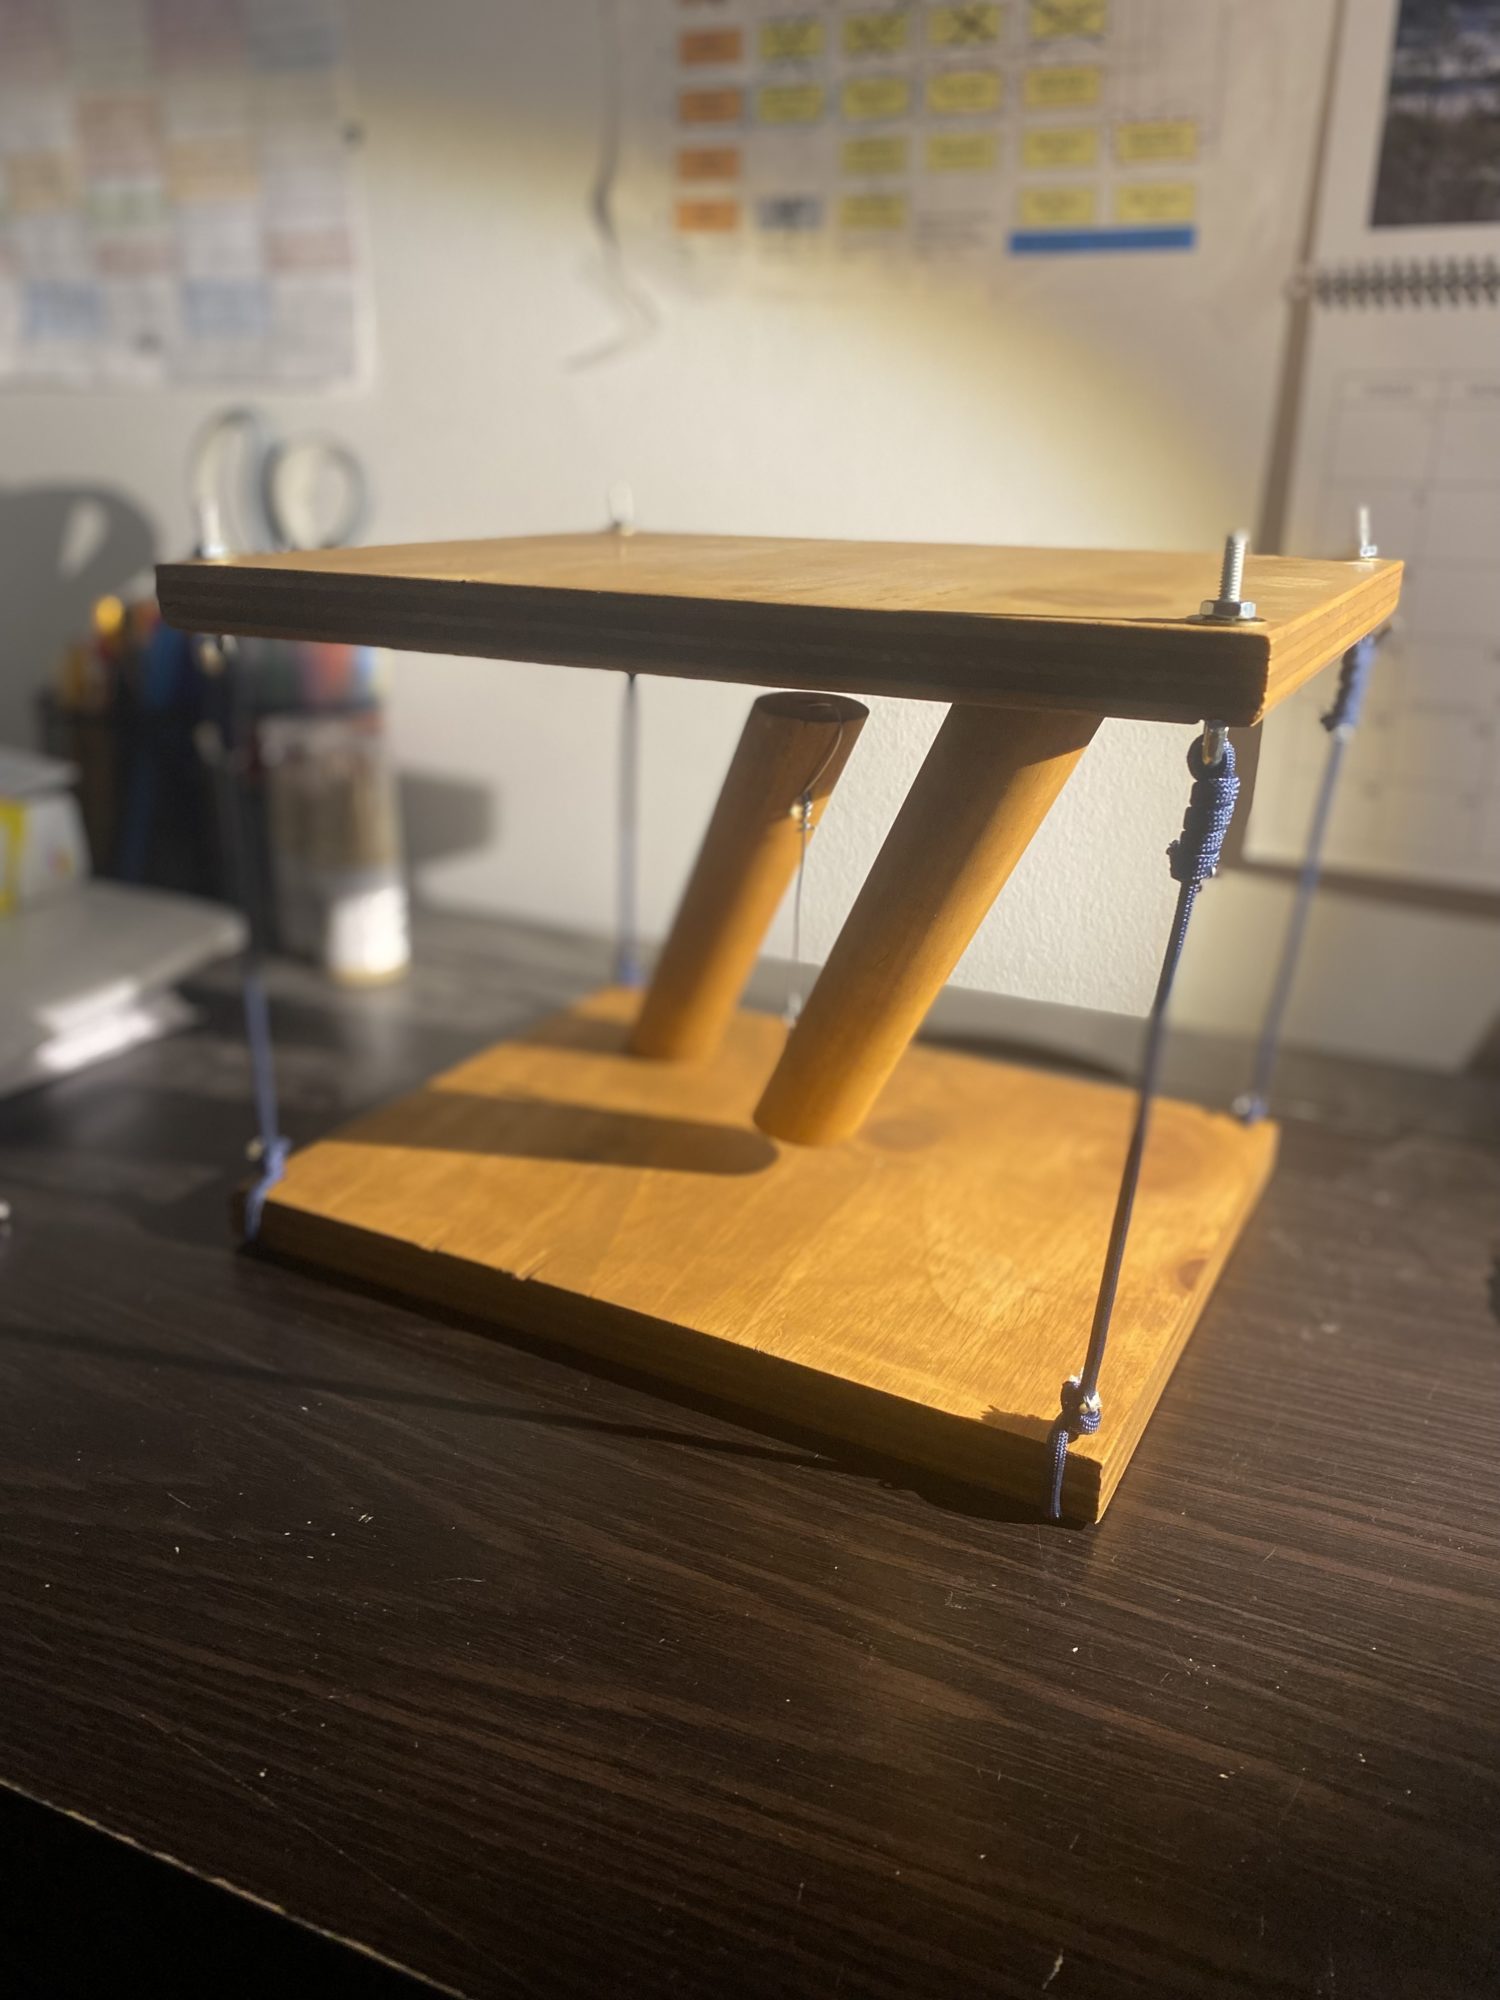
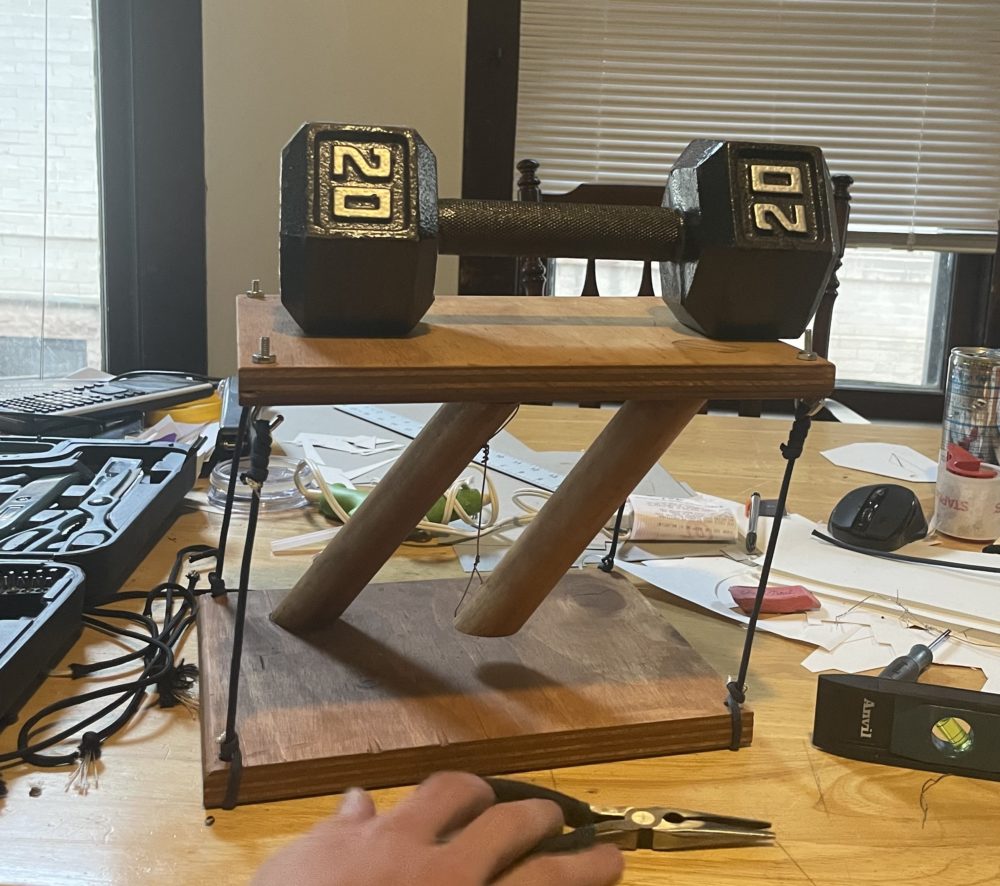
Final Build:
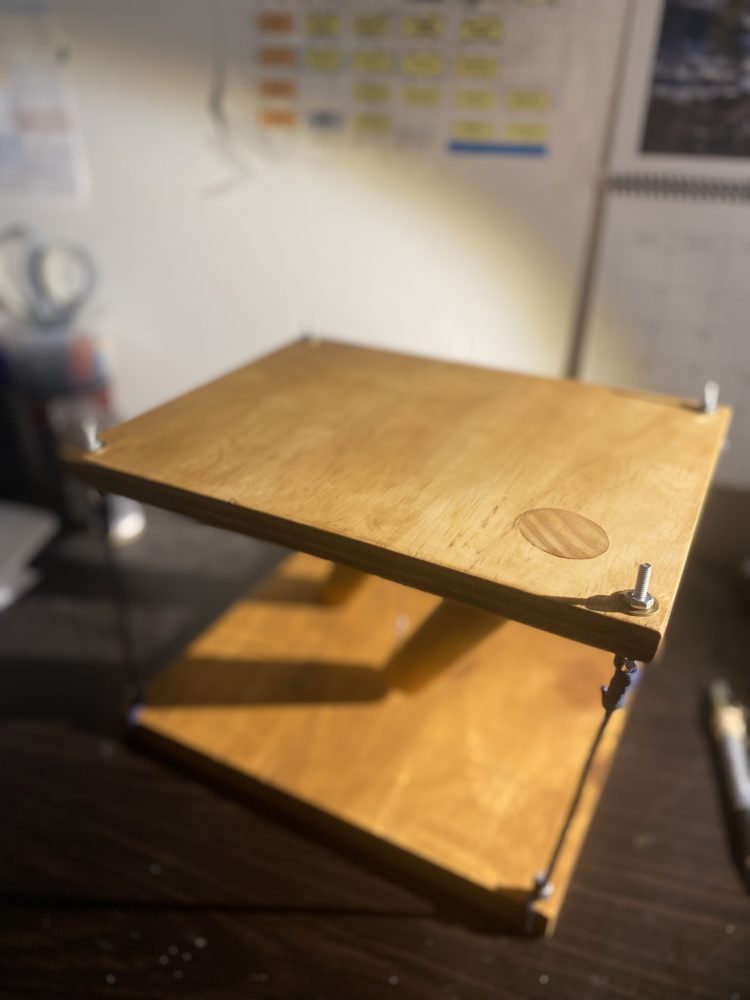
Although I was happy with how my first build came out. The top was very wobbly and didn’t feel very sturdy. To solve this issue, I went to Mcguckins and picked up some wire that was twice the strength of that used in the initial build (10 lbs) along with some more paracord. I used this wire for the center, and I also threaded it through the paracord for the outer strings. This gave the table much more strength and stability, as you can see on the bottom right, I tested the new 20lb wire with a 20lb weight and it held up fine. I think this will be plenty of strength to hold anything I need to in the future.

Final Presentation Video:
2 Comments. Leave new
Great work on this project, you really should be proud of the final result and balance you achieved. I learned about these tensegrity structures in an architecture course last semester and they really amazed me. Would you ever consider making this table full-size for a dining room? Seems like you encountered some challenges with the type of wire and paracord material due to differing tension and strength but you did a nice job finding ways to improve and iterate upon your initial design.
Hey Rishi, I appreciate the nice comments and do in fact want to make a larger table like a coffee table at some point. I am considering doing it for my final project in this class but would like to make it more dynamic than it inherently is. I’m thinking of an adjustable-height tensegrity table but am unsure if I’ll be biting off more than I can chew.