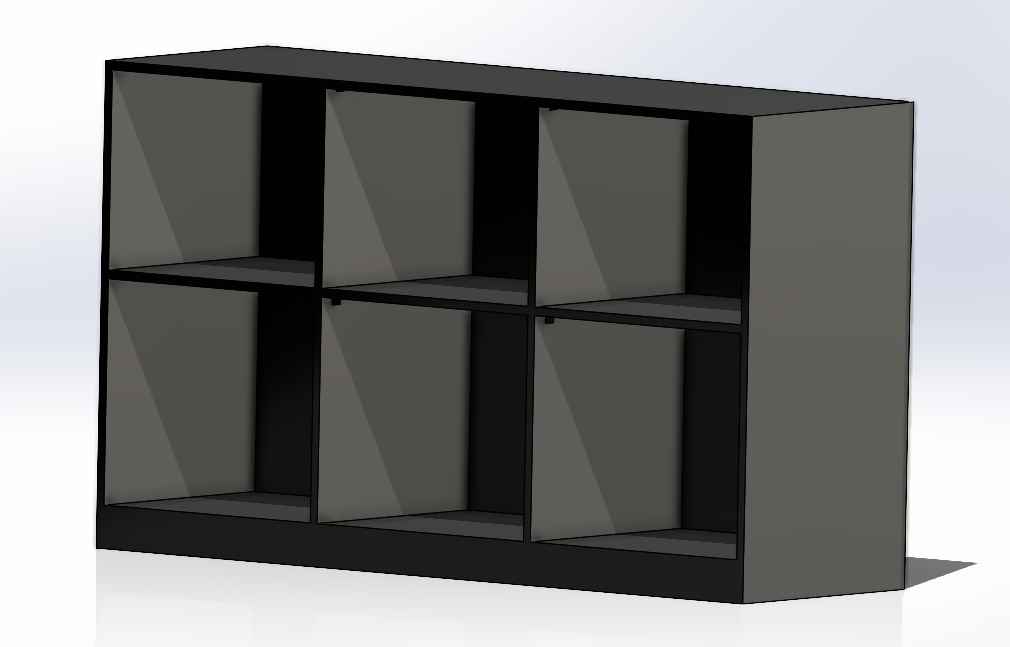
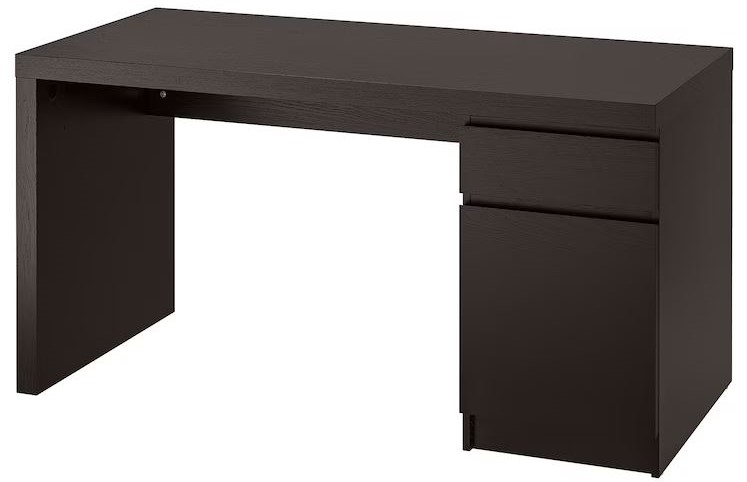
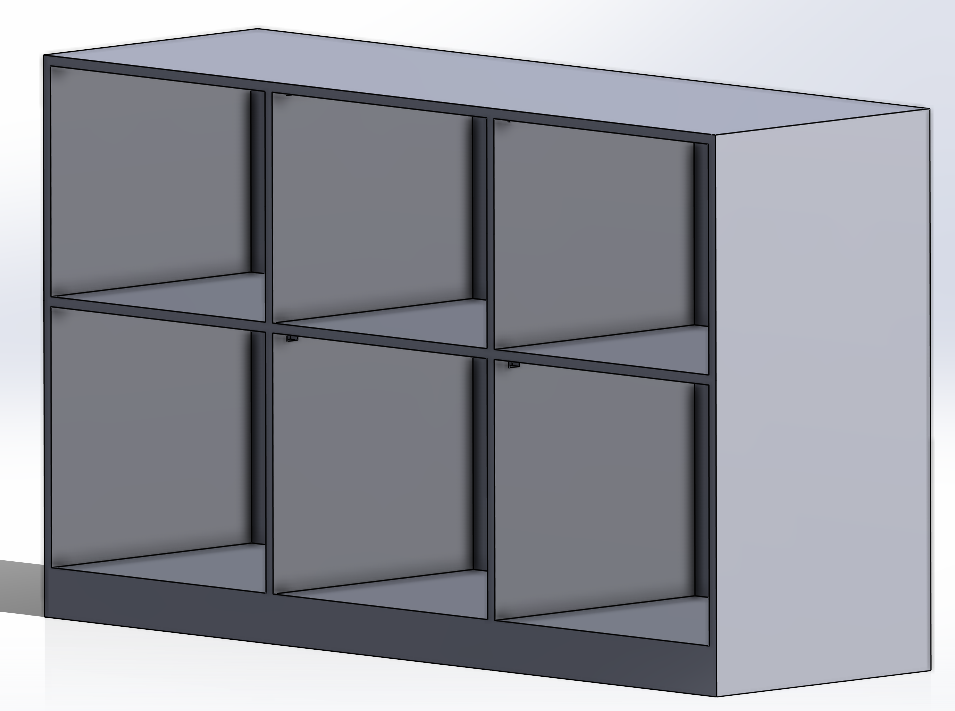
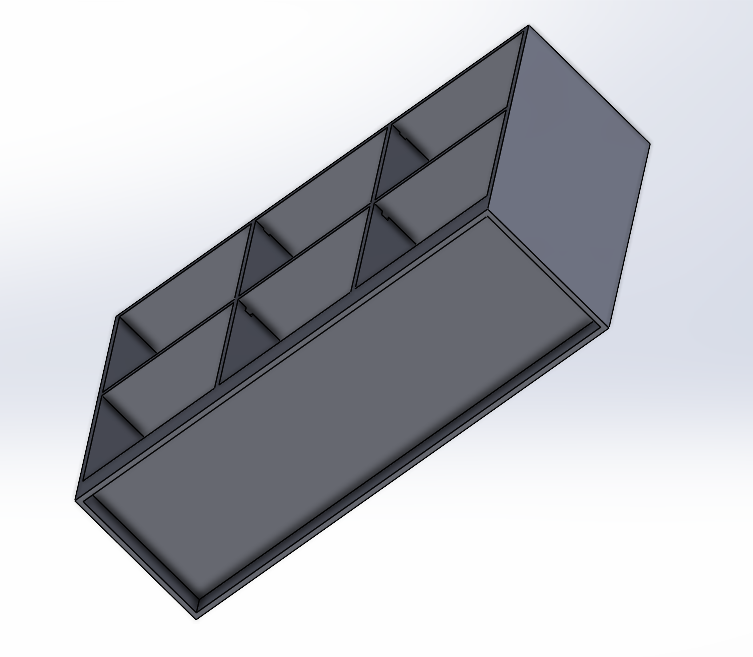
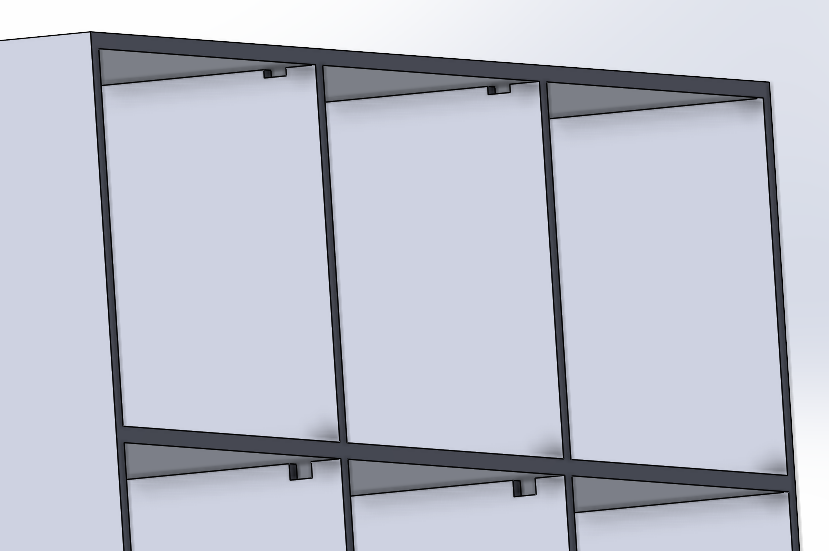
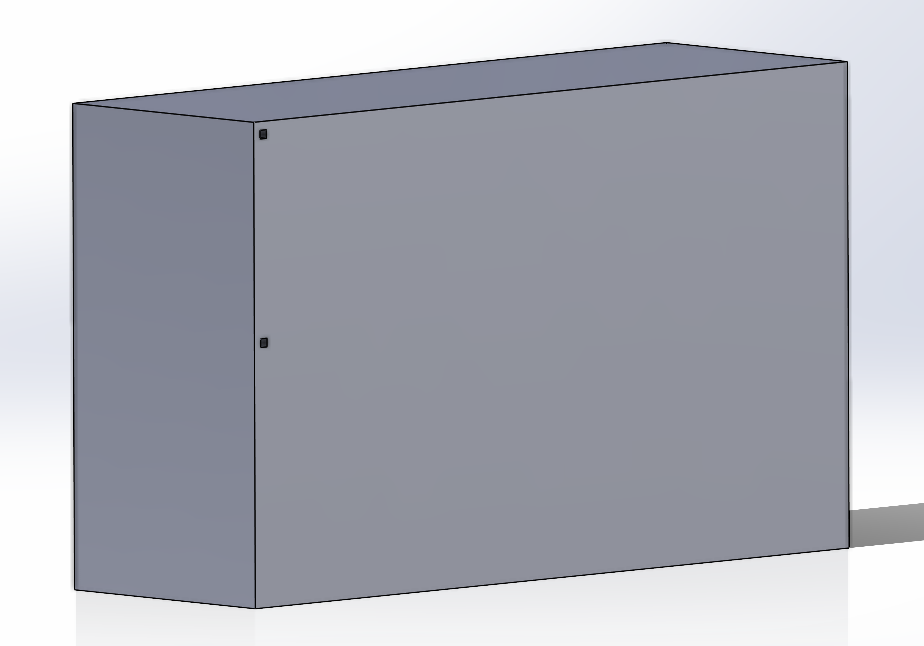
As with any good engineering project, I started with a problem that I wanted to solve. I frequently entertain myself with PC gaming, and some of that involves flight sims, including Atmosphere and Newtonian space. As such I have a decent collection of joysticks, throttles, and pedals that unfortunately frequently end up in a pile beside my computer itself or at the end of my bed. Both places are ugly and messy looking and difficult to get what I want when I want it and it recently started to bother me enough to want to fix it, so this project came along and gave me the idea to kill two birds with one stone. Create something that looks good and helps tidy up my room, subsequently making my room look much better. My primary design inspiration is my desk, it is of the Malm series of IKEA desks, the largest one in the series nonetheless. I spend the majority of my time at the desk, either working or gaming and I believe it dominates the room alongside my bed, so I think it is a great basis for establishing a theme for my room. As probably the most expensive thing in my room, my computer also helped me establish this theme. I have spent a respectable amount of time building it and making it look the way I want, so I think it also is a great aspect to consider. So combining these two things, I decided to make a shelf specially fitted to the joysticks in a black minimalist style (of the desk) with LEDs incorporated (of the computer). My design process mostly consisted of working out dimensions for what needed to fit on the shelf, (like any good engineering project, start with fixing the problem, then make it look good). I took measurements of all 3 dimensions of the sticks and accessories. I originally thought about building each compartment of the shelf to the exact size it needed to be for the item it would house, but that became too geometrically and aesthetically challenging. After that, I designed a shelf around those constraints and added the facilities to implement the LEDs with channels for them to pass through and places for the wires to route out the back and to a controller (please click through the image slider below, I left these in gray box for easier understanding). Actual construction plans consist of MDF boards (better structurally, aesthetically, and from a practical perspective than plywood), black satin paint, and LEDs. I am not sure whether or not I will inlay the LED strips or not. The main concern with that would be the difficulty of the channel cutting, light dispersion from the LEDs, and structural integrity depending on how much material I might need to cut out to effectively hide the lights and their connectors. Whether I will use glue or screws is still up in the air, I think screws will last longer and be stronger, but glue would likely maintain the aesthetic better. My deadlines for this project are as follows: 4/7 – Finalize practical plans (sheet dimensions & configuration) and finish ordering materials. 4/14 – Complete cutting sheets to size and at least have the first coat of paint on. 4/22 – Final assembly and LED installation Overall, I think this project will be a fun learning experience as well as functional and good-looking when it’s completed. Presentation Recording: https://youtu.be/xuUu6b-FcrE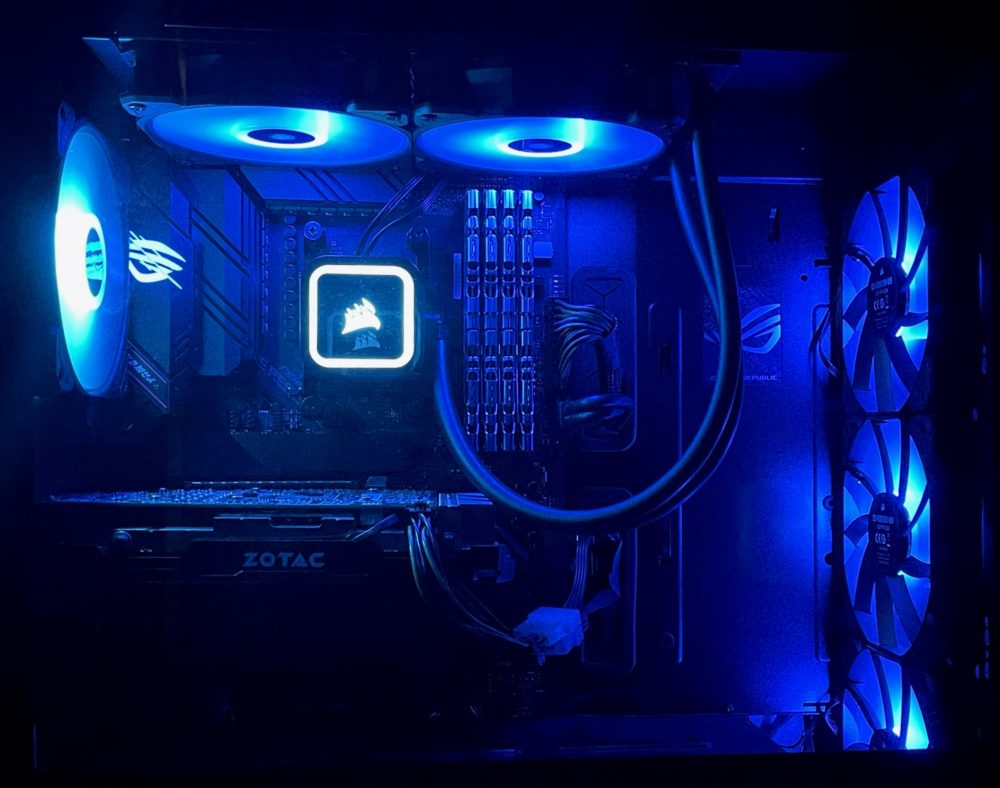
