

Since my design preview report, I was able to acquire all materials and start fabrication! From Hobby Lobby I got a brush set, black and gold paint, wood glue, and a couple different types of hinges along with a wood carving tool to create my pattern work. The stained glass was easiest to acquire from Amazon instead of trying to make my own.
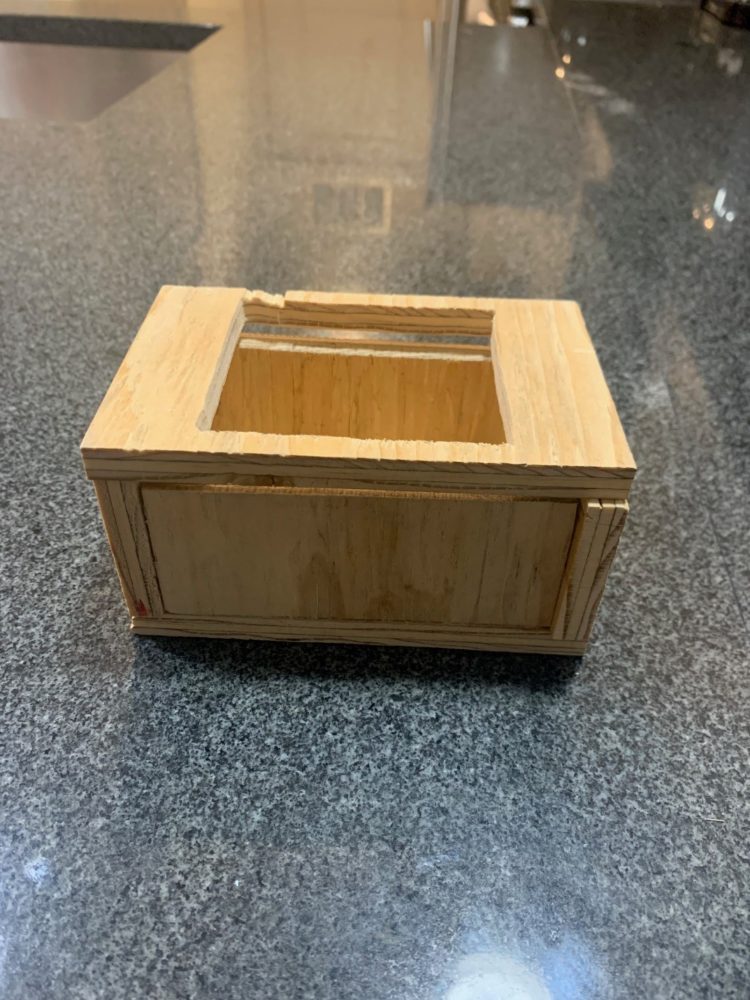
My first step in the fabrication was truly just a crude mockup of the jewelry box in order to get a rough idea how things would look and get some practice on the machines. Initially I was going to do a basic butt joint but realized after doing the prototype it would be a nightmare structurally when gluing it. Because this prototype was a rough design I just did average sizes and used the band saw for the panels and a scroll saw to create the rectangular top panel cutout for the stained glass. As you can see the cuts were terrible but again it was just for the idea. Because the cuts were made on the band saw there are very noticeable gaps all around which will not be evident on the final piece.
For the actual product I decided to buckle down on design and some calculations. Below you can see the drawings I created to understand the cross sectional dimensions and rabbet joint idea I decided to move forward with. By using this joint, it was going to help with the structural aspect as well as solid alignment of the panels.
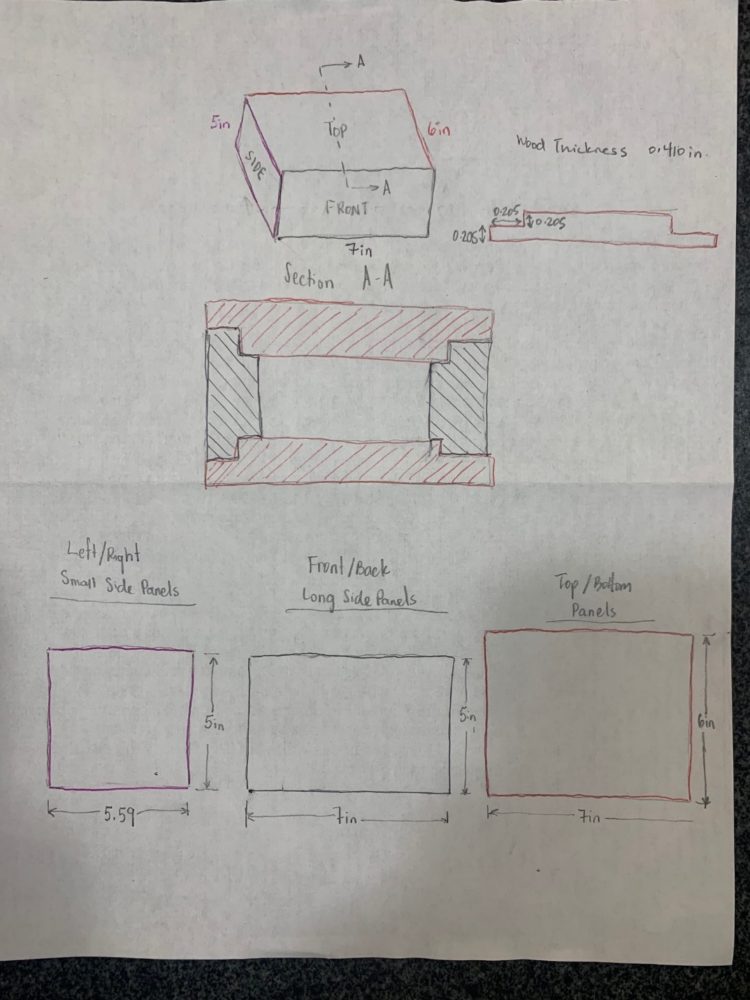
In order to have a solid structure and have an easier time cutting wood and fabricating I decided to make the dimensions a bit larger than I initially stated.
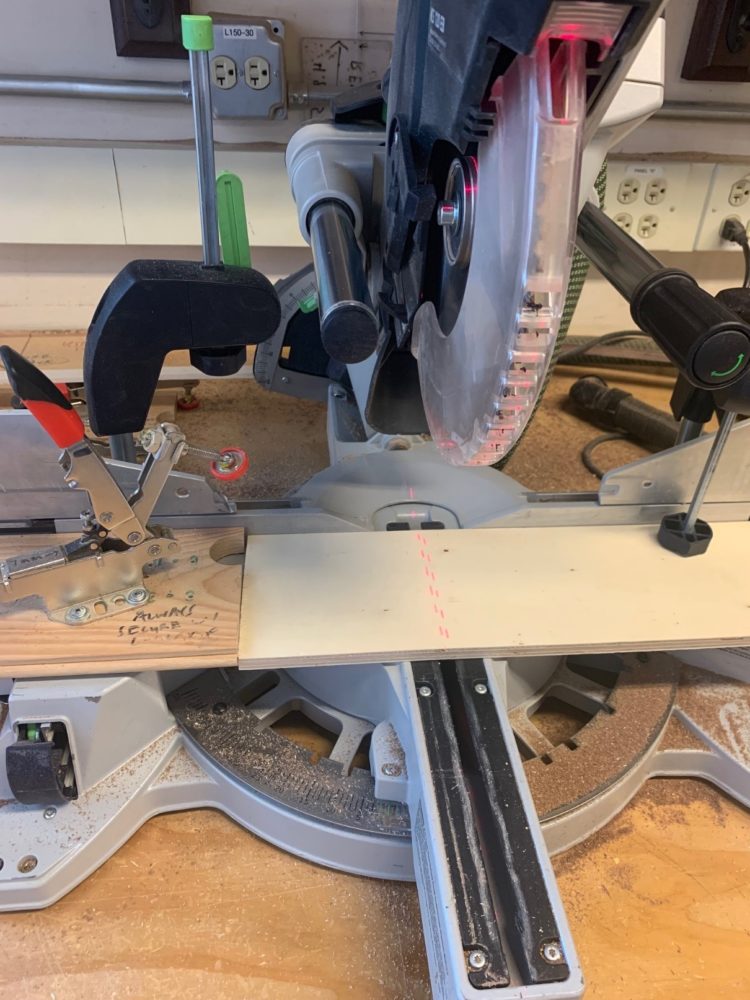
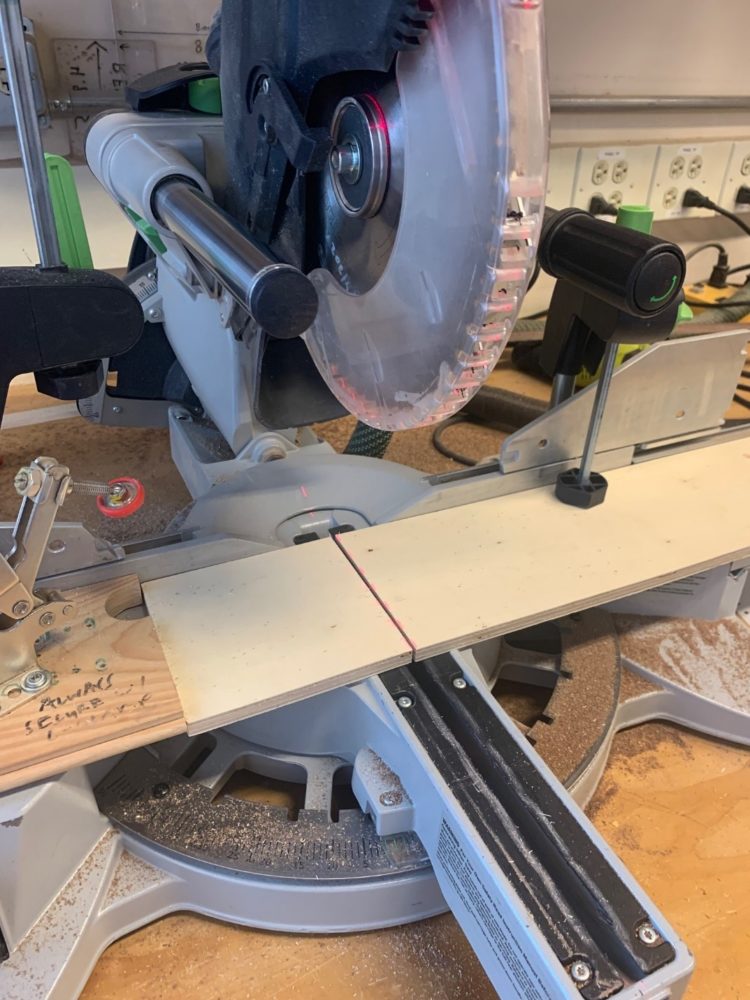
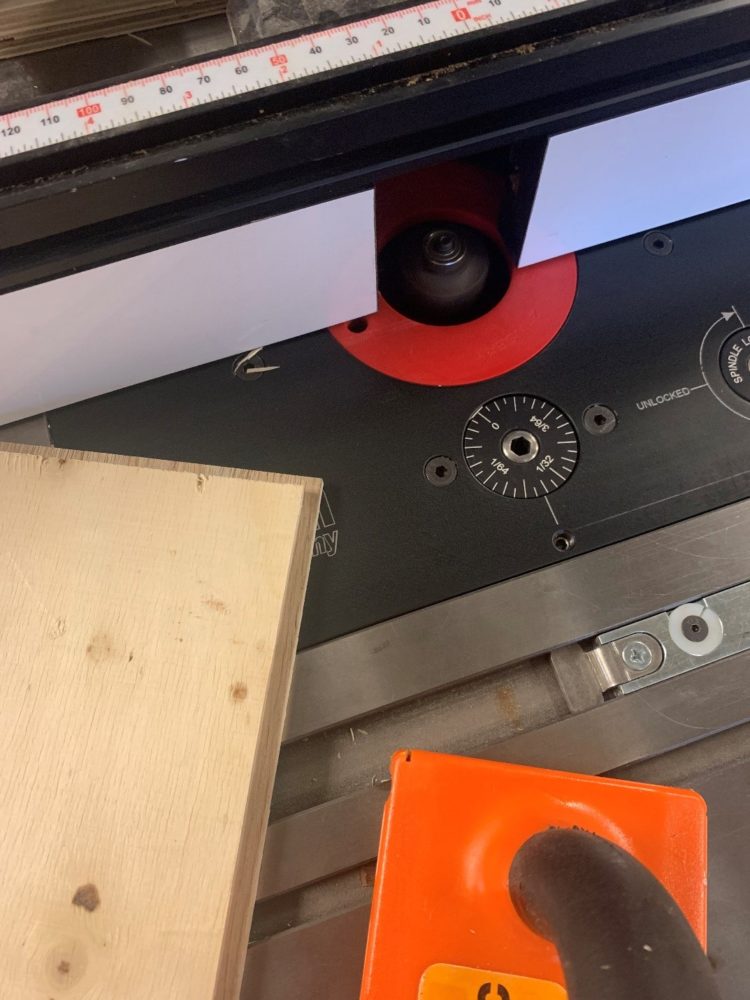
The dimensions therefore will be (7in x 6in x 5in). This also allows for more space for the jewelry as well. I used the compound miter saw in the Idea Forge which is just a regular circular saw that can be adapted for miter cuts. I calibrated the system for the different panels and made sure dimensions were accurate by doing test cuts before and then measuring each panel with a caliper. The (0.205 in.) dado cut dimensions seen in my sketch are based off the thickness of the wood panel (0.410 in.). I will explain more how that works later. That is also why you also see the outlier non-whole number (5.59 in.) for the small side panels because you have to subtract the length of the dado cut on both sides in order for it to fit. It is important to account for the width of the saw when setting up the jig to cut the panels.
In order to create the rabbet joint cuts I used a router table saw with the specific dado blade in order to cut the 0.205 inch inlays. This number again was determined by the thickness of the wood that I chose. There were decent sections of plywood in the woodshop so I decided to use those to save $$ on wood. The wood was 0.410 inches thick so it was necessary to divide that in half for each panel in order for the joints to match up. For that to able to match up properly, the small side panels had to essentially “eat” the length taken out from dado cuts which is where you get the (5.59 in.) length. [ 6in- 2(0.205in)=5.59in ].
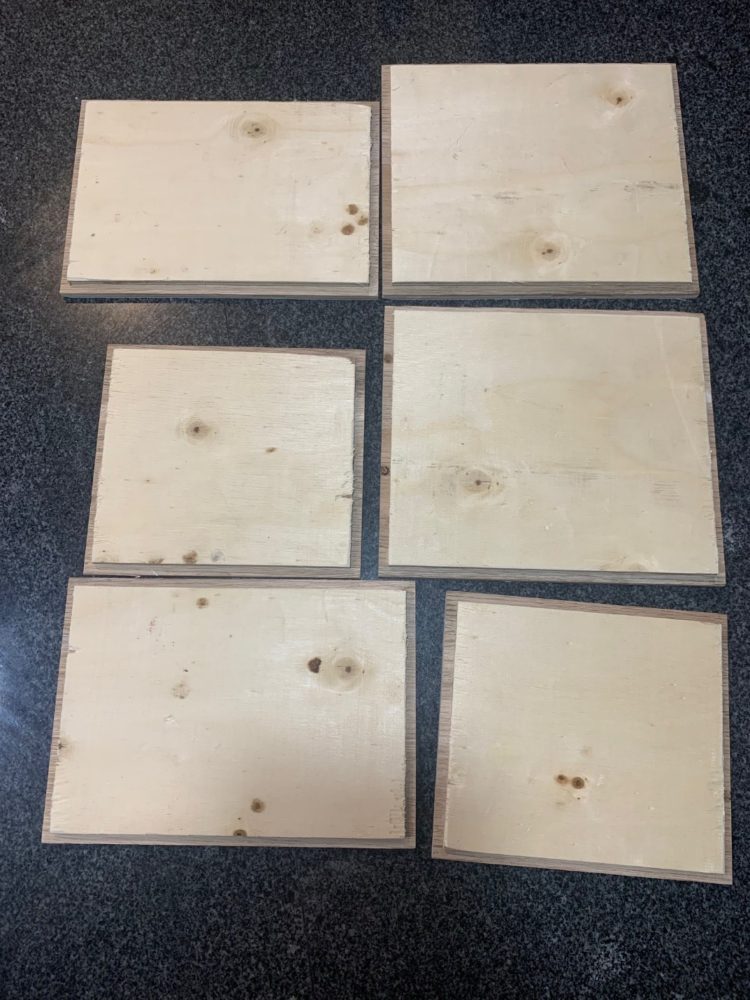
As you can see the panels have more precise cuts using these two jigs. I decided to make the cuts on the most blemished sides of the box in order to keep those concealed and facing inward towards the box. I will probably staple some felt material to the inside like actual jewelry boxes have in order to make it neater. Because the box is deep there is potential to improve it for a trinket storage instead of fine jewelry.

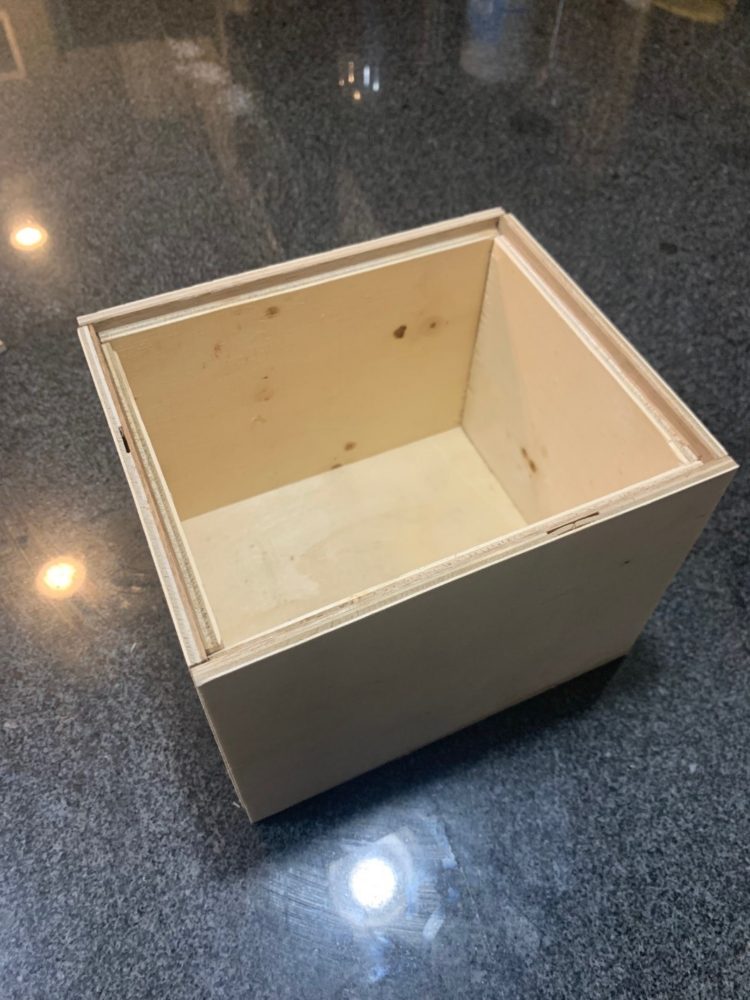
When dry assembled it can stand alone without being held up because of these joints and there are no gaps so that was a success! If there appears to be gaps, gluing and clamping will seal it even further.
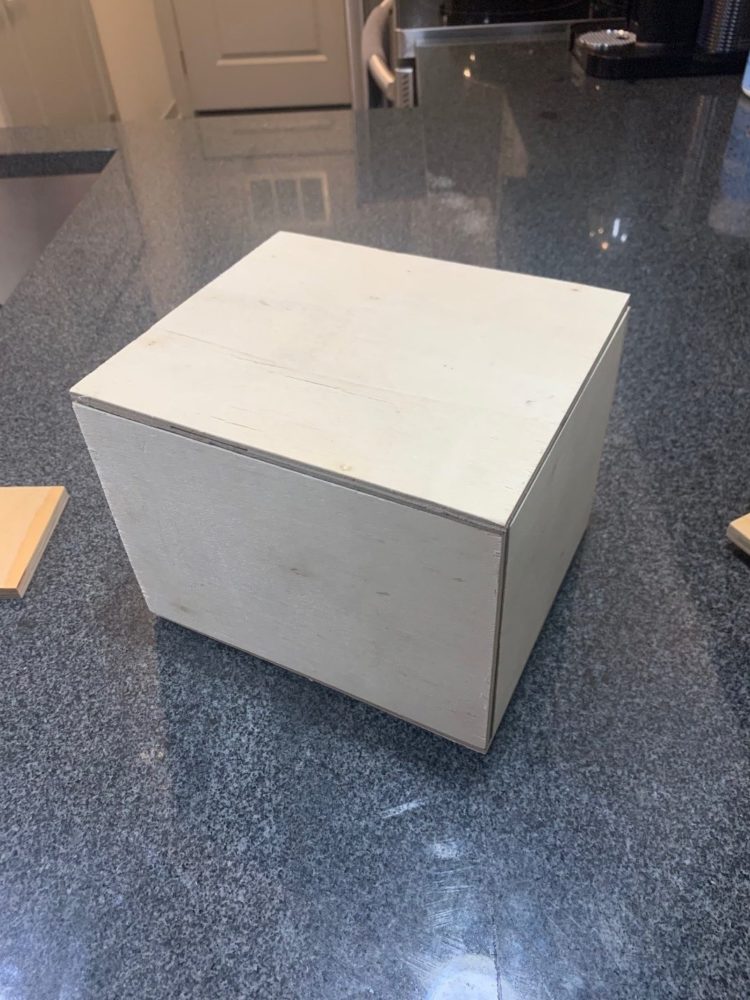
For continuing work I need to create the rectangular cut in the top panel in order to lay in the stained glass. I will have to paint all the sections and score them and paint the patterns gold. Then I will use wood glue to glue every piece together except the top panel which I will add the hinges on the exterior. This should be super easy as long as the ones I got aren’t too small or delicate. The hard part of fabrication is done so I think the rest will just be adhering to the aesthetic!
1 Comment. Leave new
I think that the 2 sides of your project are really cool (the wood working and then the glass aesthetic work). Are you going to add little subdivisions to the box for more organizational options? I think the wood working looks really good and I’m interested to see what stain you go with.