
Background
For my project, I built a nightstand using traditional joinery techniques. And just what is traditional joinery? Drawbore mortises and tenons, wedged dowels, lap joints, and finger joints! Wood and glue with no hardware whatsoever. How much of it is for the sake of tradition and how much of it is just because I love creating arbitrary rules for my own projects? Who knows!
Some of these joints are incredibly old. Before modern glue and fastener technology, interlocking joints were one of the only ways to create complex wooden structures. Mortises and tenons, for example, are incredibly old. Remnants of mortise and tenon wells have been found in Germany dating back to 5,000 BC or earlier!

The oldest known mortise and tenon joints, perhaps some of the earliest wood joinery in human history!
Even in our modern era, these traditional joints remain some of the strongest ways of connecting pieces of wood to each other. They account for material stress, racking, and wood movement in a way that fasteners or glue alone do not. They’ve been engineered and tested over the course of millenia, and the result is solid furniture that lasts for lifetimes.
![]()
A modern drawbore mortise and tenon joint
Inspirations
It’s hard to pinpoint all of my inspirations as they’ve come from so many different places. Much of my early woodworking knowledge came from my grandfather, who indoctrinated me into the craft at 7 years old when he gave me a tool set and a miniature workbench. I’ve also exchanged knowledge with many wonderful people throughout the years I’ve been employed in university shops. And in those same shops and my own workspaces, I’ve had the opportunity to learn by lots and lots of trial and error.
I’ve also learned quite a bit on the internet. The YouTube channels of Rex Krueger, Mr. Chickadee, Peter Follansbee, Anne of All Trades, and Third Coast Craftsman have been particularly informative (links to their channels below). Through these many sources of knowledge and the opportunity to put them to the test, woodworking has become part of the fabric of my life.
Vision
I wanted to create a solid, well built piece of furniture that would last for a long time, perhaps even for a lifetime. I chose a nightstand to keep the scope small enough for this class. I wanted to focus on wood joinery, meaning I used no fasters or hardware anywhere in the piece. It is entirely composed of wood, glue, blood, sweat, and tears (but mostly the first 2). I also wanted this piece to be a bit of an experiment in joinery. I wanted to see how thin I could make the panels, how slender I could make the posts and beams. I wanted to push the limits of my tools, materials, and my own ability (at times I also pushed the limits of my sanity!).
I had 5 major specifications in mind when constructing the piece. I wanted it to fit inside a roughly 16”x16”x32” space. I wanted it to be well engineered to be delicate in form yet strong and rigid too. I wanted the entire piece to be held together with joinery and glue. I wanted it to be durable and long lasting. And finally, I wanted it to showcase the natural beauty and imperfection of the wood. I did want to include some painted ornamentation as well, but unfortunately, I did not get around to that.
Design Plans
I did my initial design in Blender while quarantined with COVID over Winter break. Blender is excellent for generating quick 3D concepts. Its mesh-based modeling and modifier system allows for quick ideation and easy modification. Unfortunately, I had a hard time using the models to generate drawings, mostly because my model topology was sort of bad. Instead of pursuing other higher tech solutions, I decided to go old school and make my drawings by hand, referencing model geometry for dimensions. A PDF of my drawings can be found here.
Initial CAD drawings for the nightstand
Final Thoughts
I’m very happy with how the piece came out. I say that a lot, mostly because I tend to put so much effort into projects that by the end I don’t have the energy to worry about what didn’t go to plan. But I do genuinely mean it. There were things that went wrong along the way, but I tried to see them as learning experiences. And in the end, it’s still a fully functional, beautiful, solid nightstand. It fits in the planned window, it’s rock solid, only weighs 25lbs, it’s beautiful, and most importantly, there’s not a single piece of metal in the whole thing. How ’bout them apples, Magneto?
I hope this is the first of many pieces like this I will make. There were times in the making of this project where I wanted to throw up my hands and call it quits. But now, at the end of it, I feel like I’ve not only shaped a wonderful creation, but in turn, it has shaped me. It has taught me ingenuity, patience, and technique. And above all, it has left me wanting more.
The biggest hurdle I encountered was time. I spent the entire semester working on this nightstand and I still barely finished it in time. However, as I worked I began to realize ways I could speed things up and make them more efficient. Making components in larger batches, building jigs for common operations, and finding the right balance of what to do with power tools and what to do by hand. If I continue joining and scale up my projects, these will become increasingly important. One day, I’d like to use what I’ve learned to build a whole bedroom set. Until then, I’m looking forward to bringing this piece home and finally getting some use out of it!
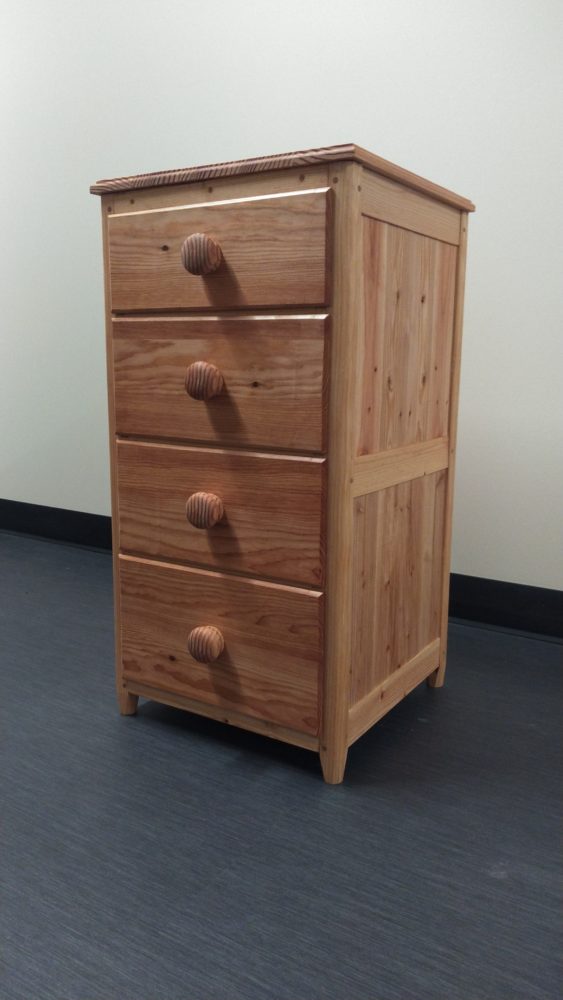
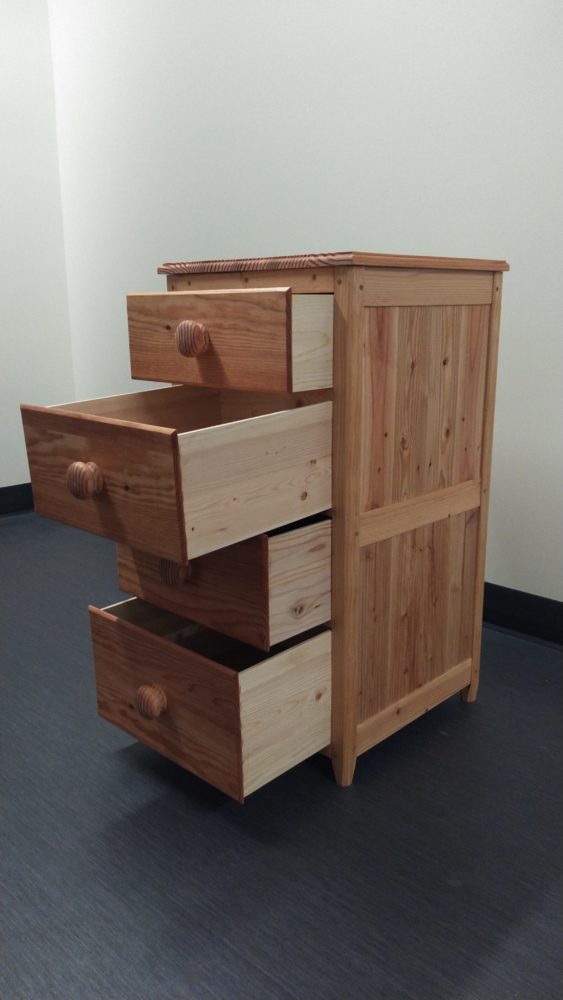
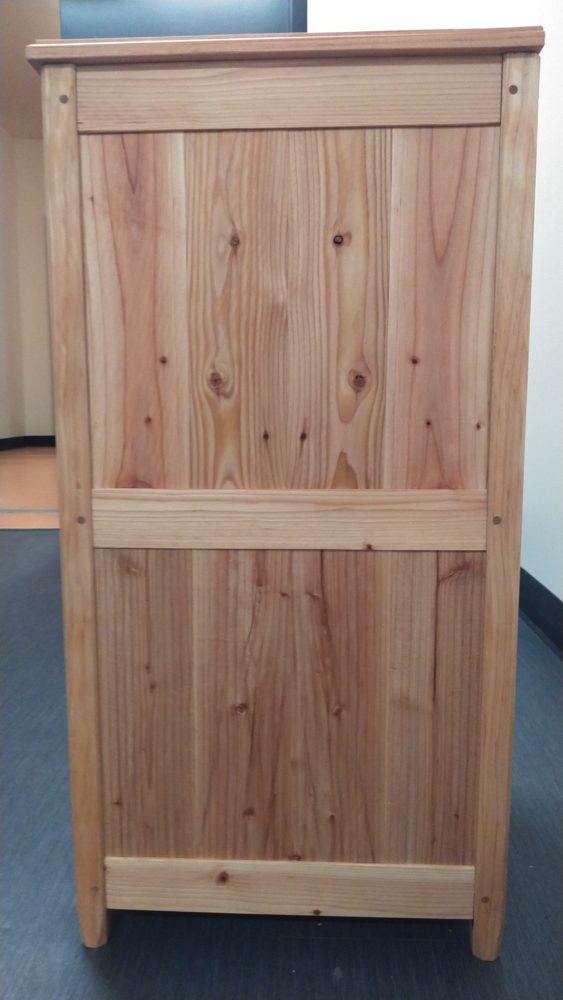
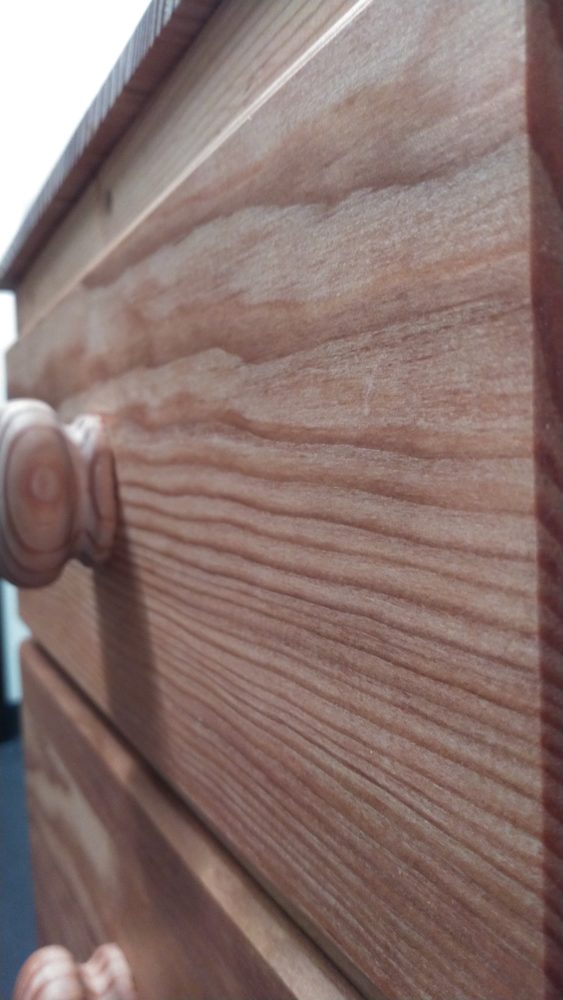
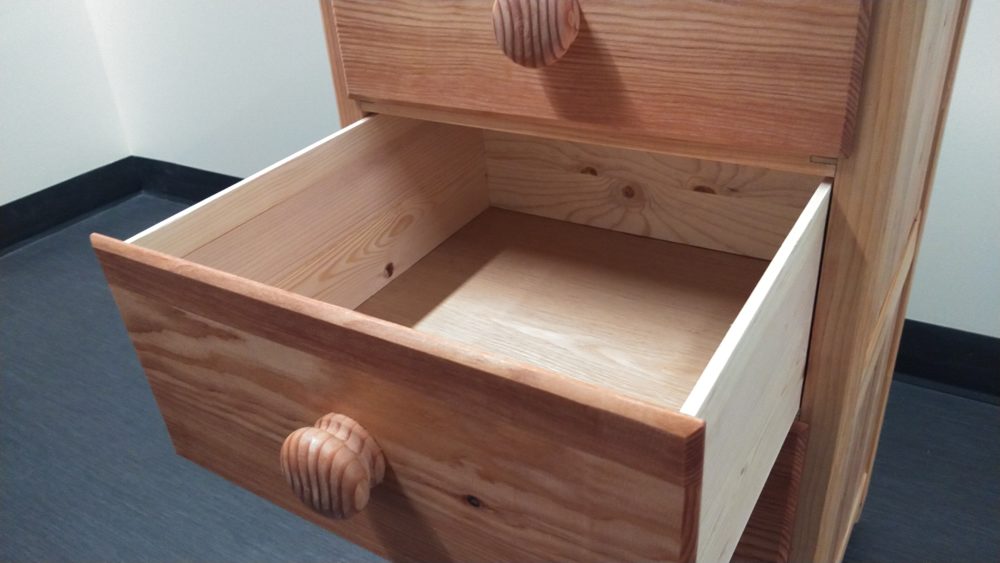
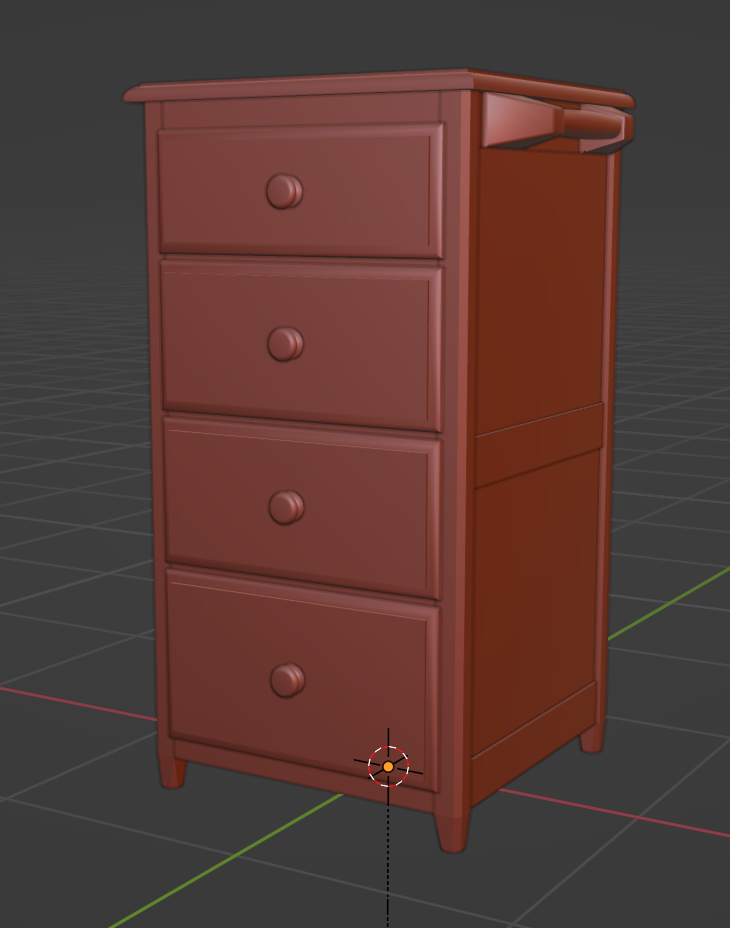
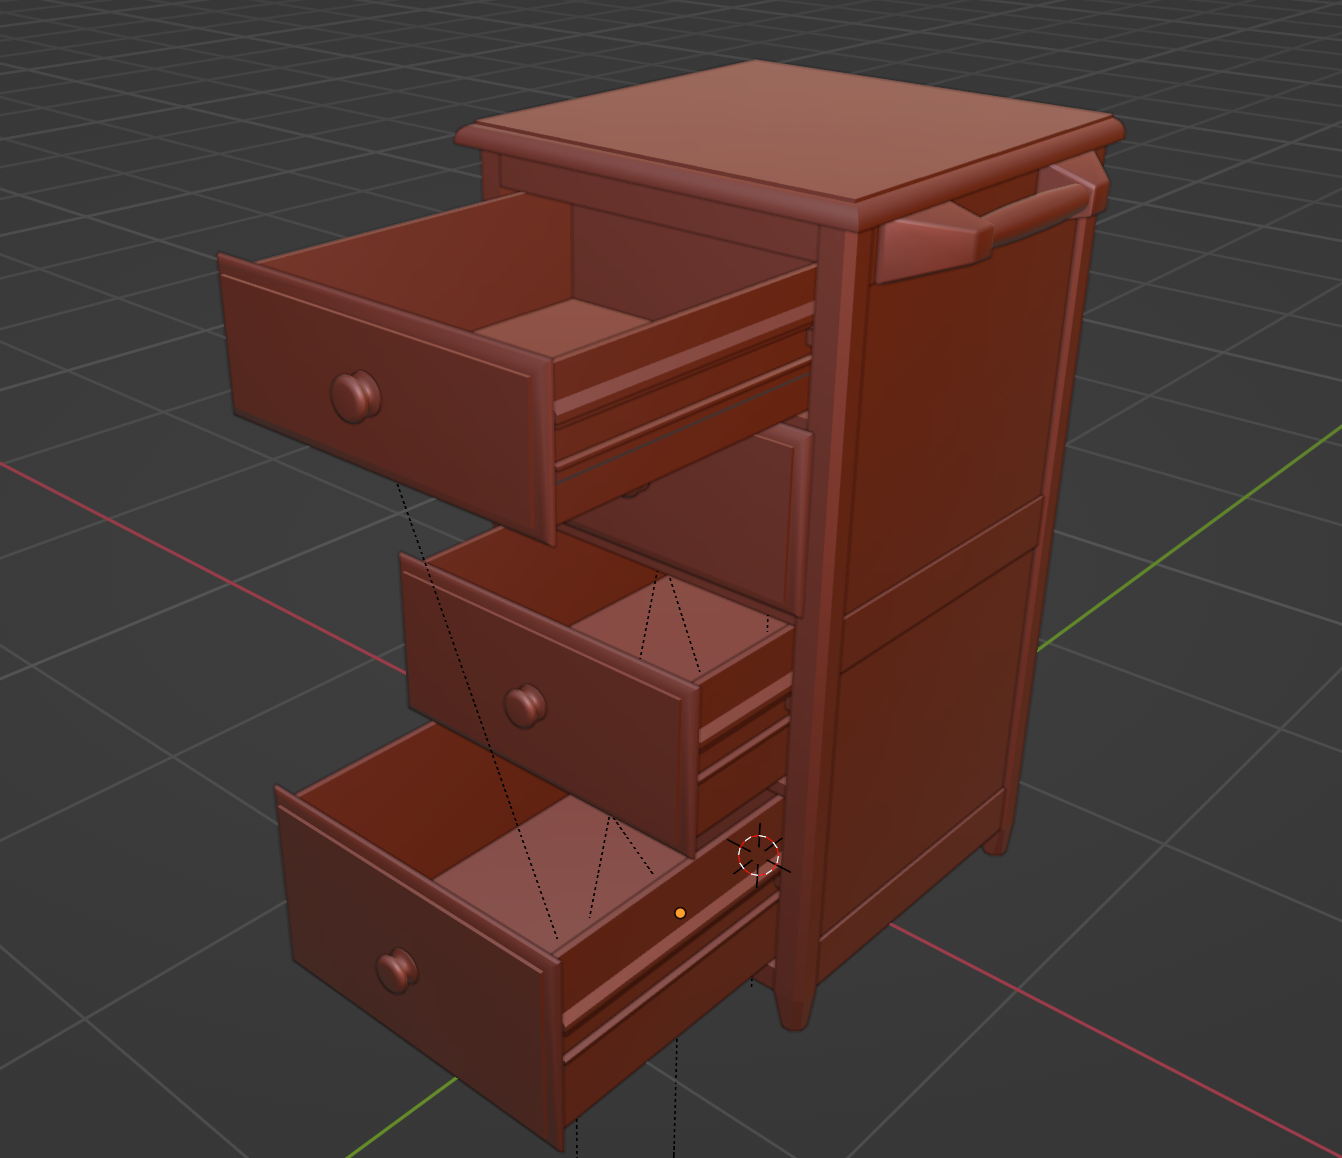
Finished nightstand photoshoot!
Sources
May 18, Huy Huynh and 2022. “Drawbore Joinery.” Wood. Accessed April 25, 2023. https://www.woodmagazine.com/woodworking-how-to/joinery/drawbore-joinery.
“The History of Mortise and Tenon | Laurel Crown.” Accessed April 23, 2023. https://www.laurelcrown.com/mortise-and-tenon-history.
“The Neolithic Toolkit – Archaeology Magazine.” Accessed April 25, 2023. https://www.archaeology.org/issues/152-1411/features/2591-germany-recreating-neolithic-toolkit.
Links to YouTube Channels
https://www.youtube.com/@RexKrueger
https://www.youtube.com/@MrChickadee
https://www.youtube.com/@MrFollansbee
2 Comments. Leave new
This is a really project and it looks great, I’m just wondering how well to the drawers slide in and out?
I didn’t mention it, but I lubricated them with Castile soap and they slide quite nicely! I just added my presentation video and towards the end of that I slide them in and out. It’s not necessarily the smooth motion you get from off-the-shelf drawer slides, but they’re time tested and they do the job!