
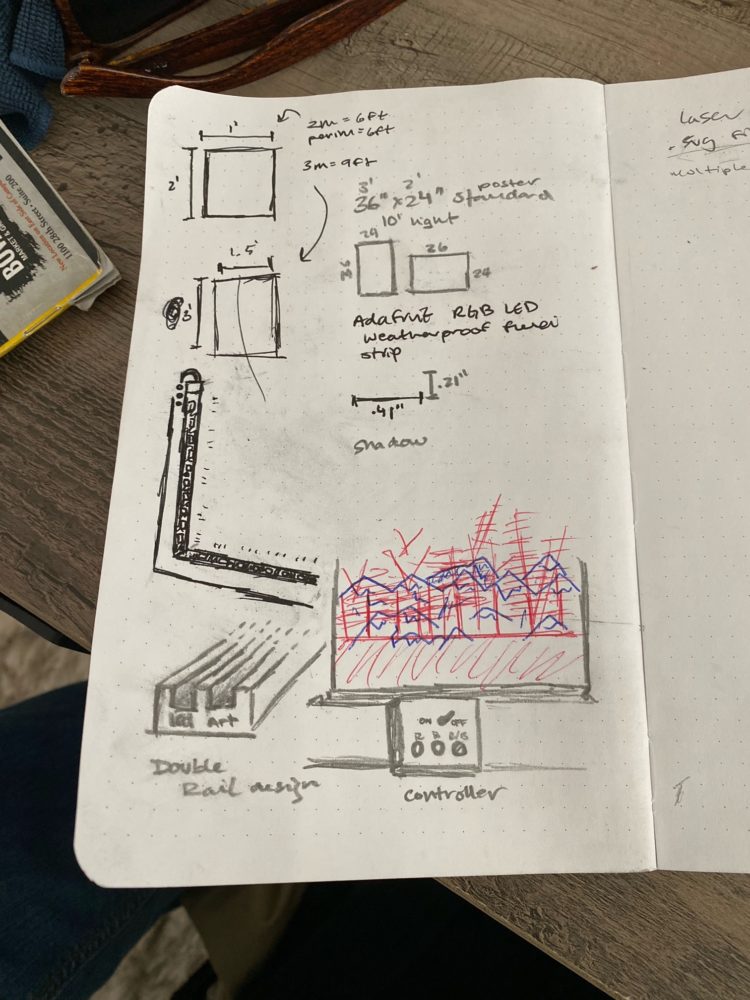
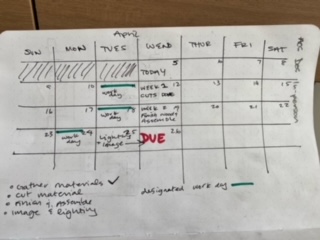
A look at some of the original sketching I did for this project in my notebook, also pictured below the rough timeline that I used to keep myself on track. Some specifications for the frame, it holds art that is 12″x16″ and can create the full spectrum of light from the built-in LEDs.
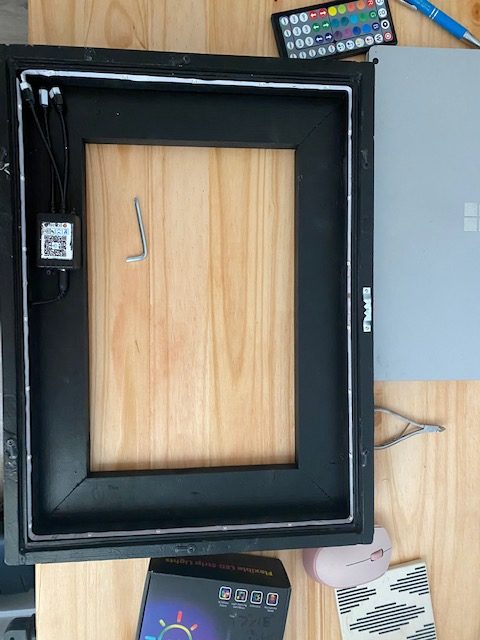
The frame is constructed entirely of pine wood sourced from the local Lowe’s, the actual framing is constructed of 1″x2″ boards that are connected via lap joints, counter-sunk screws, and Titebond wood glue. Before they were assembled I took each board and created a 1/4″ rabbet (a step in the frame) along the length of each piece to create the well for the picture and backing to be inserted into. The “face” of the frame, the portion on top of this framing that creates the matting to hide my electronics / make this more like a shadow box to eliminate ambient light. This face is made up of 1″x3″ that were cut into a box that has the the same perimeter length as the perimeter of the interior part of the frame. The frame’s “face” was created using miter joints that were also glued and screwed.
Sanding, priming, and painting became time consuming, and began to encroach on my time for actually inserting the electronics and troubleshooting that process. This would be the area I would seek to improve upon a second iteration of this project, hopefully away from deadlines and time constraints. Nonetheless, I think the matte black paint that I chose was good at hiding some of the imperfections that I know are there.
This leaves only one part left in the actual physical construction of this piece which was adding the picture framing hardware to the back, and attaching the electronics. The picture framing hardware was a breeze comparatively, one Amazon order and eight tiny screws later I was in business. The LEDs need power 24V in fact and short of fabricating an on-board power source this late in the game, the obvious option was to integrate the power, literally through the wood. One drill bit usage later and there was as perfectly sized hole for me to insert the barrel jack into the frame and the other end into the wall. Now comes the real challenge, the real world perception.
Photos
Figuring out the correct way to employ the effect that I wanted was not an easy task, yet many photoshop techniques and opacity changes, I was left feeling as if the effect were muddied. On of the issues that I encountered was the definition of these subjects under the selective color. Carnovsky’s RGB art (my inspiration, see pervious post) relies a lot on their “sketch” style, hard colored lines layered on top of one another was a superior way to produce this effect as opposed to my image tinting and opacity play. Therefore, I pivoted and created two artworks that are created (filtered through) using the Ben Day Dot method. Ben Day dots are the way that old comic books, and newspapers printed images, just color ‘pixels’ instead of continuous ink. This allowed my original images to be reproduced only using one channel of color, with less interaction between layers. Printing, then adjusting the programmable LEDs so that the colors were just right was the final step of my process, after that all there was left to do was enjoy this one-of-a-kind piece.
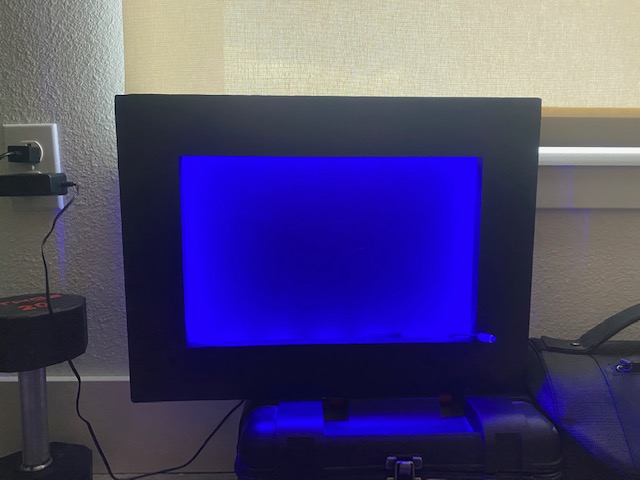
^Early Test
^Something isn’t quite right

^Ben Day dot style image
In-Class presentation video: here