

Post 2 – Upcycling Project Aesthetic
Introducing My Idea
For my upcycling project, I am aiming for a rustic aesthetic. I’m inspired by this aesthetic because I anticipate wood to be the primary material that I’m working with.
Additionally, my friend has offered up some of his old vinyls for me to do what I want with, so down the line I’m considering adding this element to my art piece, depending on where the process takes me.
What I’m Emulating From the Rustic Aesthetic
I feel that the rustic aesthetic is broad and can be thought of in a few different ways, so I want to specify what aspects of this aesthetic I’m aiming to emulate in my wooden art piece.
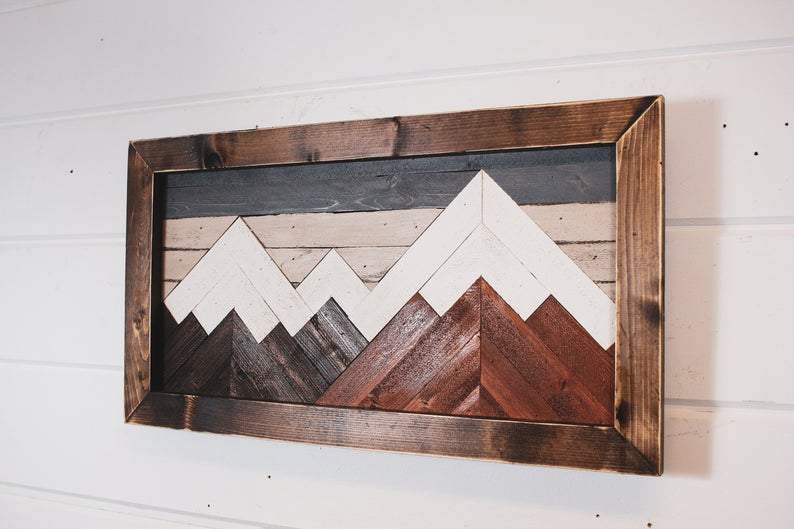
Native Range – Mountain Wood Art
Rustic, as an aesthetic, references a natural and organic look, which is perfect to emulate through a wood-based design. In rustic designs, only natural, neutral colors are used, including warm tints of beige, white, brown, and green. This is something I’m going to consider for my wood staining. Thankfully, I have some leftover oak wood stains from a project last semester, so I’m hoping that will achieve the coloring I want for my wood design.

Zoey Louise Design – Rustic Color Palette
Finally, rustic design implies a rough, imperfect texture, as well as a visually handmade and heavy quality, two key factors that I will consider and bring about in my woodworking design.
My Ideation Process & Woodworking Background Story
Over the past week, I’d been scavenging around, considering what materials I had to upcycle for this project.
I came across some wood in the BTU’s scrap material section, and thought that I could use the wood scraps and the laser cutter at my disposal to create a rustic wall art piece for my room.
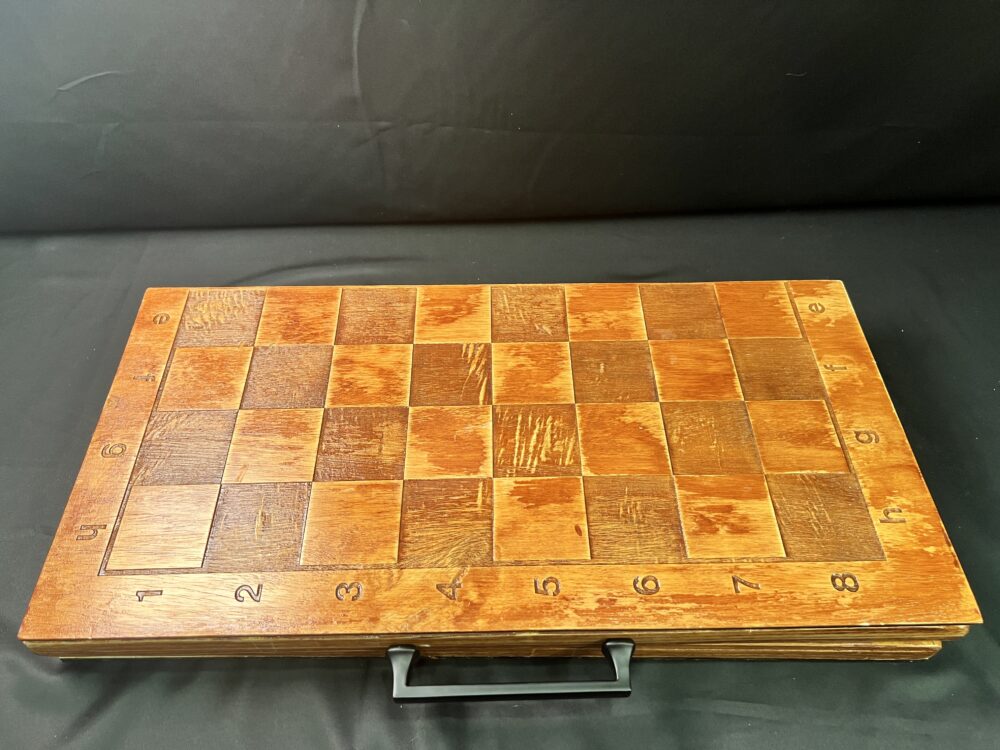
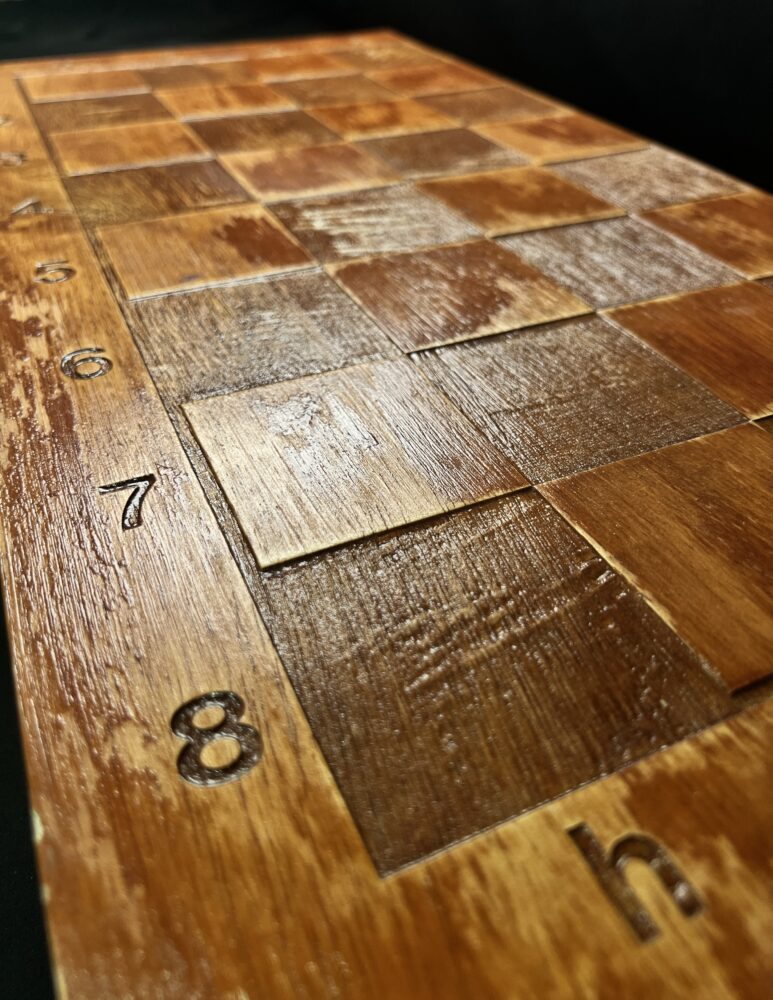
This same time last semester, I was a complete novice at woodworking. I’d always considered myself to be more of a digital person than hands-on with my CTD projects. However, I was enrolled in a class called Form, which focused on making both digital and physical products. For my final project in Form, my partner and I decided to both 3D model and build a foldable wooden chess set. Going into this project, I was doubtful of my ability to create a physical object out of wood that was up to the standard of a professional-quality wooden chess set.
Weeks into the project, my partner and I had sunk hours into learning the different woodworking machines, techniques, and went through many stages of failures and successes; we ended up re-building our wooden chess board three times due to failures in slicing, assembling, and laser-cutting our pieces.
Come mid-December, when our final object was due, we had created a chess set that was not only functional, but looked (in my humble opinion) like a professionally made piece. Looking back, I’m extremely proud of how far I’d come in my woodworking abilities. My Grandpa and Dad, who are both excellent woodworkers, are definitely proud of my growth in this area. I’d turned my initial fear of working in this sphere to a newfound strength of mine!
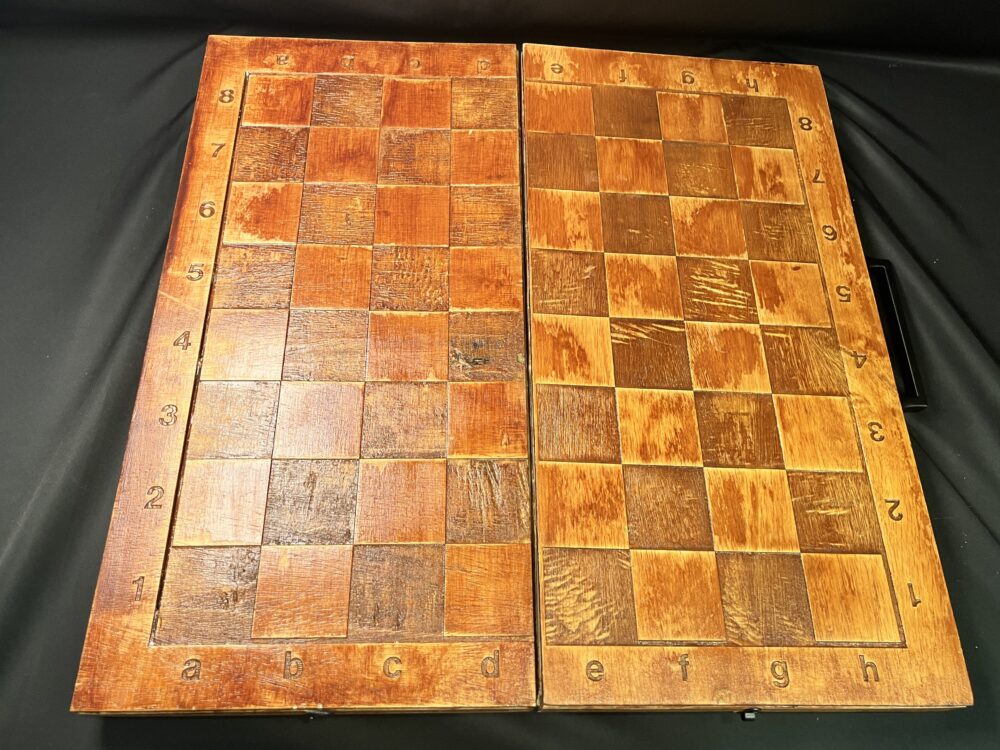
Foldable Chess Set – Hailey Usher’s Portfolio
With my chess set project now in the rear-view, I’m excited to face a new challenge in the form of creating an art piece out of scrap wood for this class.
My Current Progress & Concluding Thoughts
Finally, I’ll talk about my current vision of my wooden design piece. As I was sketching out some ideas, I ultimately decided I wanted to do a multi-layered nature landscape contained within some sort of silhouette; I visualized a crow or buffalo to be a good outline to utilize.
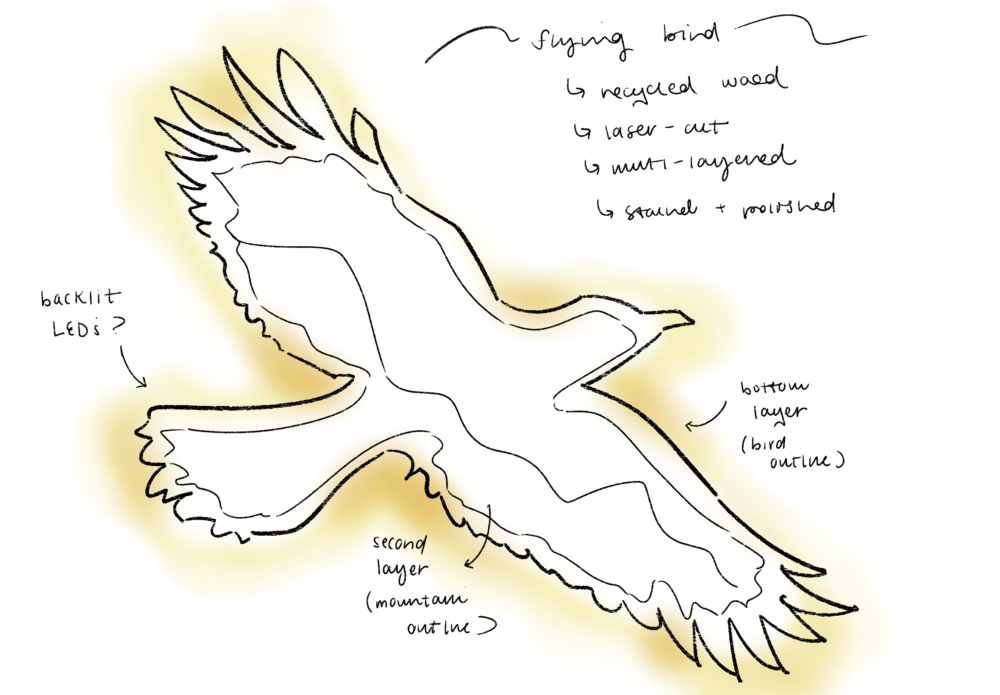
My initial sketches (in Procreate) before I moved onto Illustrator to draw the outlines.
For my nature landscape, I was between trees or an outline of the Flatirons – I went with the Flatirons for my sketch because I thought they’d offer me the best look if I’d be layering wooden pieces on top of each other for a 3D effect.
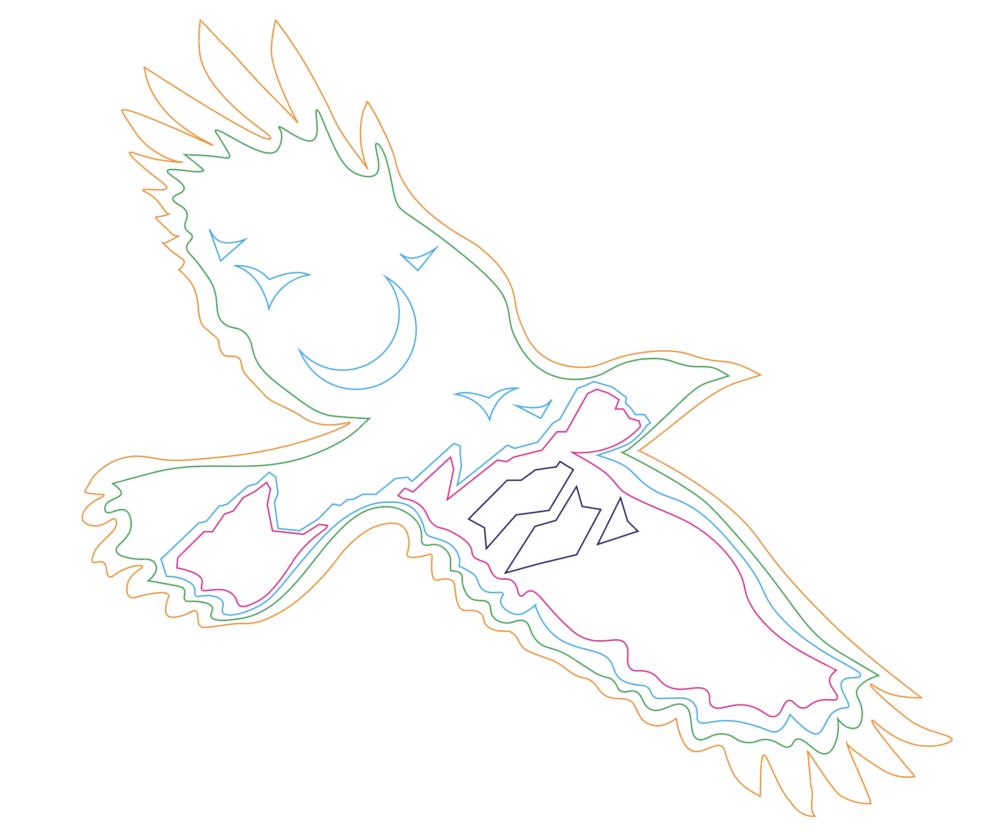
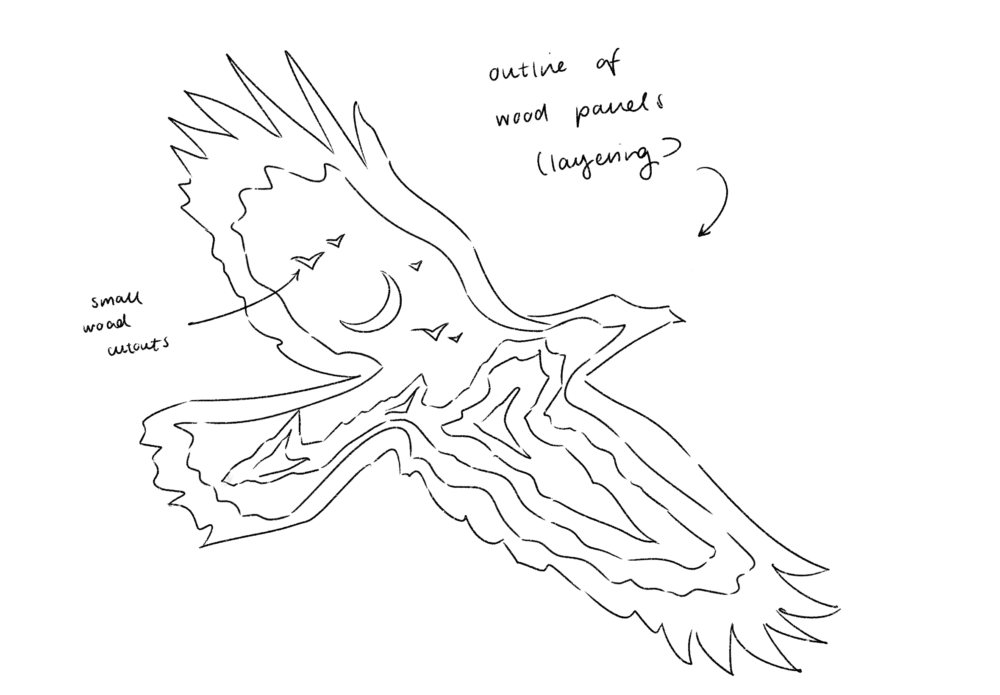
My current outline for the wood cuts (made in Illustrator).
Currently, I’m still in the planning phase as I gather my materials and finalize my sketch and outline of my wood piece. My next phase in this project would be to test and cut out each layer in my wood scraps.
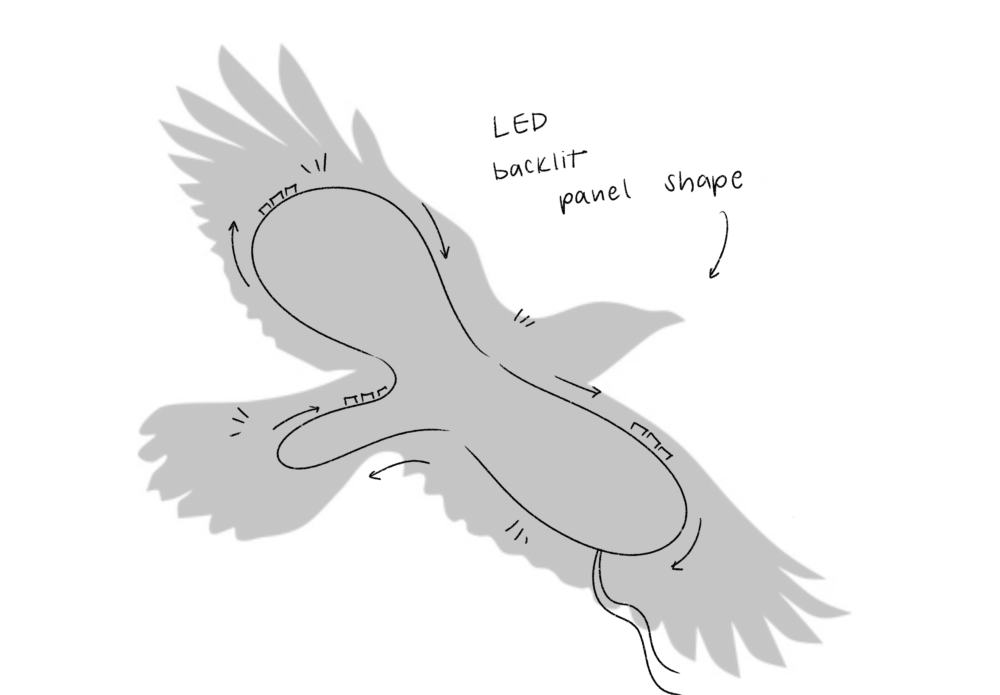
My sketch for how the LED backlighting could be designed.
Later down the line, I’m thinking of making this piece into a light feature, since it’ll already be hanging on a wall. To do this, I’d use some spare LED strips that I have and attach them to the back of the bottom wood panel to create an outline effect. My only issue with this addition is that it may water down my “rustic” aesthetic for the piece, so it’s definitely something I need to think some more about.
I can’t wait to work on this project some more. I’m open to new ideas and from my previous experience with woodworking, I definitely don’t anticipate everything to go exactly as I planned! I’ll keep you updated on my progress these coming weeks! I’m also welcome to any feedback regarding my project so far!
Sources Cited
The Spruce – What is Rustic Design?
4 Comments. Leave new
Hello Hailey! I really loved reading about your aesthetic and project idea. I personally love the crow silhouette. I can picture a bird like this soaring over the flatiron landscape you plan to use, and it is stunning! The only question I have right now is how the wood layering will be different colors. Are you planning on finding wood scraps that already vary in hue, or is this achieved through wood-staining? Also, have you thought about if this piece will be mounted or where you will display it? I can’t wait to see how your project unfolds! I loved seeing your woodworking experience, too. I think the chess board is beautiful.
Hi! thank you so much for your positive feedback on my chessboard and current iteration of my woodcut outlines. In regard to your question, I’m thinking of using some leftover wood stains that I have to achieve the layered color effect. I’m excited to continue working on my project this week!
I can tell this project is gonna turn out really well! You have done a lot of planning so far and I think the bird/flatiron design was a good choice. I think the backlighting can definitely be implemented in a way that still stays within the rustic aesthetic you just need to play with the color and brightness. Can’t wait to see the final product!
Hi! Thanks so much for your compliments on my project! I agree that the LEDs can be implemented in a way that maintains the “rustic” aesthetic of my piece. I’m probably going to test the LEDs out on a cardboard prototype I’ll be working on this week. Thanks so much for the feedback/advice again!