
Overview
The goal of my upcycling project is to turn my brother’s old jeans, that I don’t fit, into something I can wear and use. Using three pairs of denim jeans, I will be making a tote bag with a patchwork aesthetic.
Phase 1: Design Sketch and Plan
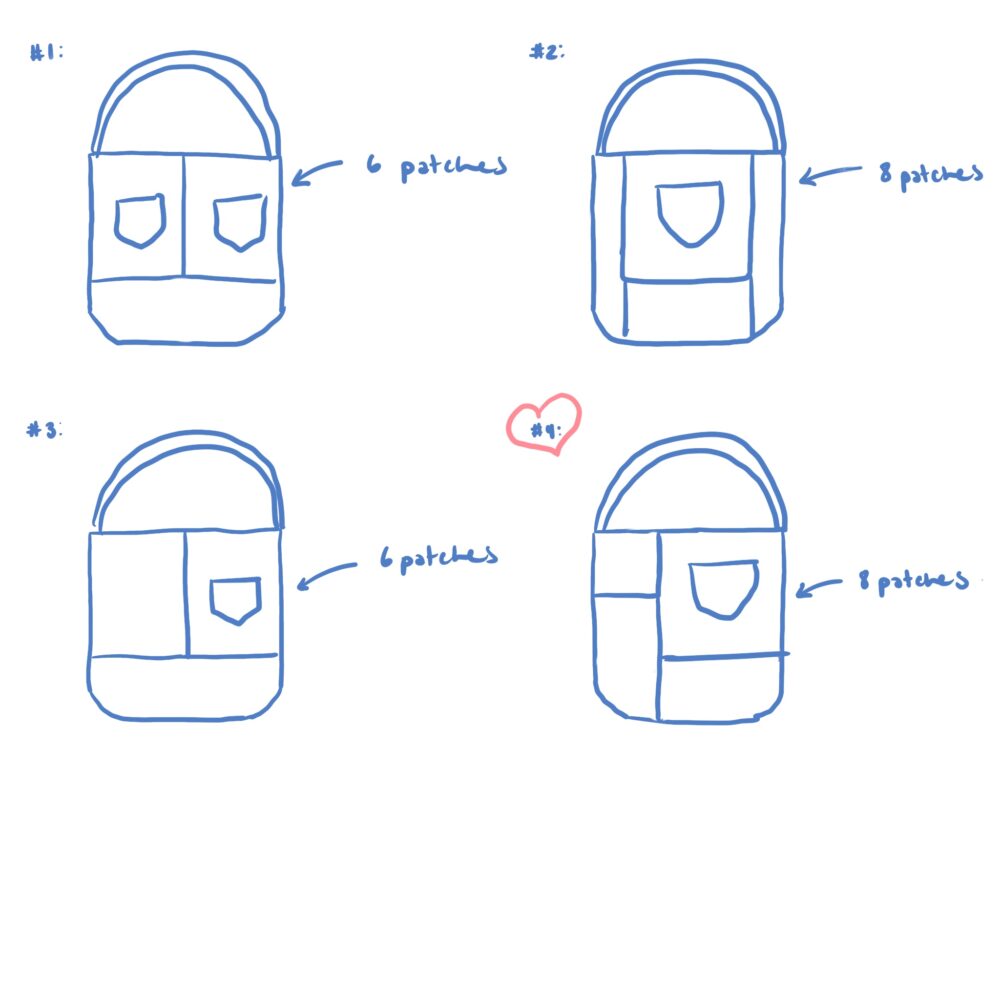
I first started off sketching four different layout options for how I wanted the tote bag to look and approximately how many different patches of jeans I could use in each design. I chose my fourth design because I liked the asymmetrical look as well as being able to use more patches of jeans.
From there, I re-sketched that design and thought about how I actually wanted to implement it. I originally placed the back pocket of the jeans higher on the bag, but because I intend to place my phone there, I wanted to move that patch lower for a lower center of mass, which would help my tote be more stable as it holds my belongings. I also watched a tutorial for sewing a basic tote bag [1]. In the video, the resulting bag is 16 by 16 inches in size. However, I prefer a smaller bag, so I planned to make mine only 12 by 12 inches, which means I would have to adjust my patch dimensions. I also planned to have the same layout for both sides of my bag.
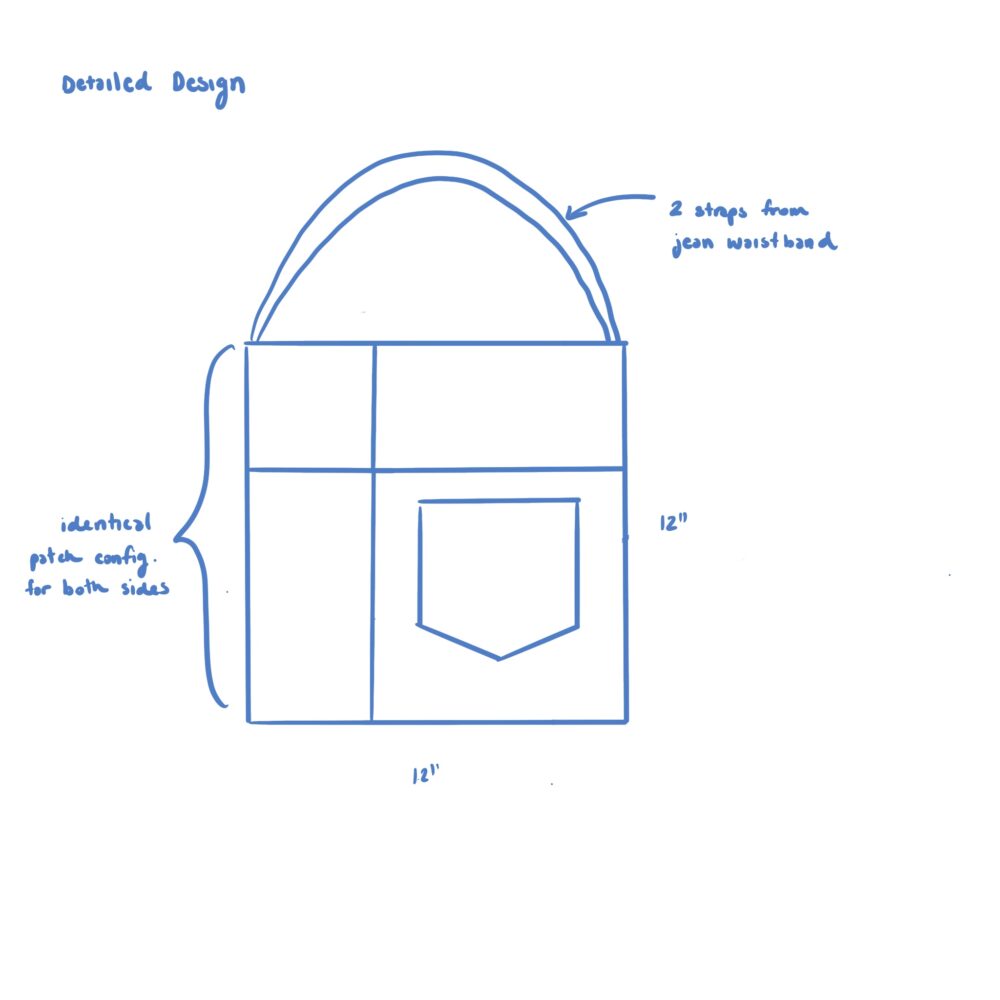
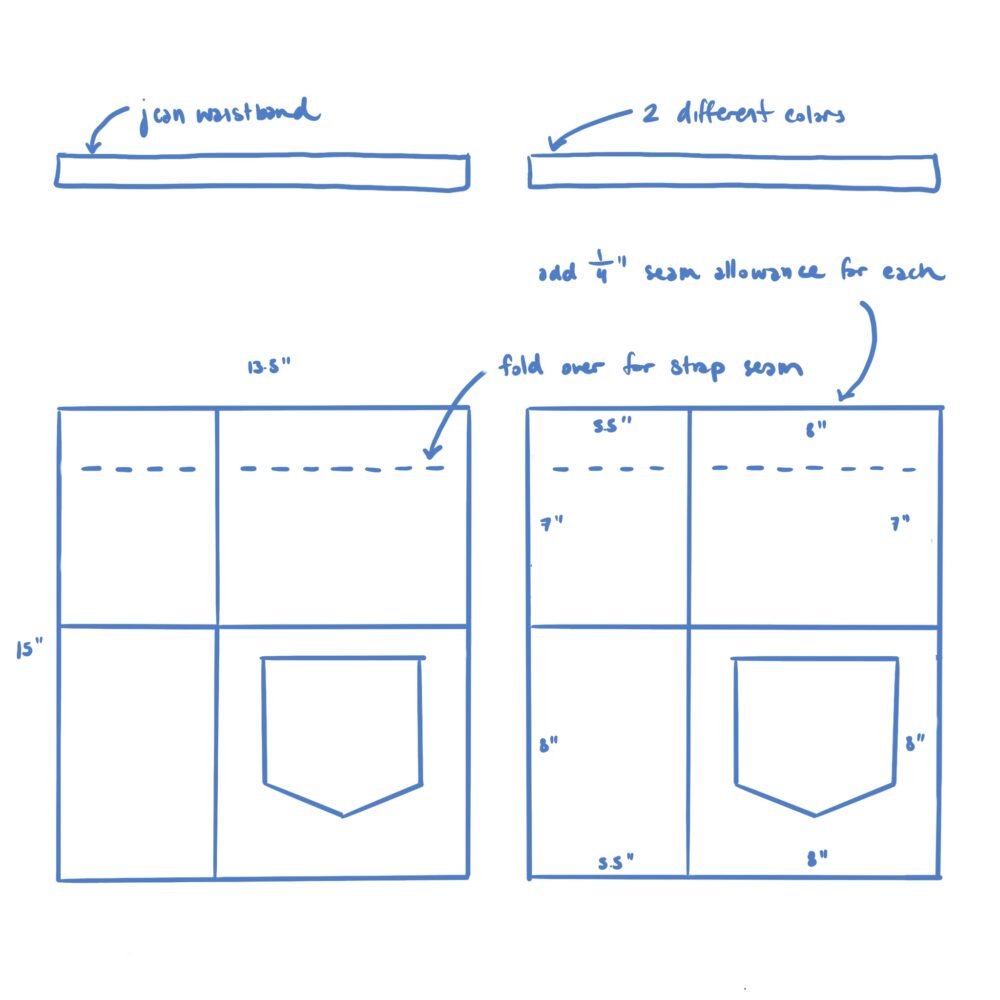
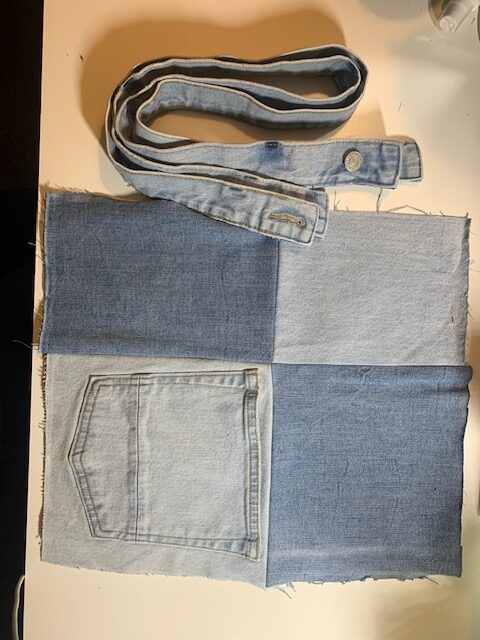
Breaking down the design even further, I wanted to resume the jean’s waistbands as my shoulder straps because they are already sewn and sturdy. I broke down each section of the tote to see what size the jean patches should be.
Phase 2: Deconstruction and Cutting
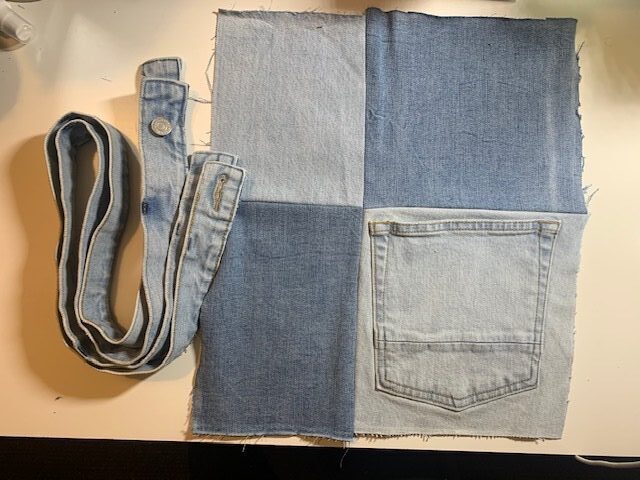
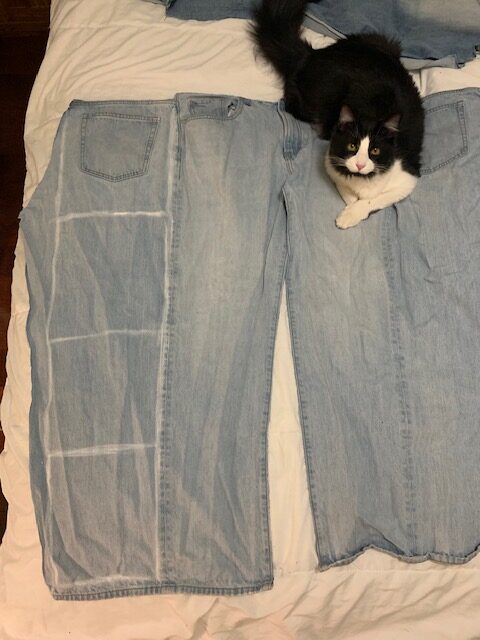
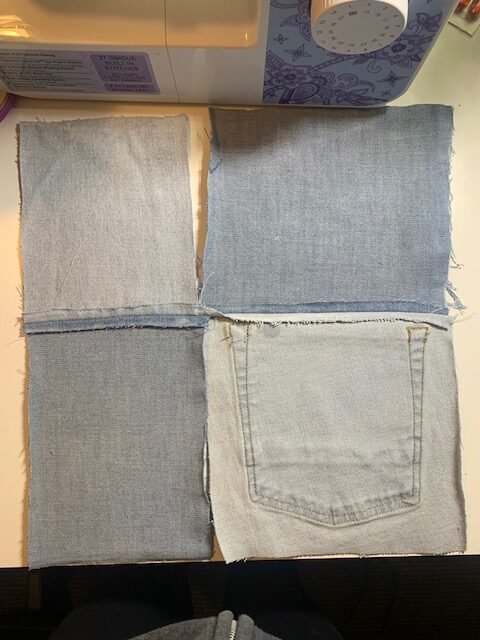
Because I really like a monochromatic look, I chose to only work with the blue jeans my brother provided and set aside the two black-washed jeans for a different project. I deconstructed each pair into two pieces: the waistband and the legs. The legs of the jeans were cut open into one large piece so I could see the total surface area of fabric I could work with.
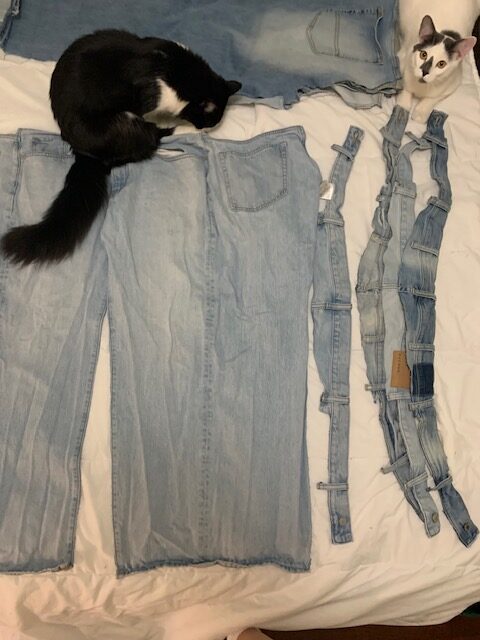
For each pair of jeans, I chalked out each of the four sections in my tote bag plans, adding 2 inches to each dimension because my chalk markings and fabric scissors are not precise. I then cut out the sections and stretched them in four directions (vertically, horizontally, and diagonally both ways) to get the grain direction of the jeans to be consistent. Lastly, I steam irons the sections for smooth and wrinkle-free fabrics to work with.
Phase 3: Layout and First Patchwork Sewn
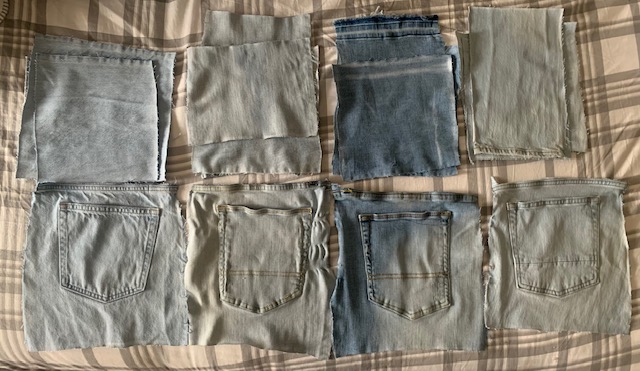
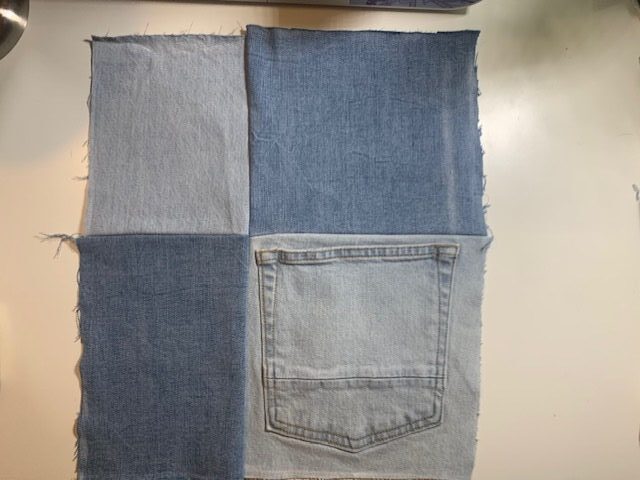
With each patch on my tote bag plan cut out in each jean’s fabric, I began to lay them out to see which combinations I found visually appealing. I really wanted the patches to contrast with one another, so I placed the lighter wash with a darker wash.
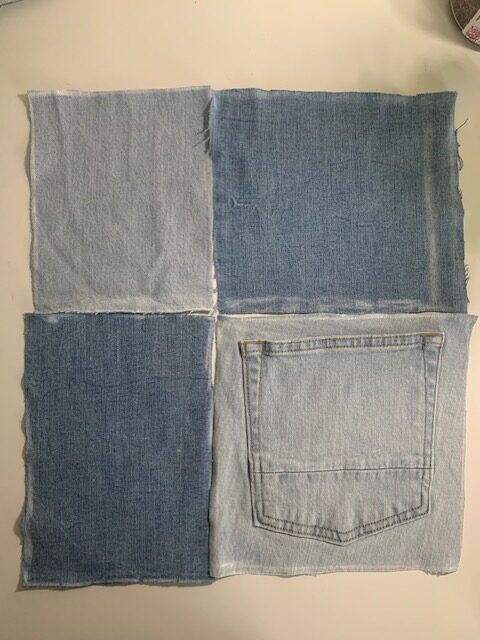
I lined up the patches I liked with the grains in the same direction. Then, I measured and chalked each patch to their proper dimension, adding ½ inch for a seam allowance. I cut the patches, pinned them together, and then sewed them together, two at a time. Each time, the seam had to be flattened and steam ironed for a nicer edge and easier control when sewing.
Phase 4: Prep-Work and Next Steps
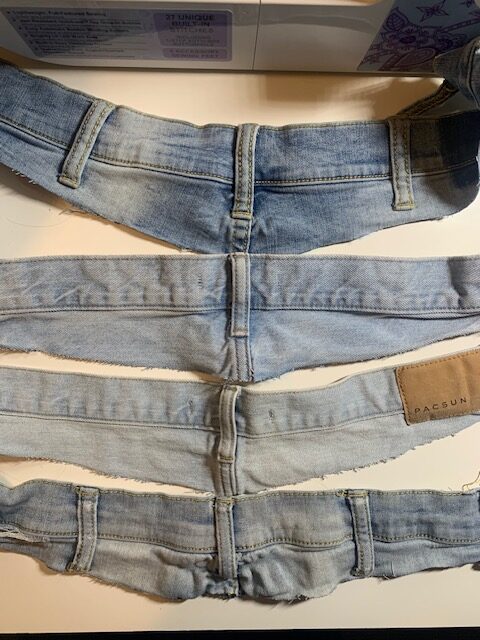
For my straps, I picked the two jeans that had a more rigid waistband, as opposed to the other two with a more elastic, stretchy waist, so I would have more rigidity and strength when holding heavier items in my tote. I cut off the tags, belt loops, and extra edge materials so that they look more clean.
To finish the project, I plan to:
- Repeat my process to make the other patchwork side to my tote bag
- Sew together the bag
- Sew in the straps
Based on the feedback I received, my bag should include additional elements to make it pop. While I plan to stick with my denim fabric, I want to possibly find ways to integrate the metal buttons, or to sew on the belt loops so it can hold decorative keychains/chains/charms/bandanas that would give the bag more personality.
References:
[1] Notches Sewing. (2023) How to make a Simple Tote Bag -DIY Easy Sew to Sell [Video]. YouTube. https://www.youtube.com/watch?v=LhZ2_Q9AVMA
2 Comments. Leave new
Hi Helen,
It looks like you have made some good progress on you project! I was wondering if you had considered making a bottom to your bag so the 2 sides of the bag are connected to the bottom giving you a little more room to put stuff in the bag and have it sit nicely? I know you said that you wanted to keep to the denim aesthetic and wanted to perhaps use the metal buttons have you considered using them as clasps so the bag closes?
Hi Sophie,
Thanks for your questions. I did not include a bottom because I am not very experienced with sewing, so I followed the pattern shown in the Youtube video I referenced. As for the buttons, my roommate also gave me the same suggestion and I loved it! I planned on sewing them as clasps across the top, but as I worked on my project, I realized just how think the waistband and my sewing machine was not happy with me. I tried to find ways to remove the buttons, but with the materials I had, it did not seem safe for me to force the buttons off the pants. Sadly, the buttons did not make it onto the final product 🙁