

For my upcycling project, I decided to create an iPad holder for my desk that fits into the Skateshop Aesthetic. When I lived on the East Coast my local skateshop was Switch Skate and Snow which was located in Newark, Delaware. This shop, which is shown in the images below, is the main inspiration for the aesthetic of my project.


Photographs taken by Jeremy Mazur [1]
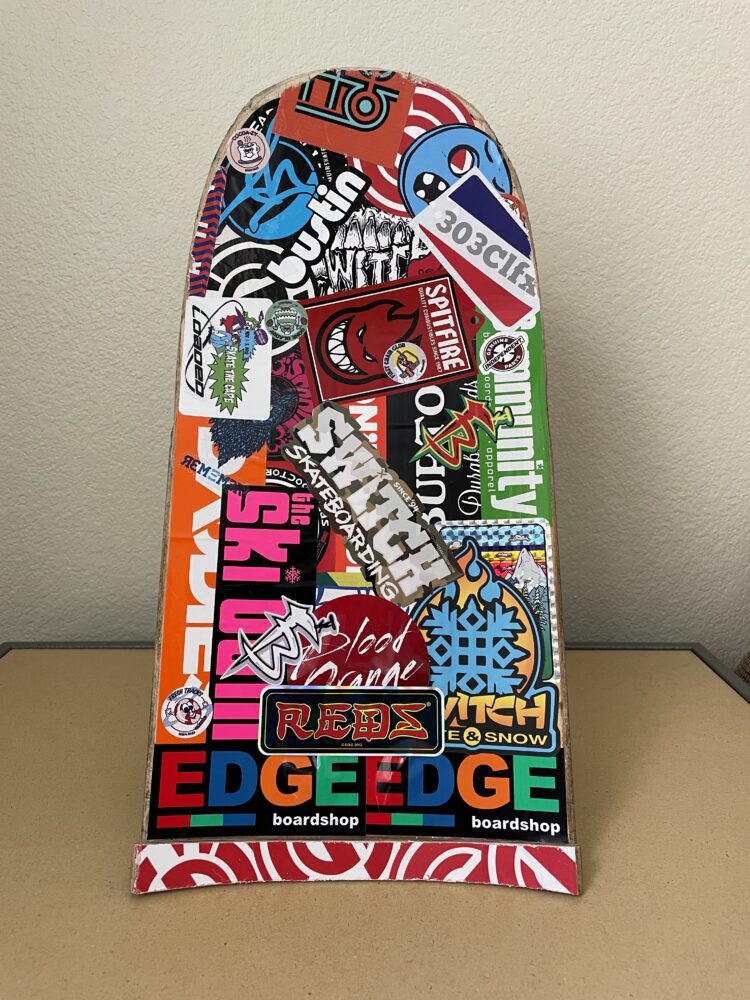
Another inspiration was the aesthetic of longboard competitions held by Faceplant Boardriders. At many of these events, equipment such as jumps, skateboards, and helmets were covered by overlapping stickers so I planned to incorporate this look into my design. When brainstorming project ideas I wanted to create something that not only fit my aesthetic, but also served some function. Since I will be using my iPad a lot more to sketch and doodle in this class, I thought an iPad holder would be useful. I could also use it to display notes when I am doing homework so I decided it would work great for this Upcycle Project.
Project Aesthetic:
Before I go into detail about the design and fabrication process, I would like to start by quickly explaining what the Skateshop Aesthetic looks like. At its core, the Skateshop Aesthetic encompasses anything that looks like it belongs in a skateshop. This includes skateboard equipment as well as clothing and graffiti. Some features of this aesthetic are listed below and can be recognized in the images I shared above.
- Graffiti style graphics
- Colorful
- Equipment focused (decks, trucks, wheels, stickers)
- Lots of exposed wood
- Hats and Hoodies
- Loose fitting clothing
I big part of skateboarding and longboarding culture is DIY projects. In skate shops you can find chairs, signs, mirrors, and more that are made out of skateboard parts. Designs usually incorporate wood, stickers, and unique colorful graphics since this mimics the look of a skateboard.
Design Process:
Once I had a project in mind, I began by brainstorming how I would design the iPad holder with the skateshop aesthetic in mind. I sketched out some initial ideas which can be seen below.

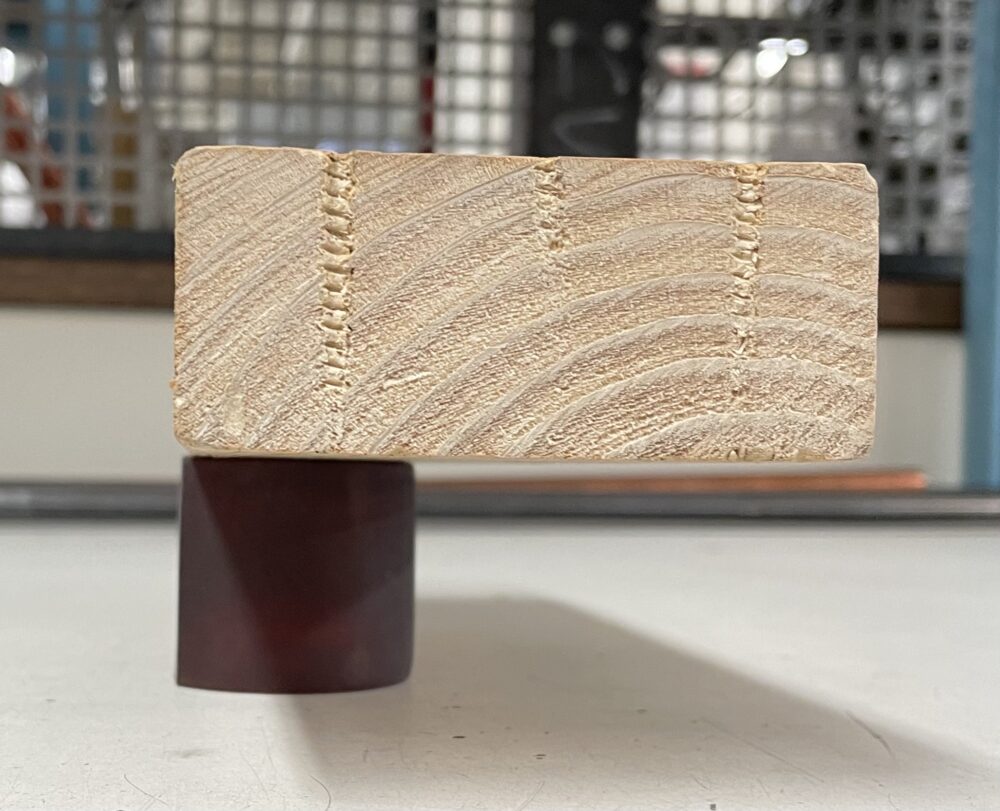
I remembered I had some old skateboard decks at home so I knew I wanted to use one of those as the backboard of the iPad holder. Next I needed a way to support the deck at a slight angle. Back when I was longboarding every day, I remember our wheels used to get flat spots from holding long slides. This would force us to get a new set of wheels and while a flat spotted wheel would be useless for longboarding it would work just fine as the base of my iPad holder. For those who do not know, the image below shows what a flat spotted wheel looks like. I planned on exaggerating the flat spot until it reached the core of the wheel so that the base of the ipad holder would be stable.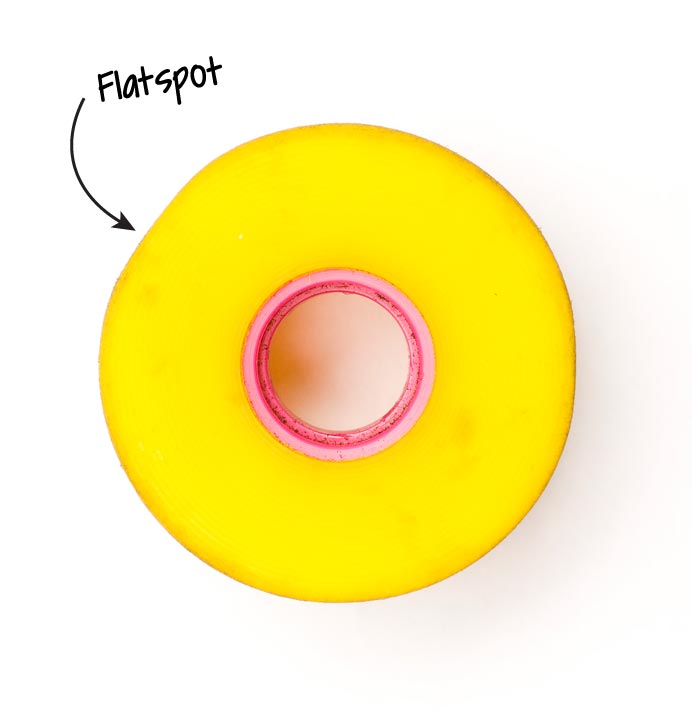
Photo of flat spotted wheel from Lush Longboards [2]
To mount the wheels to the board I would use an old skateboard truck. One concern I had was how stable this setup would be. In my initial sketches above, I came up with two possible solutions to improve stability. I also needed a ledge at the bottom to support the base of the iPad. My plan was to cut a piece of wood to match the concave of the deck and glue that to the base of the iPad holder. Finally, to fit my aesthetic, I planned on slapping a bunch of overlapping sticks on the board instead of using some type of wood finish. I want the board to look clean, but slightly worn and damaged at the same time.
Fabrication Process:
With my design completed I started by gathering some of my old skateboard/longboard equipment from home. I also grabbed a bag of stickers I had saved up over the years. Out of the 3 board I had to choose from I chose the one with the most wear and tear on the back, but the least damage to the edges.

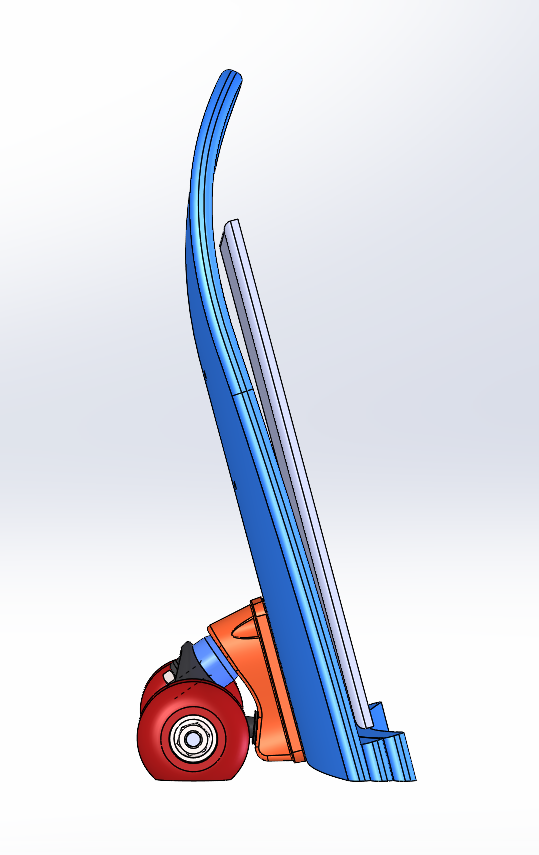
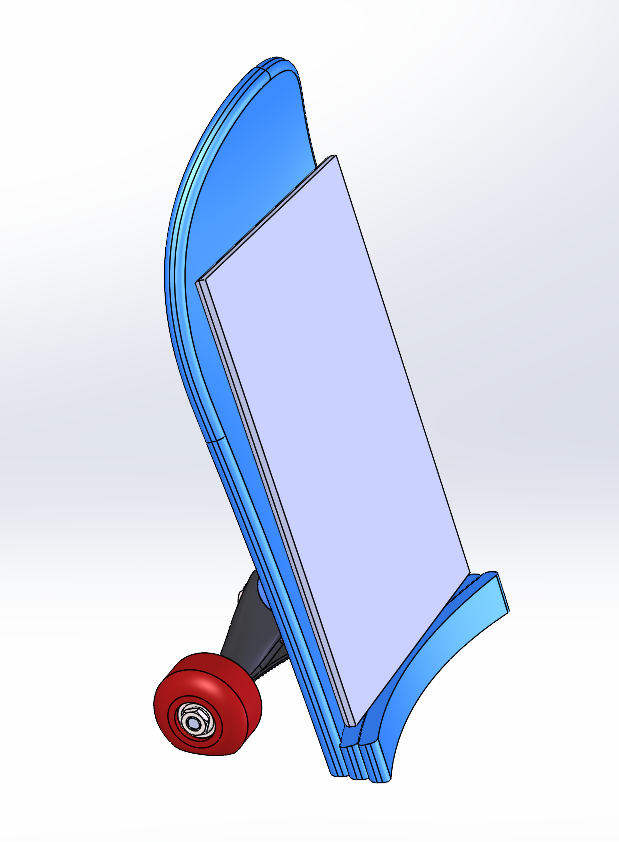
My next steps were to take the woodworking workshop at the Idea Forge so that I could begin modifying the materials above into my design. After completing the workshop I discussed the plans for my iPad holder with Josh Colyer, the man who runs the Idea Forge Woodshop. He gave me some good ideas for how I should go about fabricating my stand as well as some design considerations. Using Josh’s feedback I created a CAD assembly of my design by modifying skateboard CAD files I found online.
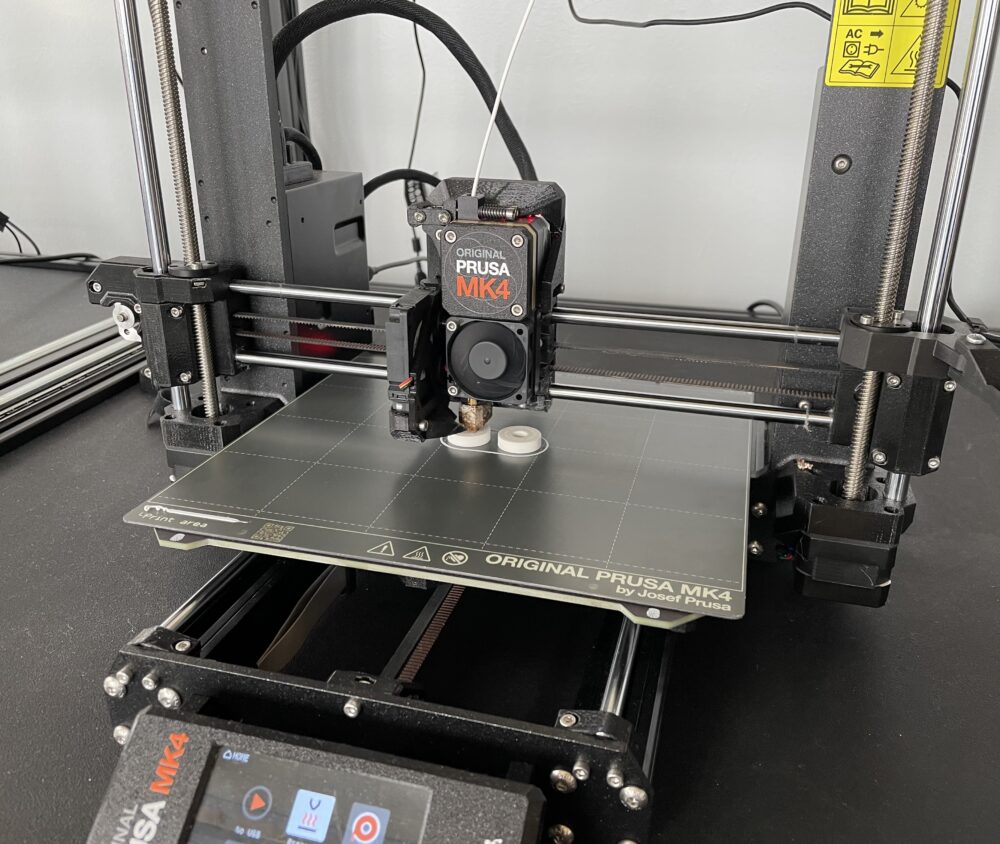
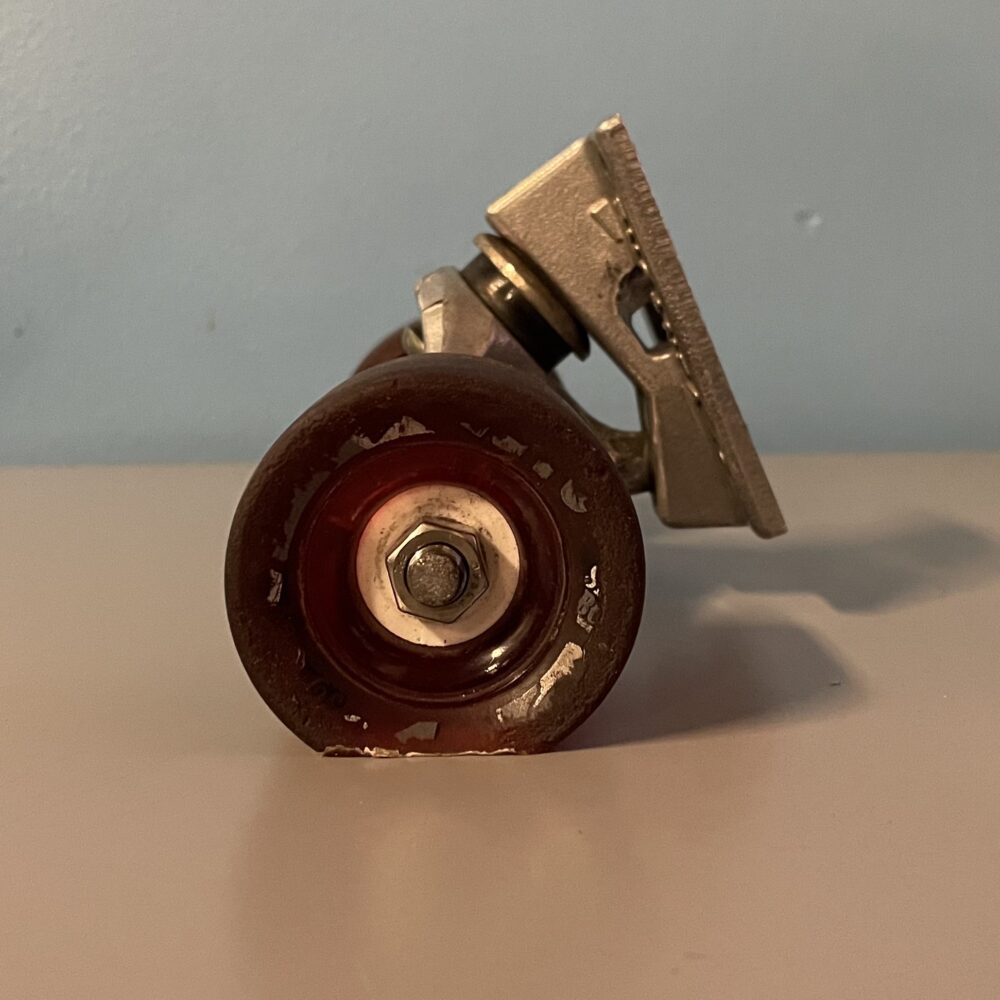
One thing Josh and I talked about was making a rig to help me sand the flat spots on the wheels. For my rig, I found a piece of scrap wood and simply drilled a hole 19mm from the edge. I used this rig to sand one wheel at a time so that each wheel would have the same depth flat spot. To secure the wheel to the rig and stop it from spinning I needed to 3d print plastic placeholders for the bearings. I quickly made a 3d model using the standard dimensions of skateboard bearings and printed them for free at the ITLL.
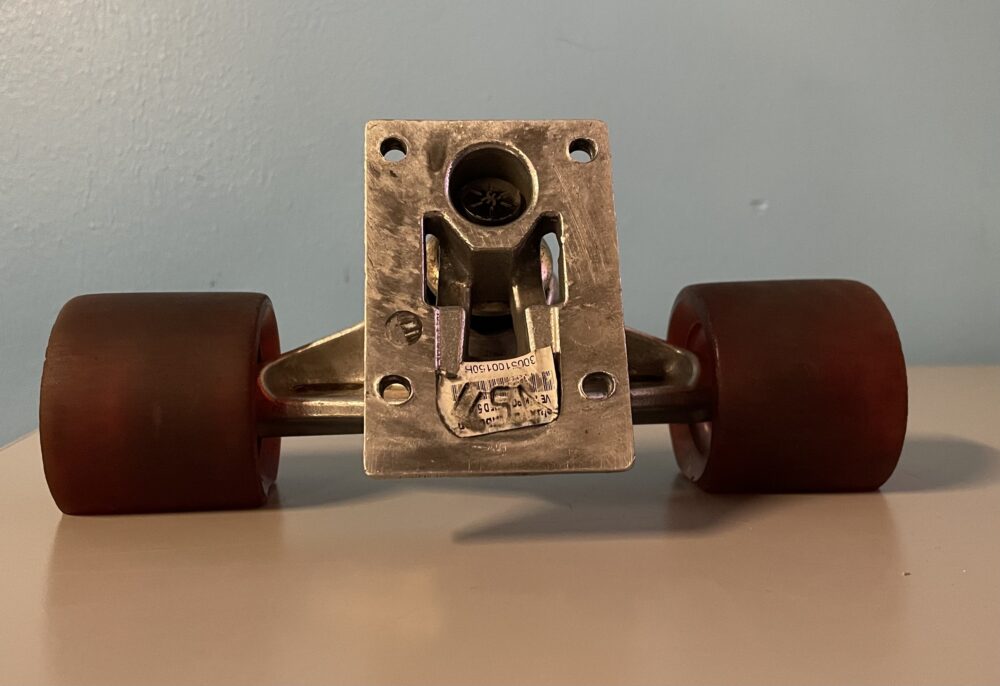
Next, I inserted the bearing placeholders into the wheel and secured it to the rig using hardware I grabbed from the ITLL project vault. Once I flat-spotted both wheels I secured them to a skateboard truck to complete the base of my stand. The image below shows what the rig looked like fully assembled as well as the completed base of my stand.
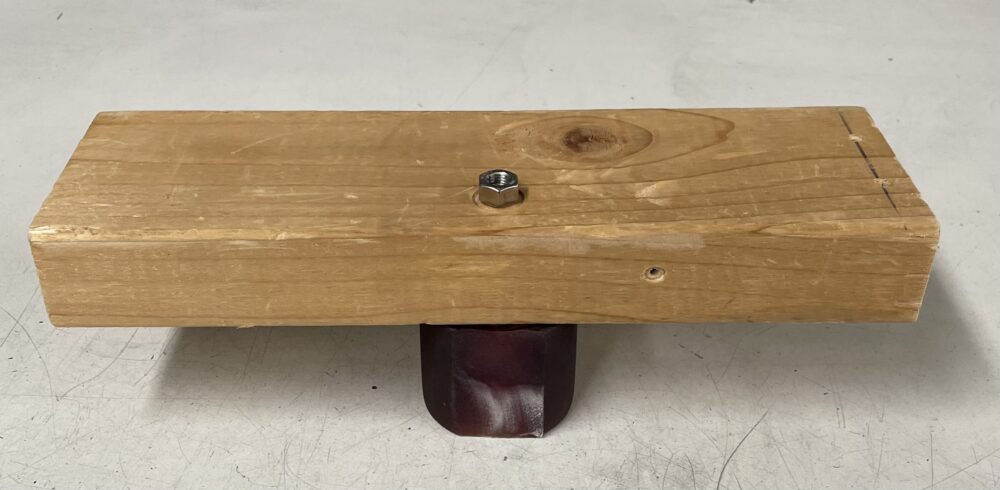
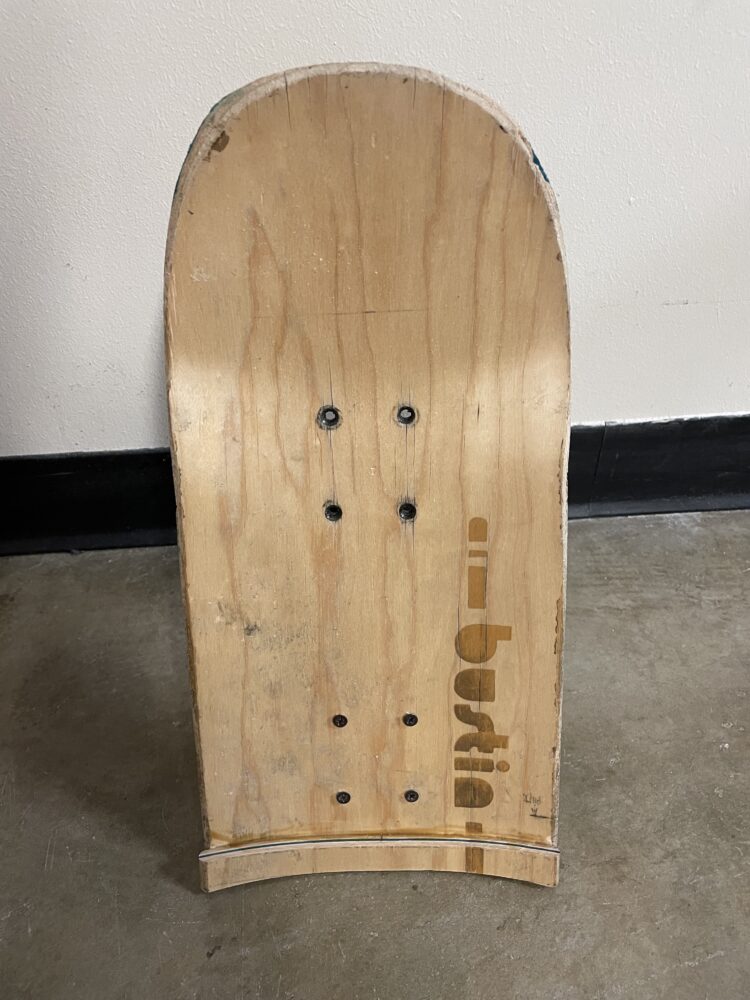
Josh and I also discussed what material I would use to make the ledge at the bottom of the stand that supports the iPad. We decided it would look cool to cut two thin pieces of the board and bond those together so that you can see the laminated layers of the deck. Before I could start cutting the deck I needed to remove the grip tape. I used a heat gun to heat the glue so I could easily remove the grip tape. Next, I cut the skateboard deck to length using a miter saw and cut one of the two thin pieces for the ledge mentioned above.
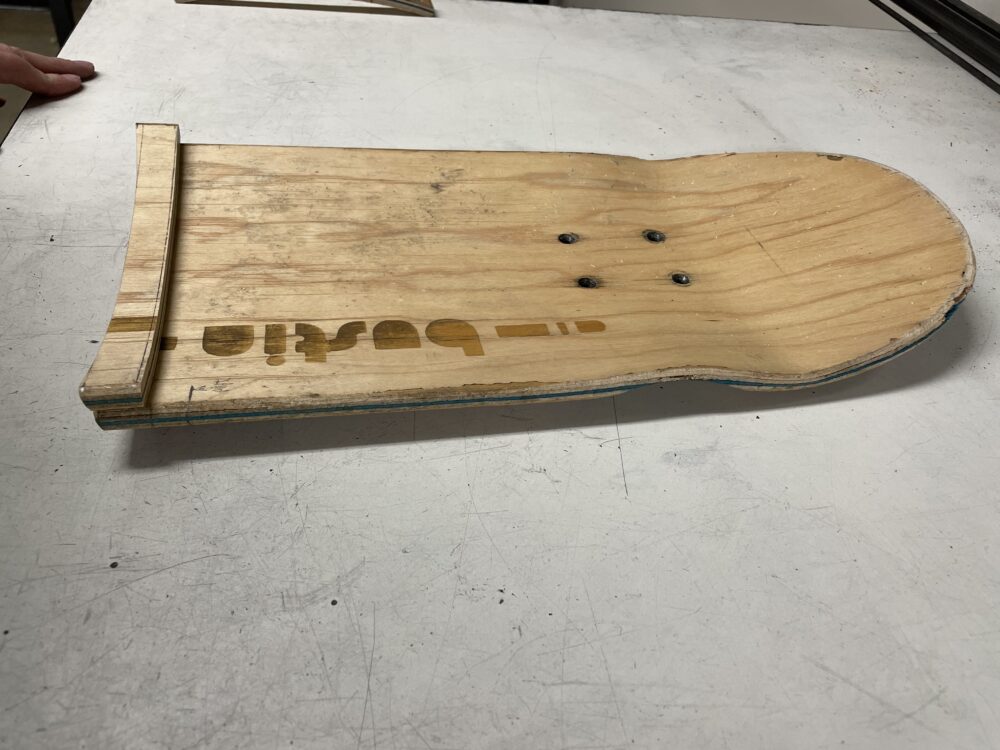
I ran into trouble trying to cut the second piece for the ledge since there were limited options for securing the board in place. I made the decision to just use one of the thin cuts for the ledge. I bonded the ledge to the base of the board using wood glue and then drilled 4 hole for mounting the truck. After assembling everything I had the functioning stand shown below.
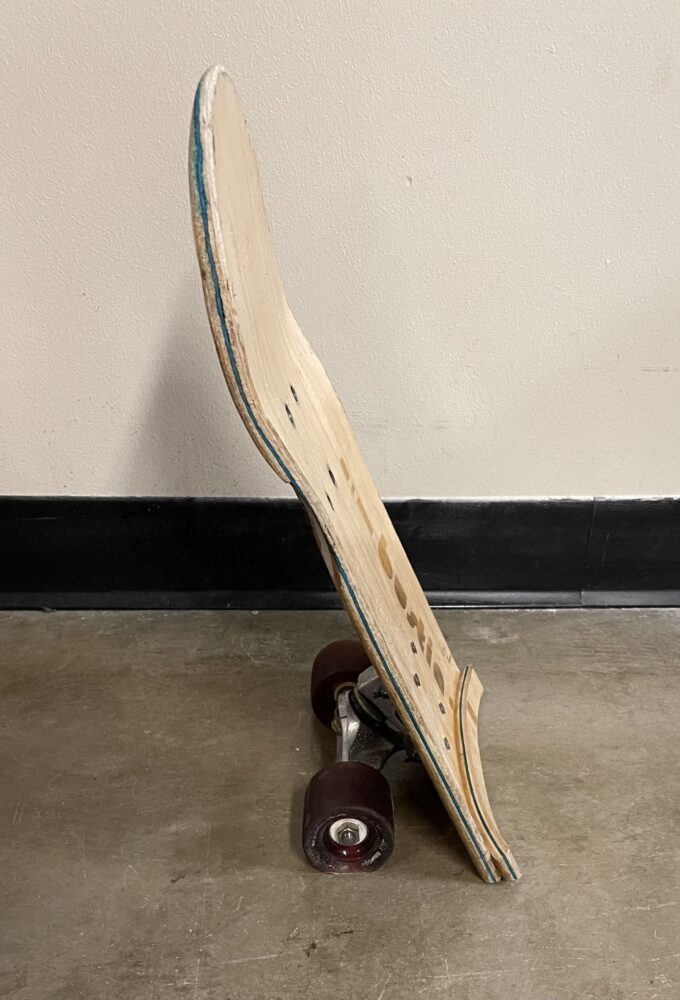
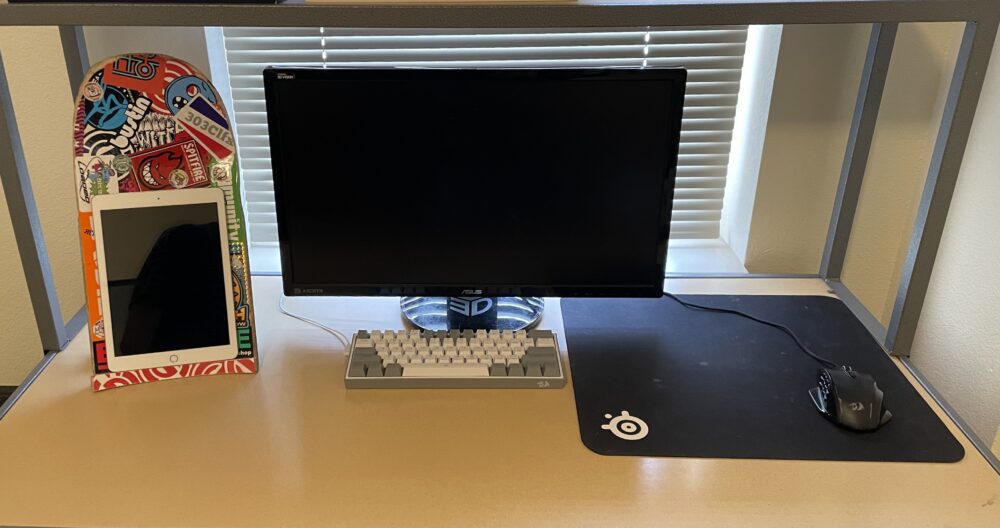
The base of the deck then comes into contact with the table was not completely level so the stand had a slight wobble. I used a sander to level the base and now it is very stable. The final step was to cover the front in stickers. I started with square stickers to line the straight edges of the board and cover the interior surface. After that I used the round stickers to line the round edge of the board and filed off any stickers hanging over the edge. Then I placed many stickers overlapping the others to get the look I wanted. The images below show the final product, which I am very happy with. In the future I would like to add a hole for a charger and possible a way to secure the iPad to the stand, but for now I accomplished what I set out to create.
Citations:
[1] Jeremy Mazur, Photographer
Website: https://www.flickr.com/photos/jbmazur/6126387352/in/photostream/
[2] Lush Longboards, Longboard Wheel Guide
Website: https://lushlongboards.com/workshops/longboard-wheel-guide/
4 Comments. Leave new
Hey Ethan! This is such an awesome project! I remember seeing it glued up in the woodshop and I wasn’t sure what it was in that moment–but now that I have the context I am super impressed by your fabrication process and functional final product! It is exciting that you got some experience making custom tools/jigs for your project’s needs. The skateboard has an interesting design history, so it was cool that you were able to transform it into something totally new that still fits the original aesthetic. I think you really embraced the DIY ethos of skate culture–nice job!
Thanks Katie! This project was a lot of fun and I definitely gained a lot of useful woodshop experience. I’m glad to hear you think it fits the aesthetic so well.
To whom it may concern,
I would like to begin with the fact that skateboards are the coolest! and the fact that you were able to take this rascal of an activity into the classroom is truly riveting. I especially like how you utilized the ground breaking technology of 3D-printing to create your own press-fit bearings that limit the rotation of your flattened out wheels. The idea of a hole for a charging cable has me charged up! as I feel like that would really take your project to the next level. You are truly a savant and I commend you on the work you have presented us with.
Now you listen here John. Your opinion means the world to me. If you said scrap it, I’d light this on fire in a second. The fact that you are happy with the final product has me tingling with excitement. The manufacturing process was a lot of fun and I got to utilize many useful technologies as you mentioned. You also say the idea of a charging hole has you, “charged up”. Well consider it done. I will drill it in the bottom, lay it at your feet, and you will say that it is good.