
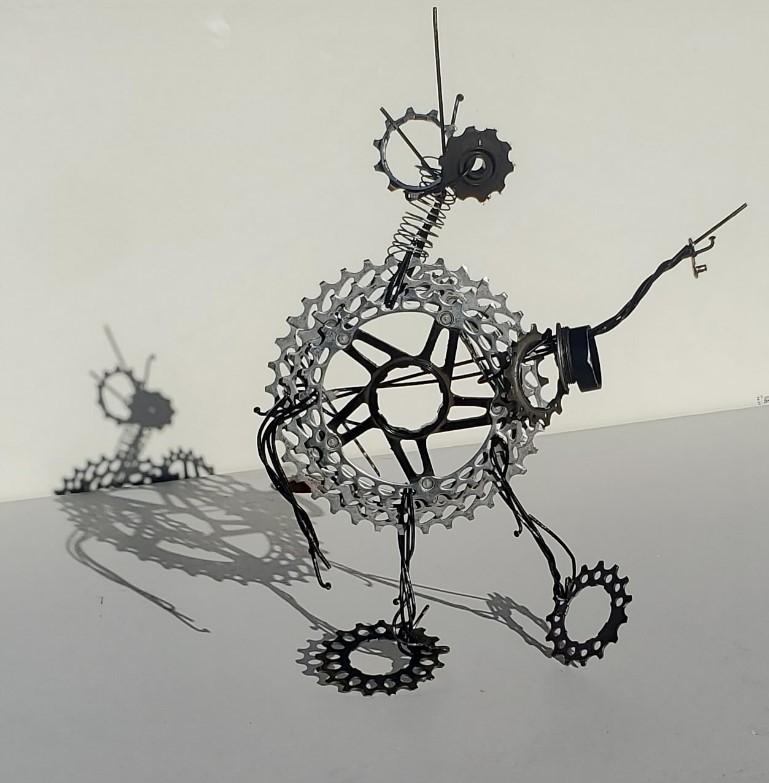
Here is the culmination of my upcycle project work! I’m calling it the “Industrial Disco Man”. I love the way the final result came out. I think the little guy is pretty cute and funny looking.
Inspiration:
I have wanted to create industrial looking sculptures even since I was a kid going to the Swetsville Zoo. The Swetsville Zoo was a sculpture park where animals were created from old rusty cars and other metal parts. I think it is so cool to turn mechanical parts into something way beyond the vision the original designer ever had. When we were first assigned this project I immediately was inspired to use the old bike parts I have sitting around the garage. I wanted to create something cute and funny using the bike parts. I think WALL-E is a good example of the sorts of goals I was after. He is a really adorable robot that doesn’t speak a word of English. R2D2 from StarWars is another good example of a mechanical creation people grow to love. I won’t be able to make my sculpture speak the same way WALL-E and R2D2 can, but I knew I could try and make something cute none the less.

Luci Westphal “luciwest.com” – Swetsville Zoo
Vision:
My vision was to create a cute sculpture from the bike parts I have compiled the last few years. It was crucial that I created something people found cute and want to touch. Bike parts are designed with such a specific purpose in mind. The engineers care so much about the functionality of the parts to a point where they become something you never want to touch. They are sharp, cold, dirty and sometimes rather ugly. I think back to the times my chain has fallen off my bike and I’m stuck trying not to get my fingers pinched in the gears. By the time everything is back in order my hands are a filthy mess. My hope is that this project will change the perception people have when it comes to mechanical components. Gears, chains, and spokes can be combined in a new way that is loving and adorable, no different than a teddy bear (besides the cuddliness).
From this general vision I set out to understand what makes people fall in love with teddy bears, puppies, and babies. I think it stems back to big eyes and round bodies. Therefore, I knew my sculpture had to be very round and have big eyes. However, I still wanted the creation to be uniquely industrial. I wanted it to have human features while taking plenty of liberties. At the end of the day it should resemble a human by having 2 legs, 2 arms, and a head. Beyond that I wanted the bike part to still be obvious. The aesthetic I was going for was a plush industrial sculpture.
Fabrication:
Below is an image of the raw materials I was working with for the project. This pile of junk consists of bike spokes, wire, chain rings, a rear cassette, a bike chain, nuts and bolts, and a random spring.

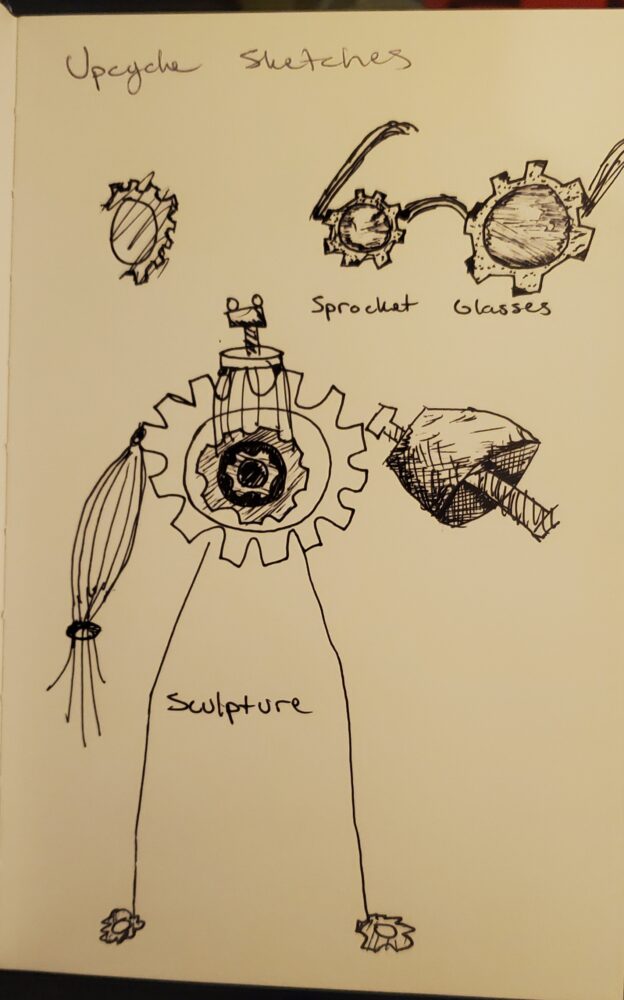
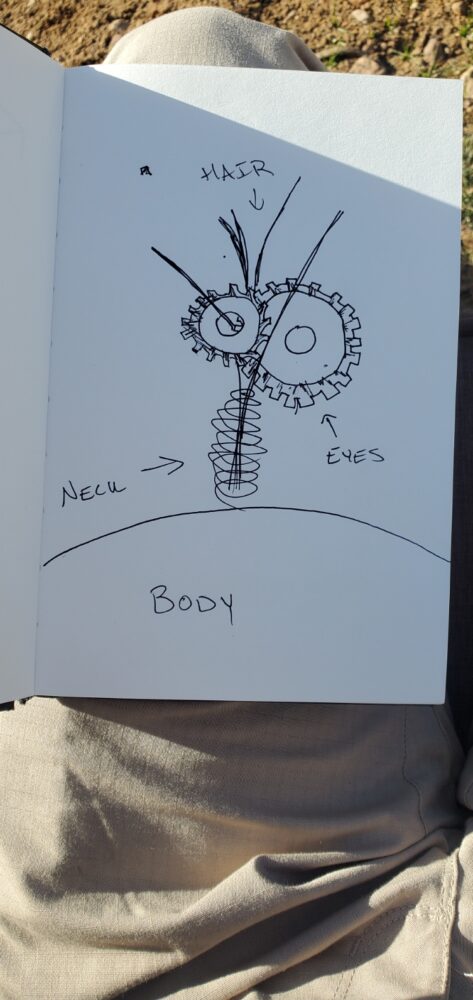
Using these parts as my reference I initially sketched up some designs for potential sculptures. I settled on the weird looking gear man in the bottom left of the sketches shown below. I think his little eyes on the top of his head resembled a frog which I thought was funny. However, as I got further into the project I knew I was going to need big round eyes if I wanted to make it looks cute. Below is another sketch I had simply focusing on the face of sculpture. I thought mismatched eyes of different sizes on a thin little neck would be really funny and cute since it is so weird.
From this point I decided I just needed to start making the design and I could edit and change things on the fly. I initially wanted to use epoxy to hold everything together, however I quickly realized the setting time was too long. Therefore, I would need to clamp everything in place for a long time before I could be sure it was sufficiently hard. Instead I opted to bend my spokes and essentially use them as both the wire and the limbs simultaneously. Unfortunately, I did a really poor job documenting the building process so I have attached some early images and then will annotate the final construction to explain what I did the rest of the way.
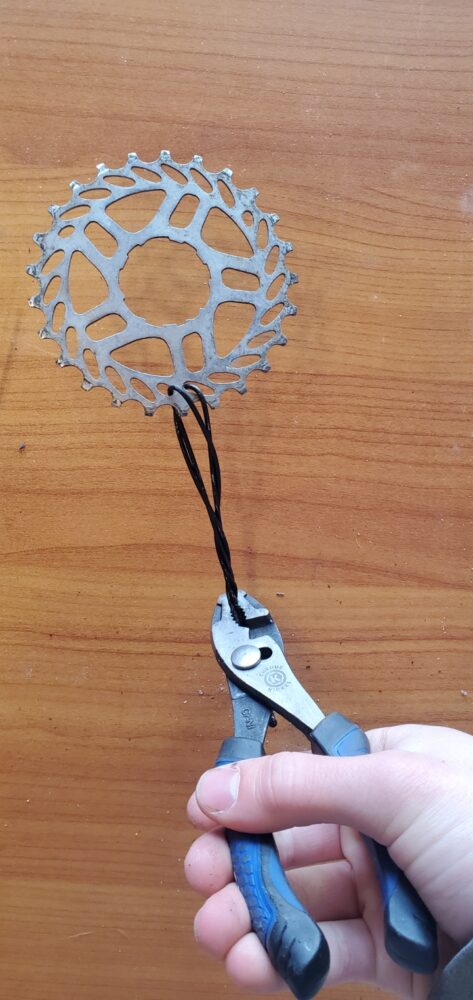
First thing was I inserted the bike spokes into gears I would use as the feet of the sculpture.
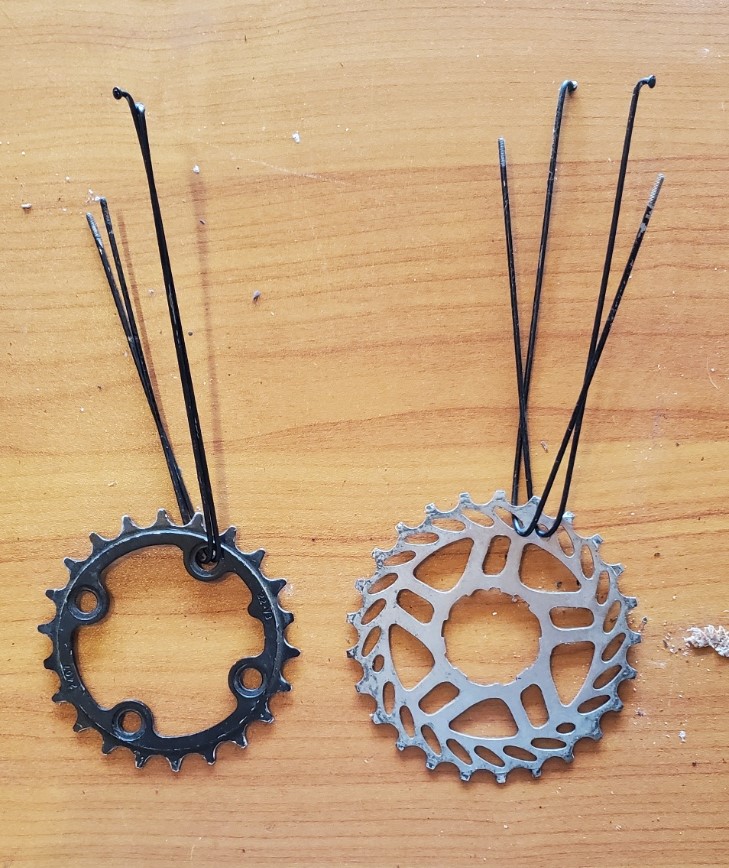
I then took my pliers and twisted the spokes together to form the legs of the sculpture. This helped ensure they were sturdy enough to support the weight of everything else. I had to add some bends halfway up to form the knees on each leg.
\
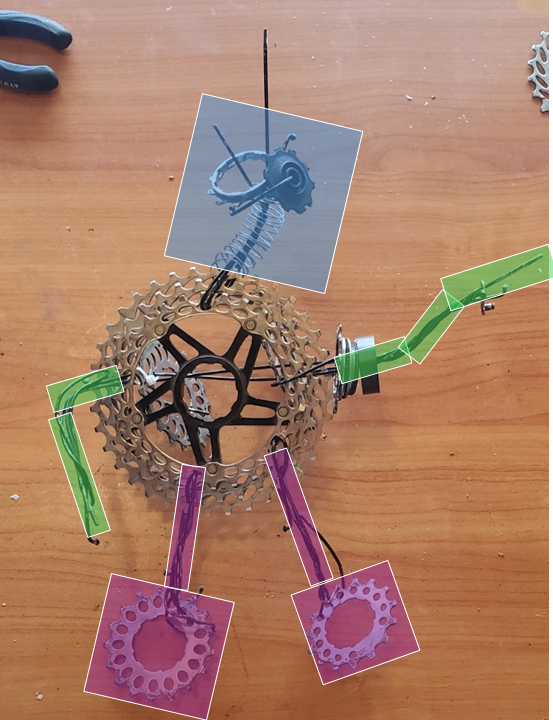
From here I wrapped the legs (purple boxes) around the central cassette. The cassette was going to be used as the central body of the entire sculpture. The legs were then twisted one last time to ensure they held on well to the body. I then had to fiddle around with the position of the feet gears to allow the sculpture to balance properly. Once it could stand on its’ own two legs I started working on the arms (green boxes). Similarly to the legs I wrapped the bike spikes around a gear and twisted, However this time I only wrapped around the middle cassette so the individual spokes would resemble fingers. The arms were in a very rigid straight position. I started to manipulate them along with the legs to put the sculpture into the “disco man” position. I chose this pose because I wanted the sculpture to be doing something uniquely human. This would allow the audience to quickly impose human characteristics onto the mechanical amalgamation. I was hoping if they saw it as human, the small form factor would help add to the cuteness. If it wasn’t in a very human position then I think people would be confused as to what it was and I wouldn’t realize my artistic vision. The final step in the assembly process was adding the head (blue box). I followed the same steps as before, wiring the spokes through the gear and leaving one end free. I twisted the spokes together and then added the spring to represent the neck of the little guy. Finally I wired in the miss matched gears for each eye of the sculpture.
It took a ton of trial and error to get the sculpture to stand on its’ own while still maintaining the disco pose. I also had a hard time getting the eyes in the correct position. Eventually I was able to get everything tuned the way I wanted and it was time for the final photo shoot.
Final Product:
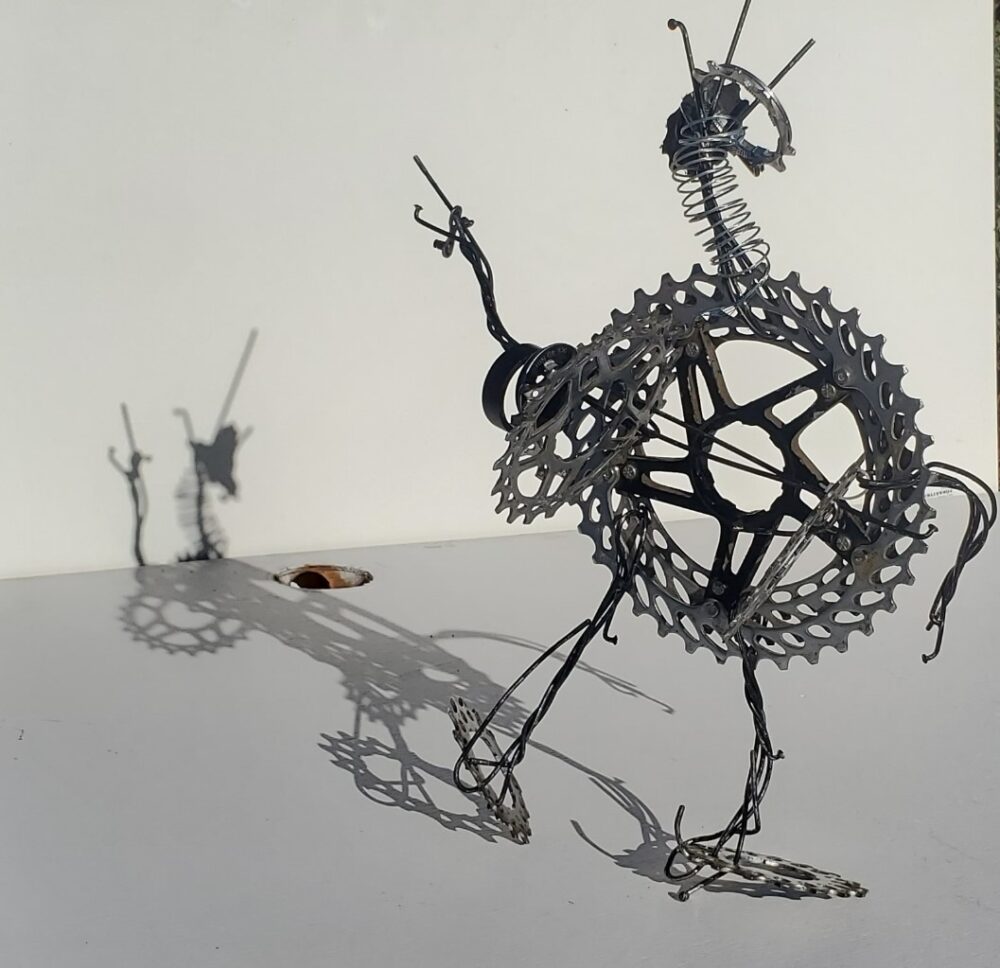
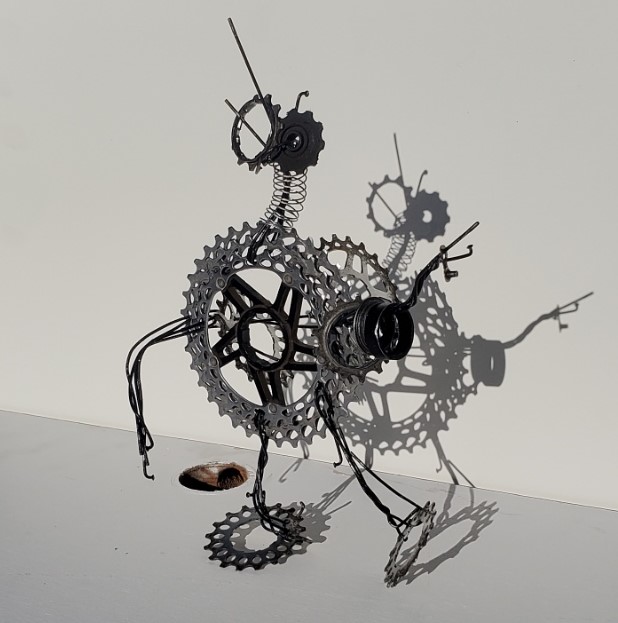
The “Industrial Disco Man” is striking his best dance pose in the images below. I really love this first picture because it looks like he is dancing and doesn’t care who is watching. The other pictures show the other angles of the sculpture. I like the way his eyes came out, since they are off center and disproportionate in size. The artifact is a compilation of numerous scrap bike parts including spokes, gears, and springs.
Review:
I think I achieved everything I wanted from my functional goals. I made a sculpture look somewhat human and cute by using its position and physical features to trick the viewer. I think the colors are a bit off however. I wish the sculpture wasn’t so shiny as it makes certain parts way to bright in the sunlight. That being said it is still clear what the sculpture is. My artistic goals were also met because I achieved my goal of combing the plush aesthetic, the anthesis of industrial, with my industrial design. I think the product is something that resembles the cute and playful nature of humans. This cute industrial aesthetic is something very hard to accomplish but I think this worked out really well. I plan to recycle the artifact since there were a couple components that I will need for future bike repair projects!
2 Comments. Leave new
Hi Blake,
I really like the pose your project is making, the final product looks great. Did you consider welding together any of the components, and is your project still holding together?
Your sculpture is a fun mix of industrial and cute, like WALL-E and R2D2. What made you pick the “Industrial Disco Man” pose, and how did you manage to make it stand and look expressive?