
Inspiration
Around the time when the upcycling project was being introduced, my brother was spring cleaning his closet. This usually means a bunch of hand-me-downs for me, especially shirts, shorts, sweatpants, and jackets that can be worn oversized. However, one item that almost never fits are jeans. I do not have much experience sewing, so altering to look nice is unlikely.
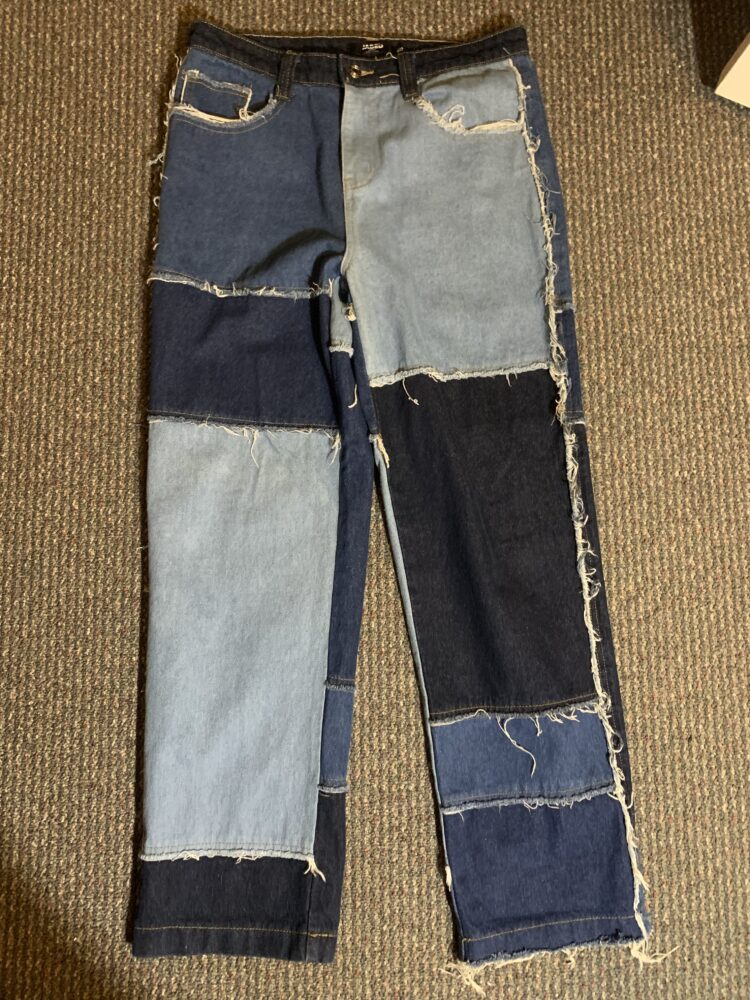
However, one pair that did surprisingly fit were these patchwork jeans. I really liked the aesthetic. While the print was quite simple, just blocks of different denims, it created contrast so that the jeans are a statement piece. Looking into the patchwork aesthetic, it was originally a crafting method to reuse fabrics by sewing together sections of different fabrics. However, it became an aesthetic during the 1960s hippie movement as a counter-culture, and today, can be seen as trendy and high-fashion.
Therefore, I thought using the jeans that did not fit me to create a patchwork piece I could make useful would be a great upcycling project. An item I am constantly buying are tote bags, so I decided it would be the perfect item to create.
Materials
All the following materials I already had. The only item I needed to purchase was the anti fray fabric glue.
- 4 pairs of jeans
- Fabric scissors
- Ruler
- Chalk
- Brother brand sewing machine
- Pins
- Anti-fray fabric glue
Design Plan
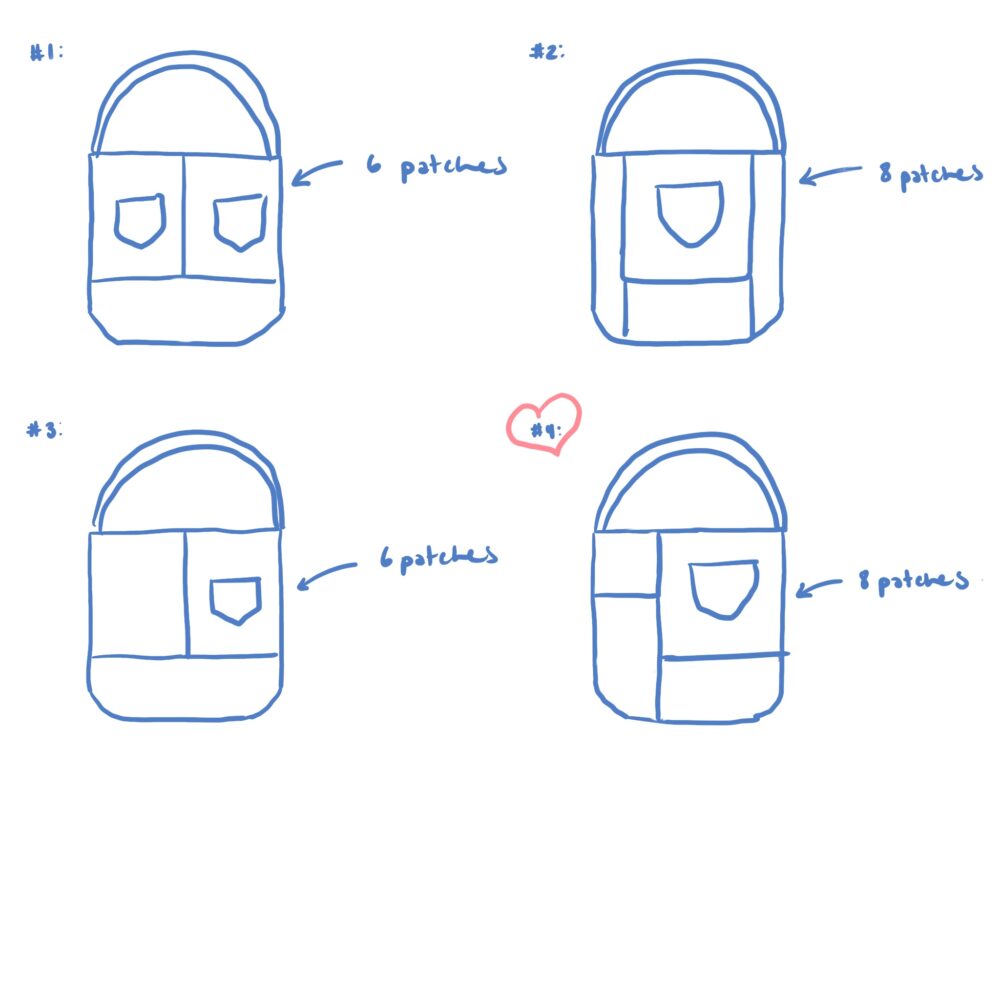
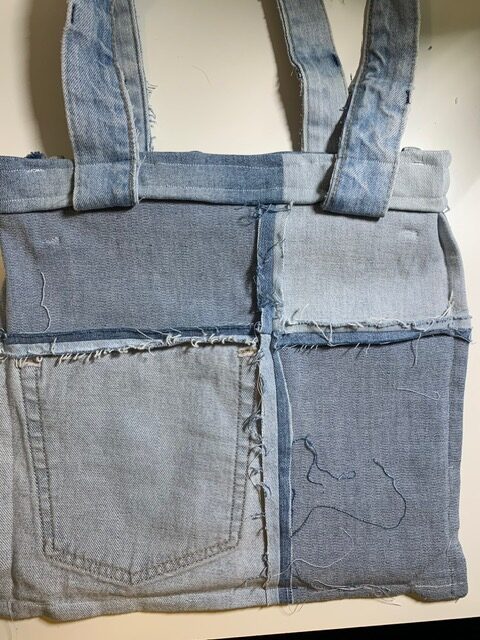
I began by sketching some ideas as to how I wanted the patchwork blocking of the totebag to look. One key element was that I wanted to incorporate the back pocket of the jeans as some easy access storage. I decided that I liked my fourth sketch because of the asymmetrical look.
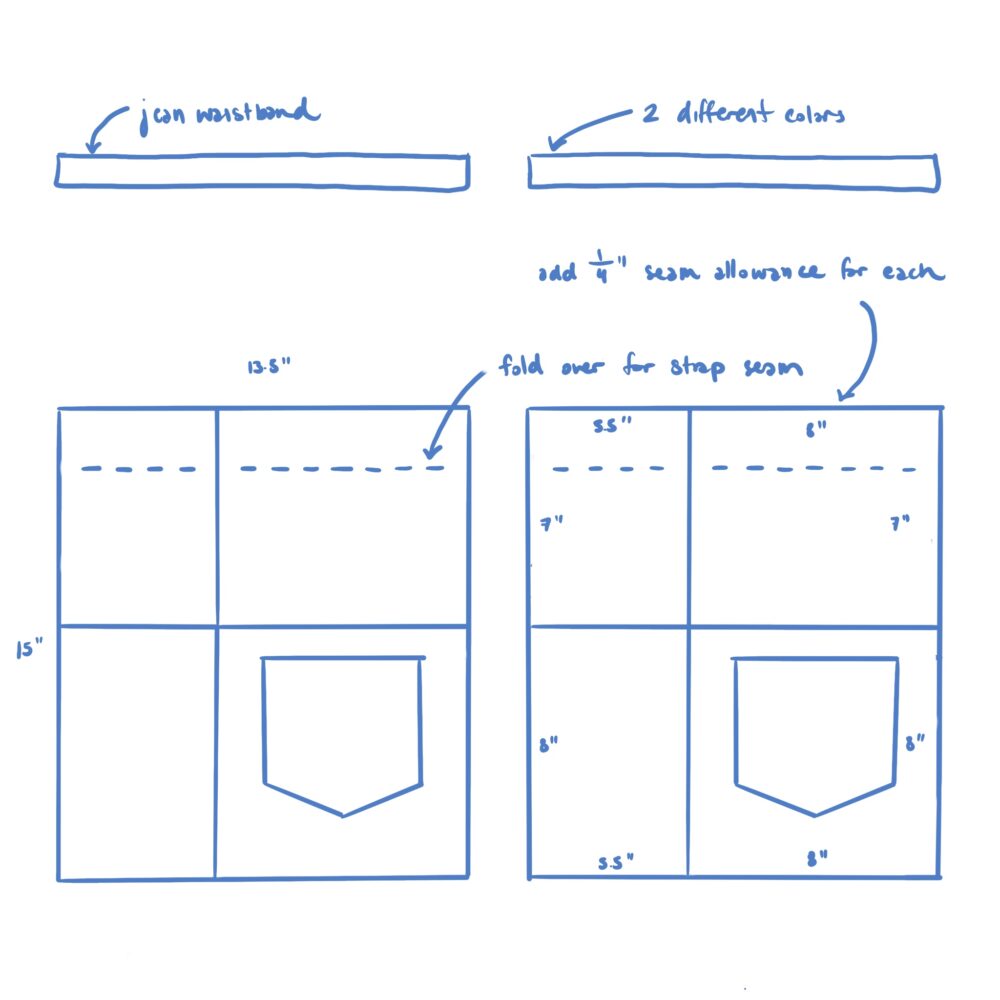
I watched a tutorial on sewing a tote bag, and decided to use the video creator’s pattern [1]. However, I wanted a smaller bag, so I subtracted about four inches in width and length.
I then sketched the detailed dimensions of the fabric sections I would need for one side of the tote. I moved the back pocket lower on the bag, so that when weight is added, it is more balanced and stable. Additionally, I got the idea that instead of having to sew my own straps, I would just use the waistband of the jeans.
Fabric Prep
Before I could sew my patchwork, I would have to prep the jeans to be flat cuts of fabric. I deconstructed the jeans by undoing the seam along the inner leg and separating the legs from the waistband. I then laid the jeans plan to see how much surface area of fabric I had to work with. Then, on the back section of one leg, I chalked out each of the four sections from my sketch. I had to add about two additional inches in each direction, since the chalk and fabric scissors were not accurate, and I could always take away but not add fabric.
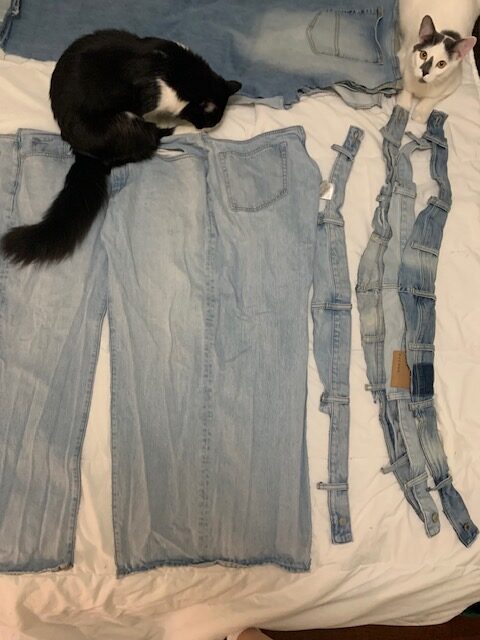
I repeated this process for each of the four pairs and then cut out the sections. The sections were then steamed to get them as flat and wrinkle-free as possible.
Sewing: Patchwork
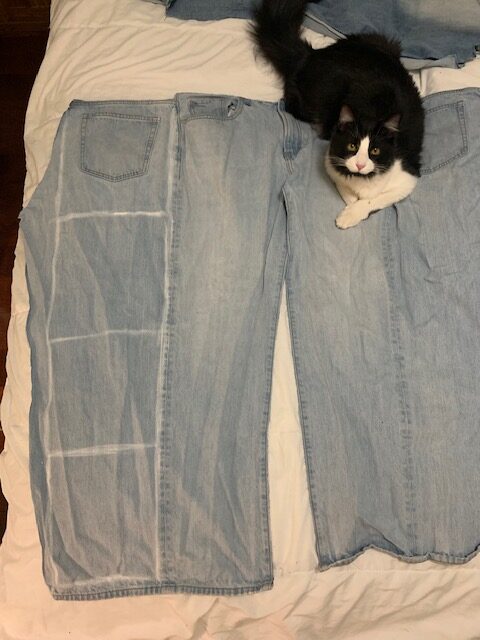
With the fabric sections now prepped, I began to lay out the sections in different arrangements to see what combinations appealed to me. My favorite was a combination of fabrics from three pairs (the fourth pair’s fabric was very worn out and dull), which had a nice contrast between the dark and light washes. I then sewed the sections together, in pairs at a time, being sure to steam flat the seams in between to get an even stitch.
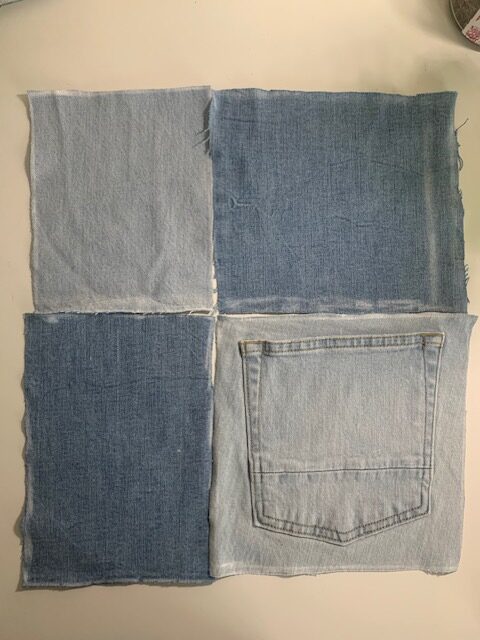
Finished Fabric Sections
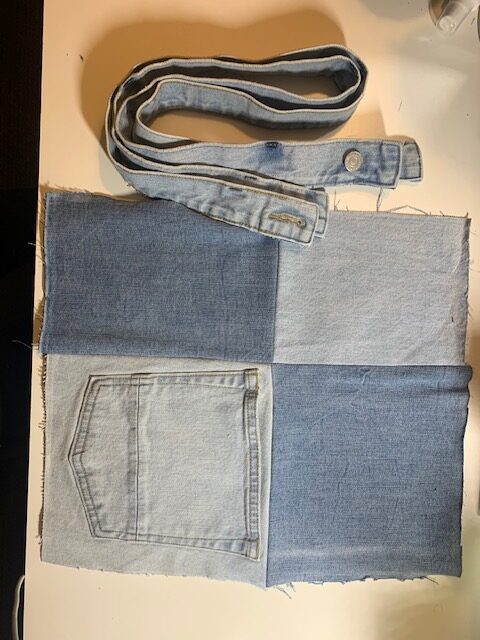
I repeated the same layout and sewing process for the second patchwork. For the straps, I picked the two waistbands that felt the most sturdy. The other two pairs have a stretchy, elastic band that would probably stretch when I put heavy things in my bag, which is unideal. To prep then, I just trimmed off the excess fabric. Finally, the fabrics I will be using to sew the tote bag are prepped, and can begin the construction of the actual bag.
Sewing: Main Bag
For the body of the bag, I sewed along the two sides and body of the bag. Then, flipping the bag inside out, the excess fabric along the seam was trimmed, before sewing along the same three sides again. This creates what is called a french seam, in which the raw seams are hidden. Not only is this a neat look, I thought this was important as to not fray the inside of the bag, since there will be a lot of movement and friction from putting things in and pulling things out of the tote.
Sewing: Straps (Major Roadblock)
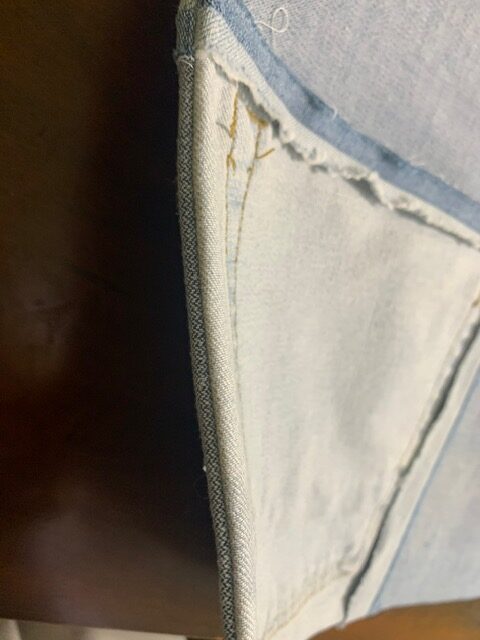
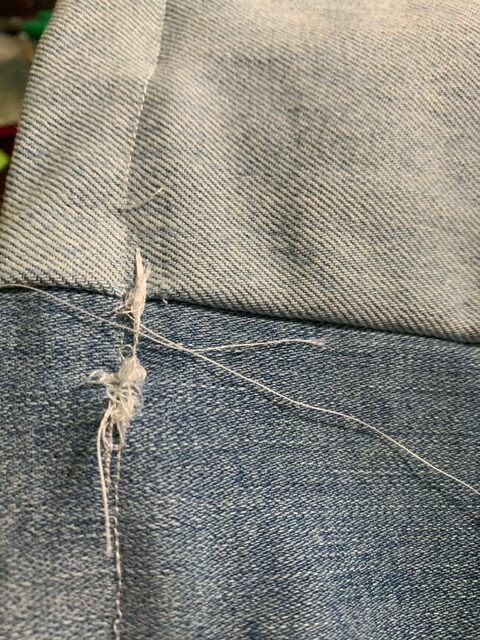
My biggest challenge would be sewing on the straps. For the straps, where they would be placed had to be marked, the top of the bag would have two folds to hide and secure the ends of the strap. This was difficult to pin and keep in place during sewing. Not only that, but because the thick sections of folded fabric and waistband was difficult to get the stepper foot to move atop off, and even when it did, it was hard to move the section along as it would get stuck. This resulted in very uneven sewing where there were transitions in thickness, and bunches of tangled and loose threads. The stitching was poor all around, so I decided it was best to redo it. It was a tedious process to cut and clean up the previous stitch.
When I attempted the stitch again, I made the following adjustments to my process:
- Go really slow
- Manually and with more force, pull fabric under the stepper foot and keep it moving
- Pay close attention to see if needle is bending
This resulted in a much neater and even stitch. However, I did notice that by the end, my stepper foot did have visible wear from the needle bending and rubbing against the stepper foot. While it did work out in the end, I realized how risky it was that I was not using a jean-specific needle and that was wearing out my machine or my needle could break and fling off.
Final Touches, Belt Loops, Gluing Fray
Originally, I was planning to sew the button second of the belt loop across the bag. It was supposed to “close” the bag, but it is honestly not very functional and more so a stylistic choice to incorporate more elements of jeans than the bag. Because of the obvious wear on my sewing machine, I thought it was risky to try to sew over the stick straps again, so I decided to omit this detail.
However, I did sew the belt loops on the outside of the bag. Additionally, the edges of the patchwork were starting to fray, so I trimmed off as much fabric as possible and glued the edges down with fray glue.
Final Thoughts
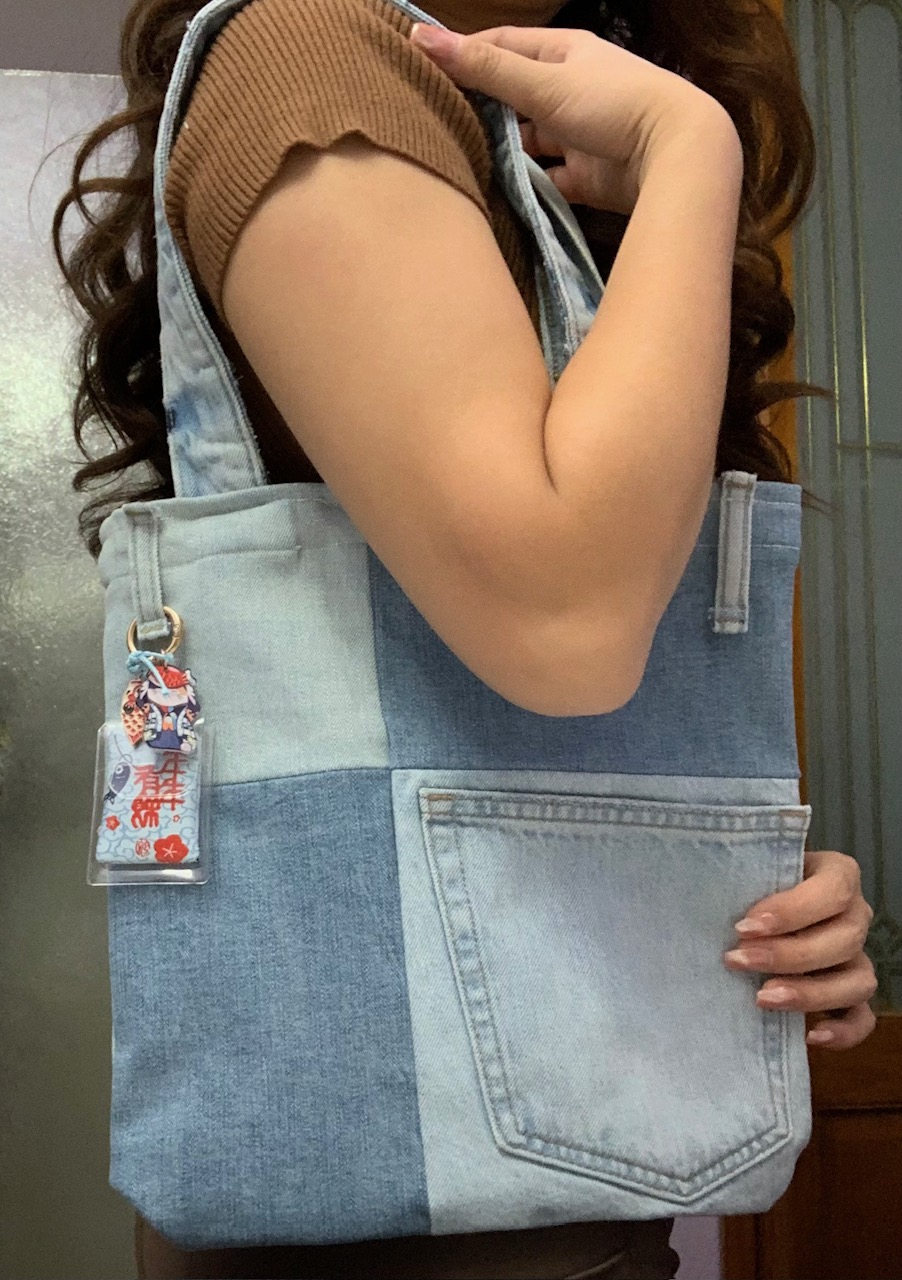
Overall, I was very pleased and proud of my project. I thought the selection and layout of the different washes created a lot of contrast and interest. I added a keychain to the belt loop, which made the bag pop even more, and I think that it’s fun to be able to constantly customize and decorate the bag this way. I brought the bag with me on a trip, and the large pocket was a very convenient spot for my phone that I constantly picked up and put away, without having to dig in the main tote compartment. I thought this project was a good challenge to improve my sewing skills, and gave me more confidence that I can sew and upcycle more future items.

The first possible improvement I noted was to have straighter stitching along the top of the bag. Additionally, I wish I had used a French seam for the patchwork portion of the sewing project as well, because it was a cleaner way to manage fraying. I also wished I found other ways to incorporate the buttons of the jeans. I did consider removing the buttons and reattaching them onto the bag, but it would require forcibly prying the button apart, which I thought was equally unsafe as trying to sew the thick waistbands again.
While I am very happy with how the bag currently looks, I can see myself making more and altering some details to make the second bag have a different look. This includes incorporating other patterns to make the bag pop, making the patches smaller or in different shapes for more detailed and complex patterns, or using the excess fabric to sew additional pockets on the outside or even inside.
References:
[1] Notches Sewing. (2023) How to make a Simple Tote Bag -DIY Easy Sew to Sell [Video]. YouTube. https://www.youtube.com/watch?v=LhZ2_Q9AVMA
6 Comments. Leave new
Hi Helen! This bag looks fantastic. You set out with a clear plan on how to piece it together and it looks like it worked great. I also did a patchwork aesthetic for this project, and I really enjoyed getting to see how your execution was different than mine. Your sewing technique is much neater than mine! Have you ever riveted buttons before? Since prying them apart sounds not-so-safe, maybe adding a jean-style button could give you the look you’re wanting.
Hey Josh. I also saw your patchwork shirt and it looked absolutely amazing! I did not know riveted buttons were a thing, but this would absolutely solve my safety issue with adding jean buttons.
Hi Helen, the bag looks fantastic! I really like the aesthetic and I think all the seams look fantastic. If you do the project again would you consider getting an industrial sewing machine that would make sewing through the denim easier?
Hi Trent! My mom requested a bag for herself, but I will be most definitely ordering denim-specific needles for my sewing machine before I do the project again. I believe the needles have a thicker shaft and shaper end to make piercing thick denim fabric safer.
Hi Helen,
The bag looks like it turned out great! The back pocket and charm were nice additions. Are you going to make more and maybe change the material now that you have some experience making this one?
Hi Sophie! I love tote bags, but they are sometimes overpriced and not always to my liking. Now that I’ve successfully made this bag, I think I will be using different fabrics and prints in the future to fit the aesthetic of different outfits.