
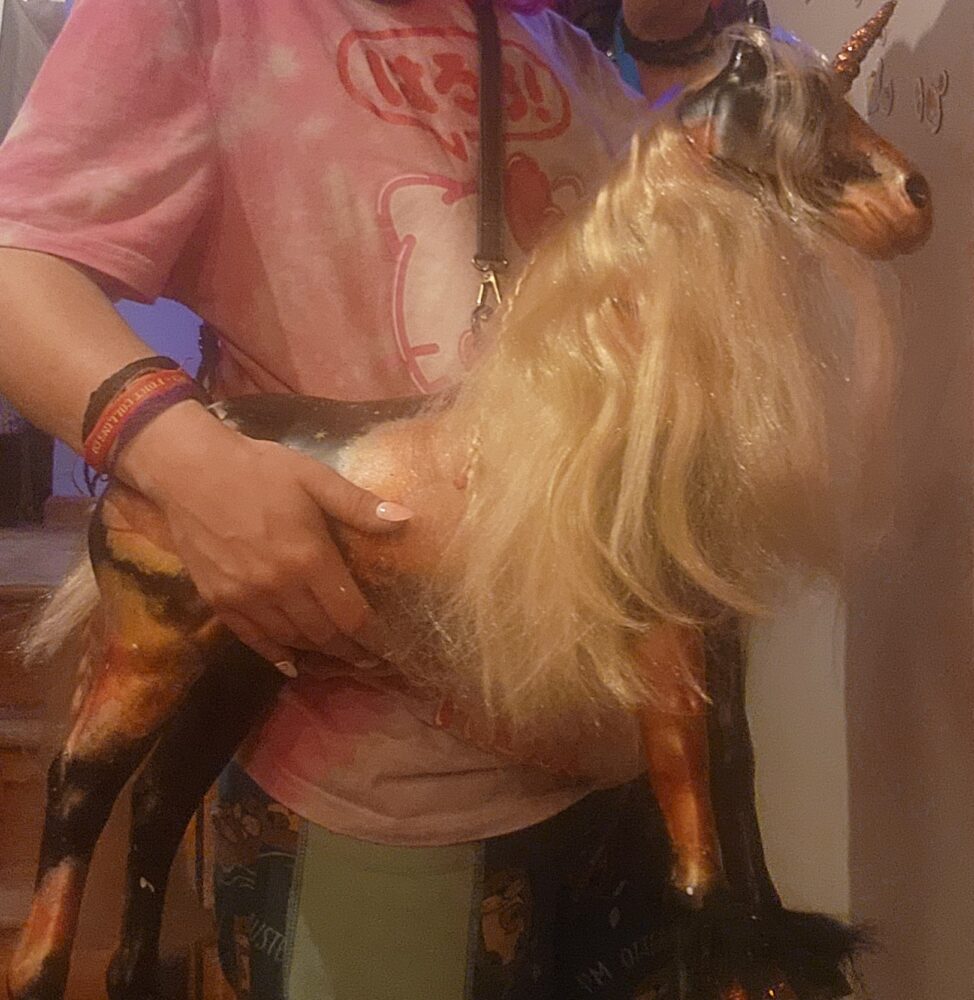
Inspiration: Initially I set out to make a centaur pencil cup holder, hollowing out his little butt to hold the pencils. Yet upon finding him at Goodwill, I fell in love with his face and I knew I couldn’t just turn him into a stationary object. His head would’ve been a plaque on some. Wood, which didn’t feel right for Buttercup. Therefore I decided upon turning him into something I could take everywhere and see often. I wanted to turn him into a purse and wanted him to match my favorite aesthetic of Whimsigoth, so I sketched up some ideas and went ahead on decapitating him.
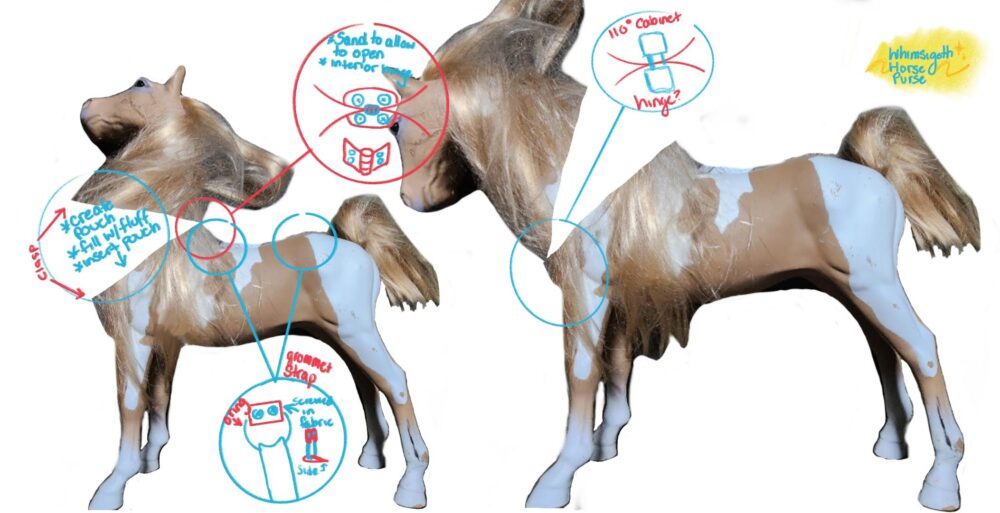
Process: Once decapitated, I was able to get a grasp of the internals. It was rather spacious yet there were many structural pieces throughout the rear and head piece. I eye balled placement and had my husband help me bend some triangle hinges around the horses neck and body. We then drilled small holes and put through screws, attaching the head and body once more but now they opened.
Taking apart an old backpack I had, I took its half O rings and straps, attaching them to the base of the neck and rear of the horse.
Attachment of strap bases: I used 2 screws and bolts to attach the straps to the horse. Each strap had a half O loop for strap attachment, allowing the strap to be interchangeable. My husband helped me by drilling the holes through the strap and horse, holding things in place and drilling the screws in while I held the bolts. The rear attachment was almost impossible, even with my tiny fingers I couldn’t quite get past the structural elements of the horse. I attached sticky tack to the tips of my fingers, attaching the bolt to the very edges of my fingers and carefully snaking around the structure bars and rear capsule that holds the tail hair. Once in place I found a way to compress my tiny fingers into the space, while painful it was effective.
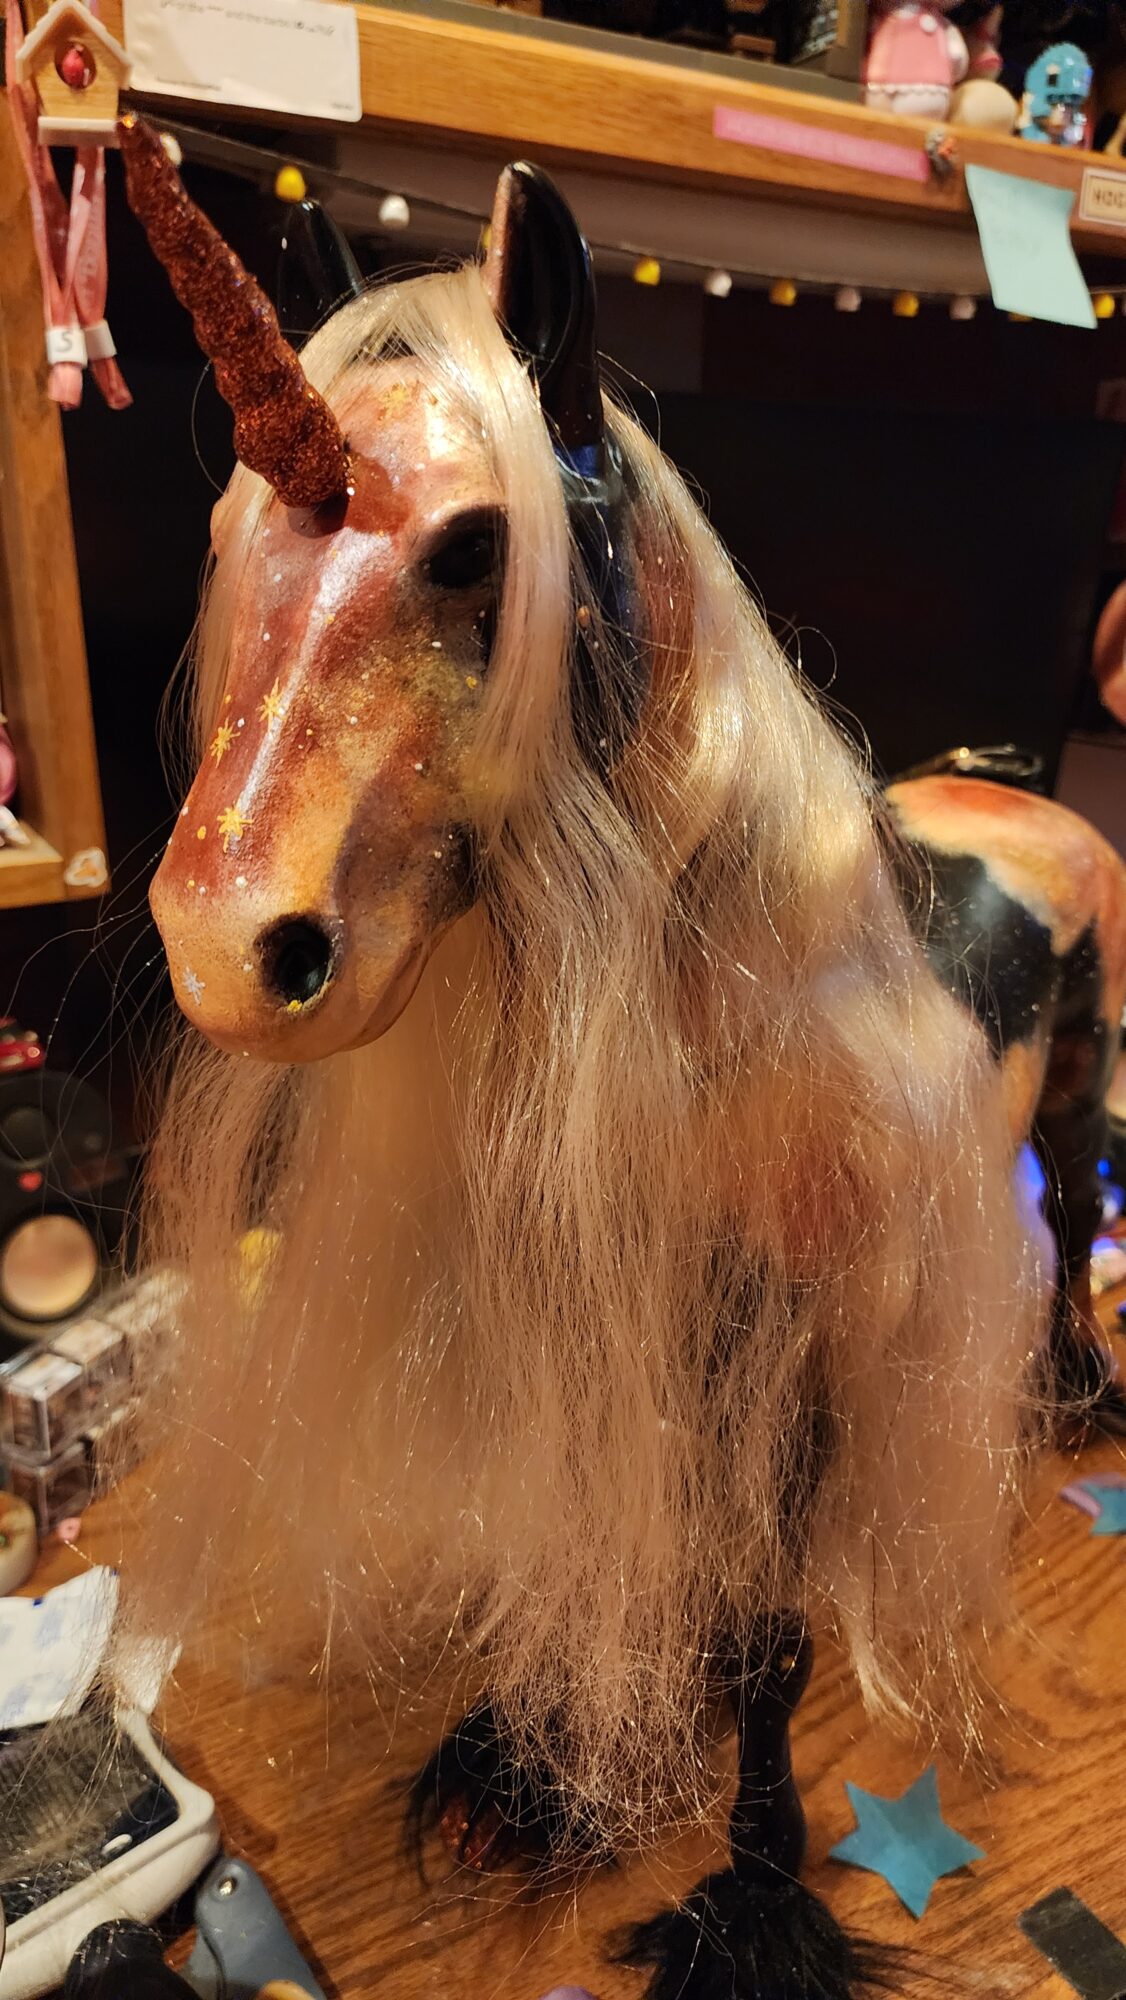
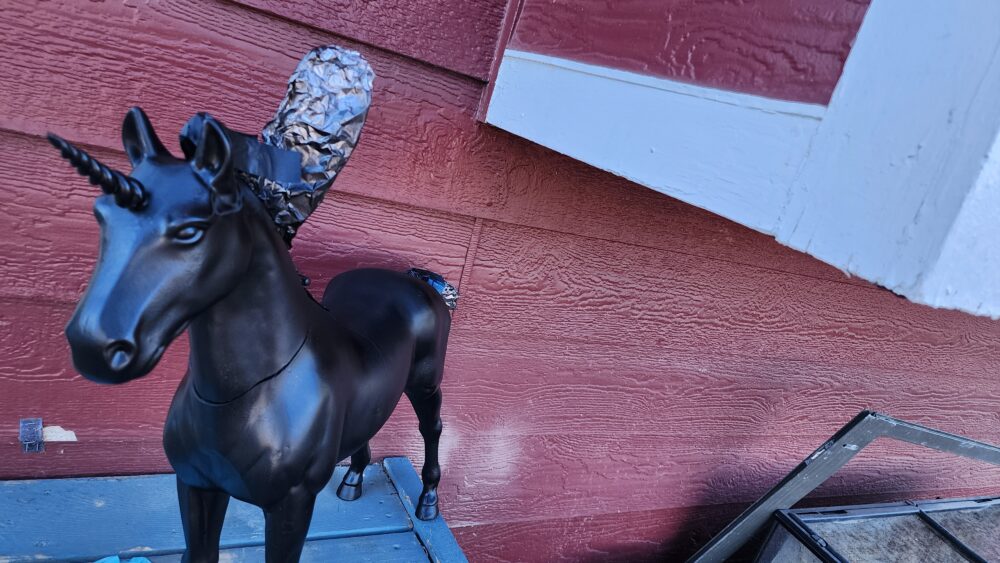
Process Cont.: Ready to be strapped, I gathered his hair into messy buns. Wrapping it then in foil and painters tape. Inspired by him in this way, without measurement or thought I drilled through his head. I went ahead and created a horn from polymer clay, twisting a long armature wire through it. I then attached the horn to a rock to not become flat while baking, being careful to not choose a rock that would explode at high heat.
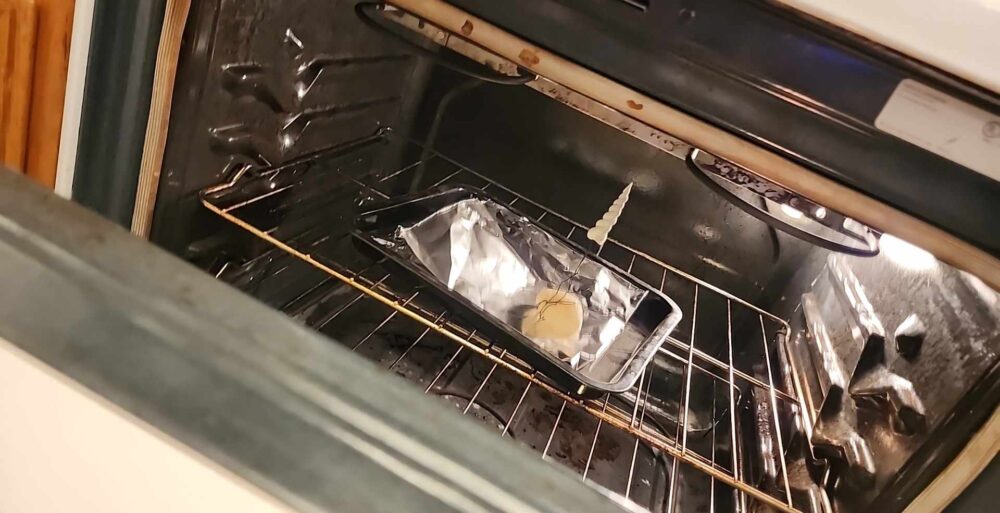
I attached the horn, yet I realized a problem quickly. If I were to bump into anything it could possibly snap and break apart. Therefore, upon attachment I did hot the end of the wire to keep it from being able to fully come out from the drilled hole. Yet this would make it flexible, the horn can bend almost fully on its side with no damage as the wire I had is quite bendy and I tripled it up for strength. My husband then sprayed him down with 2 coats of black spray paint.
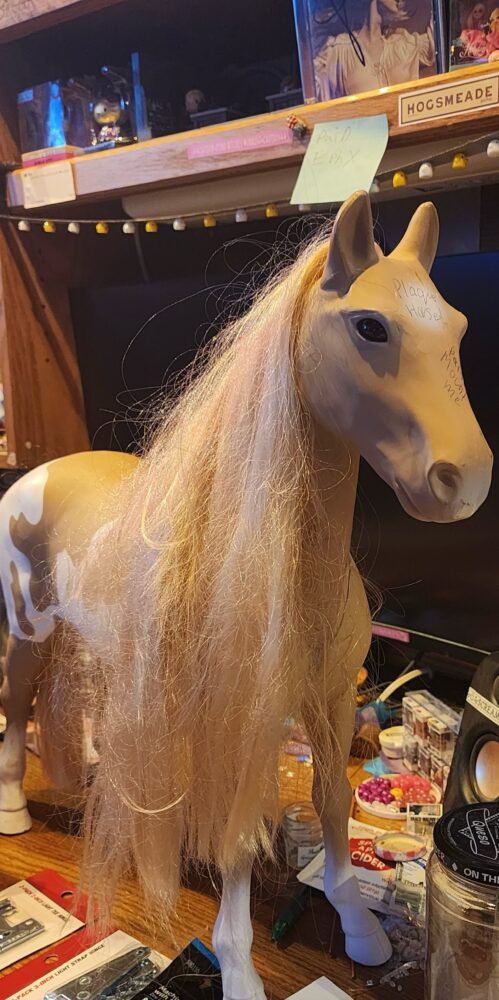
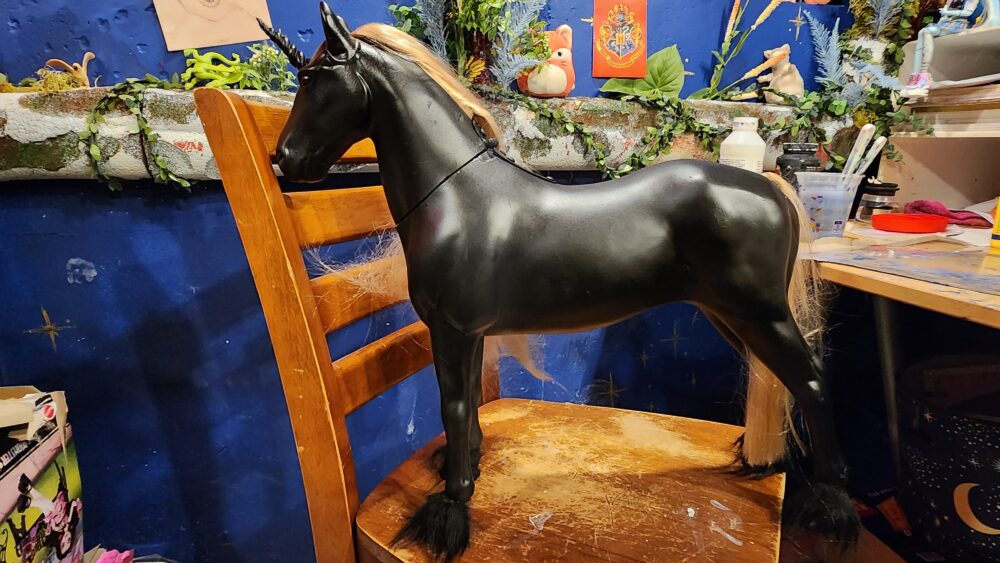
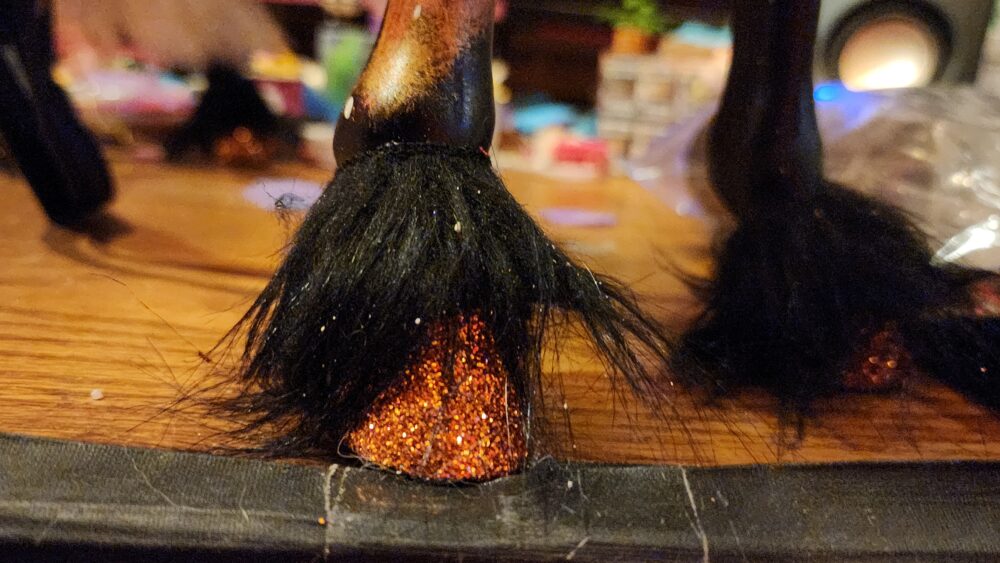
From here I became inspired again and ran to Michael’s to get some craft fur. I attached with hot glue on each hoof a piece of black fur. Ince the hair was shown against the black, even though I had bought dye, I loved the look. I looked up horse breeds and found one called Black Forest with the most beautiful look. Long flowing locks of platinum against a deep brown, almost black body. Therefore I decided against dying his hair.
Inspiration Cont.: I decided to plan out the paint job and Whimsigoth vibe I wanted. I decided upon a red fabric for the internals, therefore I wanted to follow that color scheme.
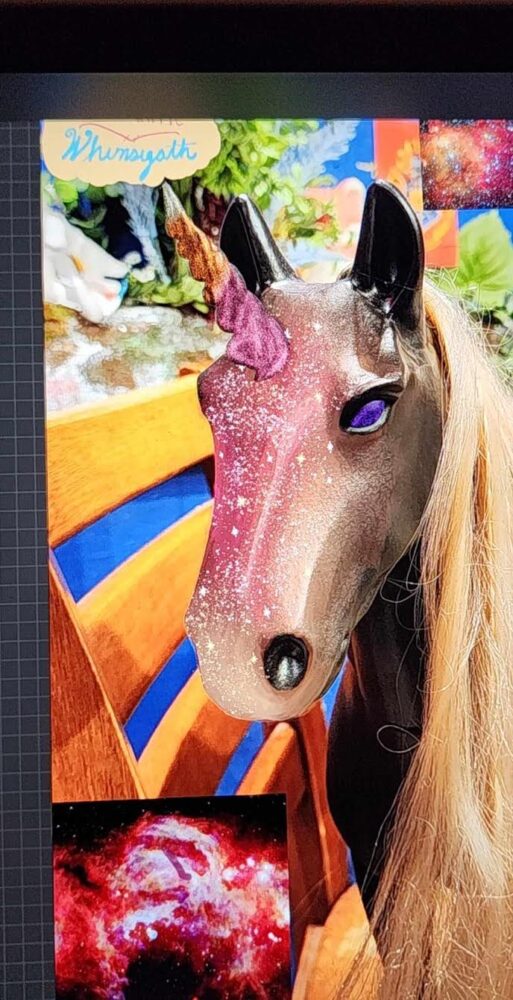
Process Cont.: Once I figured out what exactly I wanted to paint, I began to curate a pallet. Taking colors from various makeup pallets, I crushed them up and added Liquitex creating acrylic paint. I did not use measurements for this as the process requires eyeballing the material. I bought mica pigments for a different project I’m doing and decided to use some of them for this project as I didn’t have enough shimmery spacey reds. It seems that most eyeshadow pigments for reds are a matte powder, perhaps an iron oxide is the reason. I made do however, adding mica powder pigments to my pallet and adding shimmer to some of my already made colors. I recommend ventilation and not getting acrylic on your hands.
Once mixed, I got to painting the horses face. Ive been crafting and practicing my skills for years, when it comes to painting it takes the ability of making mistakes and turning them into art. The ability to let go and not take yourself serious, I had zero plan for the body, I simply got into a head space and let it take me away.
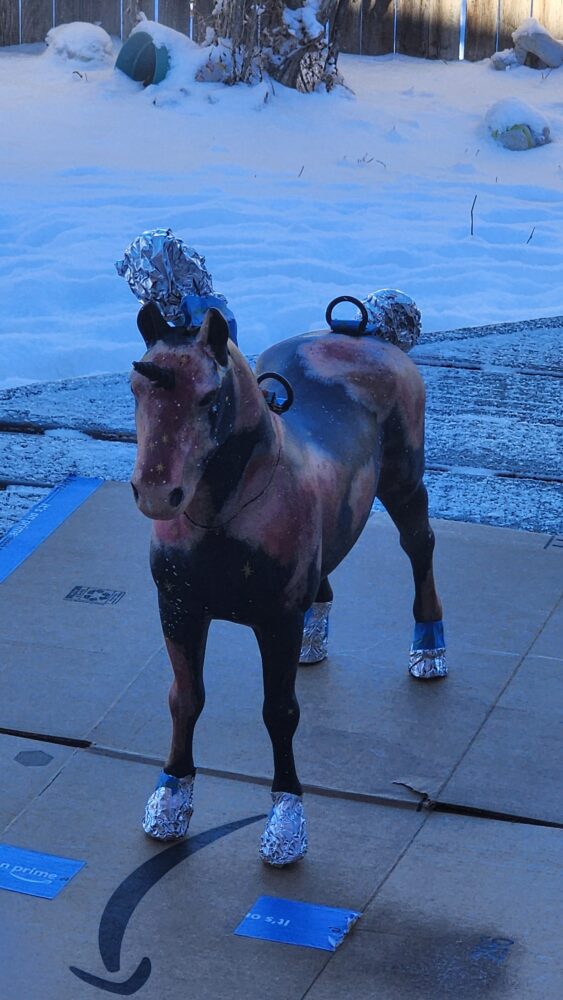
Once painted, I had my husband enamel the horse. I then added glitter to the horns and hooves, through a process of layering, Mod podge layer followed by a glitter layer for a few coats before a final mod podge layer, I used this method on some boots I upscaled for a concert.
From there, I attached a random strap I found and stuffed the body cavity with fluff. I then whipped out my sewing machine on my West Berlin thingamajig, creating a pouch based on a loose idea of the horses size. I then attached the pouch with hot glue (specifically sure bond, which is probably the strongest glue I’ve encountered).
Final Result: I attached a random strap and decided it was perfect, I am rather proud of it and will be taking it place. Did it fuel my creative ego and am I now imagining something absolutely unhinged and massive for the final? Yes.

4 Comments. Leave new
Watching Drag Race while making this purse is so real. I love the fact that you included time-lapses; it makes the post so entertaining. For those that didn’t know much about whismigoth (such as I) it would have been nice to have a re-cap so we know how “aesthetic” your project was!
That’s completely valid, I will definitely add an update to the post that includes an explanation of the aesthetic. I’m so glad someone saw me watching drag race, I called my project initially an extravaganza in reference to Rupaul and I didn’t think anyone got it so I dropped that.
This is such a cool project. I loved how you found something that you enjoyed like this horse figurine and made it a functional piece that you could use. Would you like to find other items you could use to make purses in the future?
I am constantly on the hunt to upcycle, I recently took some of my husbands work shorts and jeans to make some dresses I’ve designed. I definitely will explore future options for making whacky purses, but I will definitely try to plan a little better as I didn’t have as much time to make everything I wanted.