
For my project, I will do my own take on Nanoleaf lines. I think these are really cool and they can bring a nice atmosphere to my room. I want to have something with fluid lights that can grab attention. I want something more than just the boring LED strips that are typically in people’s rooms.
https://nanoleaf.me/en-US/products/nanoleaf-lines/?category=lines-60-degrees&pack=smarter-kit&size=9
Inspiration
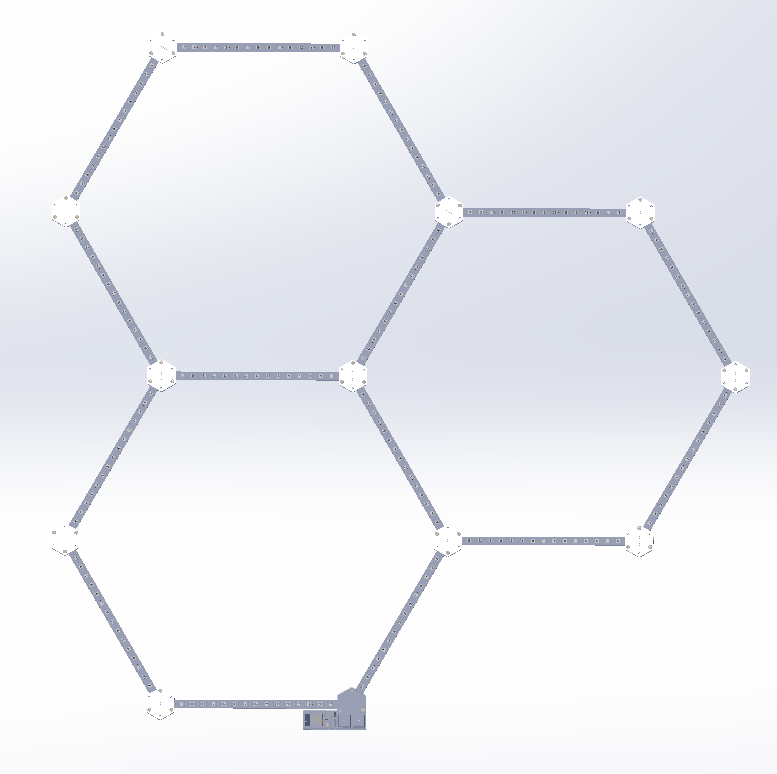
I was mainly inspired by Nanoleafs and their striking minimalist design. I think that design like Apple or Dyson is very very nice. This caught my eye and I thought I would try my own take on it. Their design seeks to create a form that does what it needs to do while keeping its features to a minimum. The seams between modules are discreet and small. The color is a simple black or gray that does not stick out and grabs too much attention. This video from Nanoleaf shows how I plan to have these things go together. In it, you can see that the light bar modules connect to nodes to create a larger structure. These then can be changed into many different arrangements.
The Aesthetic
As discussed before, I plan to use the minimalist aesthetic. I want to keep the geometry to a minimum and use simple shapes. One thing I would like to improve off of the concepts I have right now is to better blend the controller into the system. Right now, I think it sticks out kind of funny and takes away from the minimalist aesthetic. I also want to add diffusers to both hide and blend the LEDs.
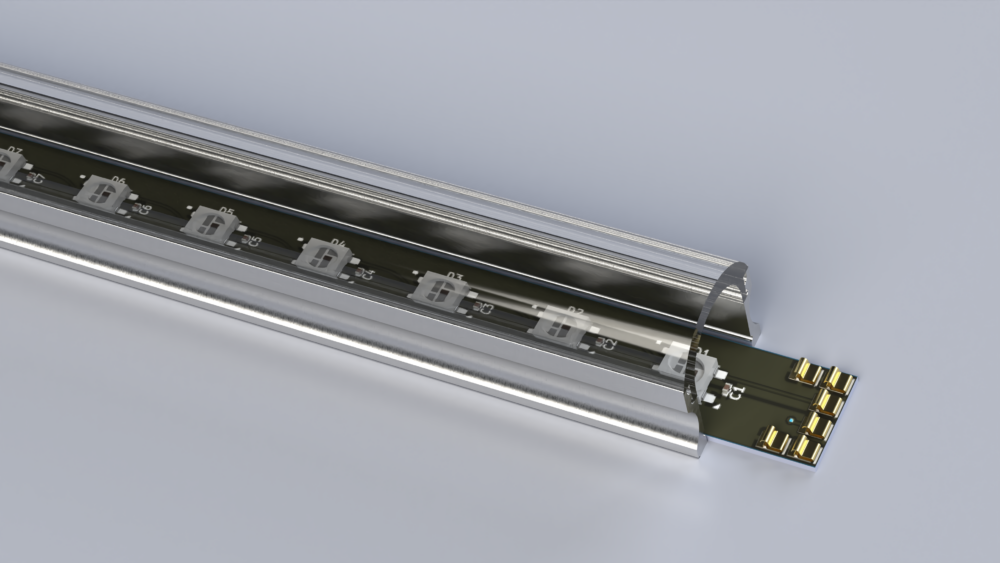
In this picture, the LED strip is enclosed inside a diffuser channel. The cover is a shown as clear in this picture to make it easier to see the inside, however it will actually be a milkey white.
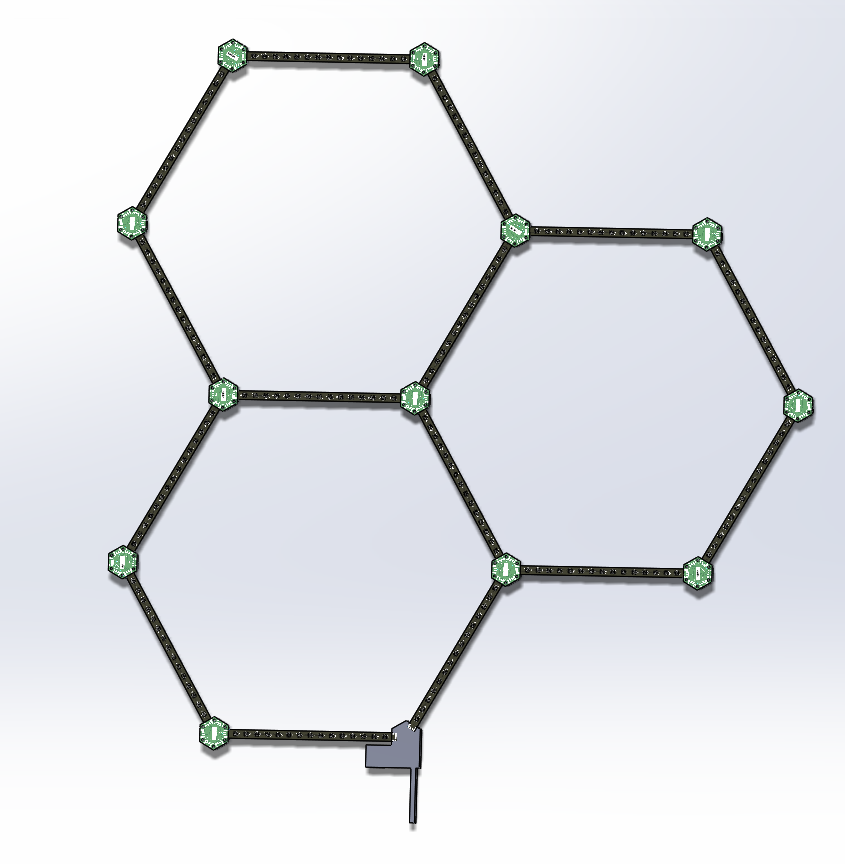
An alternate aesthetic I am looking at is the industrialism aesthetic. This aesthetic is about form over function and shows unfinished parts without hiding them behind paint or covers. In the image below, you can see a different version where I do away with the covers and diffusers. This shows off the custom curciut boards in all their glory.
Function
As with nanoleafs, I plan to make the movement come from changing lighting. I plan to have a few patterns such as a rainbow wave, solid colors, color fade in/fade out, perlin noise, and maybe even a Spotify-integrated mode. I want to make it so the user can controll the patterns, the brightness, and the time it turns on and off on their phone.
The rainbow wave pattern is a pattern where the lights cycle trough all the different colors in a wavelight motion. Solid colors can be used for either normal lighting with white light or different colors for themed events. The color fade can be used to create a slower more chill atmosphere or when you don’t want to draw too much attention to the lights.
Prototyping
I am currently prototyping different light configurations. In this picture, you can see an early test for the lights. I am using a breadboard and an ESP32 to send the signals to the lights to turn them on and set them to the right color. By testing with smaller lights, I am able to prove that small parts of the design work without having to spend a lot of time and money on the big setup.
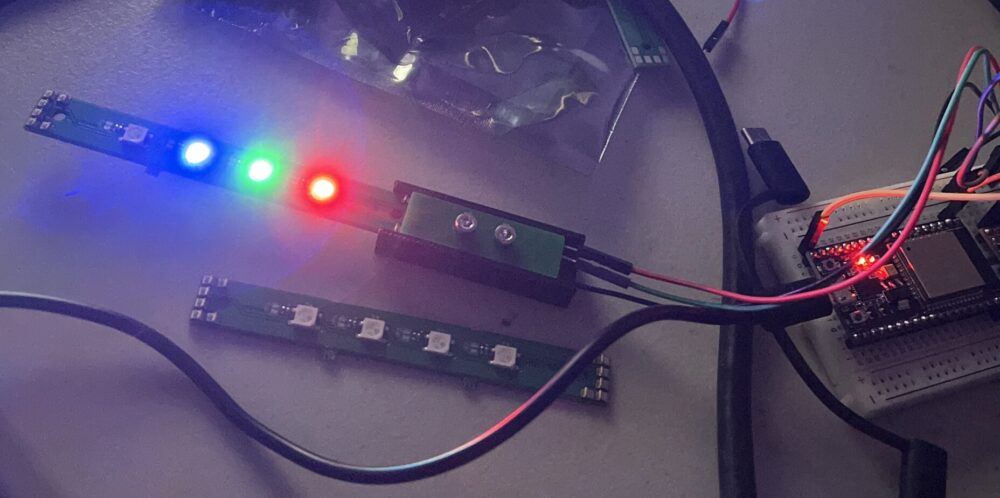
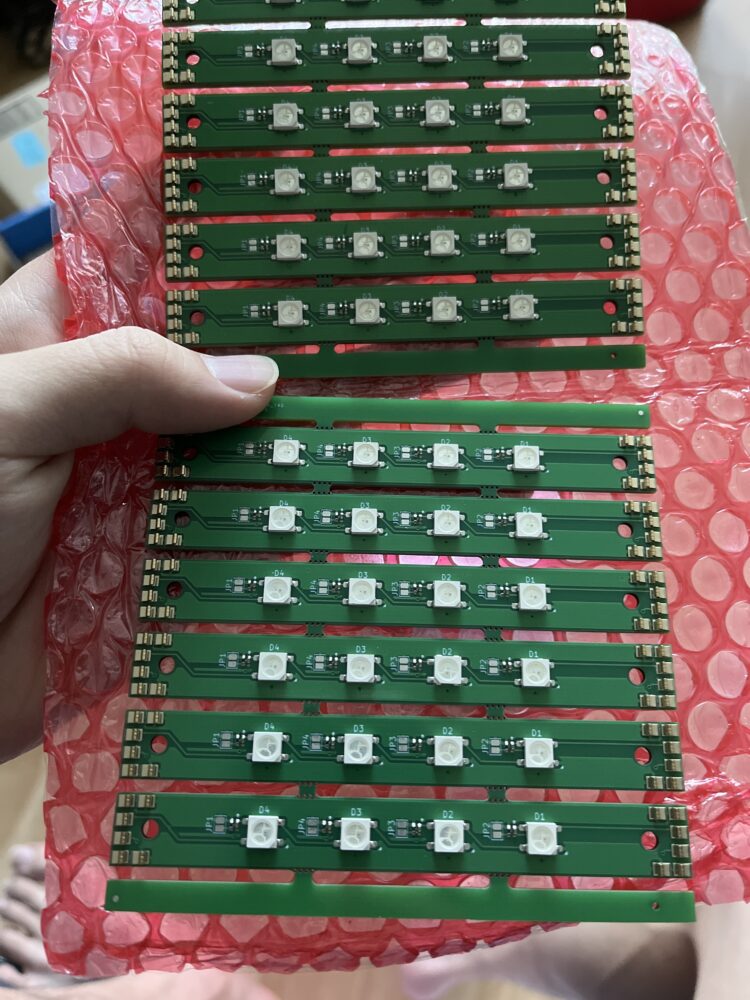
In the above picture, you can see the raw boards as they come from the board house. I used JLCPCB to both make and assemble the boards. The gold contacts on the left and right are the connections between the light bars and nodes. One lesson I learned here is that the green soldermask spills into the lighting color and gives off a green hue. On the final version, I will use black soldermask to eliminate this.
Timeline
The biggest challenge is getting the PCBs ordered. They take 1 week to be manufactured and another week to ship. This means that I need to order by friday so that they will arrive in time for final integration and testing. Unfortunately, this also means that I will not have time to make sure everything fits in CAD. I will need to order the PCBs and design around them while they are being manufactured. The next biggest challenge is software. As with anything engineering related, everything takes longer than I expect and I feel software is especially challenging here. I think there will be a big time crunch at the end when I realize the software is more difficult than I expect. Because of this, I added 1 week of buffer time at the end.
Fabrication
For building my artifact, I will need to depanel the PCBs (printed circuit boards), 3D print the node and controller housing, cut the diffusers to length, and assemble the boards and housings together. This is pretty simple as other than basic assembly, I just need a bandsaw and a 3D printer. The more challenging part of this project will be design and software as highlighted above.
1 Comment. Leave new
It’s an interesting project you’ve decided on, especially considering your goal of illuminating the LEDs rather than traditional means. Given your predicament, do you plan to work on the software consistently throughout the semester with your prototype? Since the software aspect is your main concern, continuously working on it at small intervals would definitely be less strenuous than cramming it all at once. If your limited setup for light configuration can fulfill this, of course.