
For my main Aesthetics project I plan on building an Xbox controller steering wheel adapter. The aesthetic I have chosen for this project is the street racing aesthetic. In my last post, I talked about this aesthetic along with some alternative options, but I will quickly review them here. This street racing aesthetic has a sleek almost futuristic look. It often has a dark background, but it also contains bold eye-catching lights and colors that contrast against this dark background.

Image by Pavarita J [1]
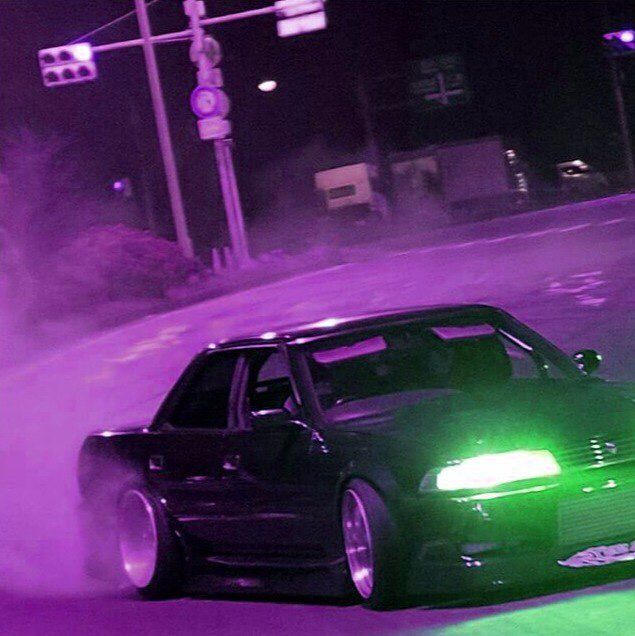
Image by CHER CHER SAN? [2]
Characteristics of the street racing aesthetic can be found below along with some more pictures.
- Urban surroundings
- Neon underglow lighting
- Bright colors and graphics
- Sleek
- Dark backgrounds
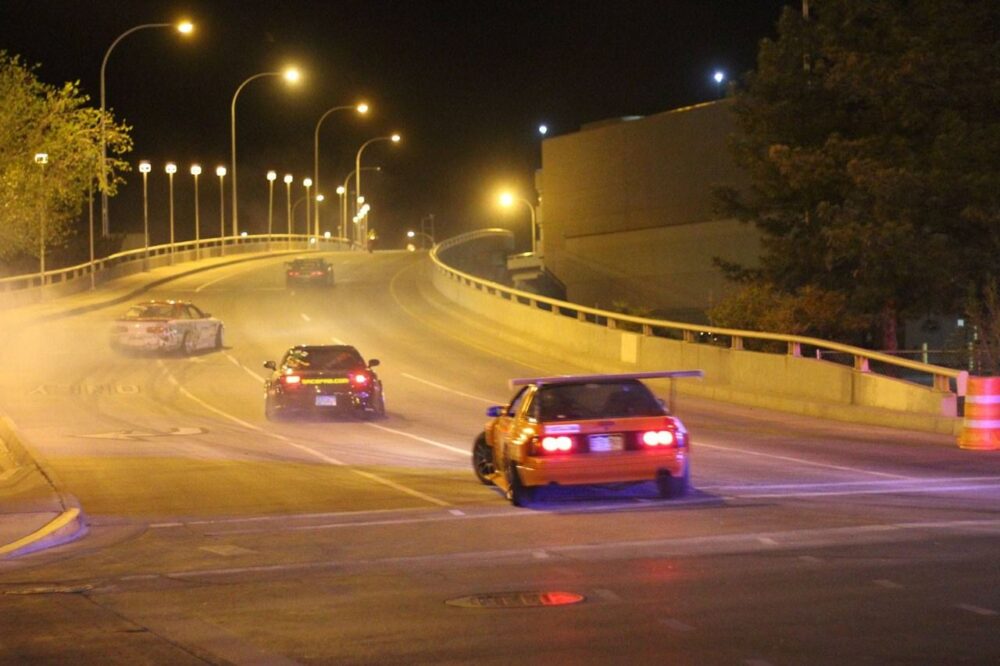
Image titled “Happiness” by the Kilowatt [3]
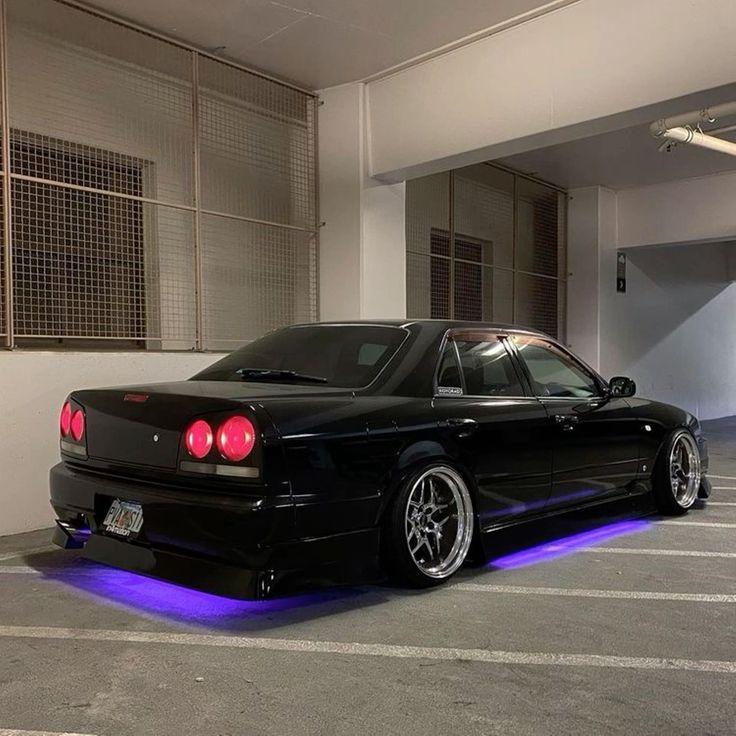
Image by h3ro [4]
Underglow kit by rgb halo kits [5]
One inspiration for the look of my steering wheel is the image below. I think having the outer part of the wheel be black leather and having the inner portion be shiny and metallic will give it the street racing look I am going for. Incorporating some backlighting will also add to the aesthetic.
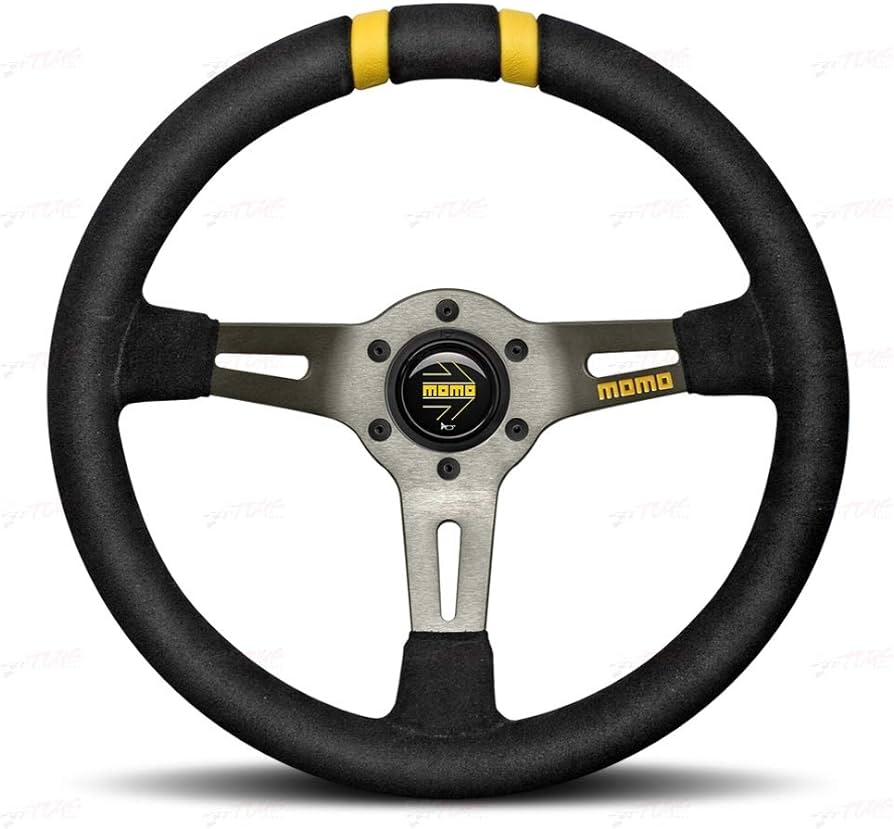
Steering wheel by MOMO Motorsport [6]
Other Aesthetics:
While the street racing aesthetic is my first choice, there are other aesthetics I considered for my design. One aesthetic I thought of in the beginning was the minimalist aesthetic. I talked about this aesthetic in an earlier post. To fit the minimalist aesthetic I would keep the base of my design very similar, but I would make it very boxy and paint it beige. For the steering wheel, I would make a flat white circular disk that doesn’t overhang the surface it is mounted to. I created this design in CAD which is shown below.


As is common with this aesthetic I feel like this design is more boring than it is appealing. Another aesthetic I could base my design around is the Diner aesthetic. The diner aesthetic was popular in the 1950s and is very similar to the retro aesthetic. Some key features of this aesthetic are described below.
- Checkered patterns
- Neon lights
- Stainless steel
- Jukeboxes
- Plastic food baskets
- Vibrant colors
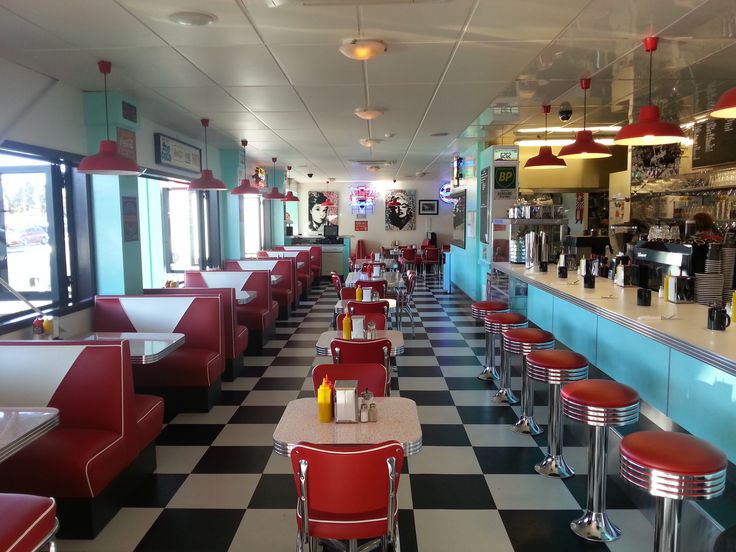
Image by Deluxe Diner [7]
A design that fits this aesthetic would have a base with more rounded corners made of stainless steel. I would paint the base with a checkered pattern which would fit both the diner aesthetic and the racing aesthetic. The top surfaces of the base would be made of cushiony material similar to the booths at a diner. For the steering wheel, I think it would be fun to use one of the red baskets you commonly find at diners. I could also add some neon lighting around the bottom of the base. While this aesthetic would be a lot of fun and a goofy aesthetic for a steering wheel, I decided to stick with the street racing aesthetic because it really suits the aesthetic of the games I will be using this for.
Design Process:
I began my design process by sketching out some ideas in my notebook. The image below shows some of my initial ideas.
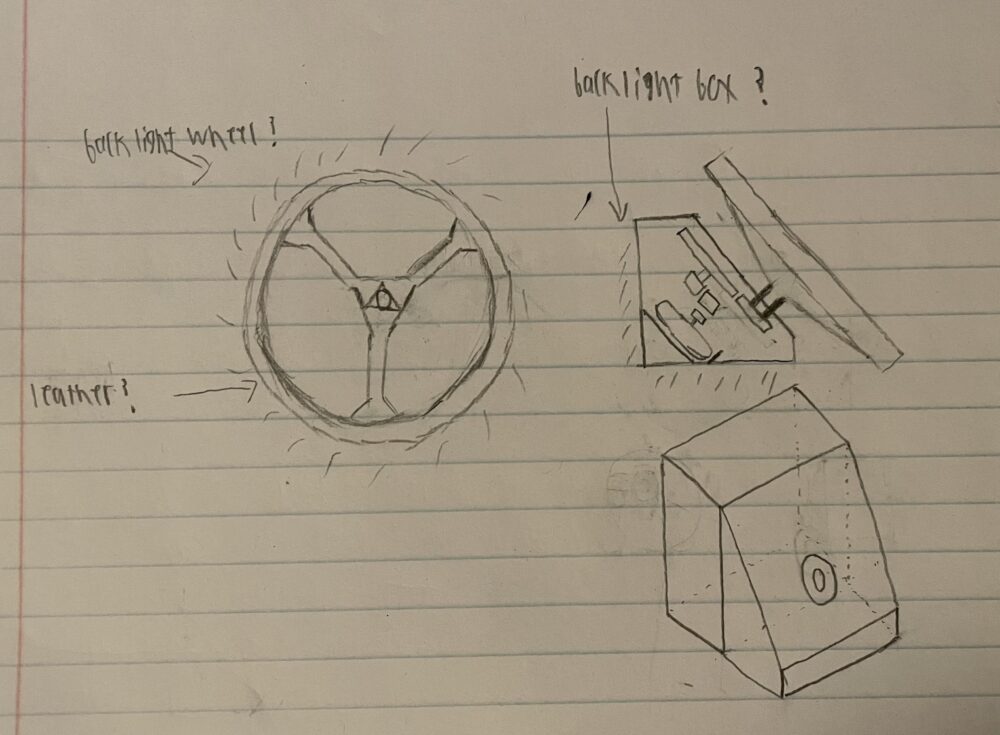
At a high level, I needed an enclosure to hold both the Xbox controller and the steering wheel in place. I also needed to design the steering wheel and an adapter to turn the rotation of the wheel to the horizontal motion of the left joystick. While I was still exploring different aesthetics I began designing the adapter since it is a critical internal component that won’t be seen. I found the following CAD model on Thingiverse that was developed by a user named Pixel2
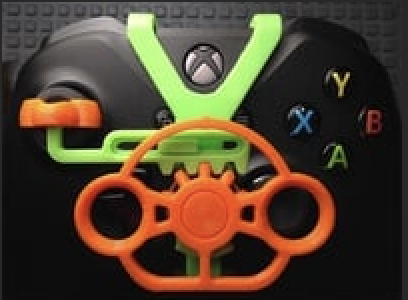
Steering Adapter created by Pixel2 [8]
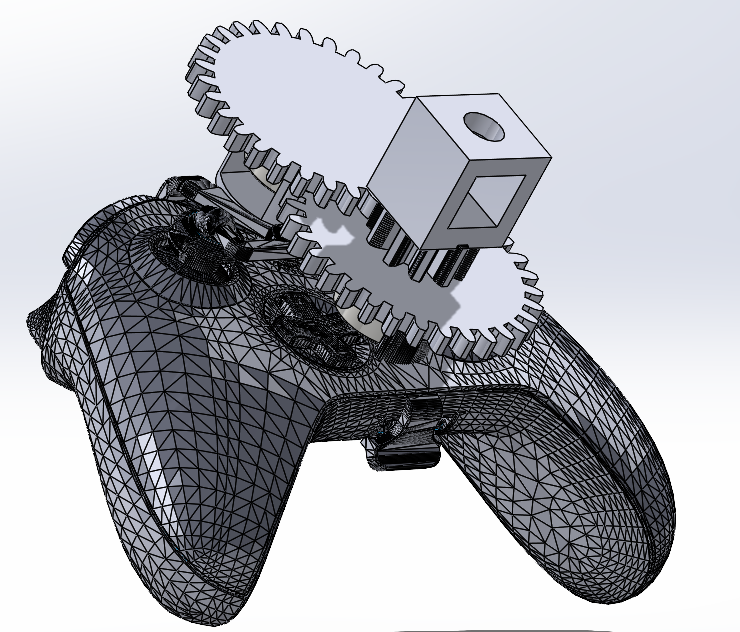
I started by printing the adapter out of PLA and testing it out on my controller. After some testing, I made several changes. I want to use my wired controller so I made room in the back of the adapter for the cable to fit. The frame of the adapter is very thin so I decided I would print it using PETG instead of PLA to give it more strength. I also noticed the gear only turned about 45 degrees in either direction and since a real steering wheel turns about 1.5 times I would need to add more gearing to make the device realistic. I made all these changes in CAD which is shown below.
By this time I had settled in on the street racing aesthetic and began designing the steering wheel. After messing around in SolidWorks I created the following model.
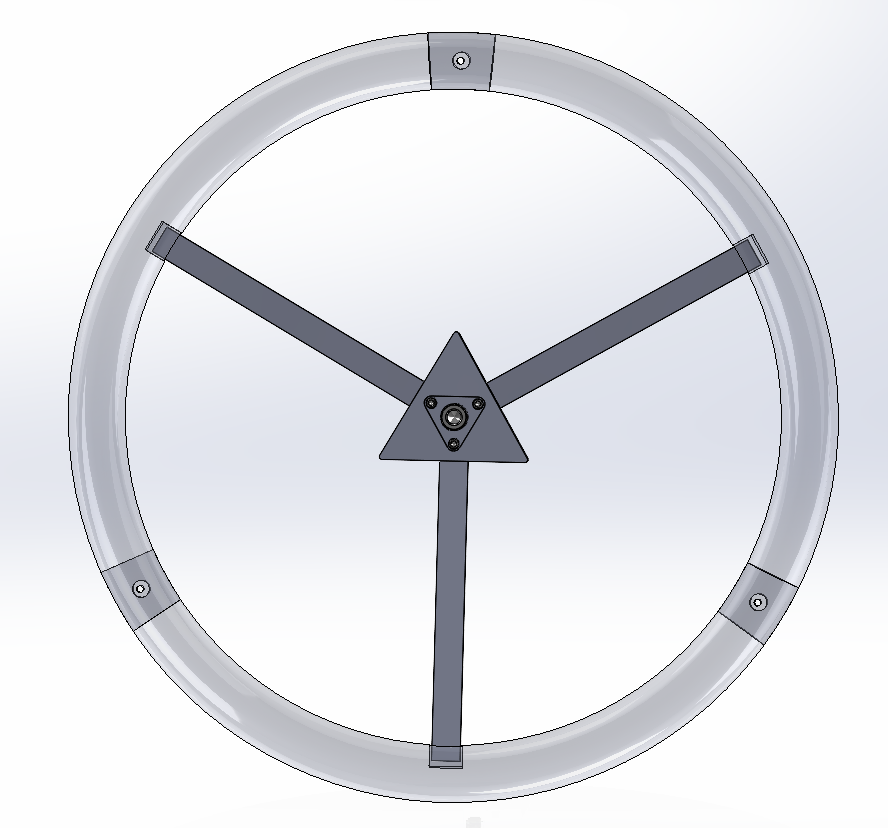
Similair to my initial sketch, I designed the core of the wheel with a triangular look. I thought this looked sleek and it provided 3 surfaces for the arms to attach. I plan to manufacture the core and the arms out of aluminum so I can give the wheel a nice metallic look but also keep it lightweight. My plan is to 3d print the steering wheel in 3 separate parts and secure them together around the arms using some hardware. To get feedback on machinability and material choice I met with Jennifer Boggs at the ITLL to go over my design. She helped me narrow down my material choice for each of the components and confirmed that each part could be machined at the ITLP except the bend on the arms which could be done at the idea forge.
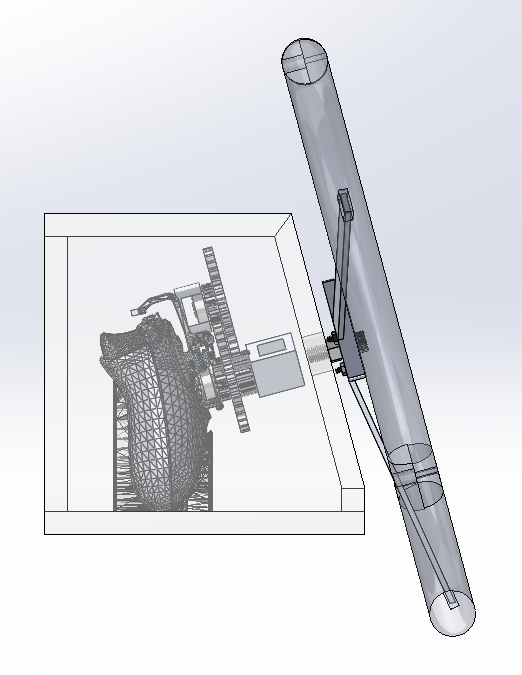
Lastly, is the design of the enclosure that holds everything together. My current plan is to create the box out of wood and to paint it black. I also plan on adding underglow to the enclosure using LEDs, but the location of these will change as my design changes. This is the one part of my design I will most likely be changing since I have not put much thought into it and its currently designed more for simplicity than for my aesthetic. I am open to ideas and would appreciate any suggestions in the comments. The assembly below shows my complete design in action.

 Timeline and Fabrication:
With my design mostly complete I created a schedule for the fabrication steps of my project. So far I have made a lot of progress in the design phase, but I wanna do one last check with an ITLP engineer before I order the stock, After that I can begin the fabrication process.

I have designed my schedule so that I am done two weeks before the project is due that way I have wiggle room for when things go wrong. I have also made a more detailed excel file that I am using to track my project and using that I have estimated a total project cost of $36. I am pretty happy with how the design turned out and excited to get to work.
Citations:
[1] Pavarita J, pinterest post titled “Boom”
Website: https://www.pinterest.com/pin/775604367088101801/
[2] Pin by CHER CHER SAN? on СΔɌƩ: Street racing cars, Purple car, Jdm
Website: https://www.pinterest.com/pin/754353006324172339/
[3] Happiness by the Kilowatt: Street racing cars, Best jdm cars, Street racing
Website: https://www.pinterest.com/pin/18788523436581511/
[4] Pin by h3ro on Ваши пины: Drifting cars, Street racing cars, Classy cars
Website: https://www.pinterest.com/pin/1080301029347989406/
[5] LED Underglow Lighting Kit 2.0: Flexible
Website: https://rgbhalokits.com/products/led-underglow-lighting-kit-2-0-flexible
[6] Amazon.com: MOMO Motorsport MOD Drift Steering Wheel Black Suede
Website: https://www.amazon.com/R1907-33S-Steering-Wheel-Drift/dp/B0792R7B36
[7] Pin by Deluxe Diner titled “1950s Diner”
Website: https://www.pinterest.jp/pin/497929302535782243/?send=true
[8] Xbox one controller mini wheel, Pixel2, Aug. 14th, 2018
3 Comments. Leave new
[…] my design preview a month ago, I have made a bit of progress on my project. The first step I took was ordering the […]
Ethan, I have watched you put in a lot of time and effort into this project. I do think you could help the unit capture your desired aesthetic by really front loading your schedule around manufacturing. This process could take longer than expected, and you want time to add the aesthetic details. With that being said, I am confident that your final product will be awesome as a result of your work ethic!
Thanks Oliver! I definitely want to get started on manufacturing as soon as possible. I think ordering aluminum stock this week while I finalize the design of my wooden enclosure will put me right on track.