
Joshua Beijer
Design Preview Report
I have been thinking of what I want my final artifact to be since the middle of our last project. I wanted something small and elegant that I could put on my desk throughout my career. I knew I wanted it to look very professional and sleek and have a dynamic component that was not distracting. My initial idea was an orbital spinner, like the one seen below but without anything in the middle. But as I thought more about this artifact I realized that this was a great opportunity to put something in the middle that meant something to me and would be a conversation starter. Inspiration struck as I was reading a new book a few weekends ago that talked about this Latin phrase, Memento Mori. This roughly translates to, “remember, you will die”. While this sounds incredibly morbid, it was not meant so in its initial context. It was meant as a focusing tool, as a reminder not to just try and get through the hard parts of life and on to the easy parts. If the goal is to just make it to spring break or graduation or the weekend or retirement eventually your whole life will be gone. I think that this will be a helpful reminder for me as a working engineer, who tends to subscribe to the “living for the weekend” mindset. To remind myself of this, I will be putting a skull inside a clear resin ball at the center of my orbital spinner.
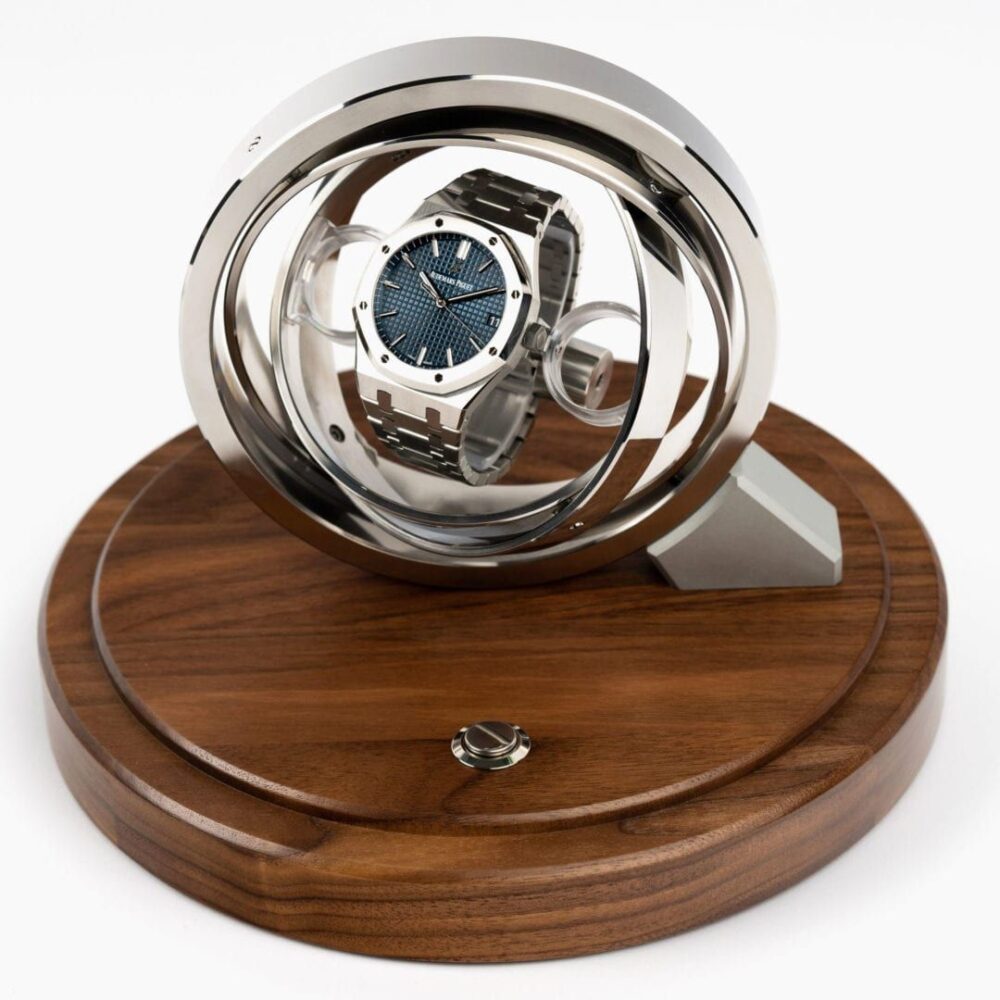
Orbit Winder Walnut – IFL Watches – https://www.pinterest.co.uk/pin/814166438880349216/
My original vision for the aesthetic was to do a Gothic aesthetic to fit the traditional memento mori theme. However, after exploring different aesthetics I have decided to stick to a mid-century modern look. I believe that this will communicate the non-morbid message I am trying to get across. I do not want to send the wrong message to future coworkers if this is on my desk.
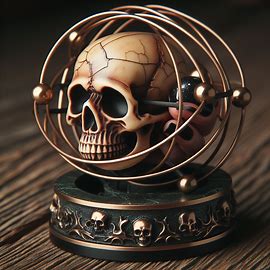
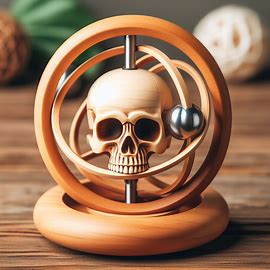
Gothic and Mid-century Modern Aesthetic Images – DALL-E3 generated images
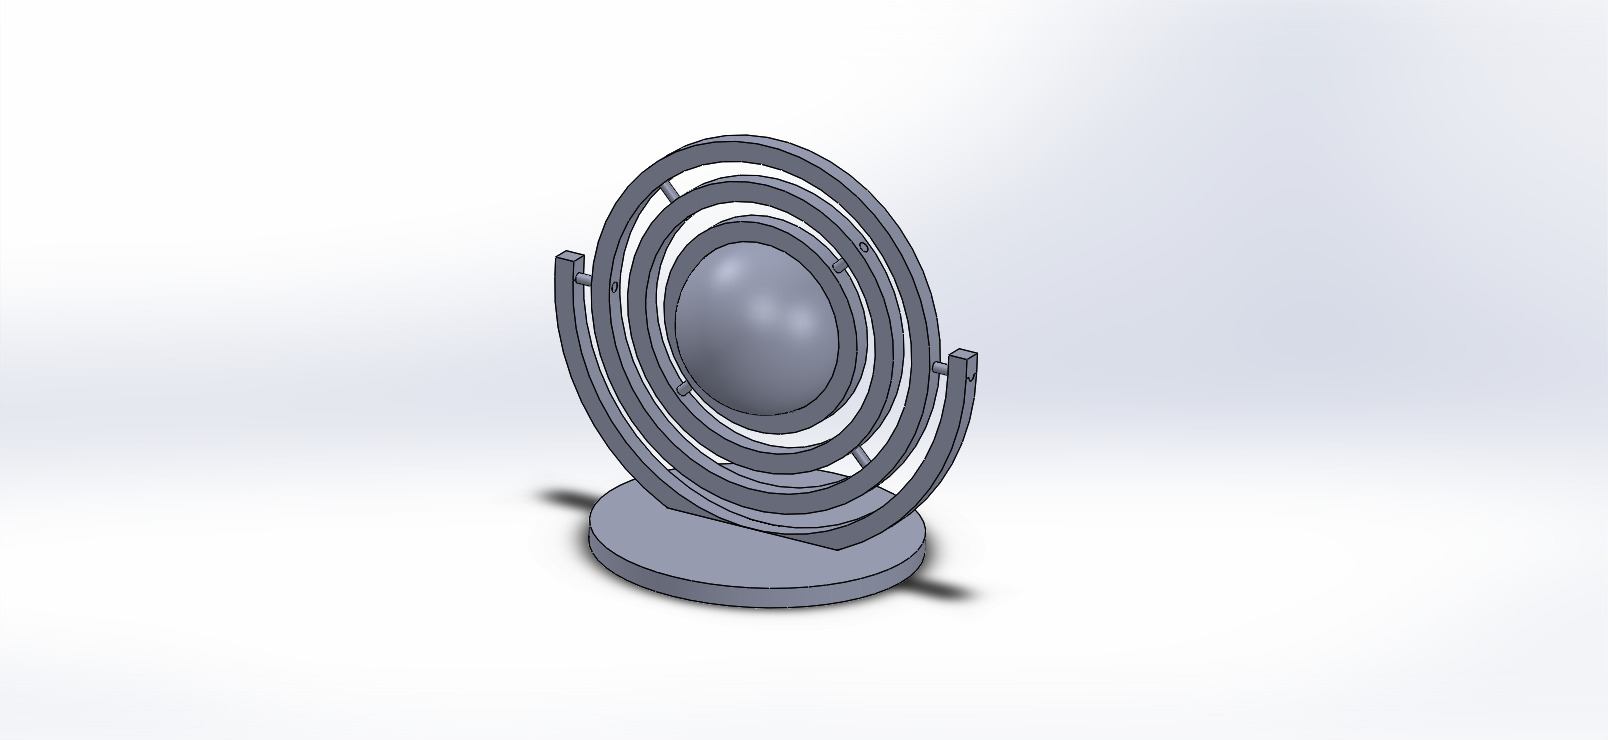
For the design of my spinner, pictured below, I will mount the resin ball in the middle of the wood rings. The rings will be connected with pins so that they can spin freely. The base has a cut-out that the largest half-ring fits into. This design is larger than I originally anticipated but I believe it is still a manageable size at just under six inches in diameter. The skull inside the resin ball will be clear with gold flake and the rings will be made out of a light wood.

CAD Model of the Spinner
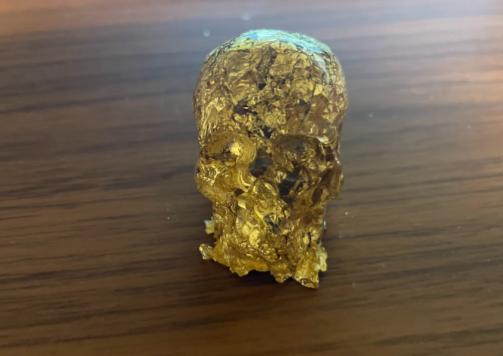
So far I have started experimenting with resin molds to try and get a skull inside a ball. My initial attempts are pictured below but two of the three are still setting in the molds. The first skull that I made had fewer gold flakes inside the clear resin so I decided to put as much as possible in the second attempt in order to decide which I liked more. The third skull has fewer flakes and some glitter to add shine. I am having difficulty getting the skull to be in the middle of the resin ball because it sinks to the bottom of the mold. Please comment on this post if you have an idea of how to get it to be in the center. I am so far happy with how the skulls have turned out. The resin has been a much slower process than I had originally anticipated. The box says it takes 24 hours to set but in reality, it is closer to 72.

Resin Experimentation
My plan for getting the project done is to finish up my resin skull and ball by the end of the week. I will also source the rest of my materials before March 18th. I will then use the week before spring break to laser-cut the wood rings. This will give me the week after spring break to assemble and fine-tune the performance. This gives over a full two-week buffer for problems that may arise. If I have enough time I may also add a motor that will drive the orbital spinner.
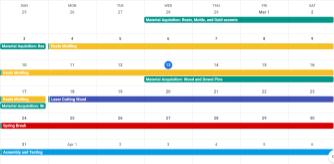
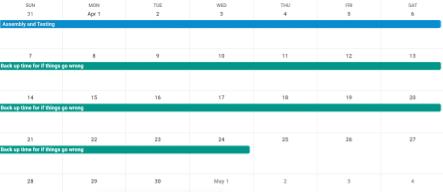
Schedule Timeline
The steps involved in making the artifact are resin molding, laser cutting of the wood pieces, and assembly with the dowel pins. The resin molding is a time-intensive process that will involve many attempts. I have already acquired the resin and molds and have begun experimentation. The first step is making the golden skull and then placing it inside the sphere mold before filling it with resin. My plan for centering the skull in the orb is to attach it to a toothpick and keep it suspended in the resin until it has started to set. Once it is hard enough that the skull will not sink I will remove the toothpick holding it in place and the resin will still be fluid enough to fill in the hole. After I have a sphere with a skull in it, I will place it inside the wooden rings that I will be laser cutting at the ITLL. I already have the knowledge and skills required to use this piece of equipment but I will be using thicker wood than I have used before. I may need to cut the design into multiple thinner sheets and glue them together. I am using the laser cutter for its speed and precision rather than other more traditional wood-cutting methods. After being laser cut, I will drill the holes for the dowel pins into the rings. Then I will press fit the sphere into the smallest ring and insert the dowel pins with a lubricant to ensure frictionless orbital movement. After this, I will set it in the base and use adhesive to secure it. The last step will be adding weight as necessary to make sure the rings return to their rightful position after being spun.
2 Comments. Leave new
Hi Josh,
Sounds like you are making amazing progress on your project so far! I am wondering if you have a backup plan for the press set of the sphere into the smallest ring this method seems like it could be difficult and using another pin could be a helpful change if it doesn’t work right away. Look forward to seeing the final product!
Worst case I could totally add pins to the center ring, however, I would like to avoid drilling into the resin if possible. My backup plan right now would be to add 2 smaller wooden rigs on either side to sandwich the ball in place.