
Throughout my engineering career, I had always thought I hated circuits. It wasn’t until my senior design project that I realized I just didn’t like it because I was bad at it! This led to to want to try to do something with circuits for this project.
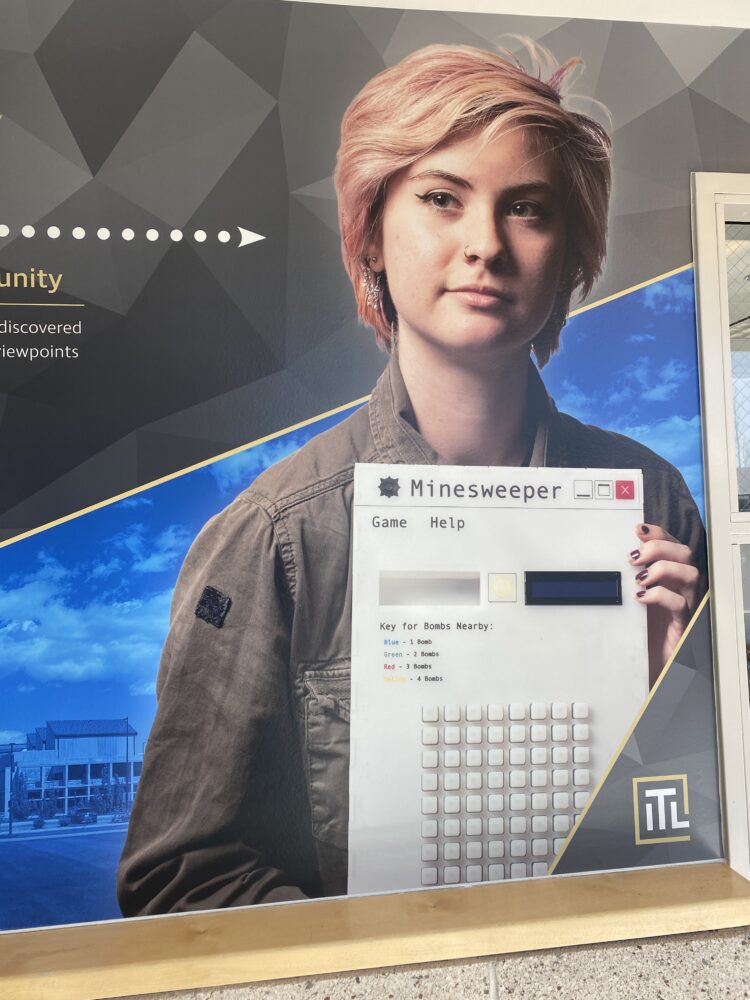
The inspiration for this project came from walking on the bridge between the ITLL and the EC, where a picture of someone holding a hand-held minesweeper would stare at me from the wall. I wanted to do something similar–like a gameboy or a arcade with a different game that I love. That game was Free-Cell solitaire. It is undoubtedly one of my most favorite games of all time. Top Tier.
I had been doing research into how intensive this project may be–I am still a busy student. I had come across this tutorial by Prathamesh Barik: “Creating Tetris Game with Arduino and OLED Display”. The thing I was most cnocerned with at that time was the logistics of the code to the display. I was worried about the resolution of a screen–I don’t really have all the money in the worried but also don’t want do work with 8-bit style…although it is pretty much the aesthetic I want? I would need to display colour, suit, and number, for all 52 cards which I see getting hard with large boxes. Therefore, I thought spider solitaire may be easier since it’s only worried about the number of the card (all cards are black and suit does not matter). But spider solitaire also includes multiple decks that can be on the screen (so 104 cards…). Sudoku, as that is another game I am fond of. The only issue for the display would be if I wanted to include pen marks.I could go as far as to design my own game–but I fear that might be a little too crazy for the time I have for this project and other classes. I was really set on Free-Cell, though.
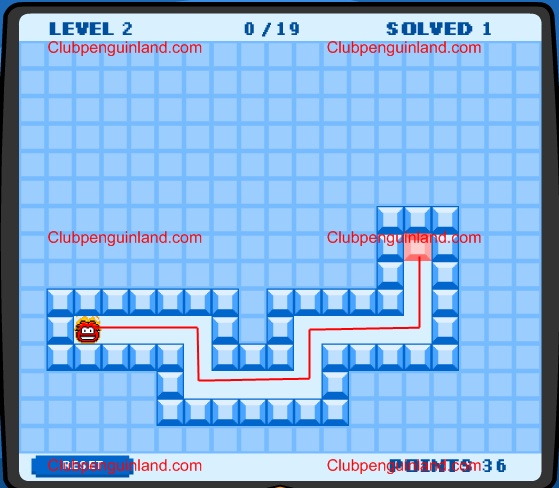
I had started the code in Python before realizing a couple of things: 1. If I want to use arduino, I would have to re-do the code in C/C++. 2.) This is a pretty complicated game for someone like me who has very limited experience. Again, this project is supposed to more about the circuitry than the coding. Therefore, I decided to switch the game to a replica of “Thin Ice” from Club Penguin. What’s great about this game is that it is already in a somewhat-pixel-style! In addition, it has a somewhat easier logic than the other games.

[3] Thin Ice Club Penguin
The pixel aesthetic (or pixel art) has it’s origins in the late 70’s and early 80’s with the rise of video games and arcades. Think Pac-man and Nintendo Mario. This aesthetic looked like the way it did because of the processing systems of the time could only display so much at once. The low resolution lends itself to the pixel style and it’s characteristic “blocky-ness” in addition to pixels just being “light” squares. Perhaps the reason pixel art is so popular today, is the feeling of nostalgia for many players. The chance to re-live their childhood.
Because I am working with circuitry and code, pixel art is definitely the way to go. I am bound to a 128×64 display (because it’s cheap for it’s resolution) and it just becomes easier to code than something with more pixels (I have to individually turn on each pixel….)
Because I am restricted physically, there is not much room for other aesthetics. They would be a hybrid between itself and the pixel aesthetic. The original club penguin game is the “club penguin aesthetic”. The player is a puffle or an in-game pet that melts the ice beneath it. The player moves with the arrow comes on a keyboard. Once the player movies cannot go back to it’s previous space–it can only move to “free” spaces. The player wants to touch all the free-spaces in the level to get the highest score, where the ending or door to the next level is the red block (refer to figure xx). However, the player may trap themselves, confining themselves between watered blocks and the walls.
As of yet, I am still coming up with what the aesthetic for the display I should do.I could do a nature aesthetic. Where it’s a seed that plants this would complicate the code as I would have to display the flower–or even multiple flowers. I would prefer a sunflower. This would also limit the complexity of the levels as the flowers would require more pixels than just the four I was planning on using for each club penguin square. It could also be like an Indiana Jones/Temple Run aesthetic where the player is stepping on broken blocks that break after the leave that square. Similar to the flowers, I would need more pixels to display the cracks, but I might be able to get by with just a color change. I could do a space theme with a similar take, except the player is a Martian and the blocks turn into the void afterward(Think of Space Invaders meeting coolmathgames’ “Run”). However, when stretching these designs I found it very hard to create anything out of a 4×4 space. That being said I might just have to be a font letter or square bug that removes the “colour” from the space.It should be too bad as the OLED works with “textures”. I would have to create functions that creates the different block types.
In any situation, there needs to be a cause and effect. A before and after. The “after” needs to block the path of the player. I also need to pay attention to how easy it is to convey each side. The most I could go without fore-going the setting of the board/levels would be 8 display pixels for each game pixel. I also only have black and white for the display, which means any aesthetic with significant colour may be out of the run.
Originally I had thought the display was only in black and white, ie. turning on and off the pixels. Upon testing the OLED, I realized that I have yellow, blue, and “off” to work with! I could do an IKEA inspired game, if I really wanted to.
I had put lots of time in figuring out how I wanted my game to work.Textures of the blocks. I am not going to include sound, a points system, or a timer. What I might do is not allow the player to complete the level until all the free-spaces have been obtained though. I would need a reset button like Thin Ice in that case. The original game doesn’t require this as it has a points-system. It’s still in progress, however. I only expect to get 3 or so levels due to time constraints. These levels will be relatively easy, with just the free spaces and walls. As the actual game progresses, other things such as blocks that can be walked over multiple times and keys appear. If I have ample time (I don’t expect myself to have), I could give it a try. IMG_0361
I have come up with a materials list (following the tutorial). I have sourced most of these materials from Pat’s shop in the Idea Forge (thank you, Pat!):
- AdaFruit OLED 128×64 display
- 4 buttons to control the movement of the player
- Arduino Uno
- Breadboard
- Wires and 4 10k resistors for the buttons
- Battery (6V)
The only way to incorporate a different aesthetic would be to make the physical part of the gameboy the aesthetic (which I would 3d print). Pat said he would give me acrylic if I wanted to go down the exposed circuit route. What I worry about is that the circuit and and everything is going to be rather long–it might end up as a brick, rather than a GameBoy. If that is the case, then we may have to go into the Pac-man arcade style.
So far, I have tested that the buttons and the display work.

Below is my tasks for the next weeks:
- Try to get a functional circuit, same as the tetris tutorial. The tutorial provides code. In this way, I will know that I can get the circuit to work. This will happen before spring break, hopefully.
- Order/acquire any materials that I have not yet.
- During spring break: Create the code for my version of the game. Since the circuit should be working, this will allow us to fix bugs that appear in the code. There is a python version of the game that I will reference for logic.
- Once the game works as it should, make the exterior of the game by 3d printing. This will need to happen after spring break as I don’t have a 3d-printer. I except the code to take a lot of time.
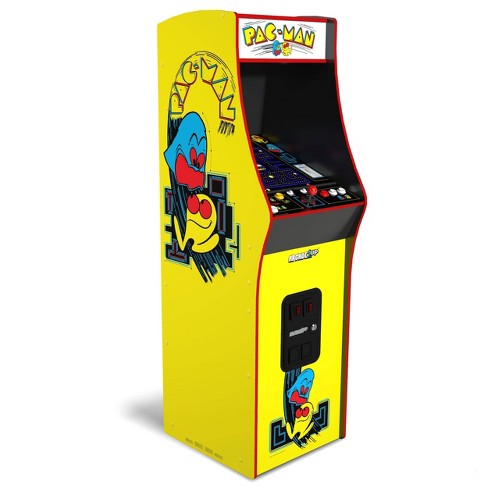
[4] Arcade but imagine its mini
References:
[3] https://www.google.com/url?sa=i&url=https%3A%2F%2Fwallpapers.com%2Fwallpapers%2Fthin-ice-2560-x-1440-d5yj0fug2f7amq51.html&psig=AOvVaw0qTXFvoDnAlLJyKIDGANUZ&ust=1709830227112000&source=images&cd=vfe&opi=89978449&ved=0CBUQjhxqFwoTCJDmy42M4IQDFQAAAAAdAAAAABAD
[4] https://www.google.com/url?sa=i&url=https%3A%2F%2Fwww.walmart.com%2Fip%2FArcade1UP-Bandai-Namco-Entertainment-Legacy-Arcade-Game-Pac-Man-Edition-with-WIFI%2F1838135417&psig=AOvVaw2ZcWX6Hg93Xwyhf8FeDn9k&ust=1710561966447000&source=images&cd=vfe&opi=89978449&ved=0CBUQjhxqFwoTCOjzooay9YQDFQAAAAAdAAAAABAQ
4 Comments. Leave new
Wow, I think this is a cool project! I like all the ideas and inspirations from previous projects. Could you tell us more about how the game works from the perspective of someone who has never played it? One thing I like here is that you are keeping functionality simple and I am guessing that will allow for a better more refined aesthetic.
I will try my best as I iron out the details. You are the player, which controls the object. Let’s list say it’s a blob for now 🙂 You move the blob with the buttons which will control up, down, left, and right. The player moves on what is essentially a defined grid. This grid has walls that the player cannot move into and free spaces that the player can move into. Once you move to a free space, it more or less becomes a wall where the player cannot move in again. The level will only advance if all free spaces are touched and the player reaches the end, denoted by lets say a star. Some levels will have a path where the player doesn’t have to think about which path to take (refer to photo 3), where one level might just be free-spaces where the player will have to plan out where to go. In this case, it’s possible that the player traps themselves between walls and touched spaces where the game will automatically reset. I hope this helps!
Tiana,
Thanks for the post. Firstly, it might be wise to check over your post before you publish it, I was able to find a few spelling and grammar errors without having to look very hard. I think this is a super ambitious project and it seems like a great way to improve some technical engineering skills. My question comes down to the aesthetic, are you more focused on the actual game aesthetic or the housing of the standalone device itself? Good luck with the project.
Both. I don’t think it would be super hard to customize the housing as it would just be the 3d print and stickers ! As for the actual game, I do expect that to be more tough and will only really emerge once I get a sense of the mechanics. I guess a more appropriate answer to your question would be the housing if I run out of time.