De Stijl emerged in the Netherlands in 1917 as a response to the devastation of WWI, with artists seeking to restore a sense of universal balance and spiritual harmony to everyday life. Pioneered by figures like Piet Mondrian and Gerrit Rietveld, the aesthetic strips art and design down to its absolute bare bones. It is defined by strict horizontal and vertical lines, rigid grid-based layouts, and a pure color palette limited exclusively to black, white, and primary colors (red, blue, and yellow). Rather than relying on perfect mirroring, De Stijl utilizes carefully calculated, balanced asymmetry to create visual harmony.
The Idea: My idea for the upcycling project is to base it off of the De Stijl aesthetic. I always love looking at the frame section in Arts Parts so I would love to do something with those. I was thinking make a connection of all the frames, adding backing, and coloring either the frames or the backing in primary colors like the De Stijl characteristics. I would love to expand on it more but at the moment this is all I have. I’m going to go get some frames and see where I go from there.
The Process: I sanded down a shit ton of frames and still have more to go! One of them did break 🙁 but should be easy to put back together. The orbital sander saved my life but I do have to hand sand the rest of my tiny pieces. Next step will be staining them and attaching them in some manner. This past week I attached the frames with brackets on the back! It was easier than I thought, however, I did crack one when I decided “ehh pilot hole who needs her”… I immediately course-corrected. I then primed it for white paint later. I also sprayed a foam board blue, glass yellow, and soon they will become a corkboard and a mini white board. Cutting corks up and gluing them = tedious. Next steps: getting more corks. I ran out. Also picking up white spray paint to finish the frames. And lastly, getting the random piece of plywood out of my room, into the BTU, and drilling a bunch of holes to make a pegboard. Yay, I’m excited for this.
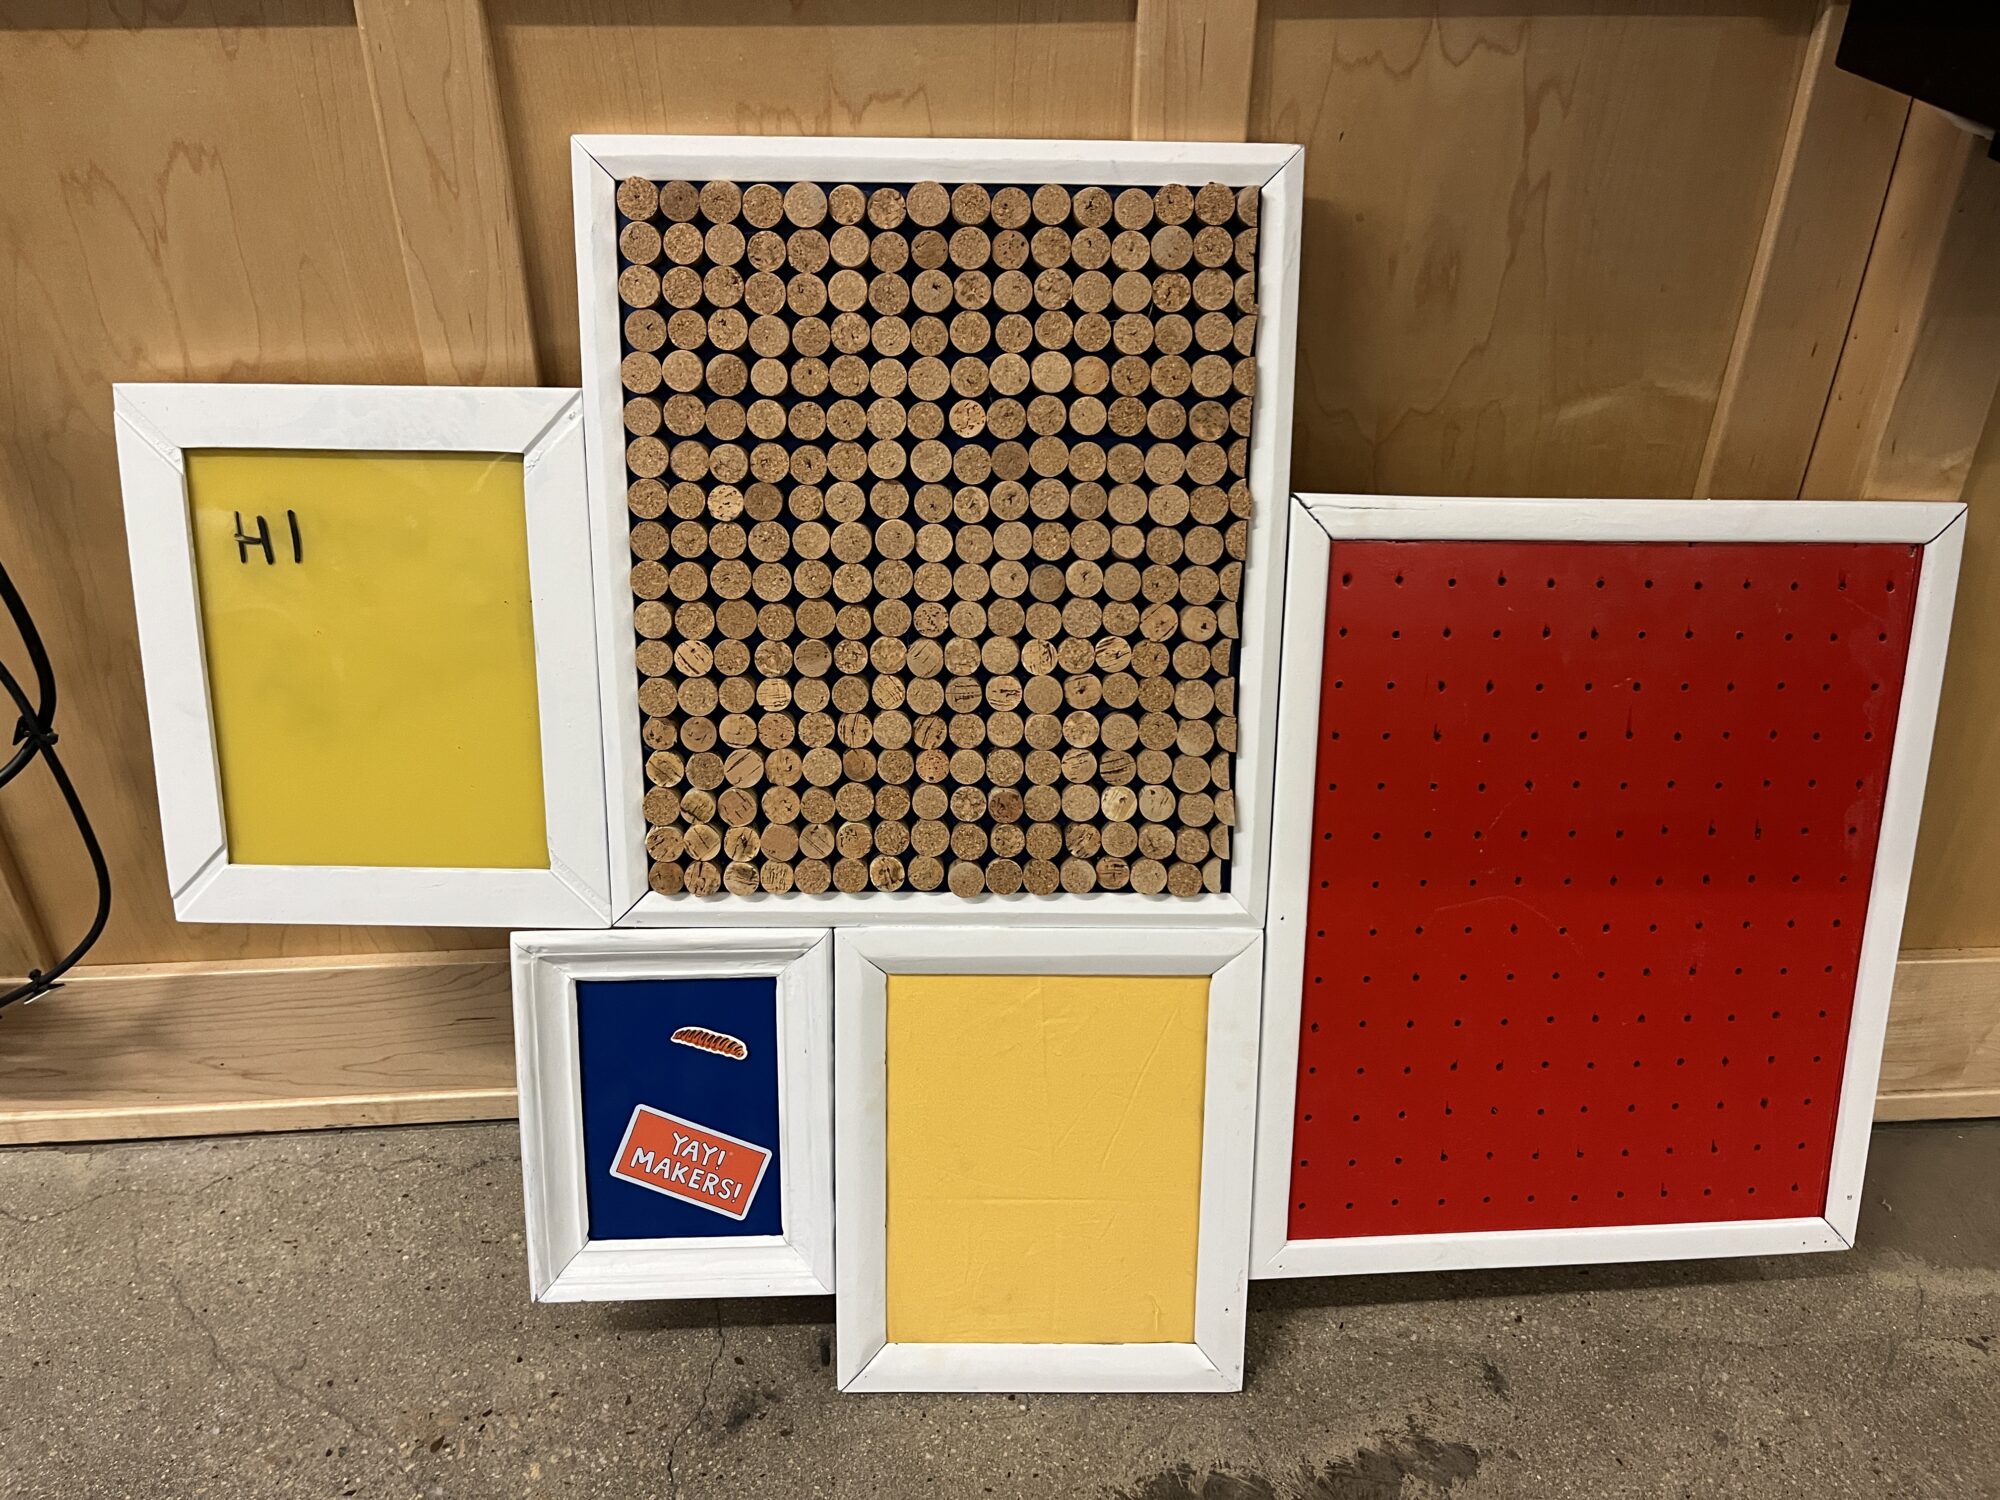
The final product: This is my finalized De Stijl “utility center” (I have no idea what to call it). I ended up with a magnetic board, white board, peg board, fabric placeholder, and cork-board. This last week has mainly been me piecing everything together.
I finalized the cork-board and sanded it down to be fairly level. This did end up with some of them coming undone due to the shaking, but I cleaned all the dust off and glued them back. I bought some other metal first, but found out it was not magnetic, so I went back to Arts Parts with a magnet in hand this time and made sure that it was magnetic. It was super thick though so I could not use the shears and ended up scoring it a bunch with an x-acto and bending it till it broke. Drilling all of the holes for the peg board was super tedious but actually really easy. I stapled the fabric in and secured it with foam board. I secured everything in the back with foam board too so that I could use picture frame fasteners. I am really happy with this and especially that I got everything from Arts Parts except for the hardware! I am also happy with my process. I did not have any major setbacks and got everything done. I think I achieved the aesthetic with asymmetry of the frames, primary colors within the inserts, and a clean grid-like look by using frames and painting them white.

The Idea: My idea for the upcycling project is to base it off of the De Stijl aesthetic. I always love looking at the frame section in Arts Parts so I would love to do something with those. I was thinking make a connection of all the frames, adding backing, and coloring either the frames or the backing in primary colors like the De Stijl characteristics. I would love to expand on it more but at the moment this is all I have. I’m going to go get some frames and see where I go from there.
The Process: I sanded down a shit ton of frames and still have more to go! One of them did break 🙁 but should be easy to put back together. The orbital sander saved my life but I do have to hand sand the rest of my tiny pieces. Next step will be staining them and attaching them in some manner. This past week I attached the frames with brackets on the back! It was easier than I thought, however, I did crack one when I decided “ehh pilot hole who needs her”… I immediately course-corrected. I then primed it for white paint later. I also sprayed a foam board blue, glass yellow, and soon they will become a corkboard and a mini white board. Cutting corks up and gluing them = tedious. Next steps: getting more corks. I ran out. Also picking up white spray paint to finish the frames. And lastly, getting the random piece of plywood out of my room, into the BTU, and drilling a bunch of holes to make a pegboard. Yay, I’m excited for this.
The final product: This is my finalized De Stijl “utility center” (I have no idea what to call it). I ended up with a magnetic board, white board, peg board, fabric placeholder, and cork-board. This last week has mainly been me piecing everything together.
I finalized the cork-board and sanded it down to be fairly level. This did end up with some of them coming undone due to the shaking, but I cleaned all the dust off and glued them back. I bought some other metal first, but found out it was not magnetic, so I went back to Arts Parts with a magnet in hand this time and made sure that it was magnetic. It was super thick though so I could not use the shears and ended up scoring it a bunch with an x-acto and bending it till it broke. Drilling all of the holes for the peg board was super tedious but actually really easy. I stapled the fabric in and secured it with foam board. I secured everything in the back with foam board too so that I could use picture frame fasteners. I am really happy with this and especially that I got everything from Arts Parts except for the hardware! I am also happy with my process. I did not have any major setbacks and got everything done. I think I achieved the aesthetic with asymmetry of the frames, primary colors within the inserts, and a clean grid-like look by using frames and painting them white.