

FINAL PROJECT UNRULR POST HERE
Overview
The final project was very open-ended. We were tasked with picking an aesthetic of our choice and then making whatever we wanted to match that aesthetic. I decided to make a roller coaster-themed bookend as a gift for my bookworm and coaster-loving partner.
Ideation
I took a long time to decide on what I wanted to do, because I wanted to make something that would be functional, not just pretty. I also will be moving across the country soon, so it had to be something that I would take with me. I originally wanted to make a foldable desk, but I doubted my ability to get it to a polished state. So, I decided I wanted to make a gift for a roller coaster and book lover: bookends that look like iconic first drops of roller coasters.
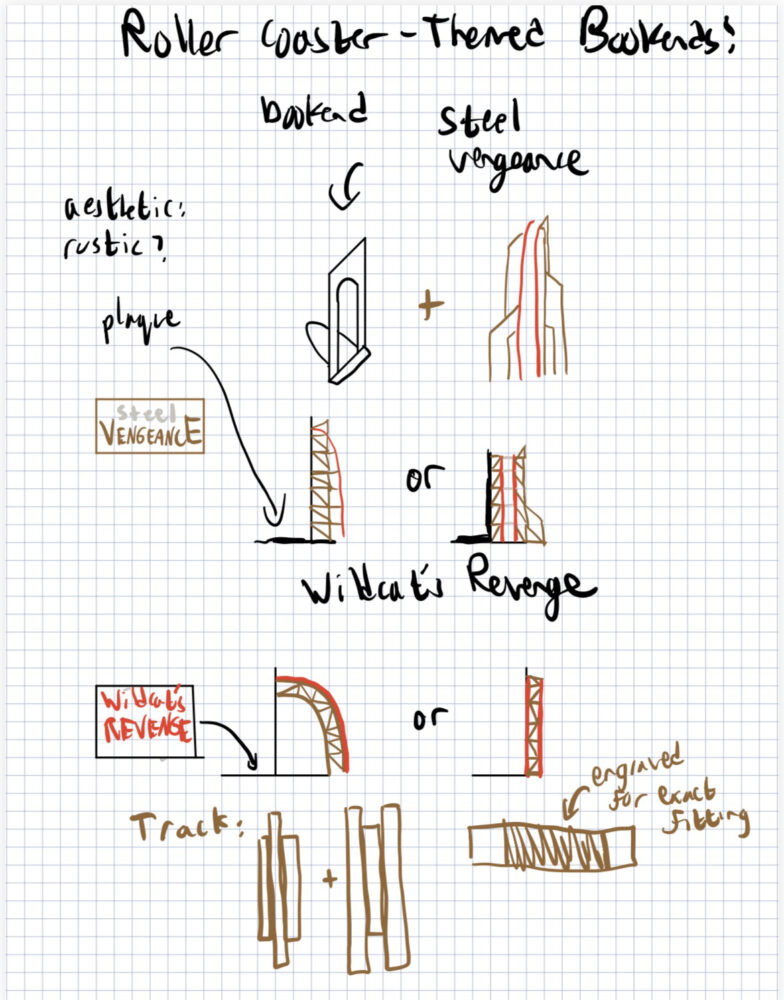
Initial ideation sketches
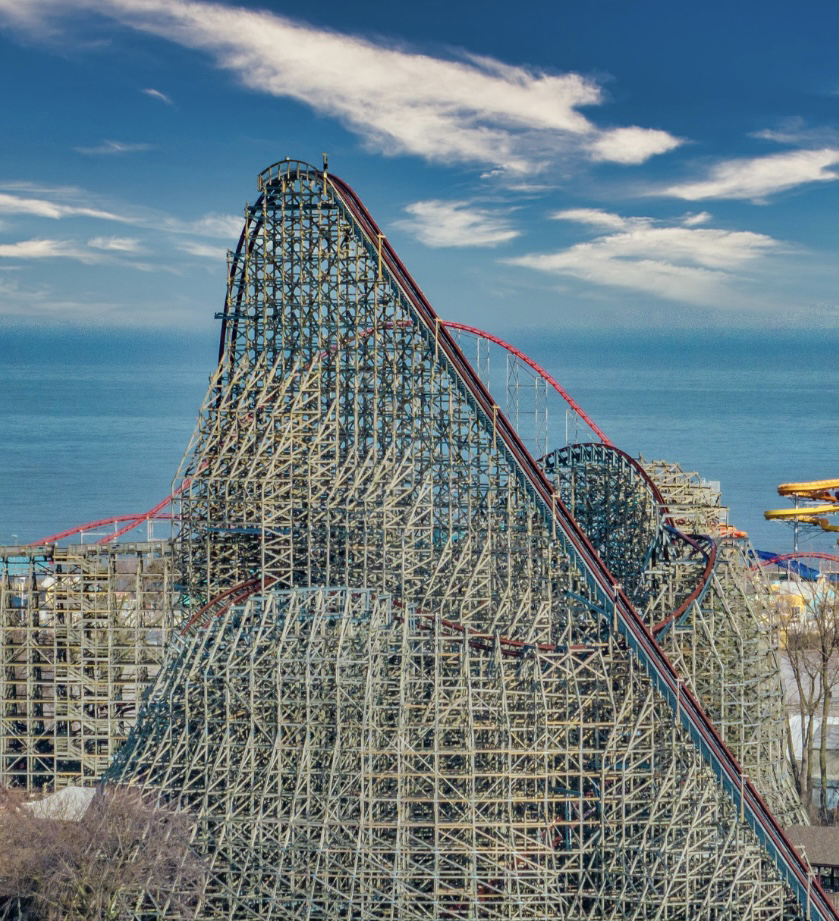
Steel Vengeance, the roller coaster inspiration
Design
Designing this in SolidWorks proved to be more difficult than I thought it would be. I had photos up from a bunch of different angles, and was constantly re-profiling the track and moving the supports ever-so-slightly forward and backwards to make them correct. Then, after making the basic profile of the front-facing supports, I needed to make the internal braces. I had a couple different ideas before narrowing in on a design that would allow me to support multiple columns with each support. However, I knew that tolerancing and manufacturing would be difficult.
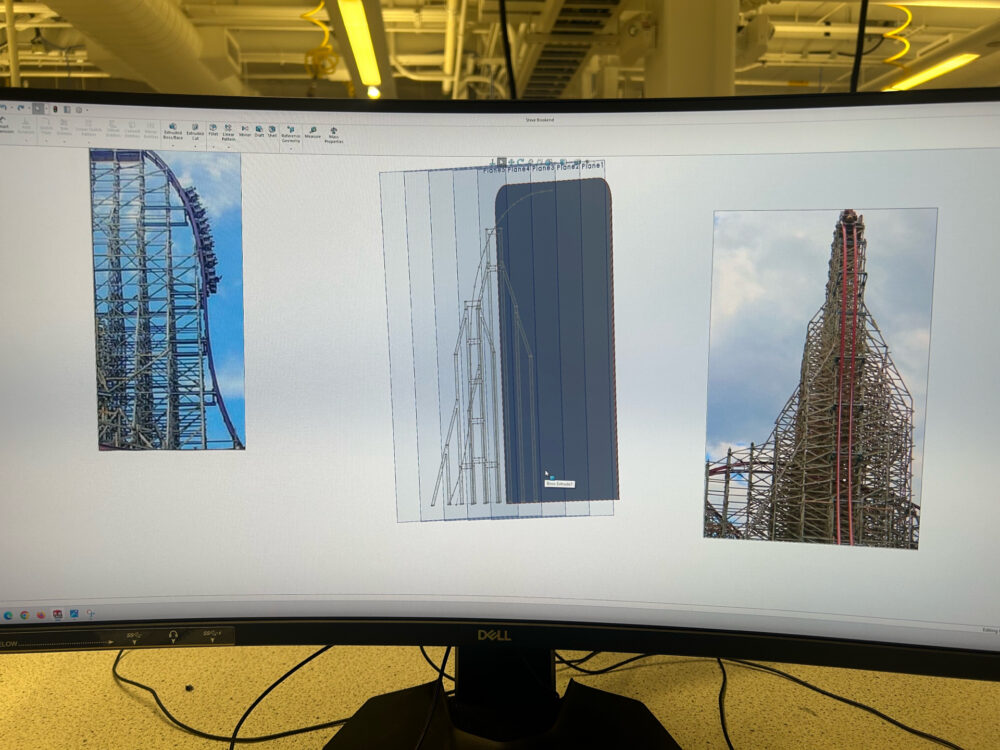
Design process with reference sketches
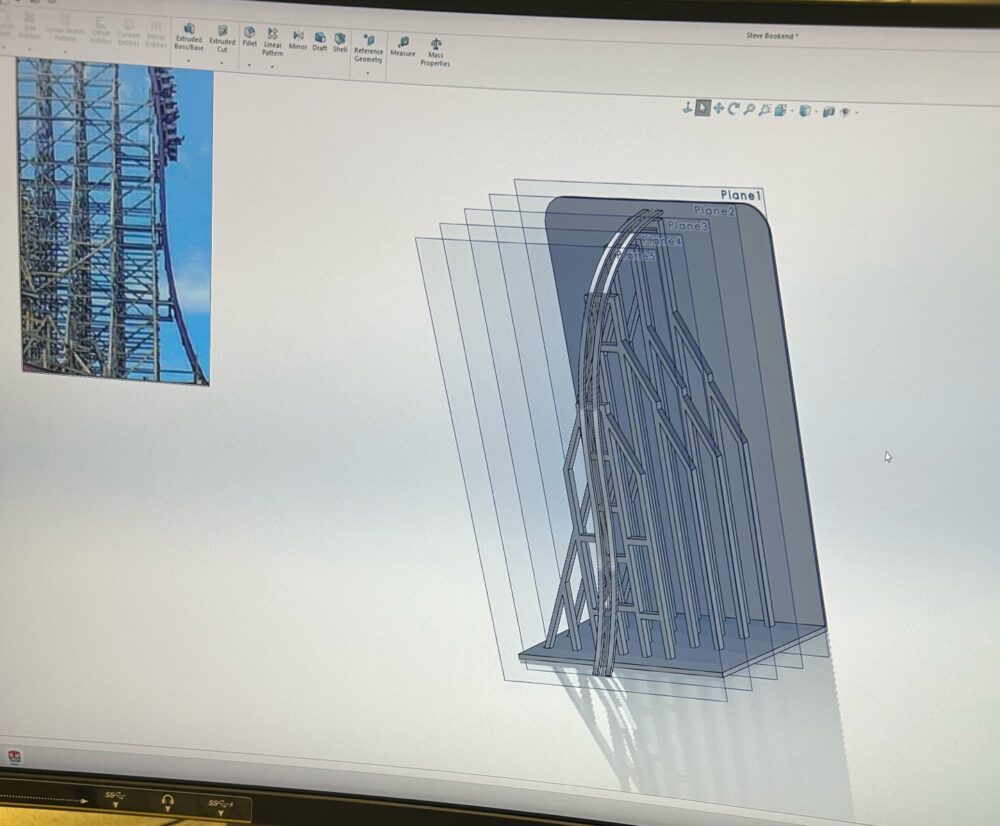
Finished columns
Manufacturing
After I finished designing the bookend in SolidWorks, I toleranced it with the laser cutter. I unfortunately learned that the wood you can buy from the ITLL varies in thickness, enough so that holes toleranced for one sheet won’t work with another. So, I had to dial my tolerances each time I used a new sheet, which was very sad. Once my tolerances were dialed, the manufacturing process consisted of putting the vertical layers in the bottom holes and holding them down as I put the horizontal braces into place. Once all the braces were locked in place (which took a lot longer than I wanted), I glued them down.
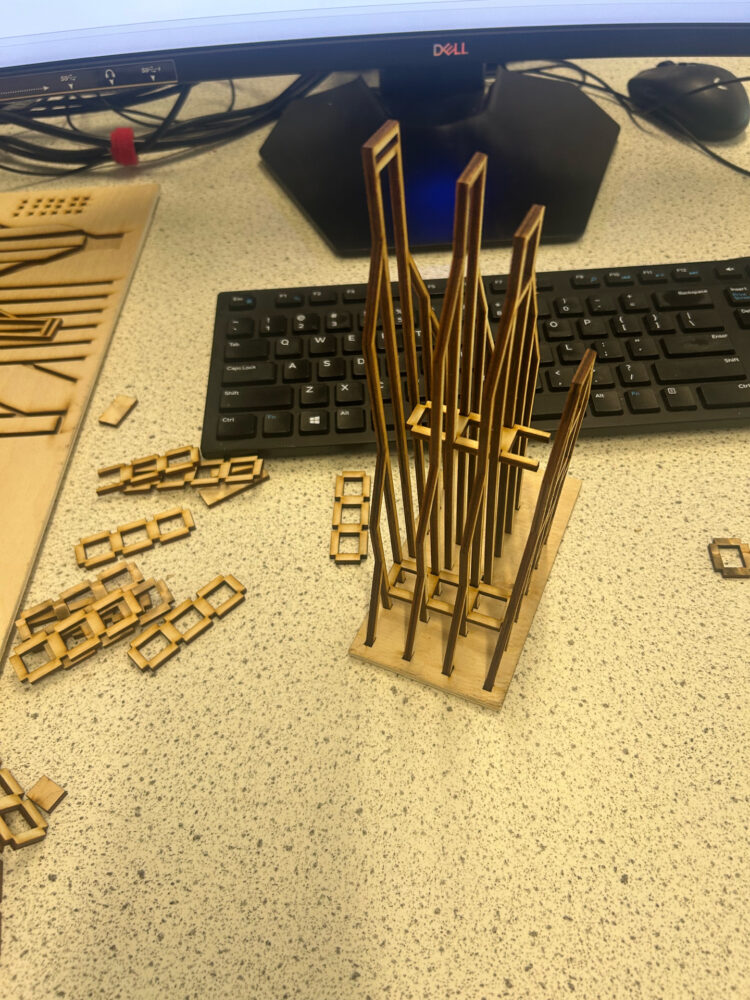
Beginning of the bracing process with prototype baseplate
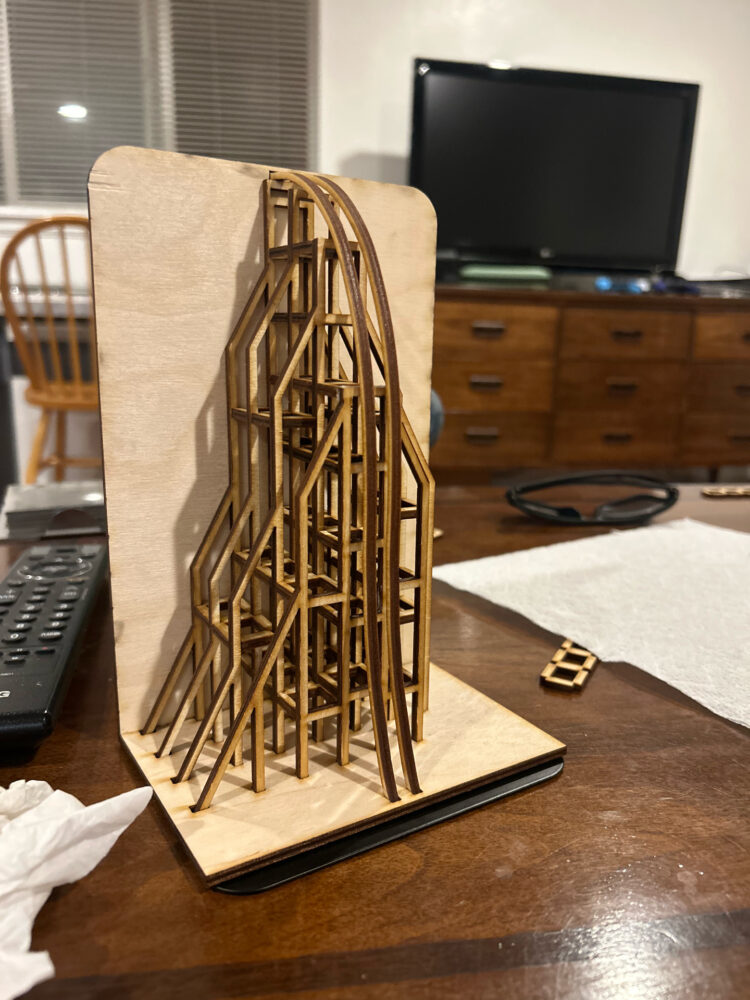
Bracing once added and glued in
Painting and Final Product
After the individual pieces were manufactured, I had to paint them before securing them to each other to create the final bookend. I messed around with paints until I could finally find a color that matched the track color of Steel Vengeance, and I decided to paint the bottom the color of grass and the backdrop a starry sky. After letting it all dry (and repainting the sky because it was hideous on attempt 1), I assembled and glued together the whole thing!
If I were to do it over again, I would create notches in the internal bracing and corresponding bumps on the vertical columns (probably mess around with an engrave setting) so they would be easier to get into place and wouldn’t move. It took me a long time to dial in my tolerances to the point that my bracing could be twisted in like a key, and even then, I often had to knock them out and replace them. All in all it was incredibly fun, and I can’t wait to gift it!
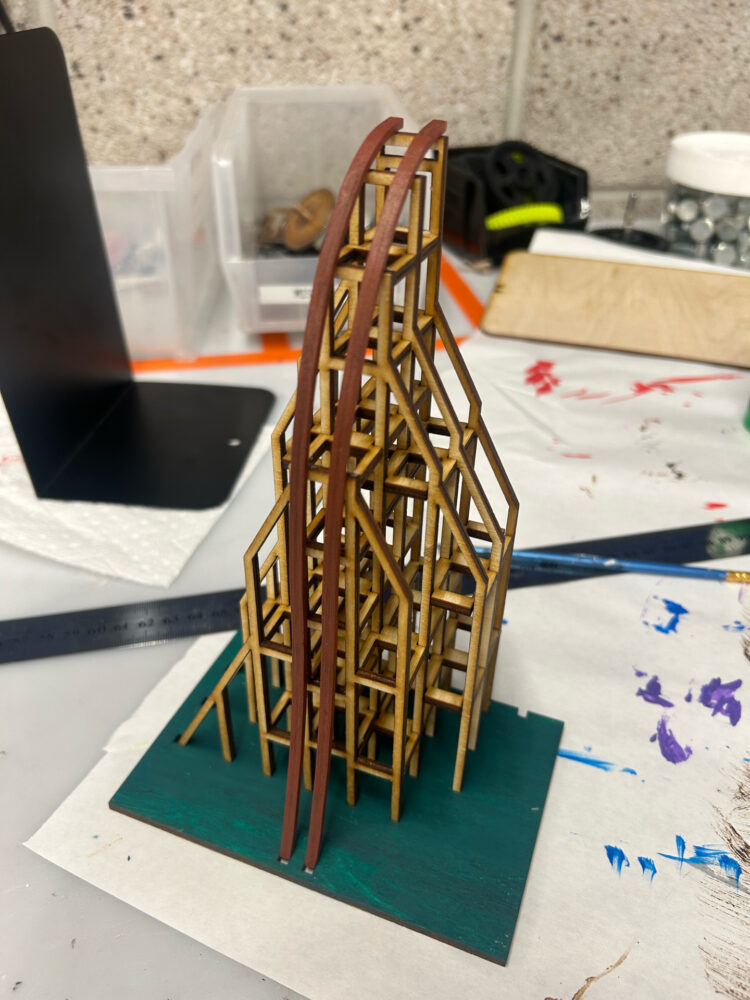
Halfway through the painting
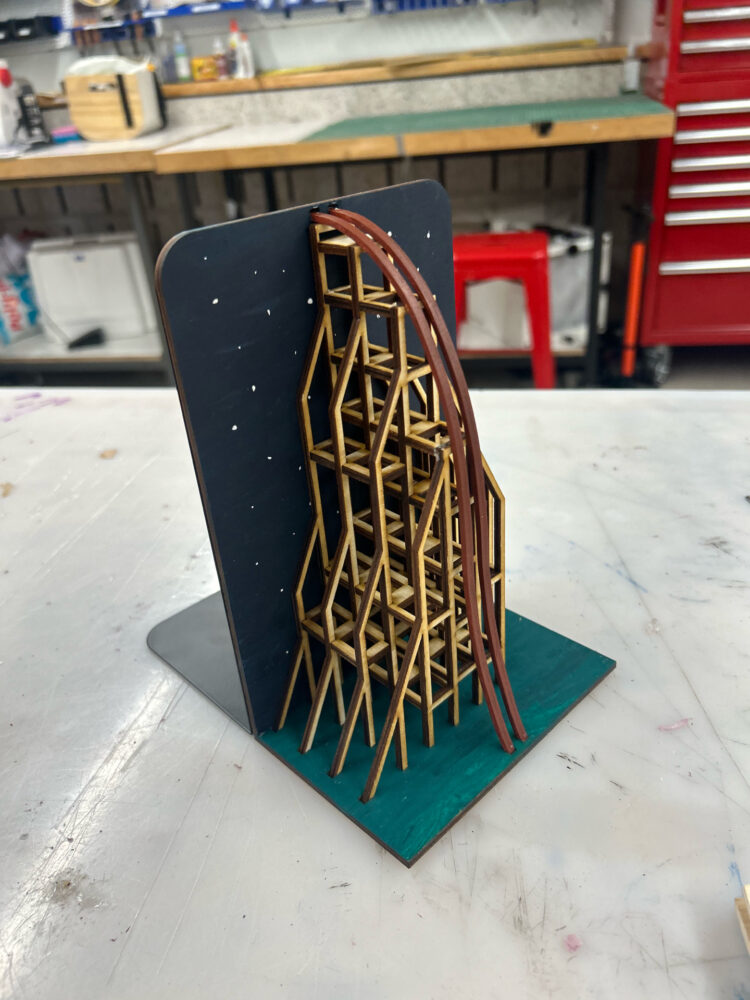
The bookend once painted and glued together!