
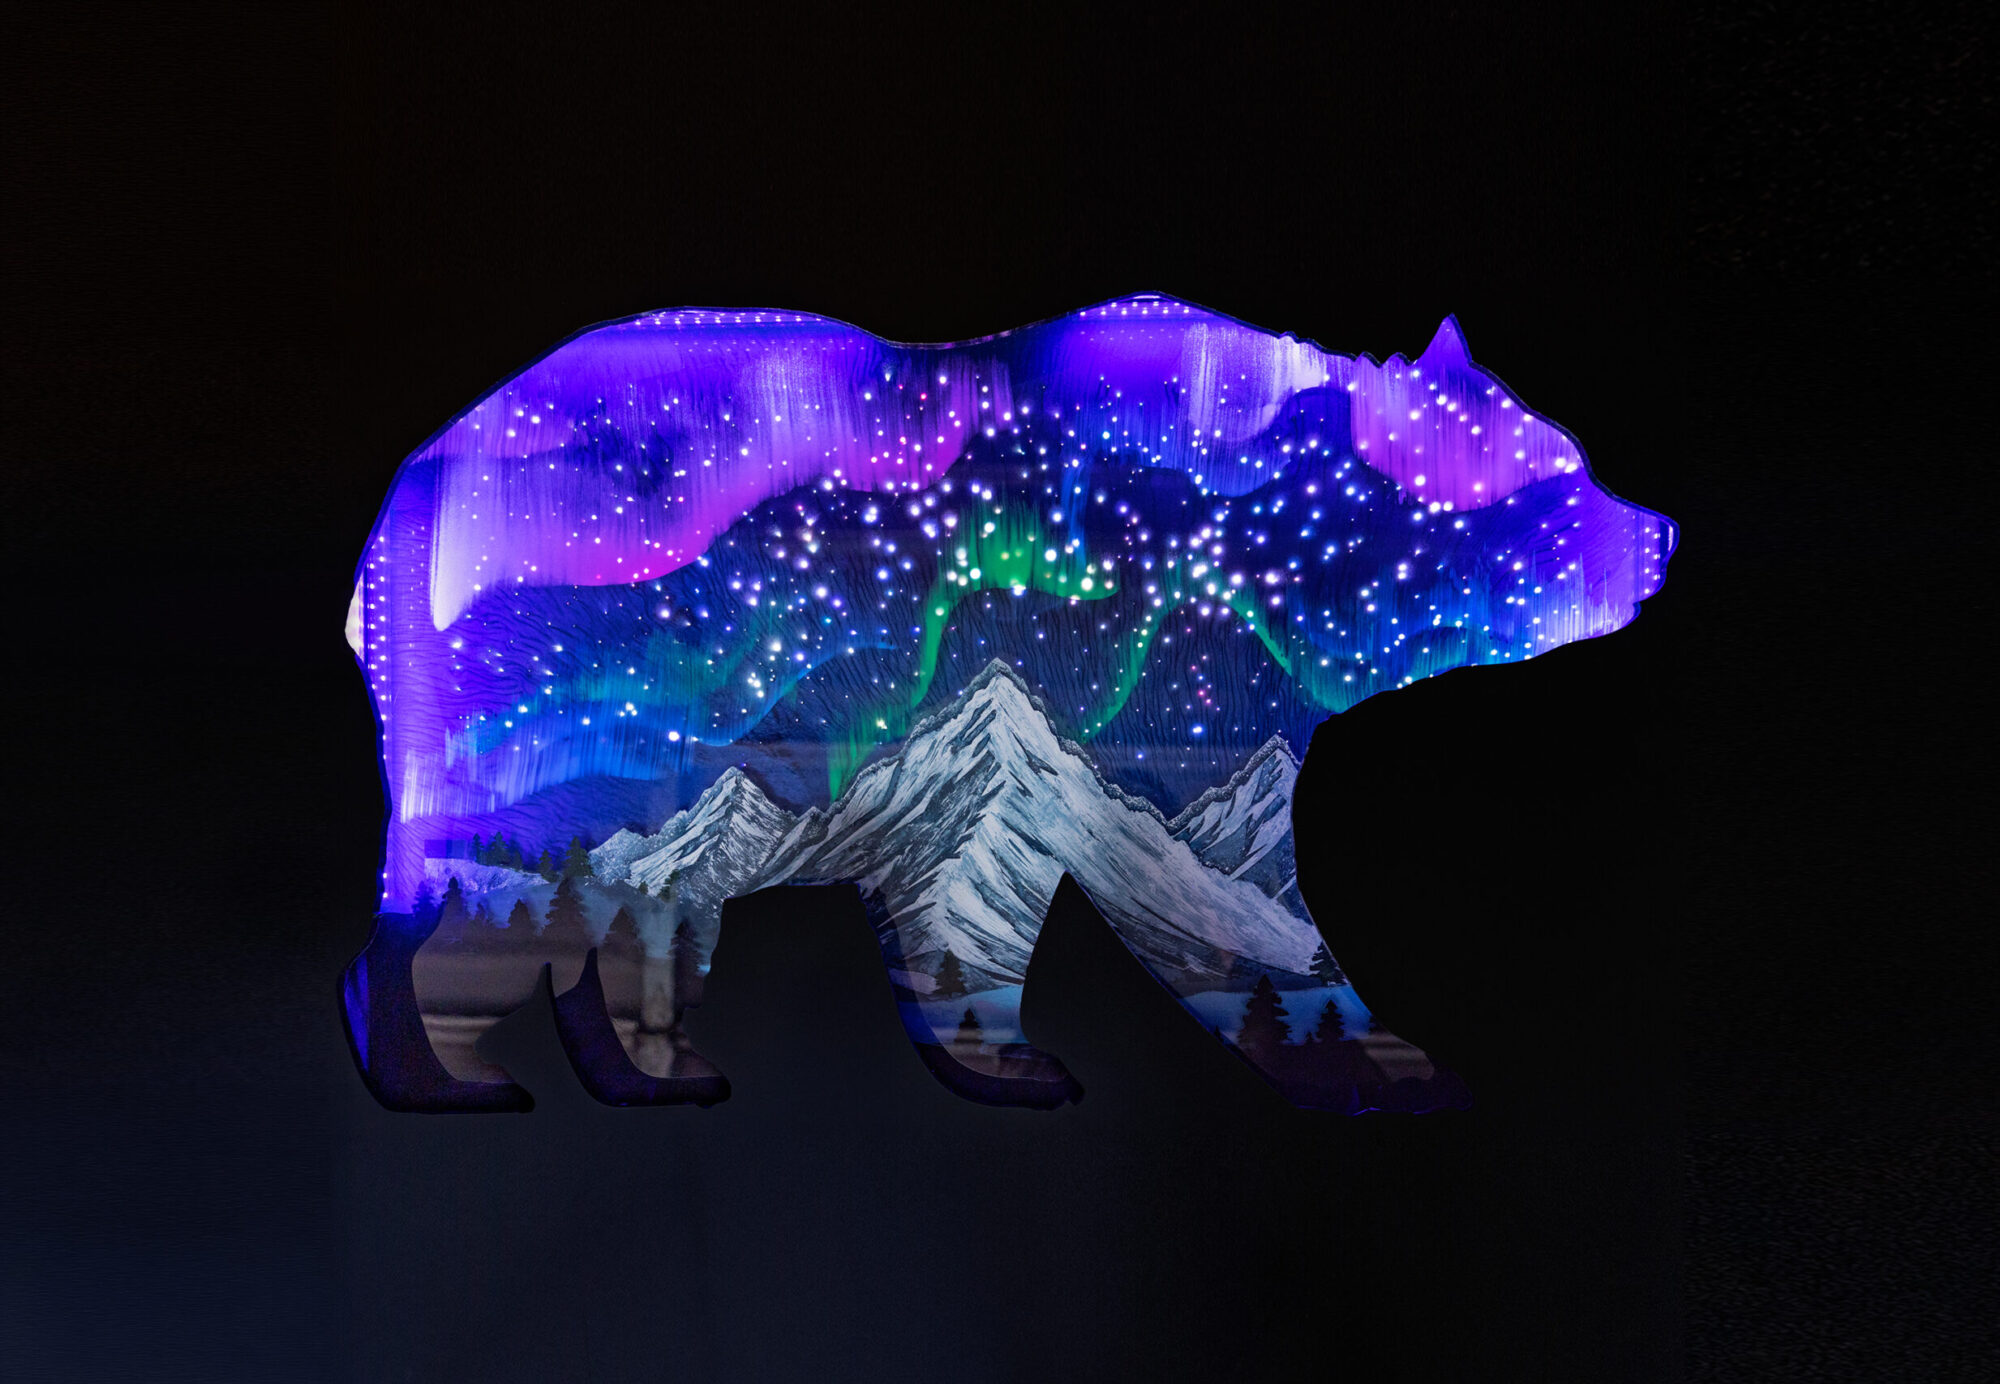
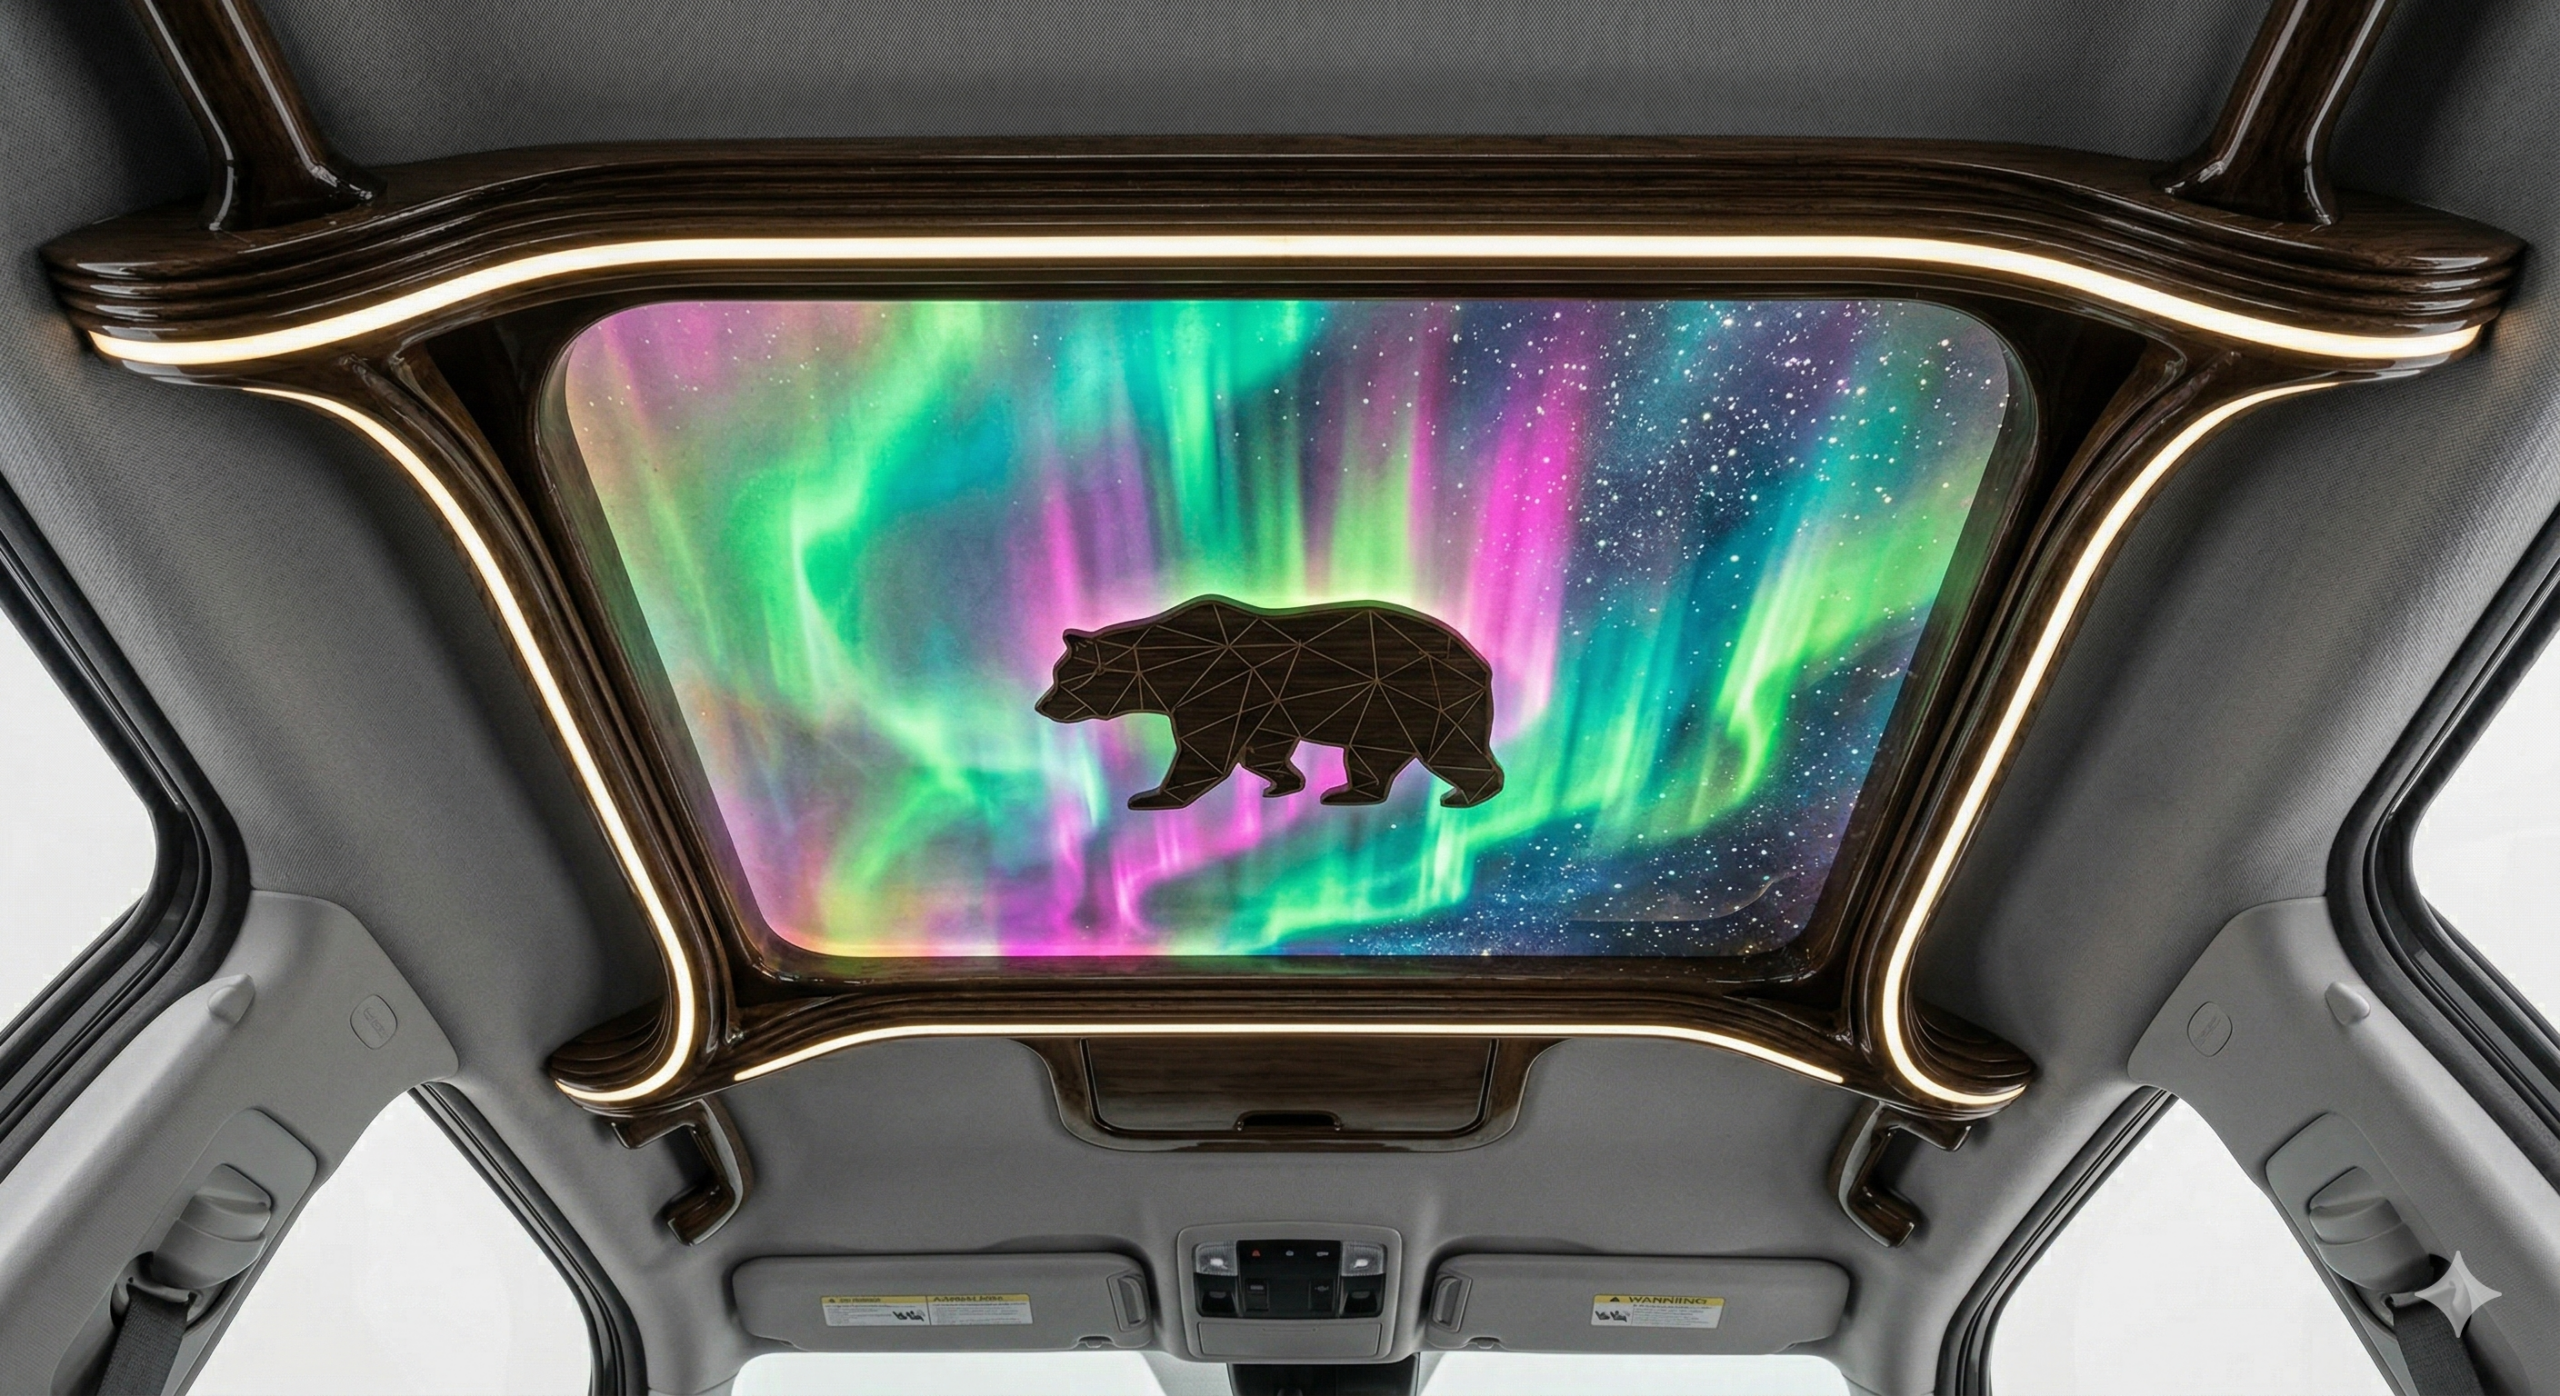
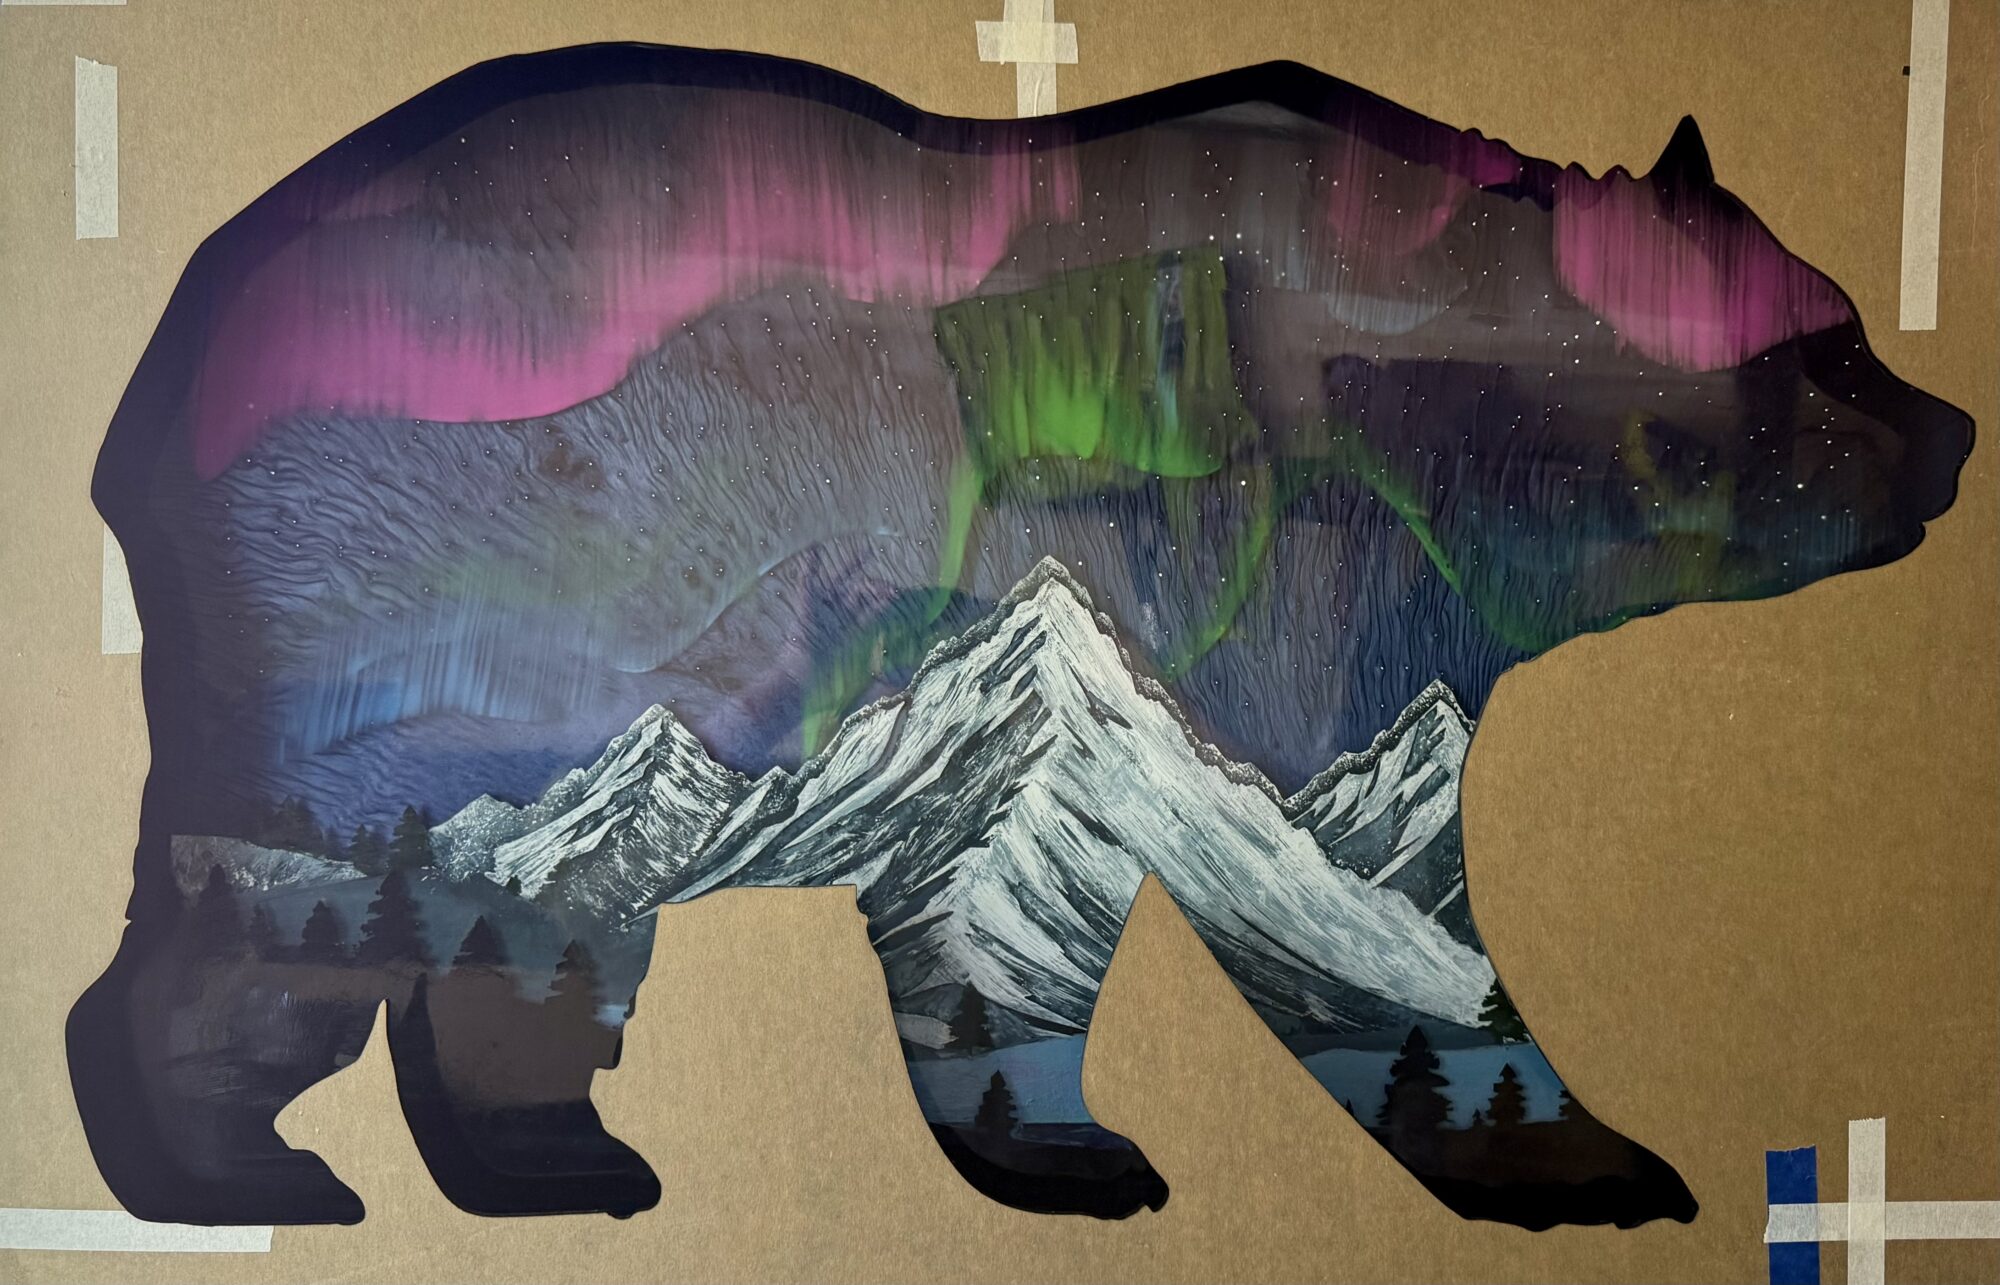
Ursa Borealis
Background Context:
Romantic Luminism:
An American art style that uses light and aerial perspective to show the splendor of the landscape and create a specific mood.
The 3 main ideas in this aesthetic I implemented:
- Sublime:
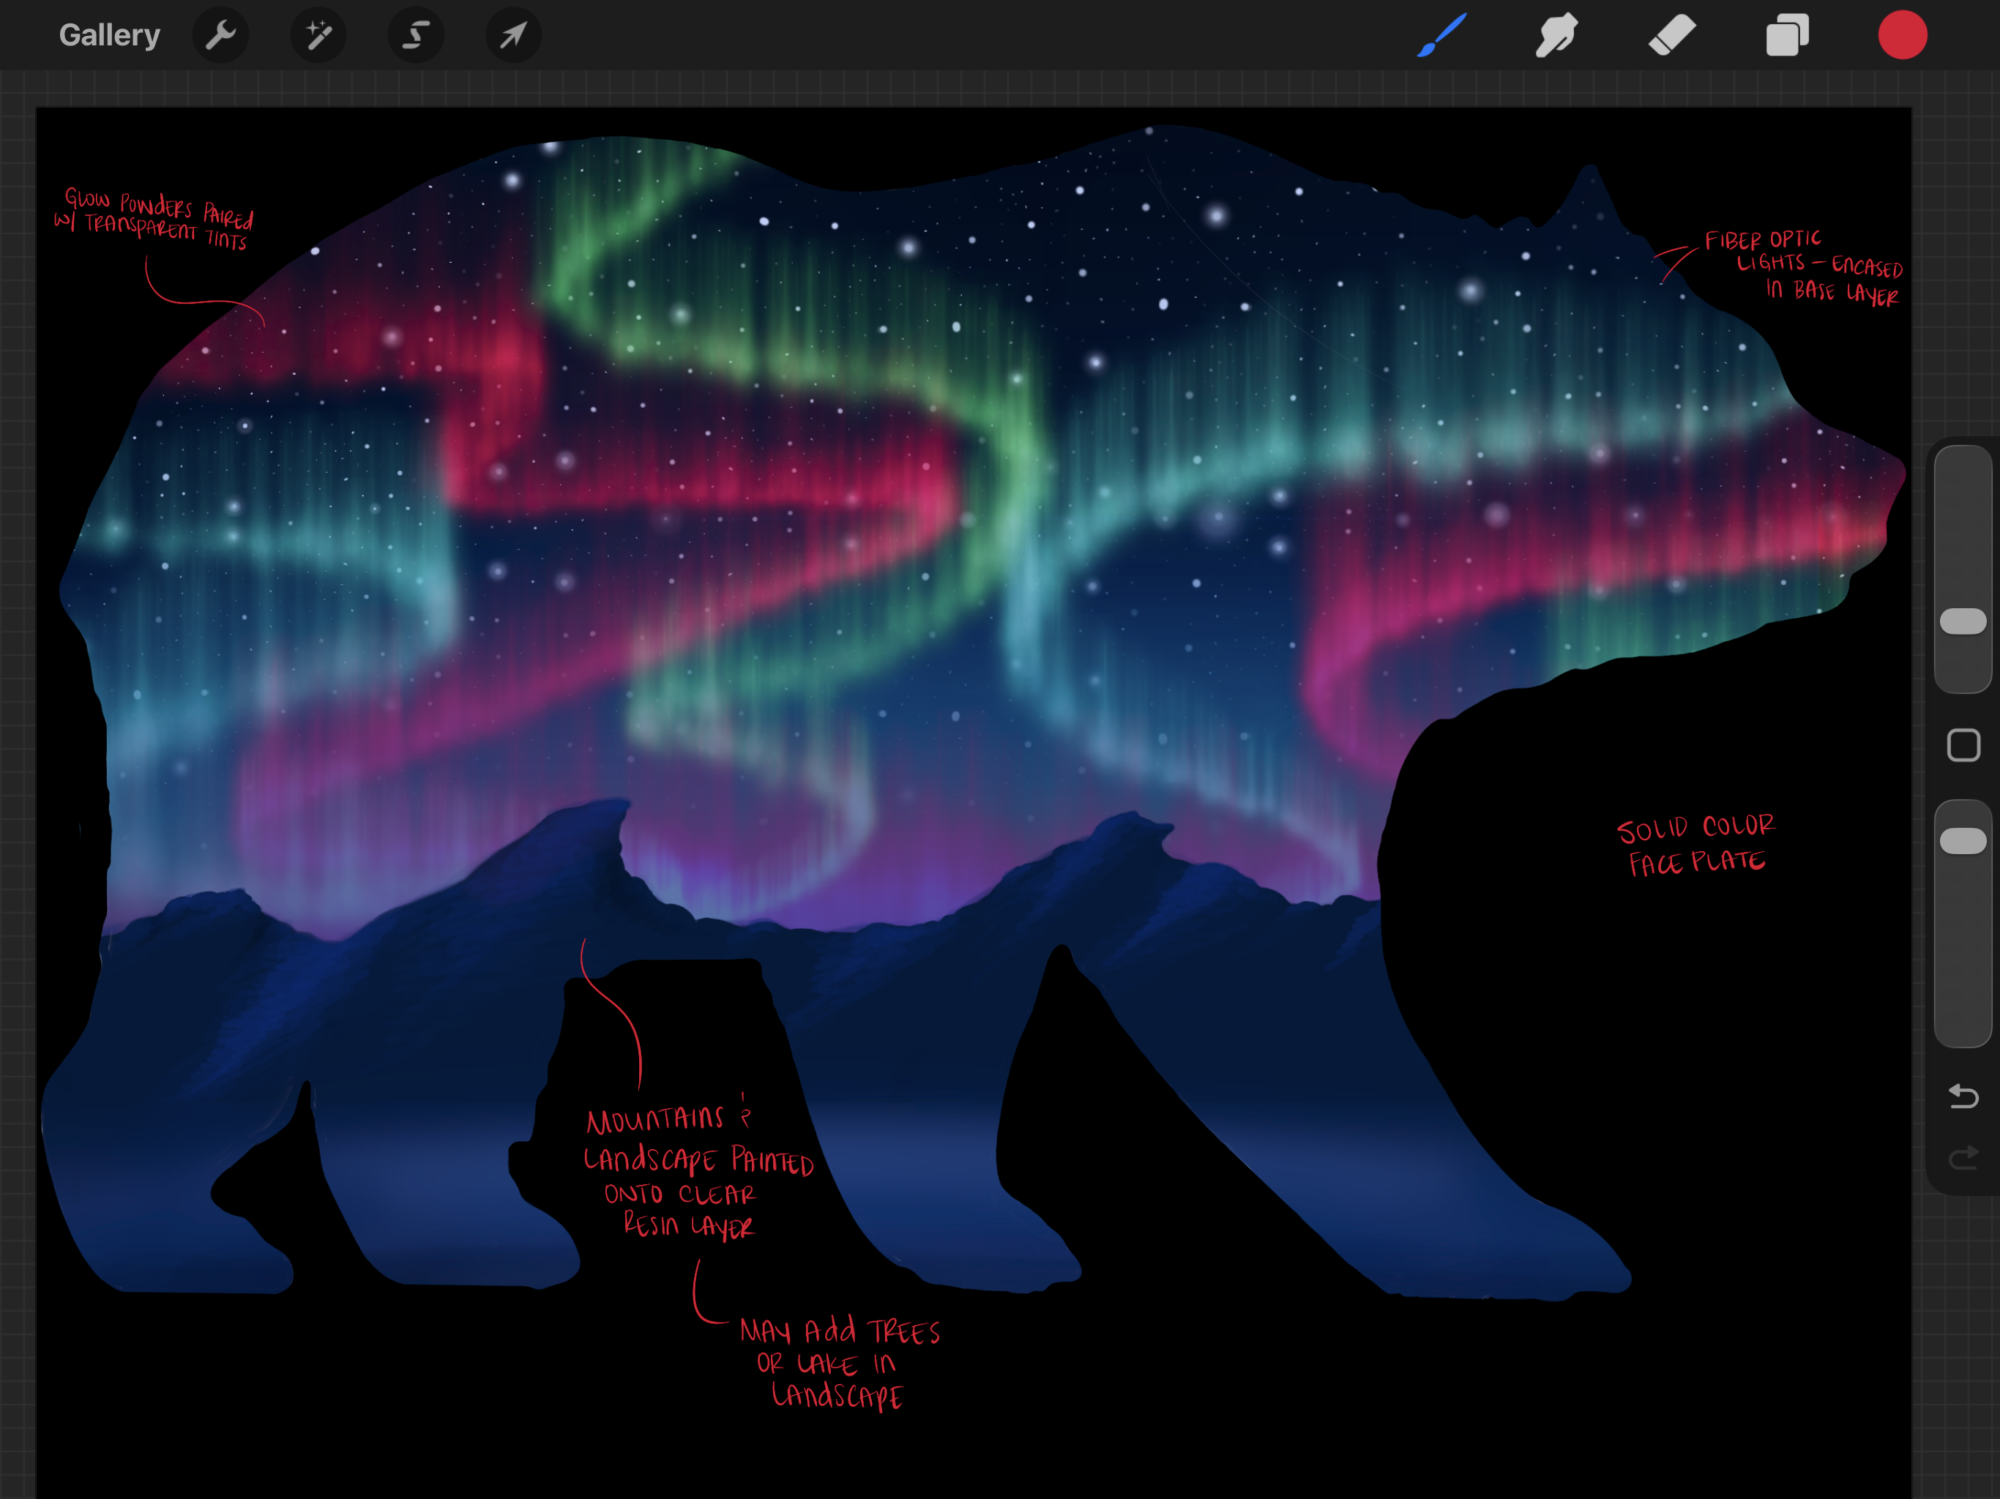
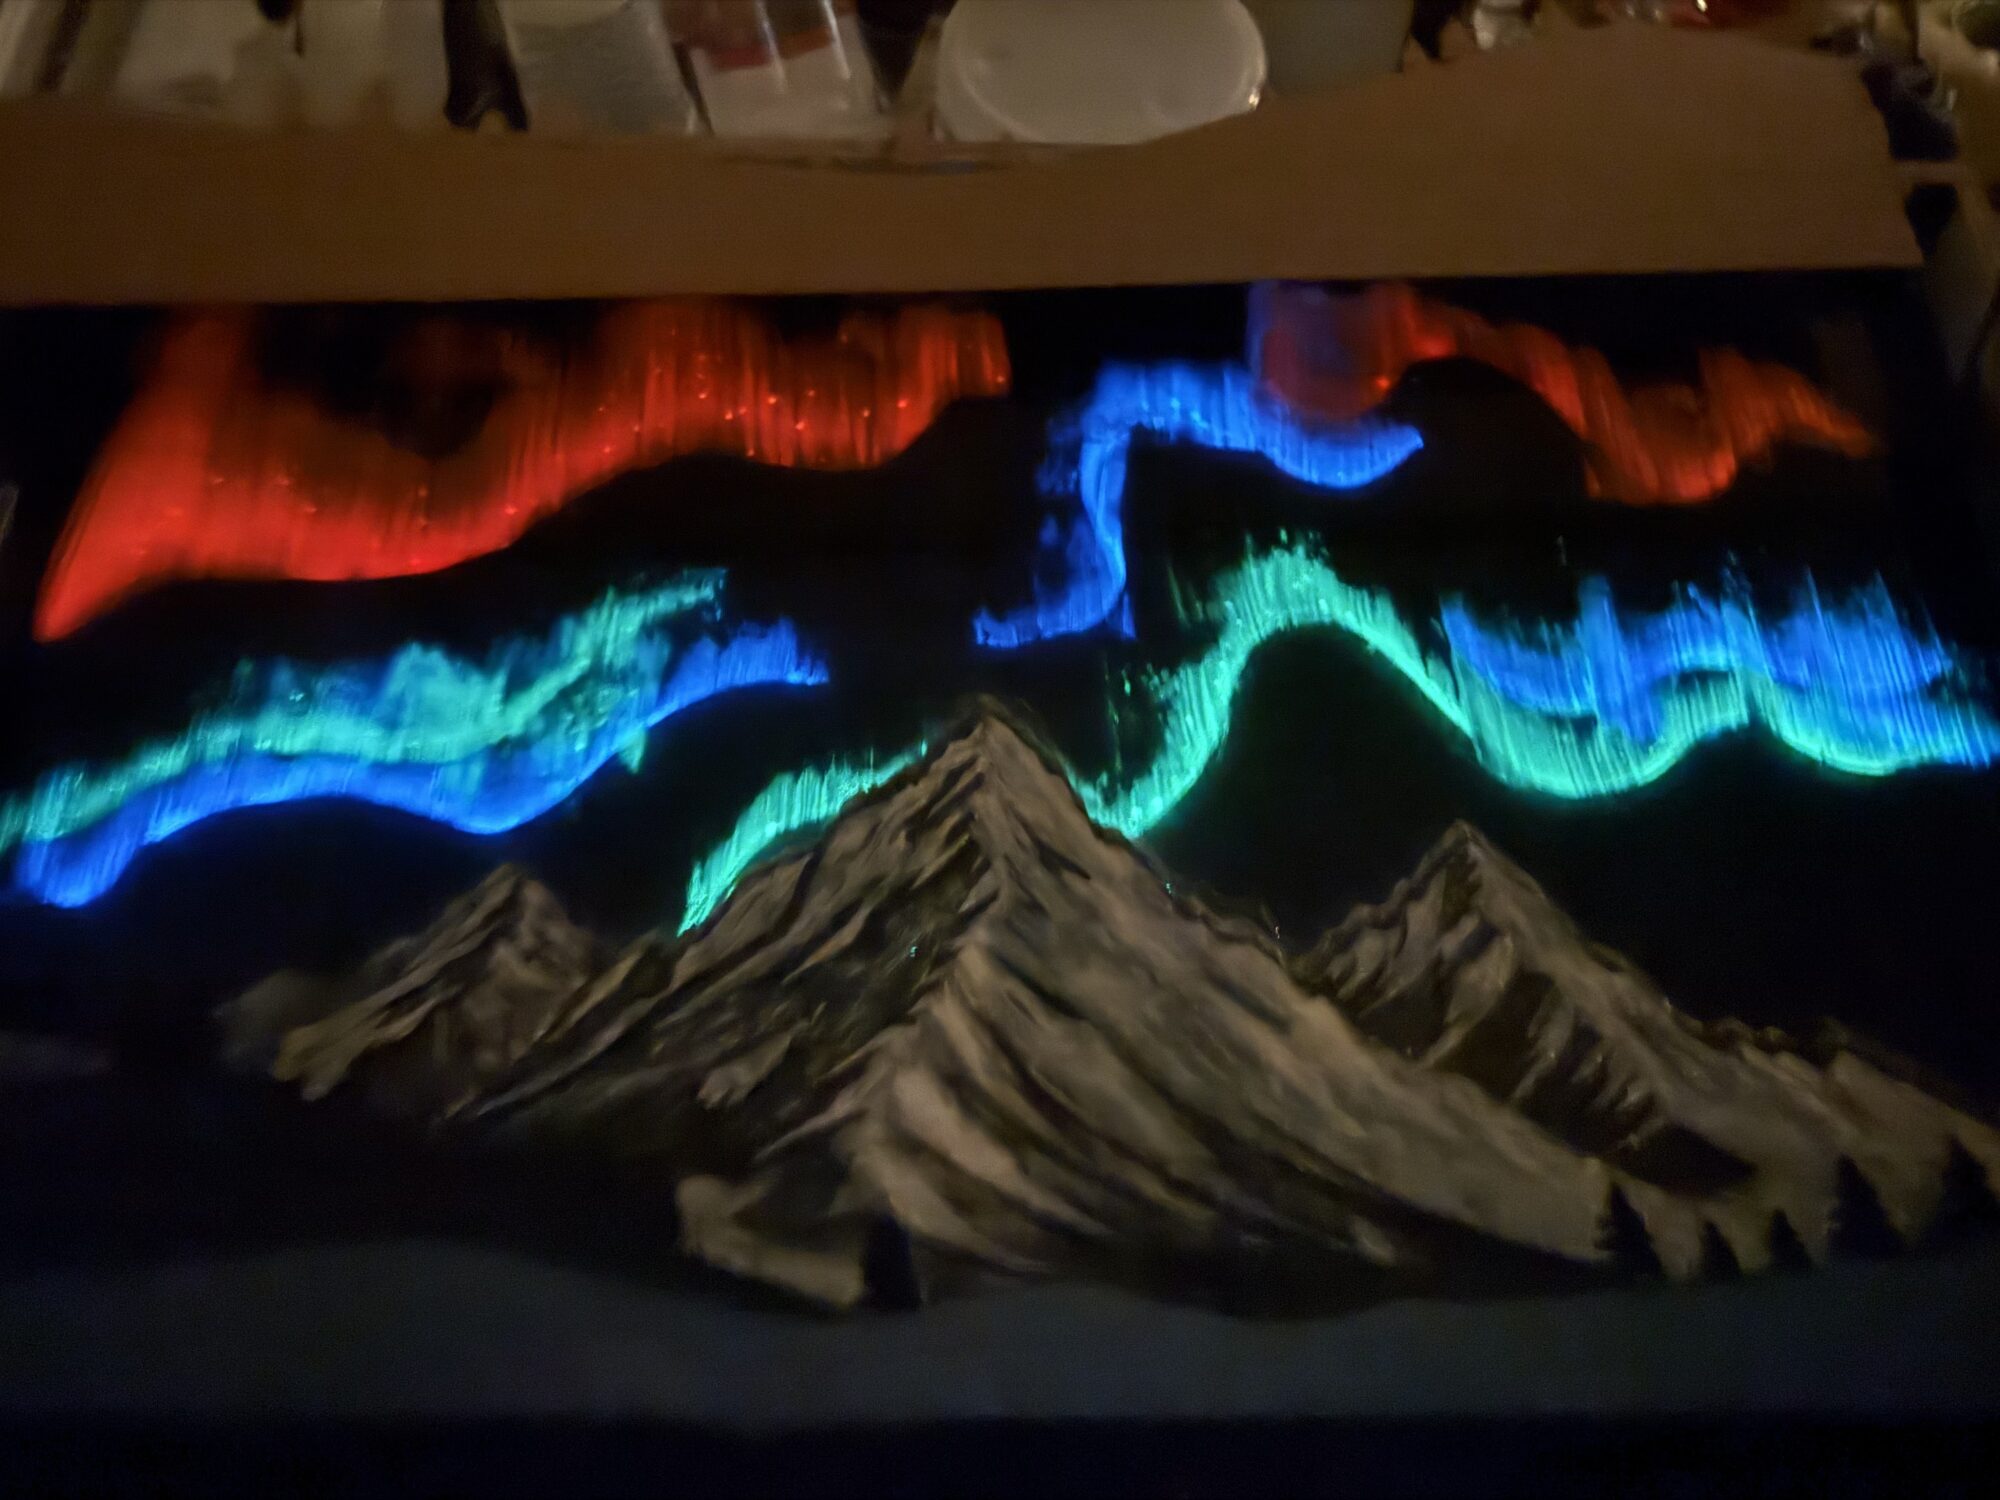
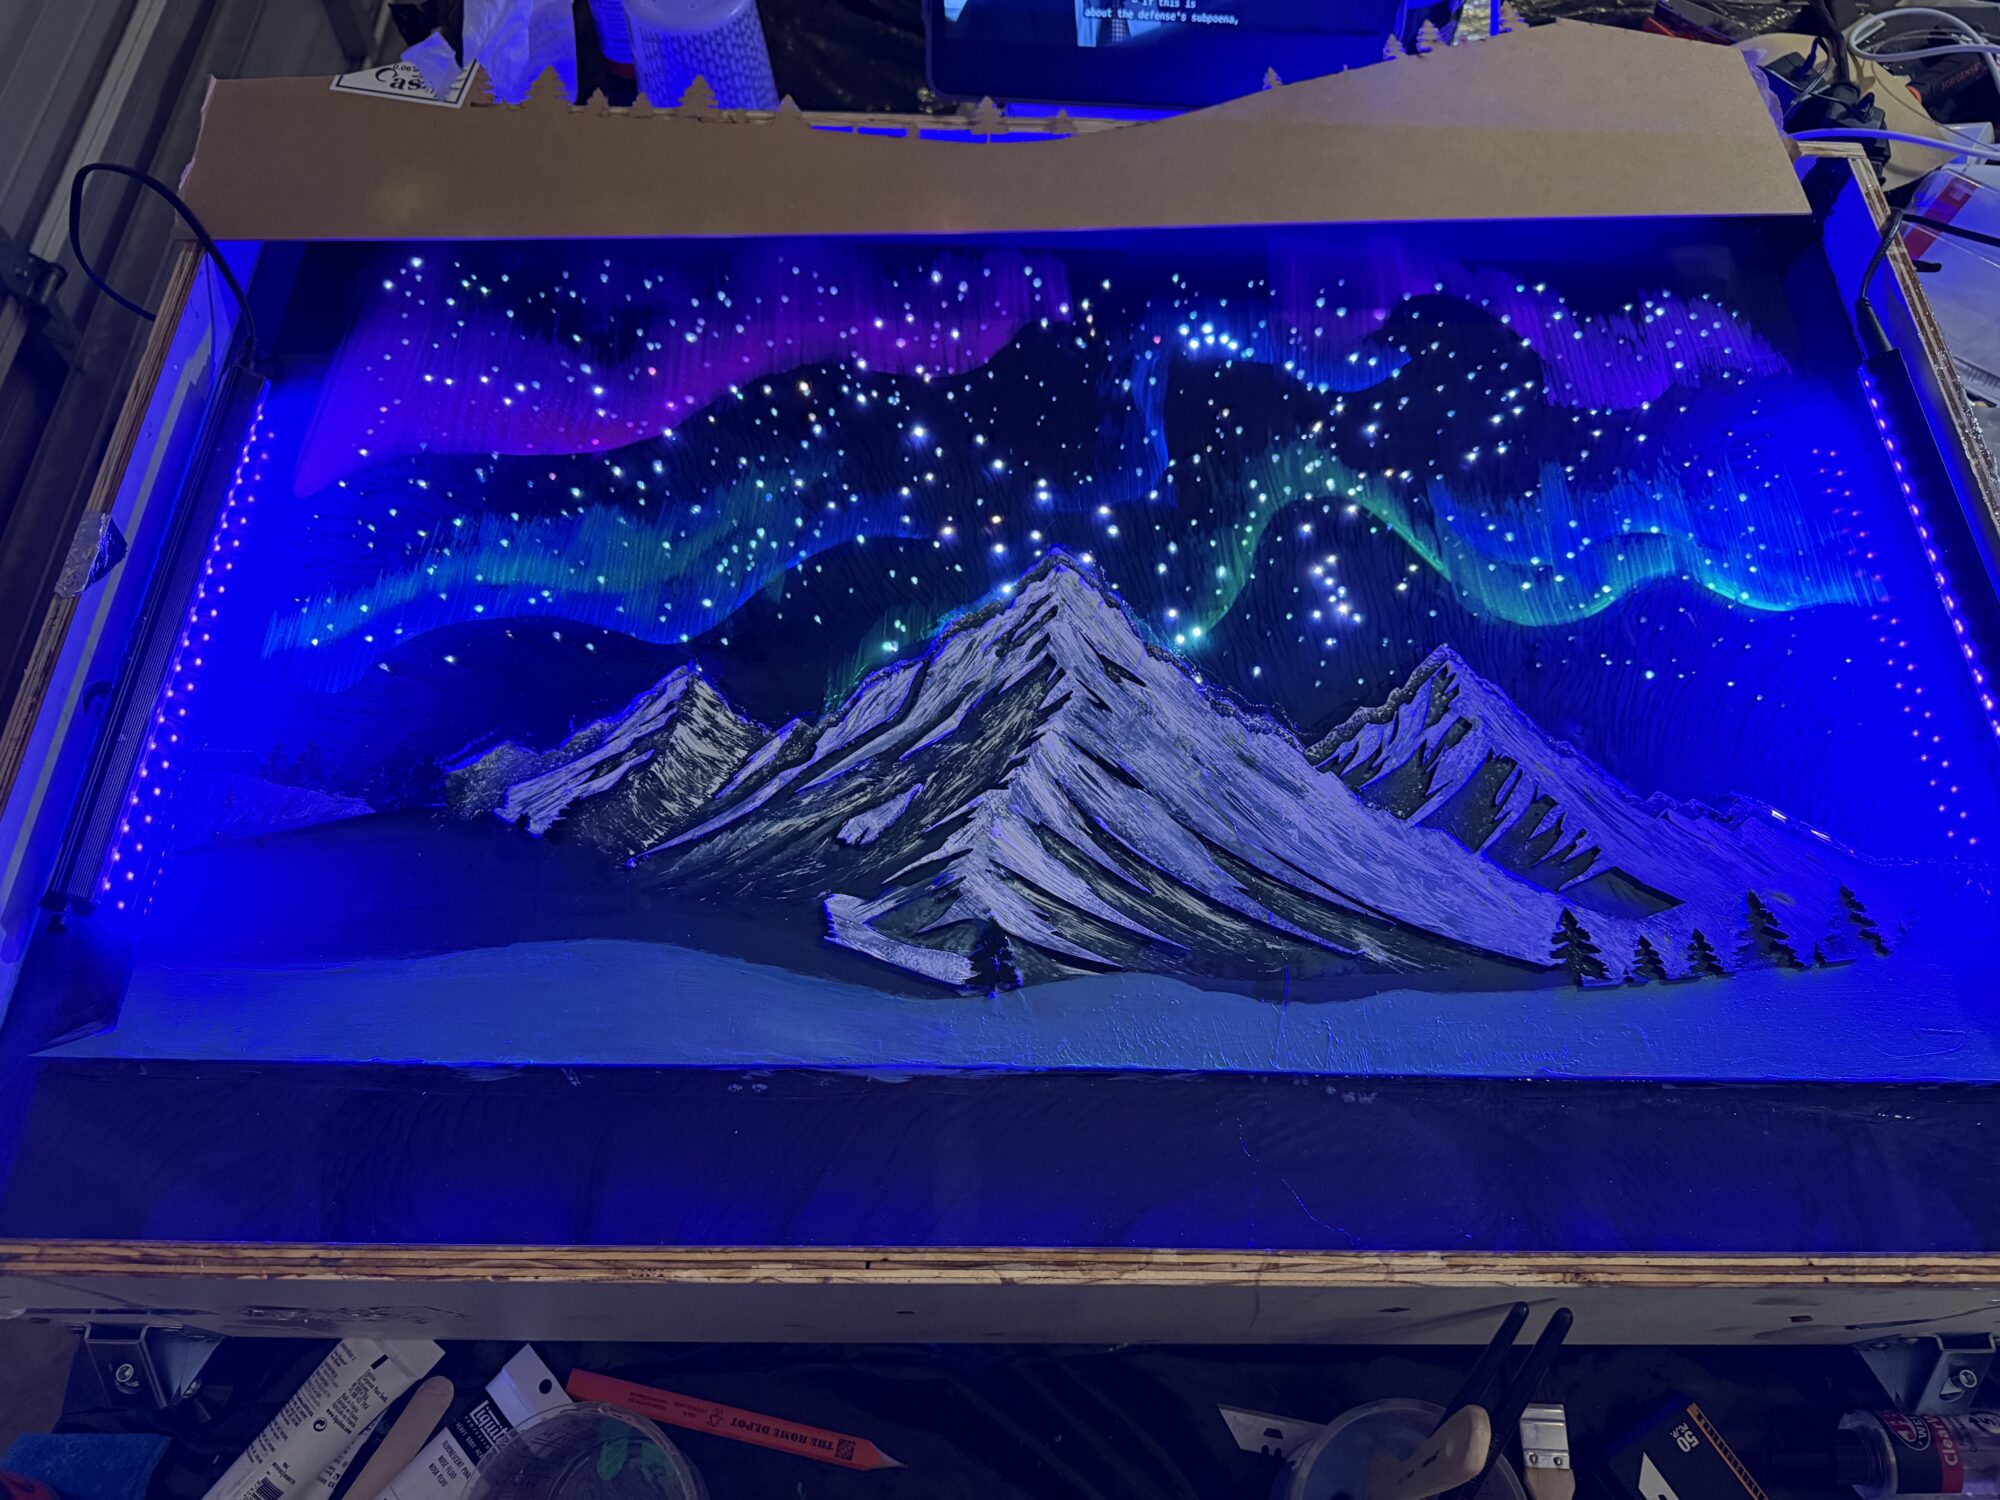
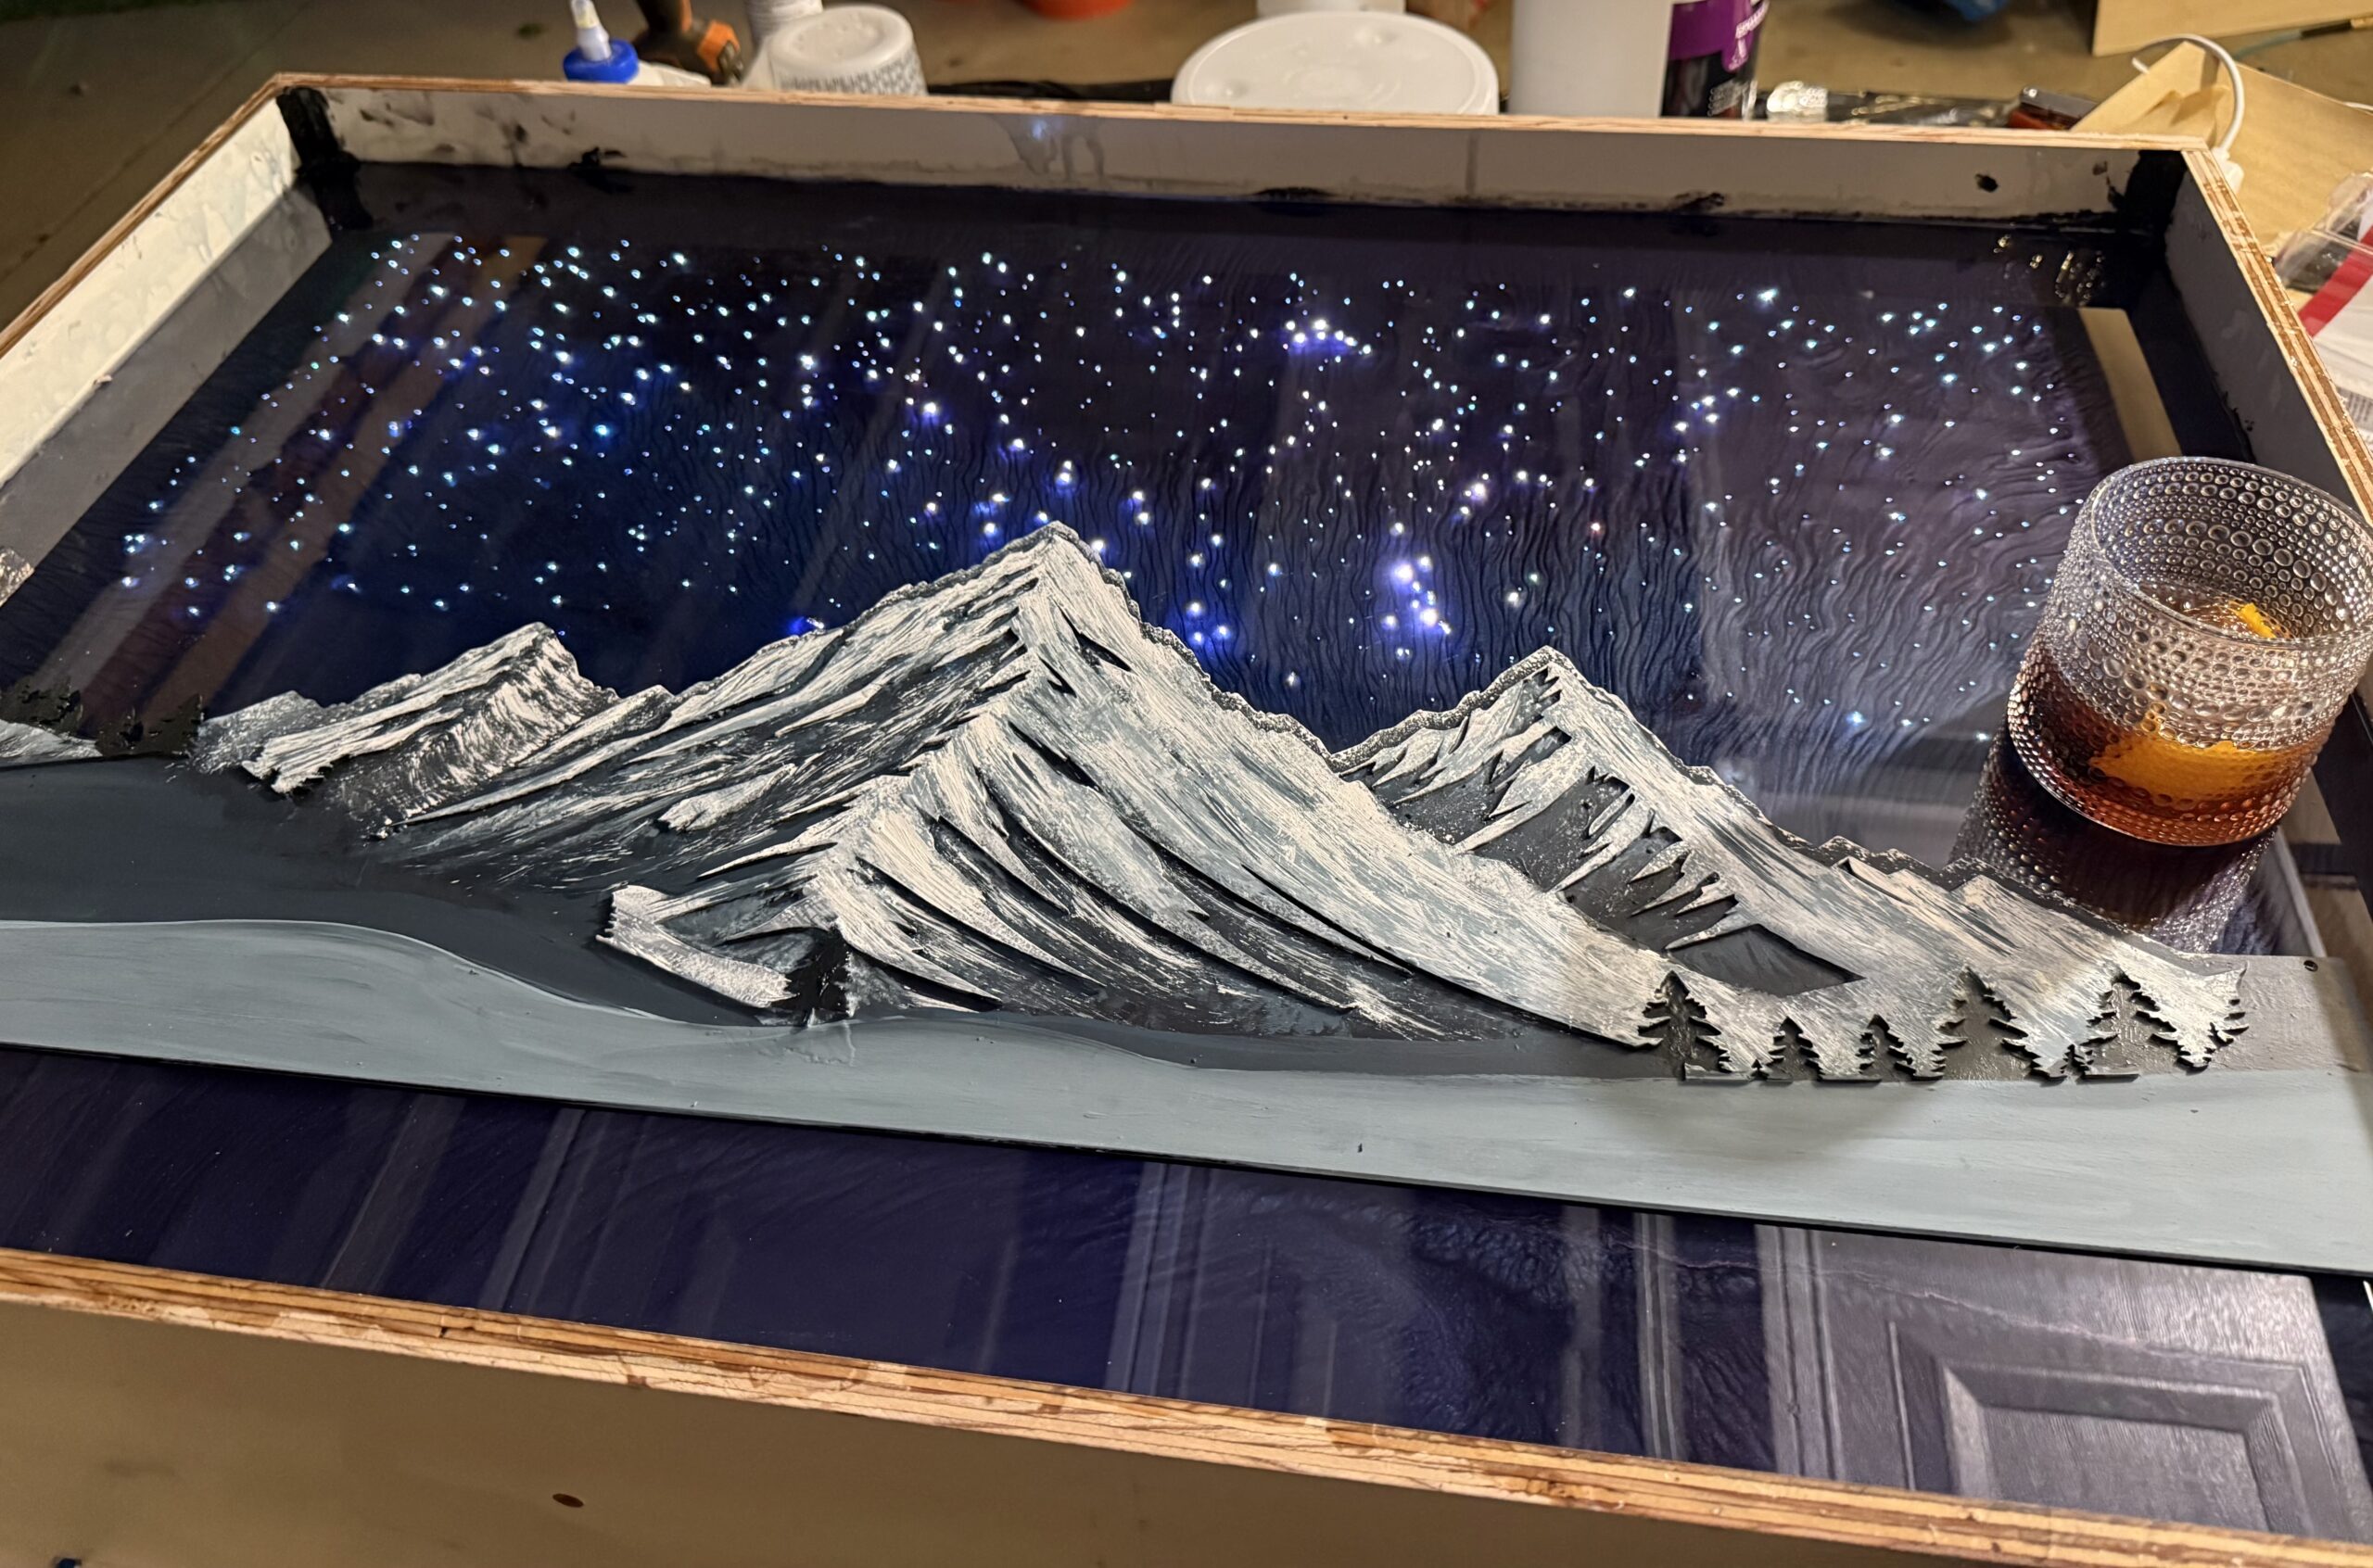
Romanticism rejected industrial geometry and favored the awe-inspiring phenomena of the natural world. The glowing, dynamic sky is a dominant feature that captures this. The goal was to make the sky glow, and I achieved it with fiber-optic lighting and glow powders and paint. - The Solitary Silhouette:
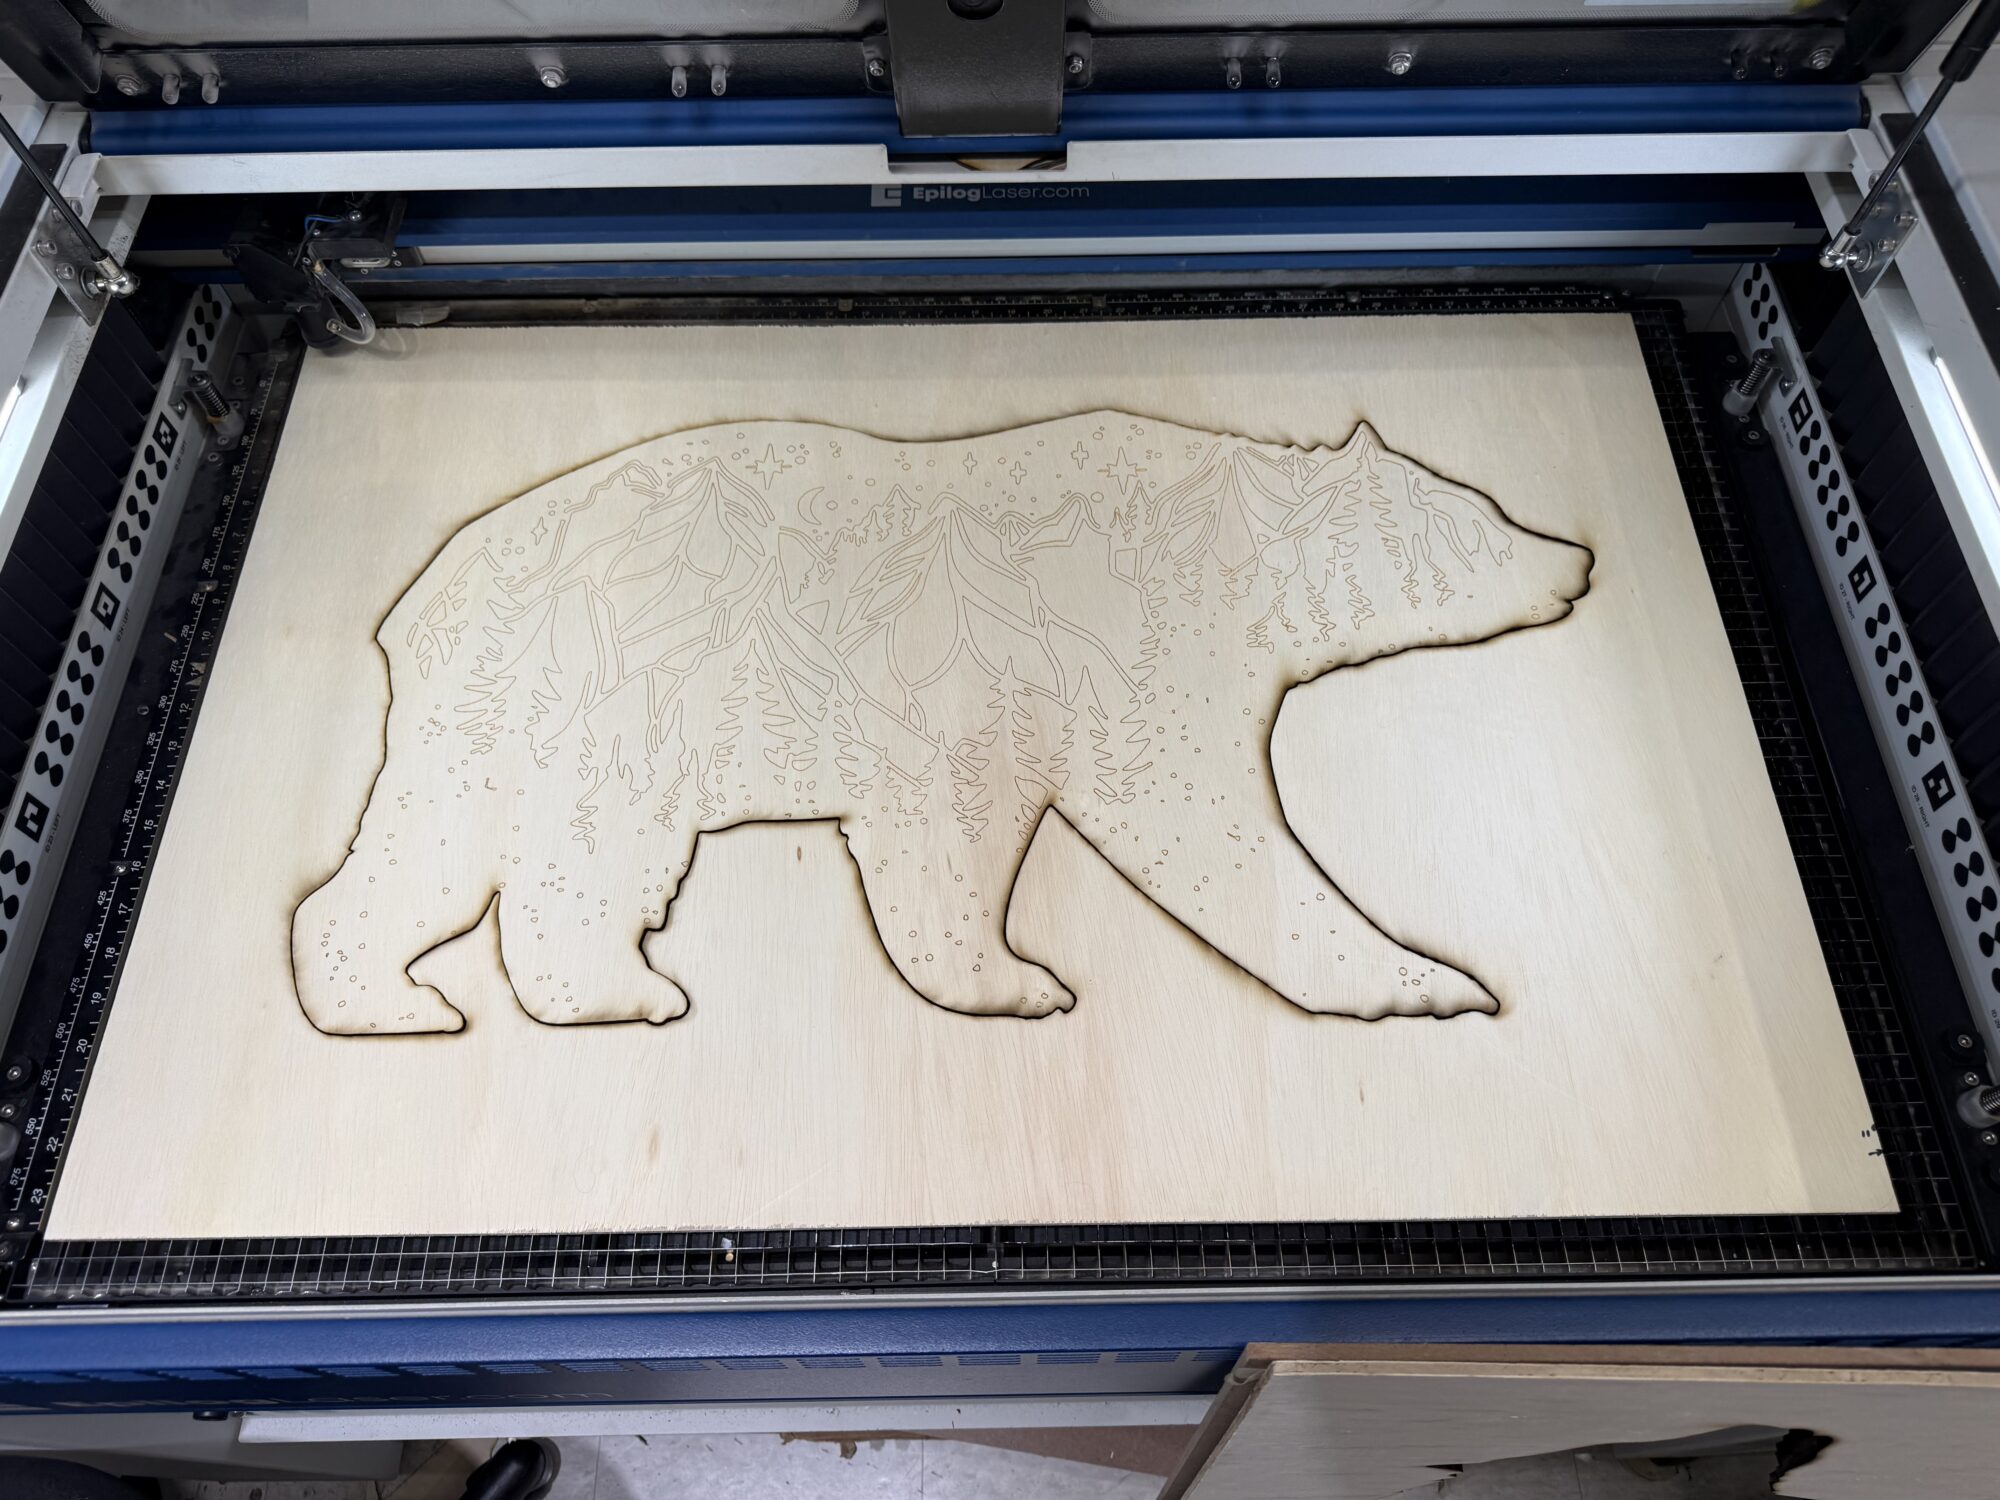
The goal was initially to cast a walnut bear into the landscape itself, but I ended up going the opposite route — using the laser-cut bear frame as a negative silhouette. I knew the bear was ideal because it would be a better focal point, aligning with the Romantic Luminism aesthetic. I chose a matte-finish frame to bolster this aesthetic and draw the user’s eye to the sublime splendor of the landscape. The specific mood I was going for is what it feels like to see the auroras in person; there’s nothing like watching them dance in real life. - High Dynamic Contrast:
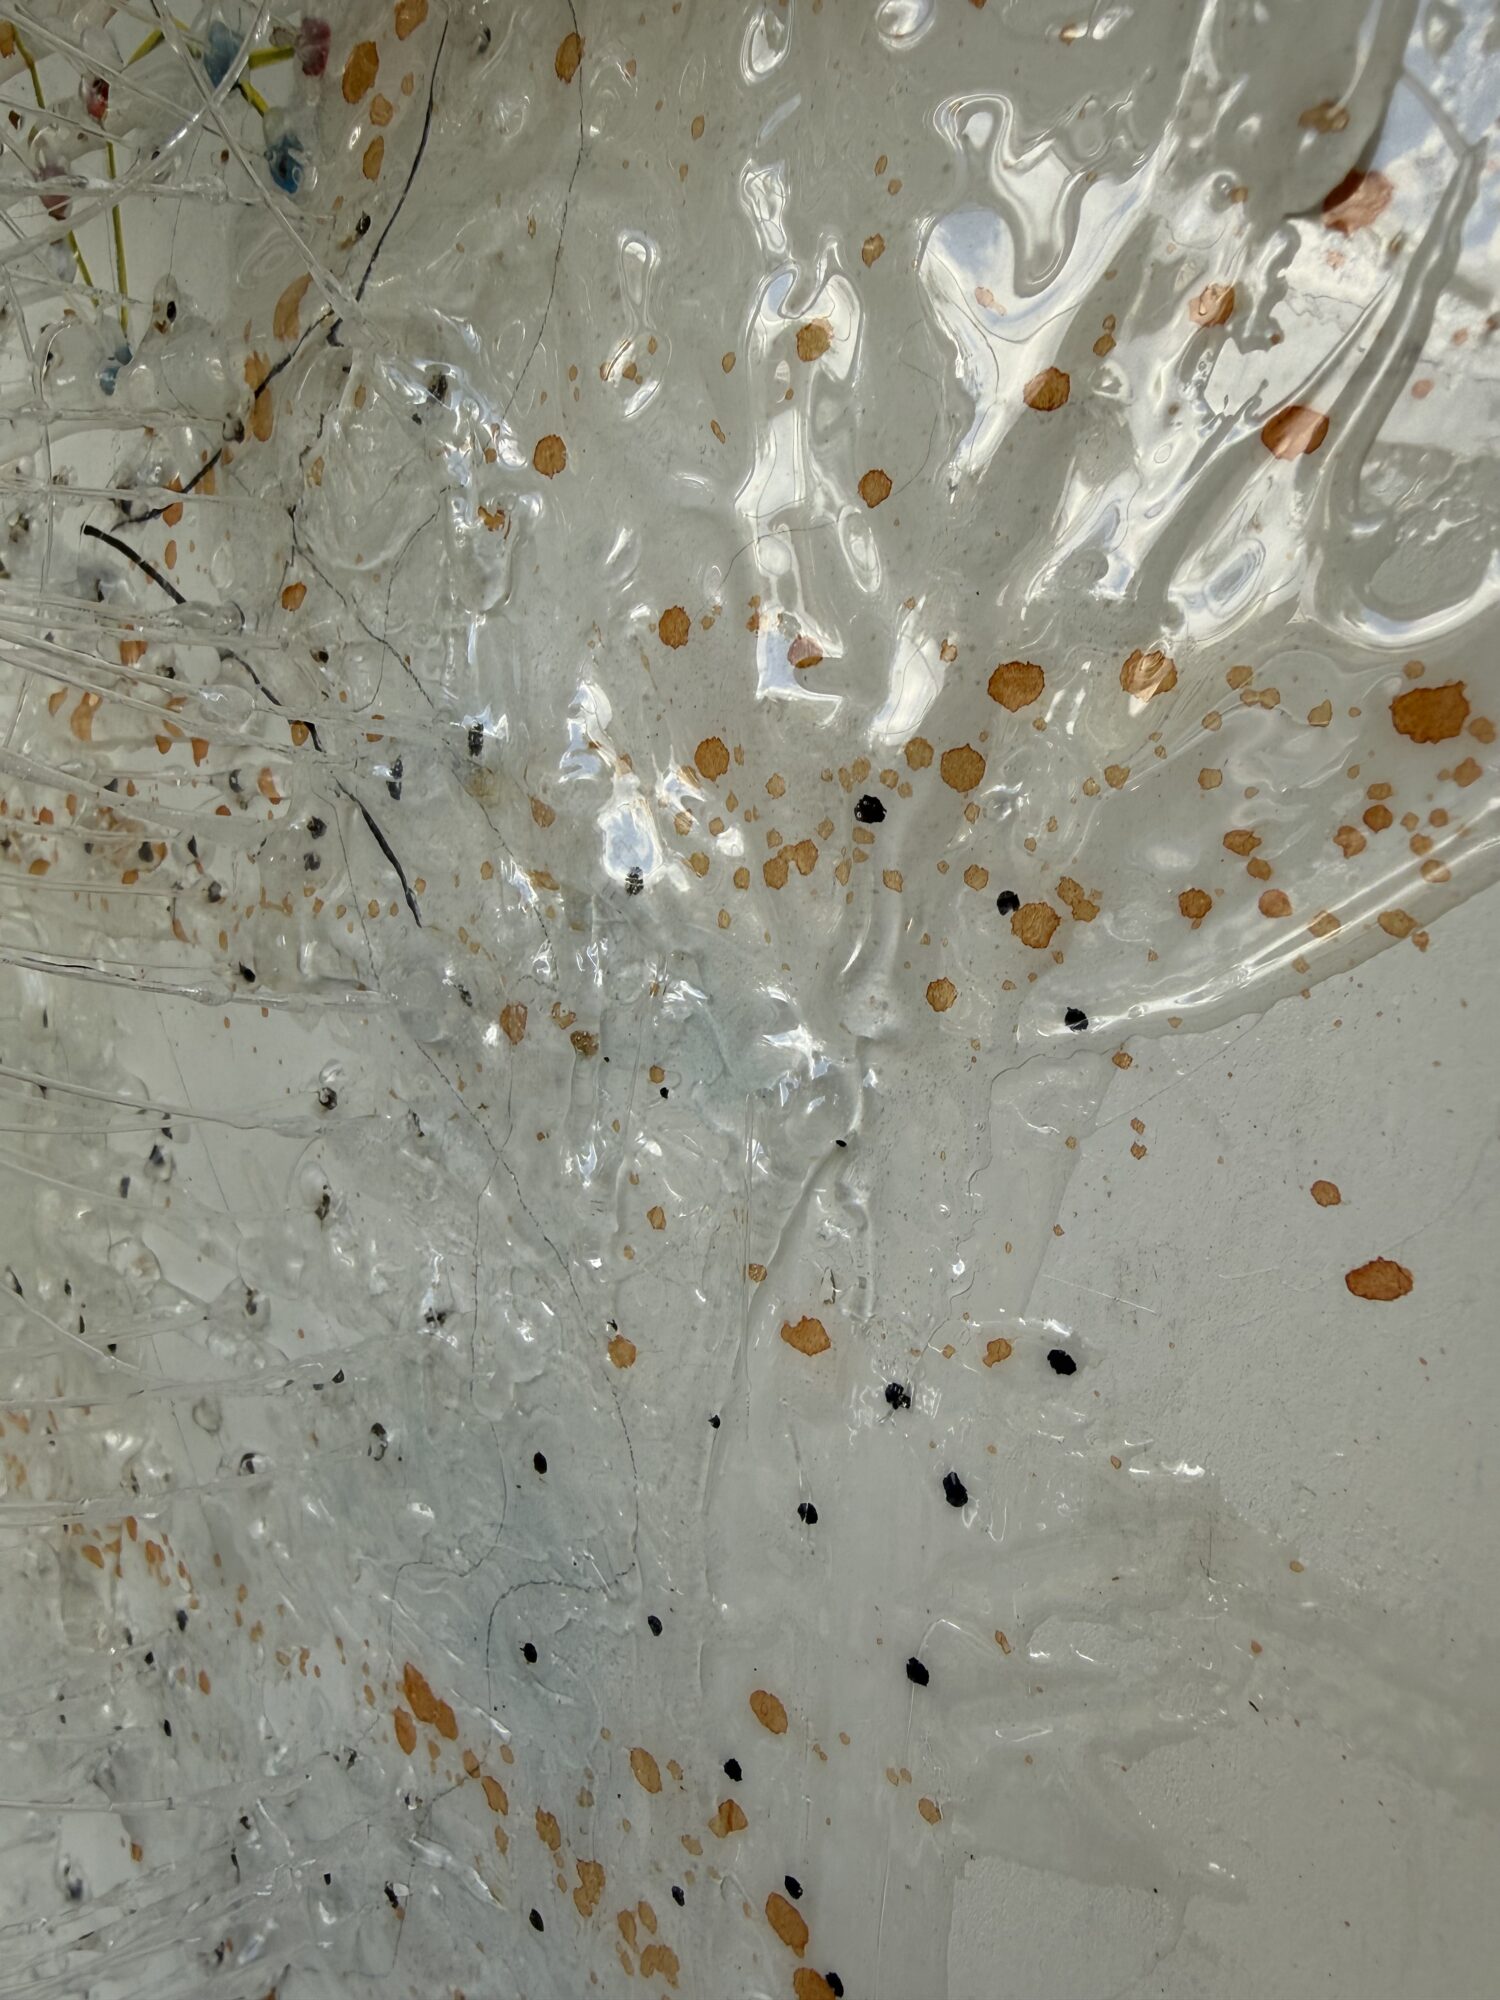
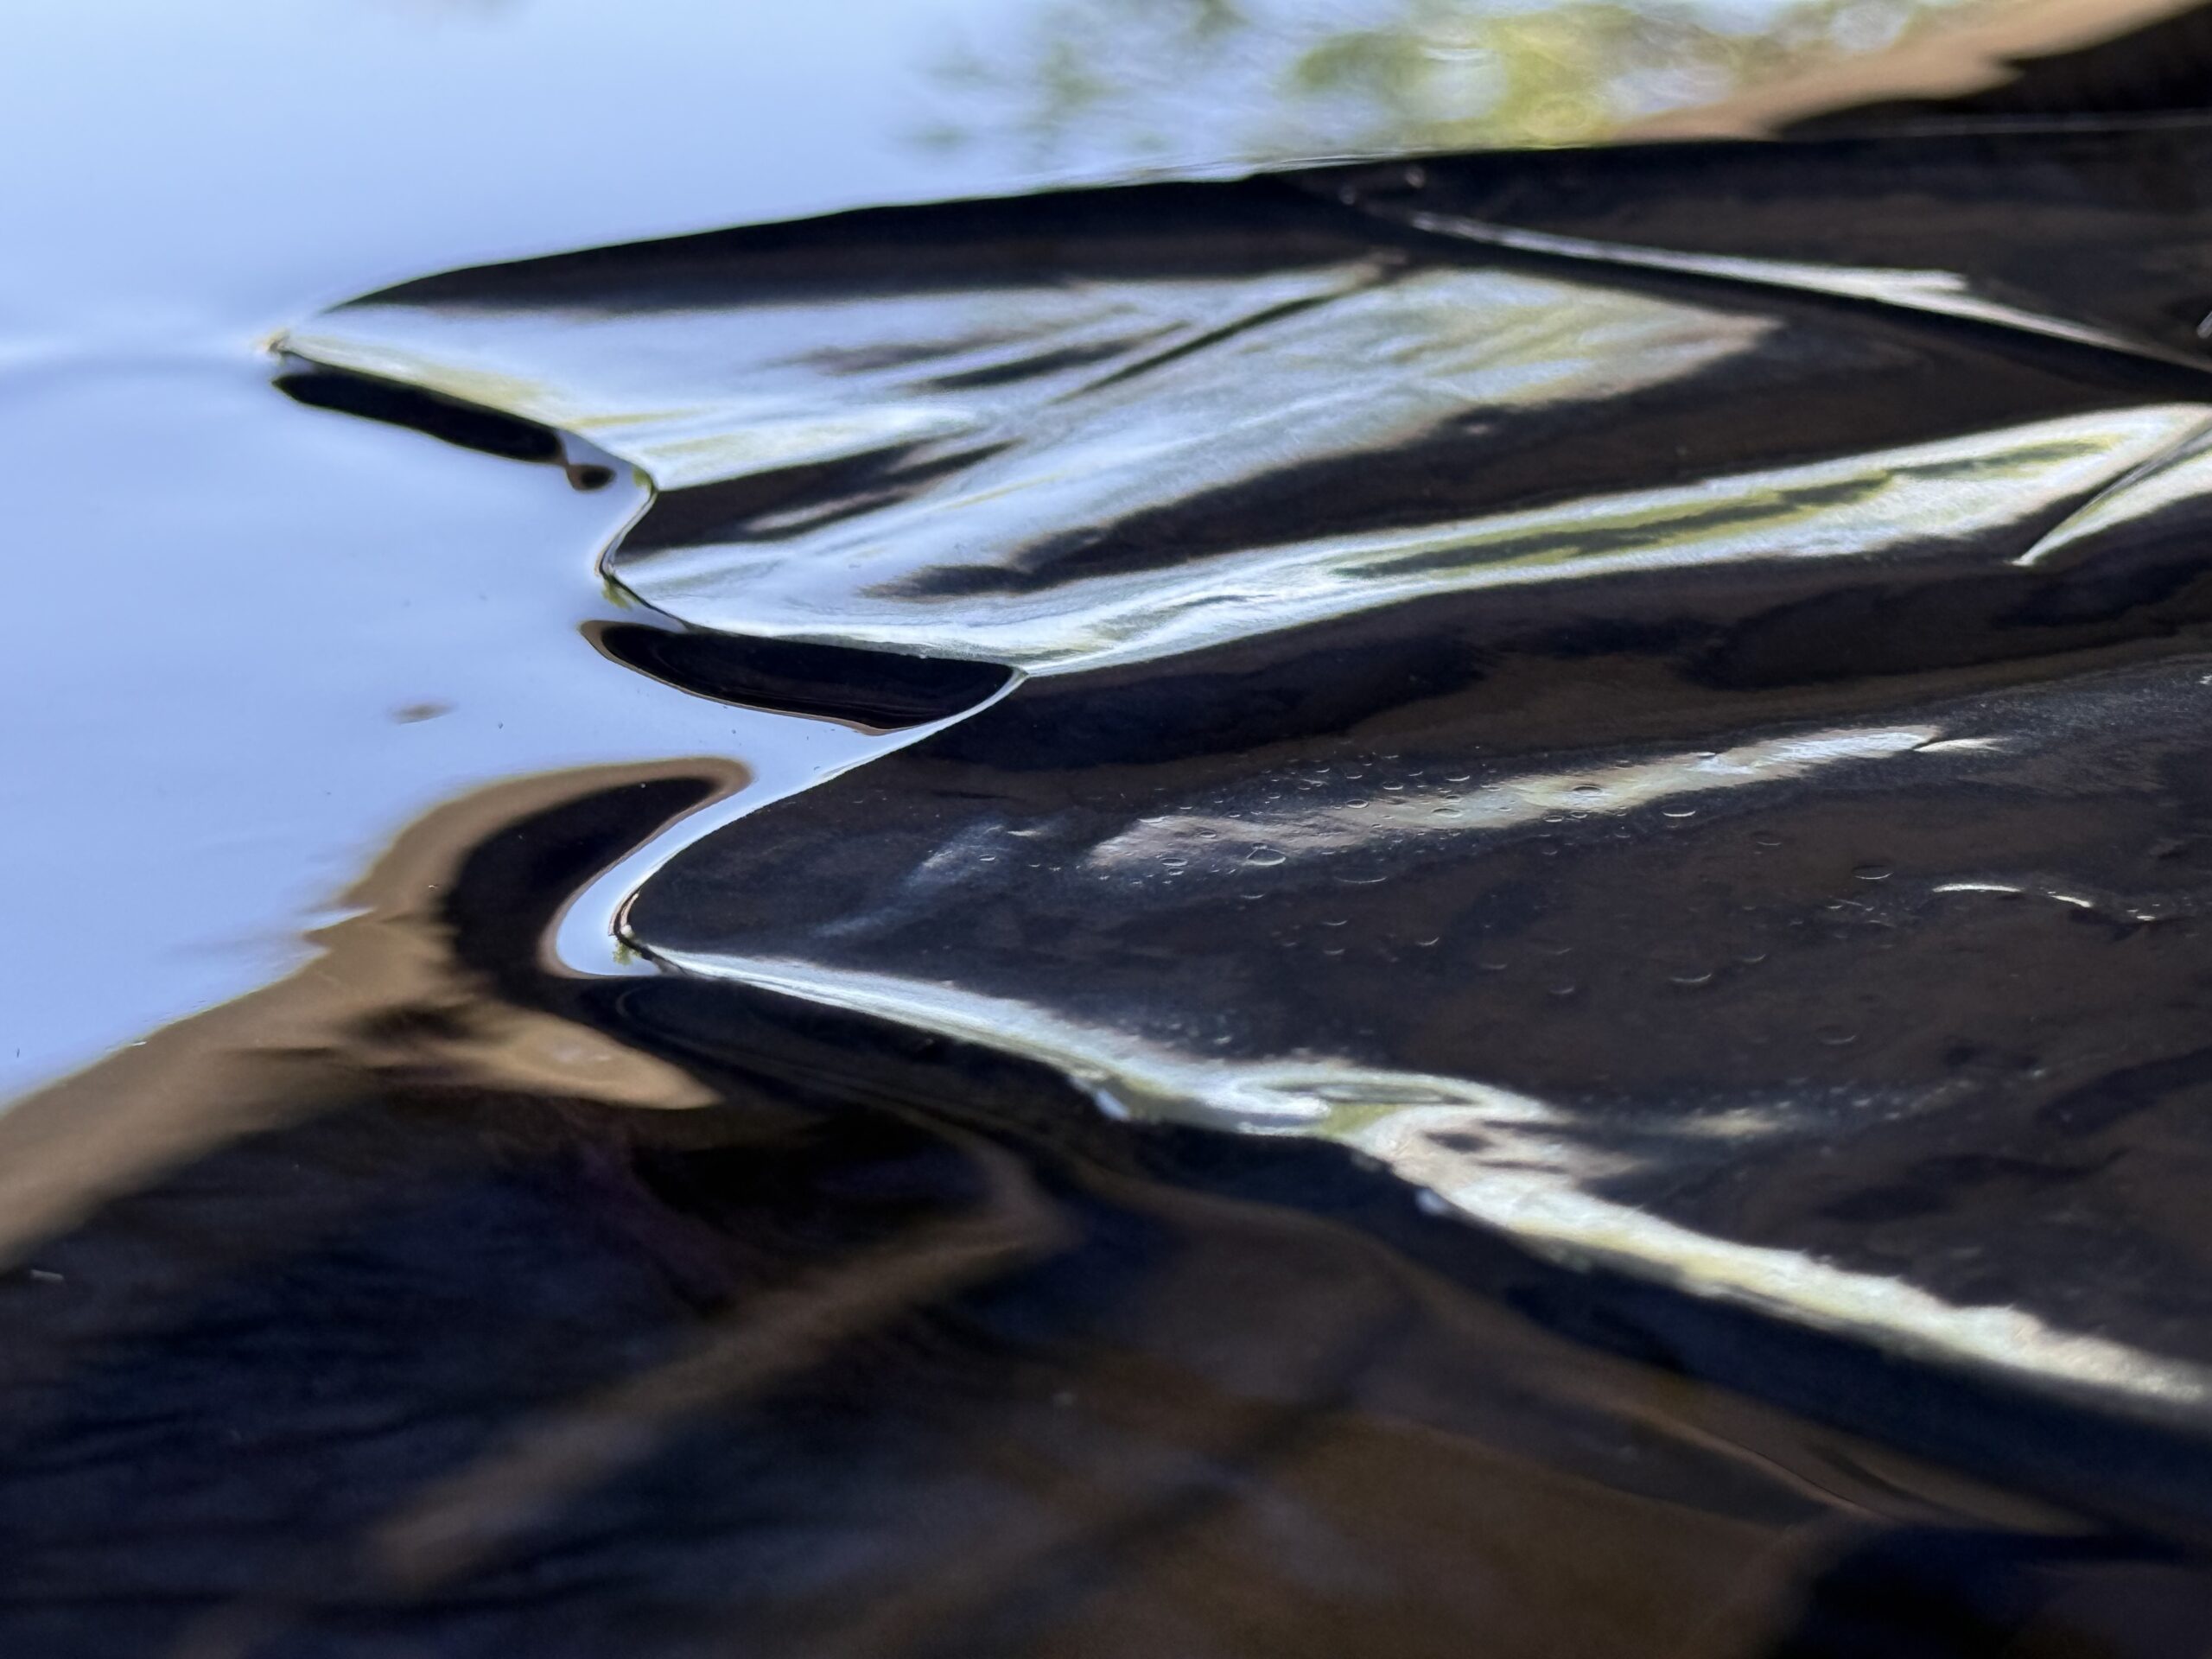
It relies on heavy darkness in the foreground and brilliant, radiant light in the background. The Black lights also helped the auroras really pop and added fantastic contrast. I also used pigmented mica powder for the sky background that kind of added a starry night kind of vibe after it flowed and separated around the fiber optic cables. I think that part came out really cool.
Design Process
Sketching and Planning
This project was initially going to be a car canopy replacement, but I shifted gears towards an art piece after discussing the technical requirements with my neighbor (he used to build vans). The initial idea was near impossibly scoped.
I fed AI sketches and specific prompts to generate the 4th image. I was trying to visualize what the attached arms might look like.

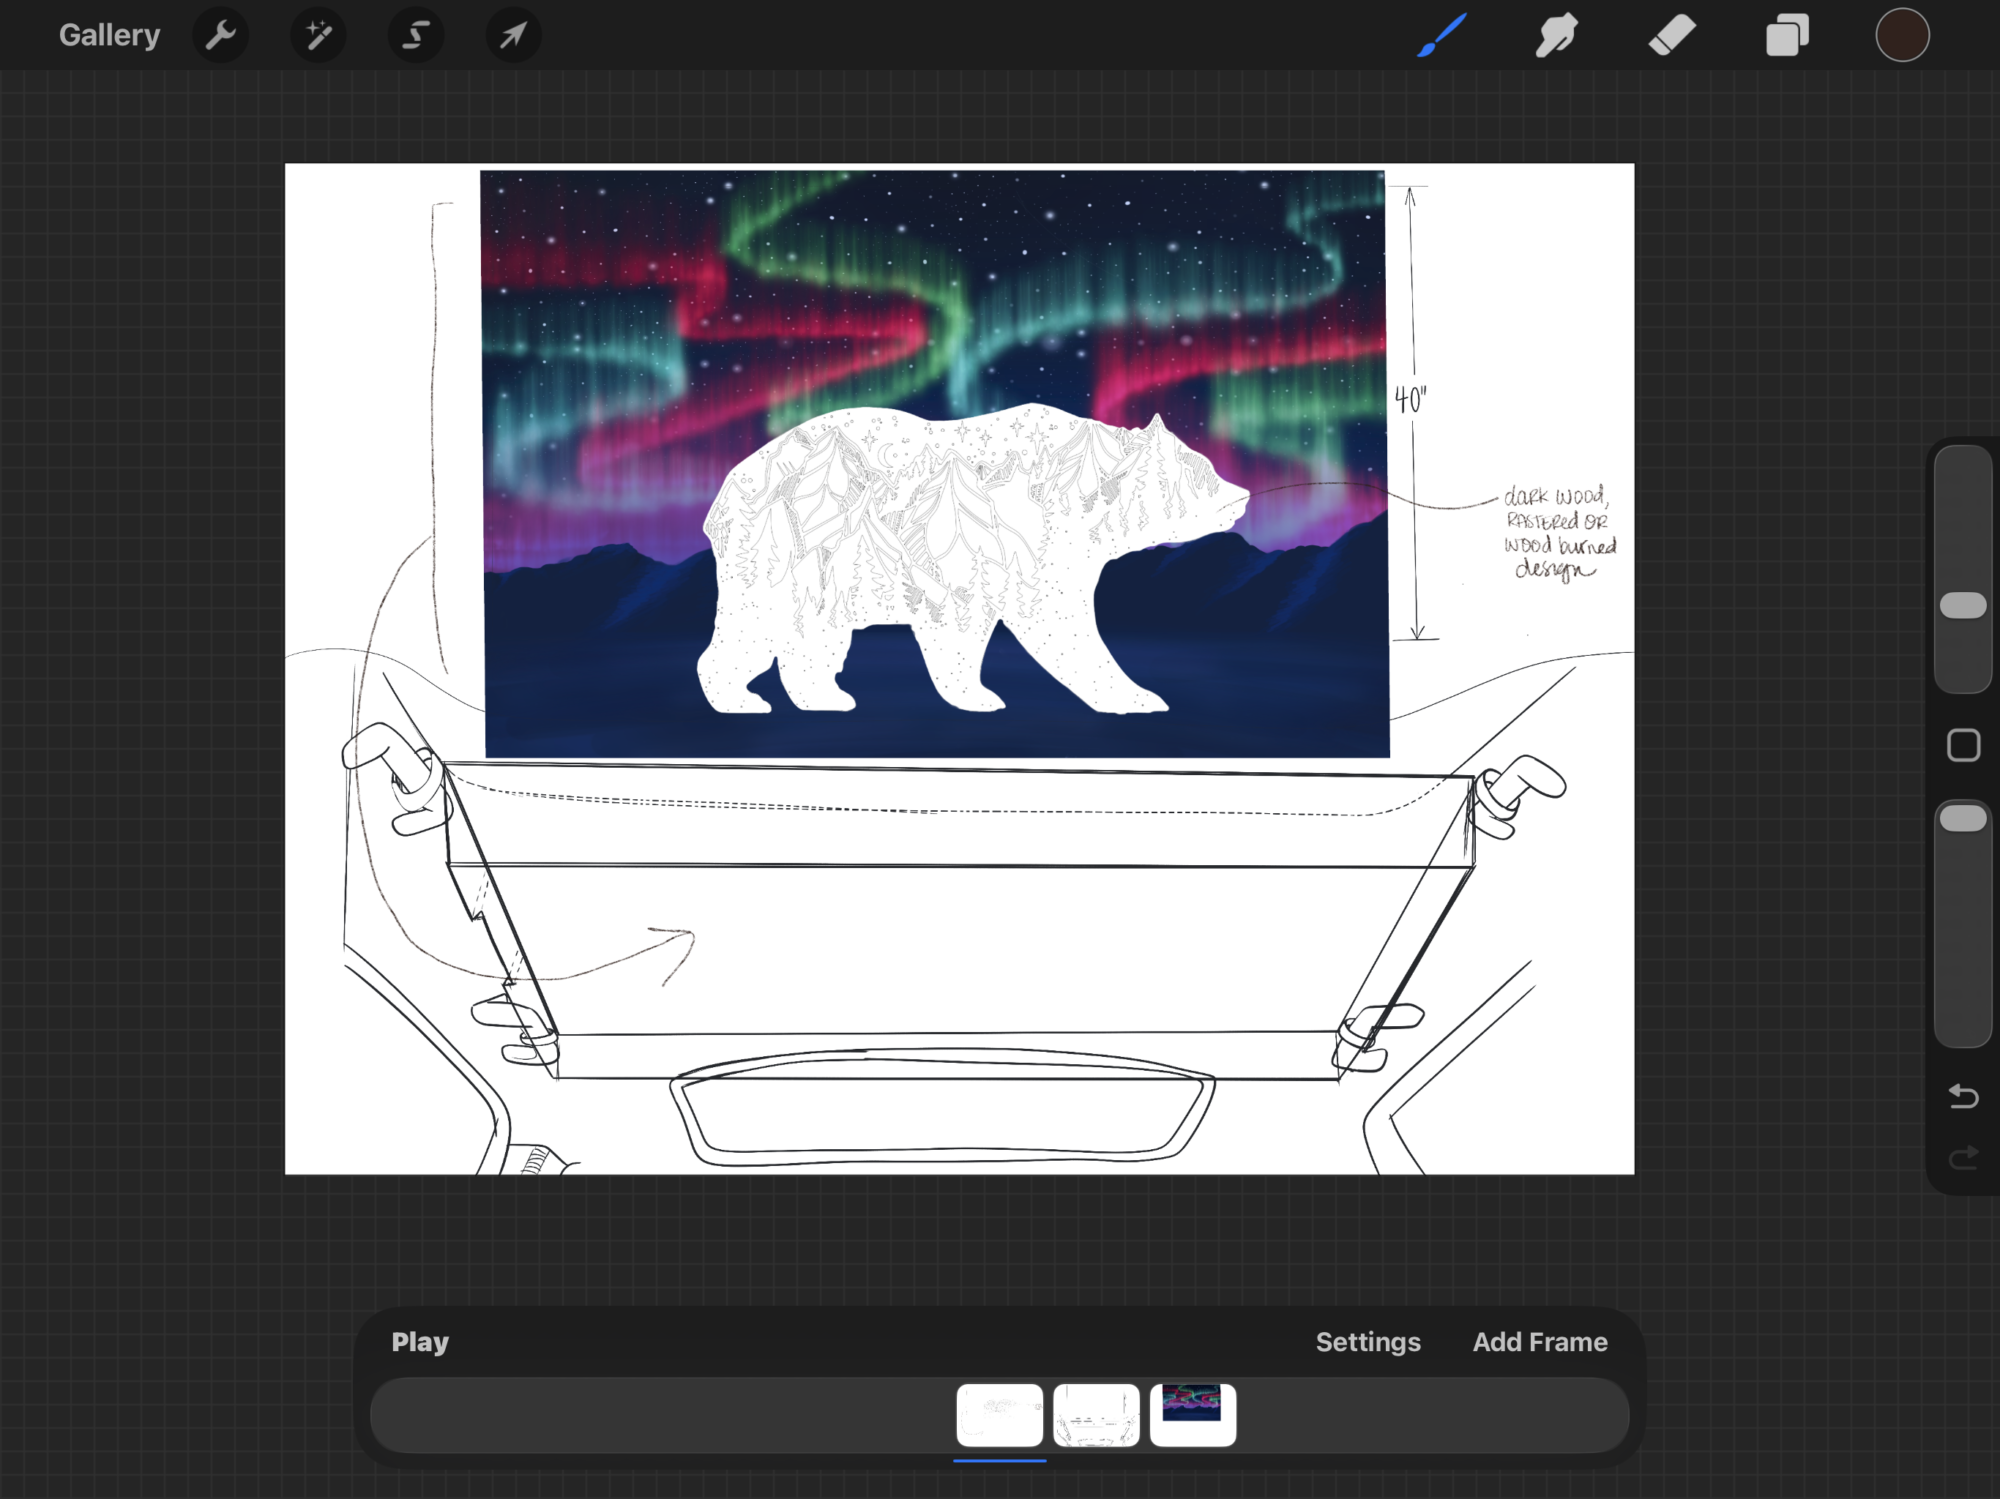

Sketching and Planning II: Shift to Art Piece
This project took more planning than I am used to—I’m used to having some freedom and flexibility to “wing it” as needed; this project had no room for that.
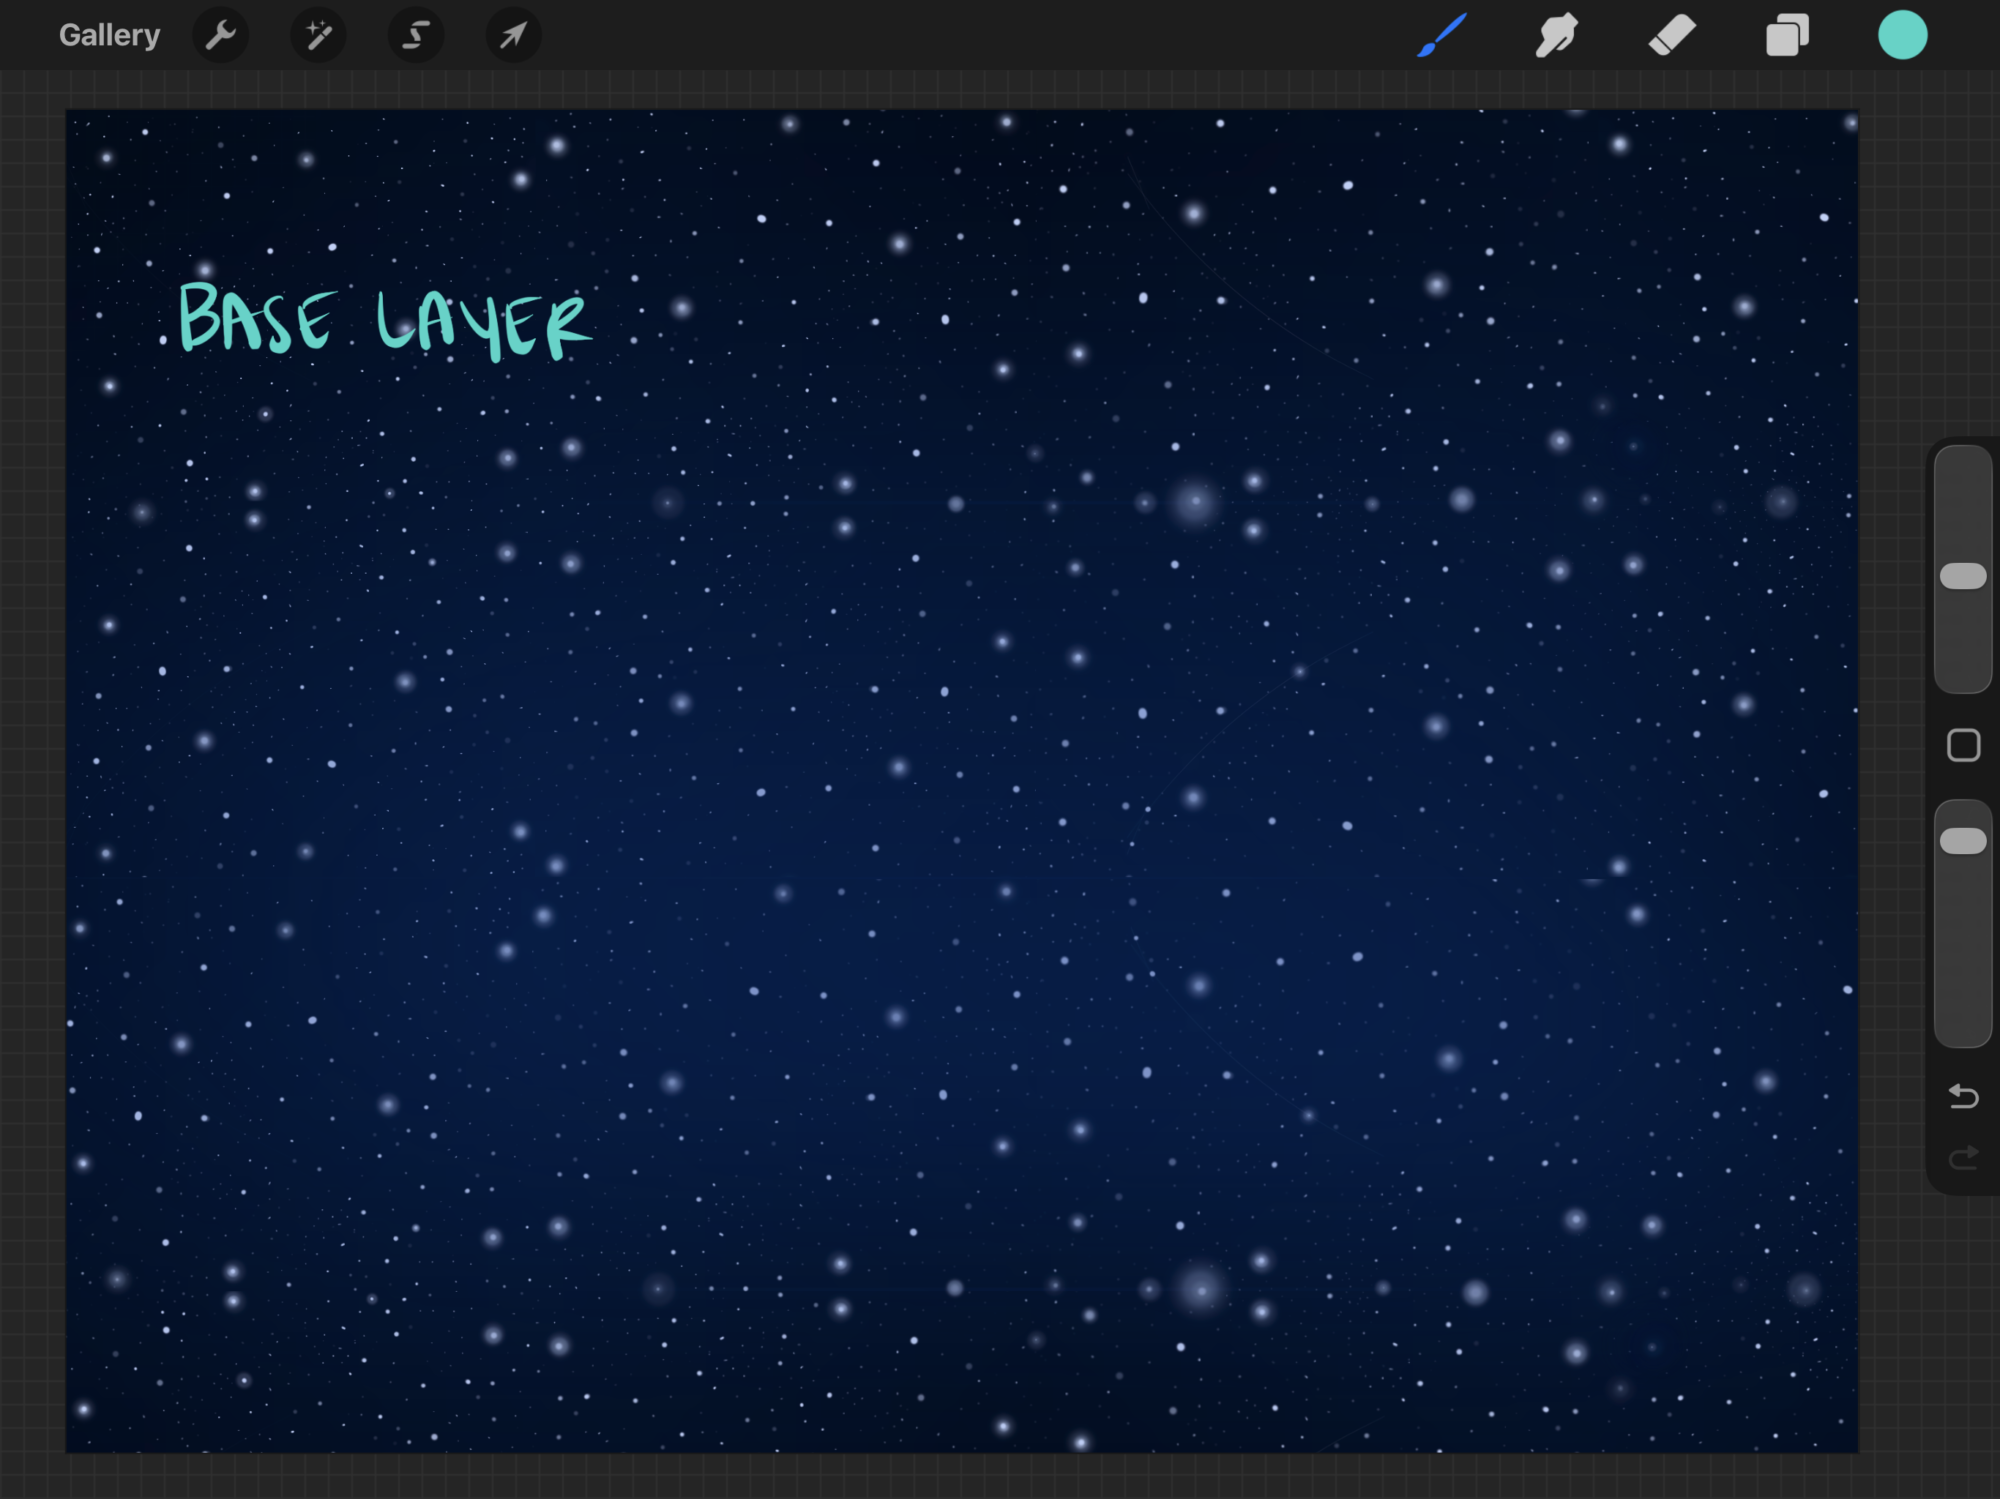
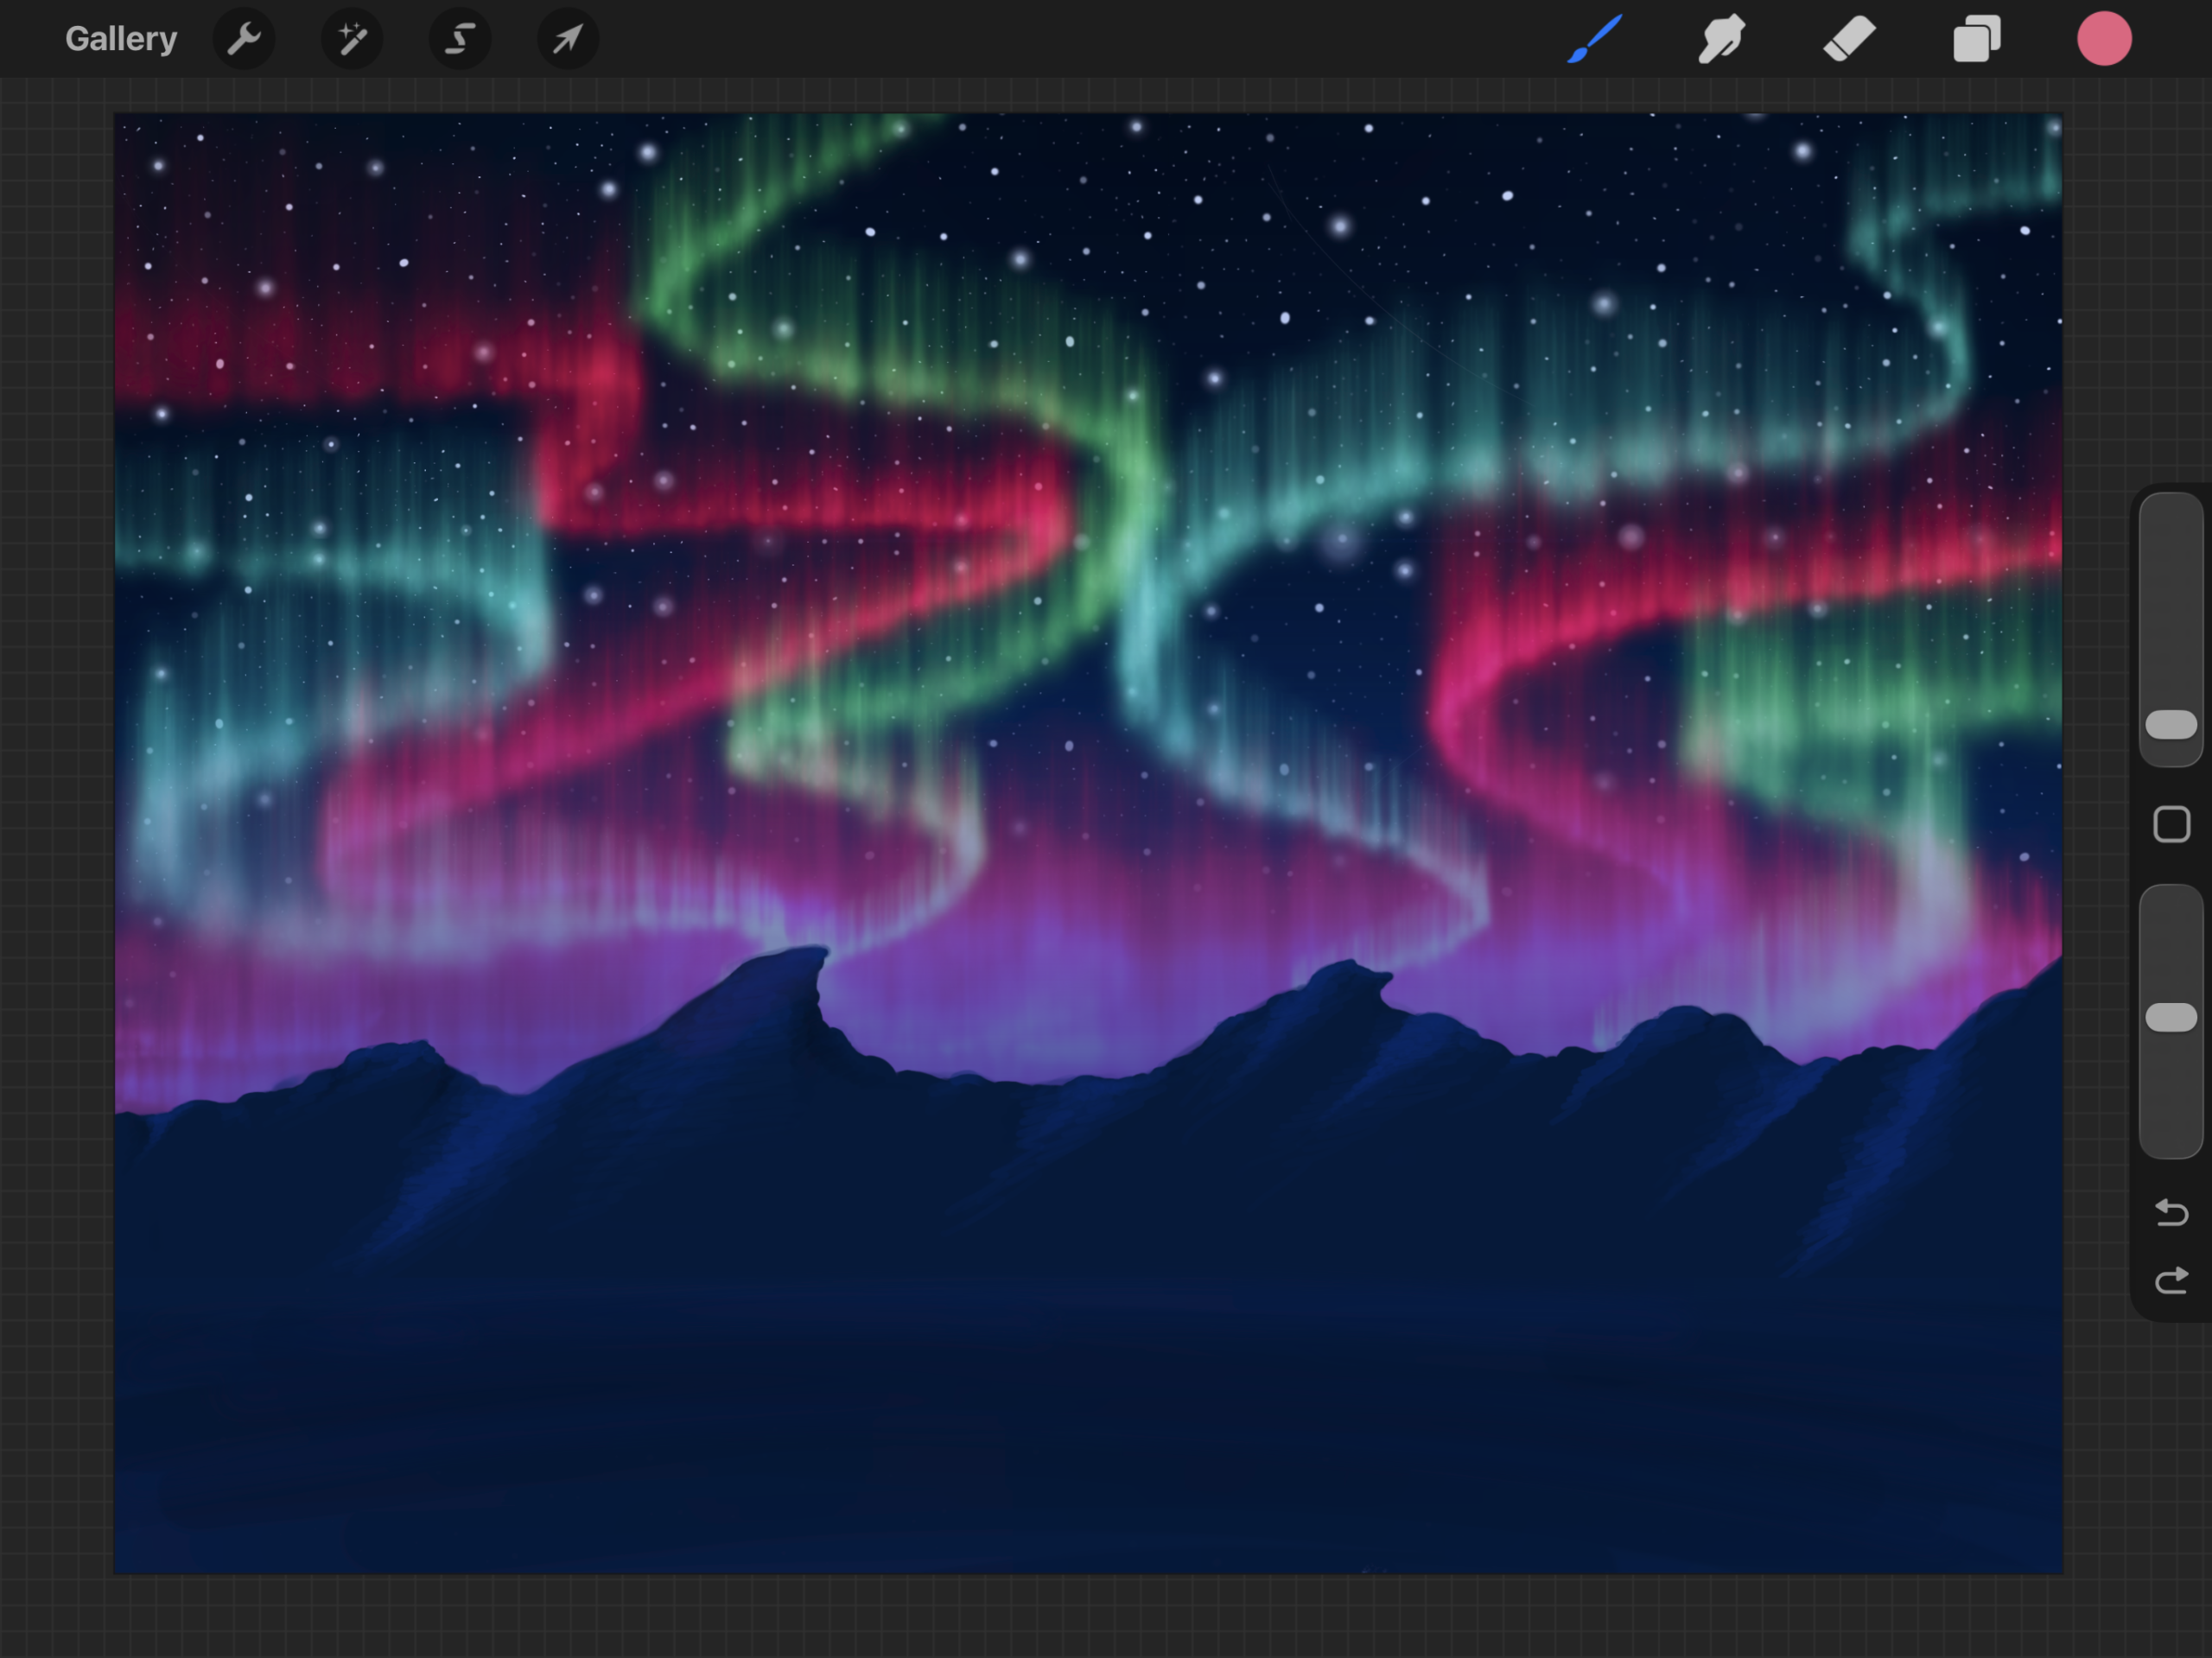
I sketched these out in Procreate and started getting an idea of how I’d do the resin pours. It helped me figure out the order of operations for fiber-optic cables, color layering, etc.
I ended up flipping the order of the auroras and the mountains.


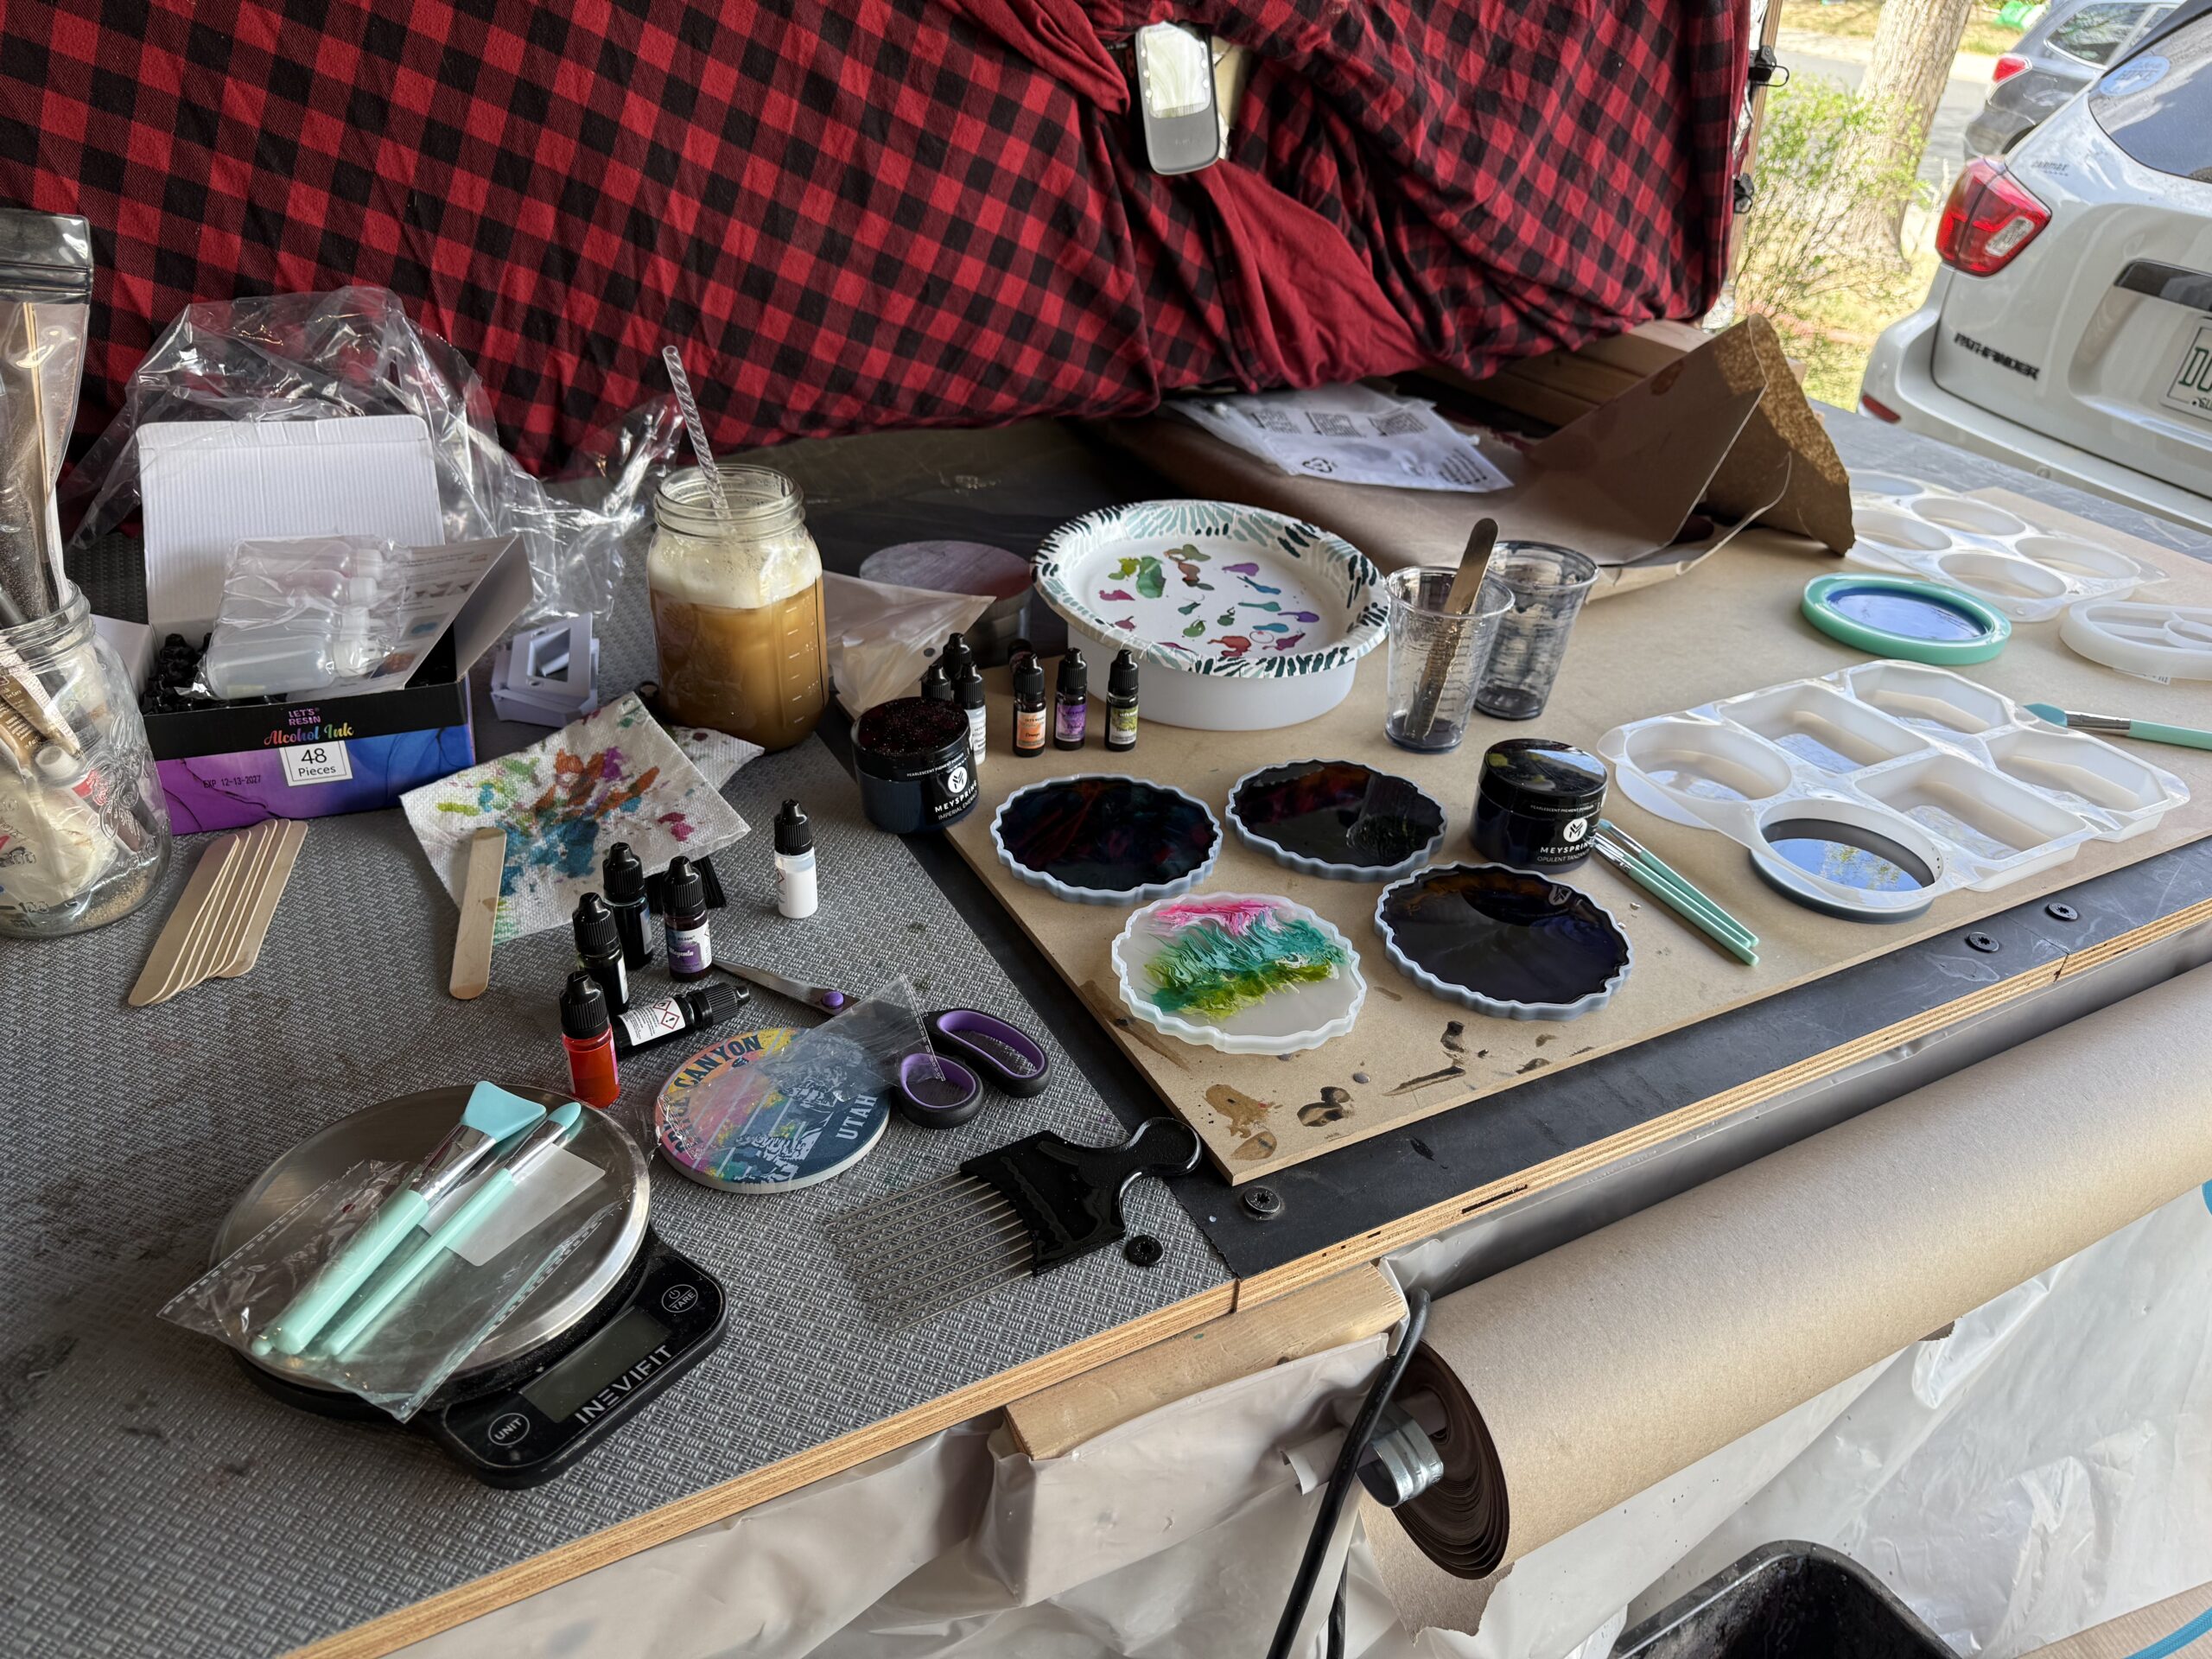
Prototypes
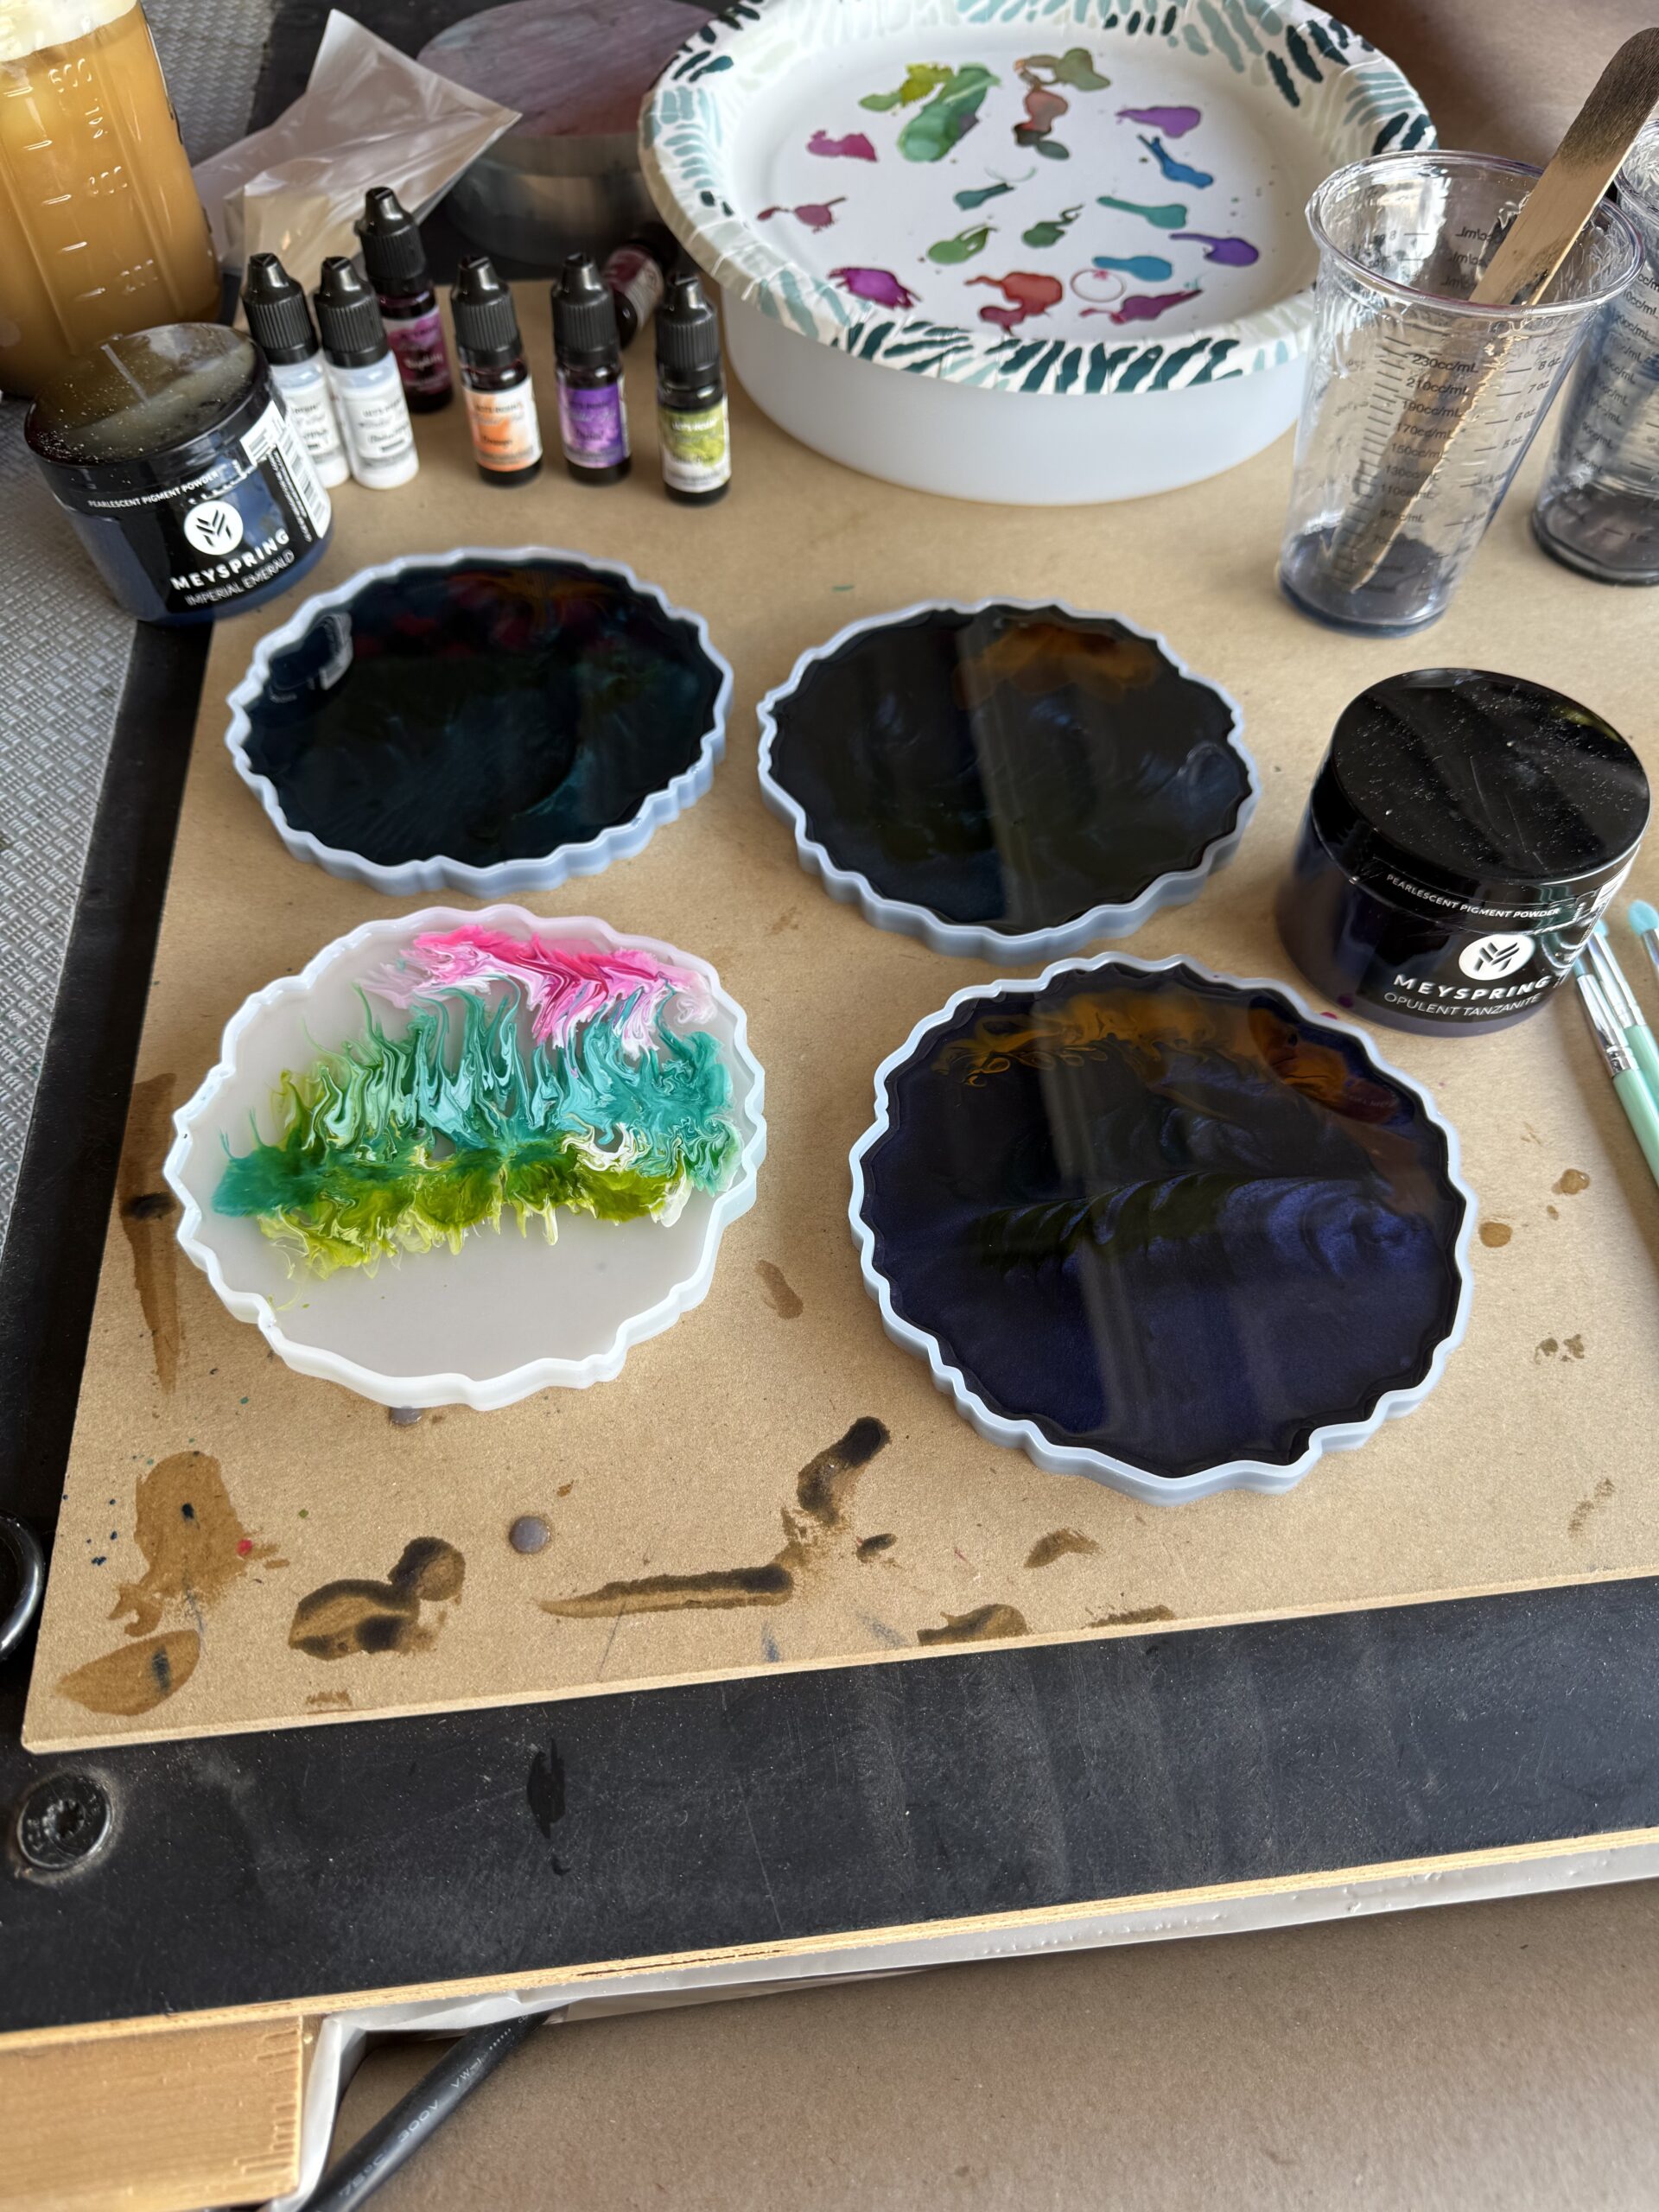
The easiest way to prototype with resin is to make coasters; lots of coasters.
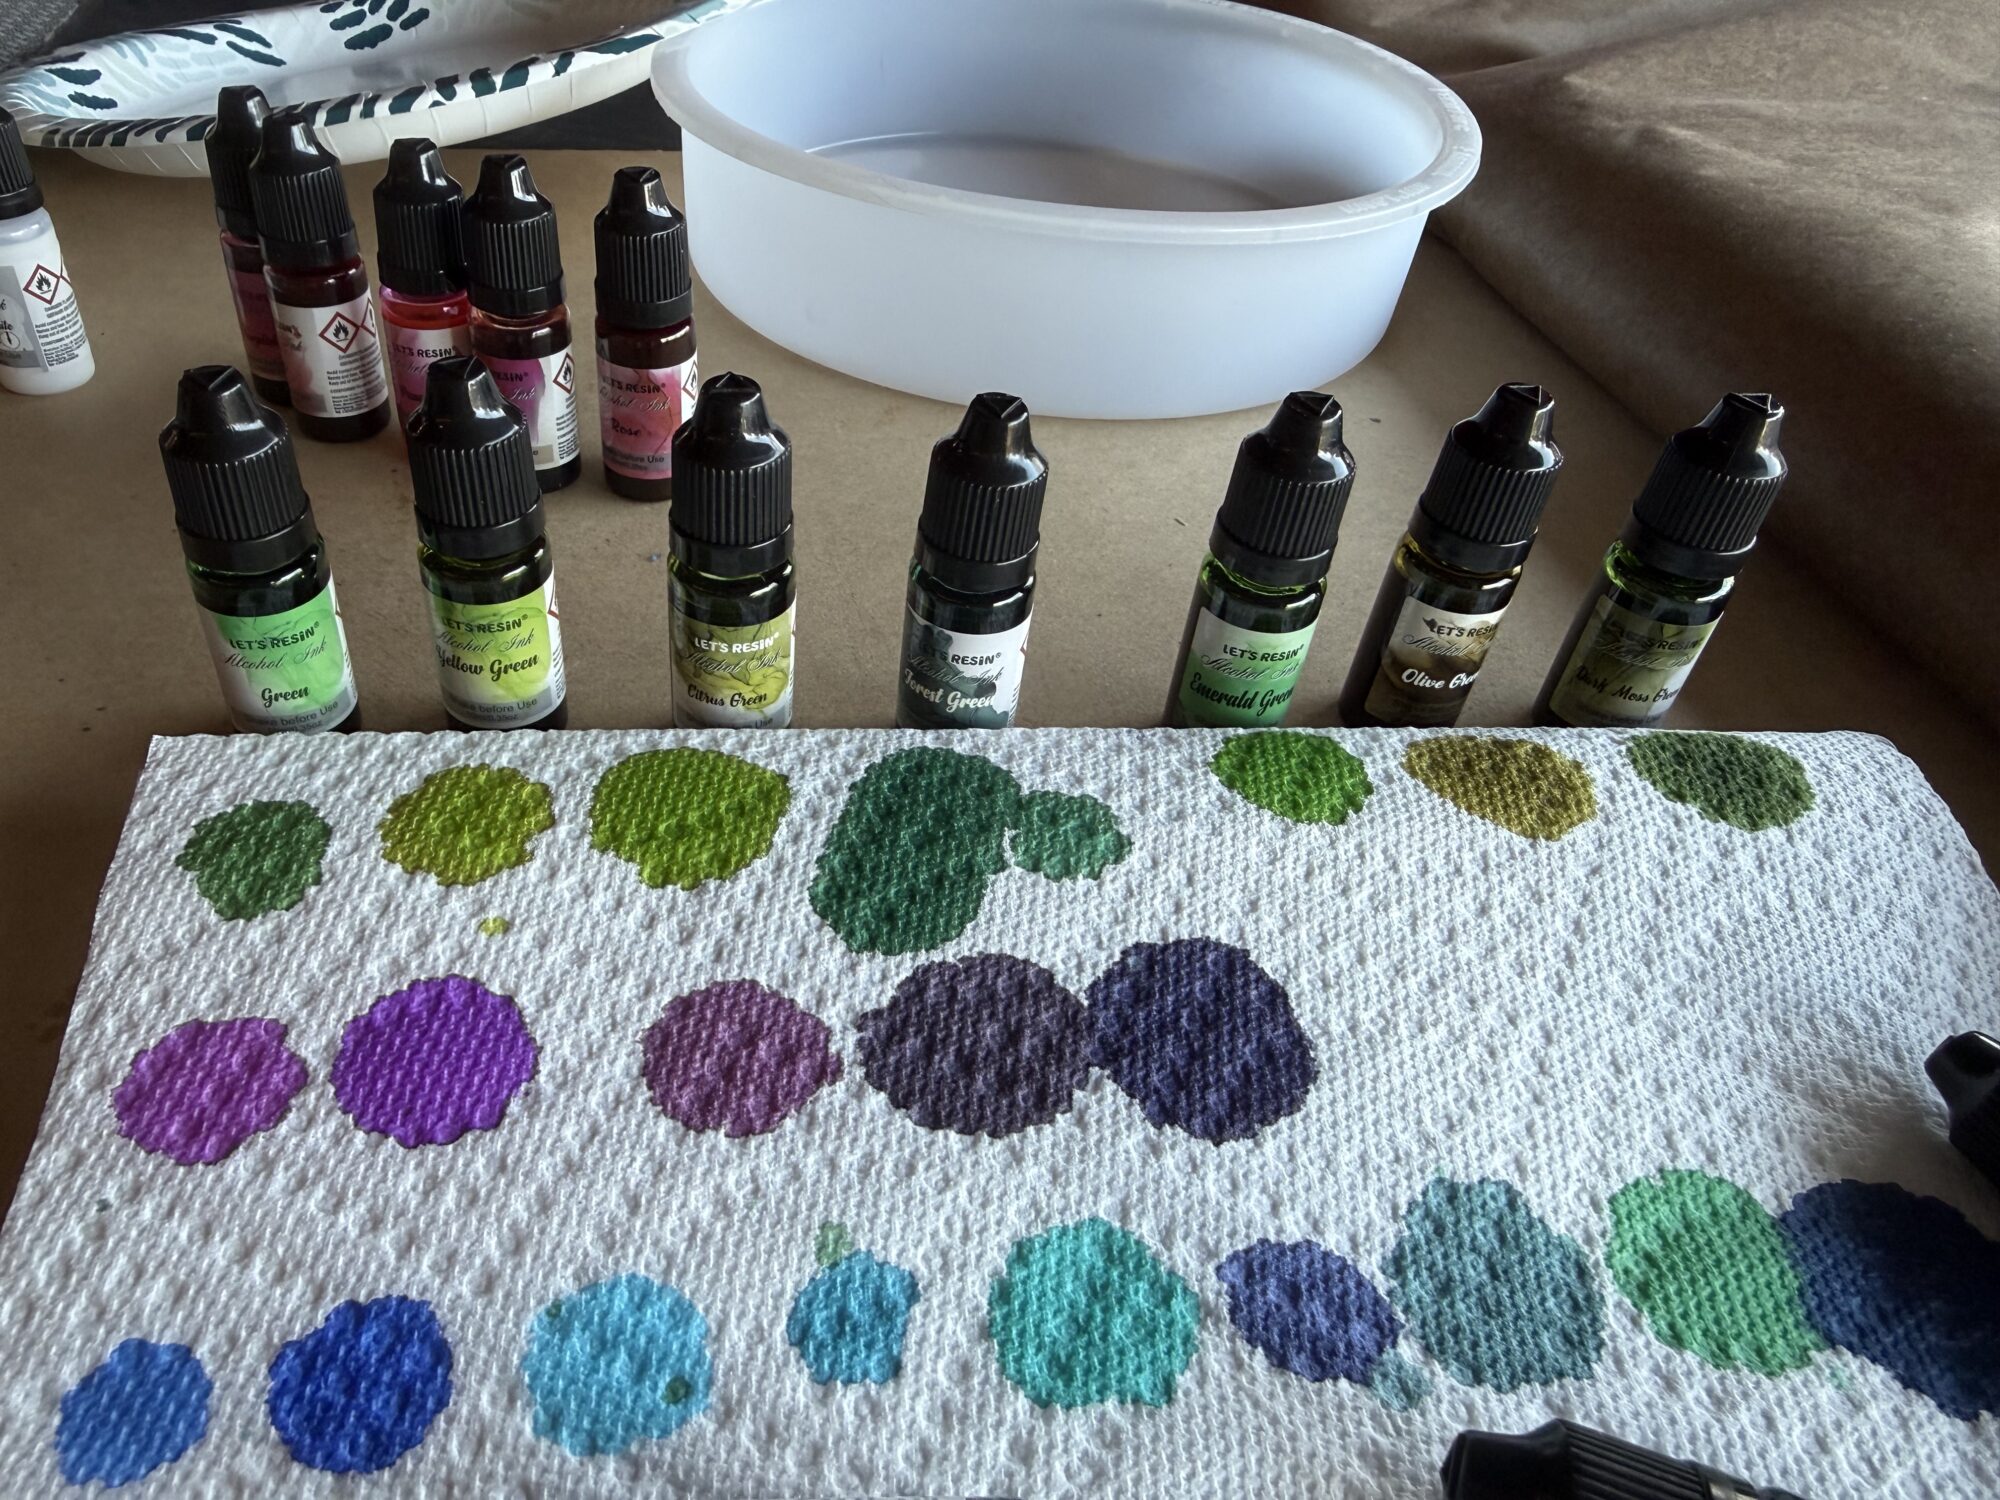
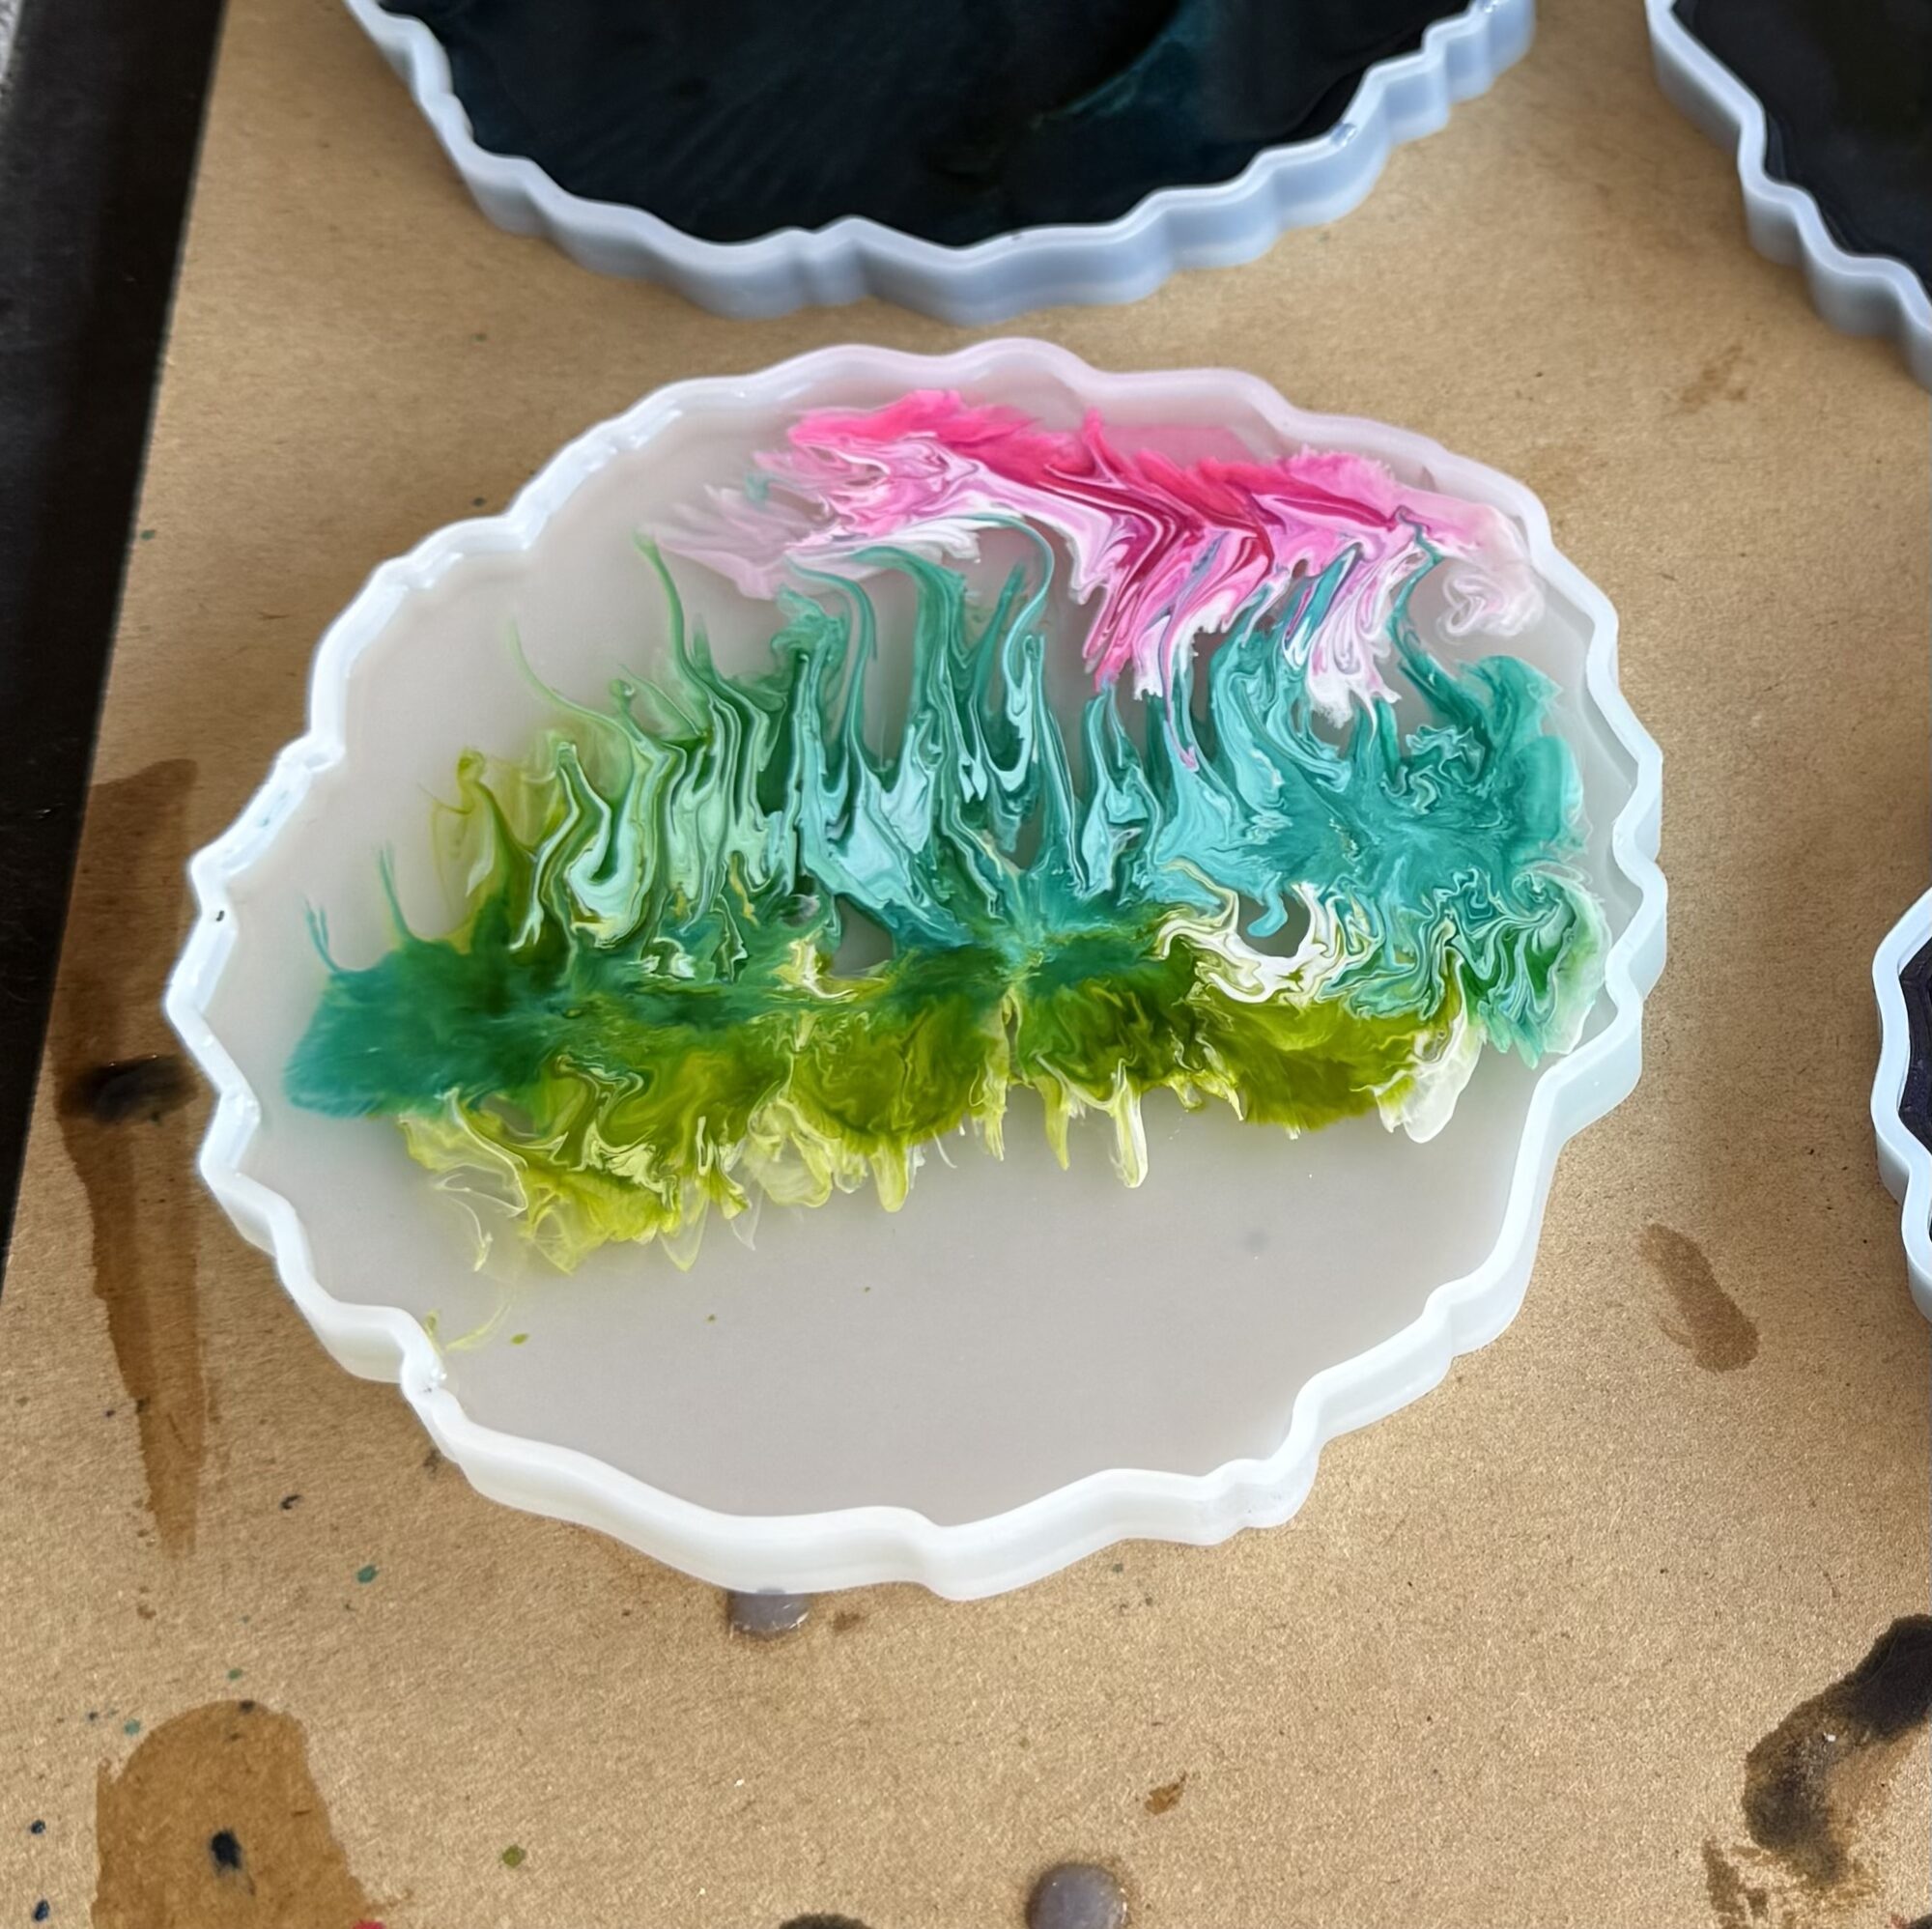
I did a lot of color testing — first on paper towels, then in the resin — and narrowed down the top choices.
Now comes the tricky part: painting the aurora curtains. I tried several techniques for this — sinking white ink into alcohol ink, mixing glow powder into the resin, trying to pull the curtains up with a comb, and so on…
The method that looked best was with acrylic paint—paint a line and immediately follow up with a dry brush, pulling the curtains up from the baseline.


The Mold and Fiber Optic Lights
Count the problems ahead
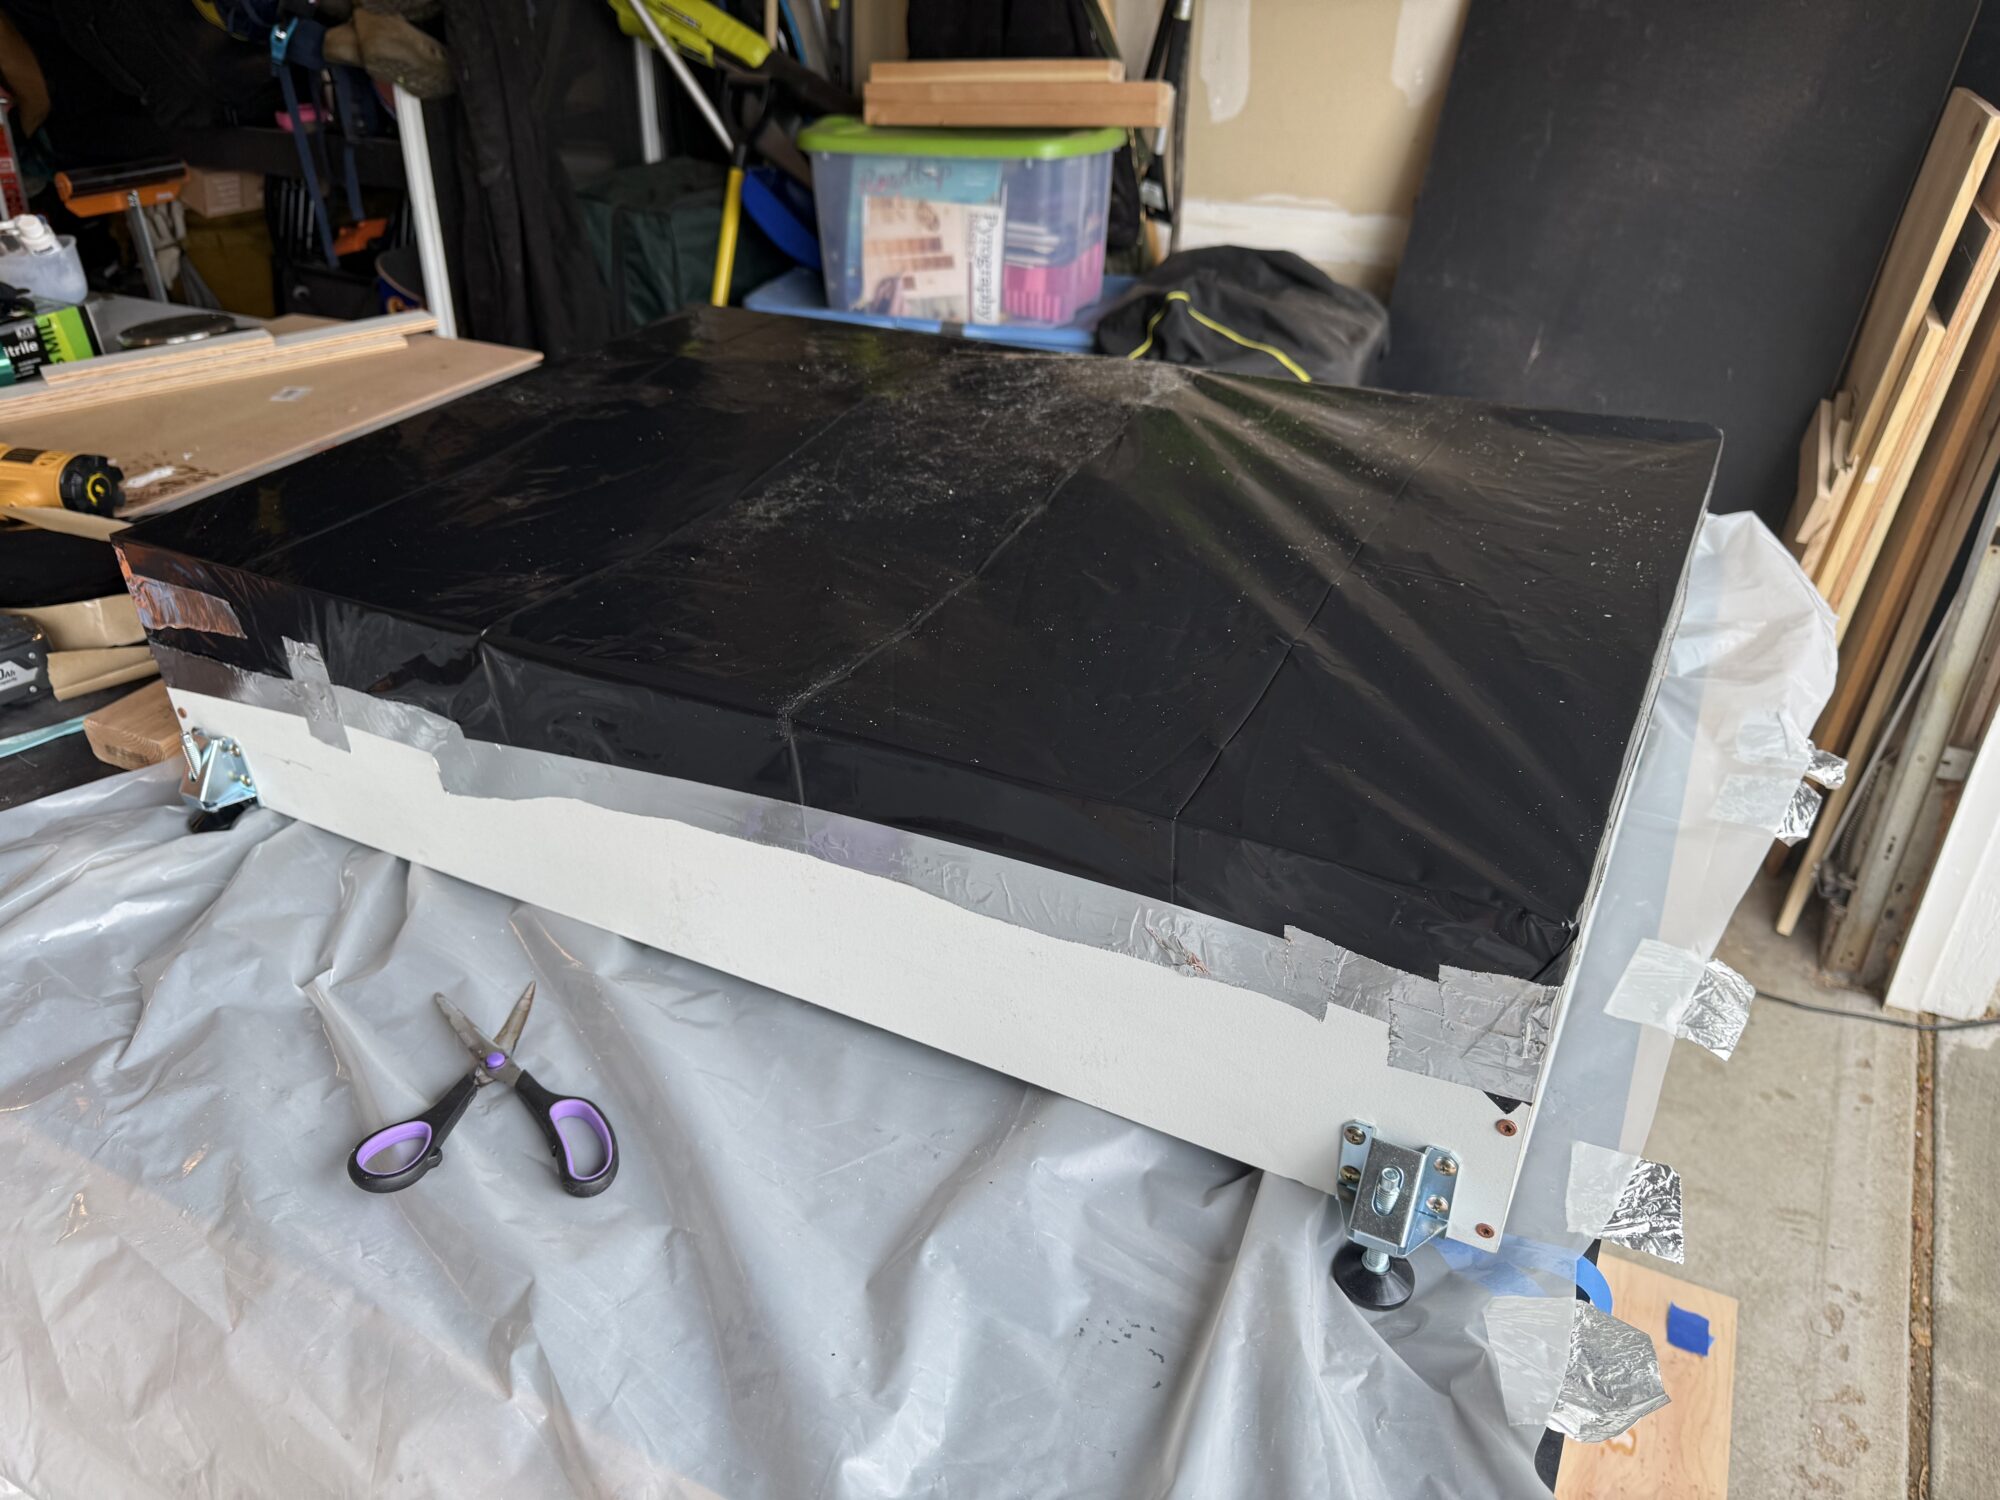
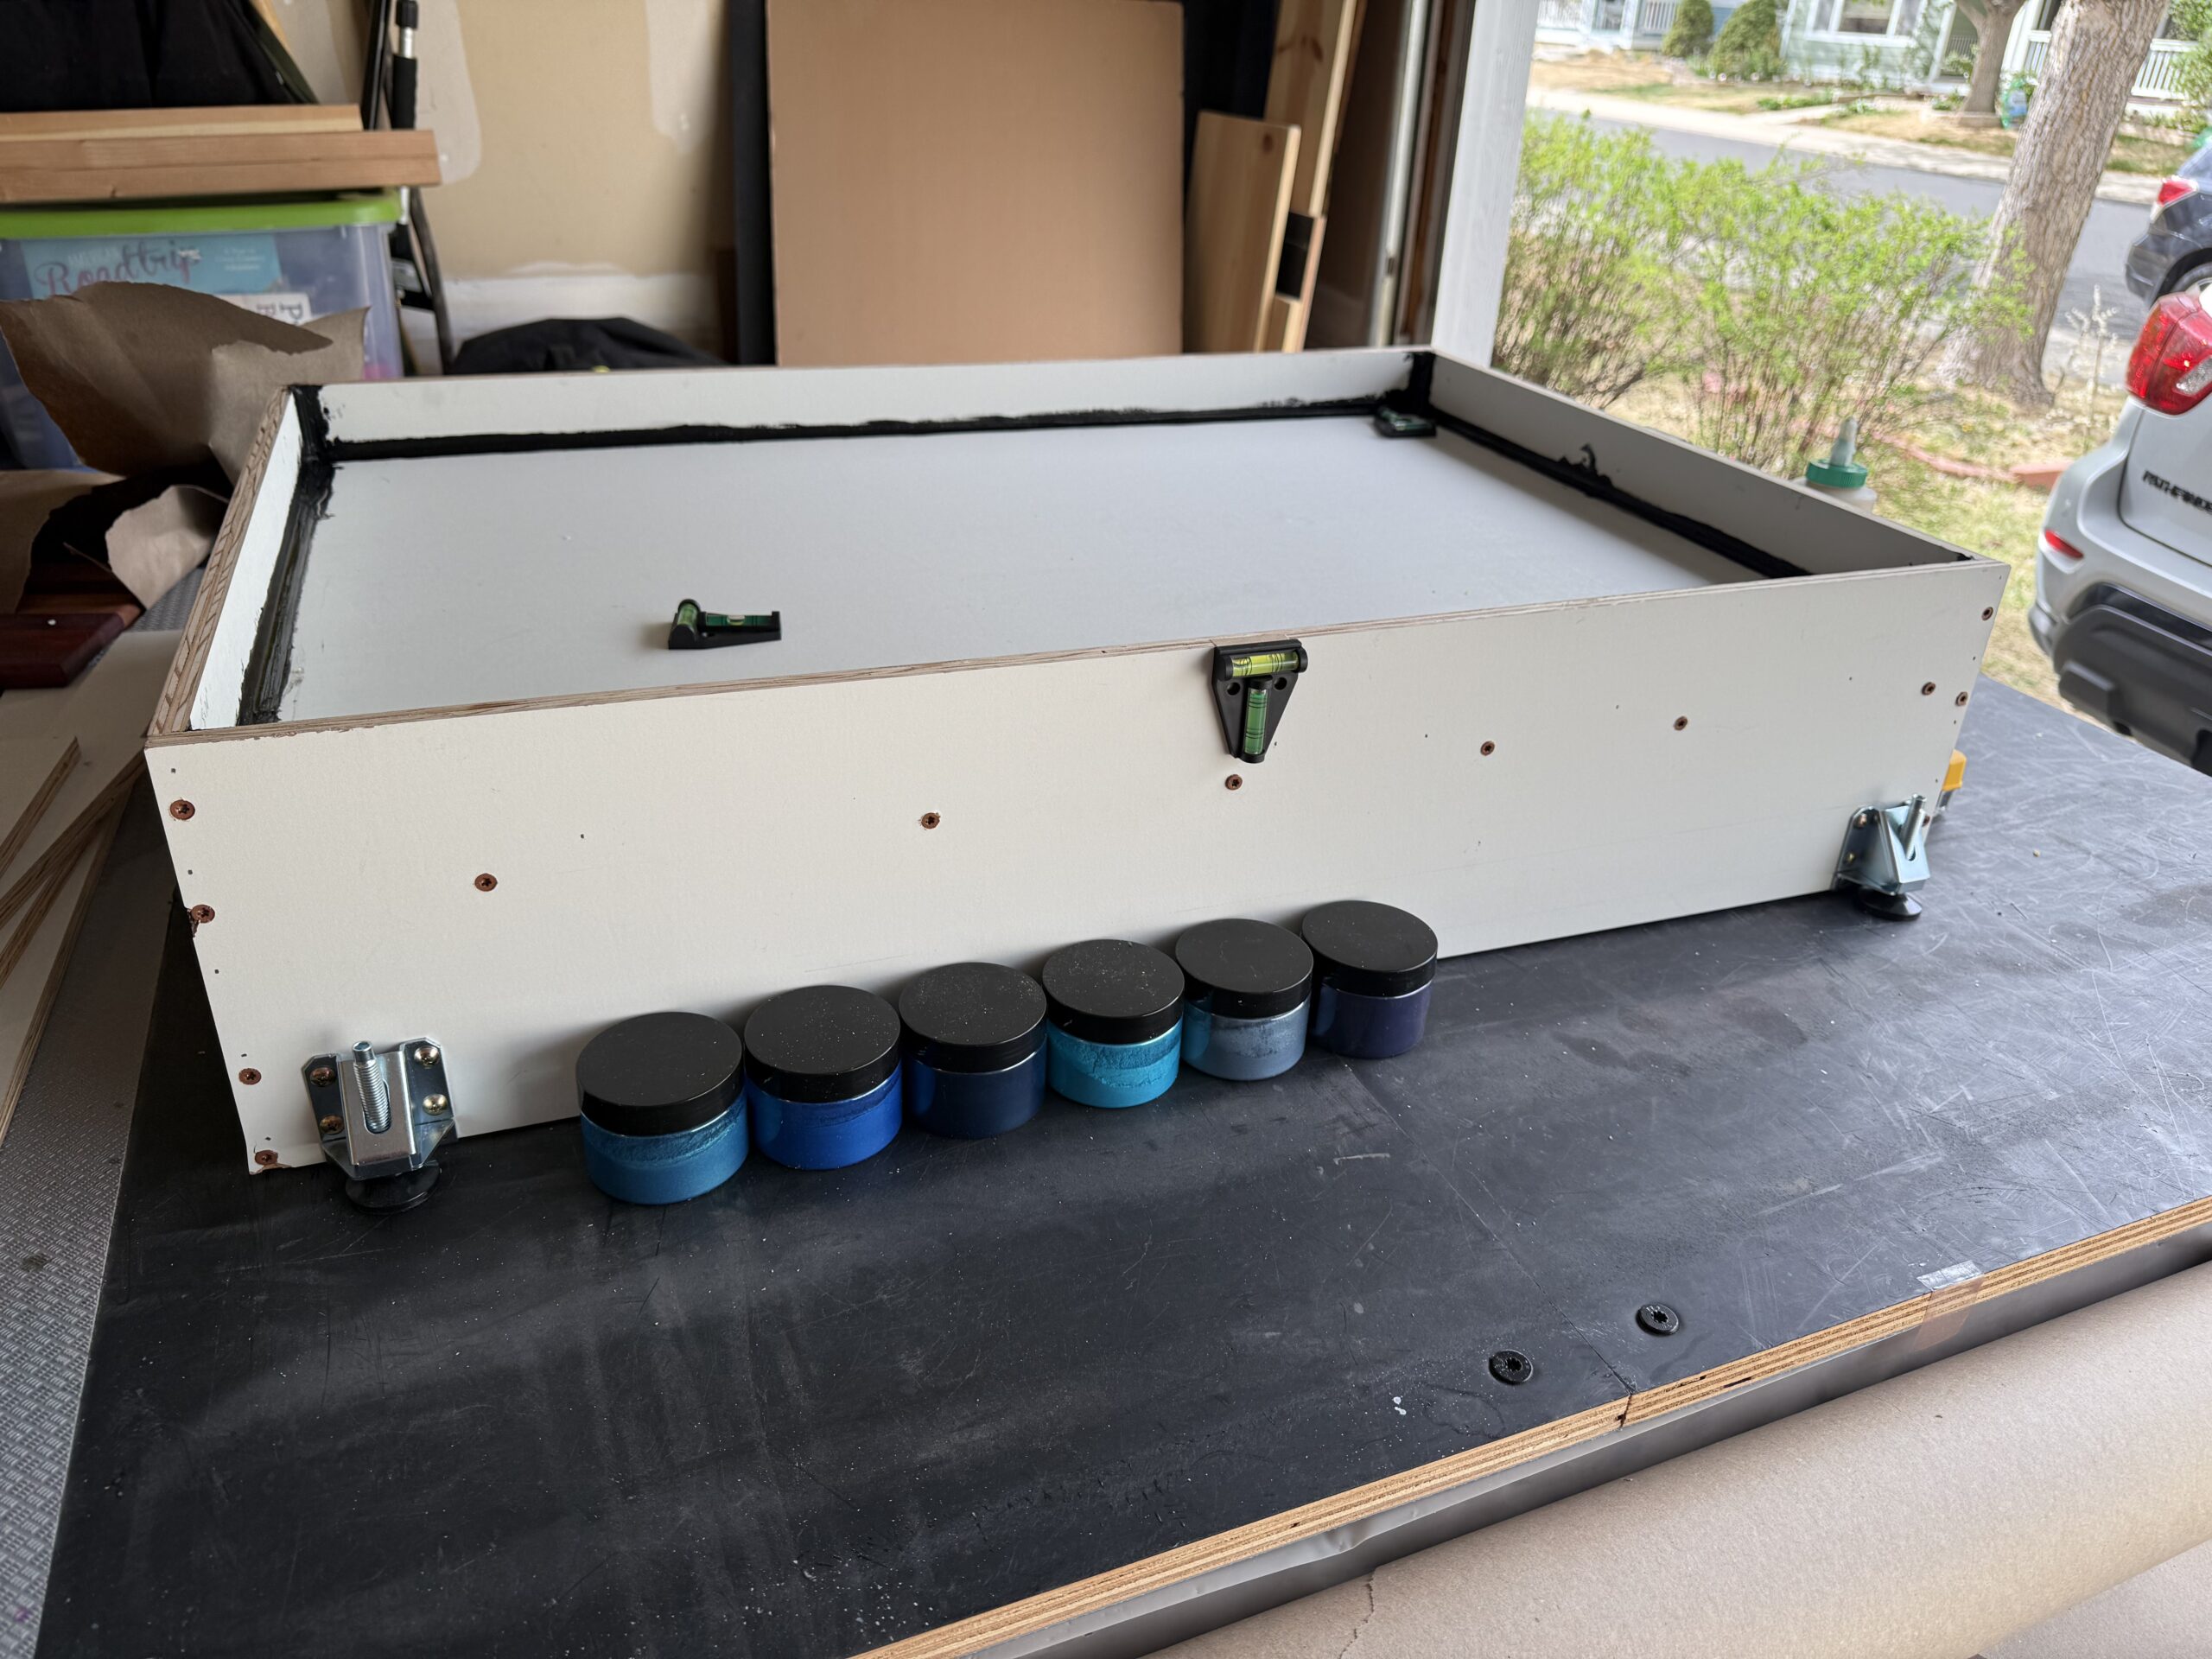
The mold was relatively simple to build and used black silicone to visibly seal the edges. Nails and screws were used to hold the mold together.
Leveling feet were used for easy height adjustments before resin pours.
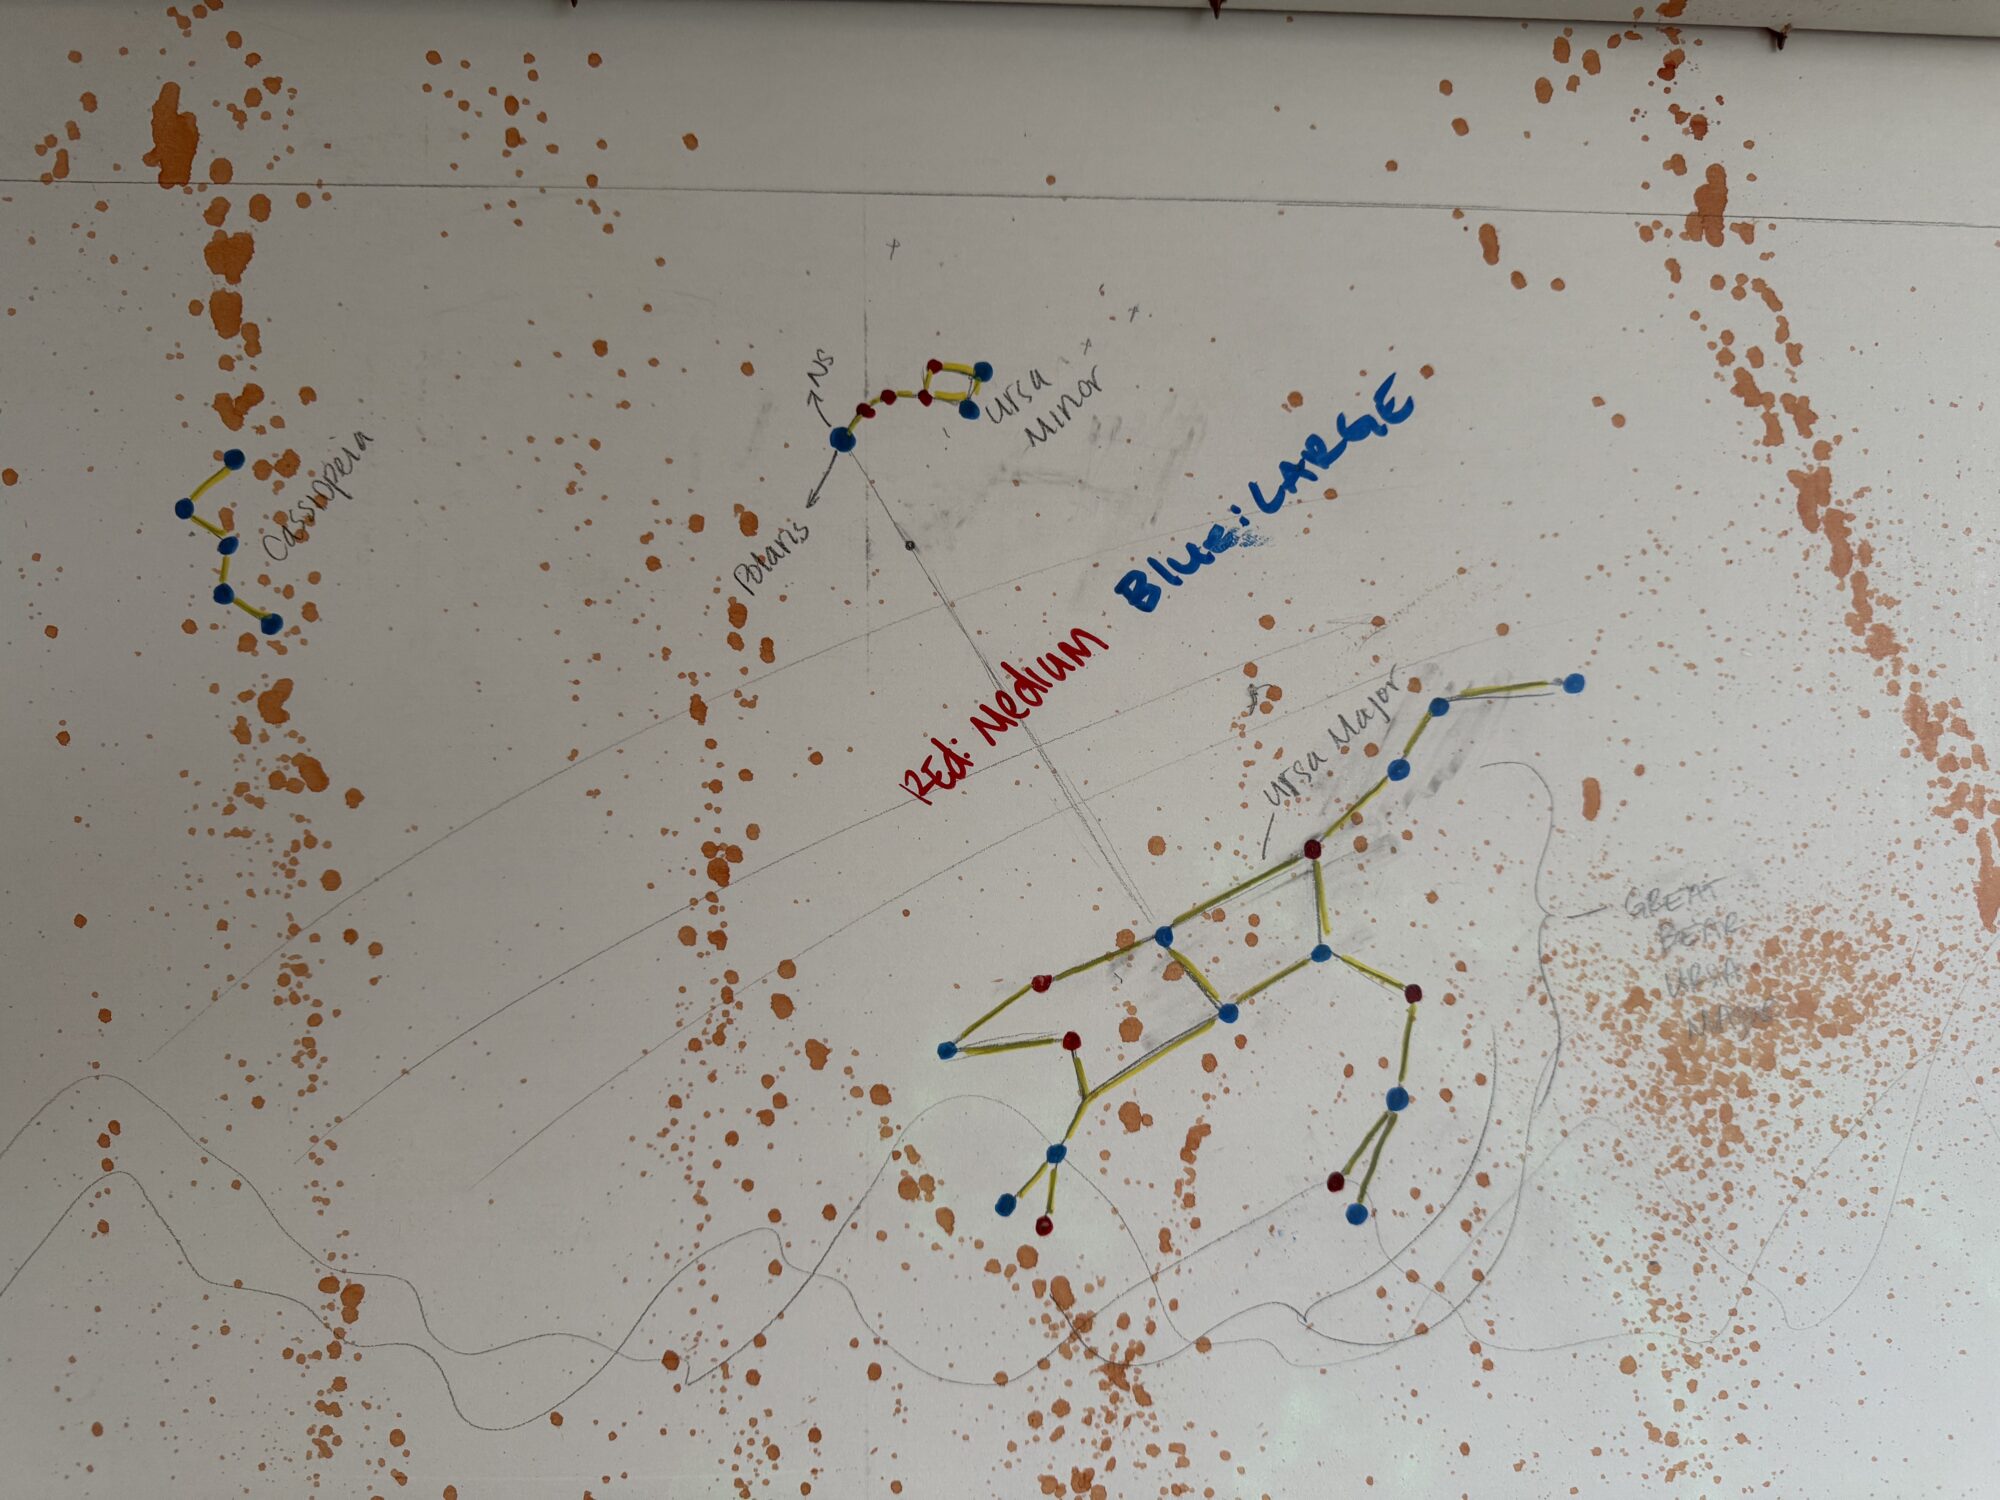
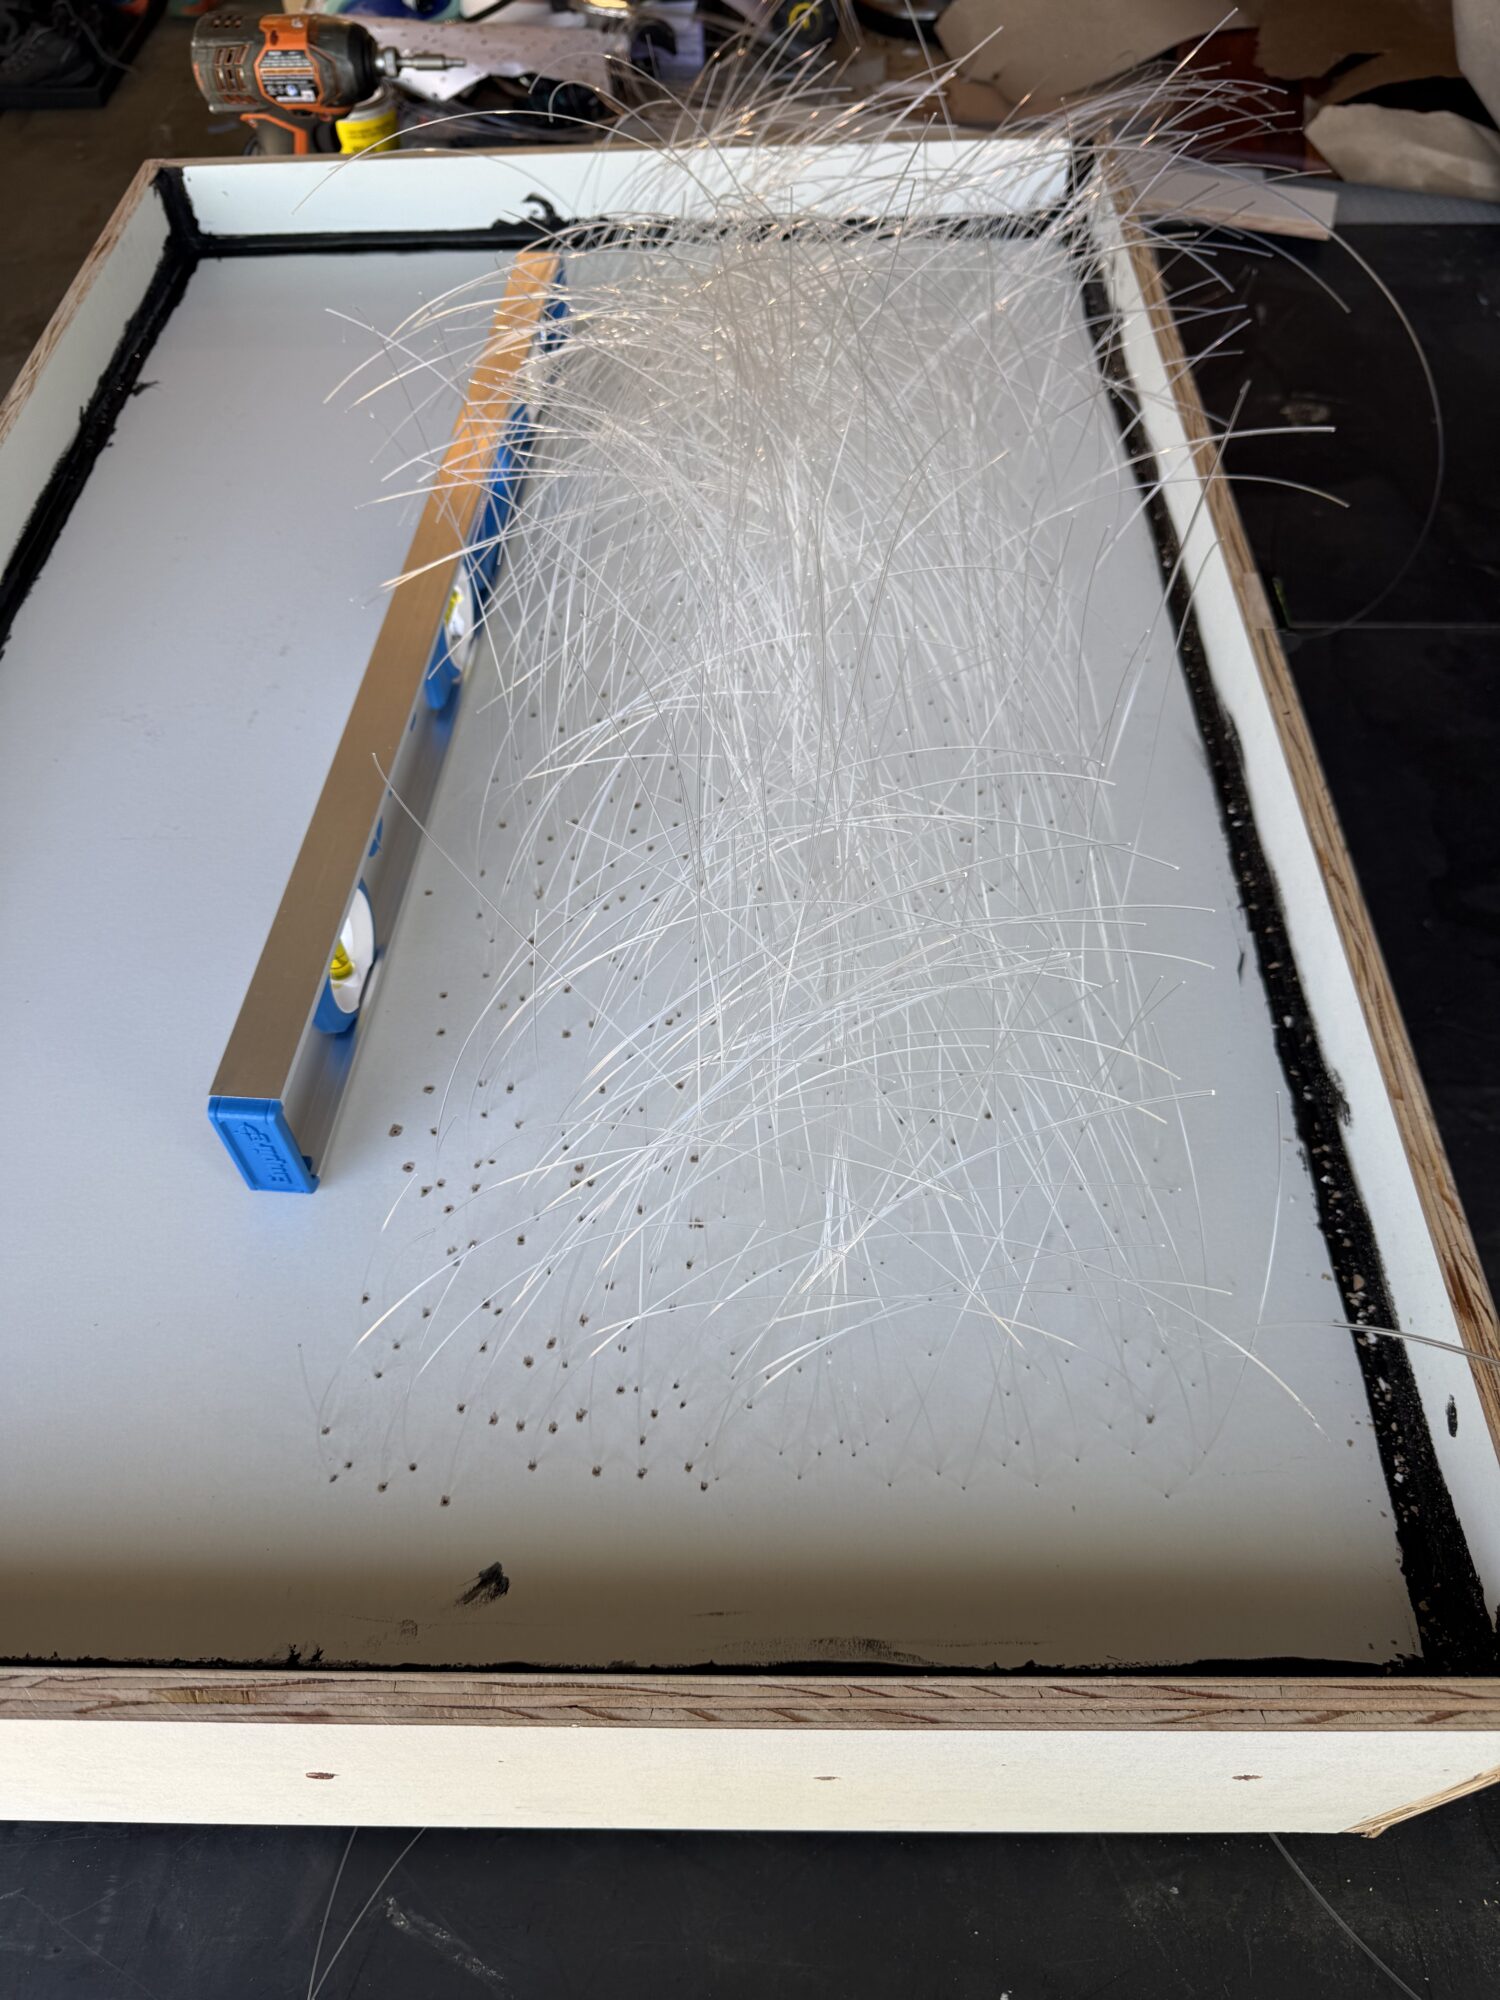
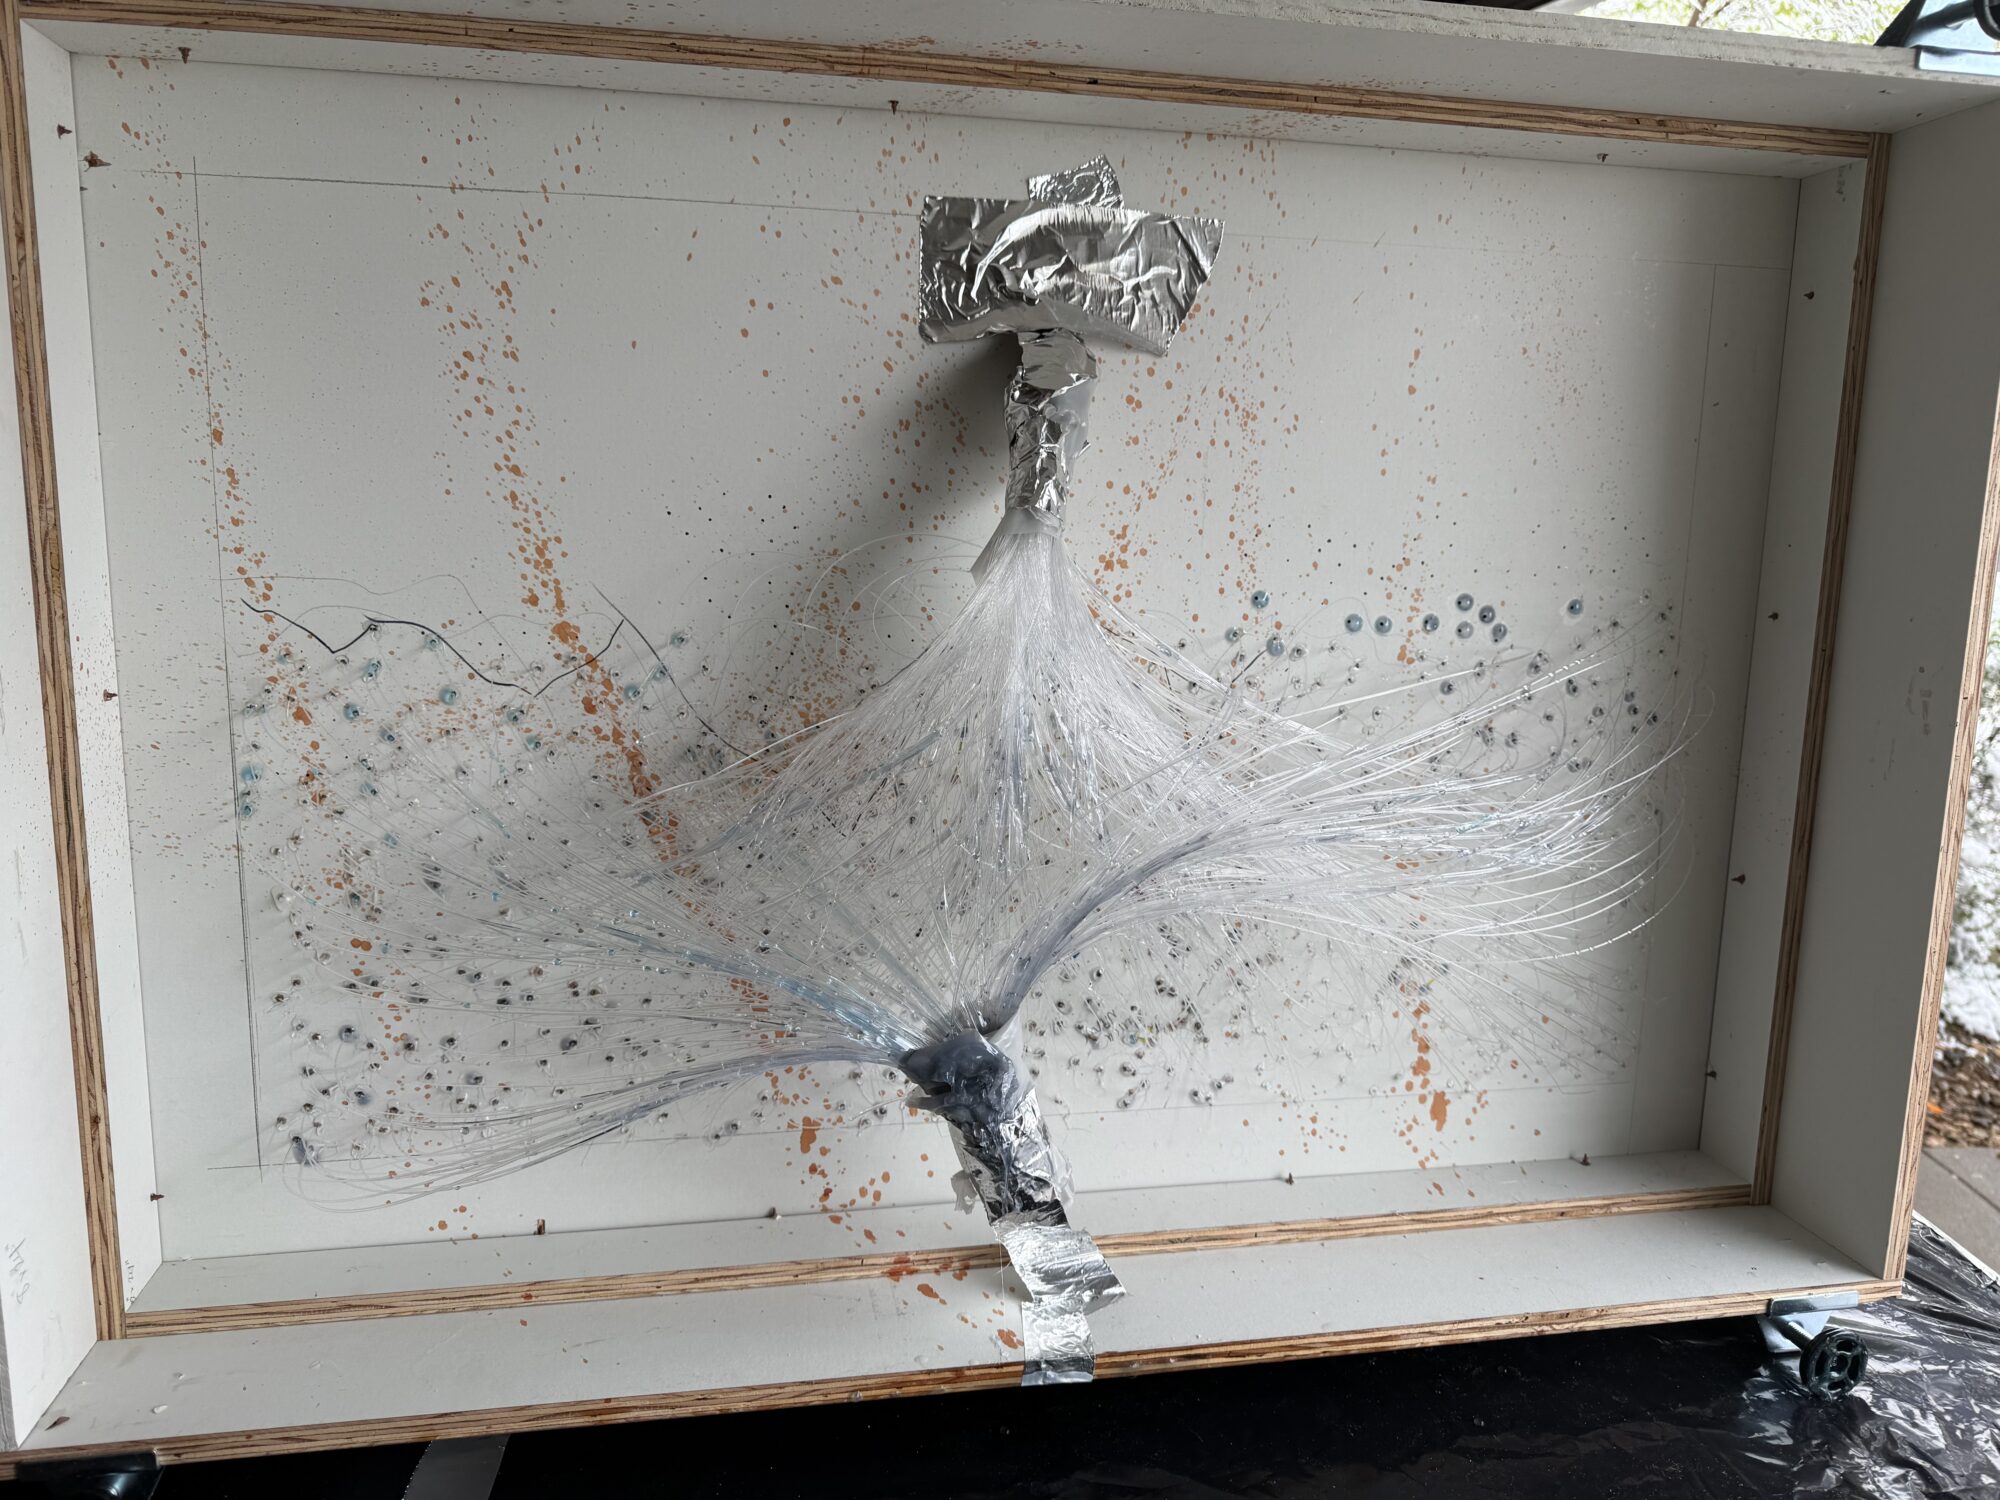
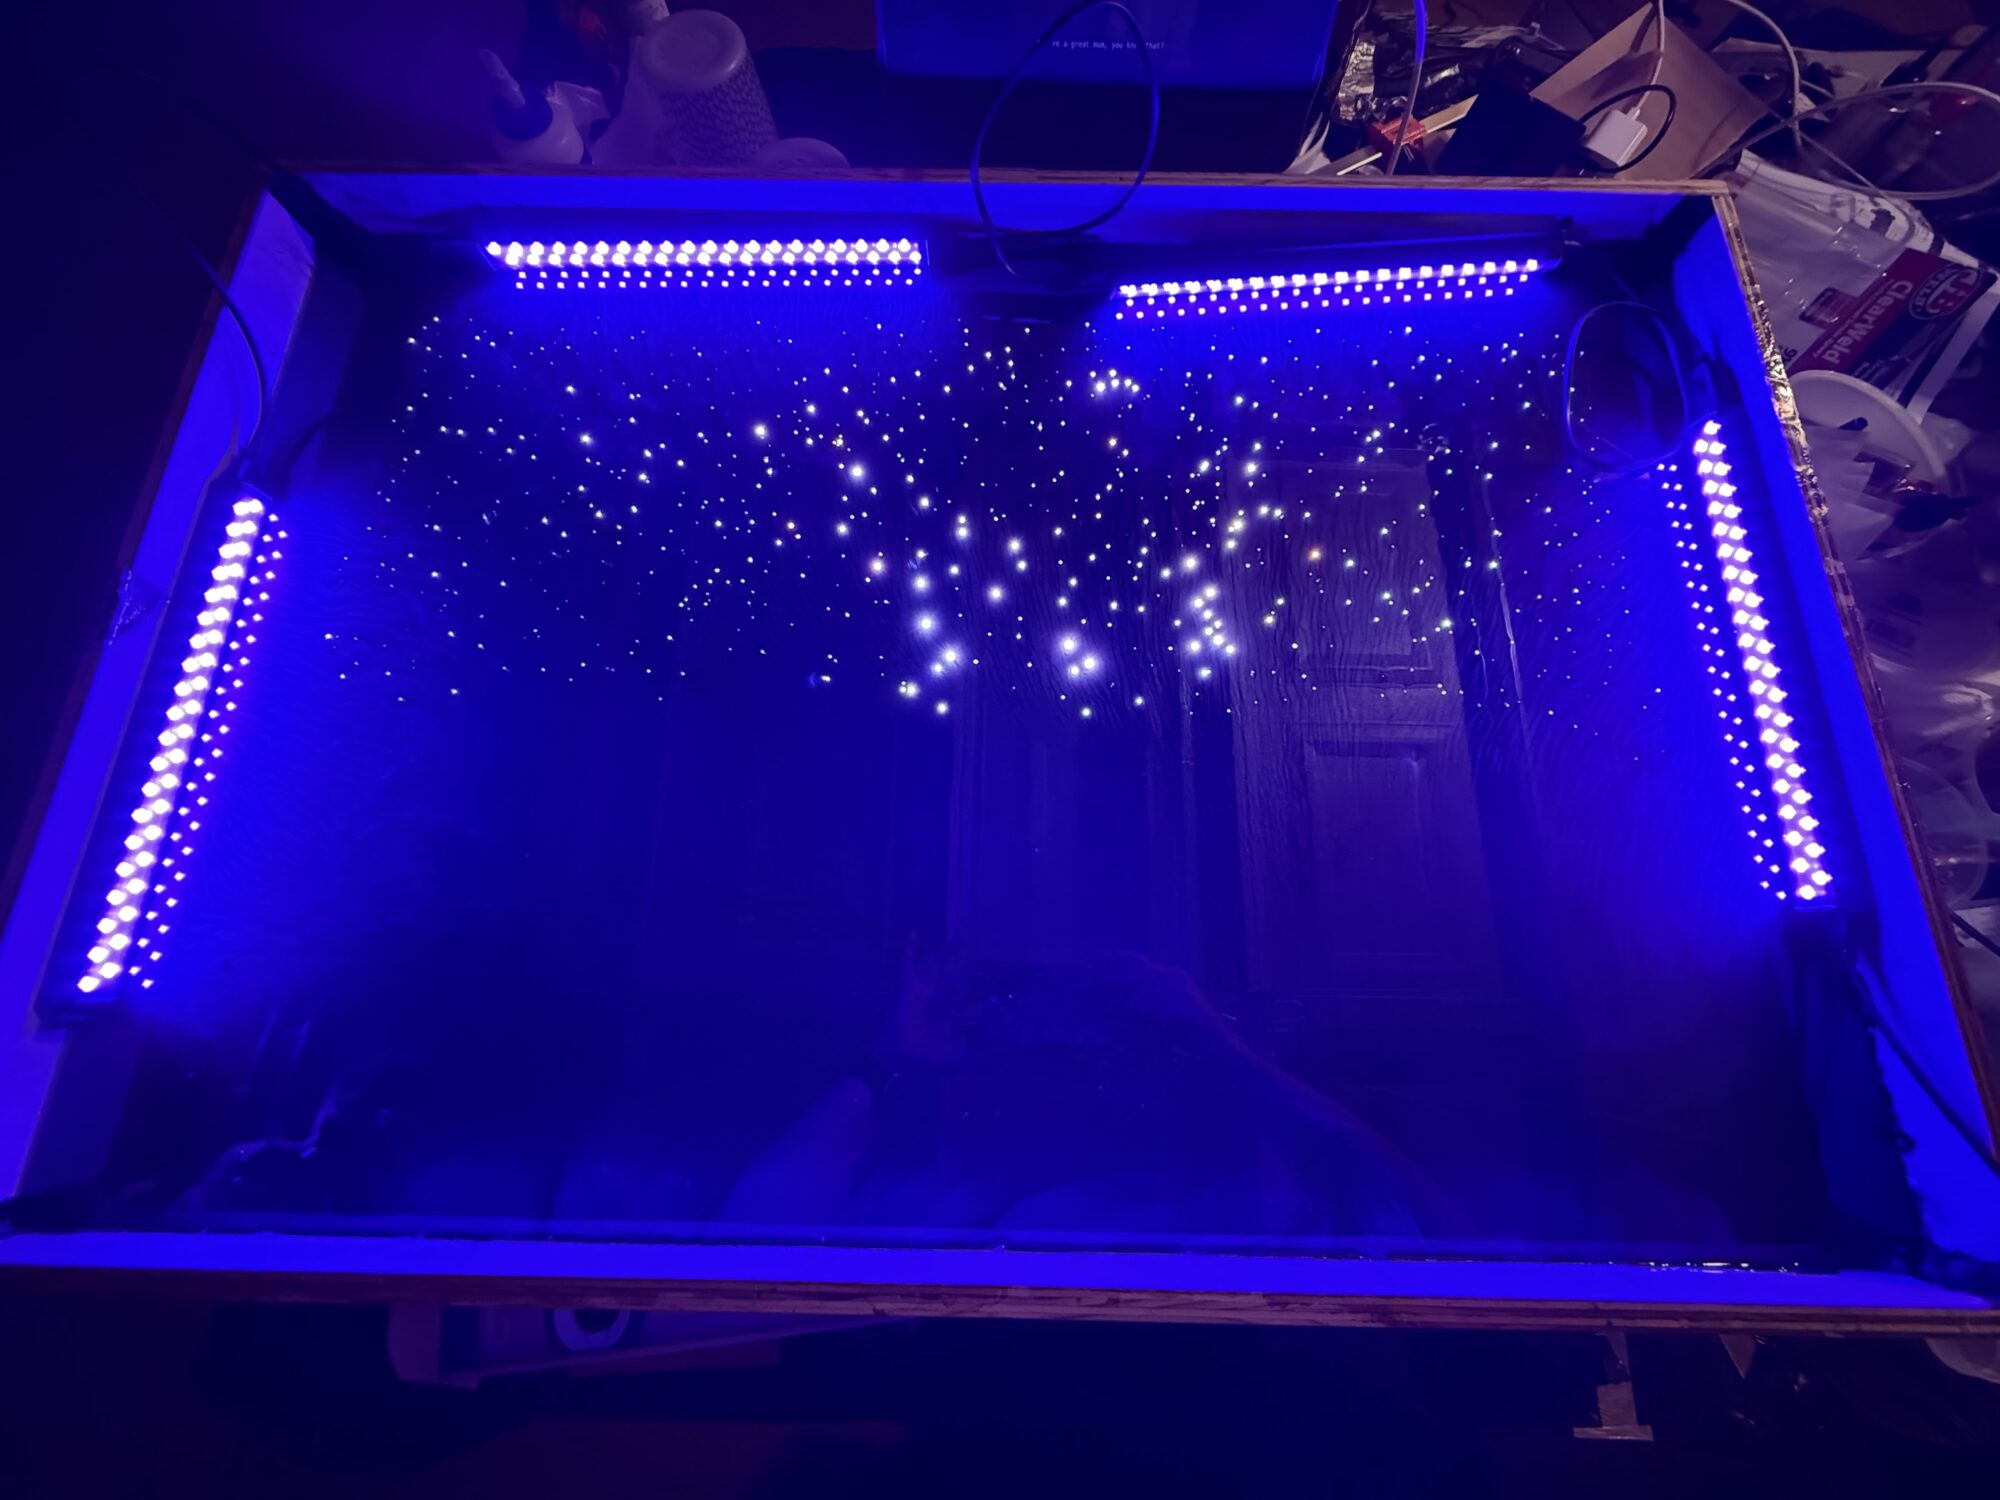
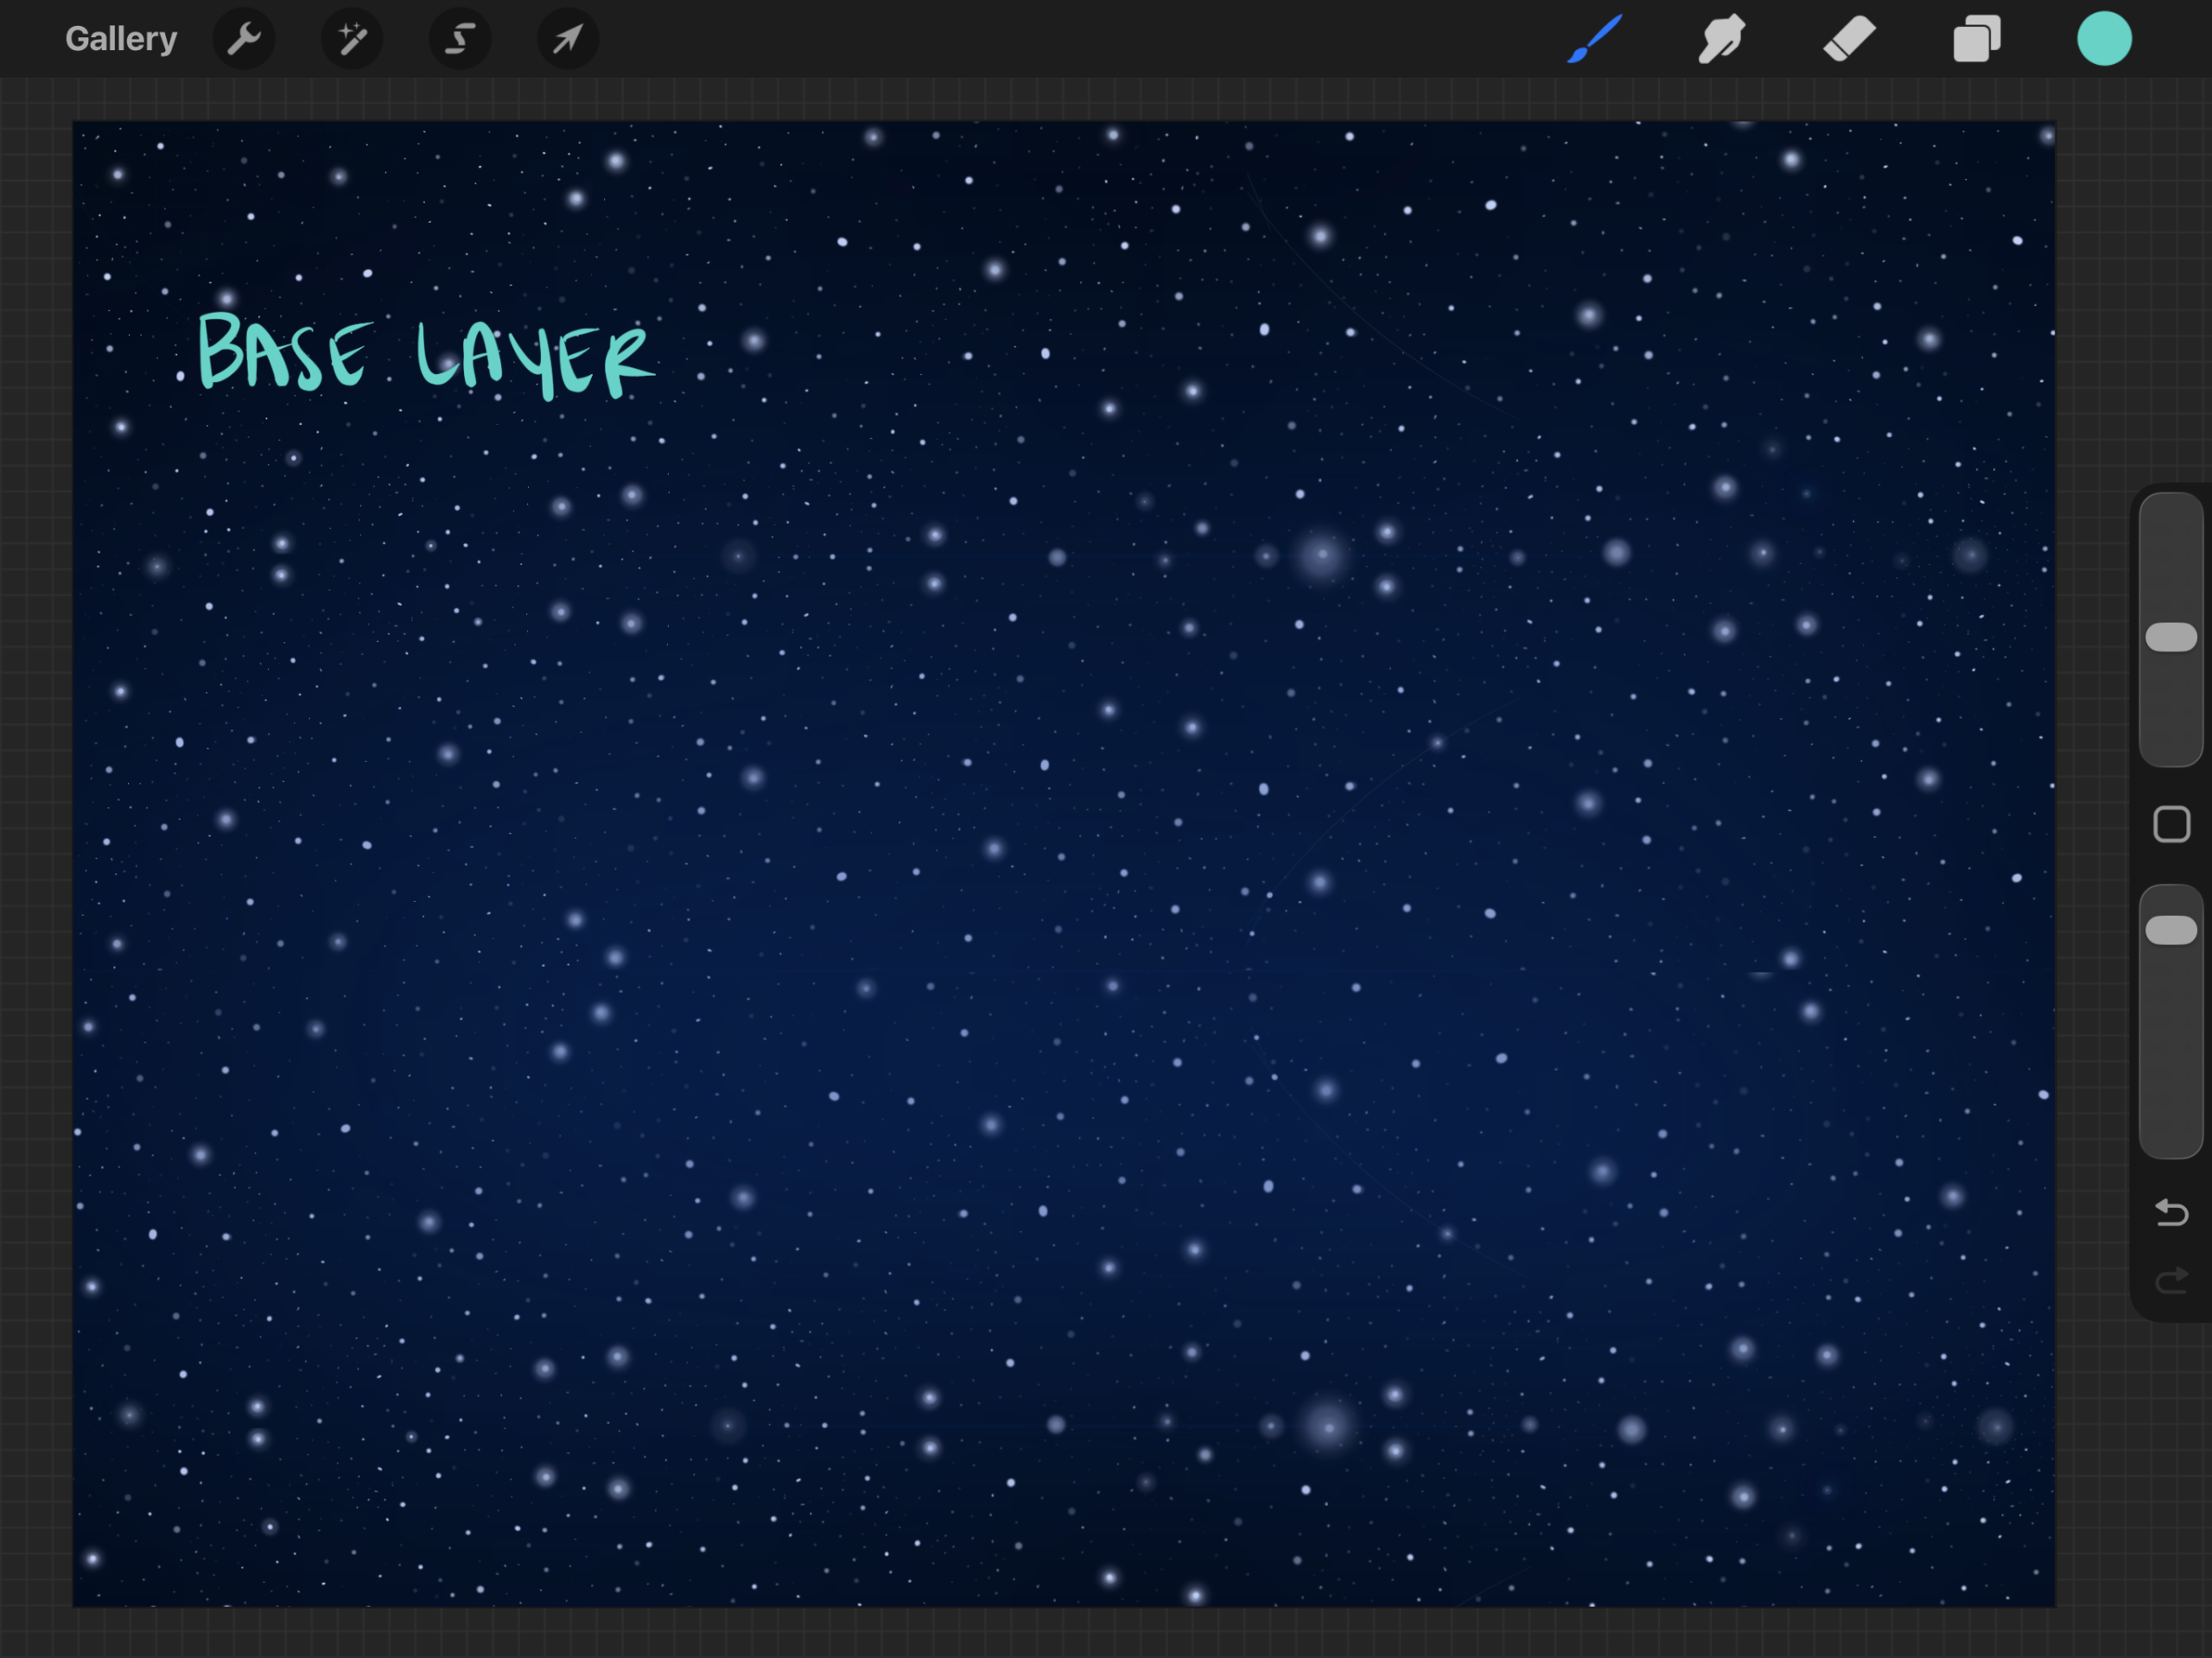
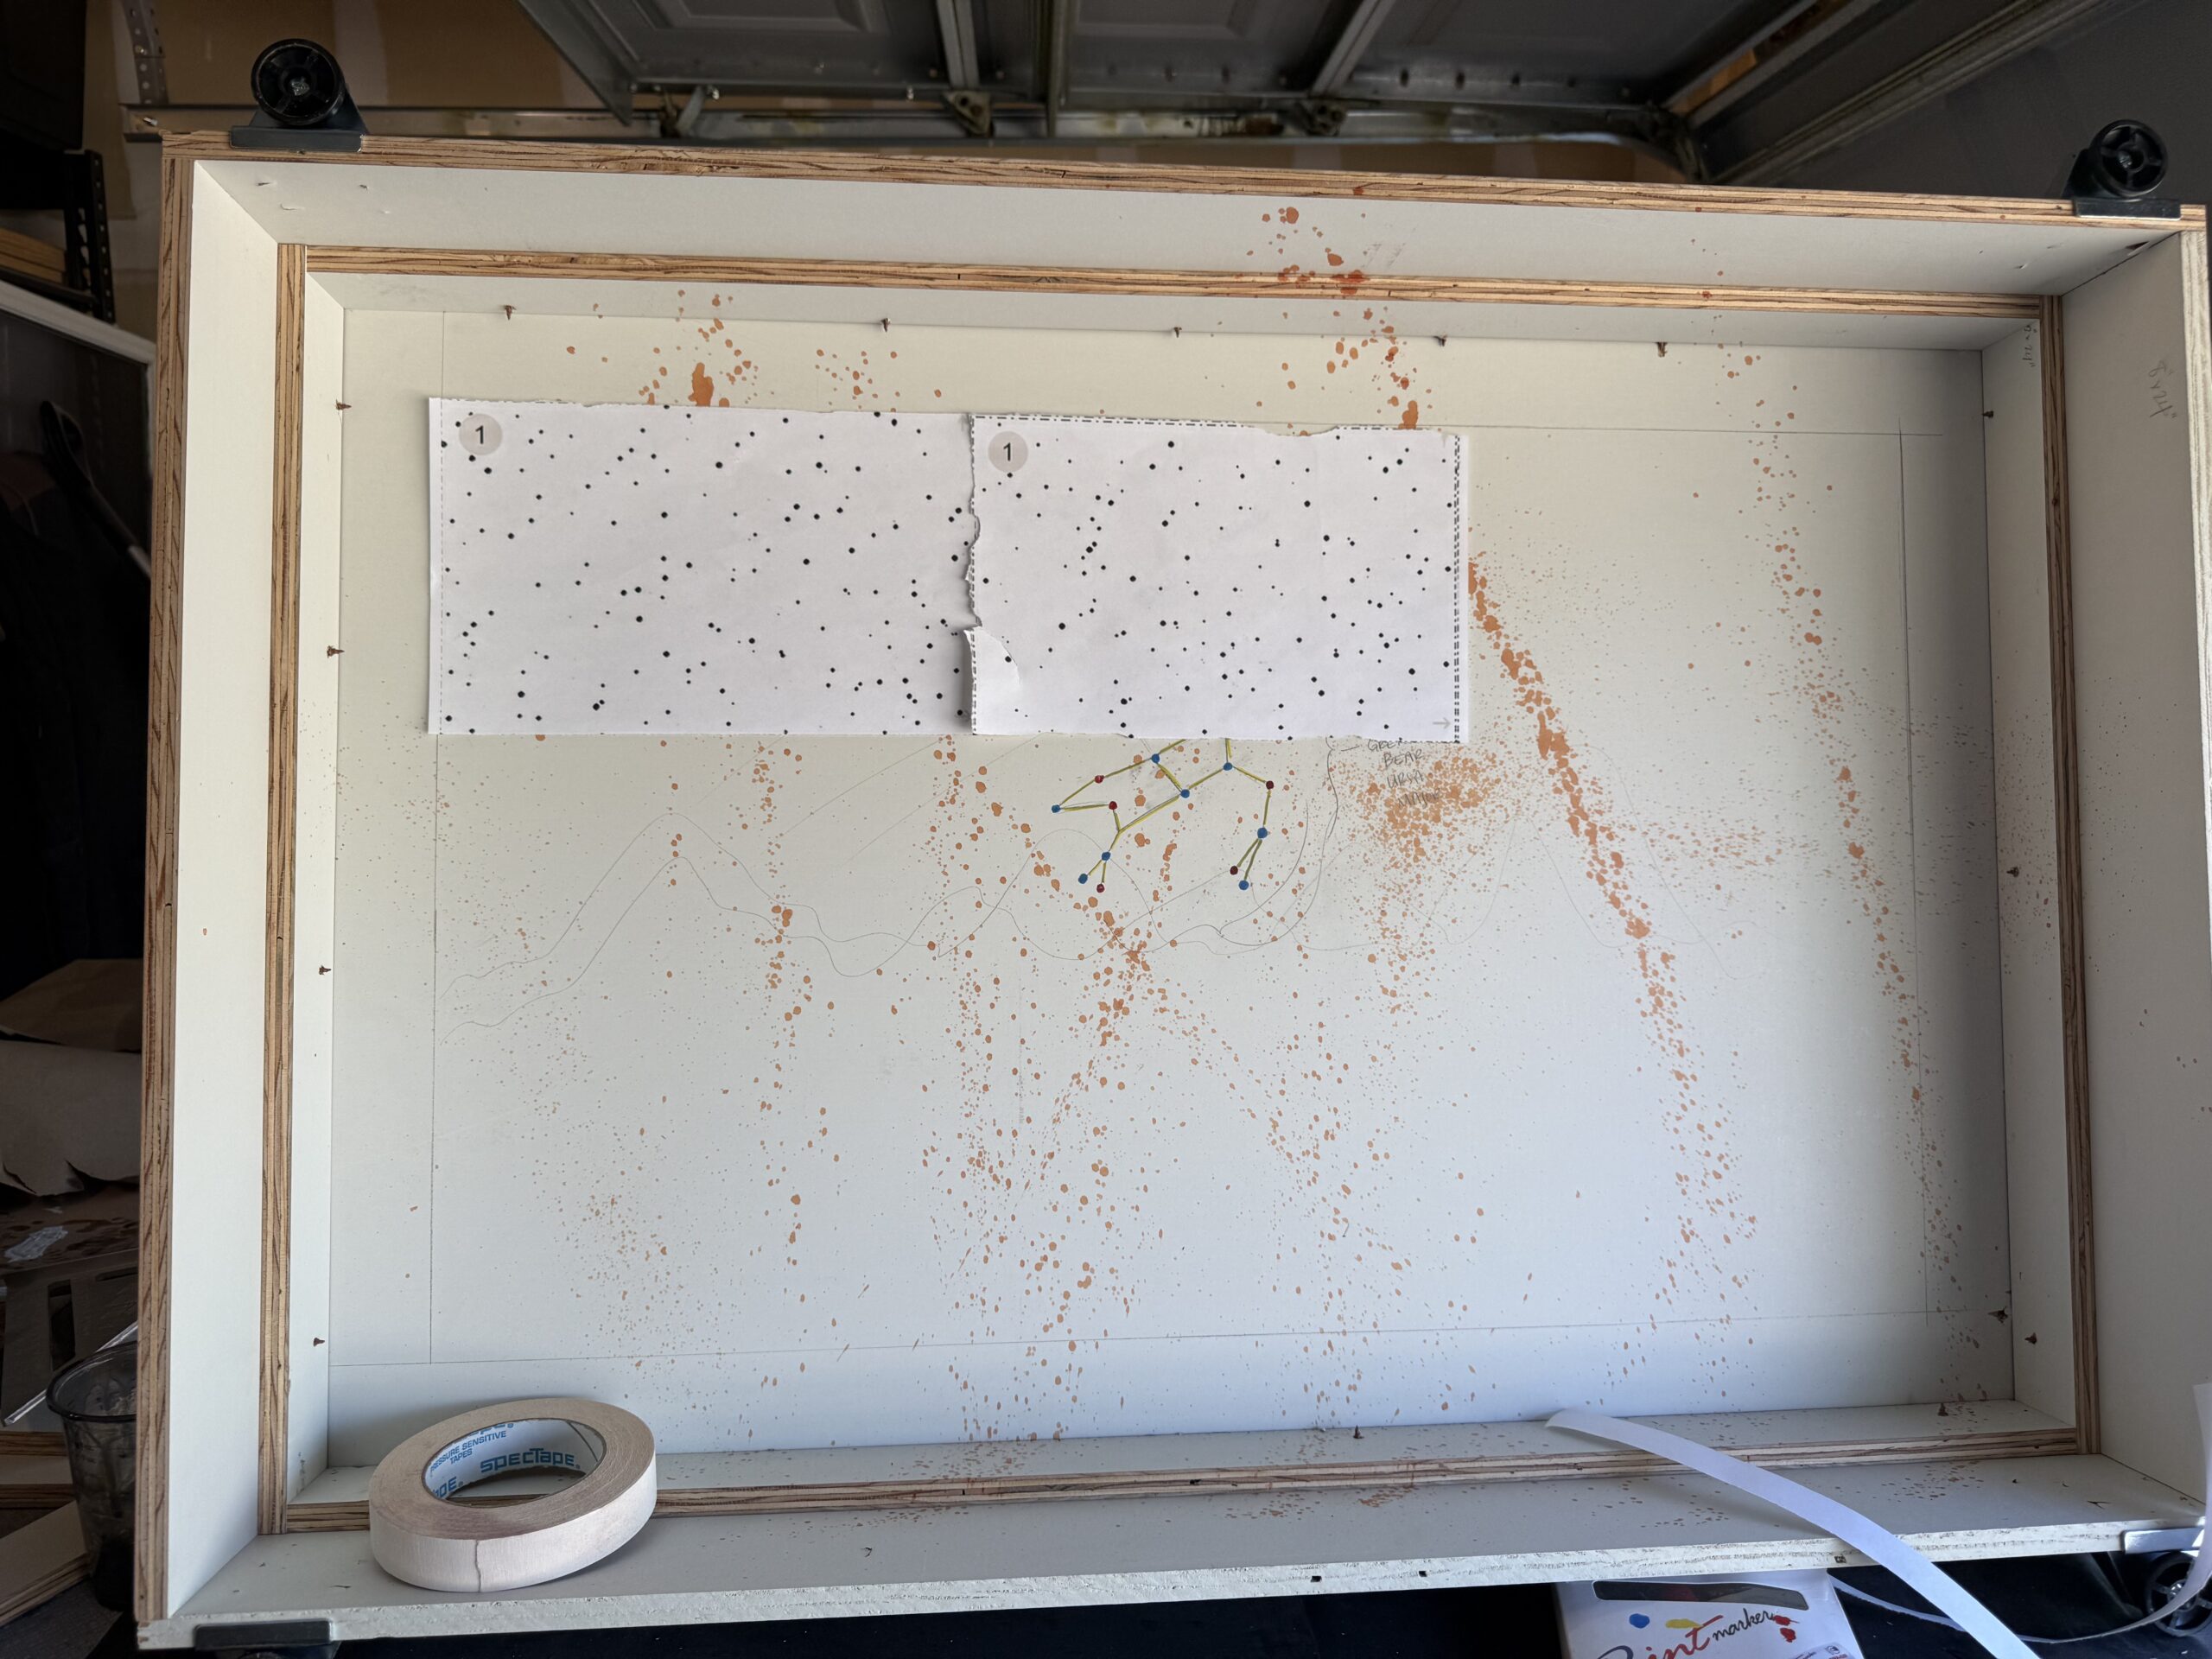
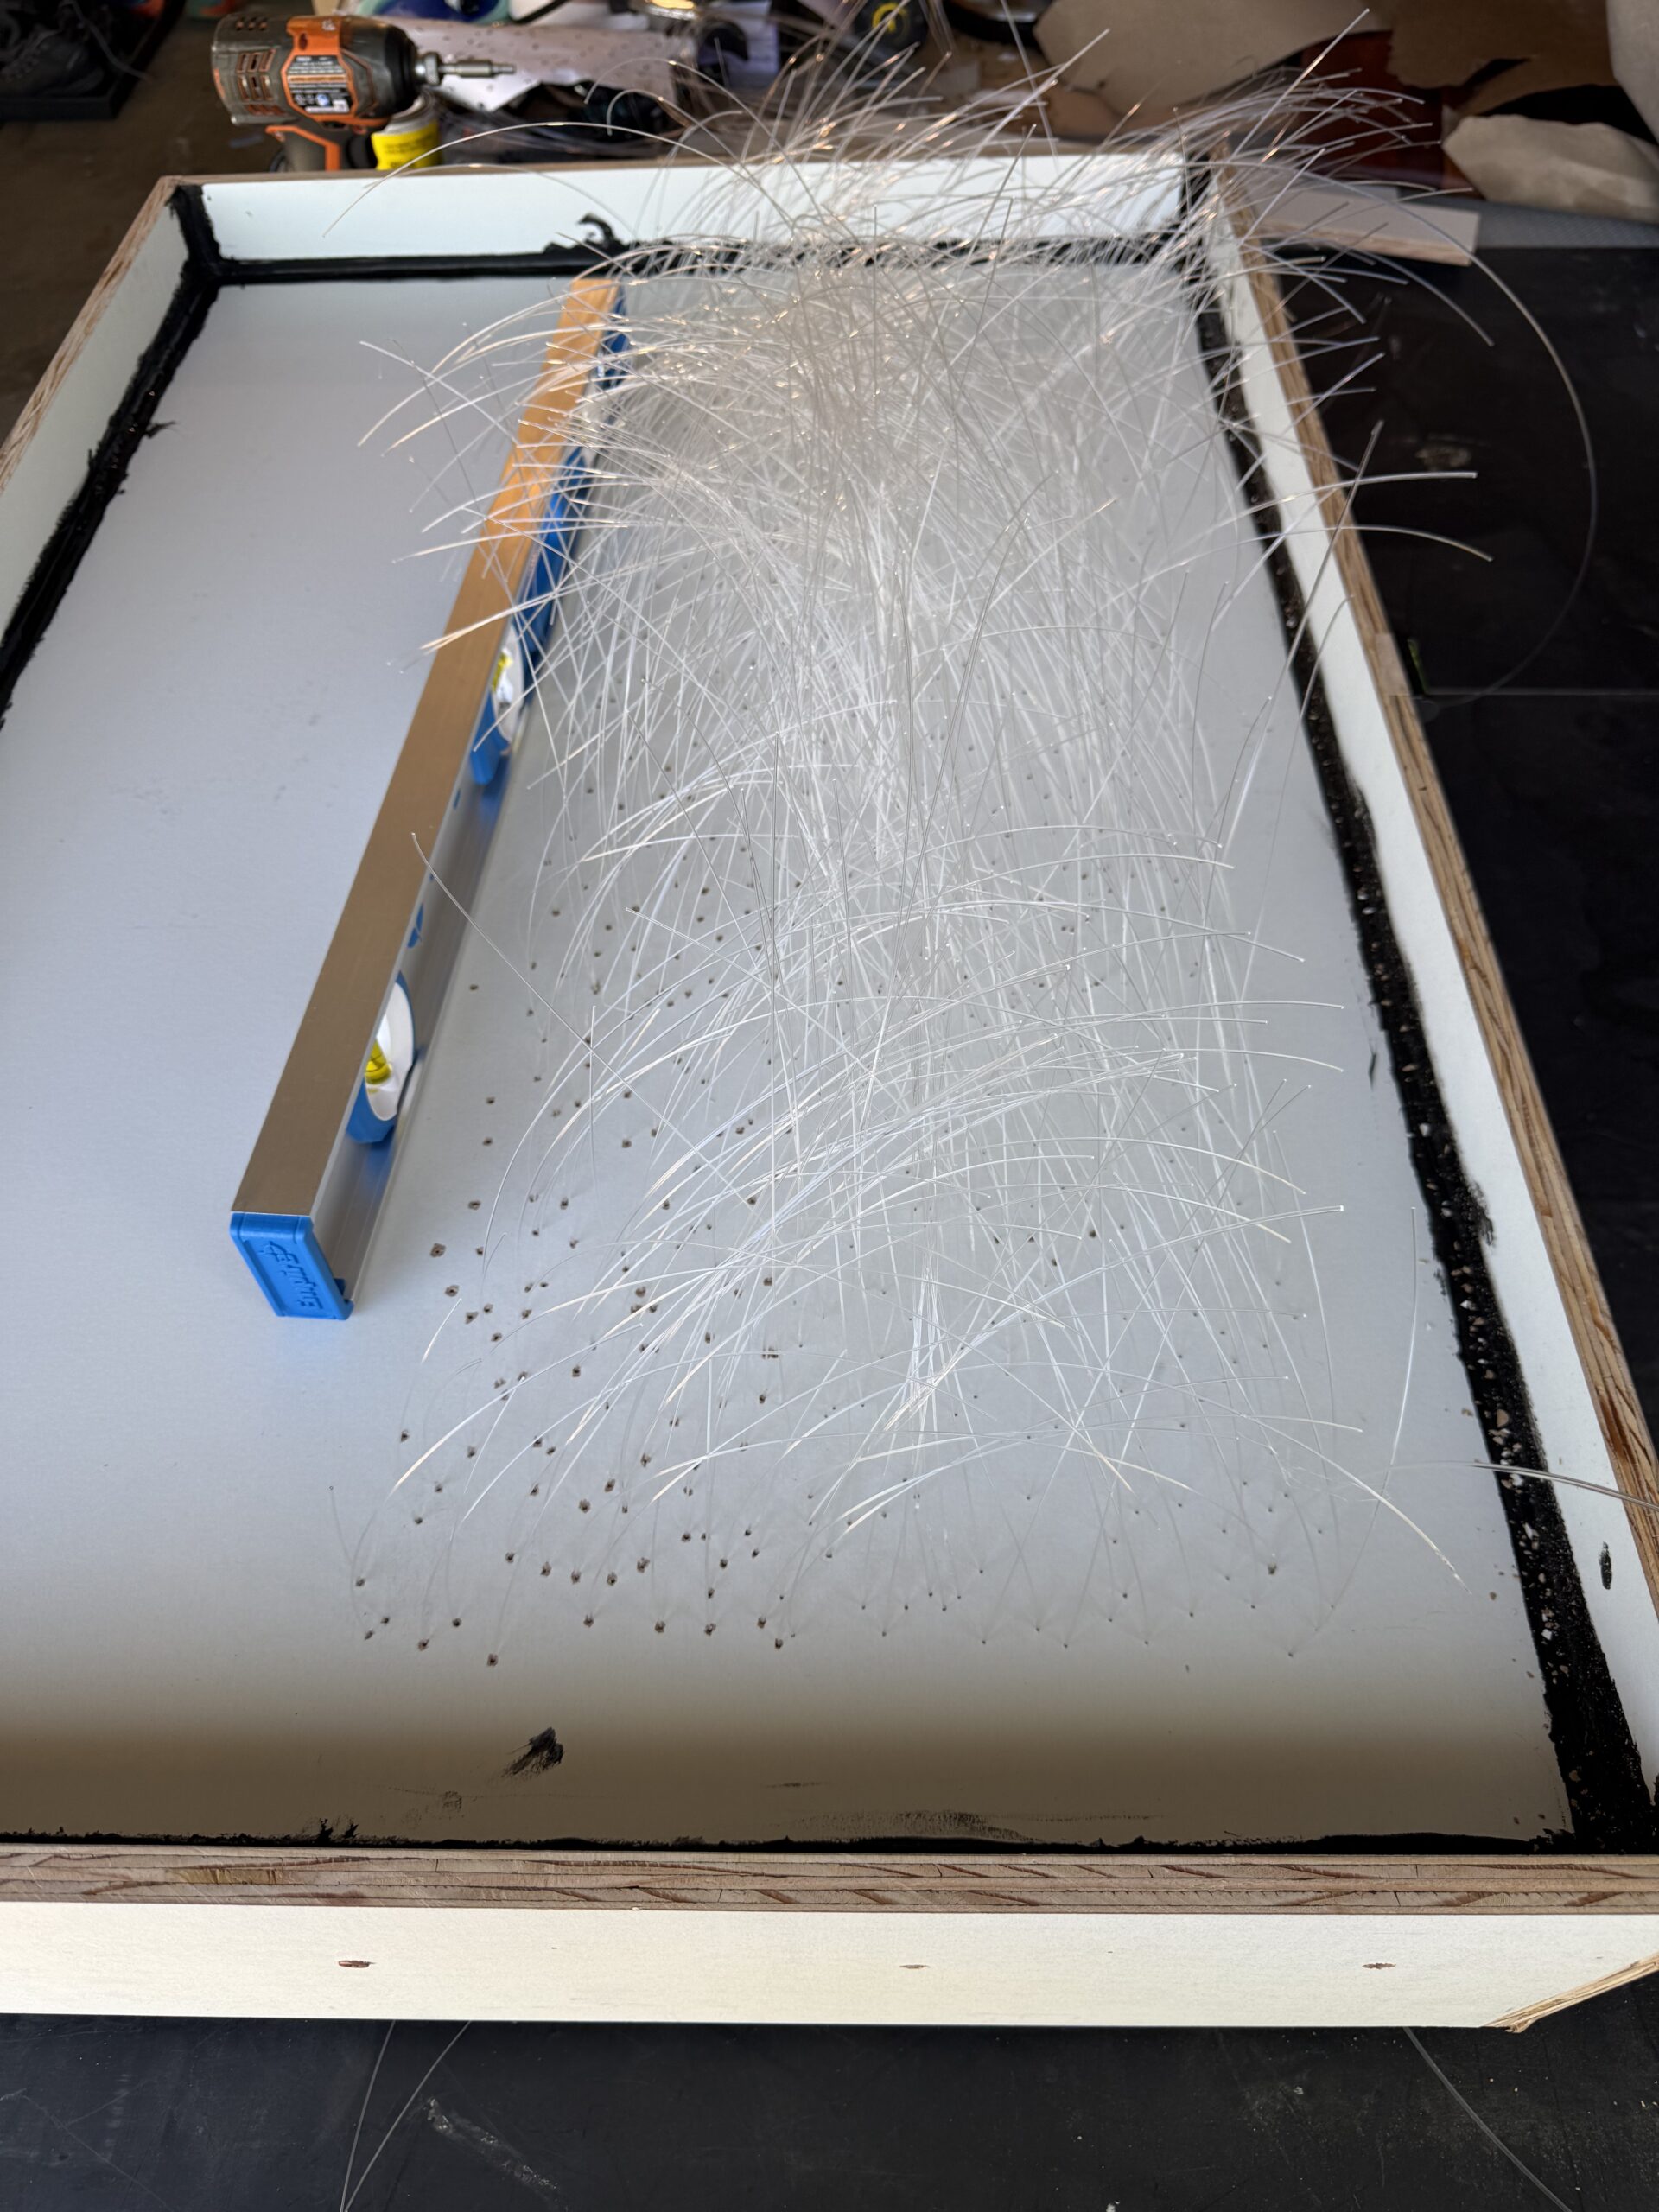
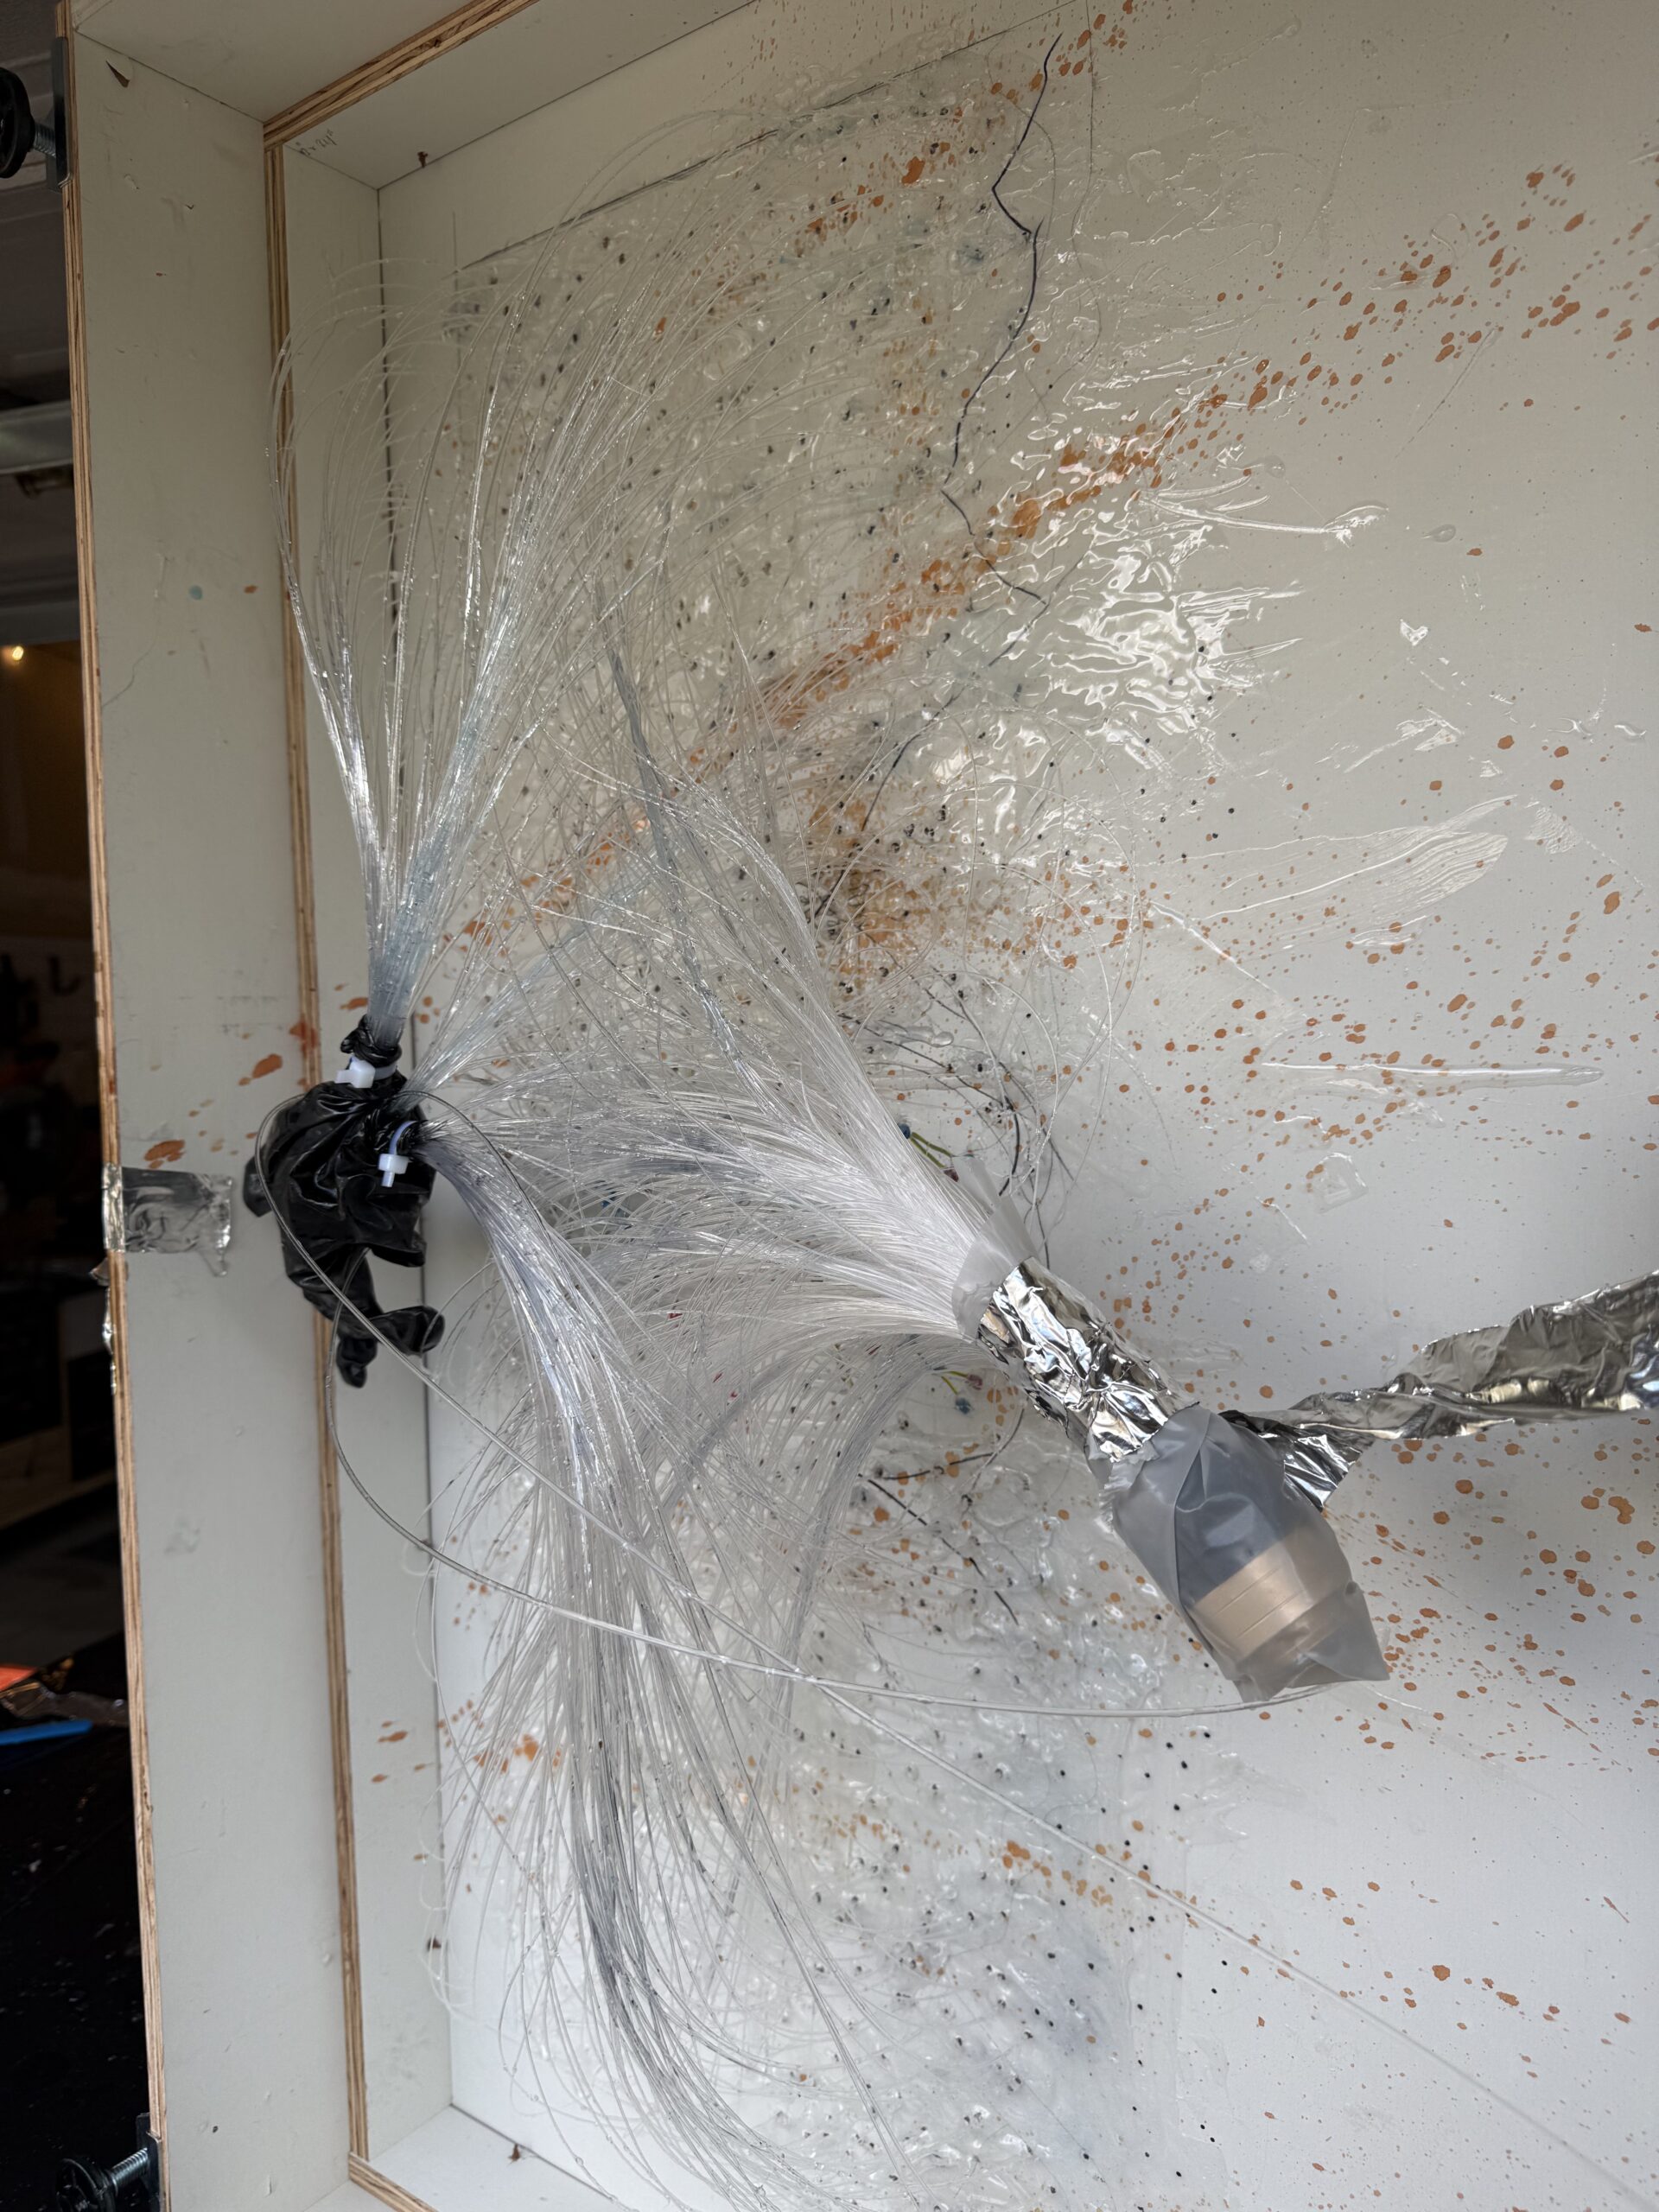
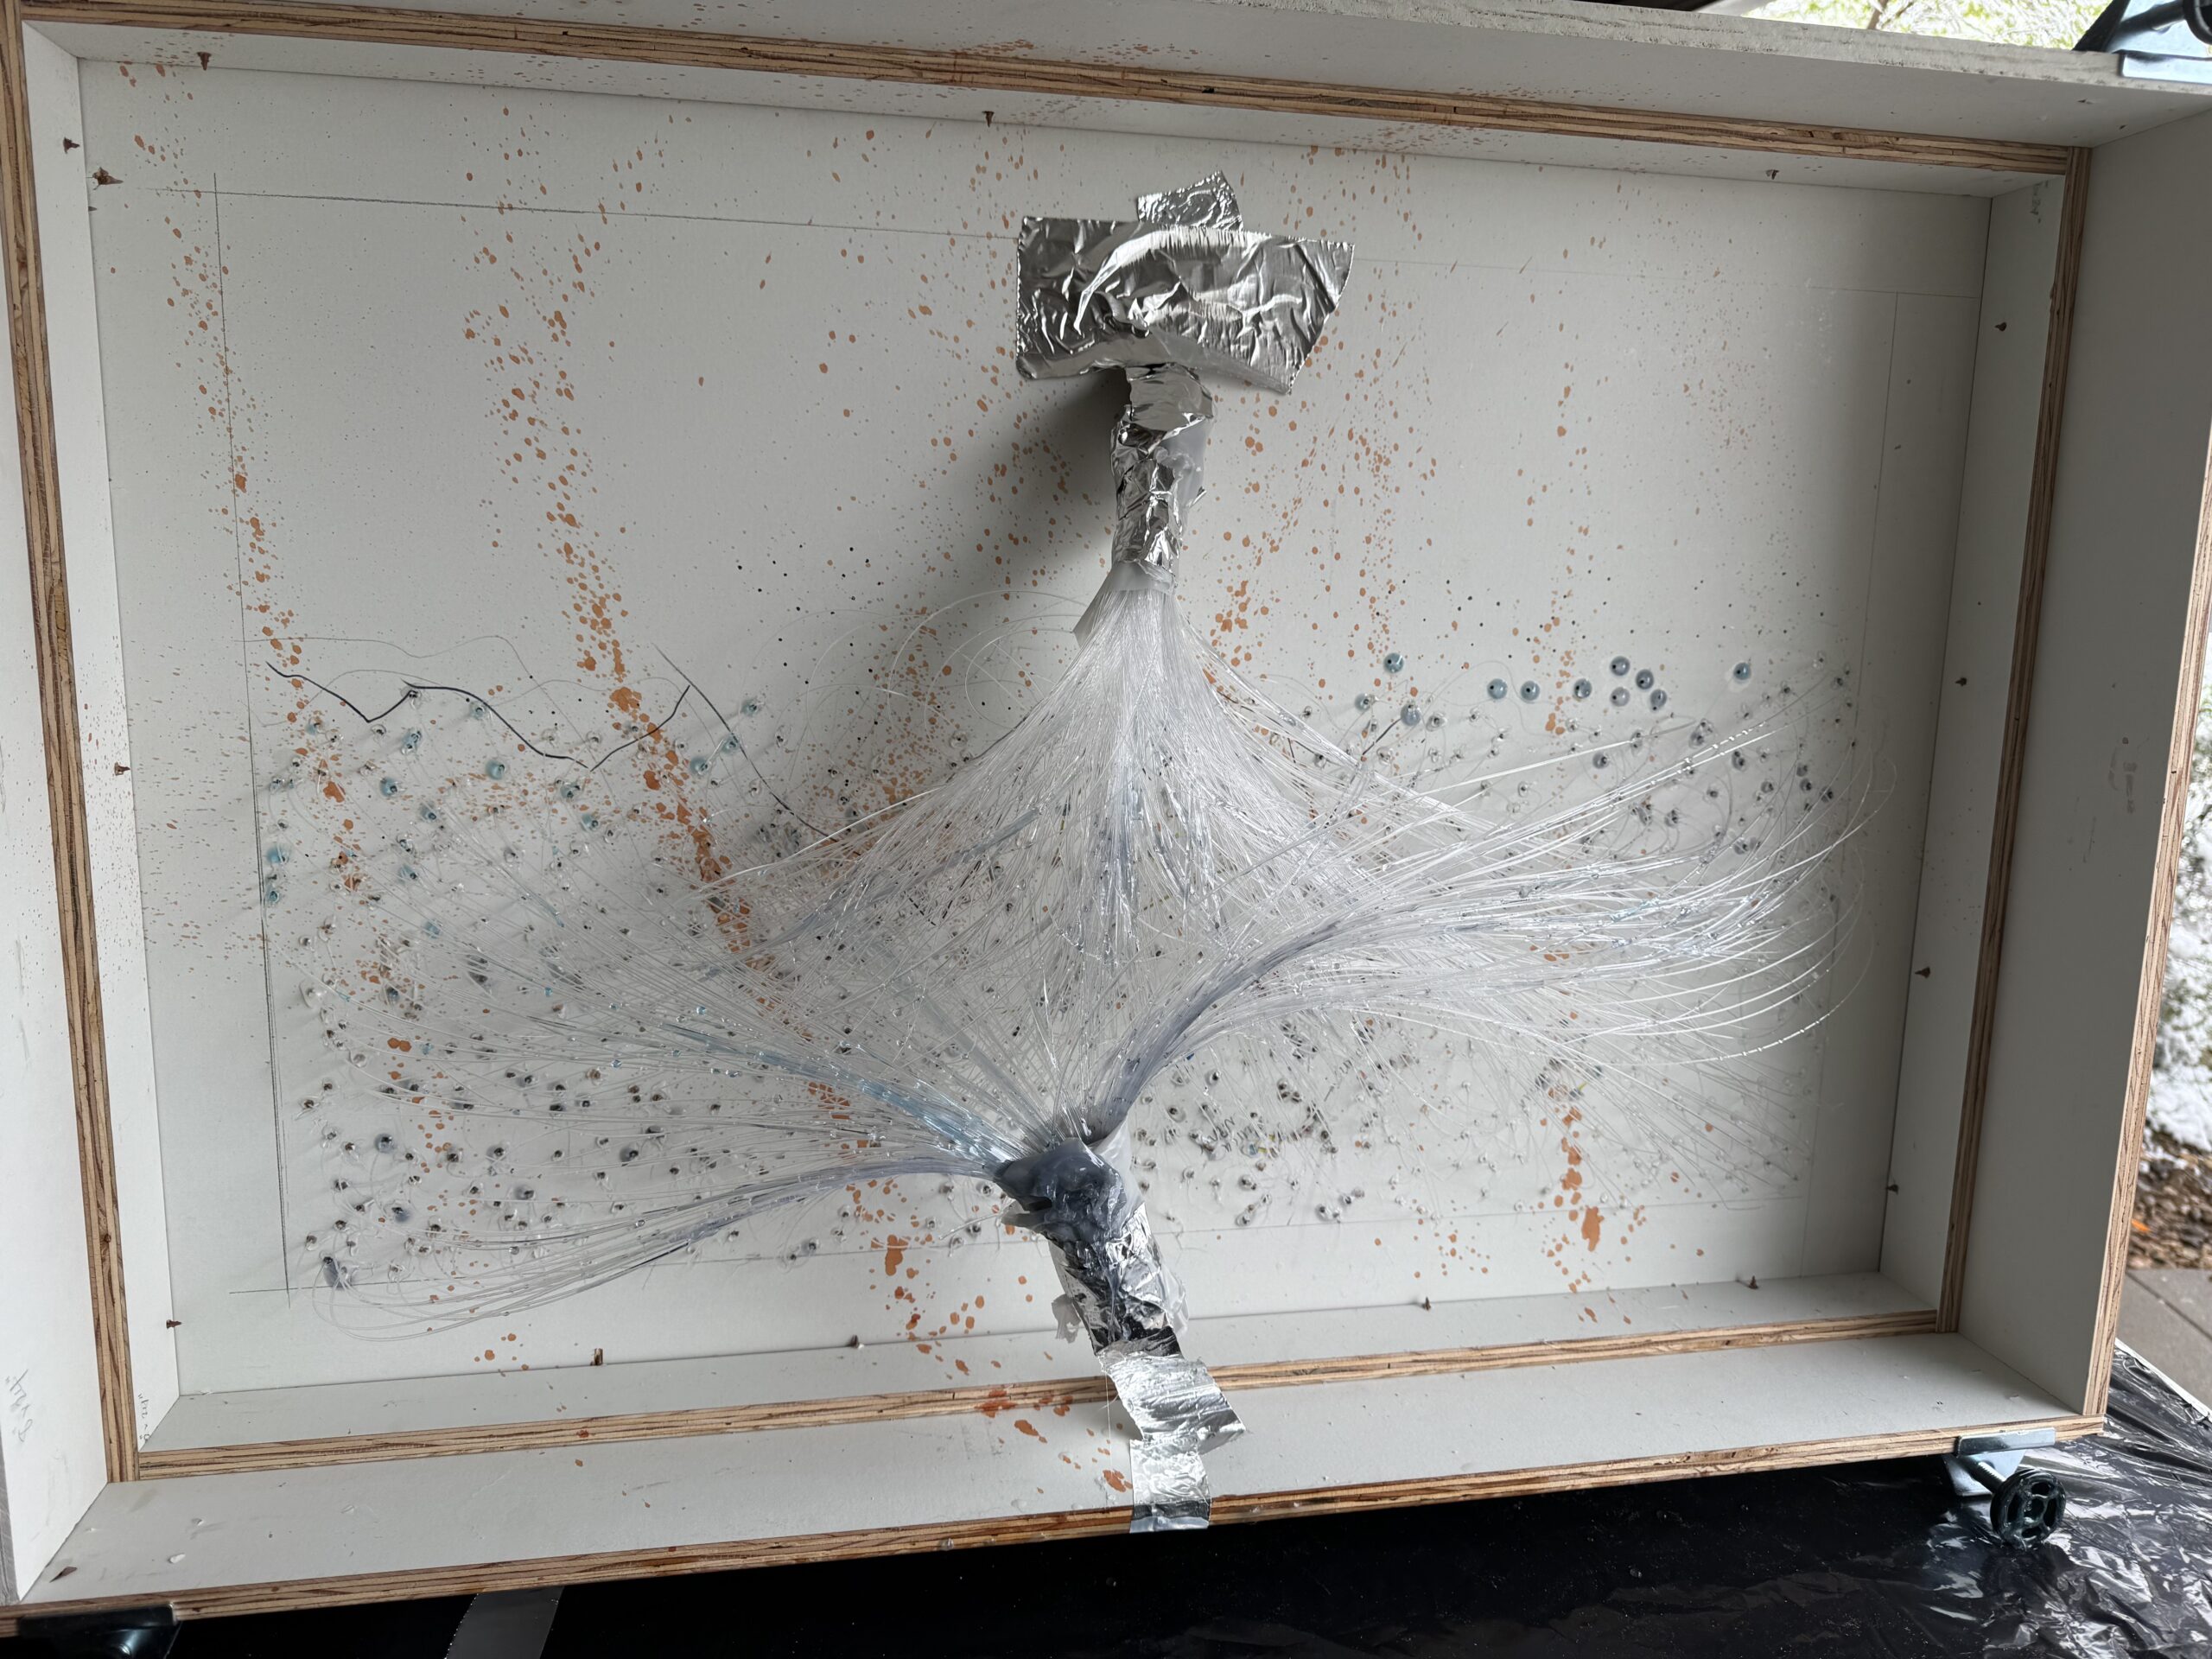
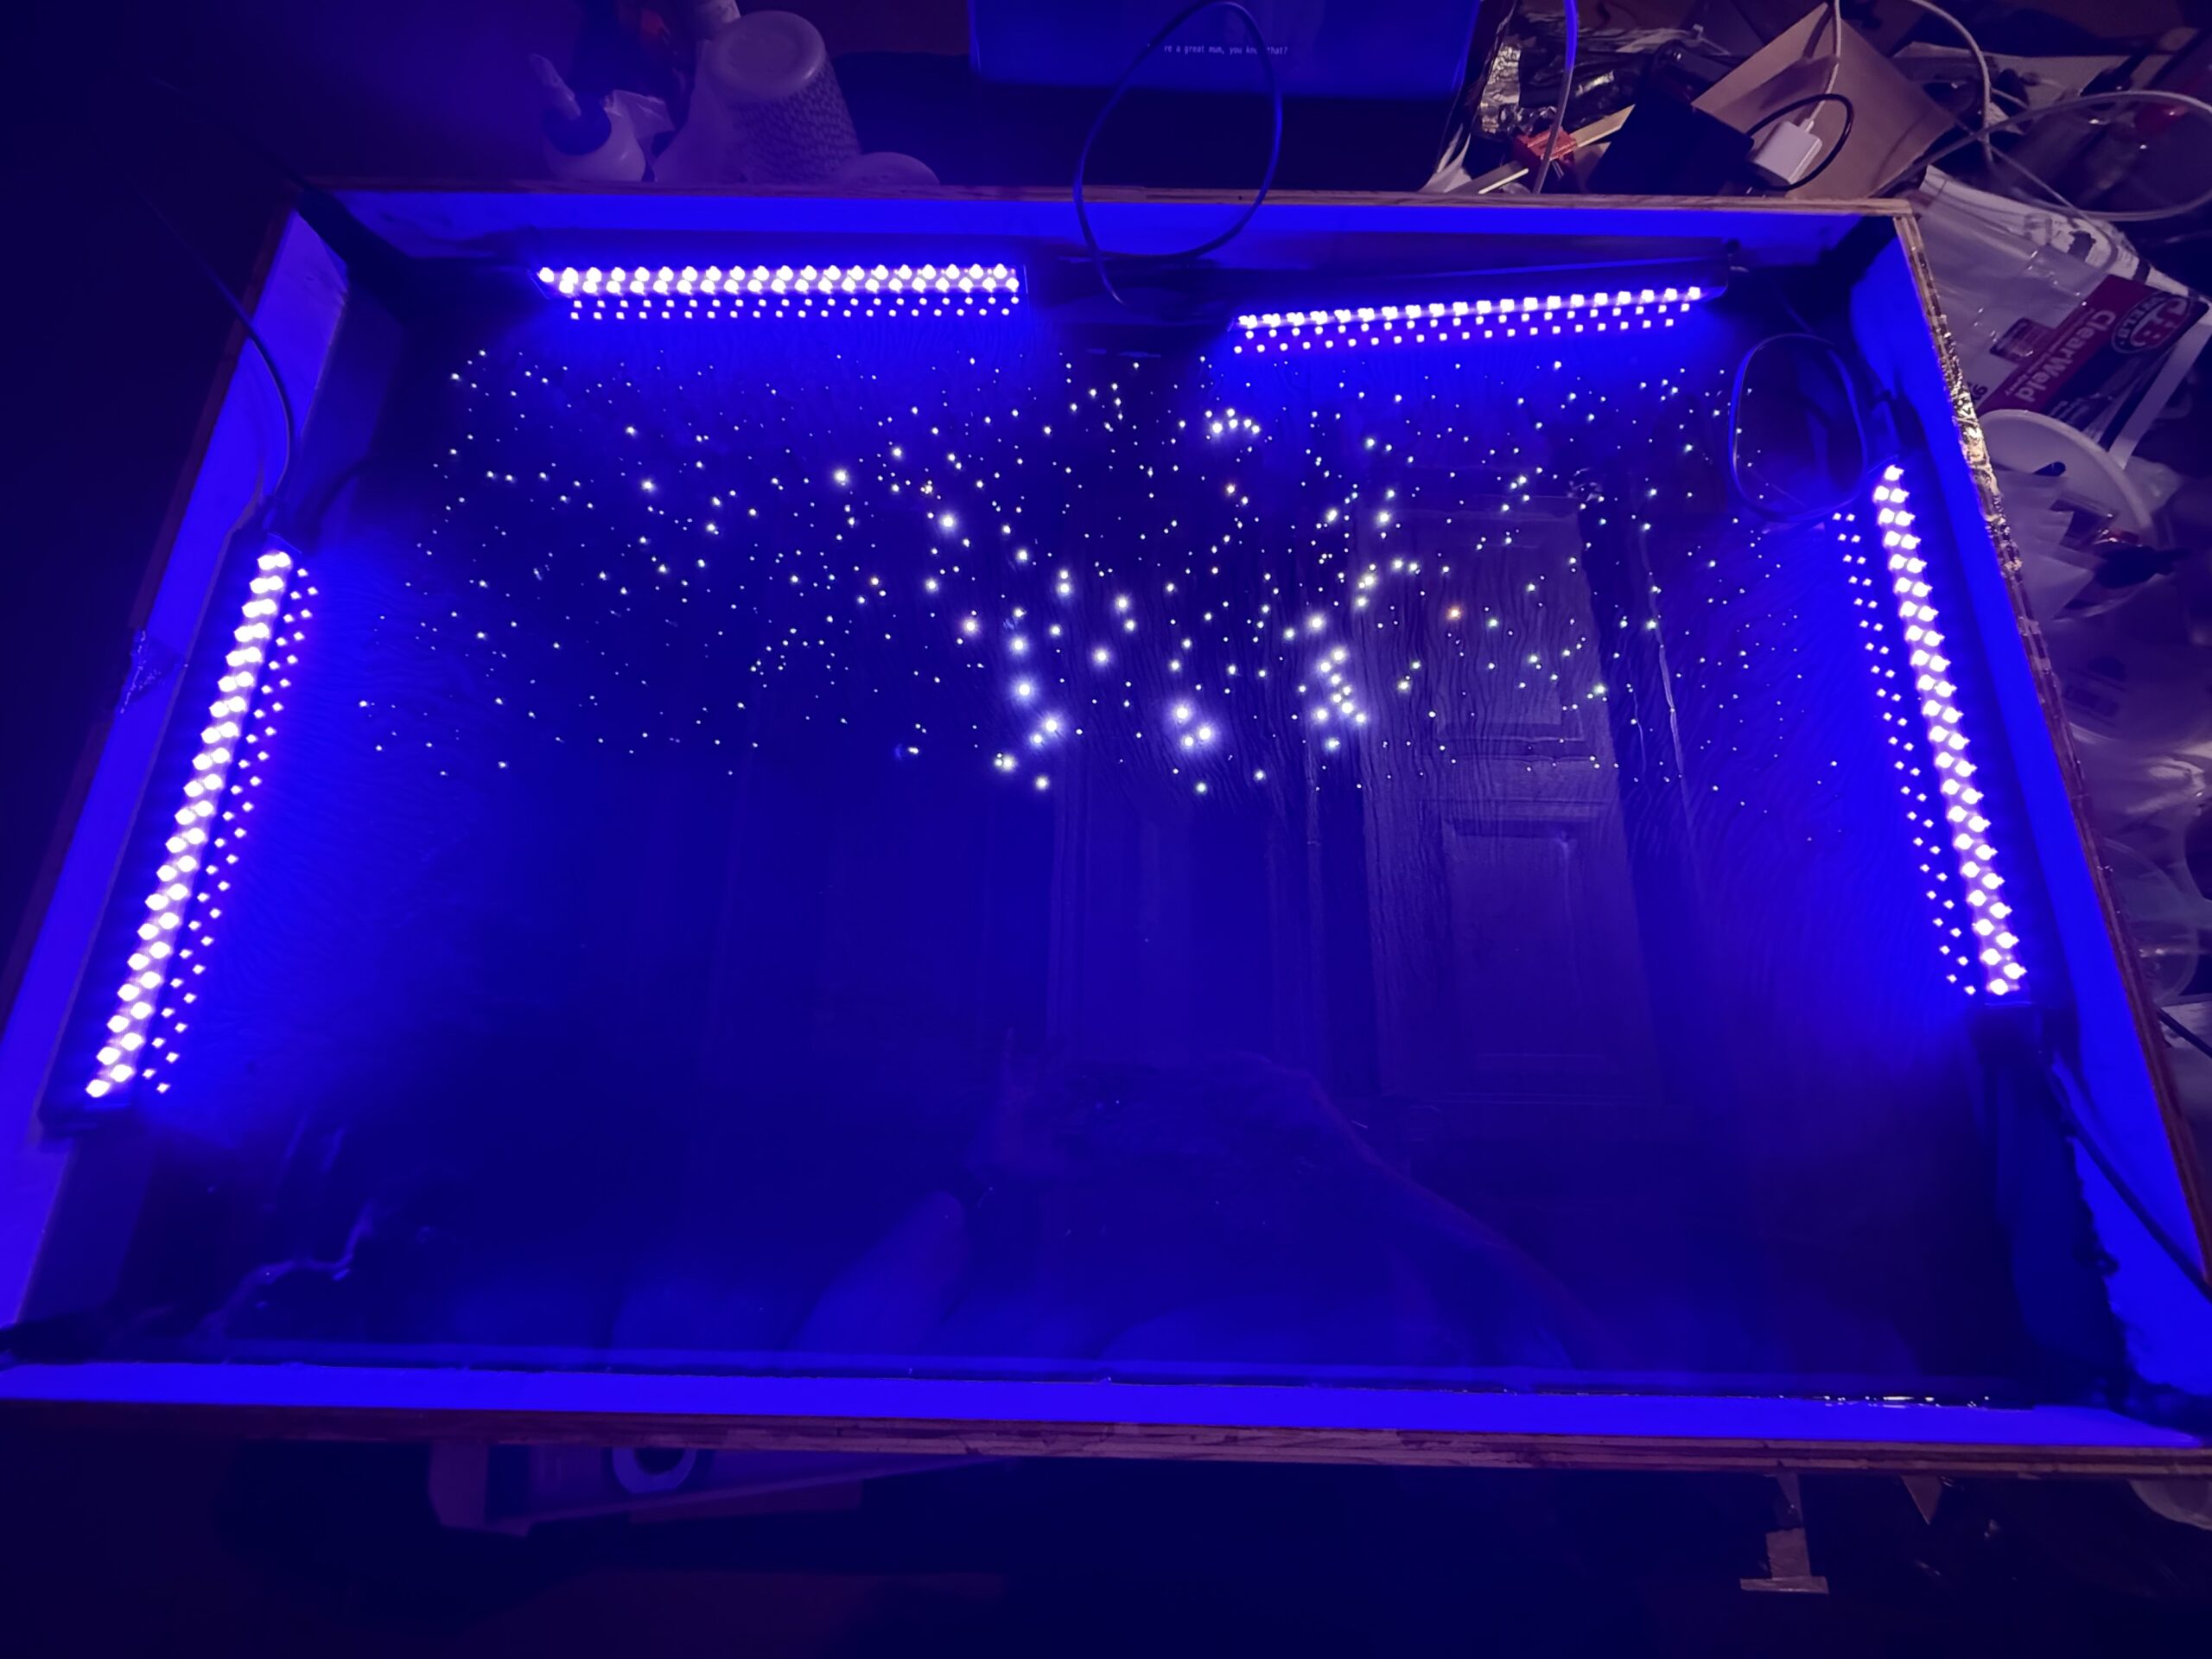
After the mold was built, I mapped the fiber-optic cables. I had Google Gemini generate a random pattern of 450 stars, printed the templates, and taped them to the back of the mold. My micro drill bit broke after 15 minutes, and I switched to a 1/16″ bit — or a size around there…it’s the smallest size before you get into micro bits (this would later be problematic).
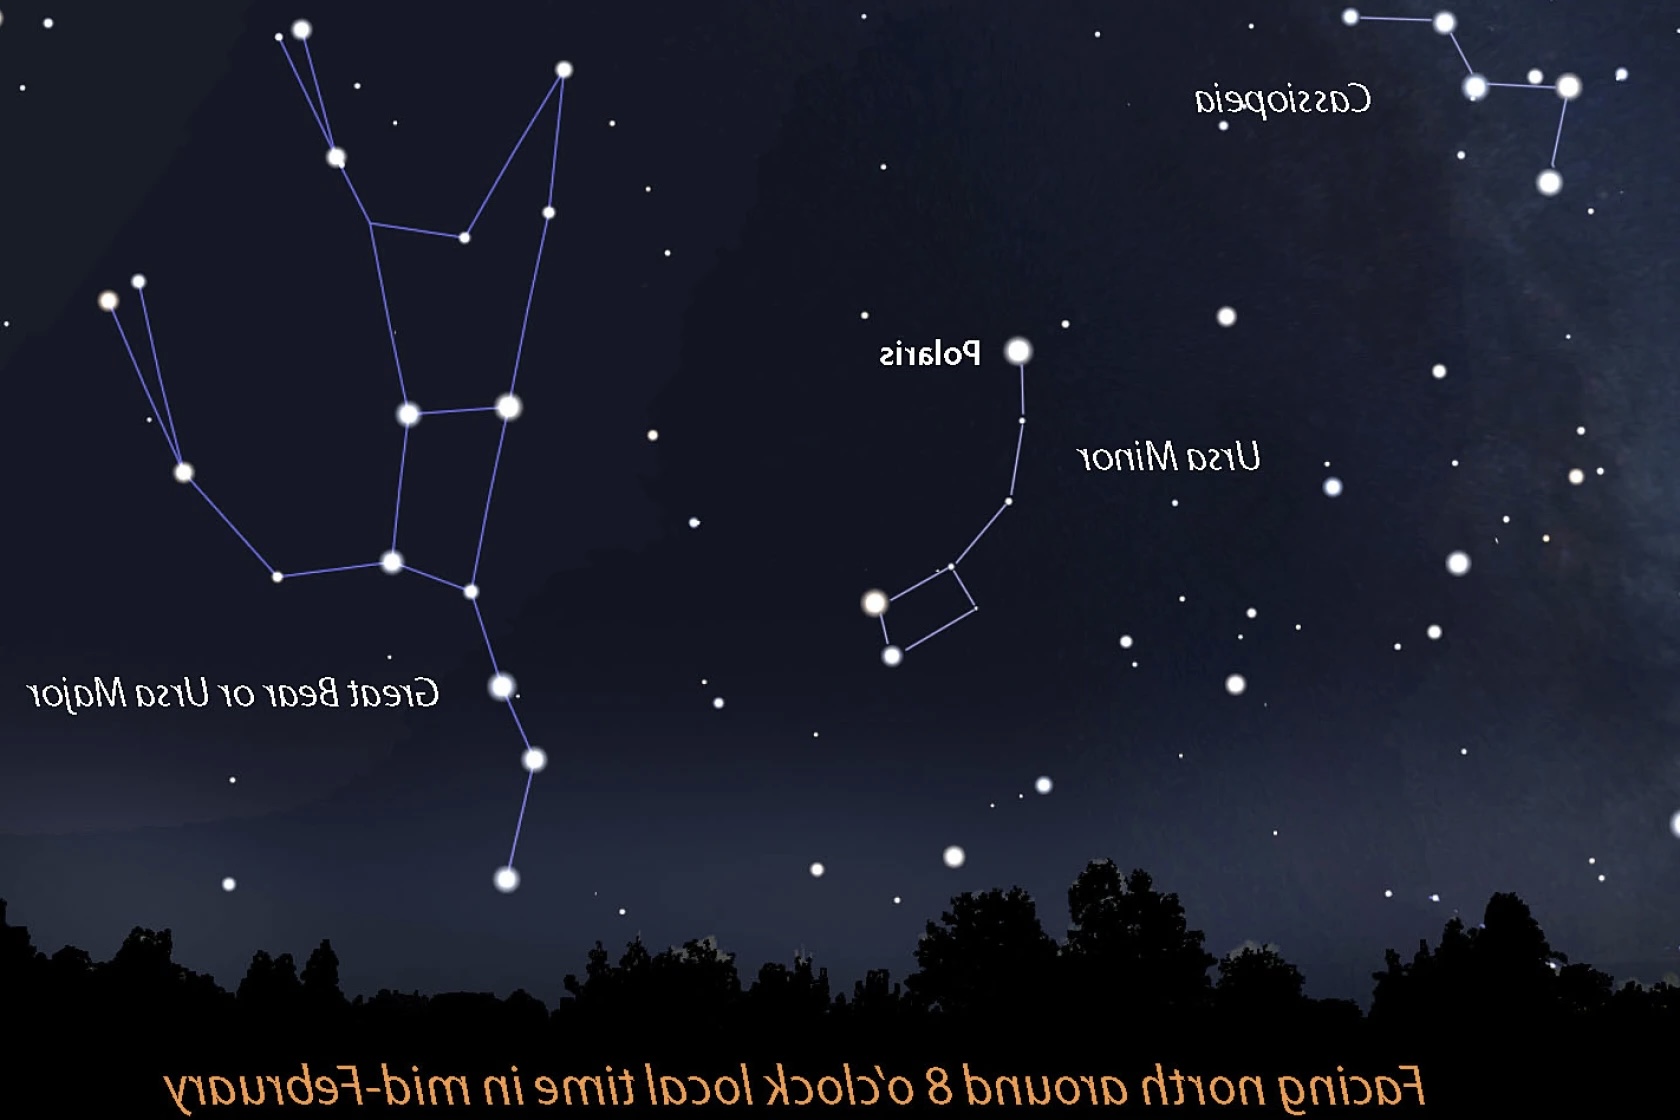
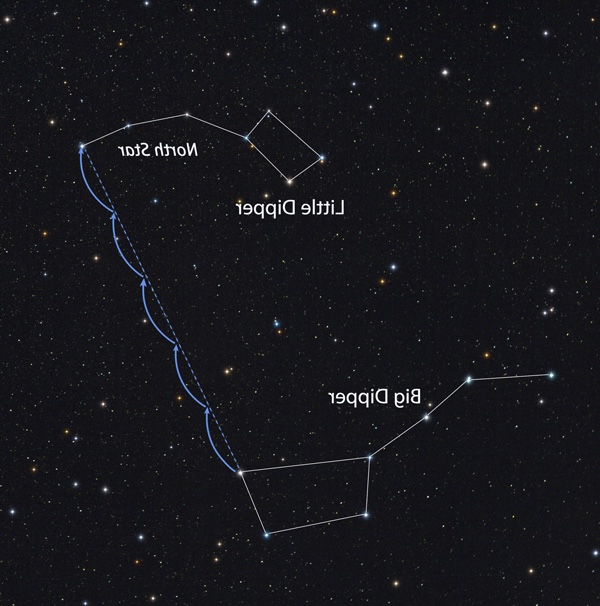
I also added 3 specific star constellations:
- Ursa Major (also known as the Big Dipper or the Great Bear)
- Ursa Minor with Polaris (also known as the Little Dipper and North Star)
- Cassiopeia
Can you actually see these in the finished product? No…But I tried.
Side note: the constellation photos are intentionally mirrored because I was drilling holes through the back of the mold.


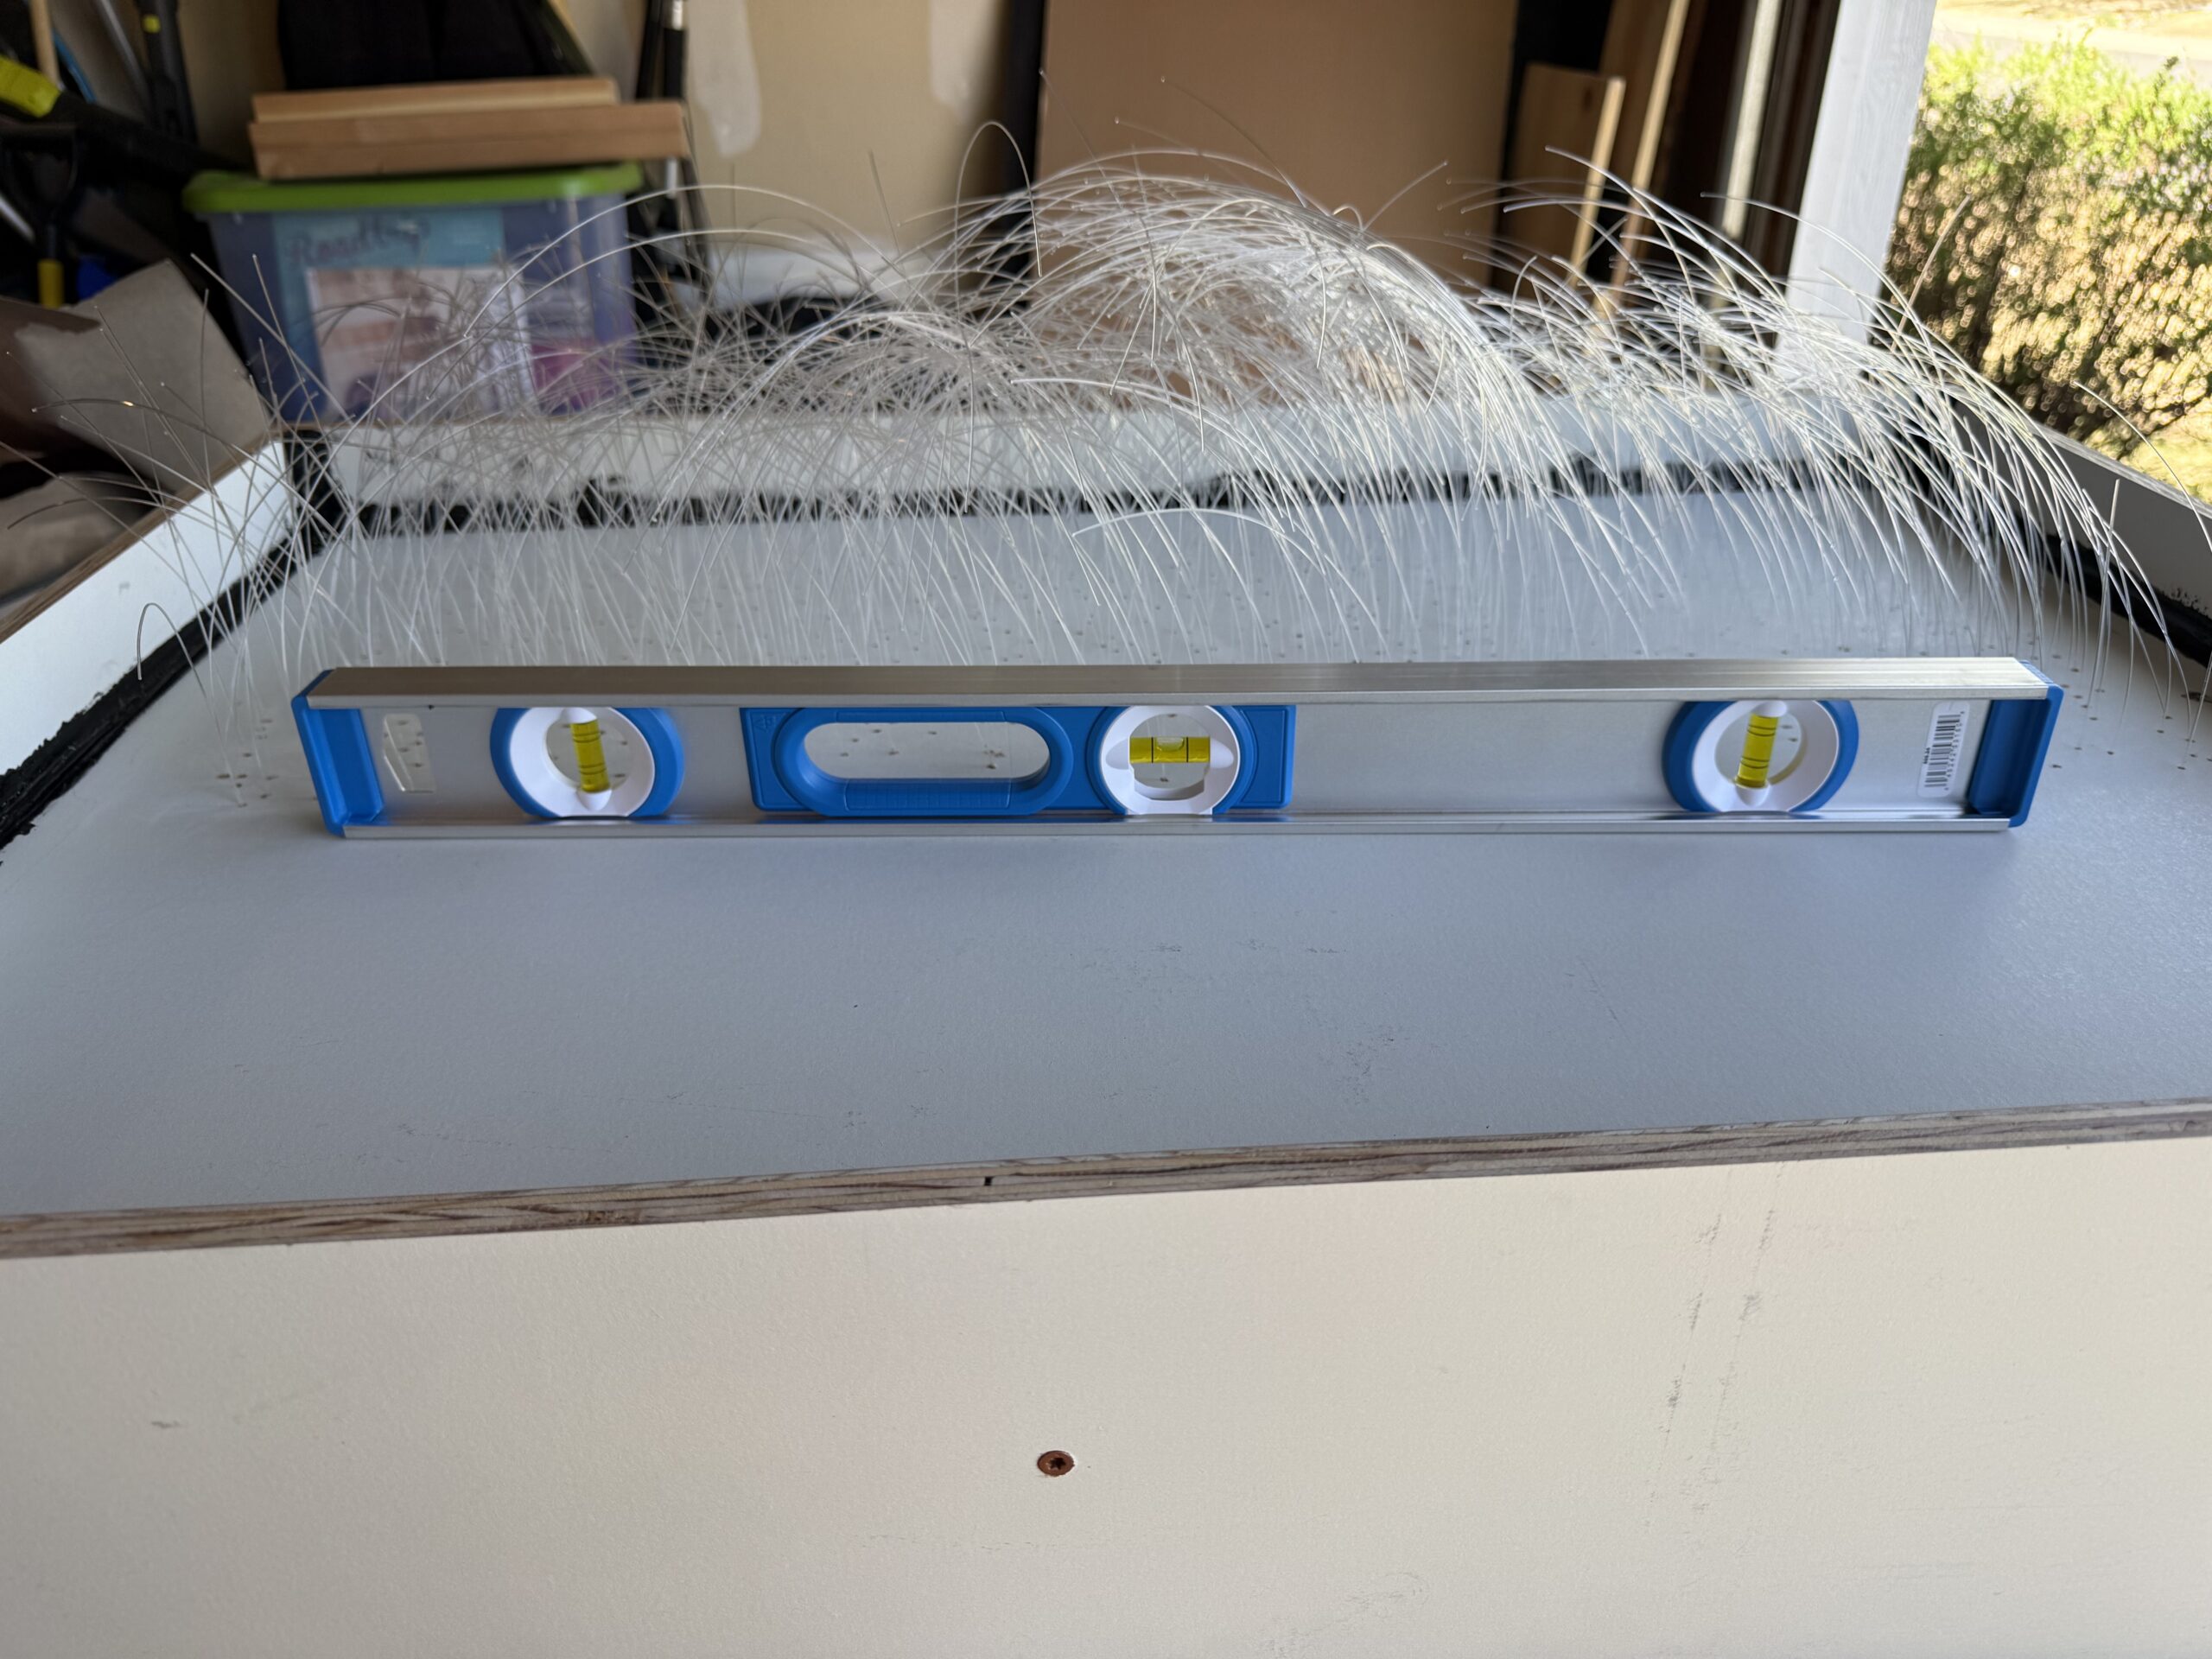
After sliding the cable in, I used hot glue to seal the back around the cables (also problematic, as hot glue causes the wires to deform under heat).
Once I glued all 450 in place and trimmed the long pieces off, I realized 450 wasn’t enough. I drilled 450 more holes and used the trimmed leftover cables — these would be secured together in another motor. Here lies another problem: I already glued an entire starscape, which meant I had to finagle the drill and wires between the ones I had already placed, making it difficult to seal them with hot glue.
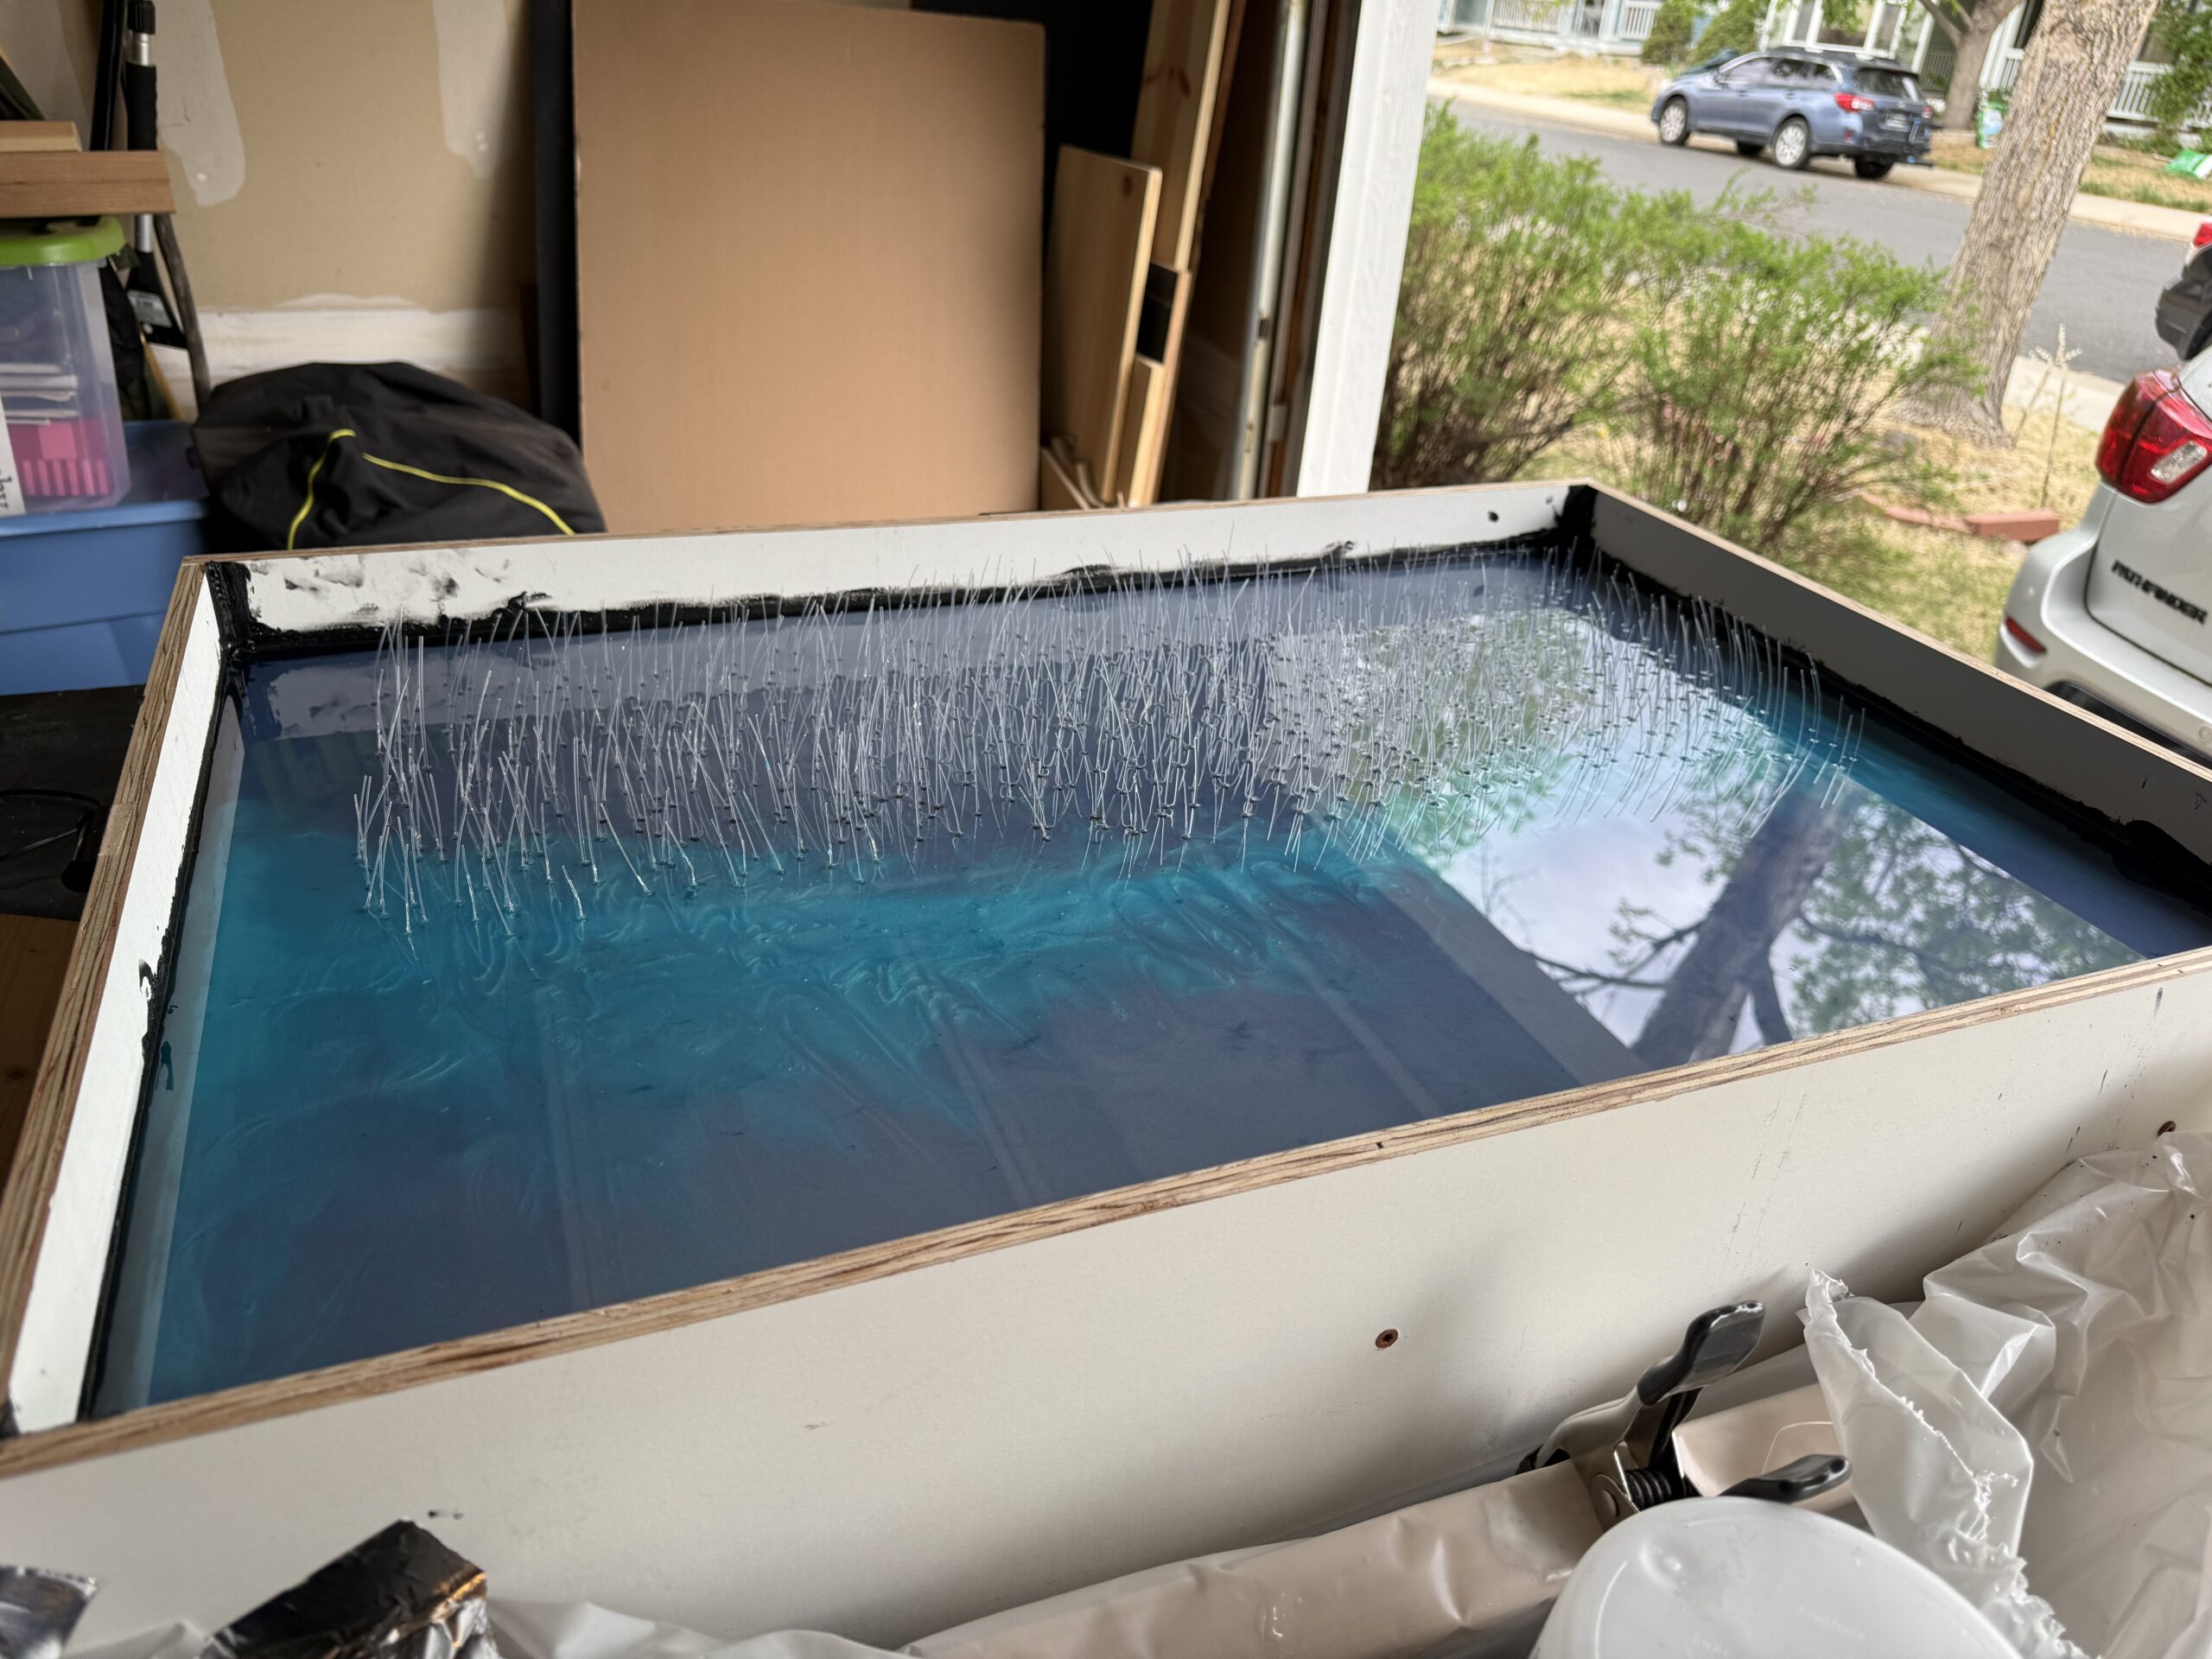
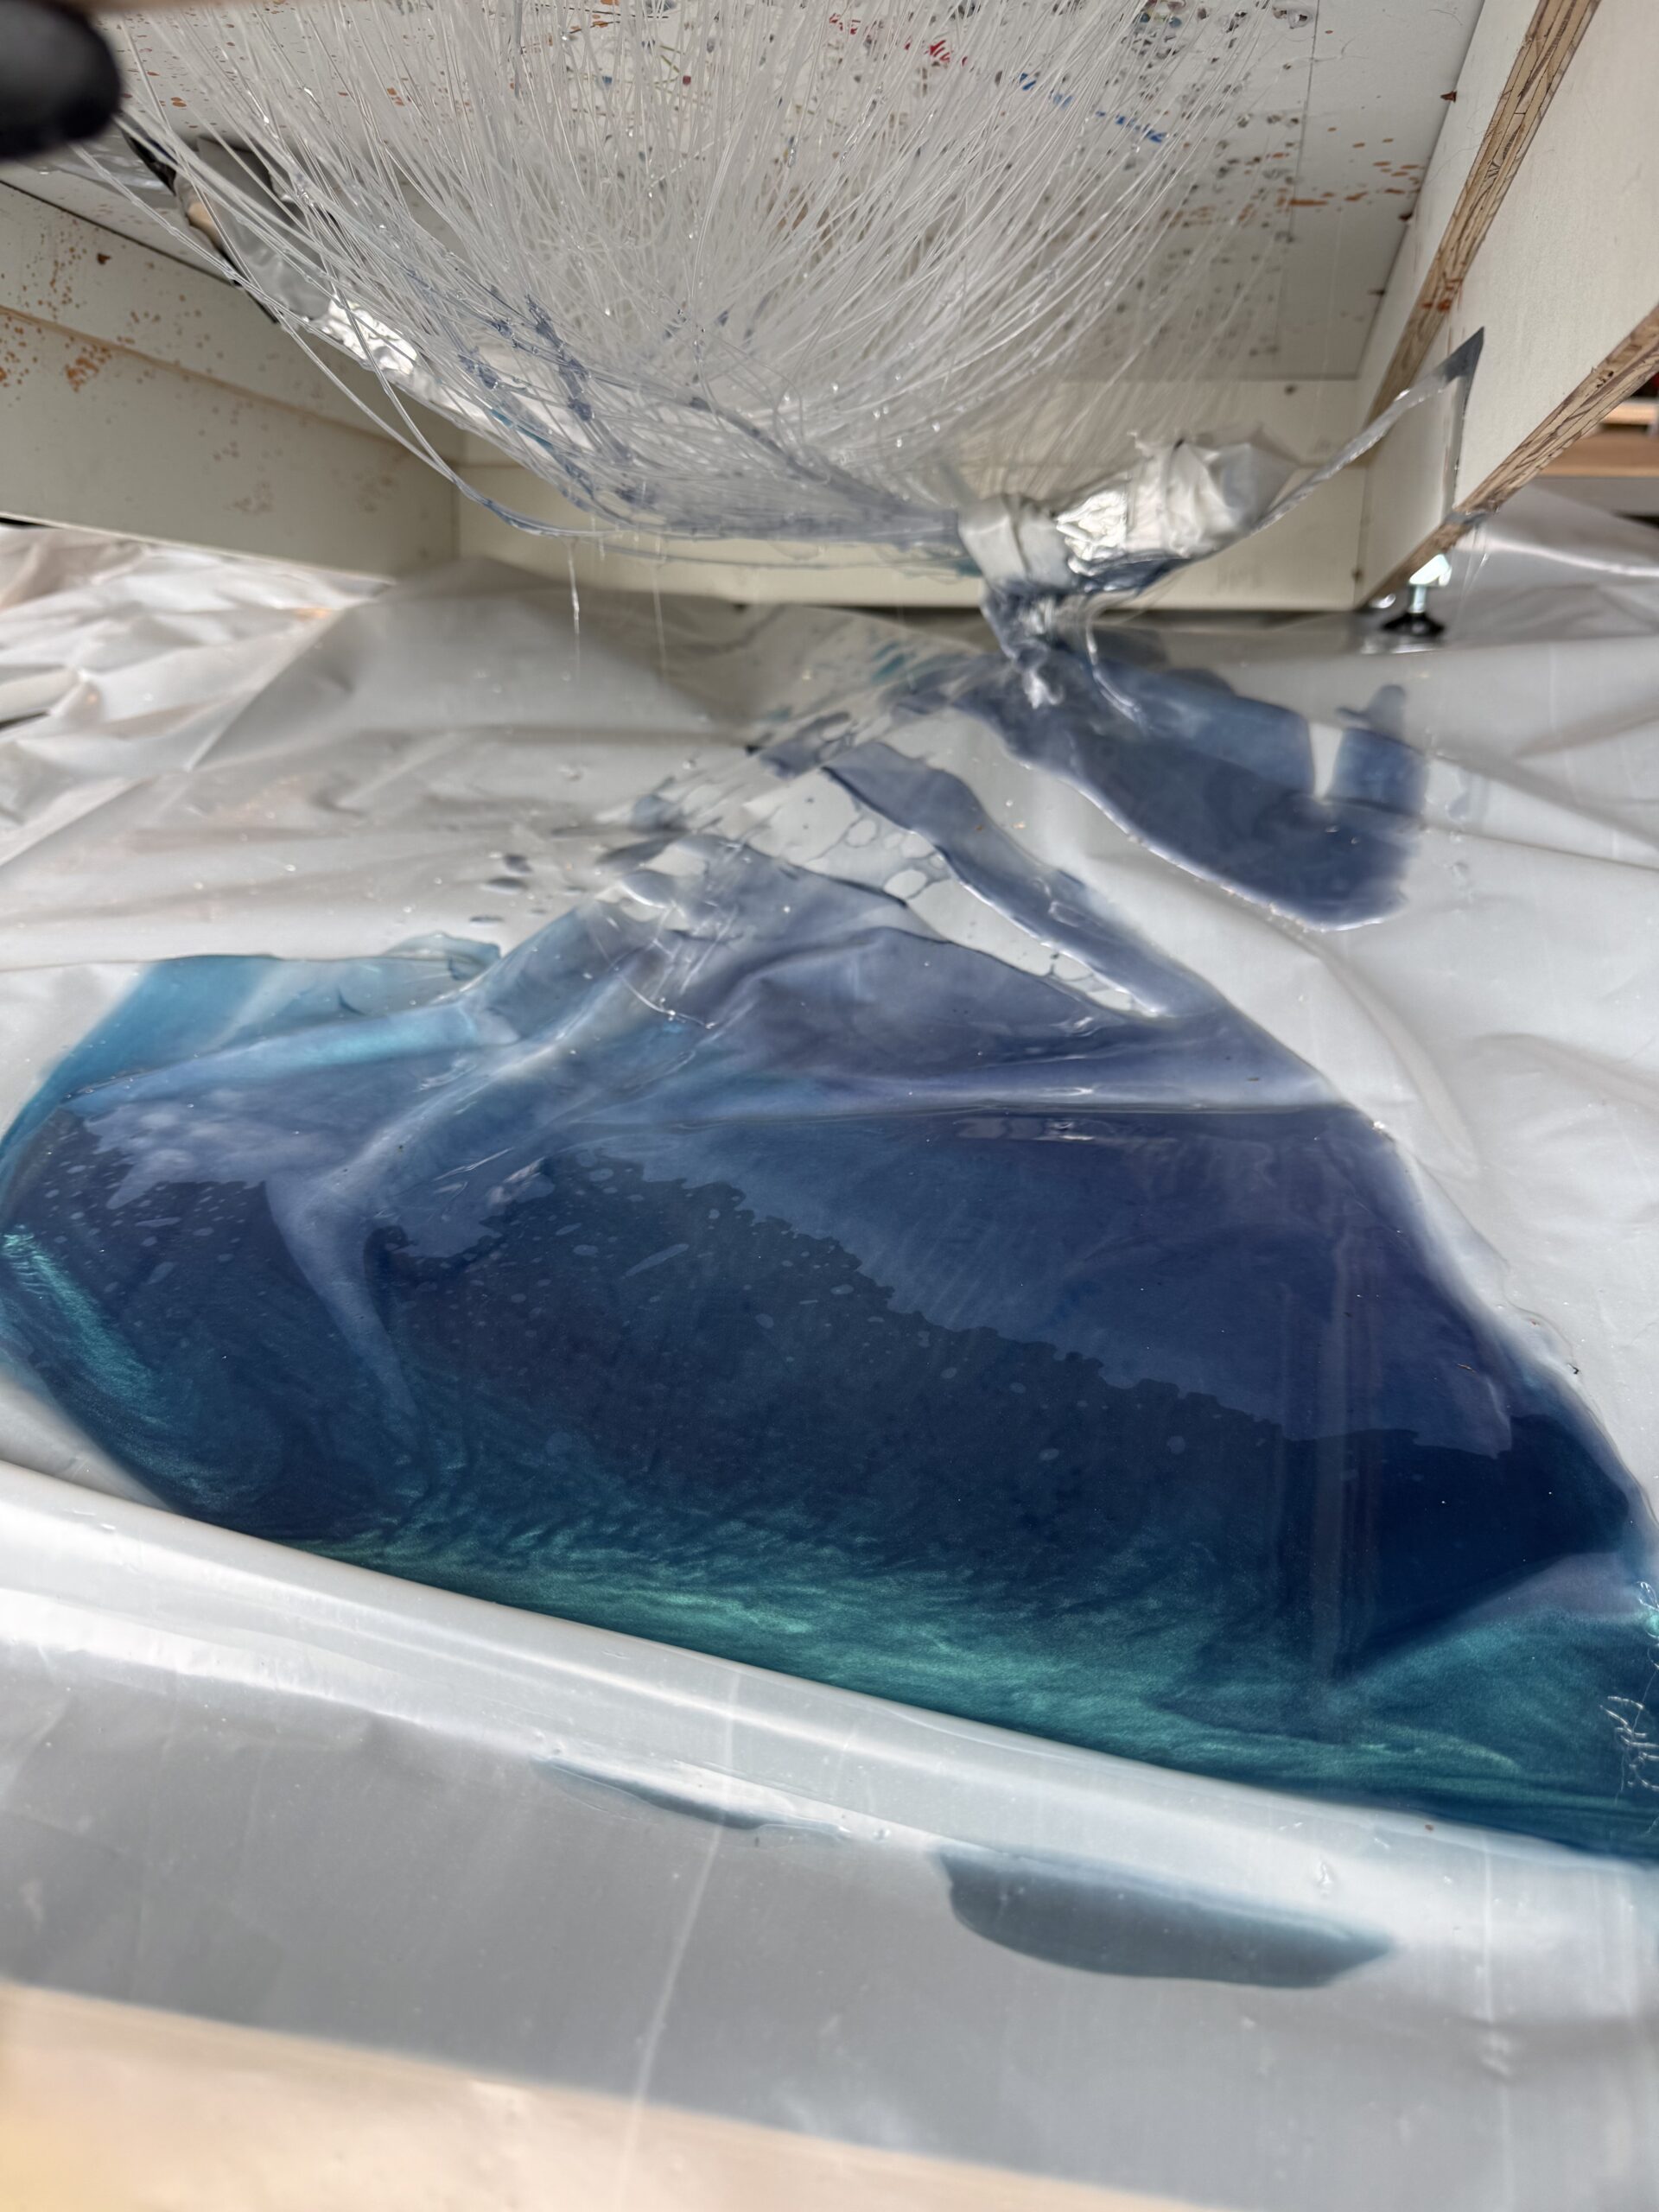
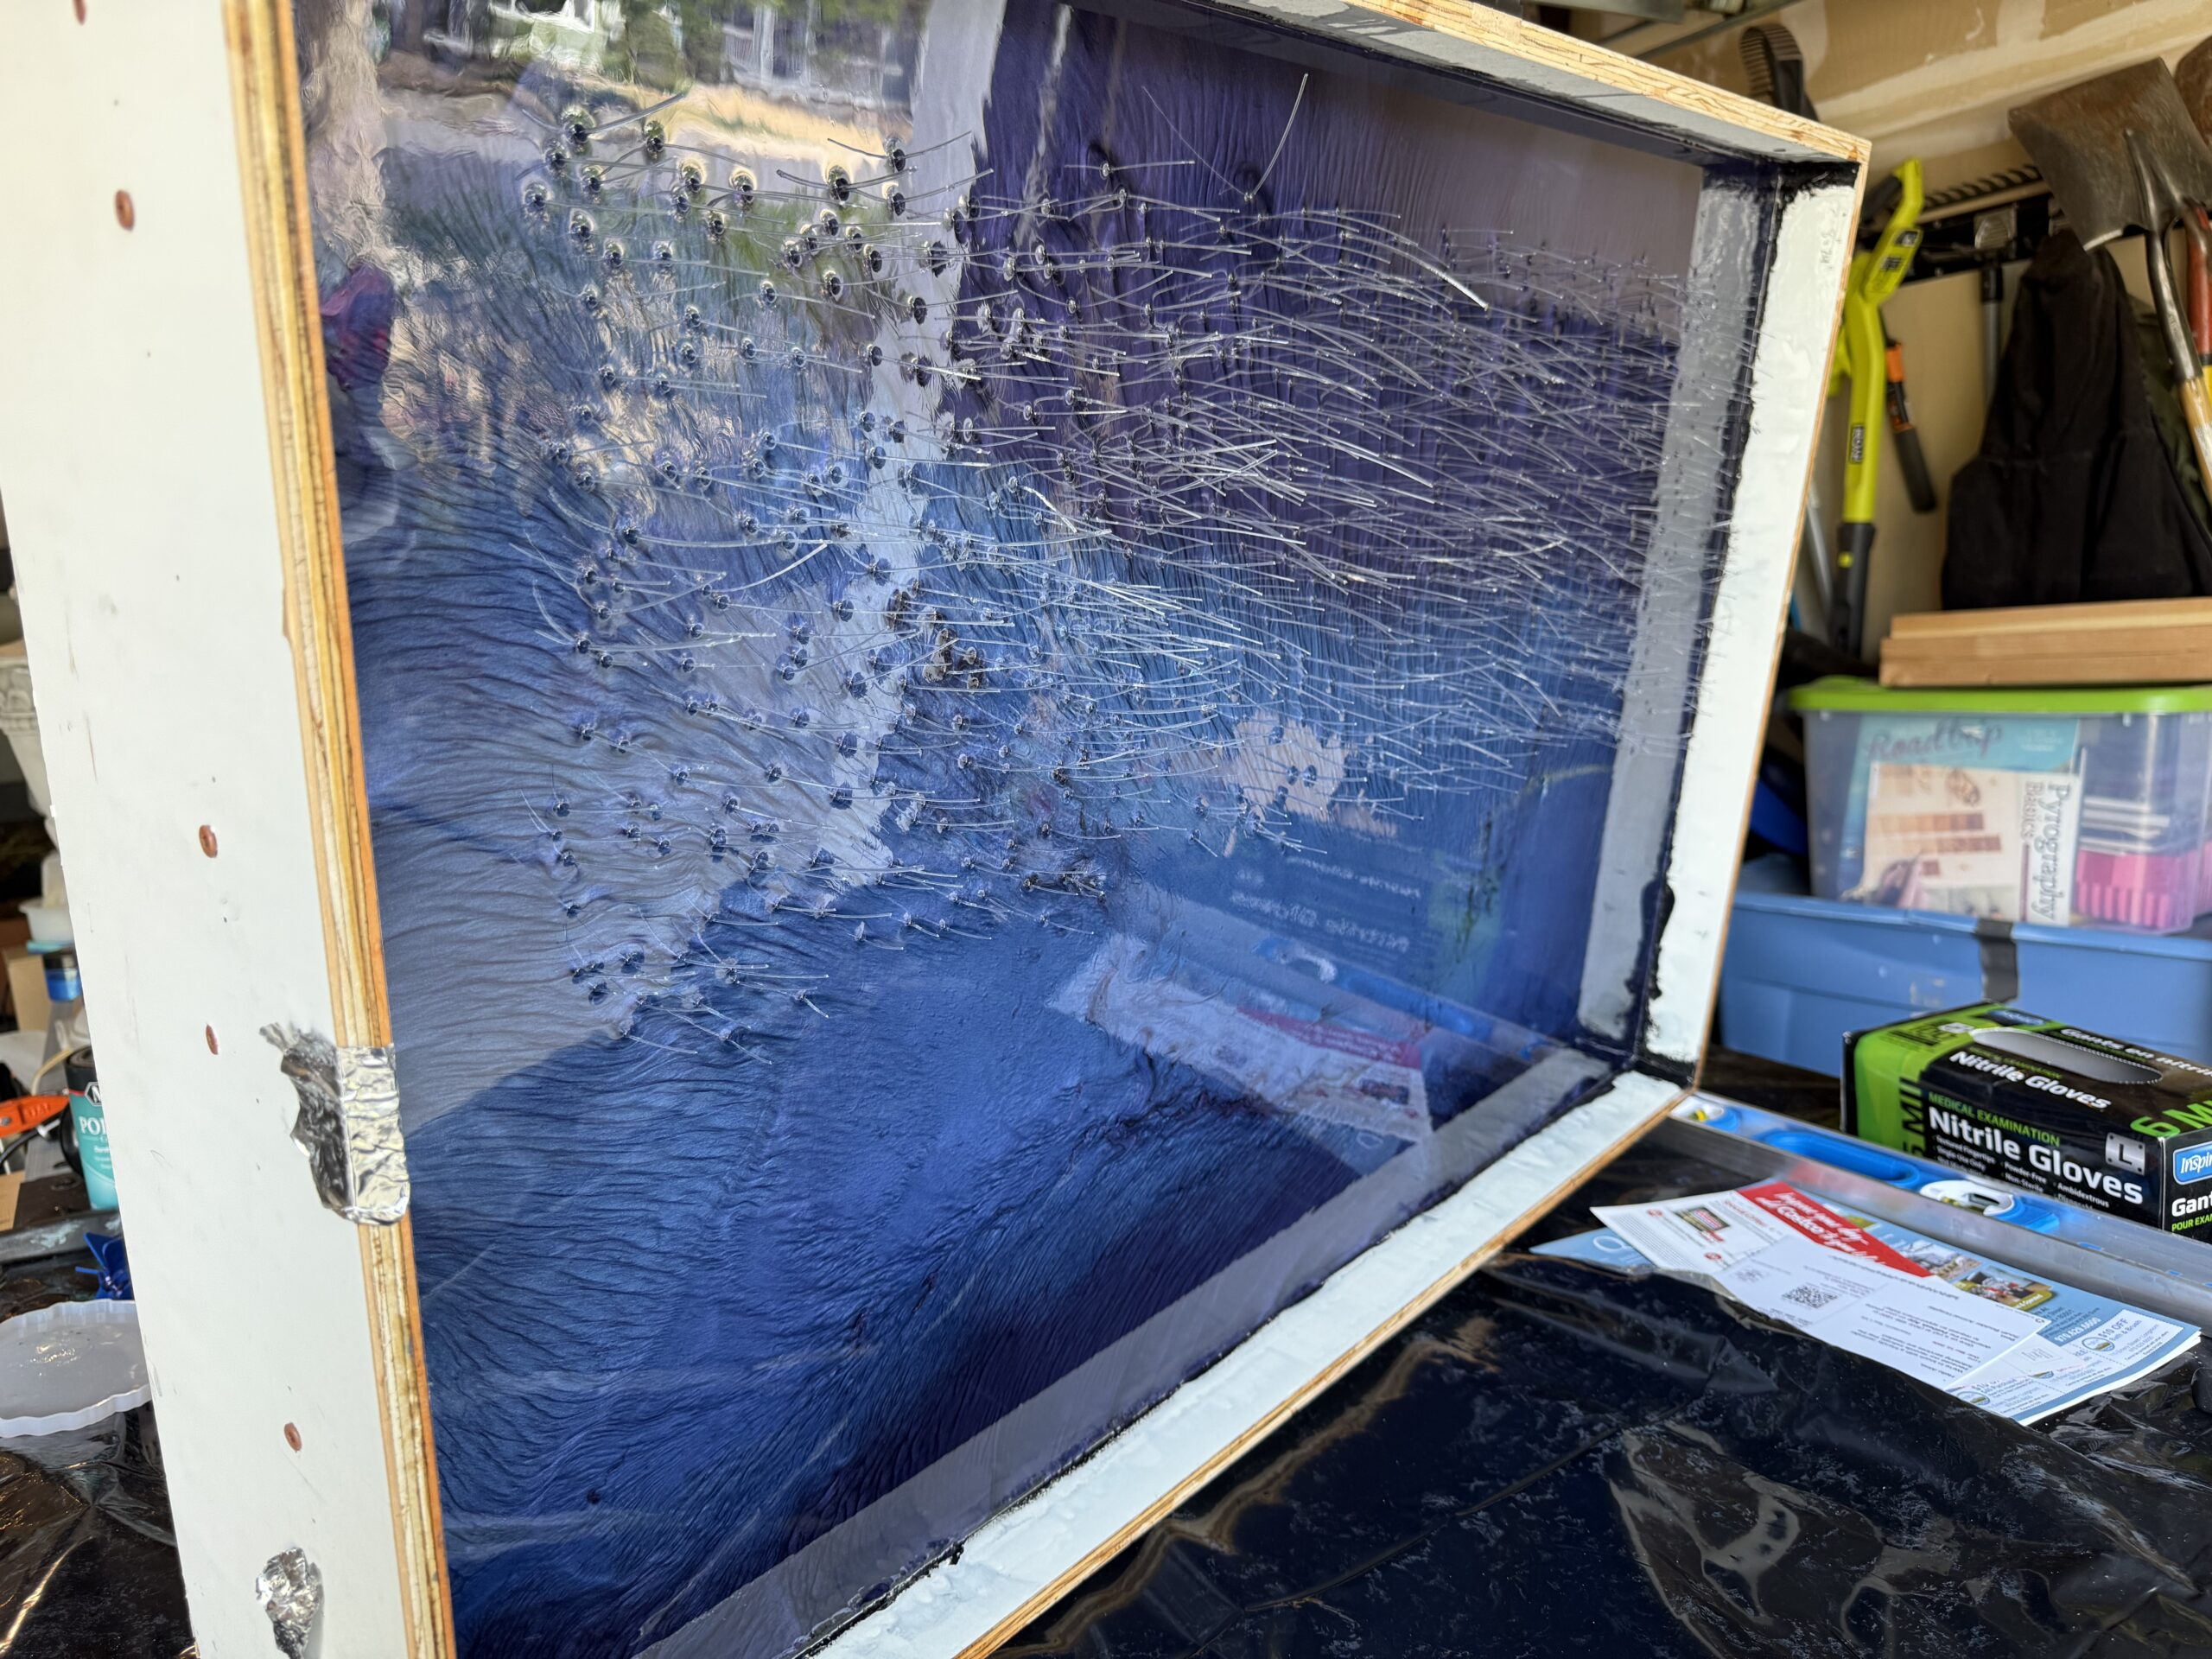
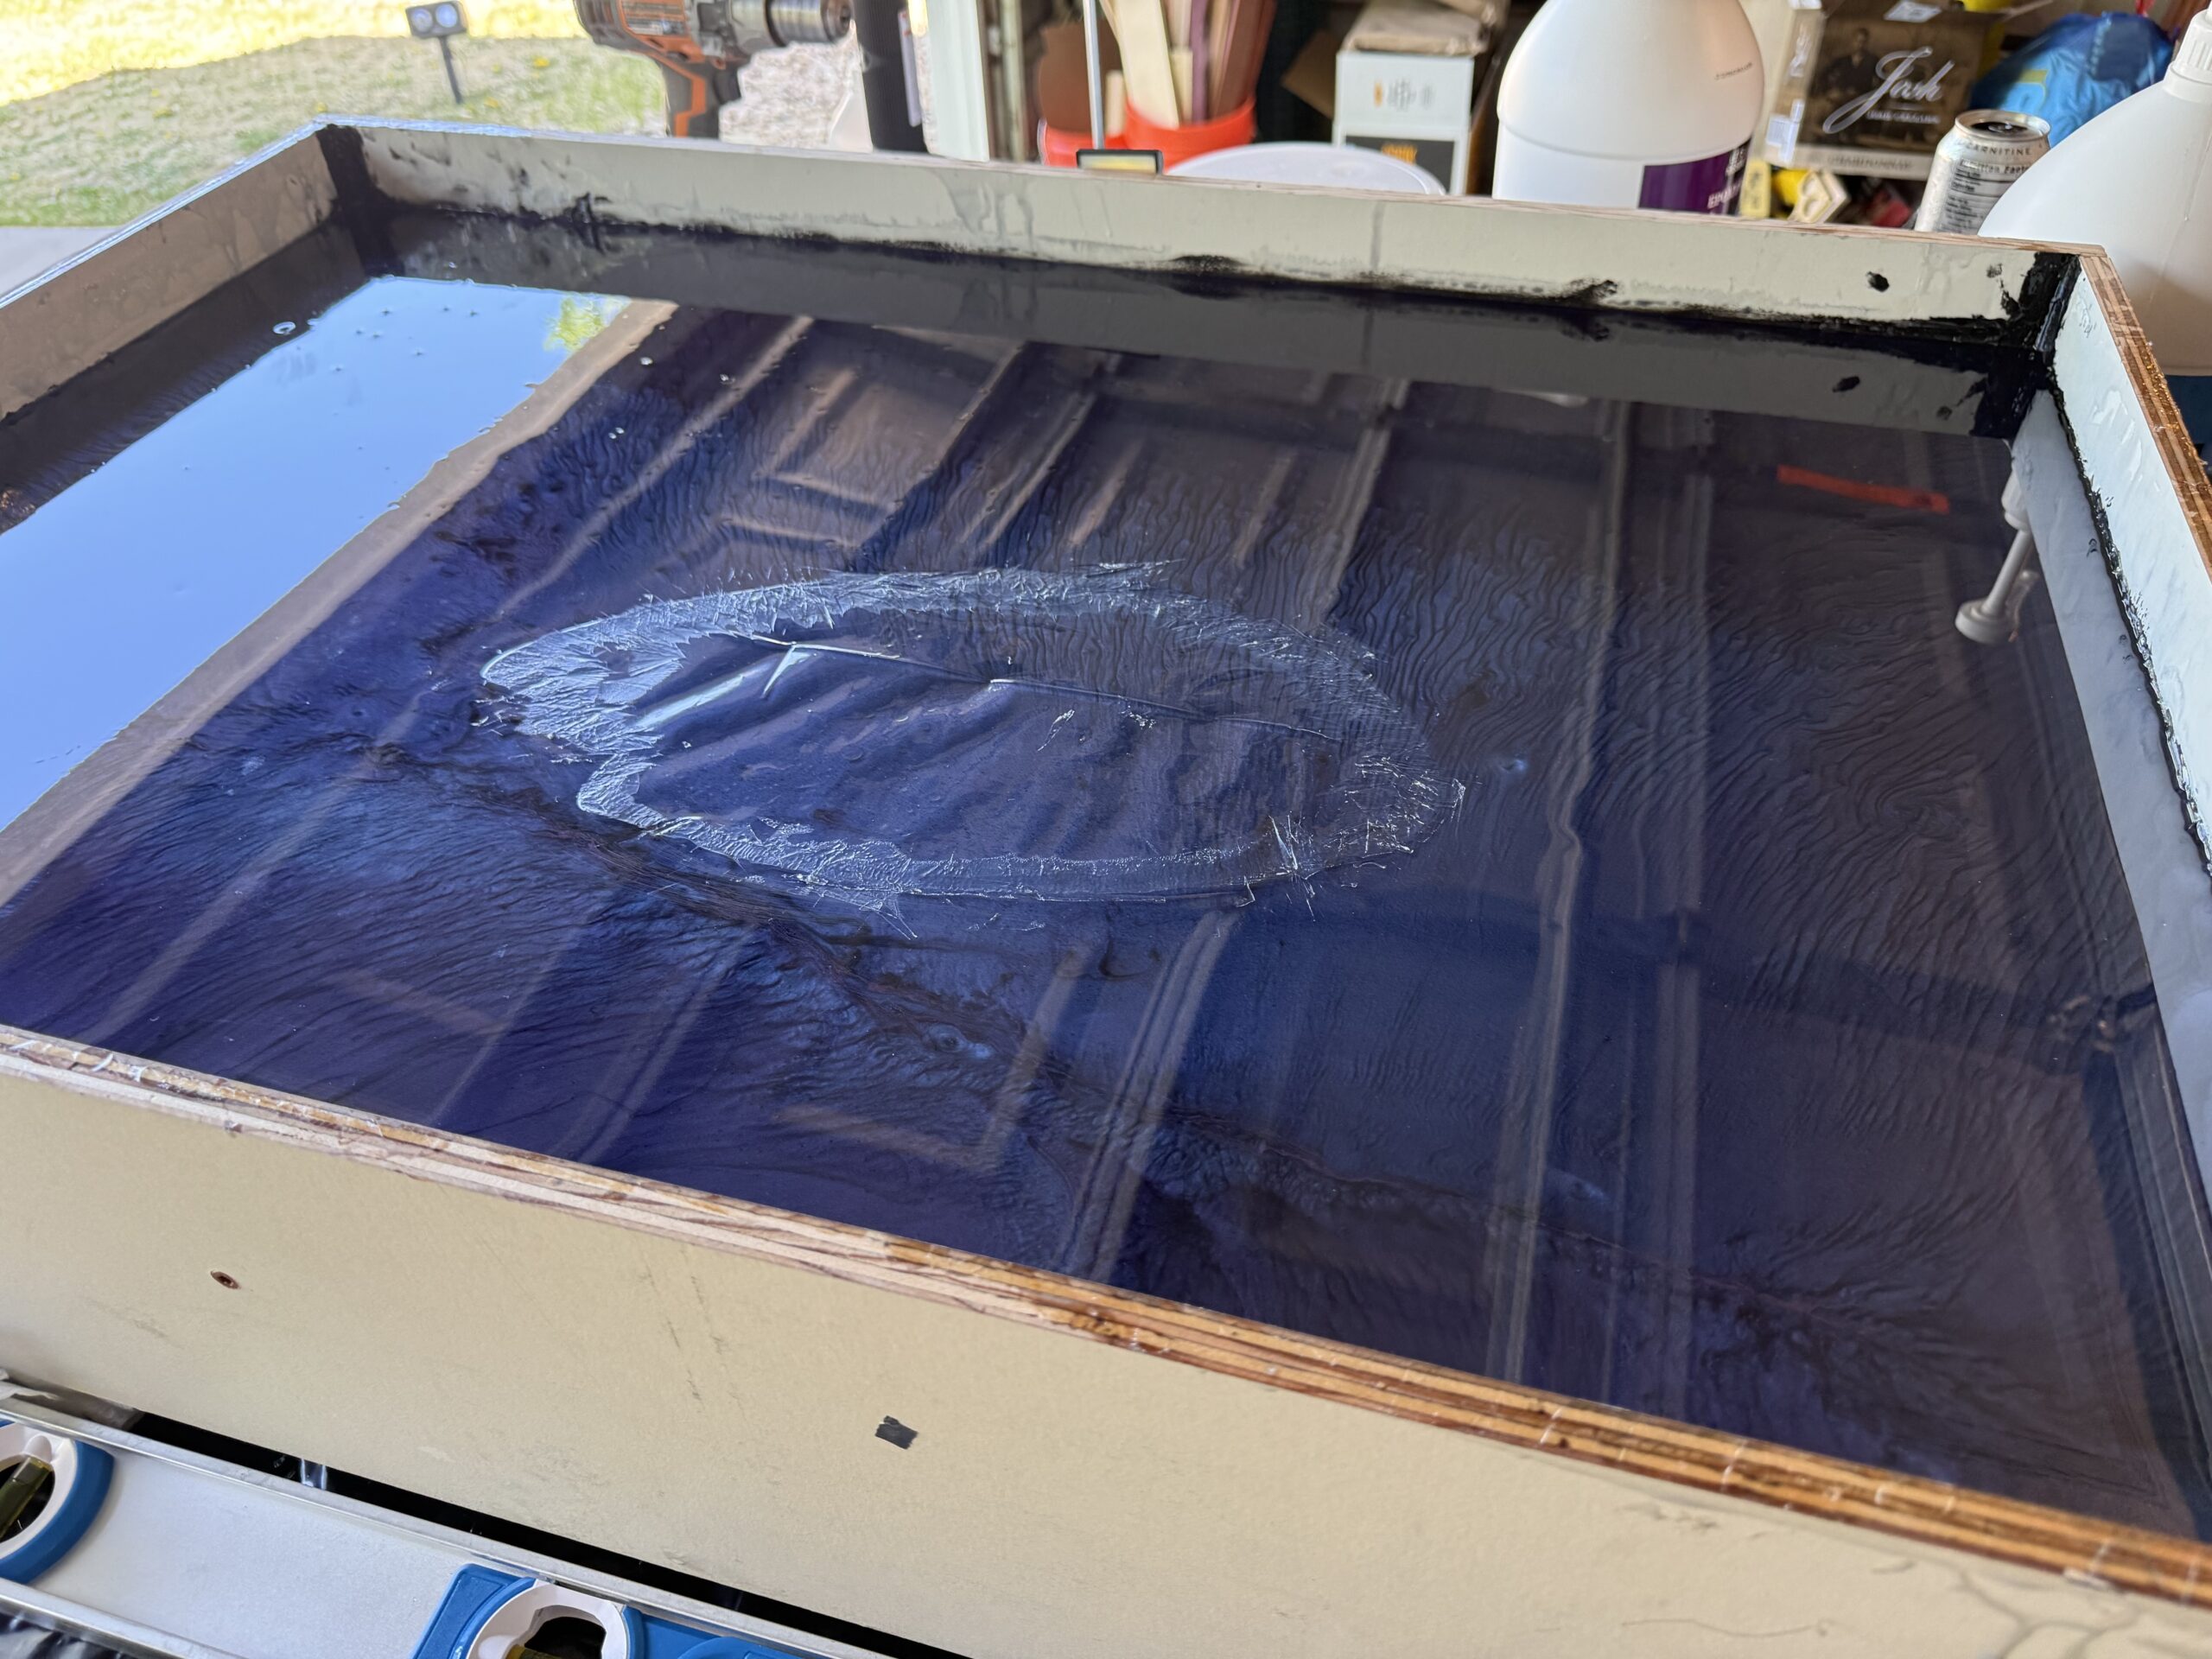
Nonetheless, I thought I had everything sealed and went ahead and executed the first pour. I used a deep-pour formula (2:1) because they are watery and could get around the cables entirely. While it was the perfect formula for getting around the wires, it was also perfect for finding every unsealed gap on the back of the cables.


Only a thin layer of resin remained in the mold, and I thought to myself, “On the bright side, it’s a thin layer and will cure faster now.” Fake news. Apparently, deep pour resins take 3-4 times longer to cure when the layer is thin, because they are engineered to generate less heat than standard 1:1 resins. A small layer means it won’t generate any heat and will never cure.
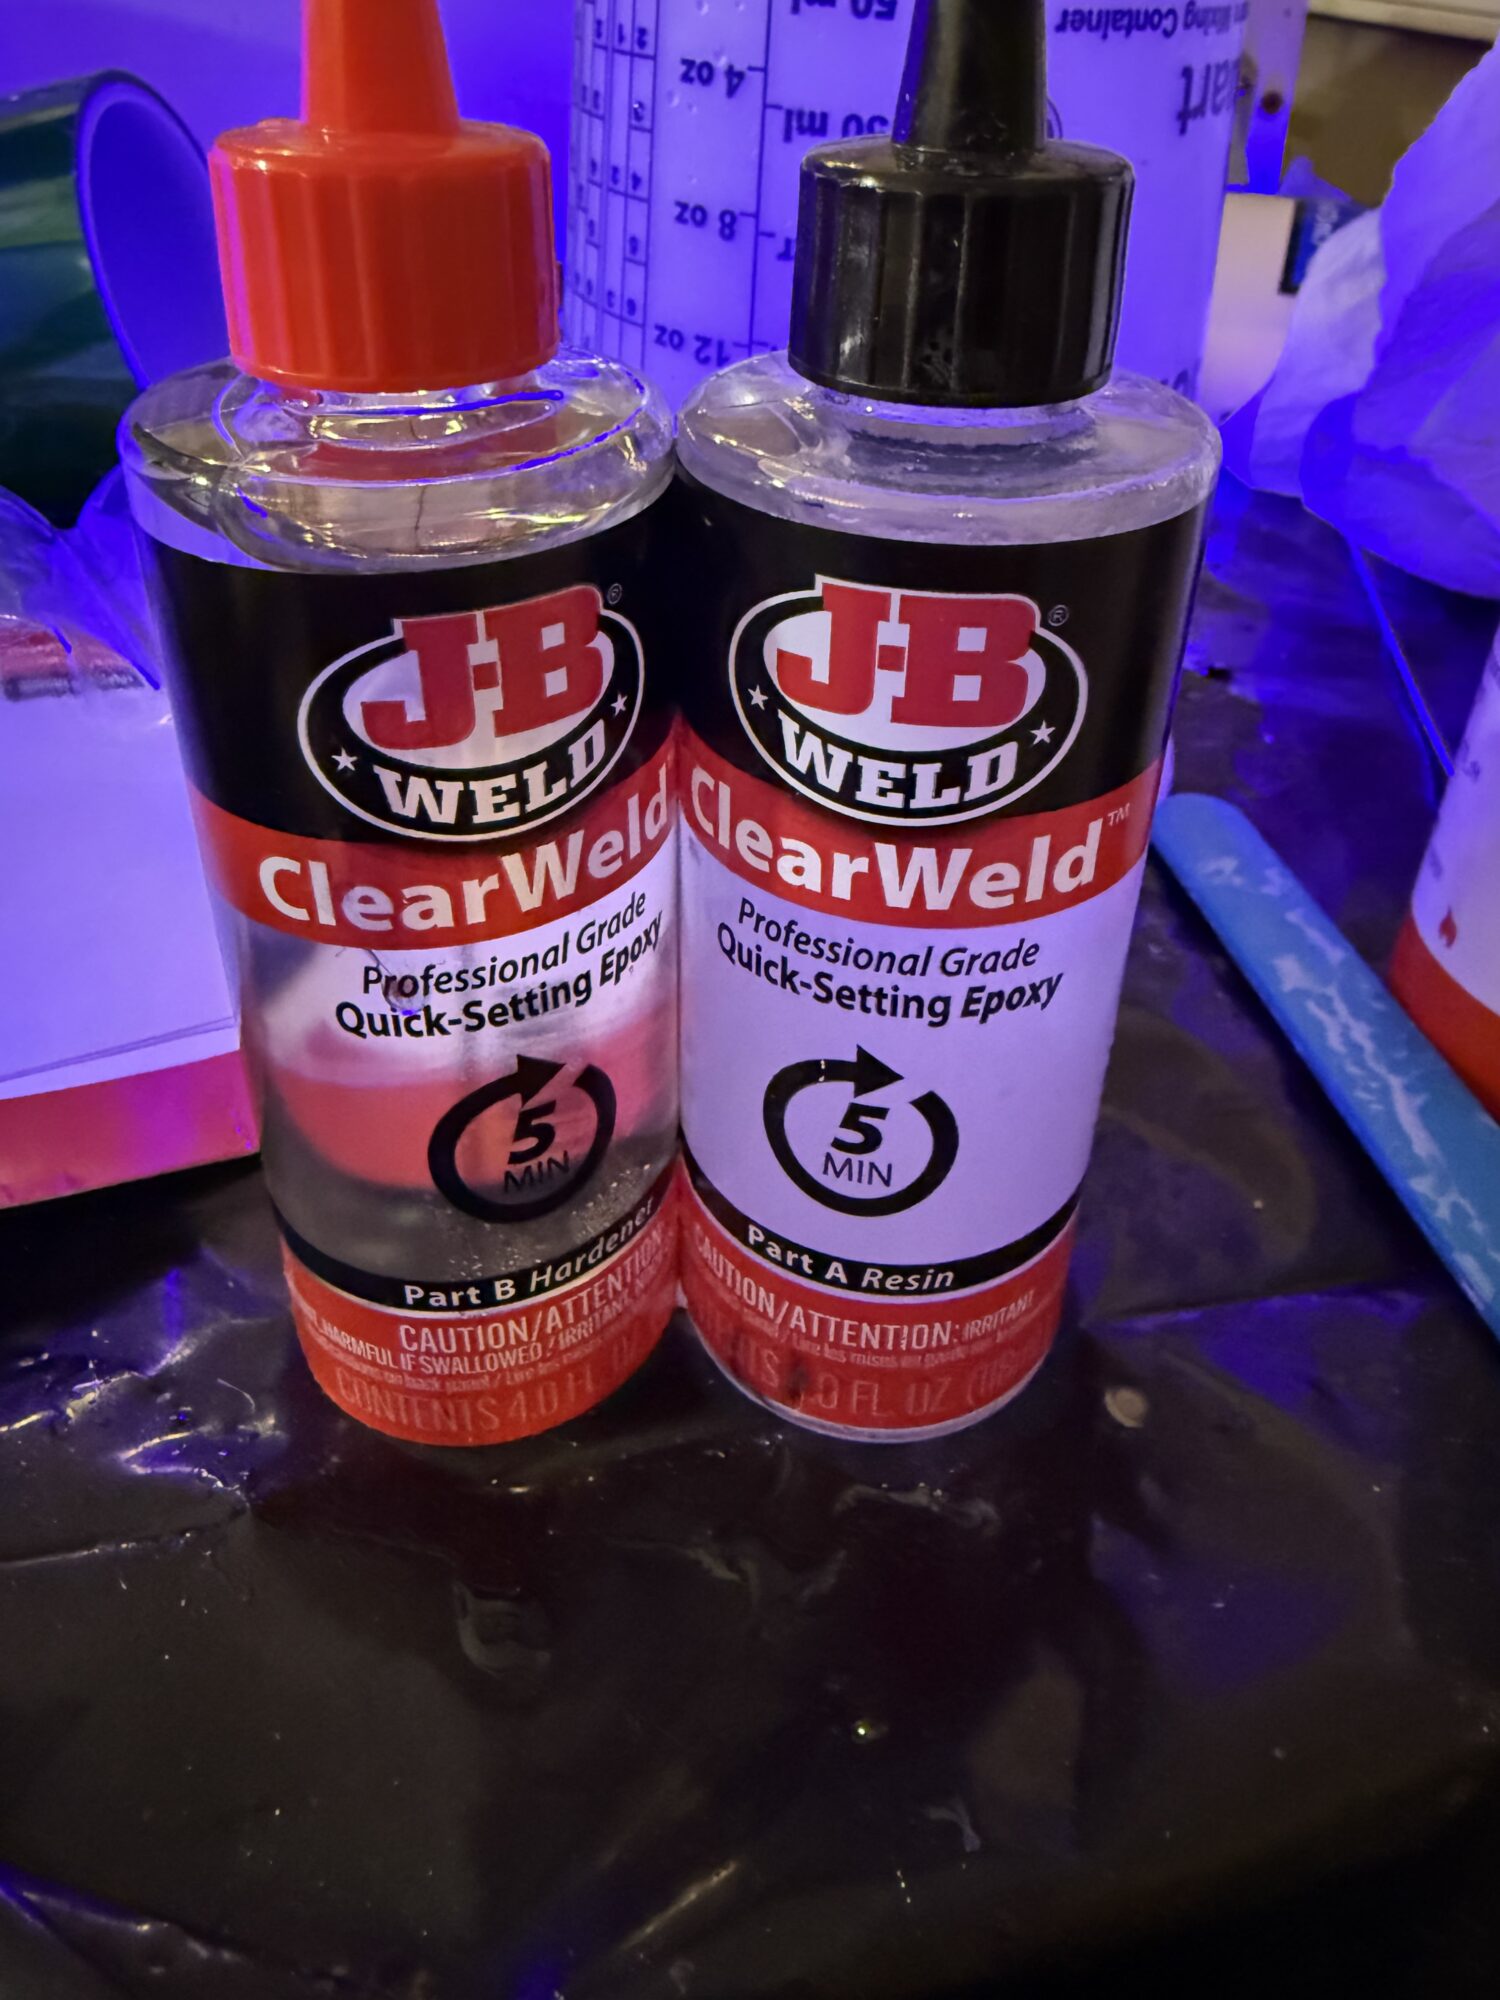
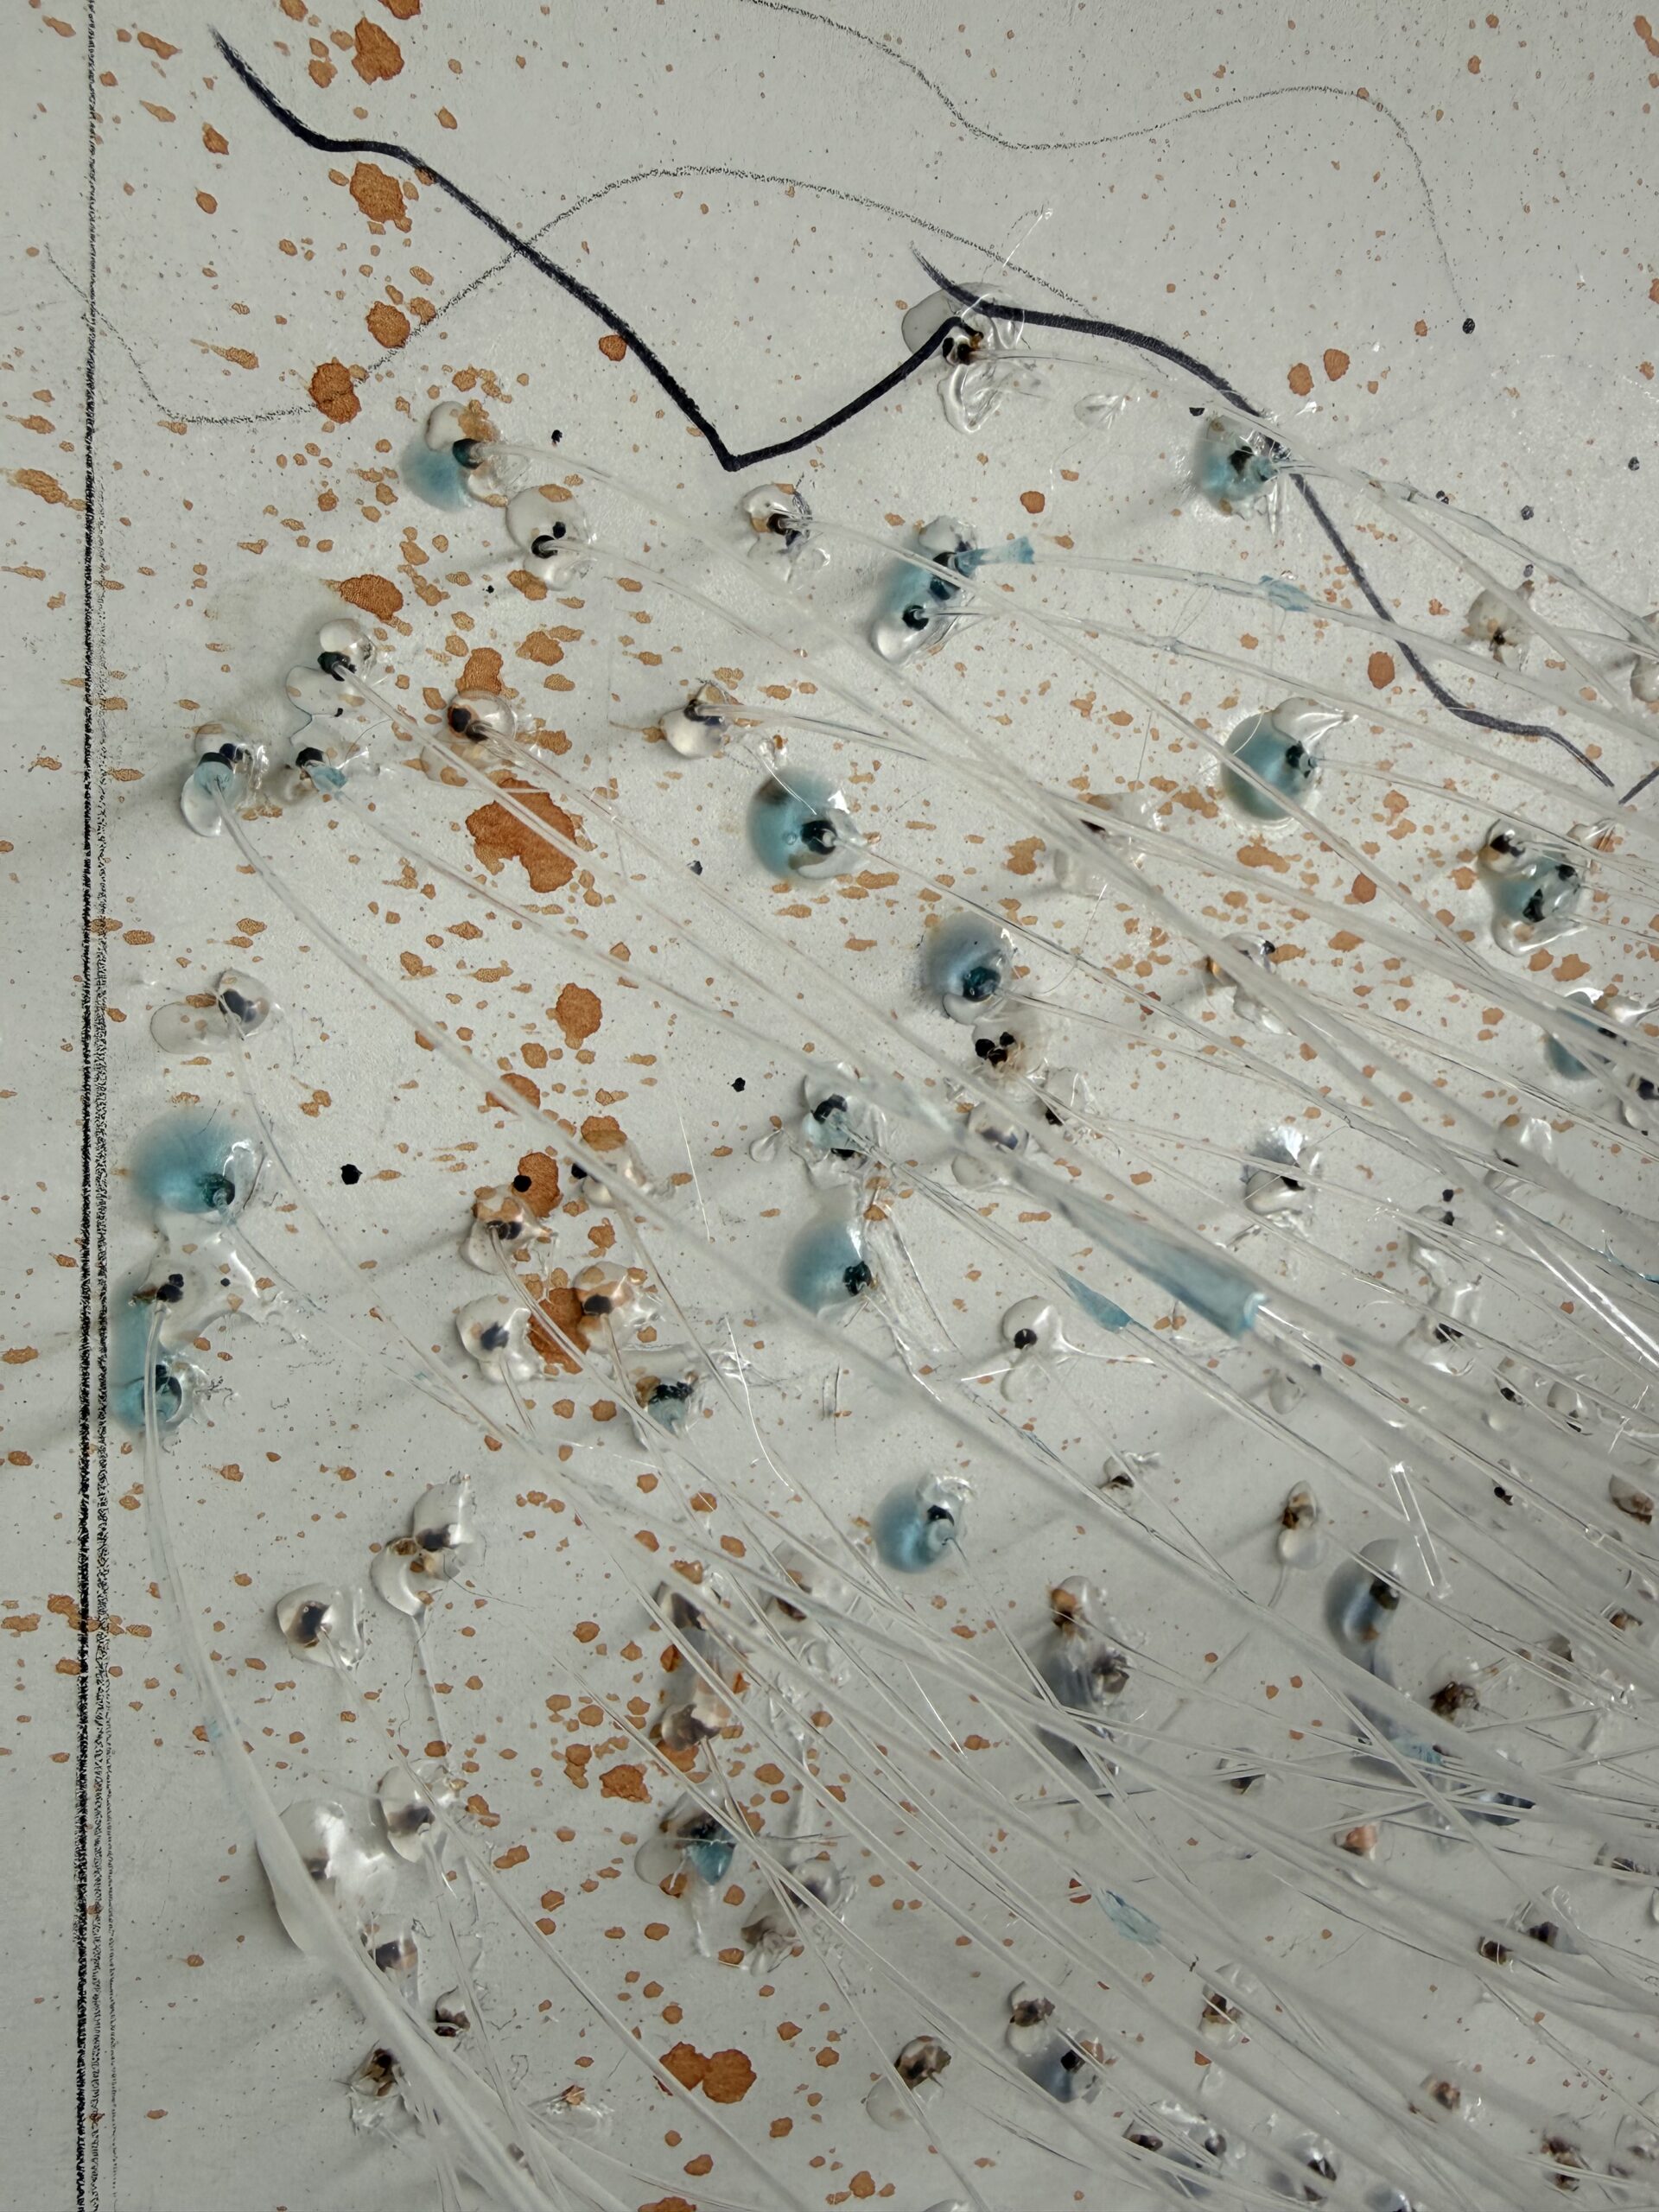
The good news is the blue pigment made it easier to find the leaks, but it was a mess. I taped a contractor bag around the top so that I could flip it over and address the leaks. I used 5 full kits of JB Weld 2-part epoxy and poured it over the back.
This didn’t catch all the leaks, but it caught almost all of them, which is enough to get a cured base layer.
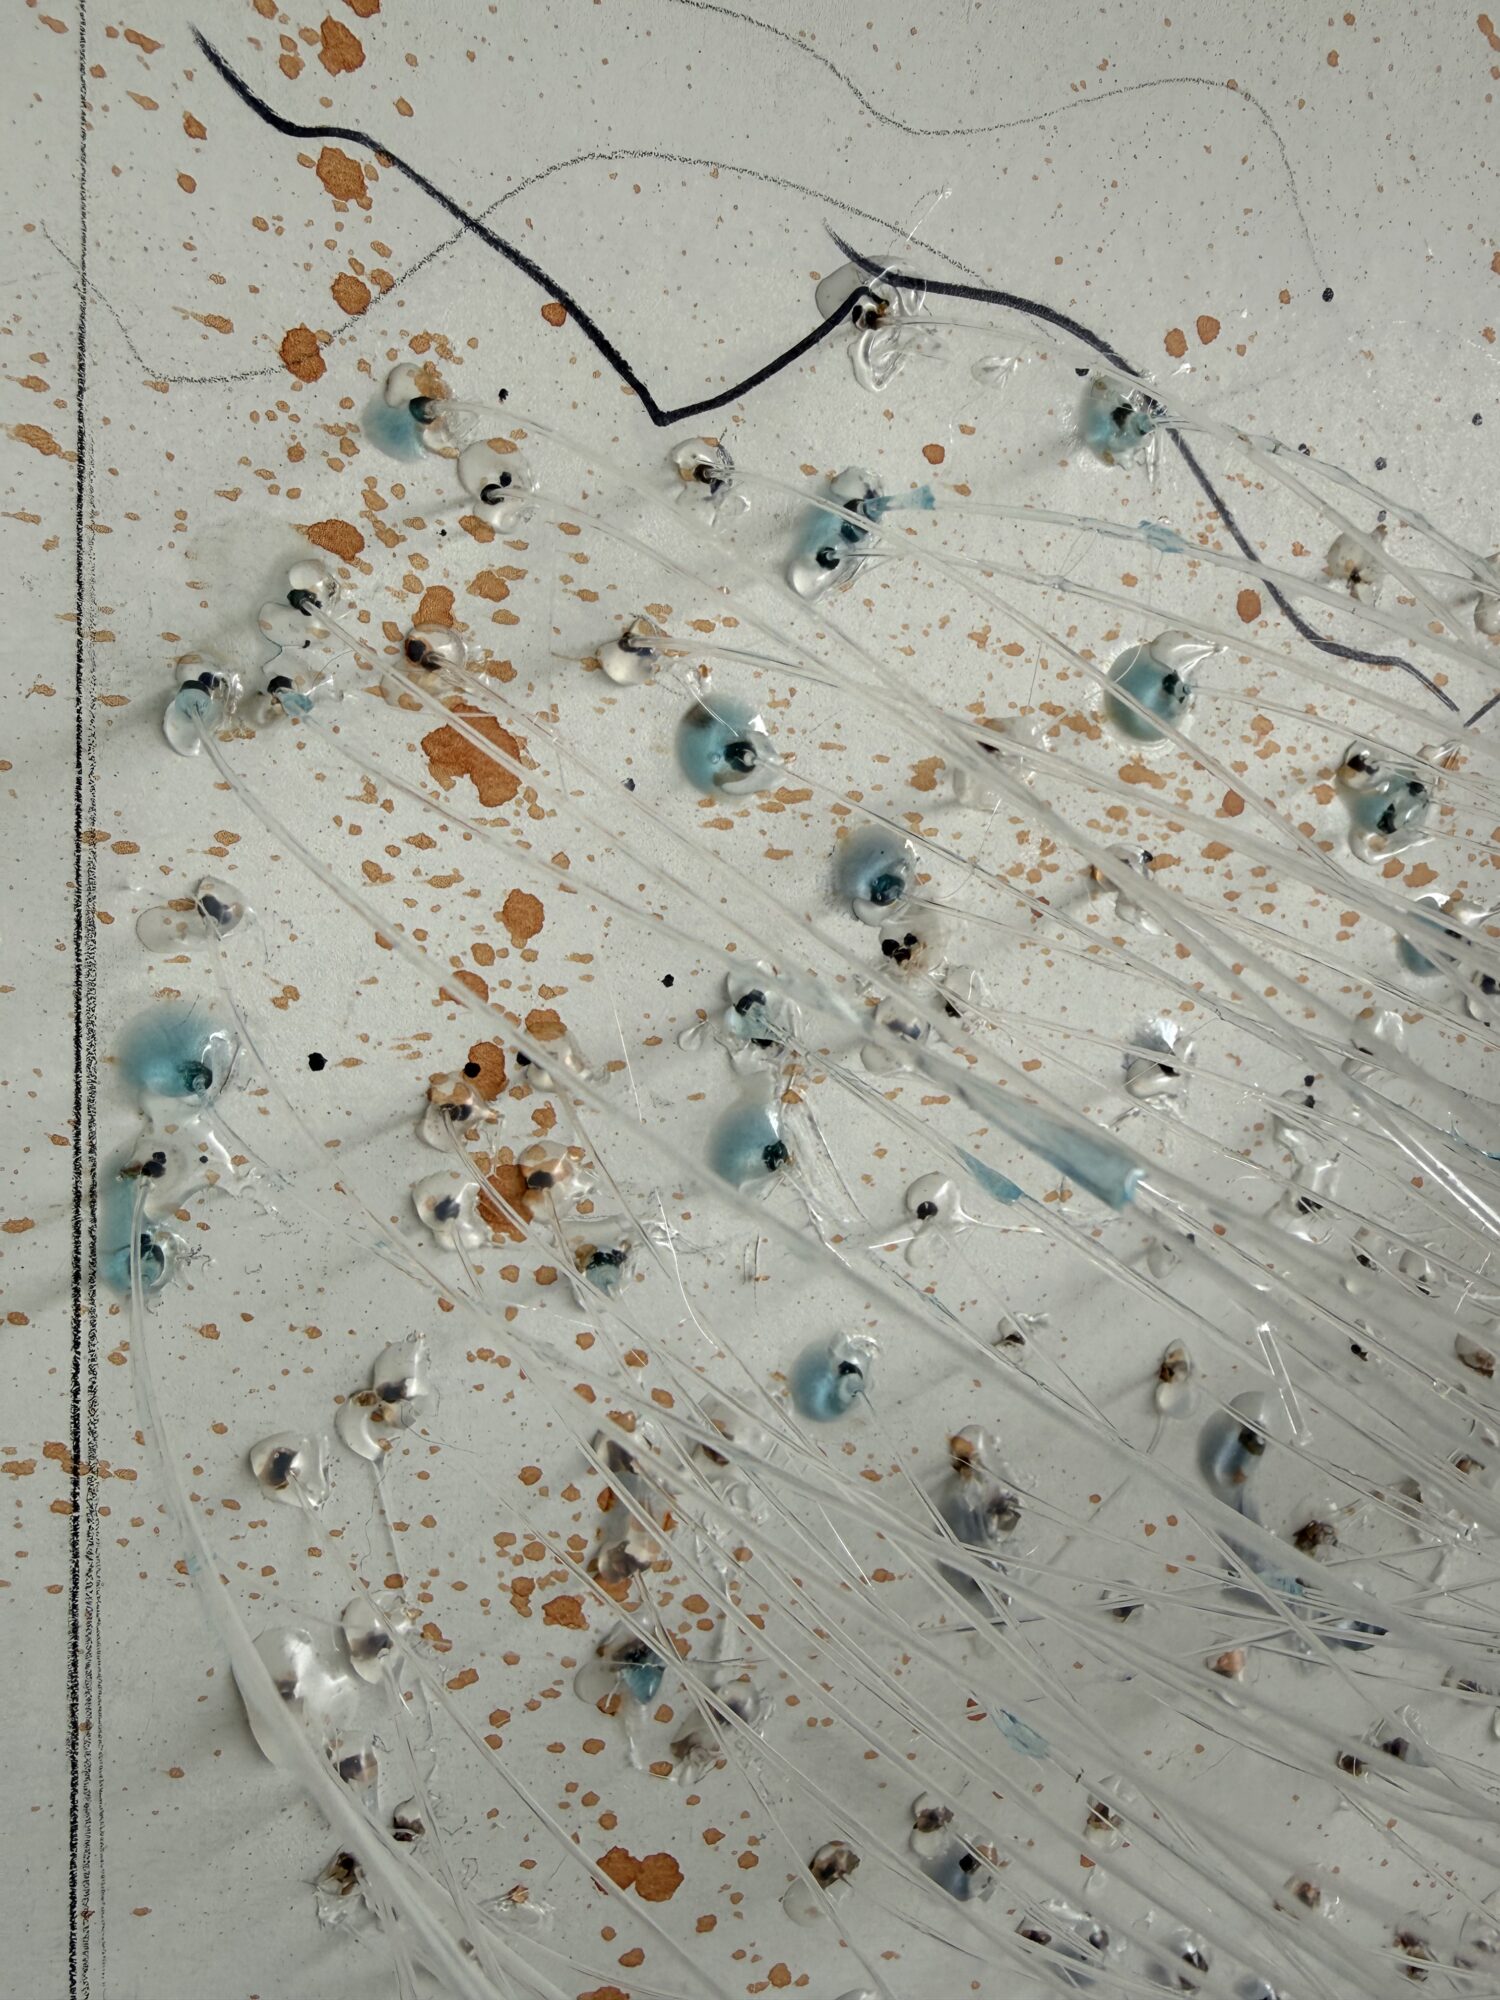

Only a thin layer of resin remained in the mold, and I thought to myself, “On the bright side, it’s a thin layer and will cure faster now.” Fake news. Apparently, deep pour resins take 3-4 times longer to cure when the layer is thin, because they are engineered to generate less heat than standard 1:1 resins. A small layer means it won’t generate any heat and will never cure.
The good news is the blue pigment made it easier to find the leaks, but it was a mess. I taped a contractor bag around the top so that I could flip it over and address the leaks. I used 5 full kits of JB Weld 2-part epoxy and poured it over the back.
This didn’t catch all the leaks, but it caught almost all of them, which is enough to get a cured base layer.


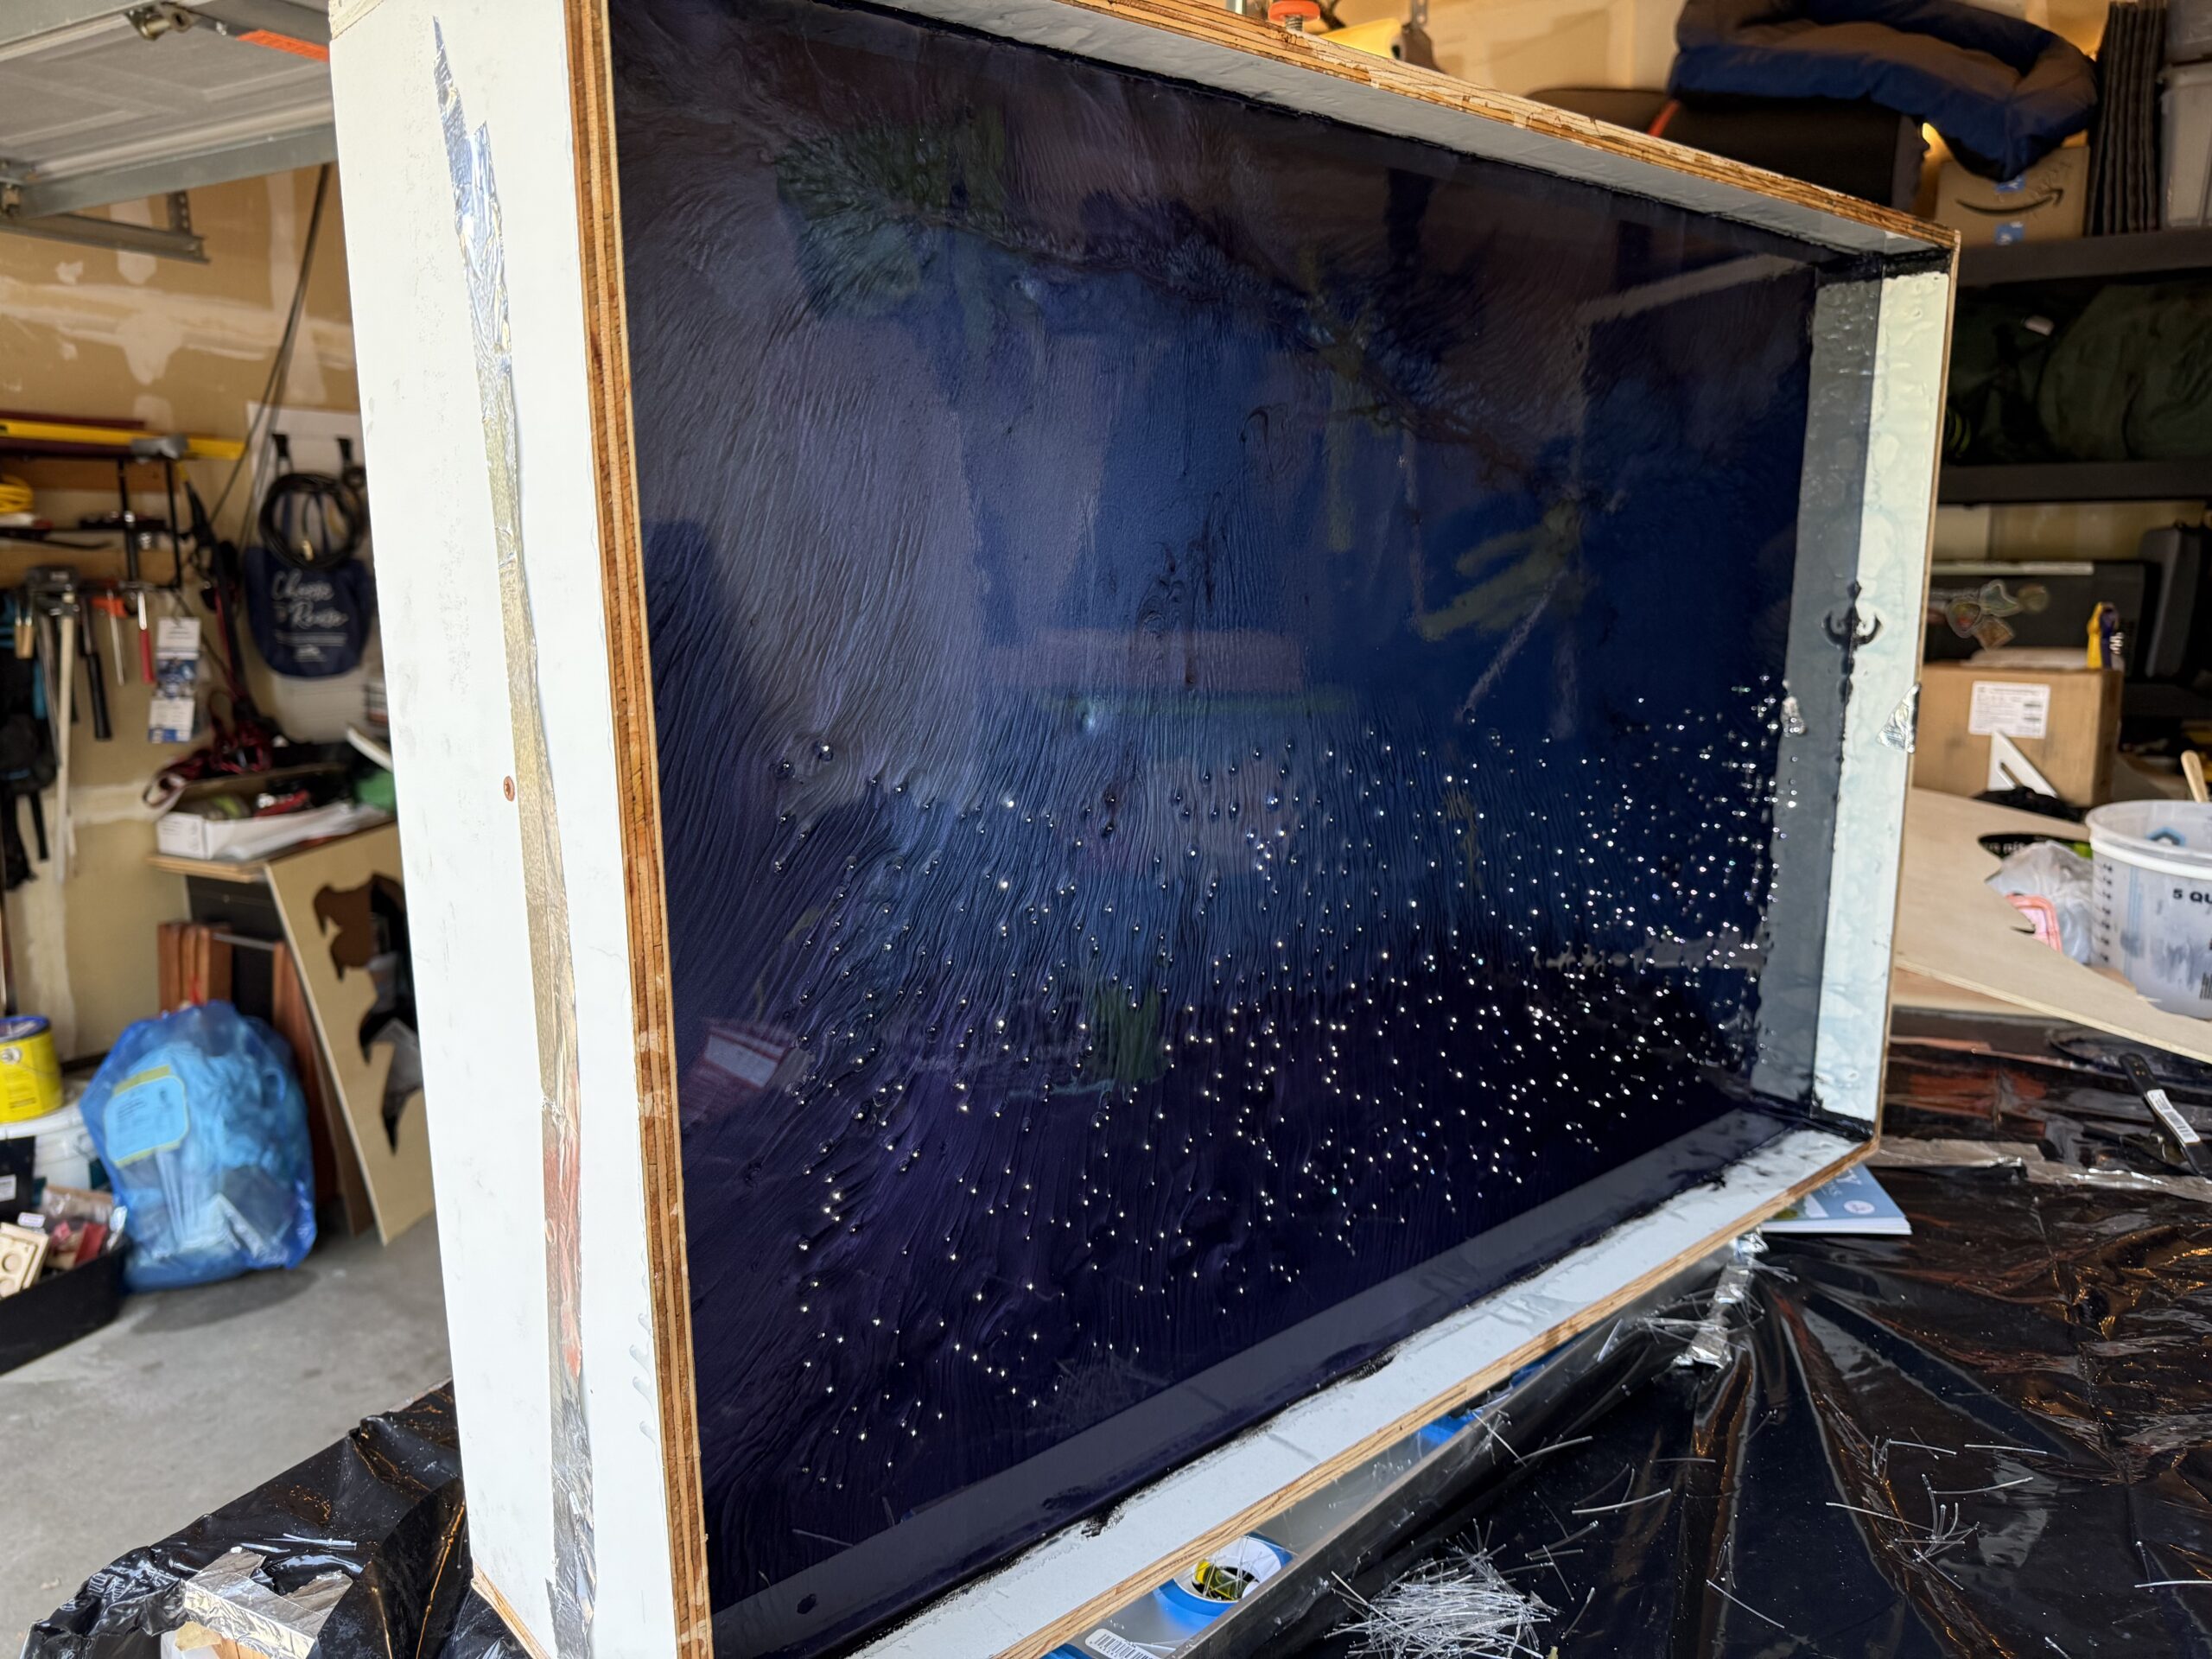
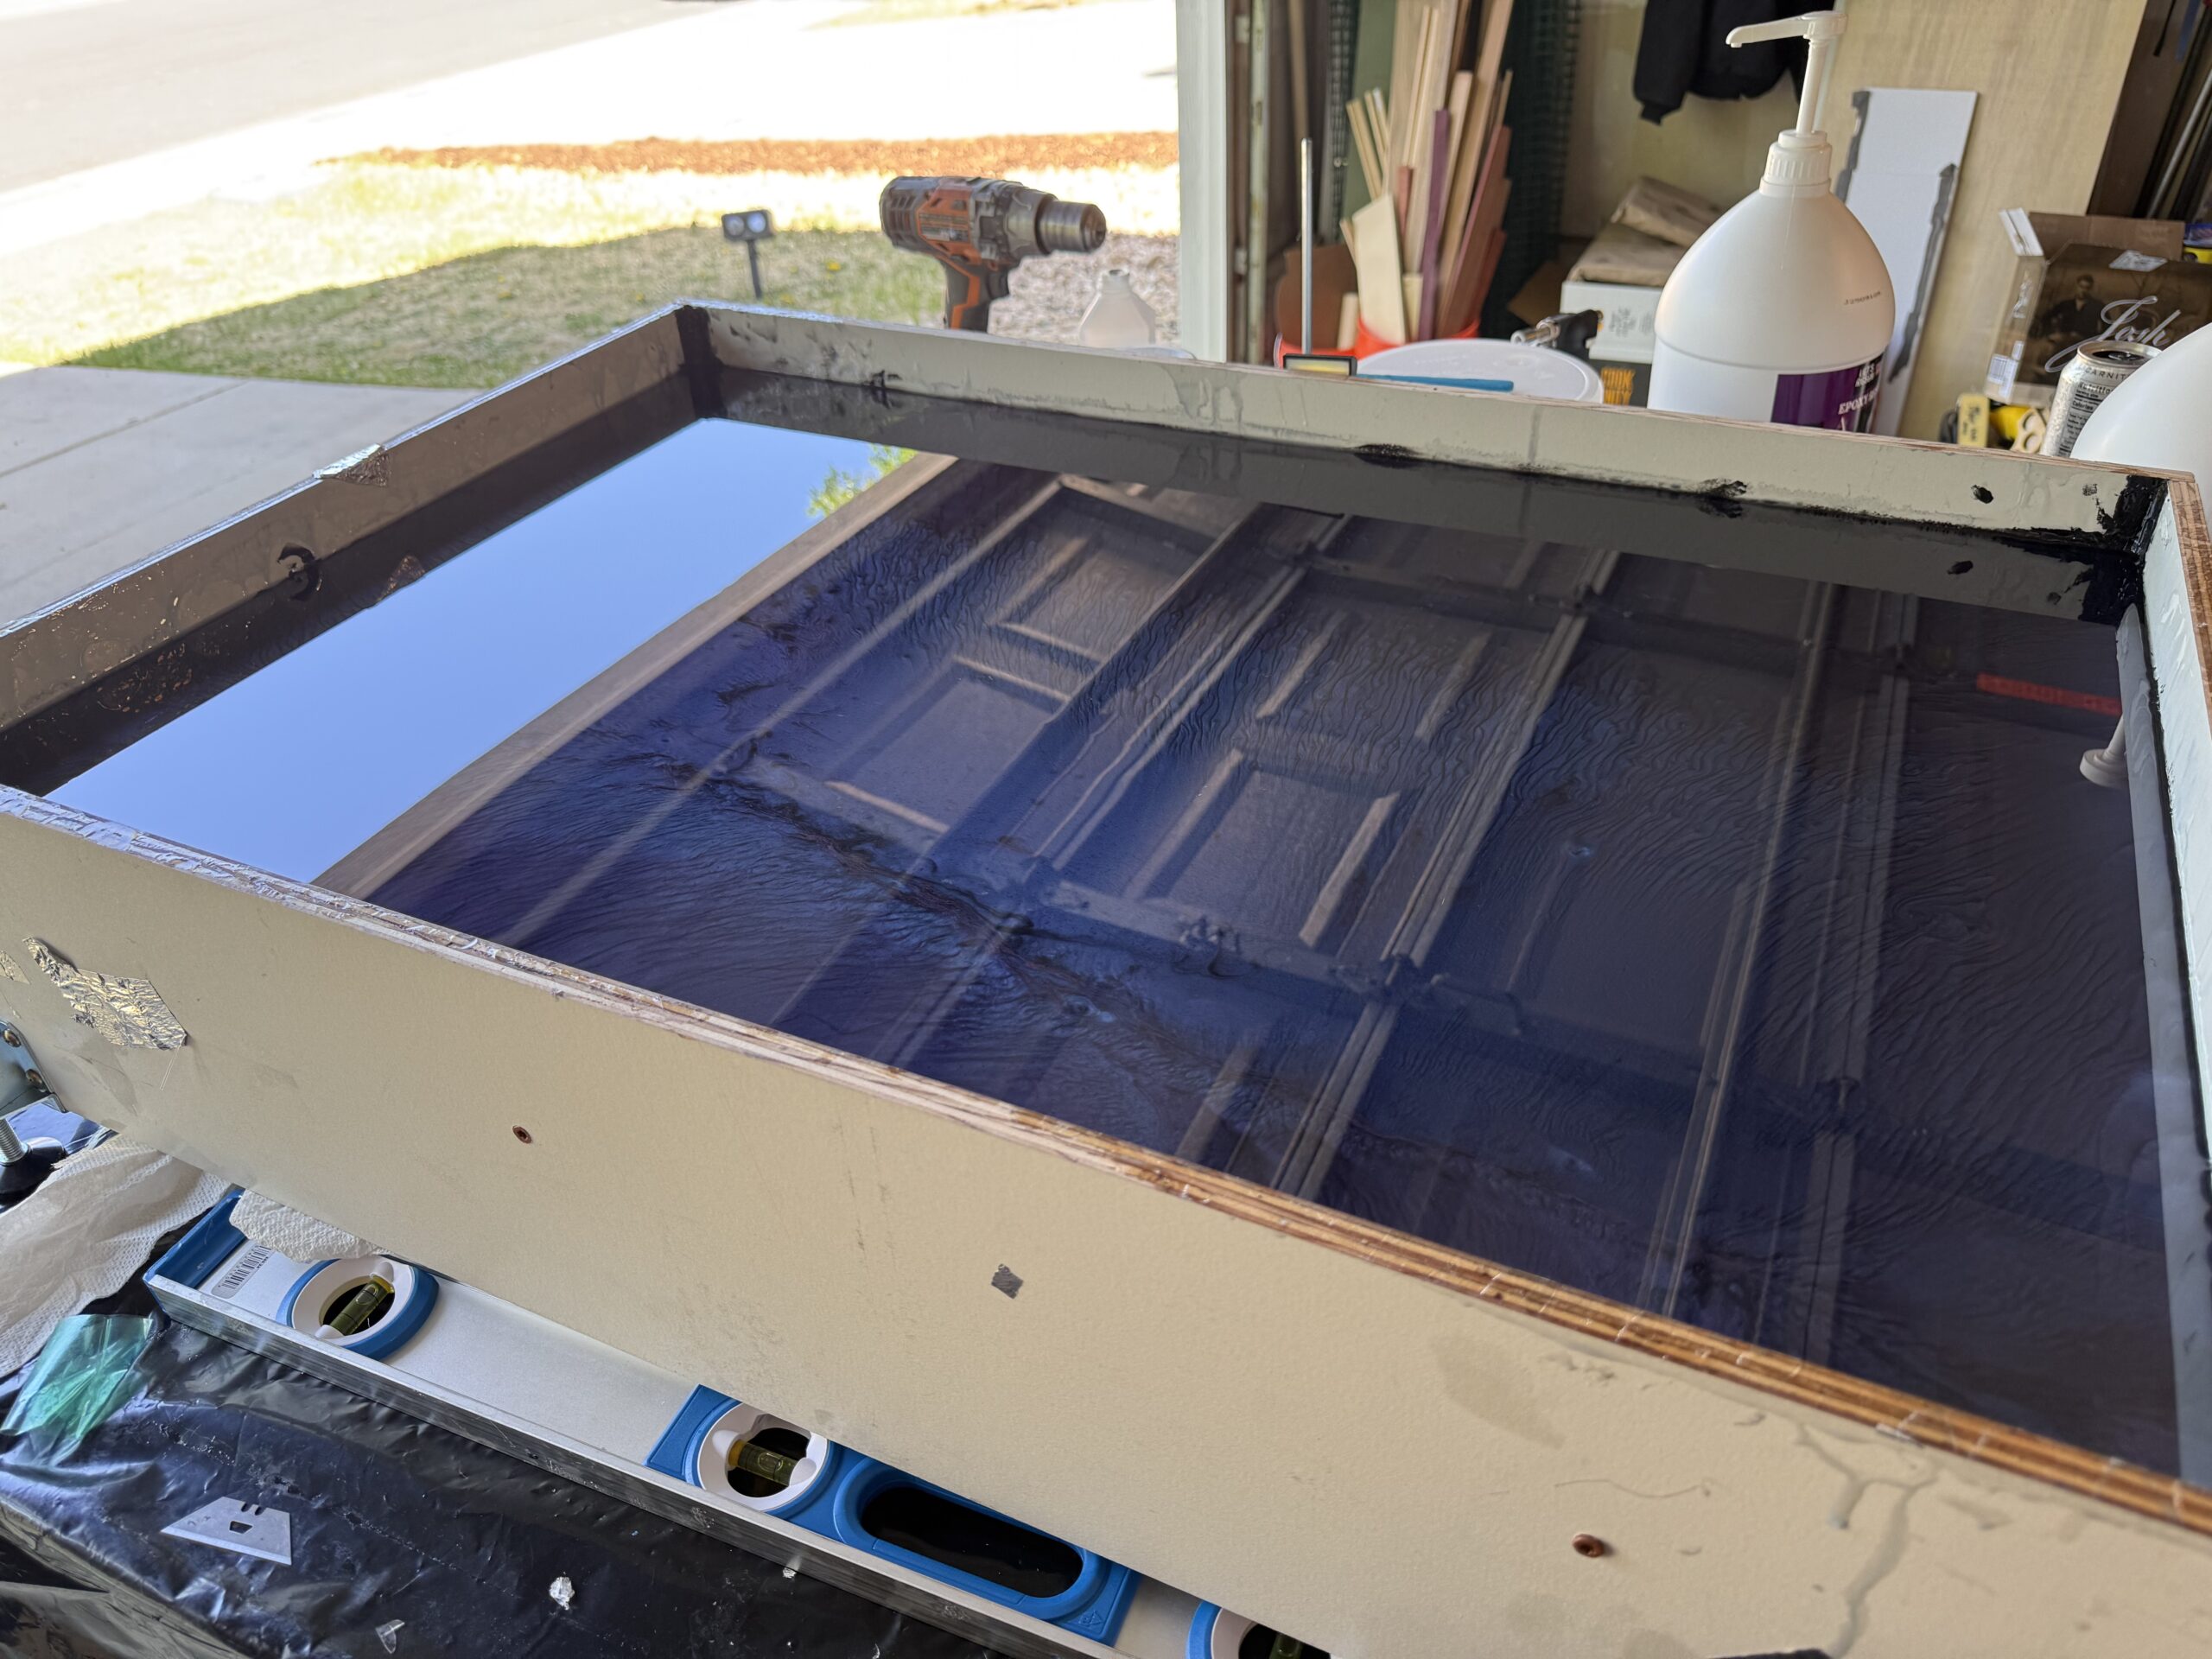
After I got a solid base layer, I could finally flip the mold up and trim the fiber optic cables flush.
After trimming, I poured a clear layer of resin to seal them in. This also helped create a more realistic sense of depth, since the stars are physically the farthest things from the viewer in real life.
Of course, this came with its own problem. I wrapped a large piece of cardboard in a contractor bag to limit the amount of debris that floated into the canvas. I learned the hard way that you need twice as much tape around a bag like this when using it as a cover. The heat from the curing resin caused the bag to sag into it, leaving a crater to fix.
I taped off the edges to limit scrapes on the outside of the crater, but I needed to get it as flush as possible. Once I got it as even as possible, I poured the next layer. When it’s early enough, the new layer will remelt the top layer of the semi-cured resin, creating a seamless blend.
The semi-cured distinction is critical, as I tried to use the same fix last night in the final layer, but it did not remove the scratches incurred during transport to and from the school. Hopefully, the frame hides it.


Painting the First Layer & Practice
While I can draw, I’m not great at painting—I was rusty and needed practice.
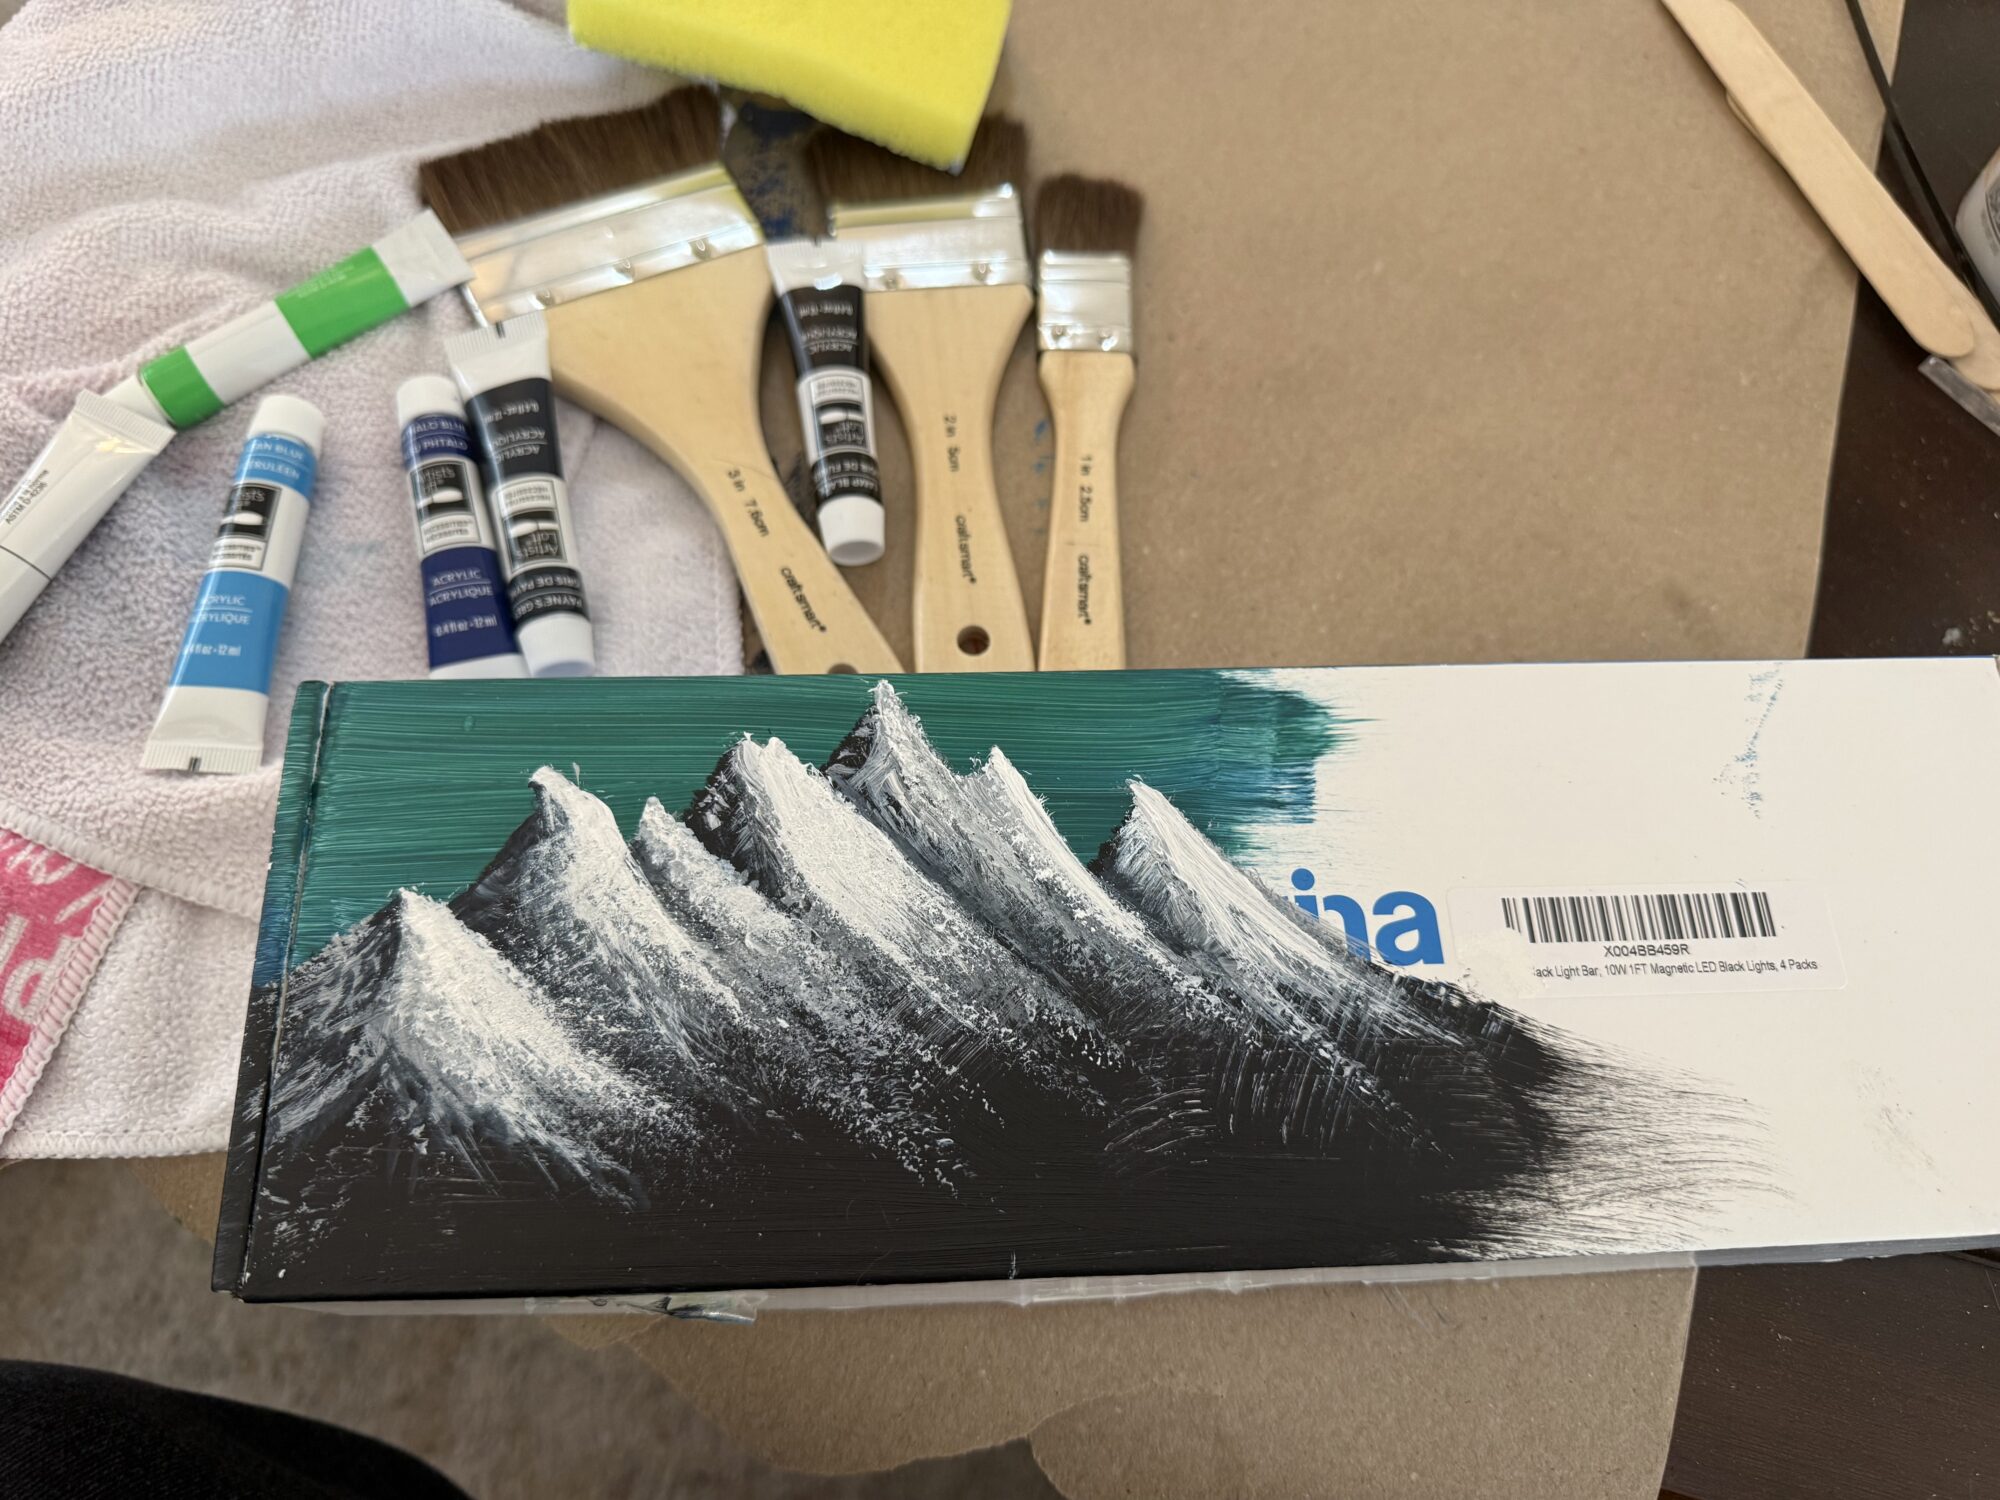
I did a test run on a box, followed by a second round on one of the cured coasters. This is around the time I named acrylic paint as the winner for the aurora curtains.
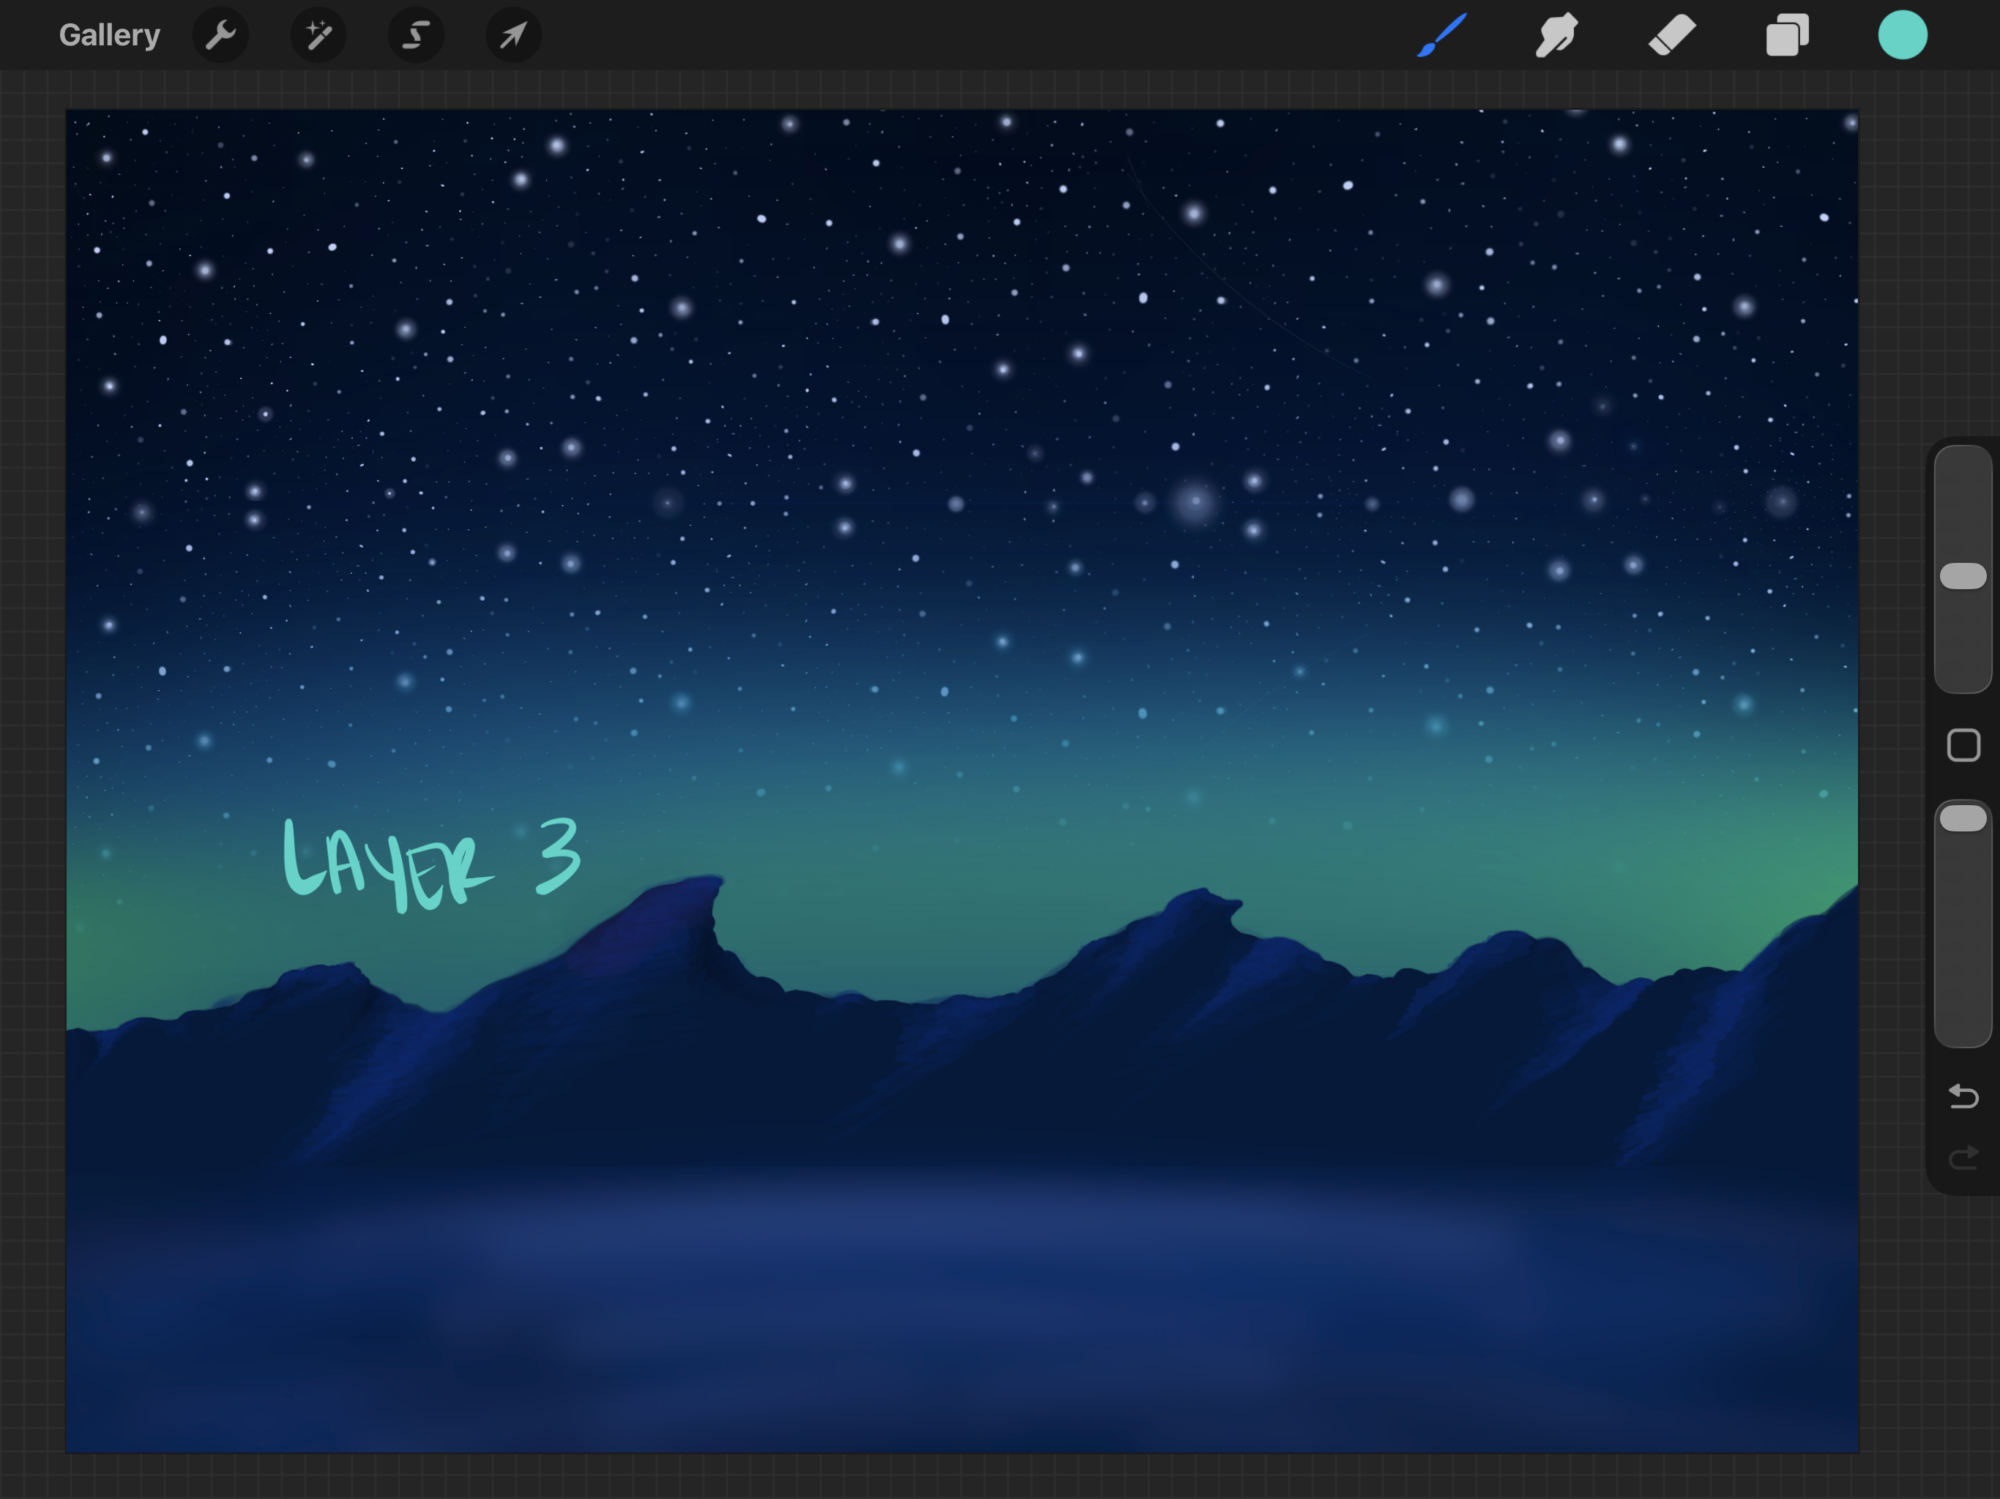
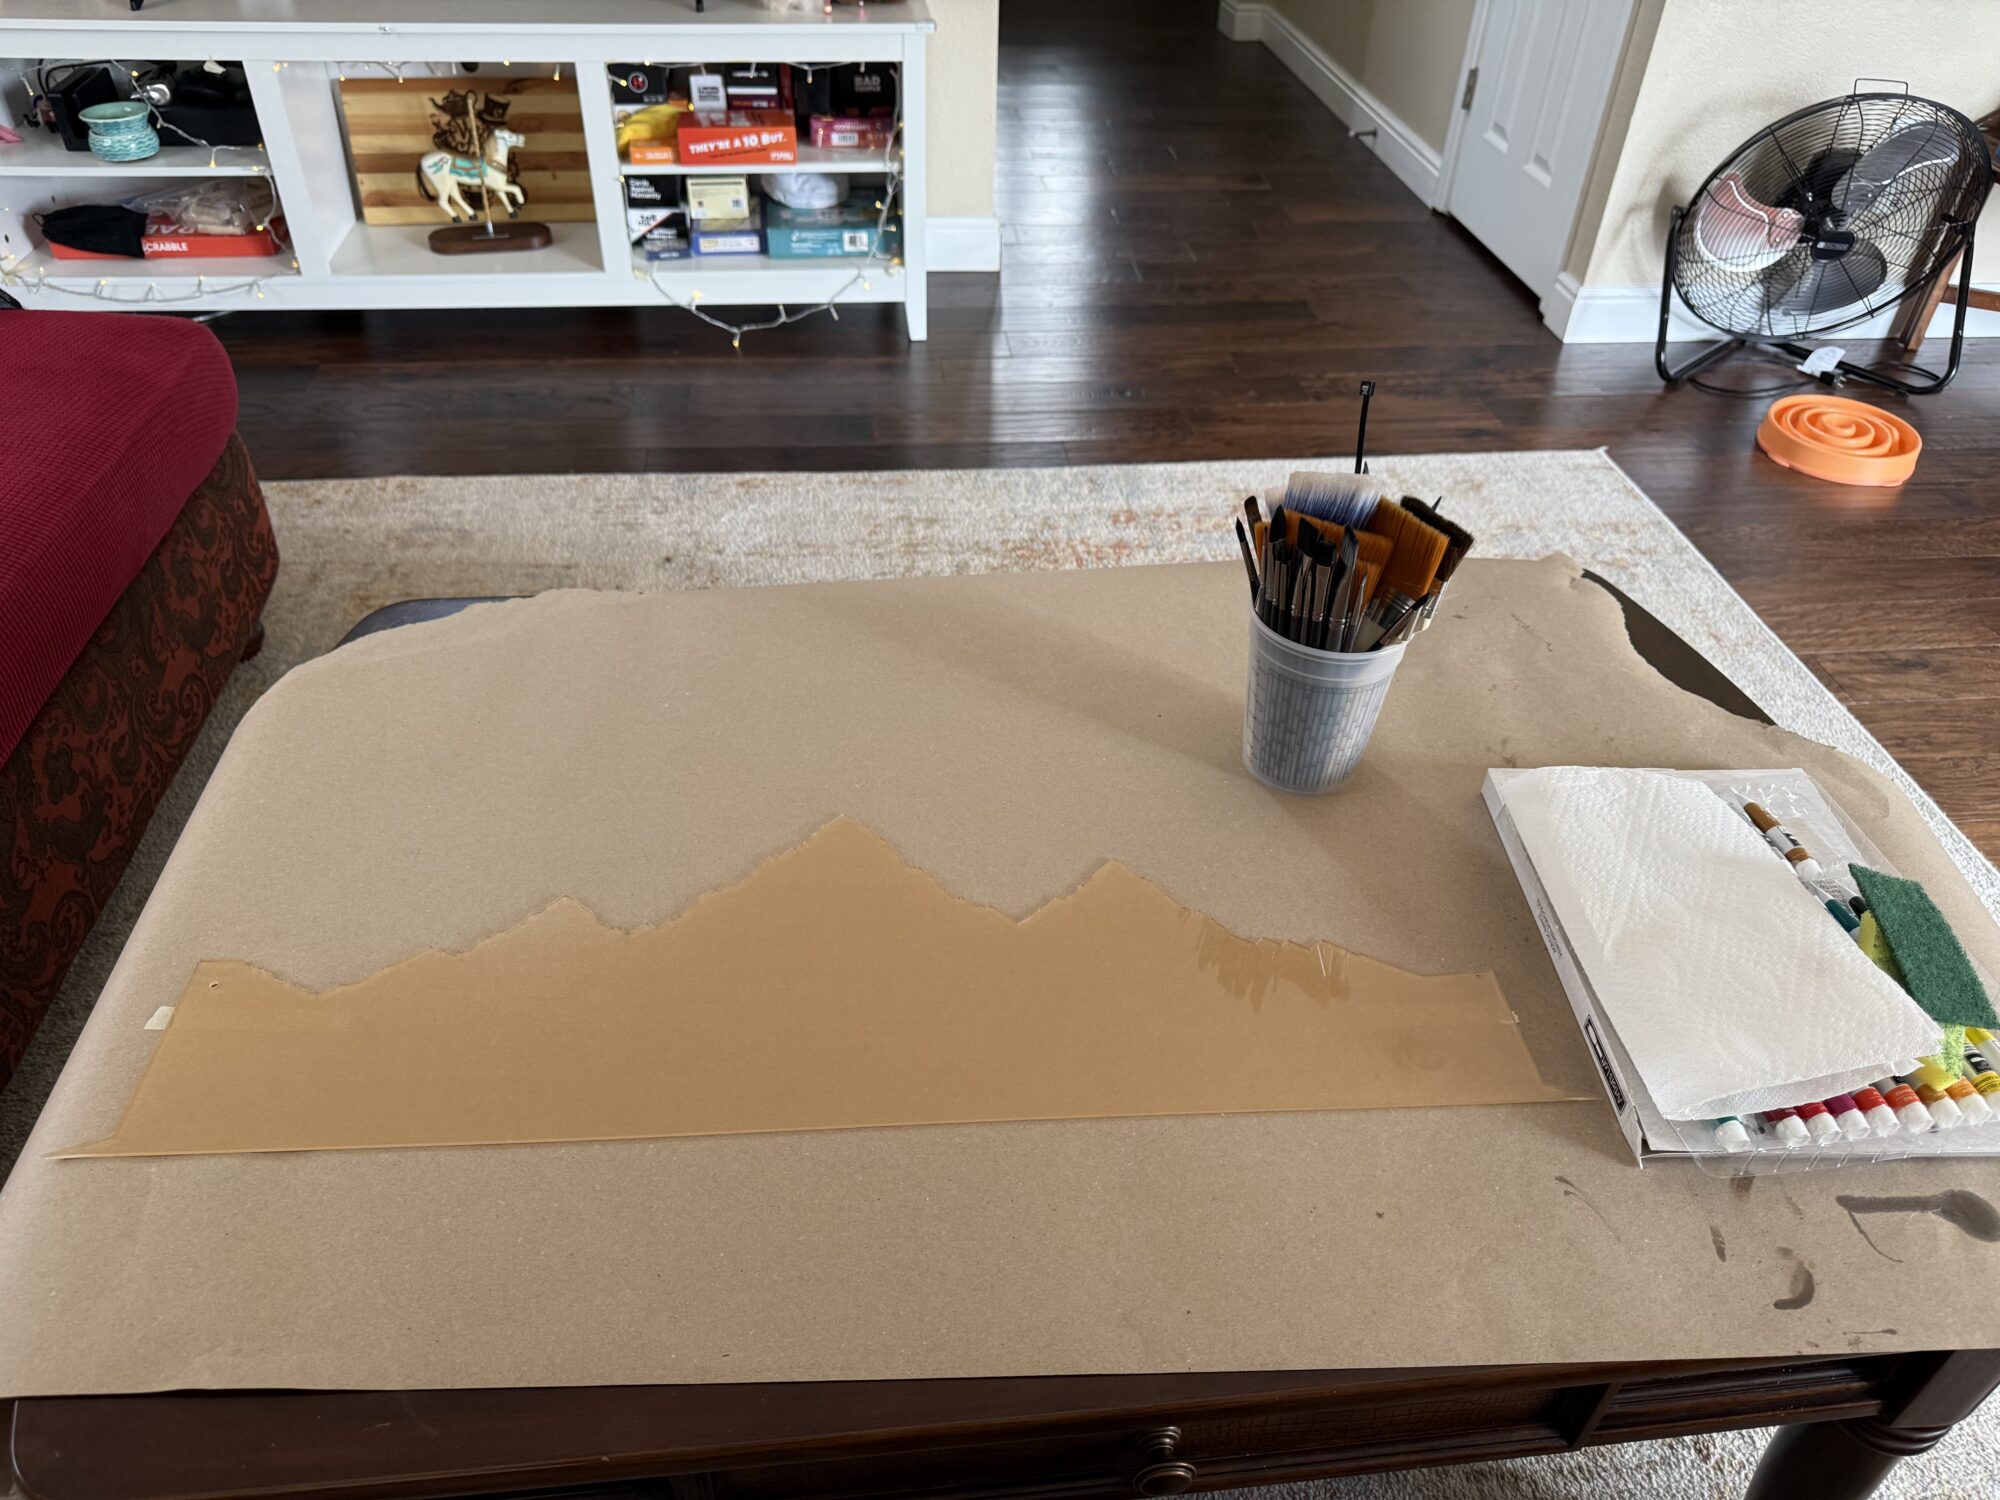
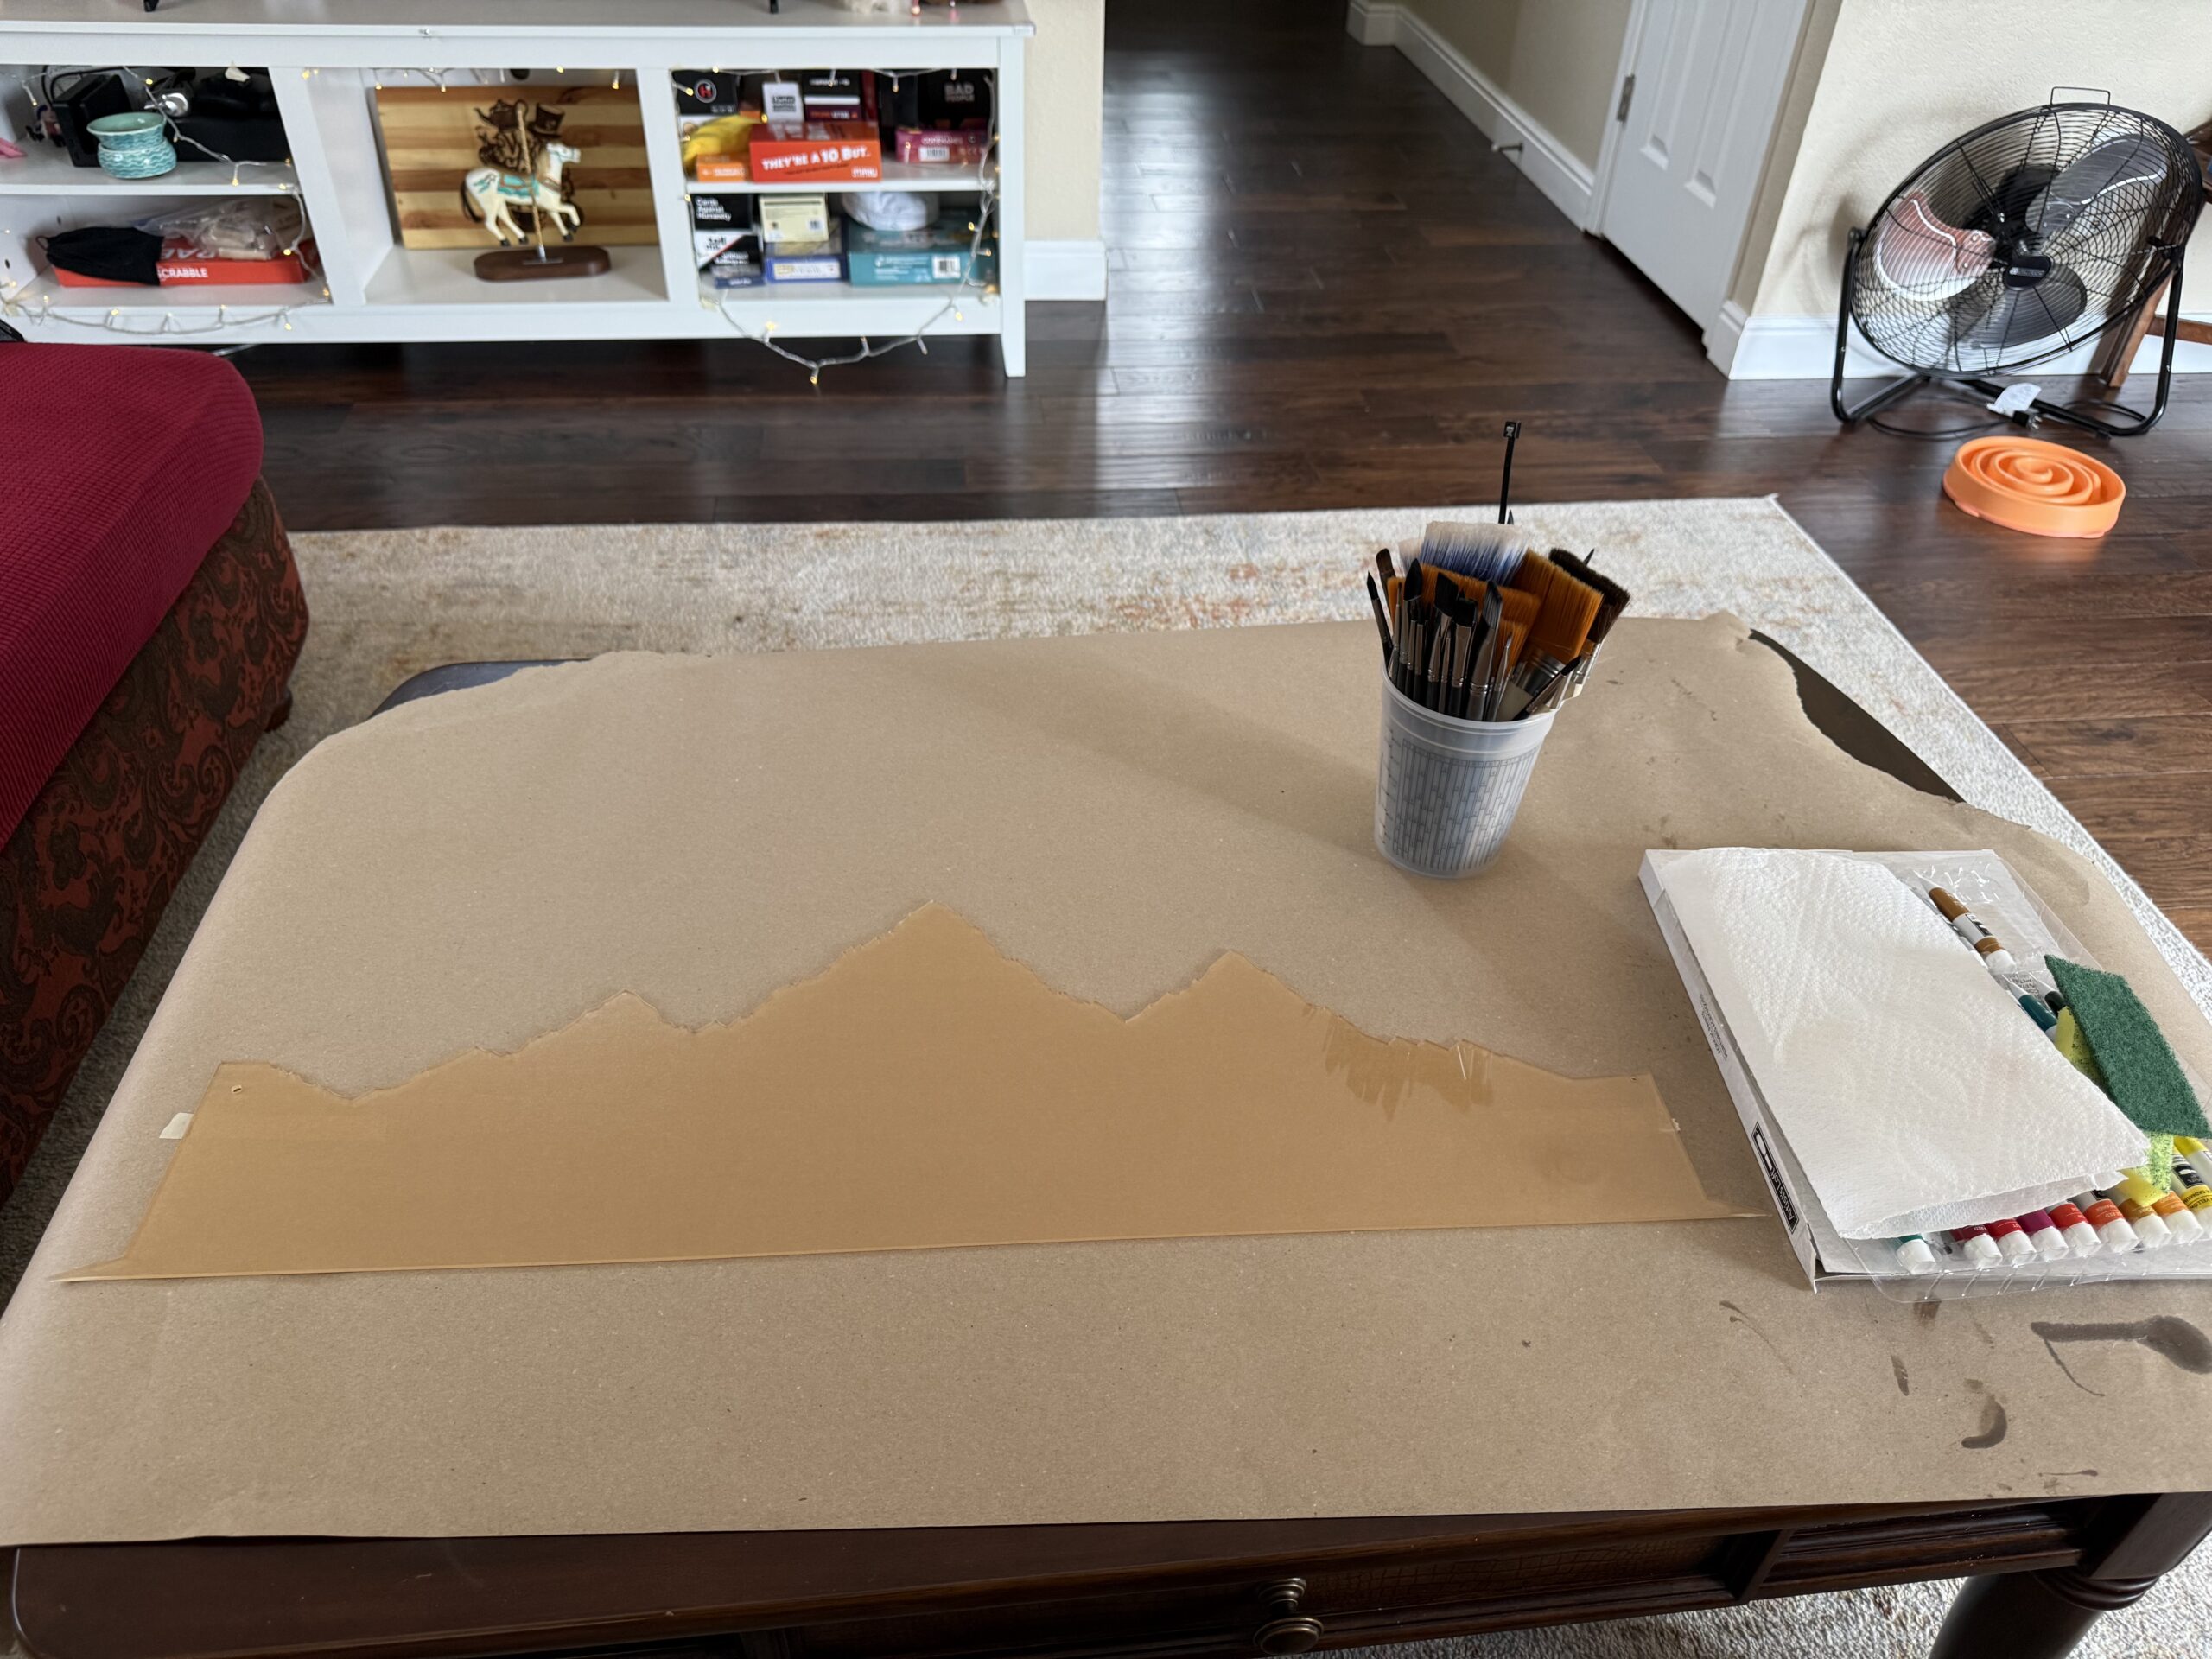
I got a sheet of 1/16″ acrylic and laser-cut a layered mountain scene (similar to a layered shadow box design). The first photo shows only the base layer, but the second shows the snow. I painted everything by hand and epoxied them together. Once I was satisfied with eyeballing the placement on the cured resin background, I epoxied that in place and covered all edges with epoxy.
Even though it’s a 5-minute epoxy, I waited 3 hours to pour the next layer of resin—this allows all bubbles to dissipate in the epoxy and reduces the chance of a cloudy pour (from exothermic reactions that cause the resin to flash cure).
The sharp triangular edges at the bottom were intentionally designed to help me align them during this step.


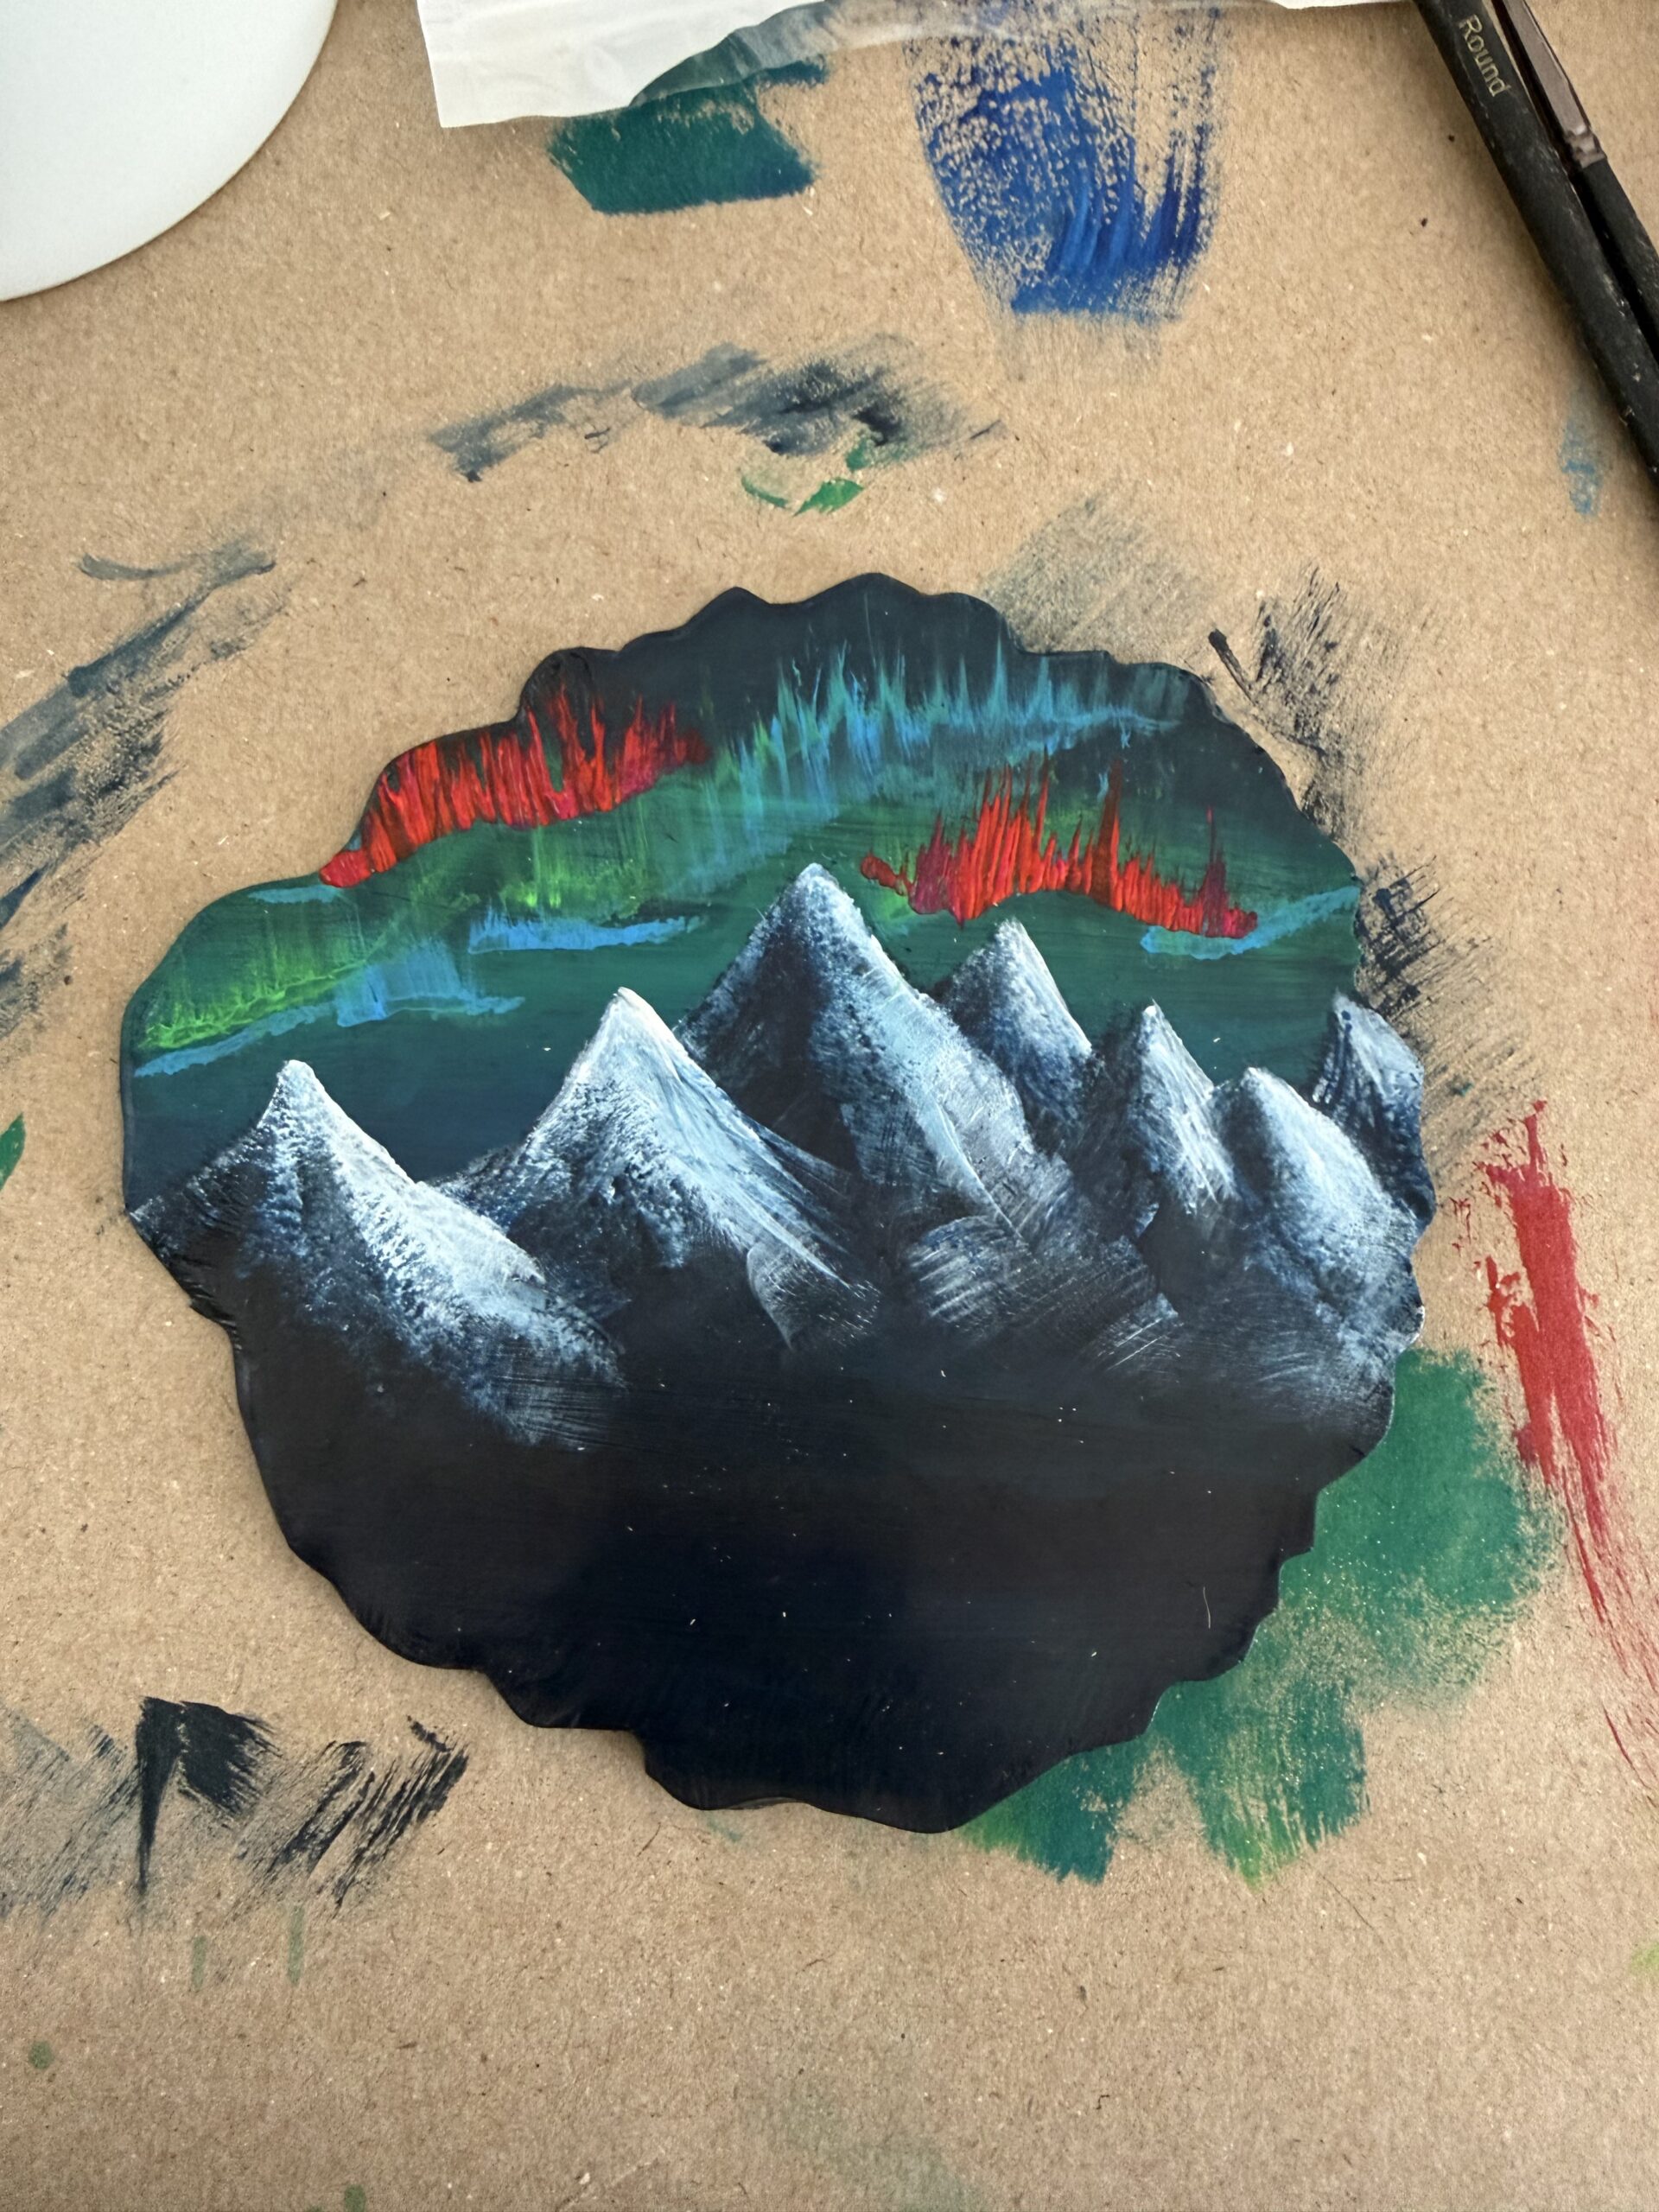
The Star of the Show: The Auroras
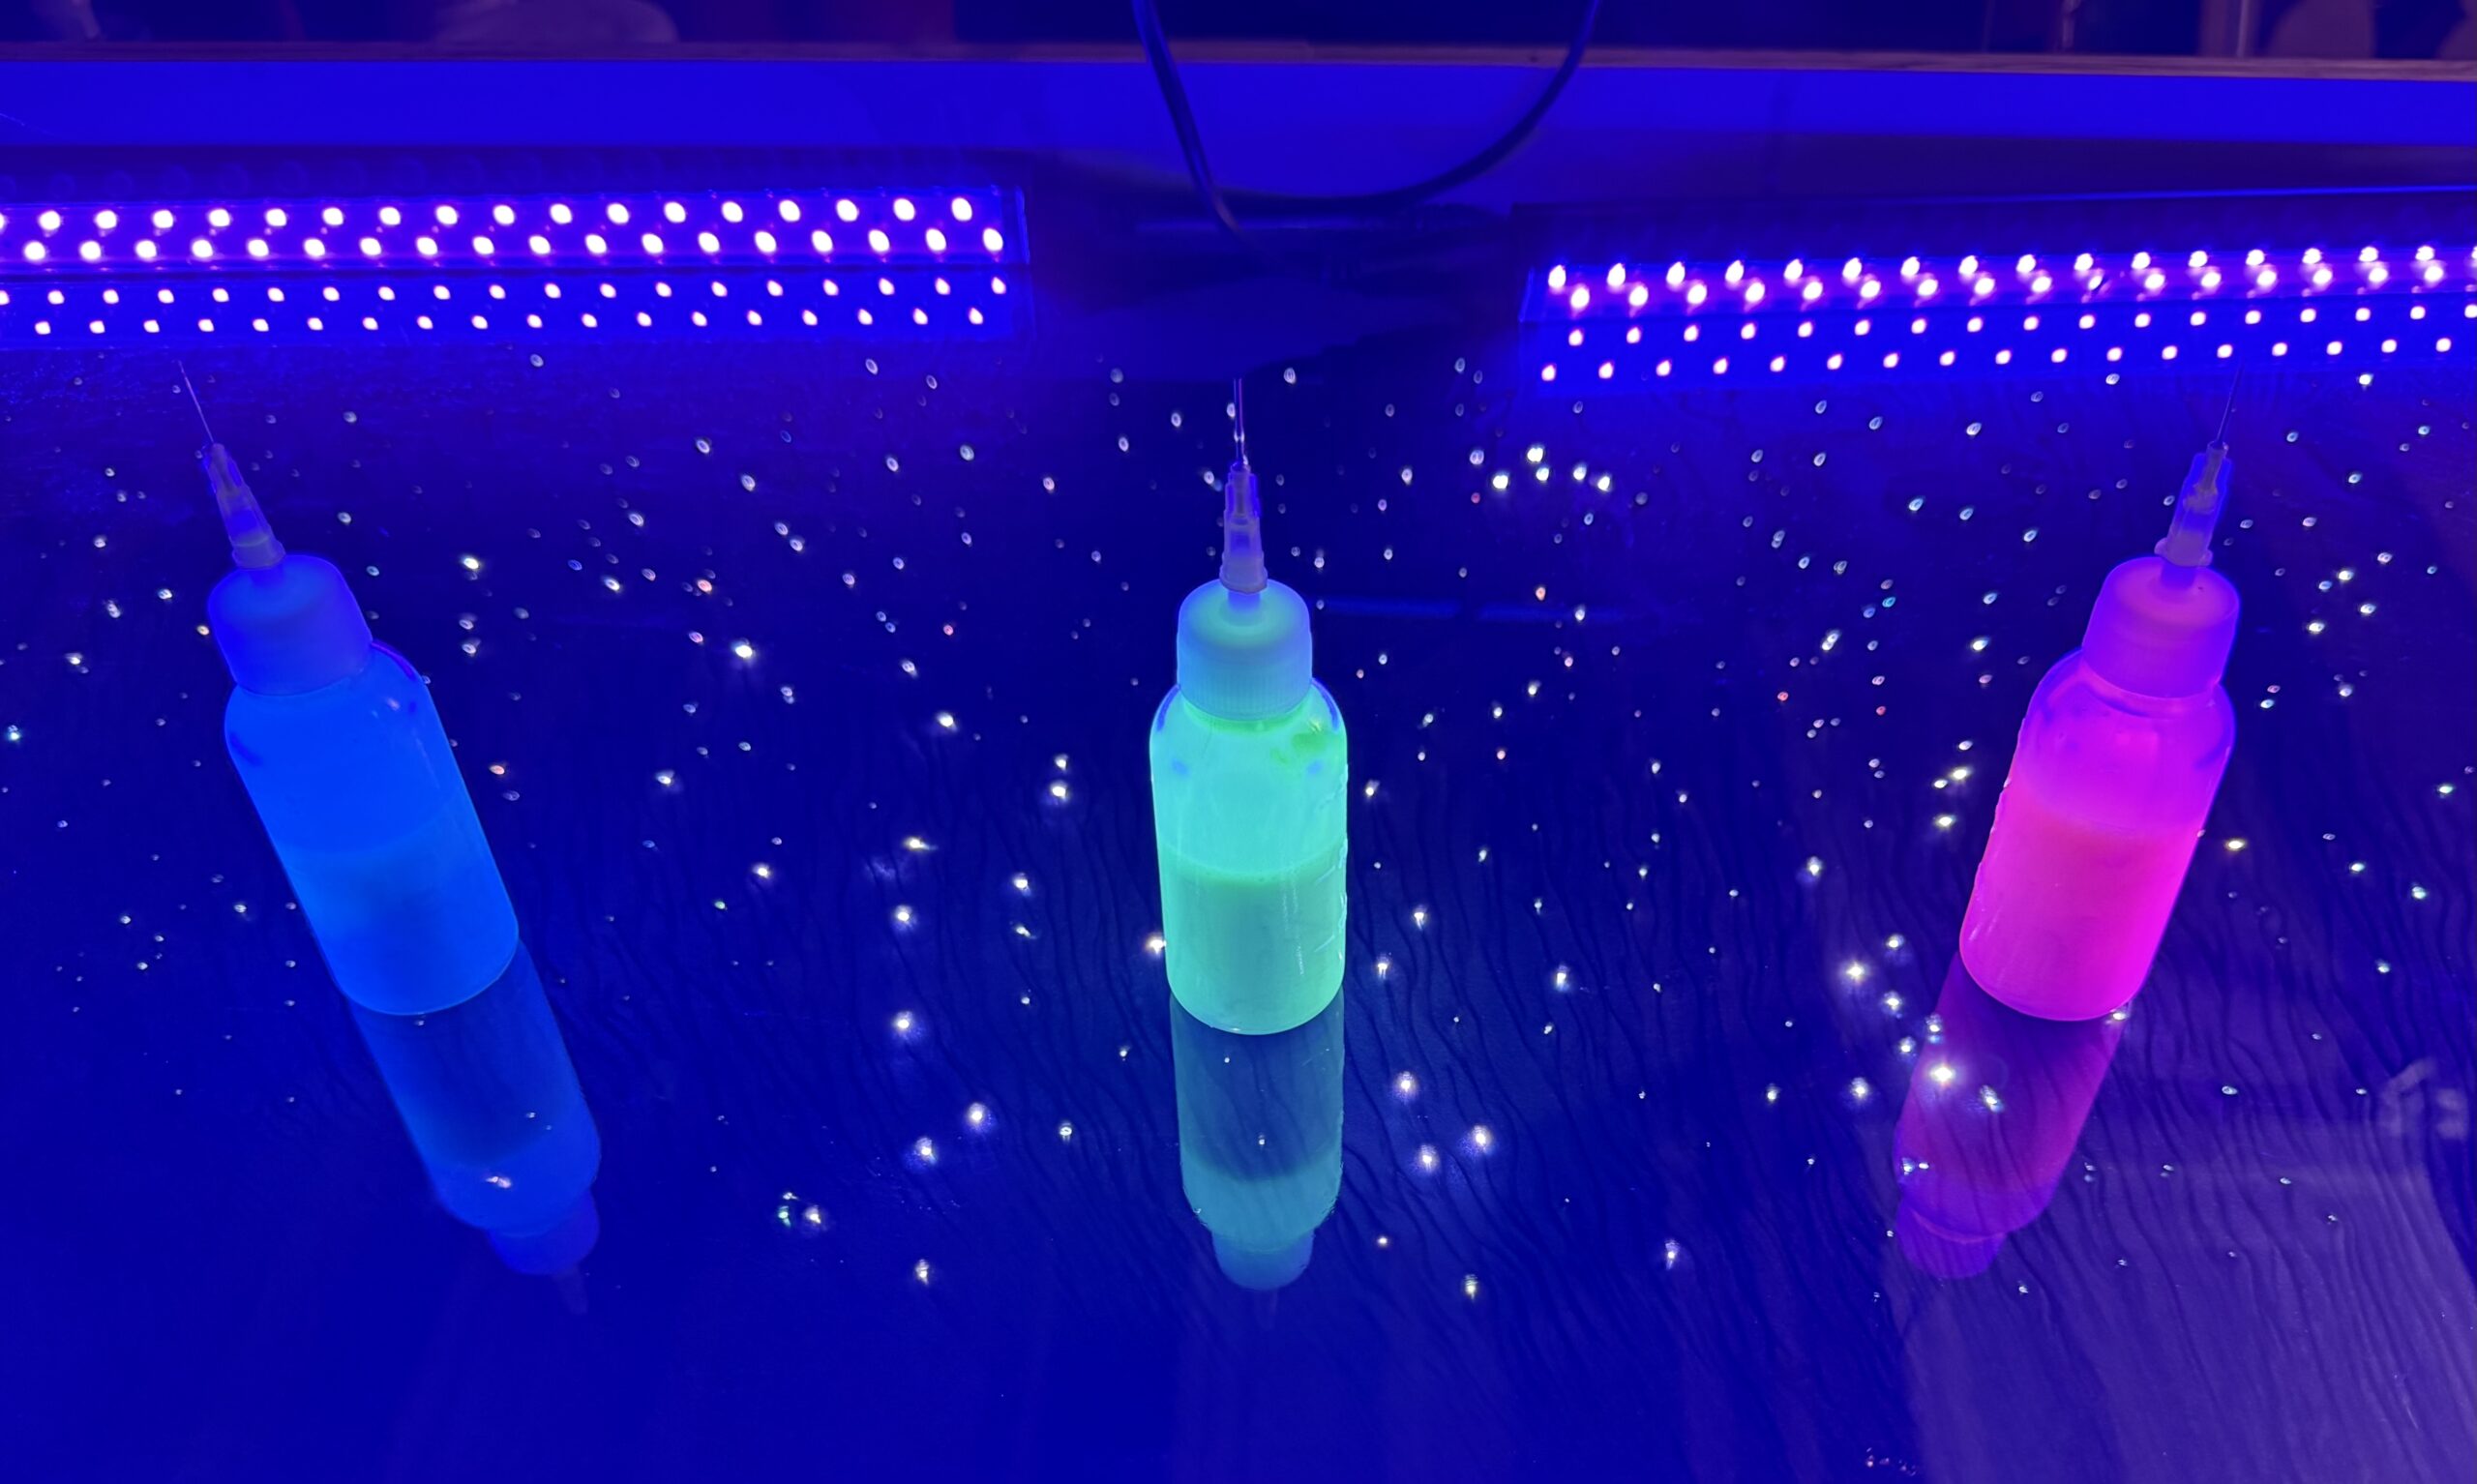
The auroras were painted and repainted several times, and black lights were used to aid placement.
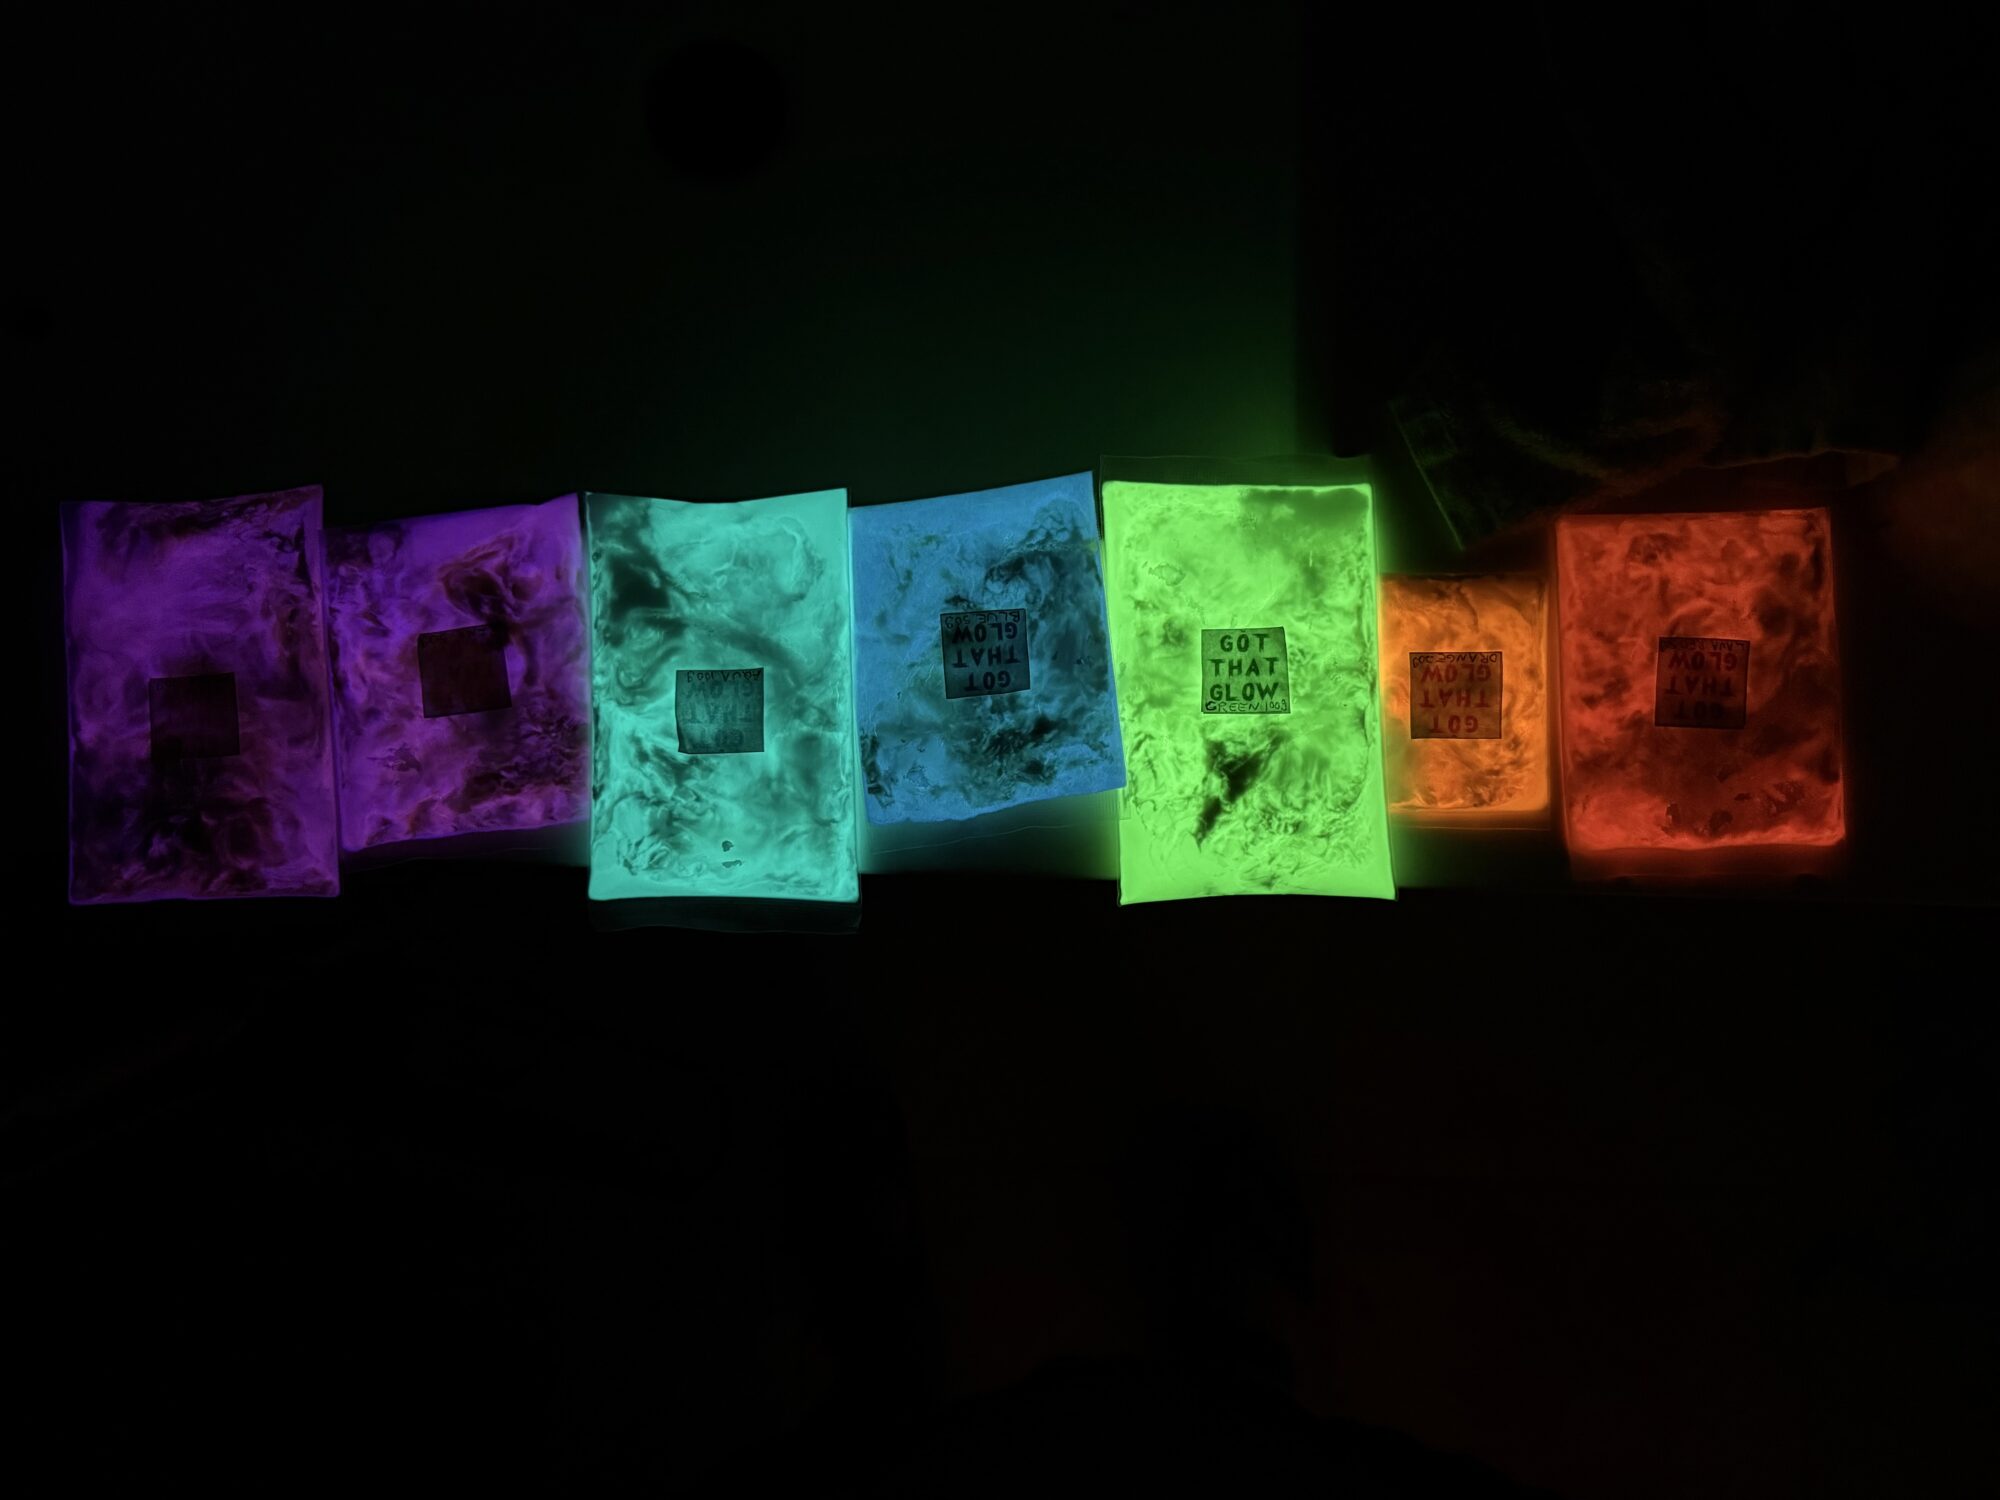
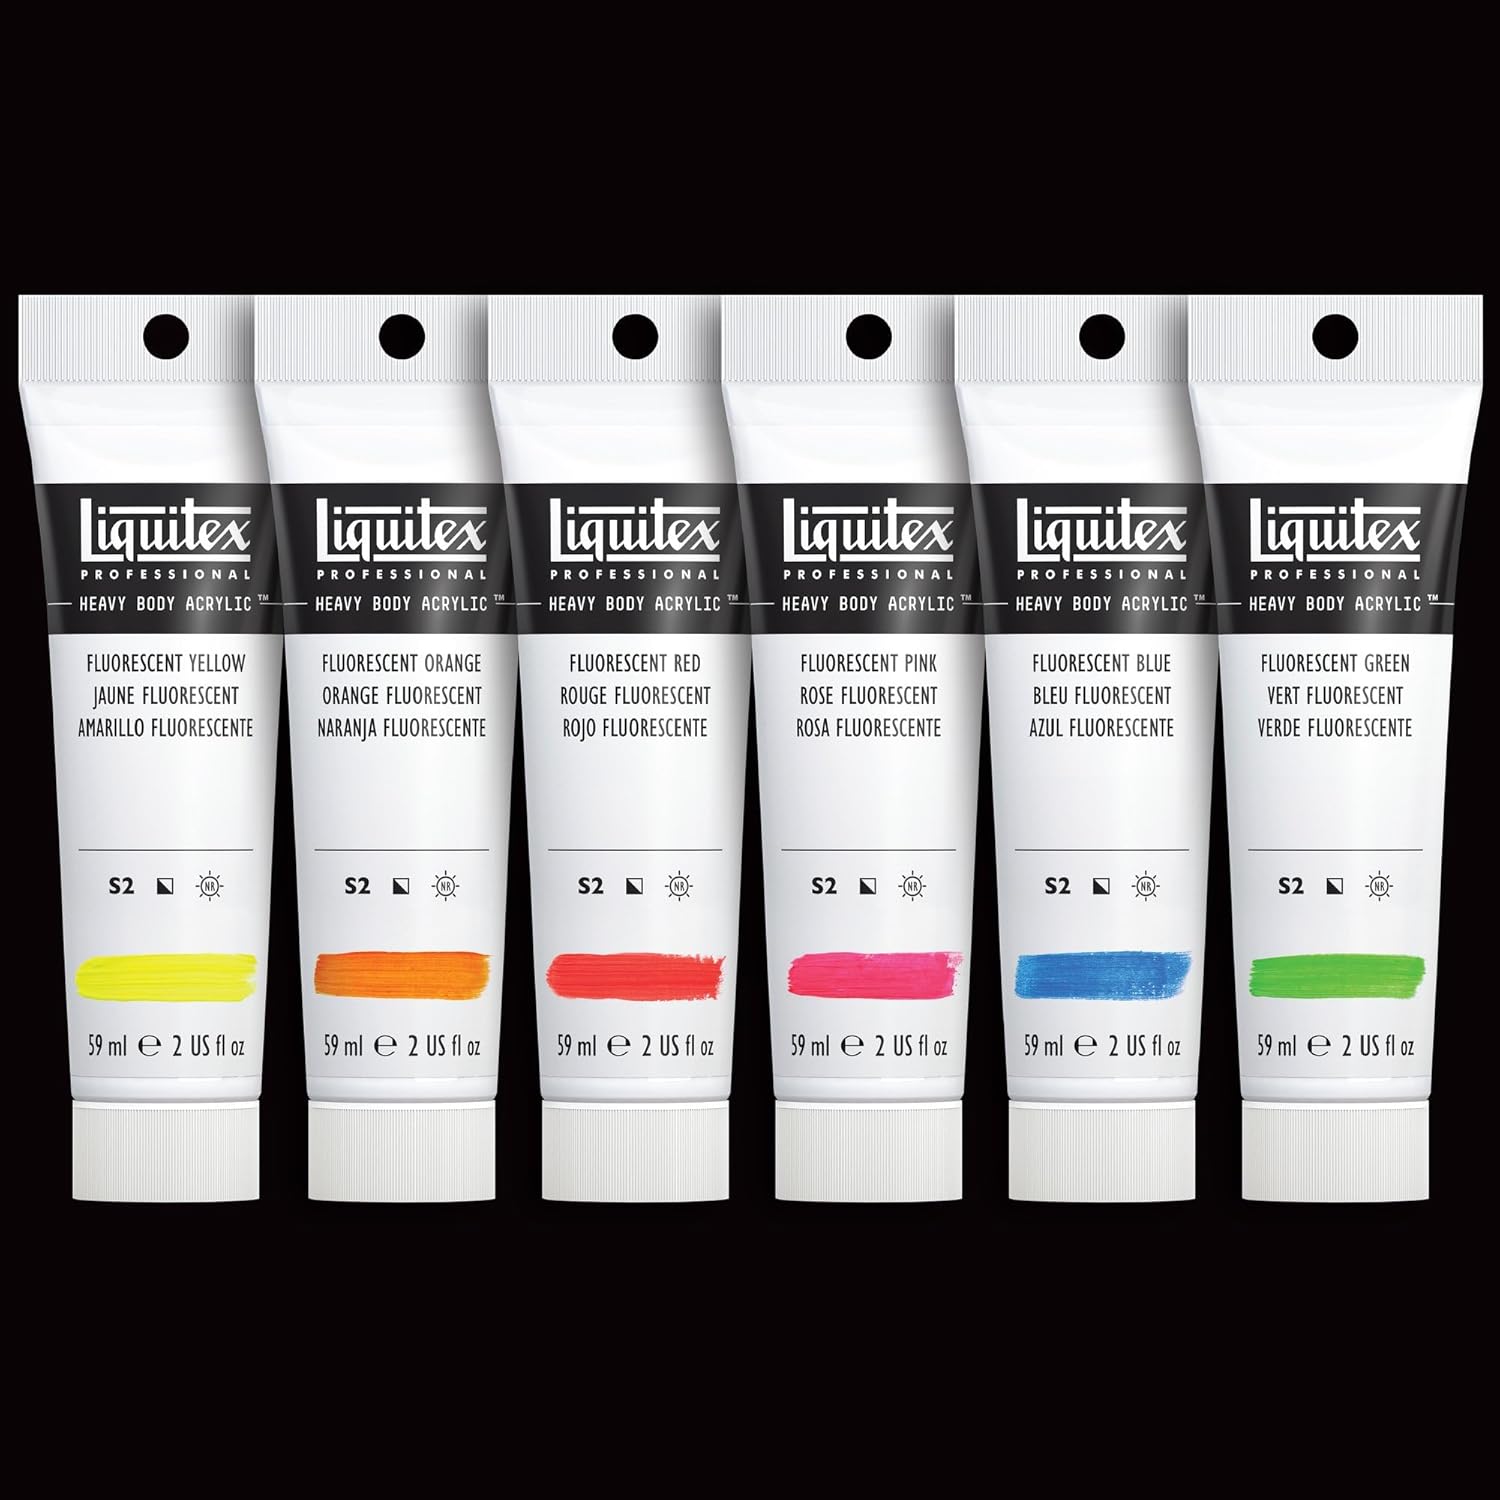
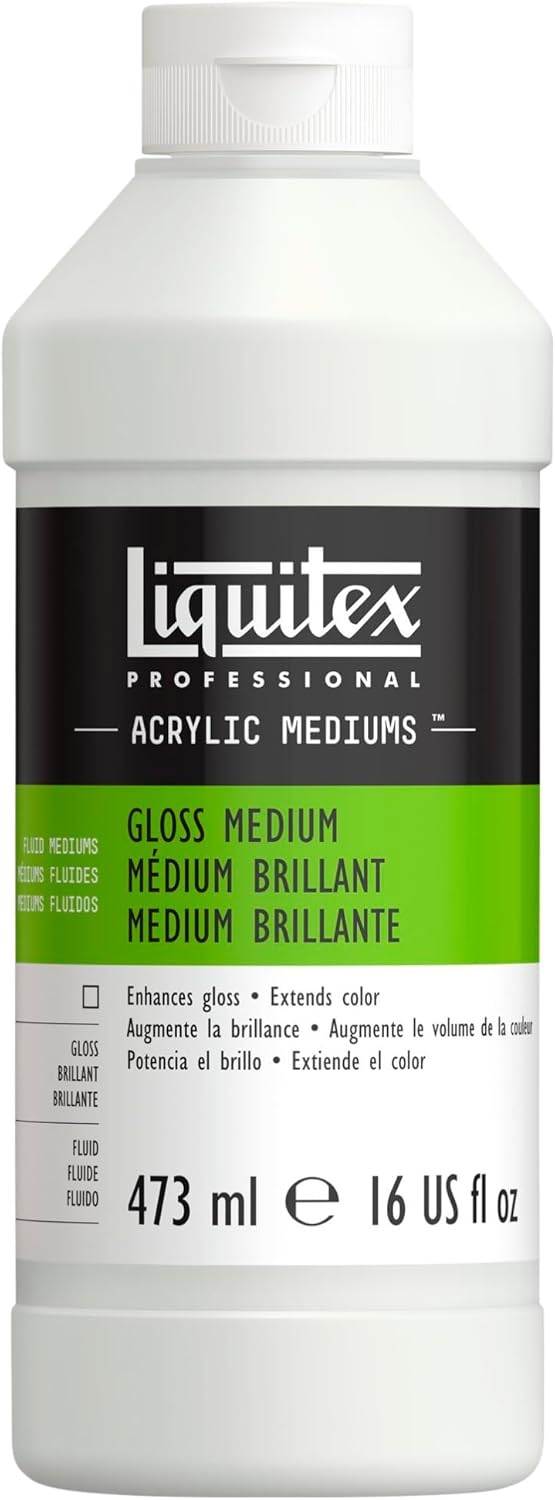
I created the pigmented glow paint by combining a base of Liquitex gloss medium, Liquitex fluorescent paint for pigment, and the matching glow powder.
I painted a straight line and used a dry brush to pull them up, using several photos to choose the color placement. After further comparison, I also painted two lines of green and blue, bringing the colors together.

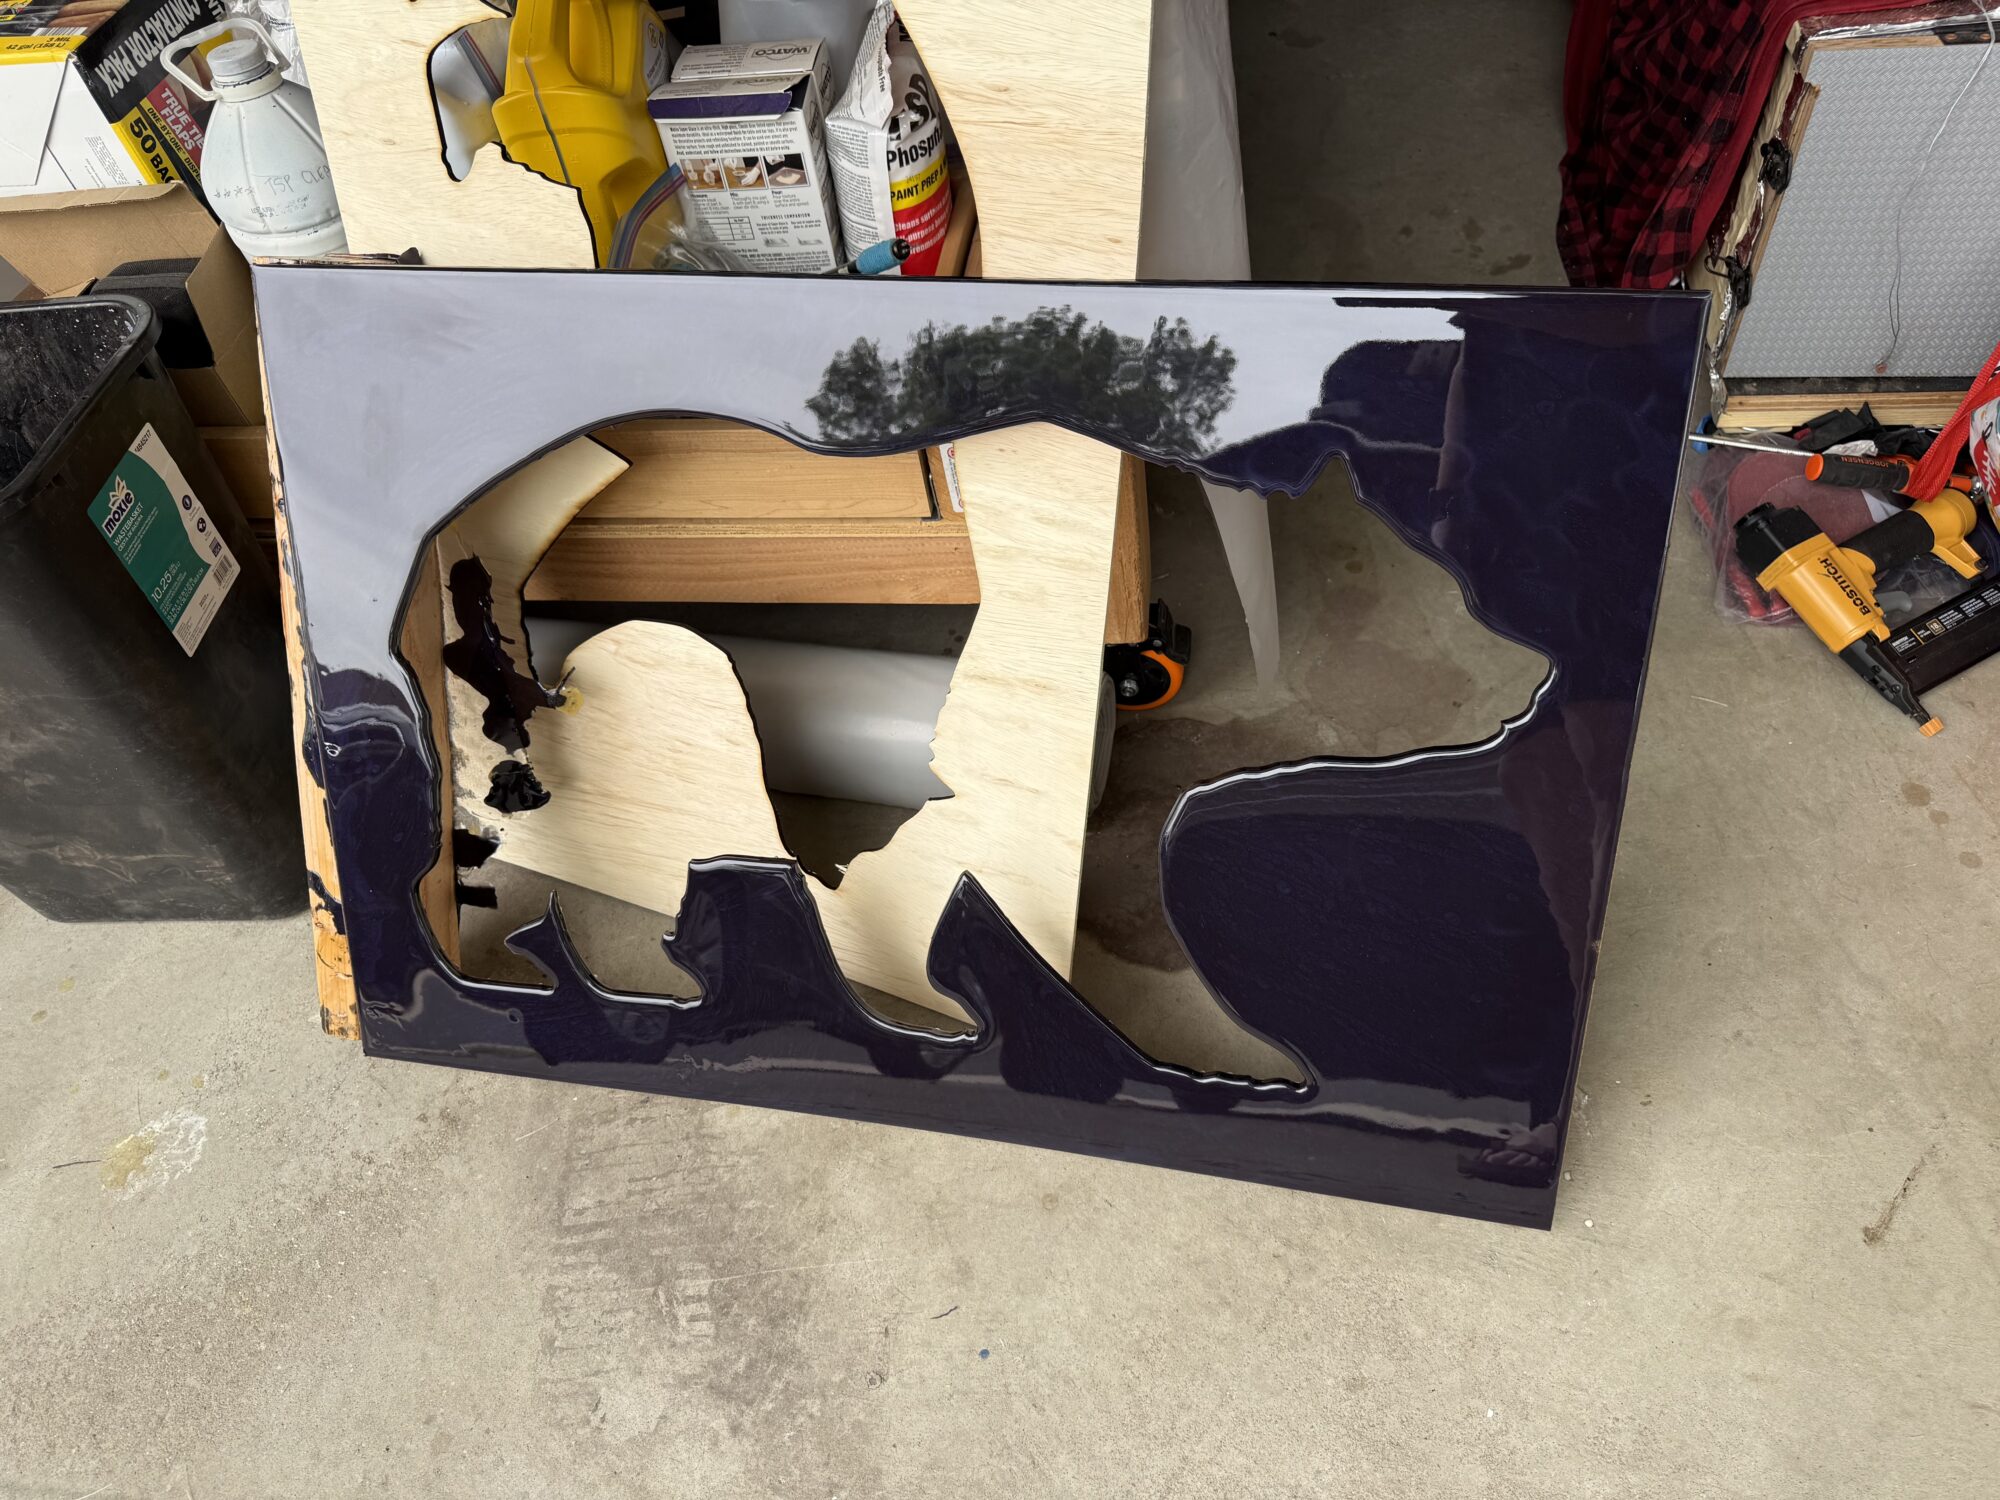
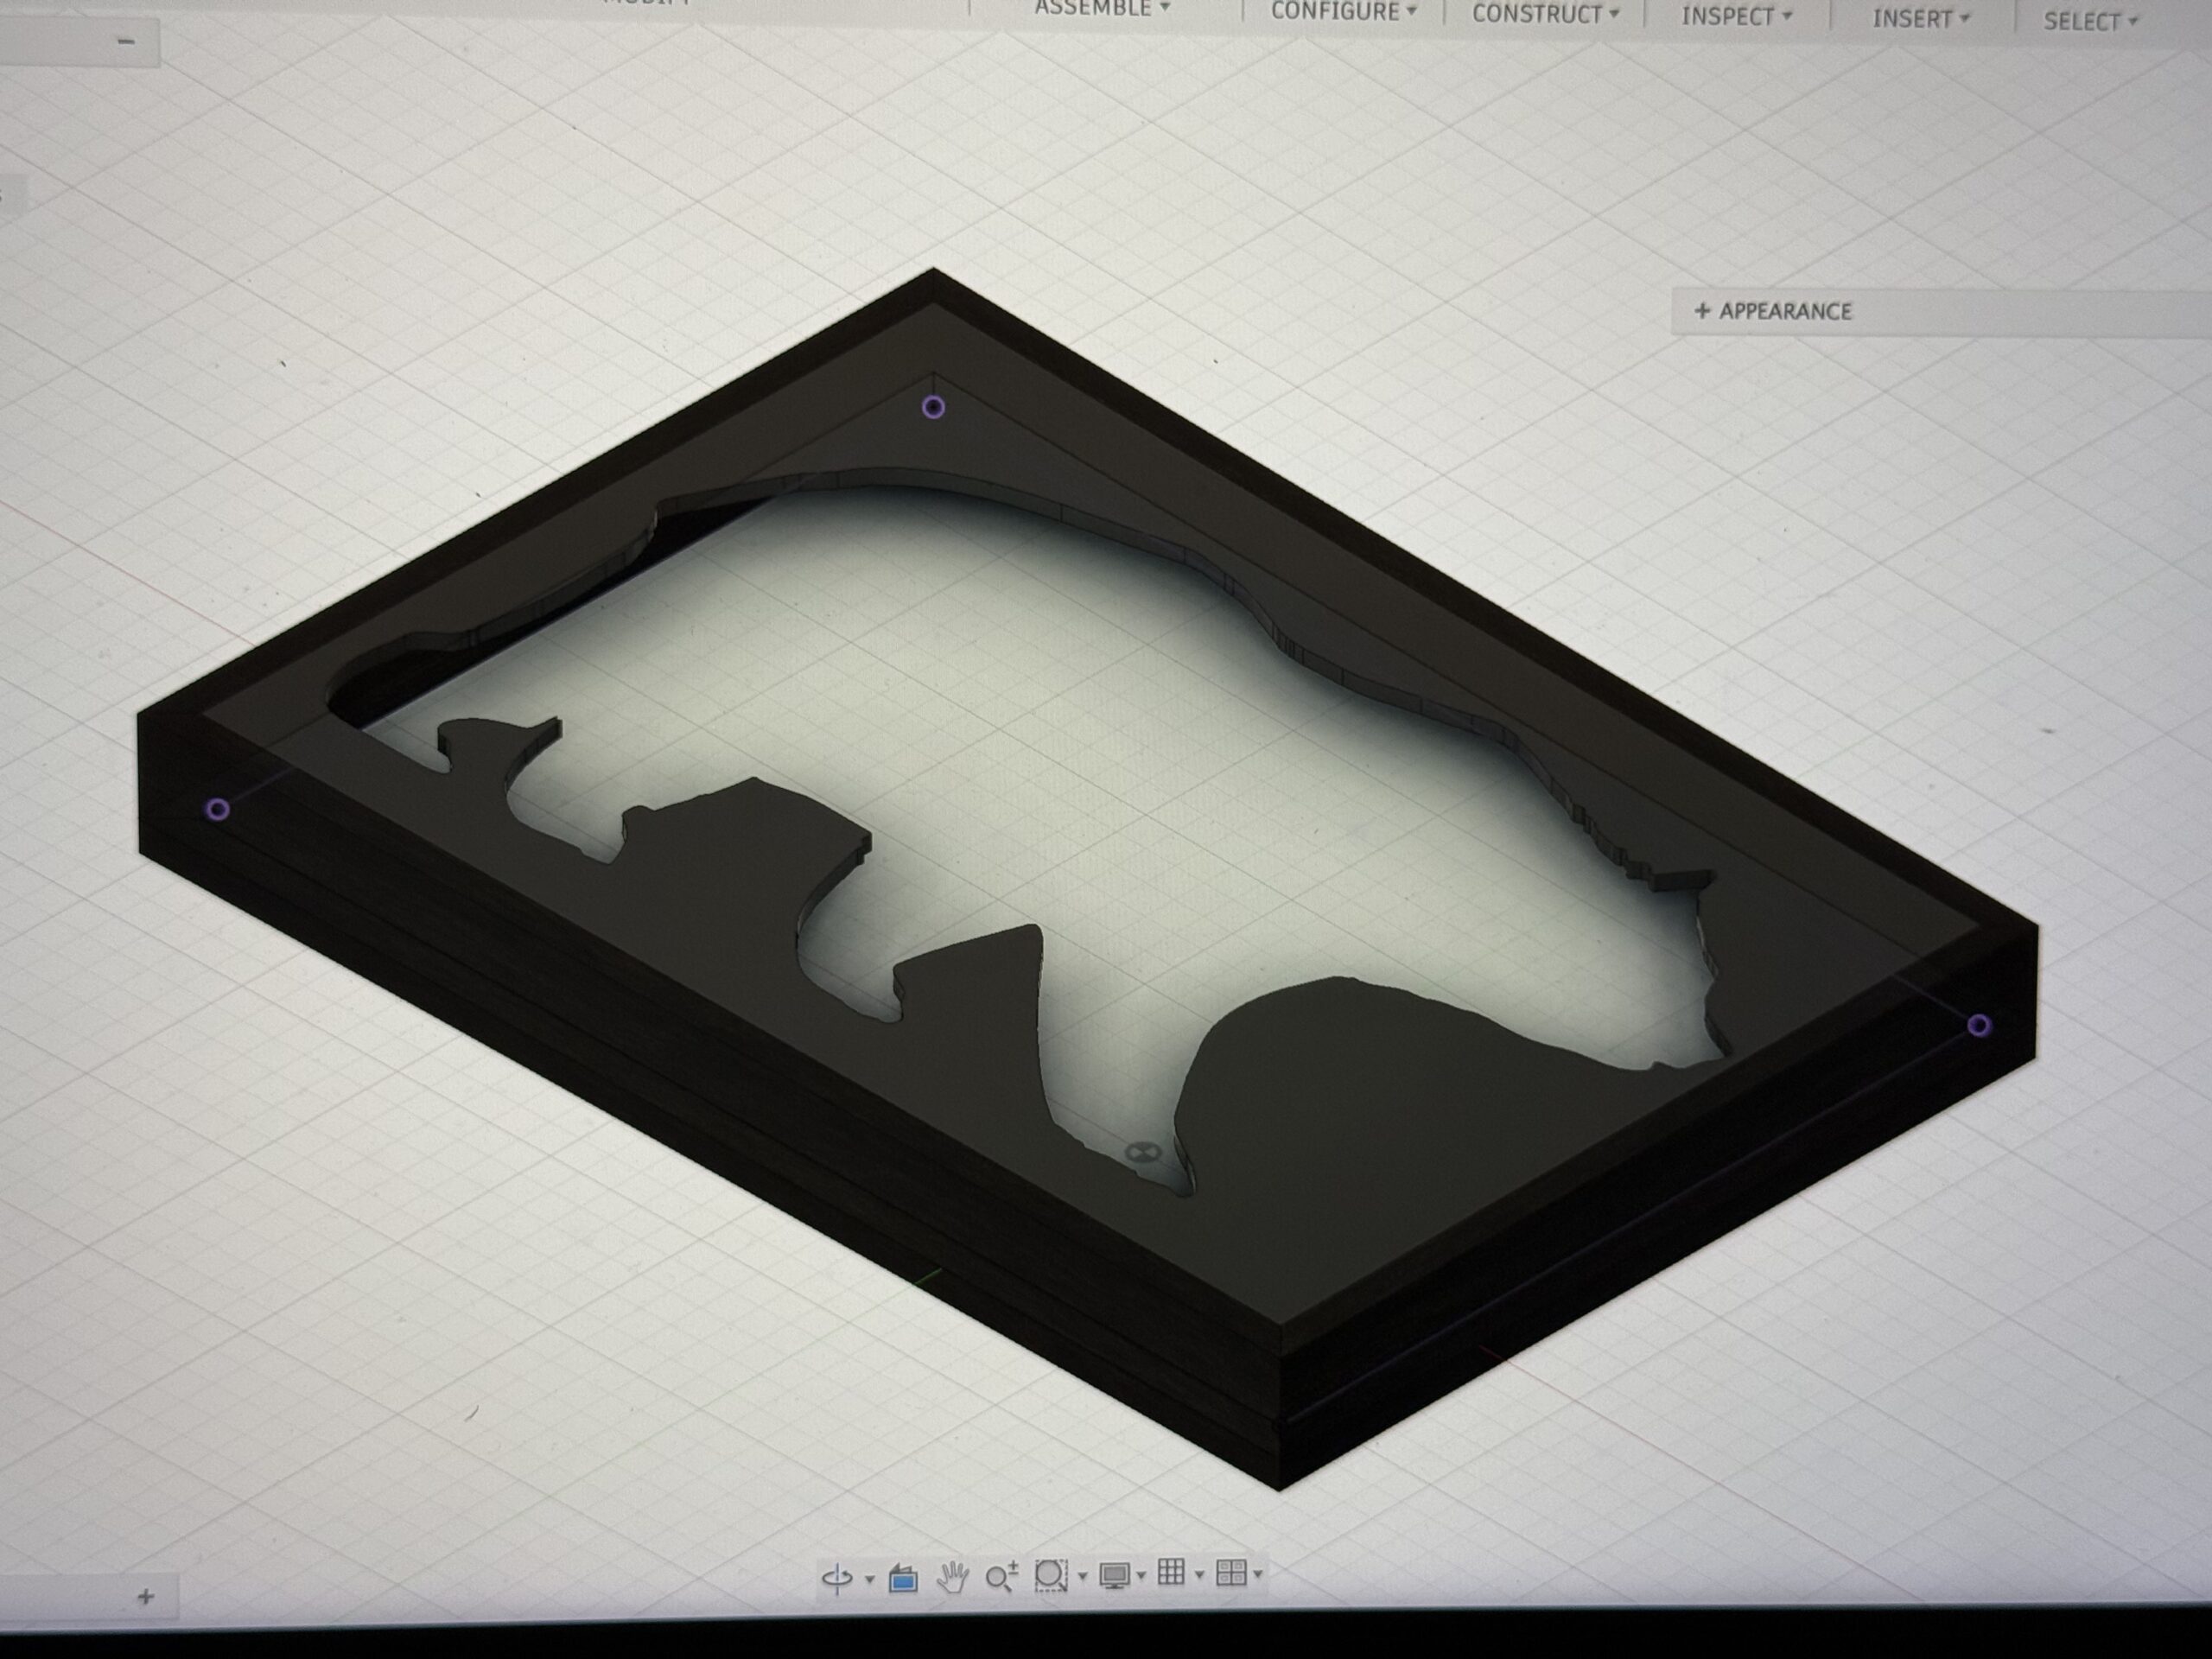
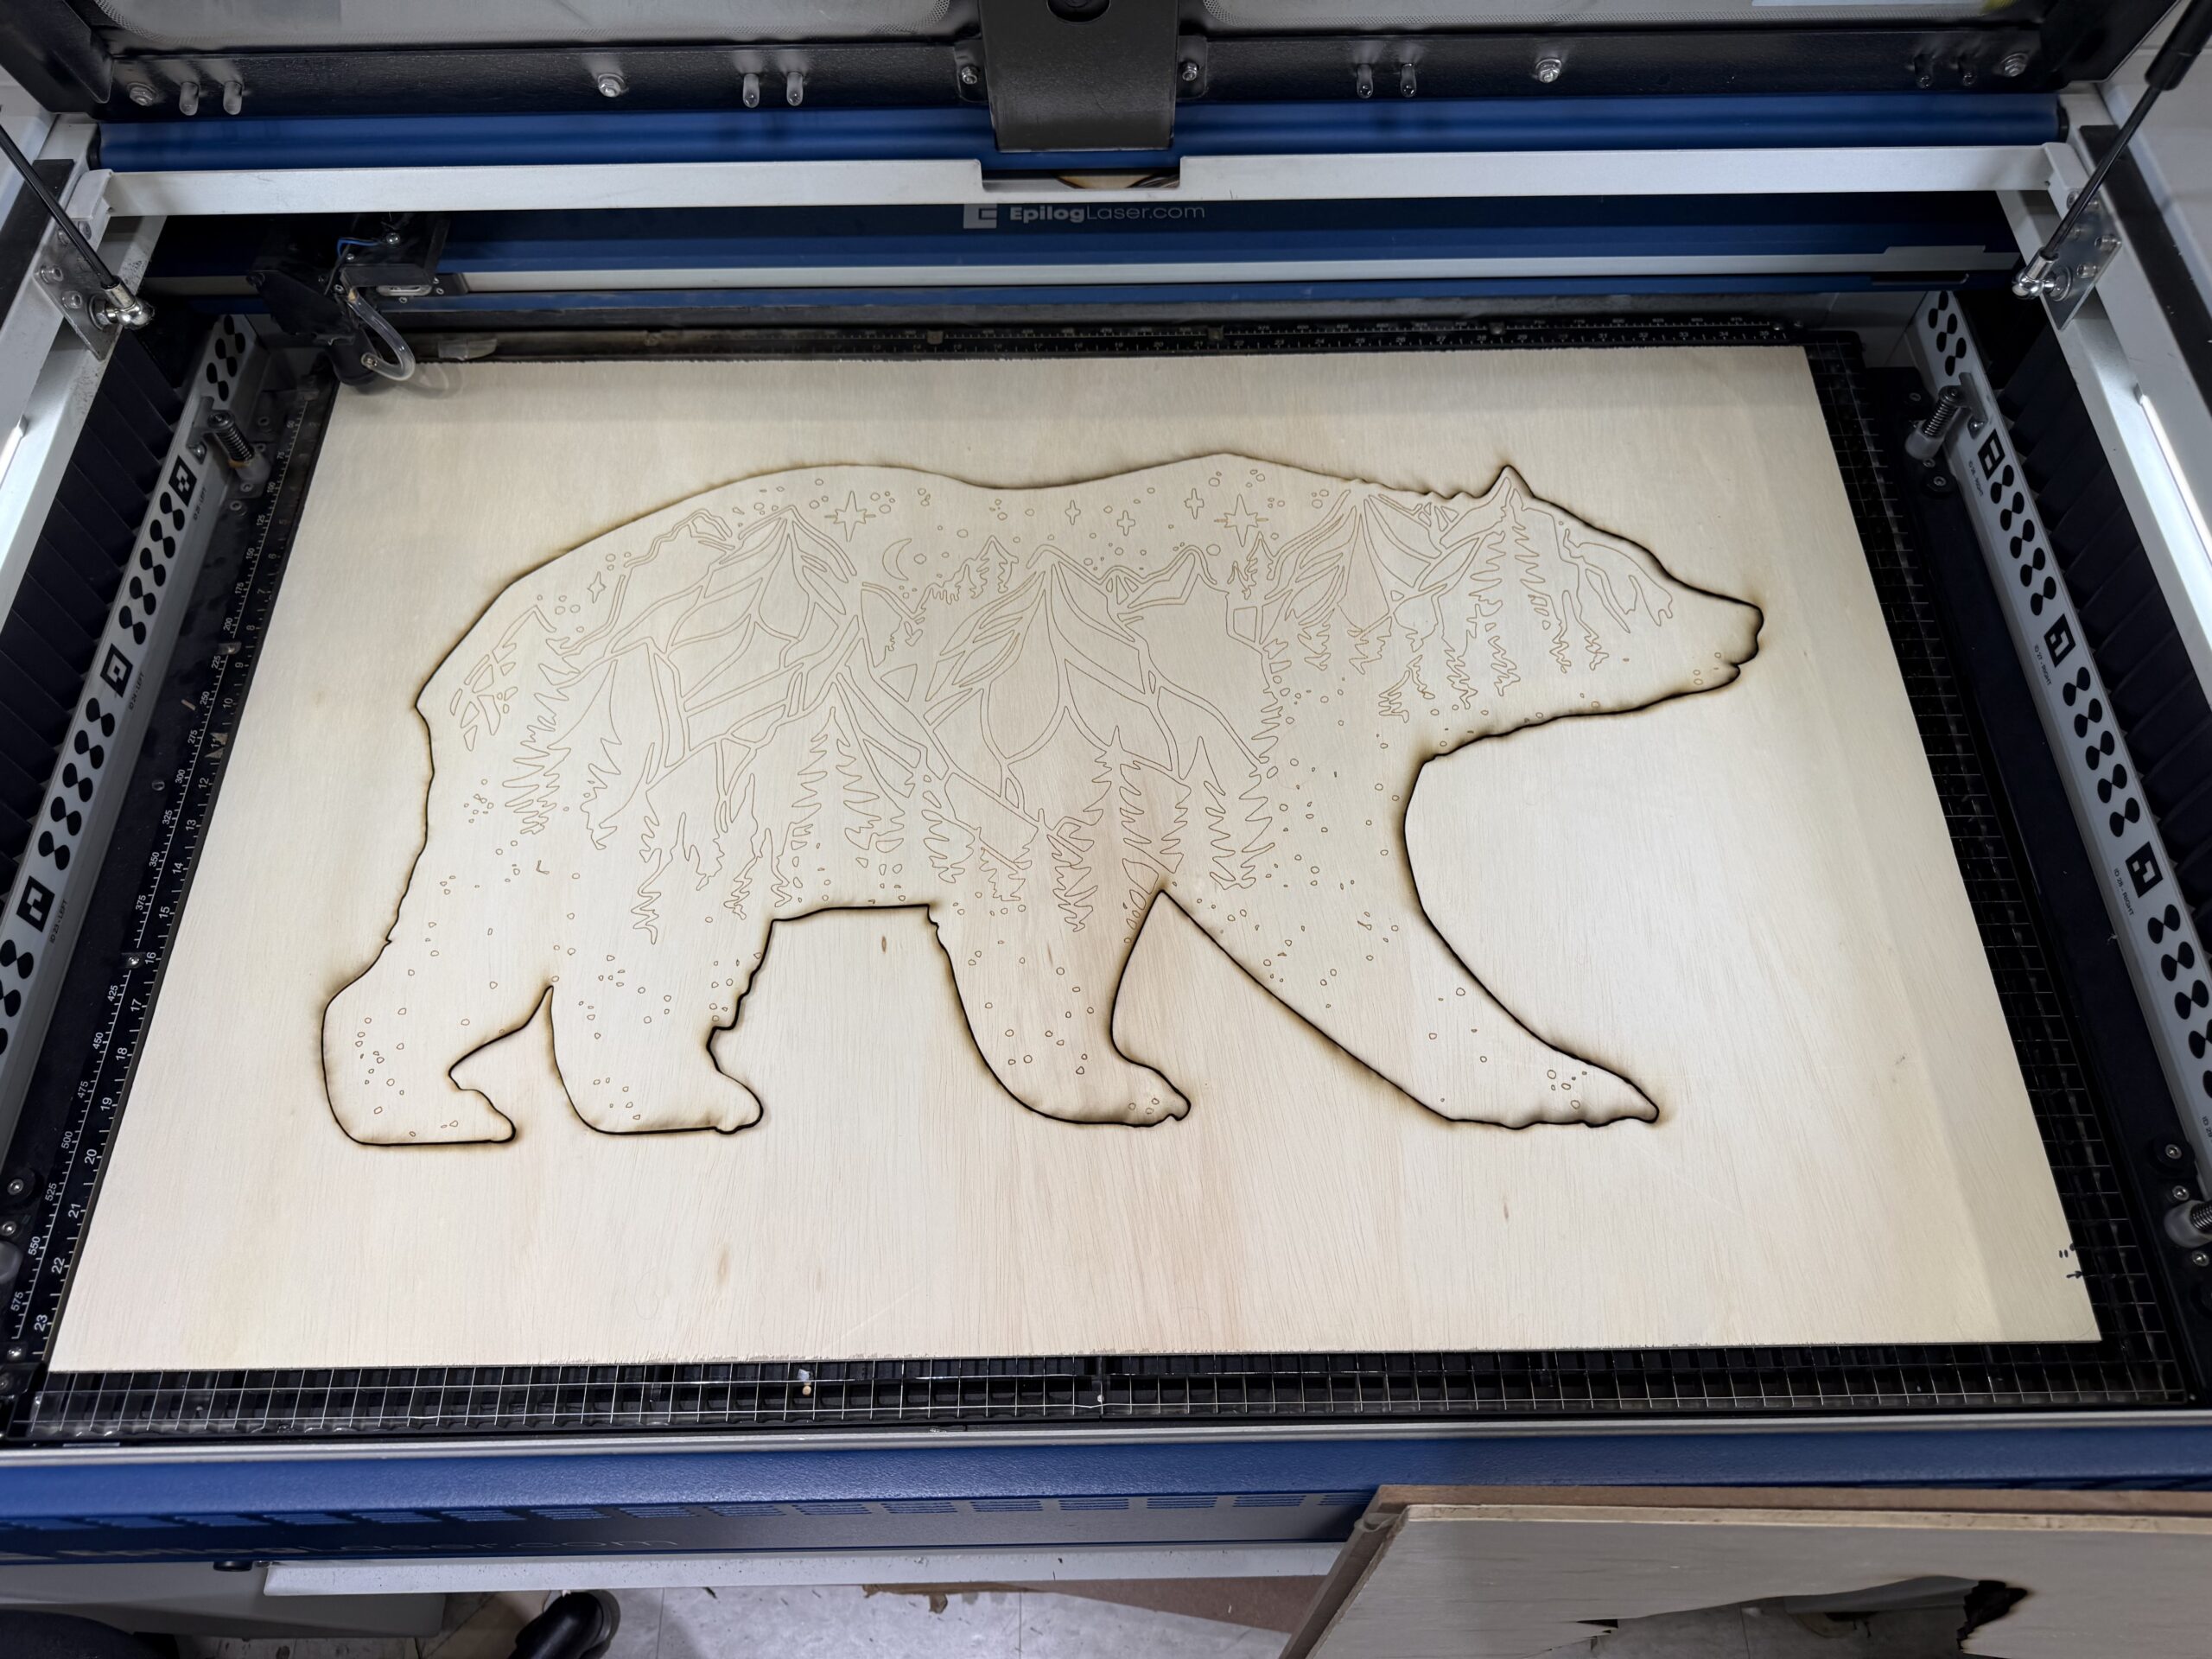
The Bear Faceplate
I modeled the bear plate in Fusion, reusing my design from my CNC class in 2024.
If I were going to have leftover bears, I figured I might as well use the engraved design to make something else later.
I decided to cut a few different sizes for the bear in the frame to give myself options for the silhouette’s size. For example, the cut I used has a 1-1.5″ gap between the bear’s nose and tail to the outer frame. A smaller-sized bear had a 2.5″-3″ gap.
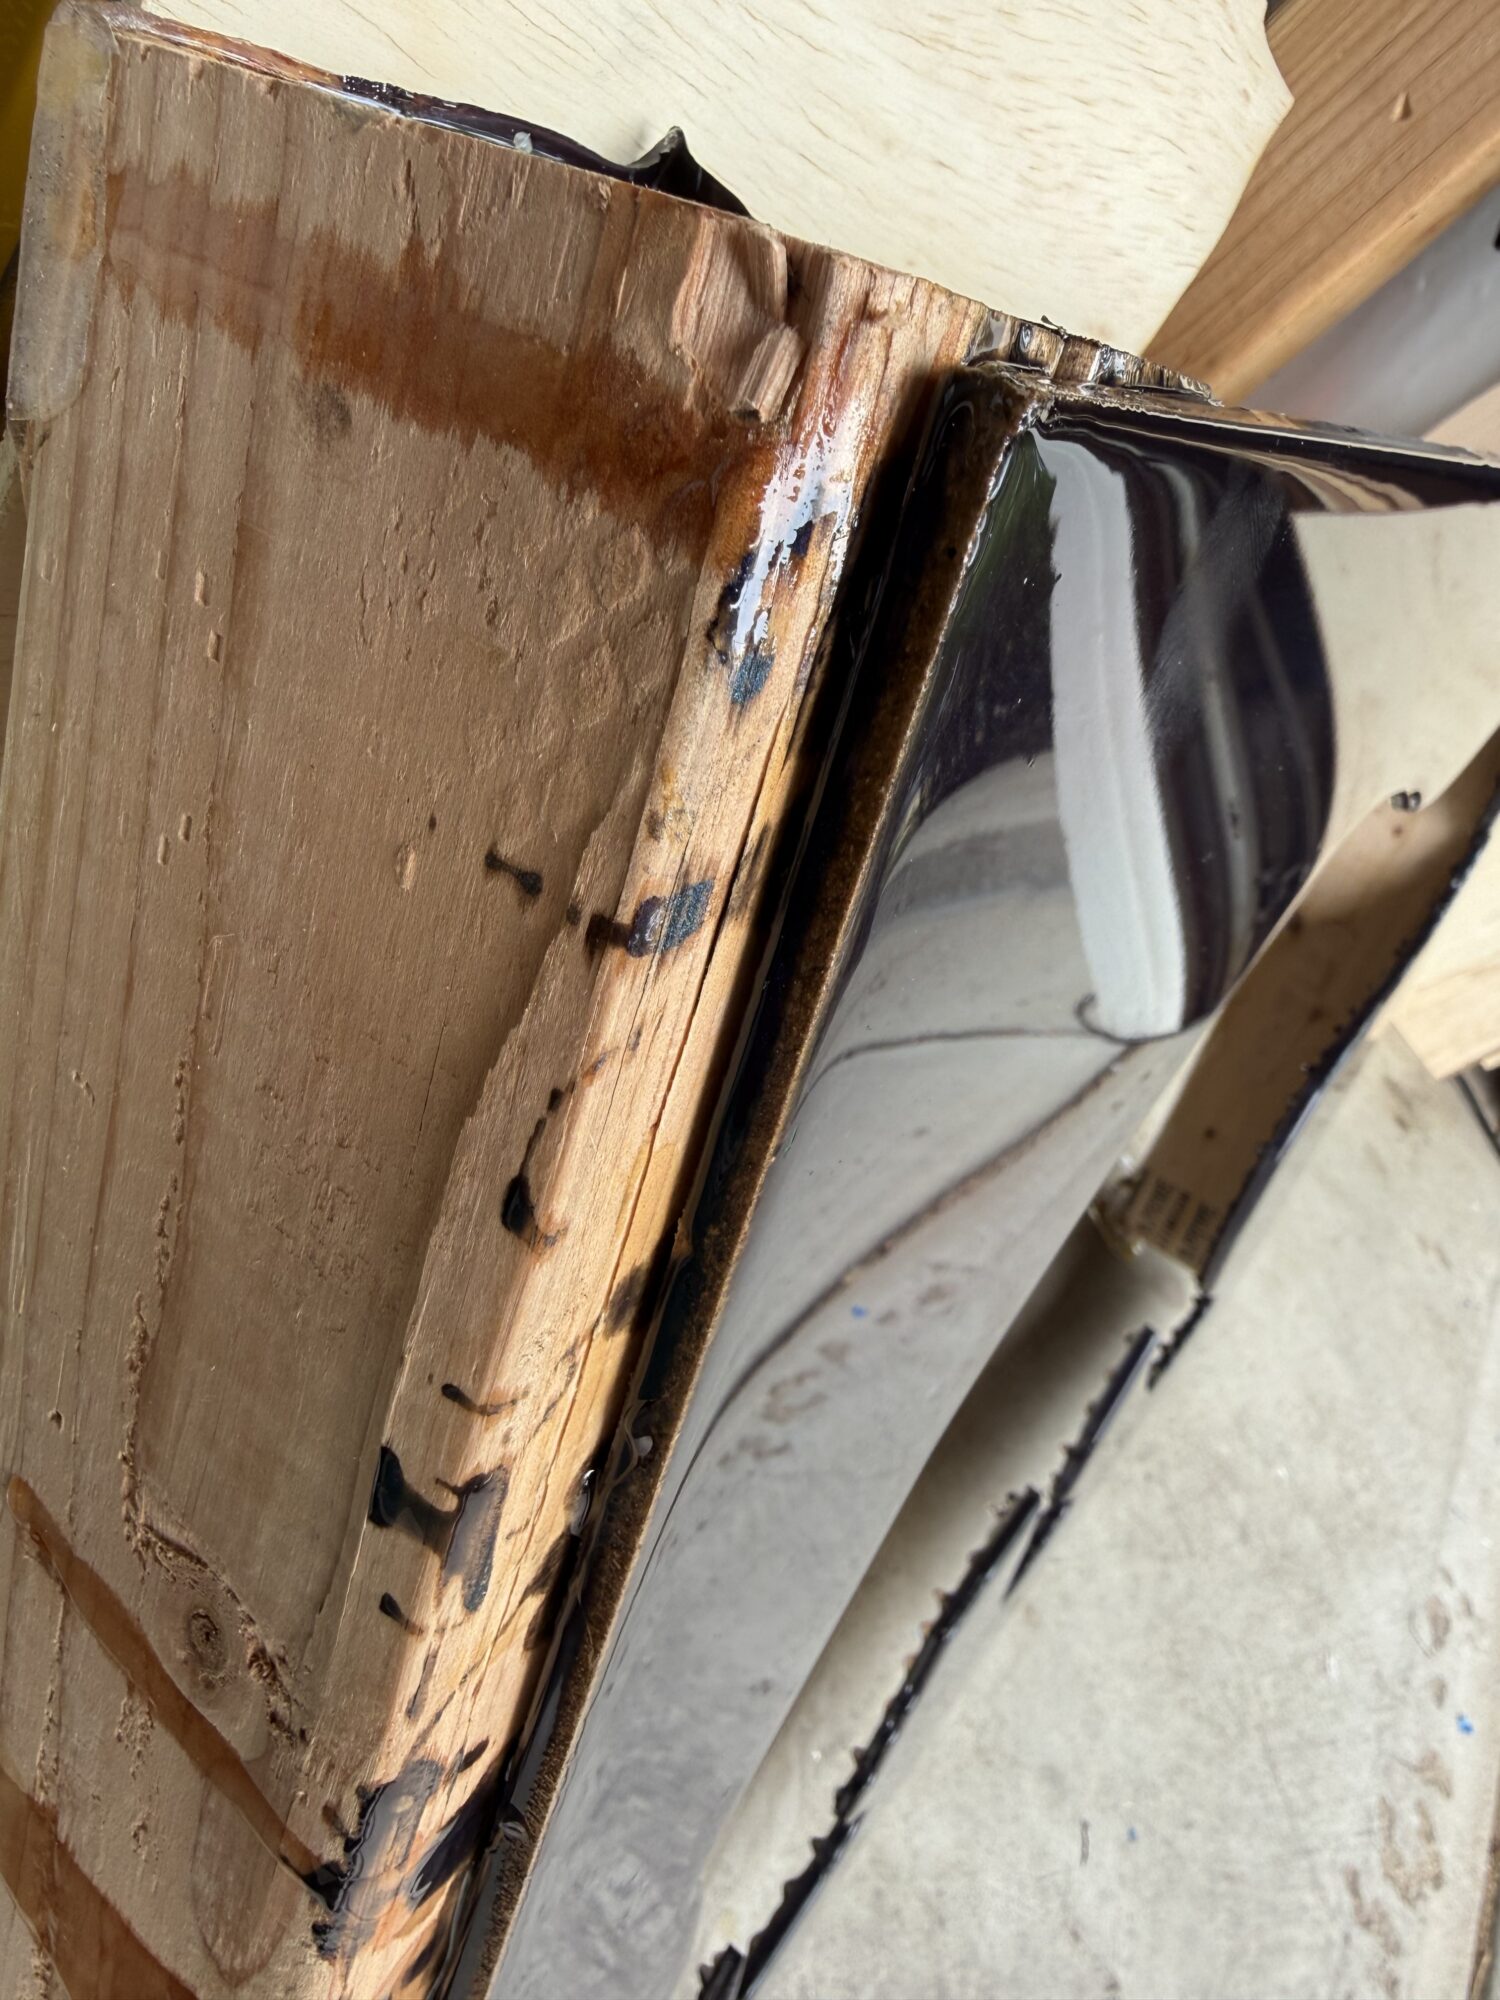
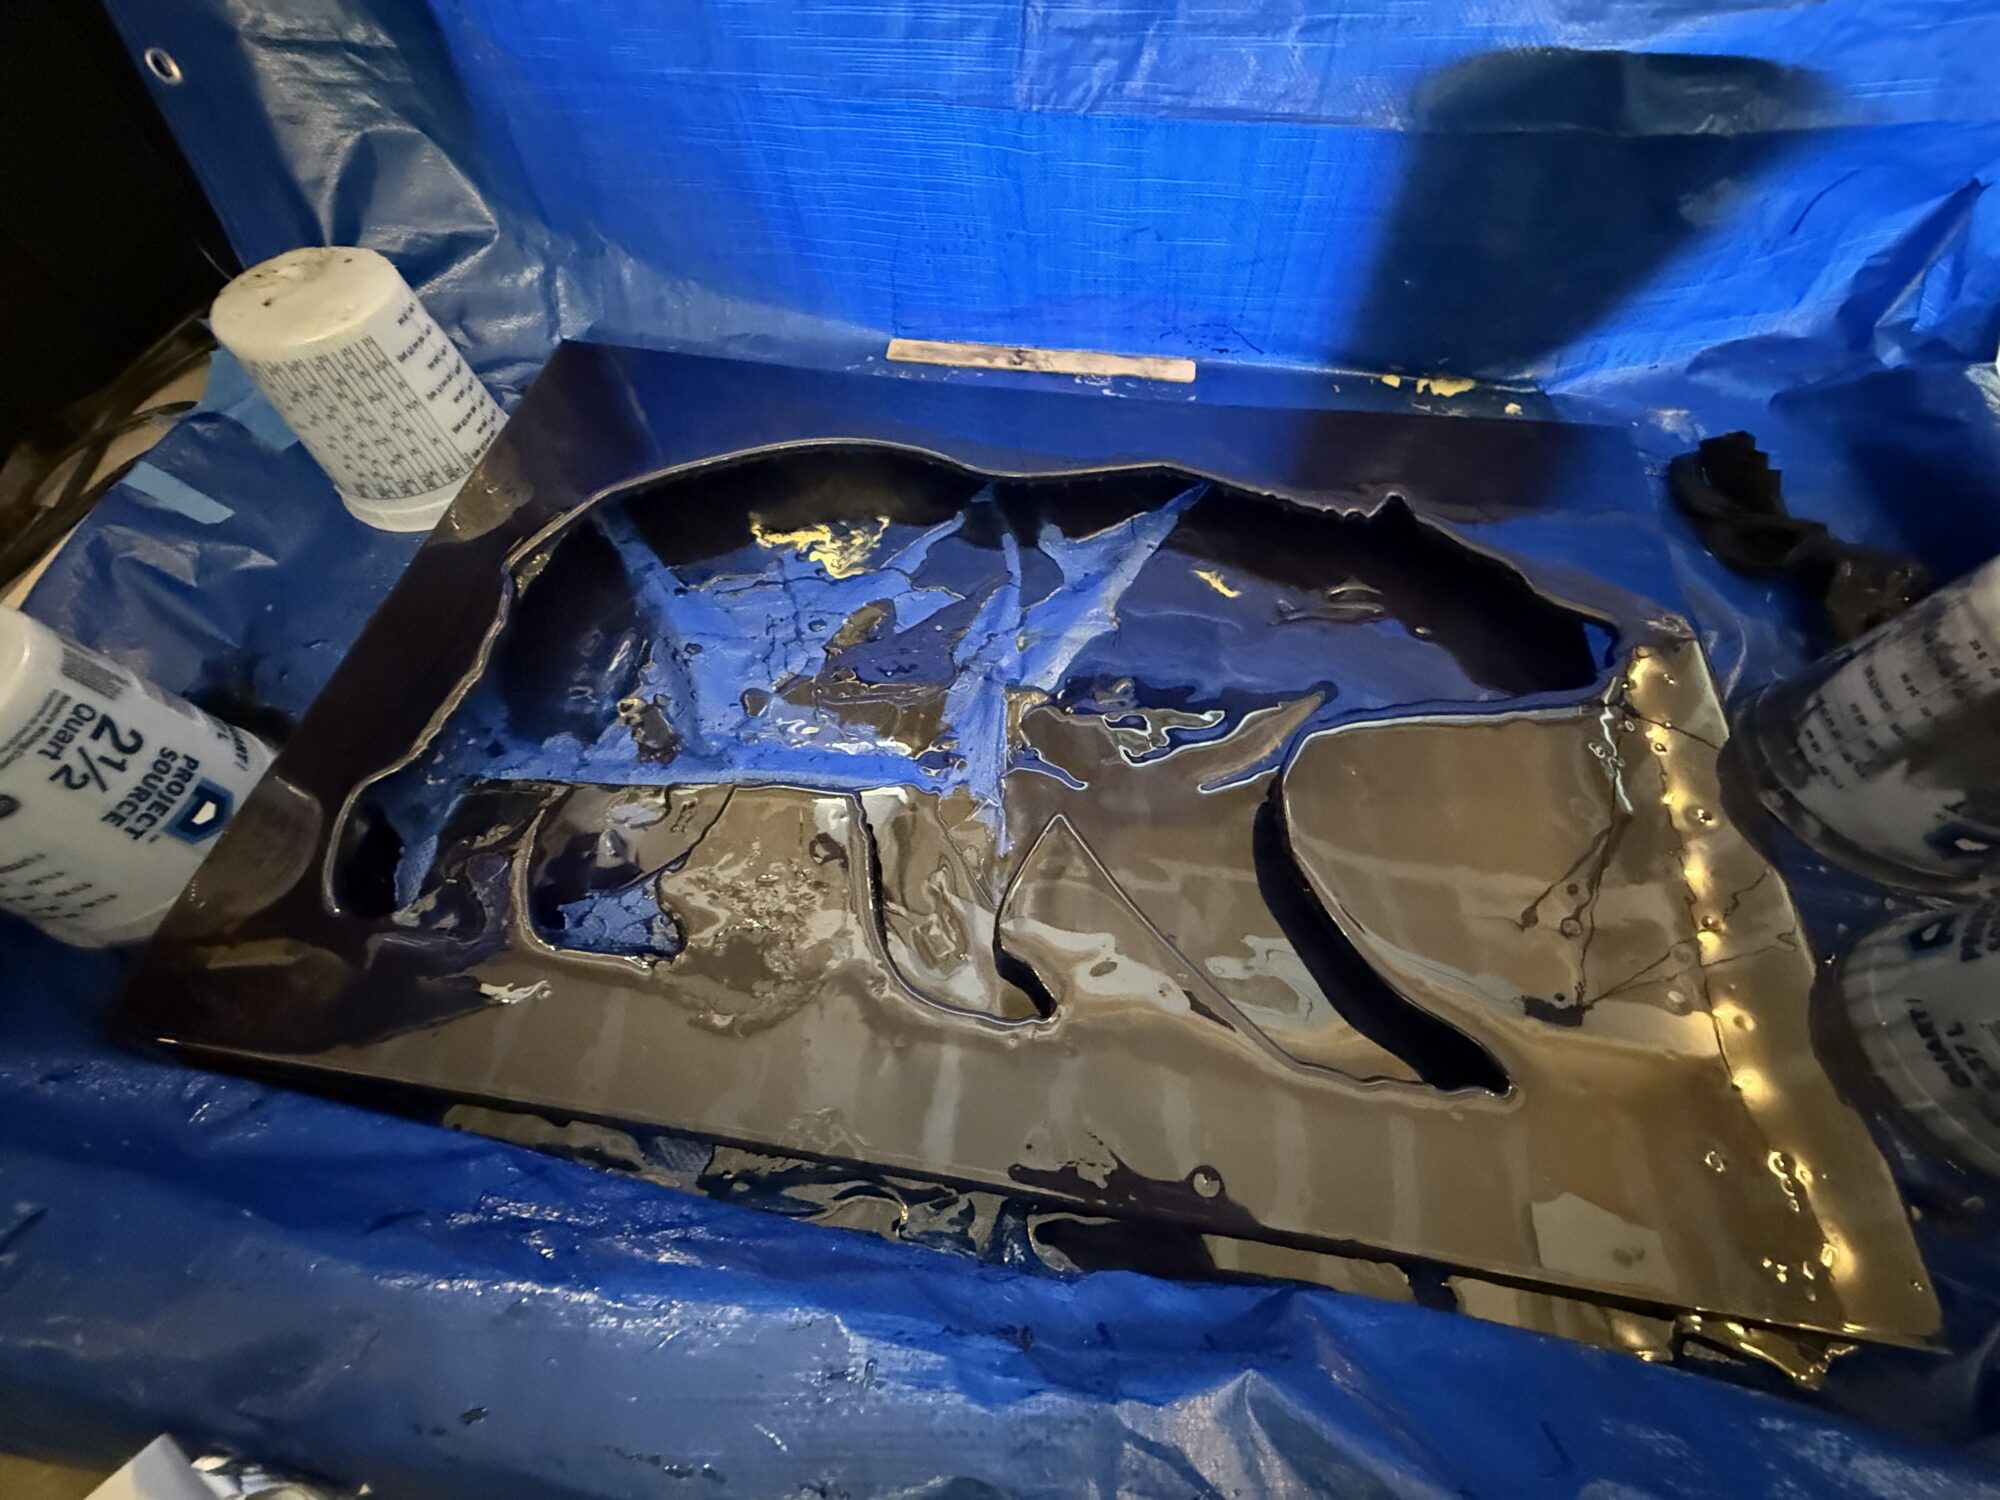
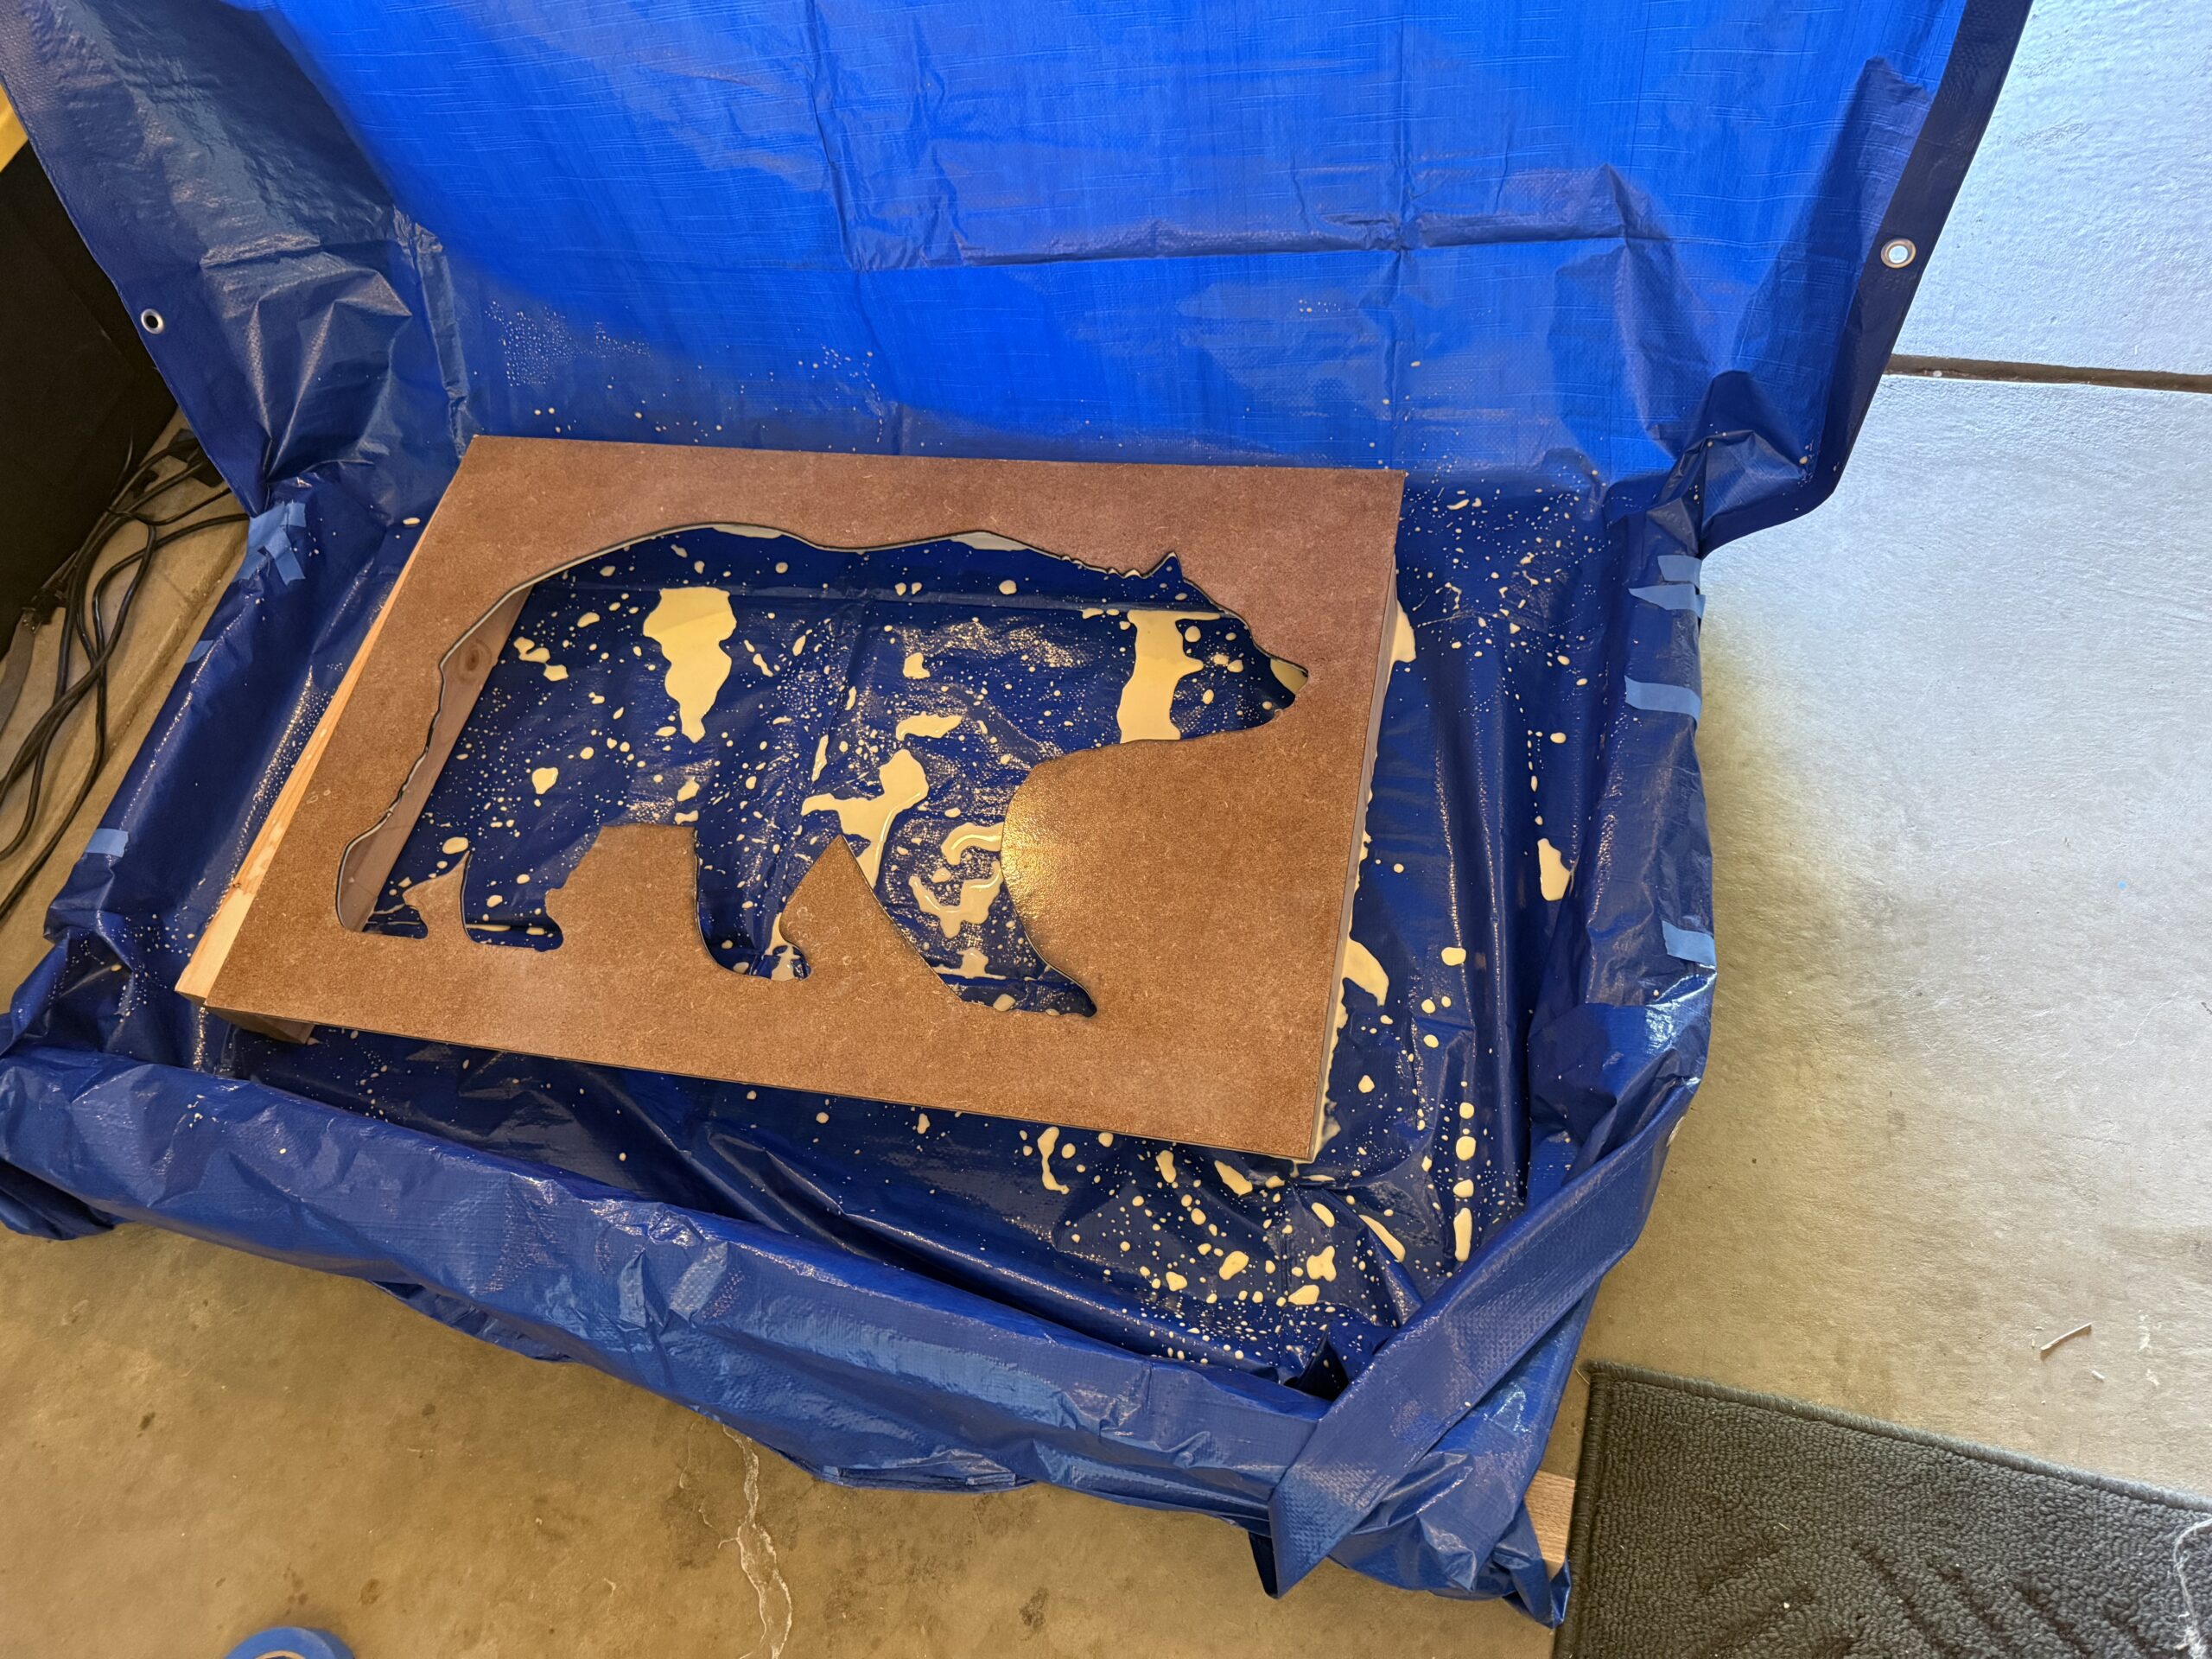
Initially, I wanted to use MDF and coat it with resin. Before I used the resin, I mixed a 1:1 ratio of wood glue to water to seal the MDF and remove air bubbles.
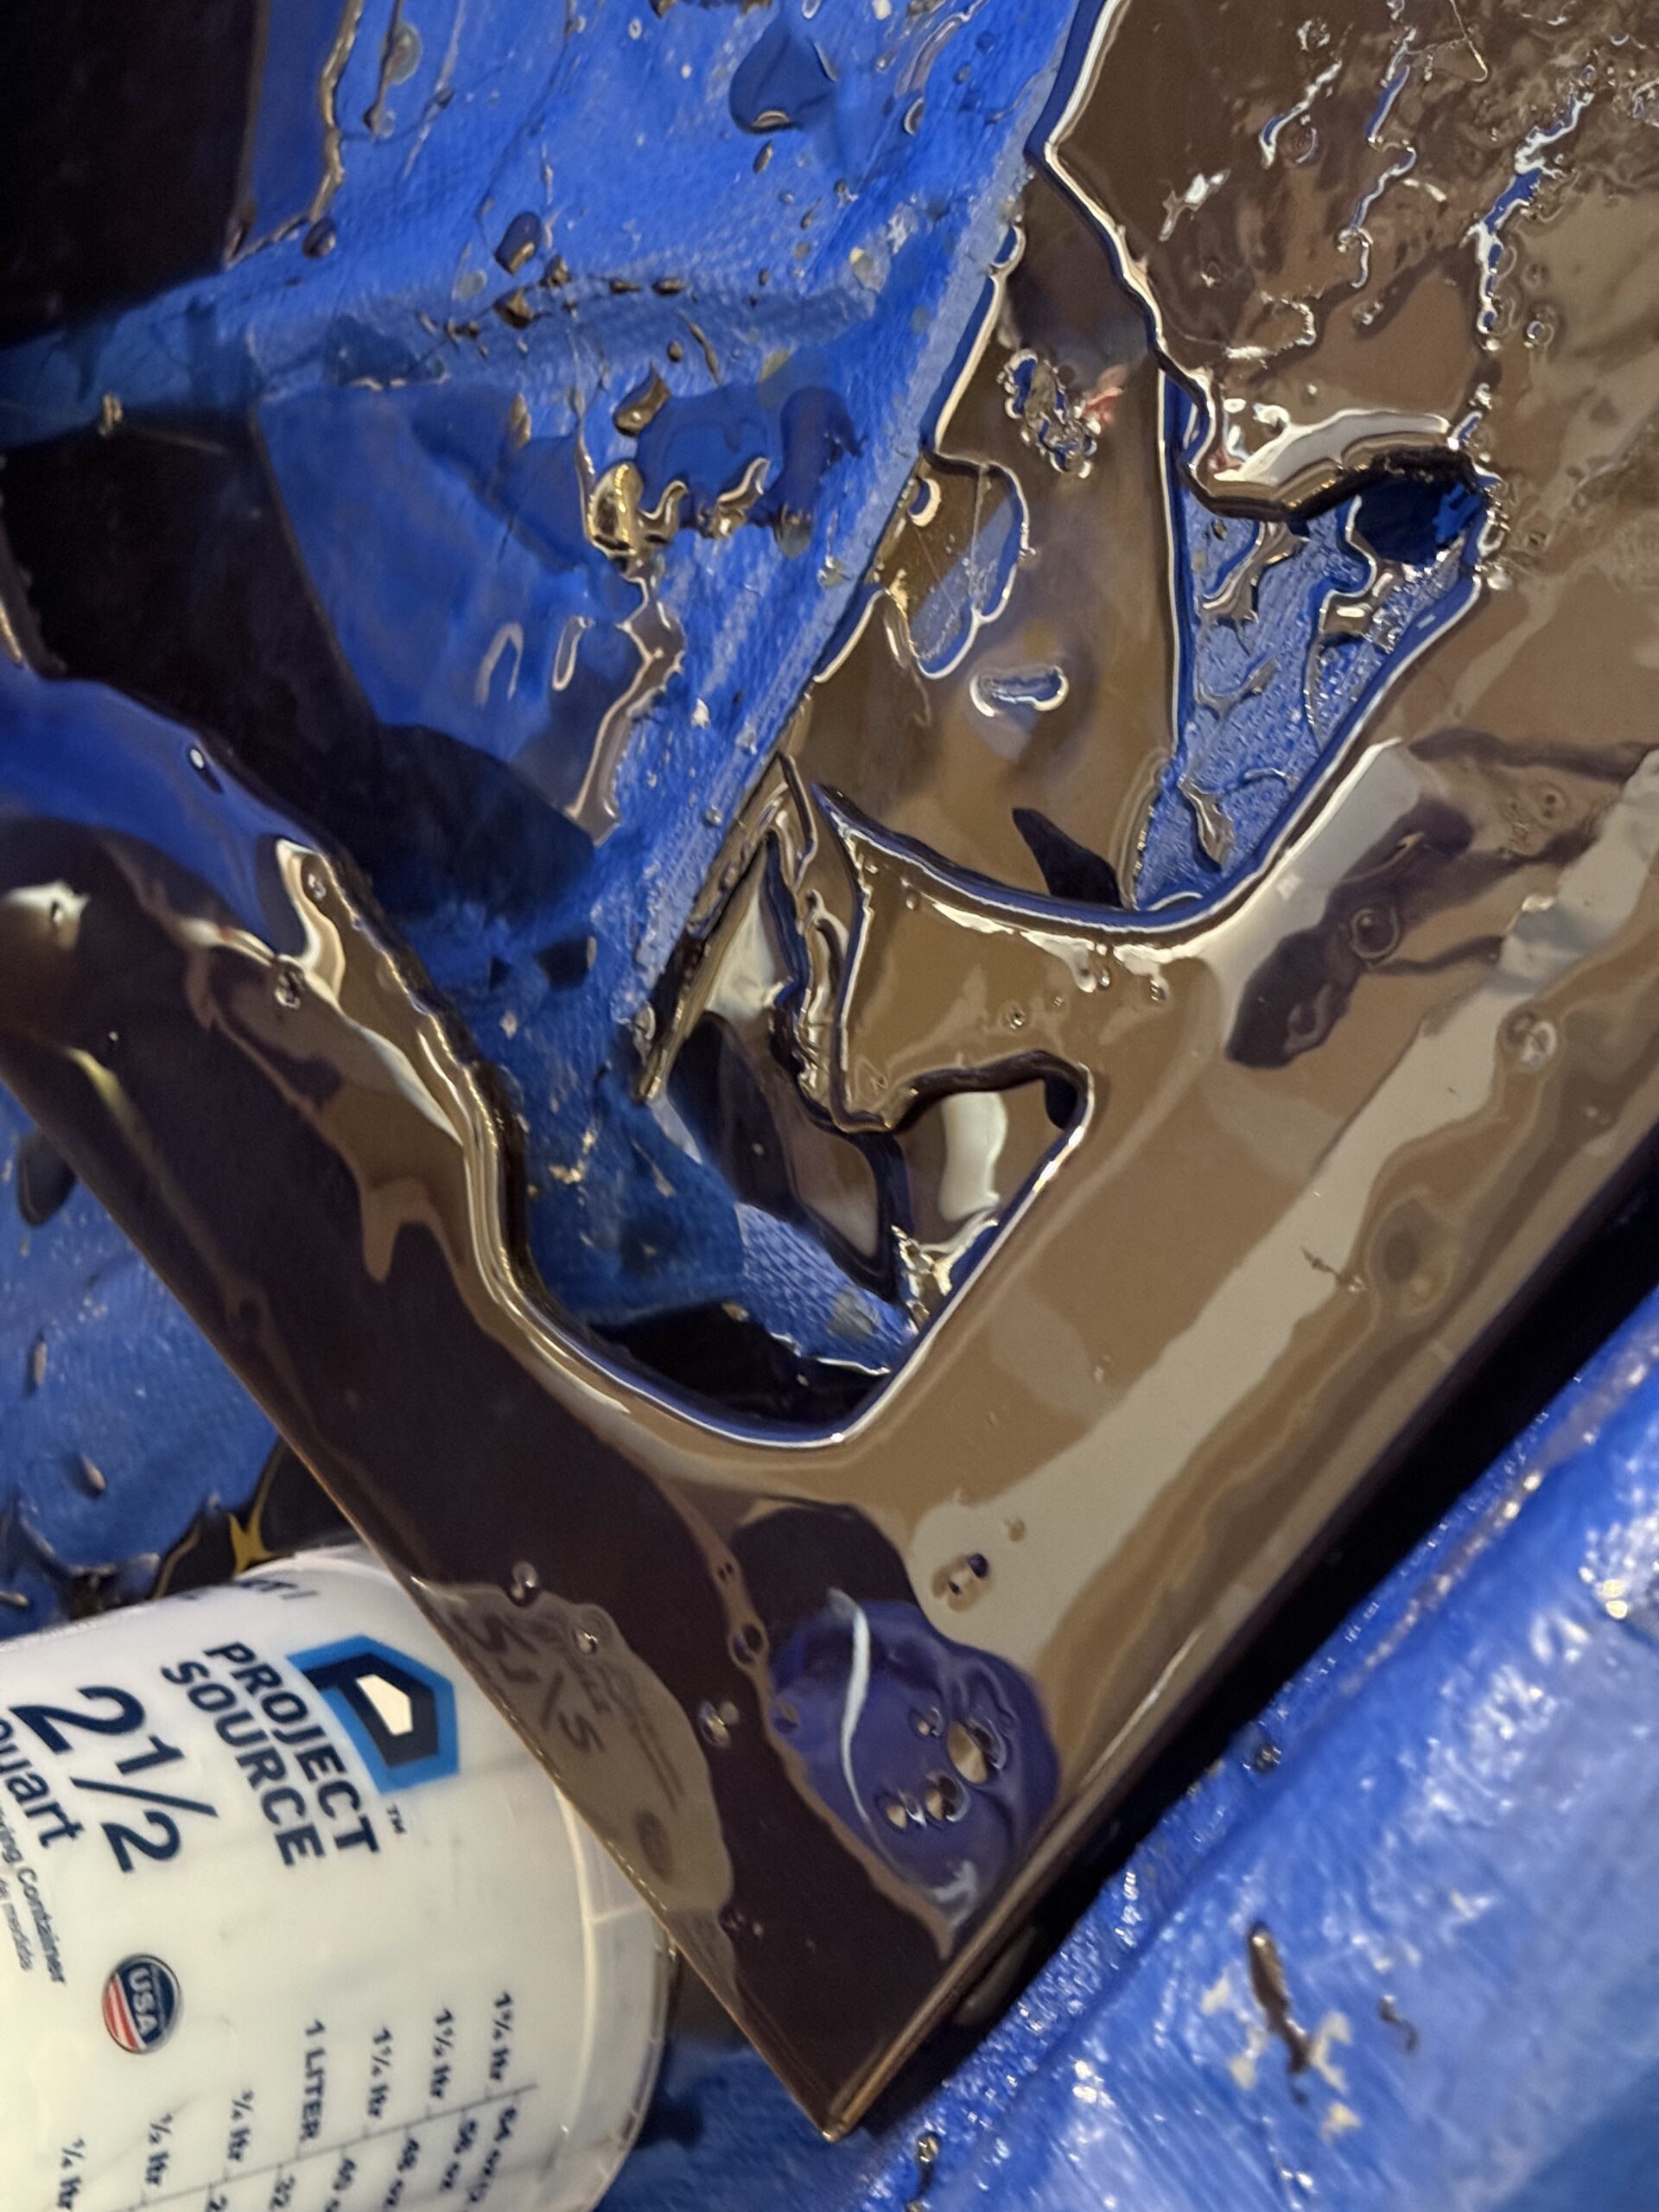
I used a dark brown tint mixed with mica powder to darken the resin. It looked great, but I accidentally cemented the wood props to the frame. I pried the frame off the boards without too much damage, but it scuffed the front and required a new pour.


And now, the next problem…
The third pour revealed a new problem: fish eyes. I wasn’t sure how this went wrong, and I tried to fix it while it was still wet with a heat gun. I tried to physically remove the debris that must have caused these fish eyes, but nothing worked, and I scorched the resin, creating that hot mess at the bottom.
Apparently, this is due to microscopic dust and oil. The biggest culprit is handling without gloves. I didn’t think to wipe down the whole surface with alcohol before coating again.
Due to cure times and the cost of resin, I decided to buy a sheet of acrylic from Colorado Plastics for the face plate.
On the bright side, I would have wanted the matte finish in the end anyway. So either way, I would have bought a piece of acrylic at the last minute and cut it.
The only bummer is that acrylic scratches easily and shows every defect possible. I may need to replace it later.


Since it was still curing, I left it in the mold for the expo and transported it with the paper covering on, which was peeled off at the expo.
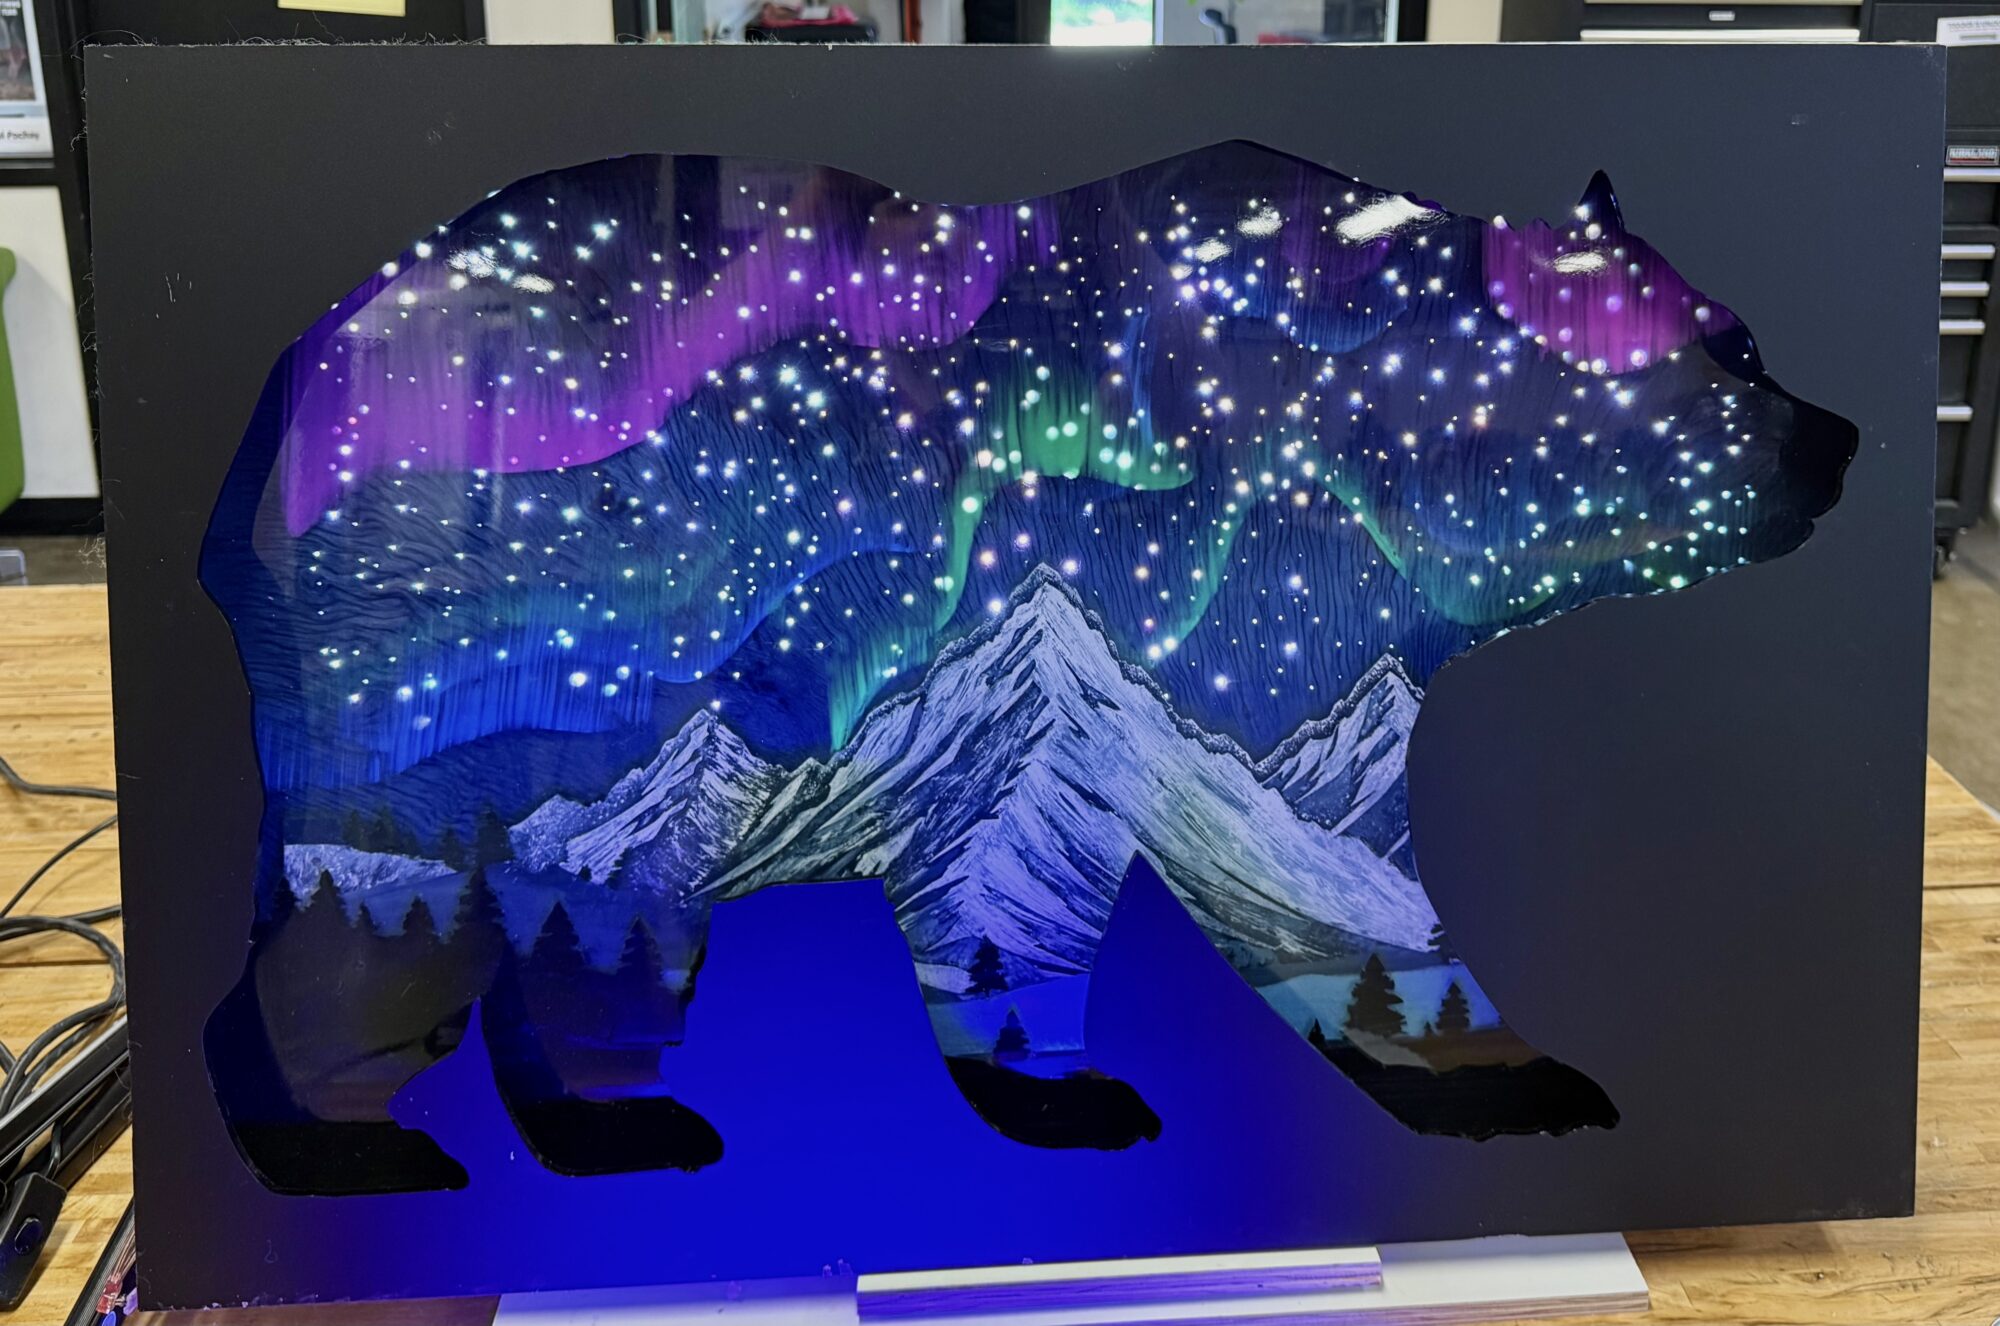
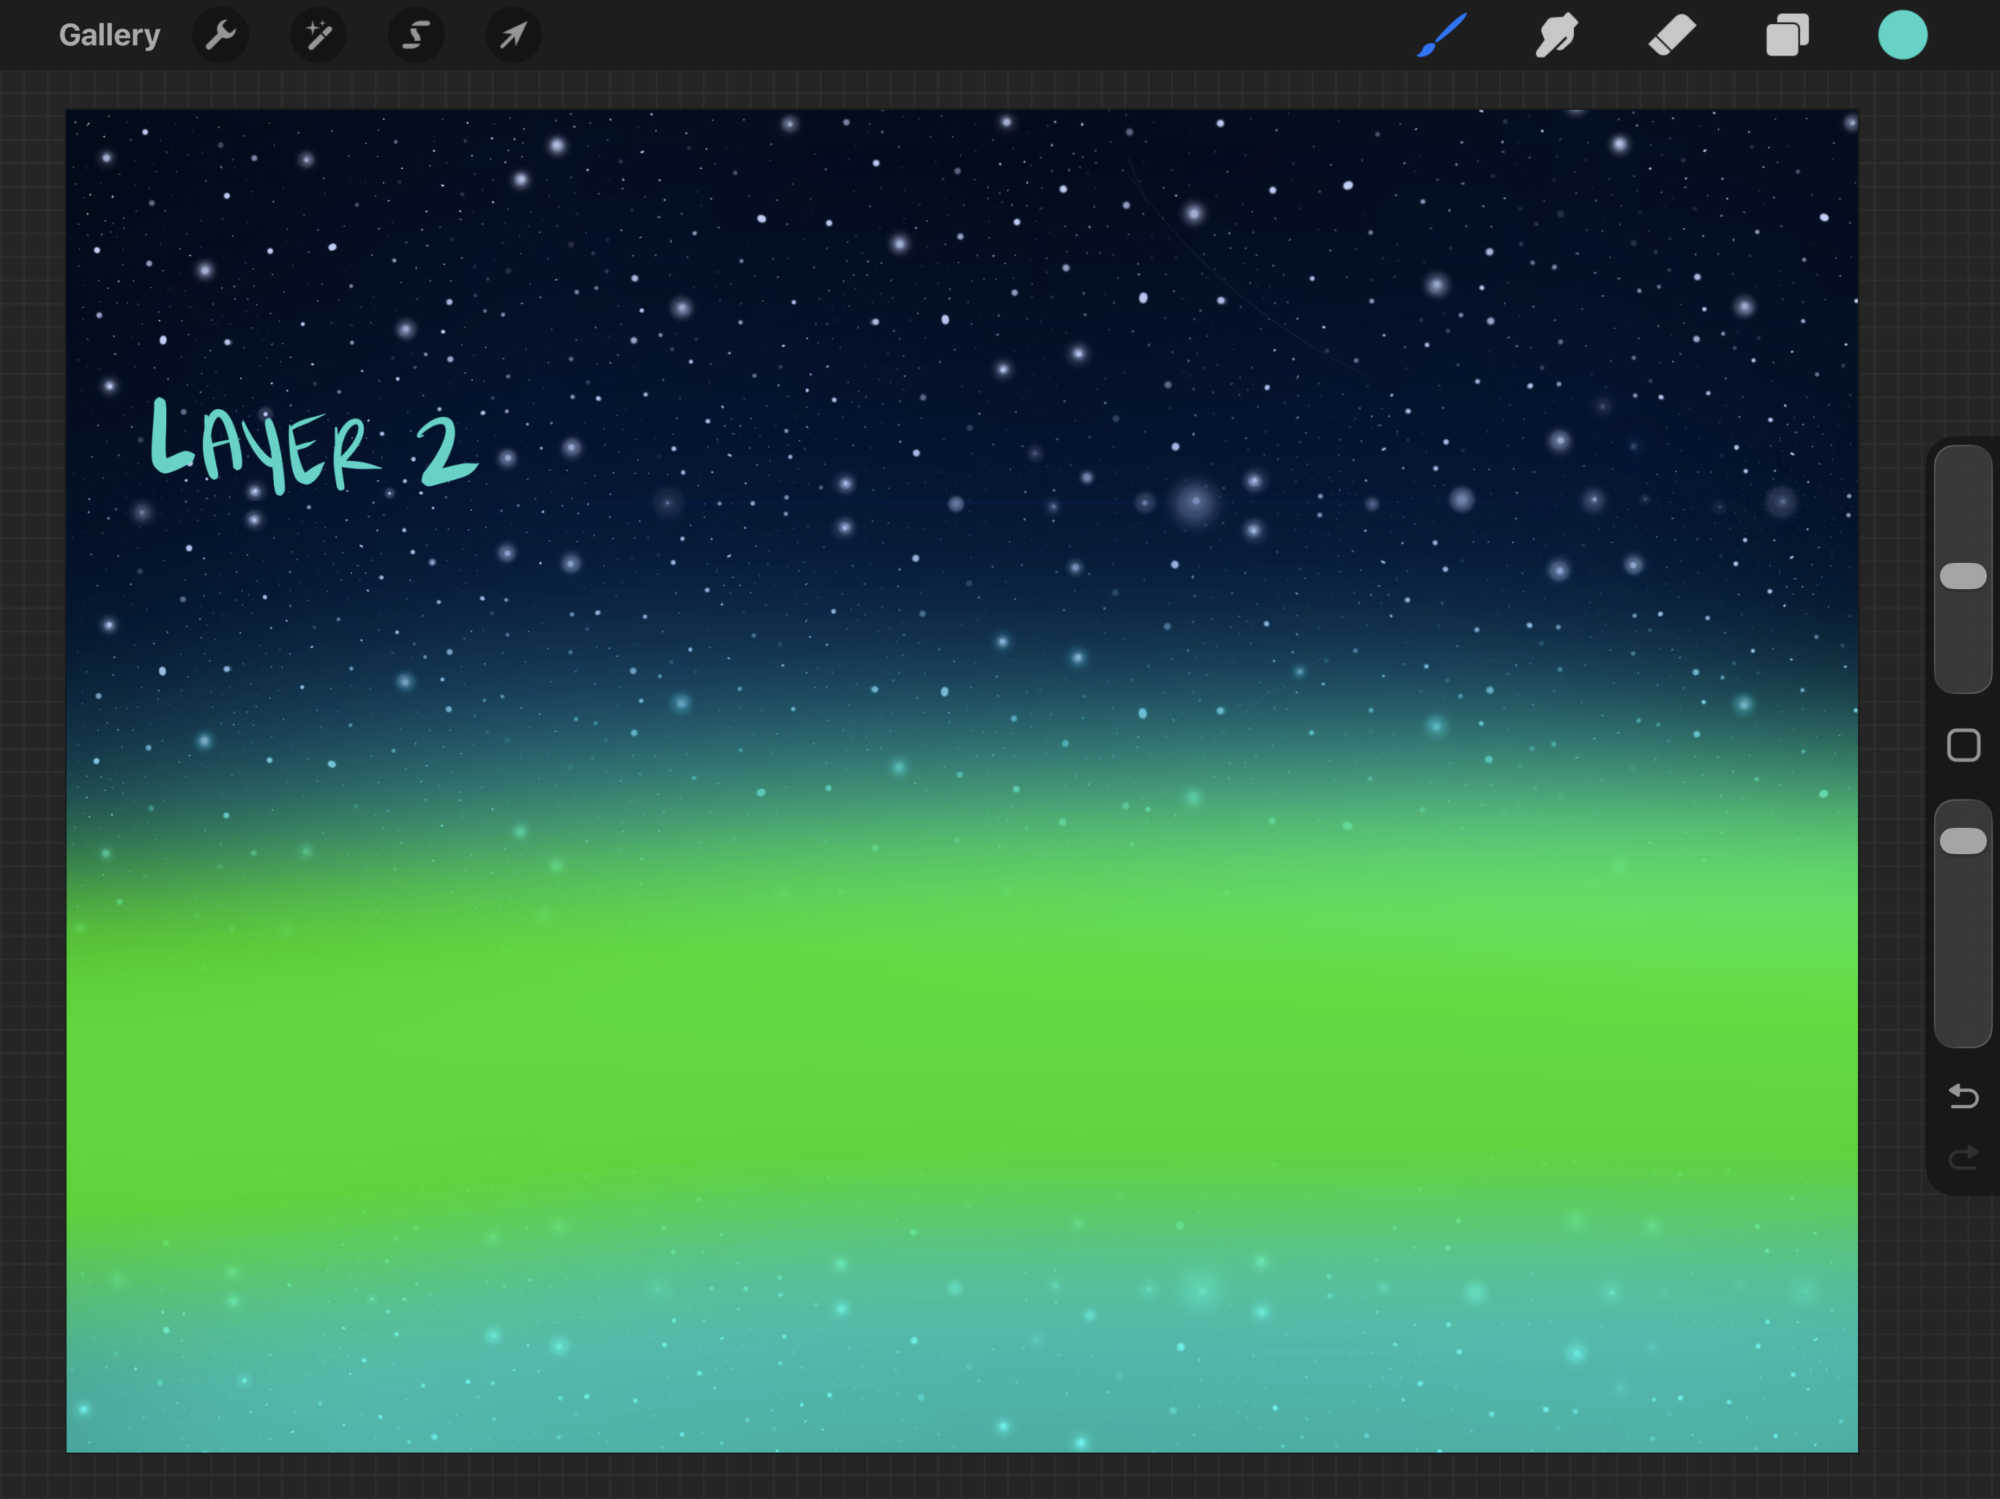
Order of Operations
- Layer 1: Mica Background
- Layer 2: Clear coat to seal the trimmed fiber optic cables
- Layer 3: Clear coat to fix the deformity from the bag landing in the curing resin. I think this actually helped set the sky and stars back a little bit from the next layer.
- Layer 4: Painted Auroras and Mountains, sealed by a clear coat of resin once the epoxy fully cured (to limit air bubbles)
- Layer 5: Painted Auroras and the black foreground
- Layer 6: Clear coat
- Layer 7: Clear coat