
For my final project, I chose to do joinery woodworking. Specifically, my project would be functional and have no fasteners of any kind such as glue, screws, and dowels. See aesthetic here.
Much like the Upcycle Project, I began with conceptual drawings and a Solidworks model. Because my toolbox would not have any fasteners, the precision of the finger joints would be paramount to a sturdy build. I could not afford to miscut a joint or that whole side would be rendered useless. Planning phase.
I decided to use 3/4″ thick pine because I like the look of a light wood. My toolbox consists of 2 end pieces, 2 side pieces, 1 bottom, and a circular handle. From my slab of pine, I cut the aforementioned pieces and left them slightly oversized. I clamped the two side pieces together and sanded them to ensure they were the same size. Following my Solidworks drawing, I marked where the finger joints would be in pencil and removed the excess material using a table saw. See here.
Once the fingers on the 2 side pieces were cut, I placed them directly on top of the 2 end pieces and traced the opposing set of “fingers”. This would ensure that any imperfections, if present, would be mirrored onto the end pieces and still fit fine. See here.
Now with the “fingers” cut into all sides of the box, I began working on the bottom. The bottom used a different style of joinery, namely dado grooves. I cut a shallow groove into the inner face of both side pieces to allow a thinner piece of wood(the bottom) to slide in. With the bottom complete, I clamped the two end pieces together and drilled a 1′ and 1/4″ hole for the handle. See here.
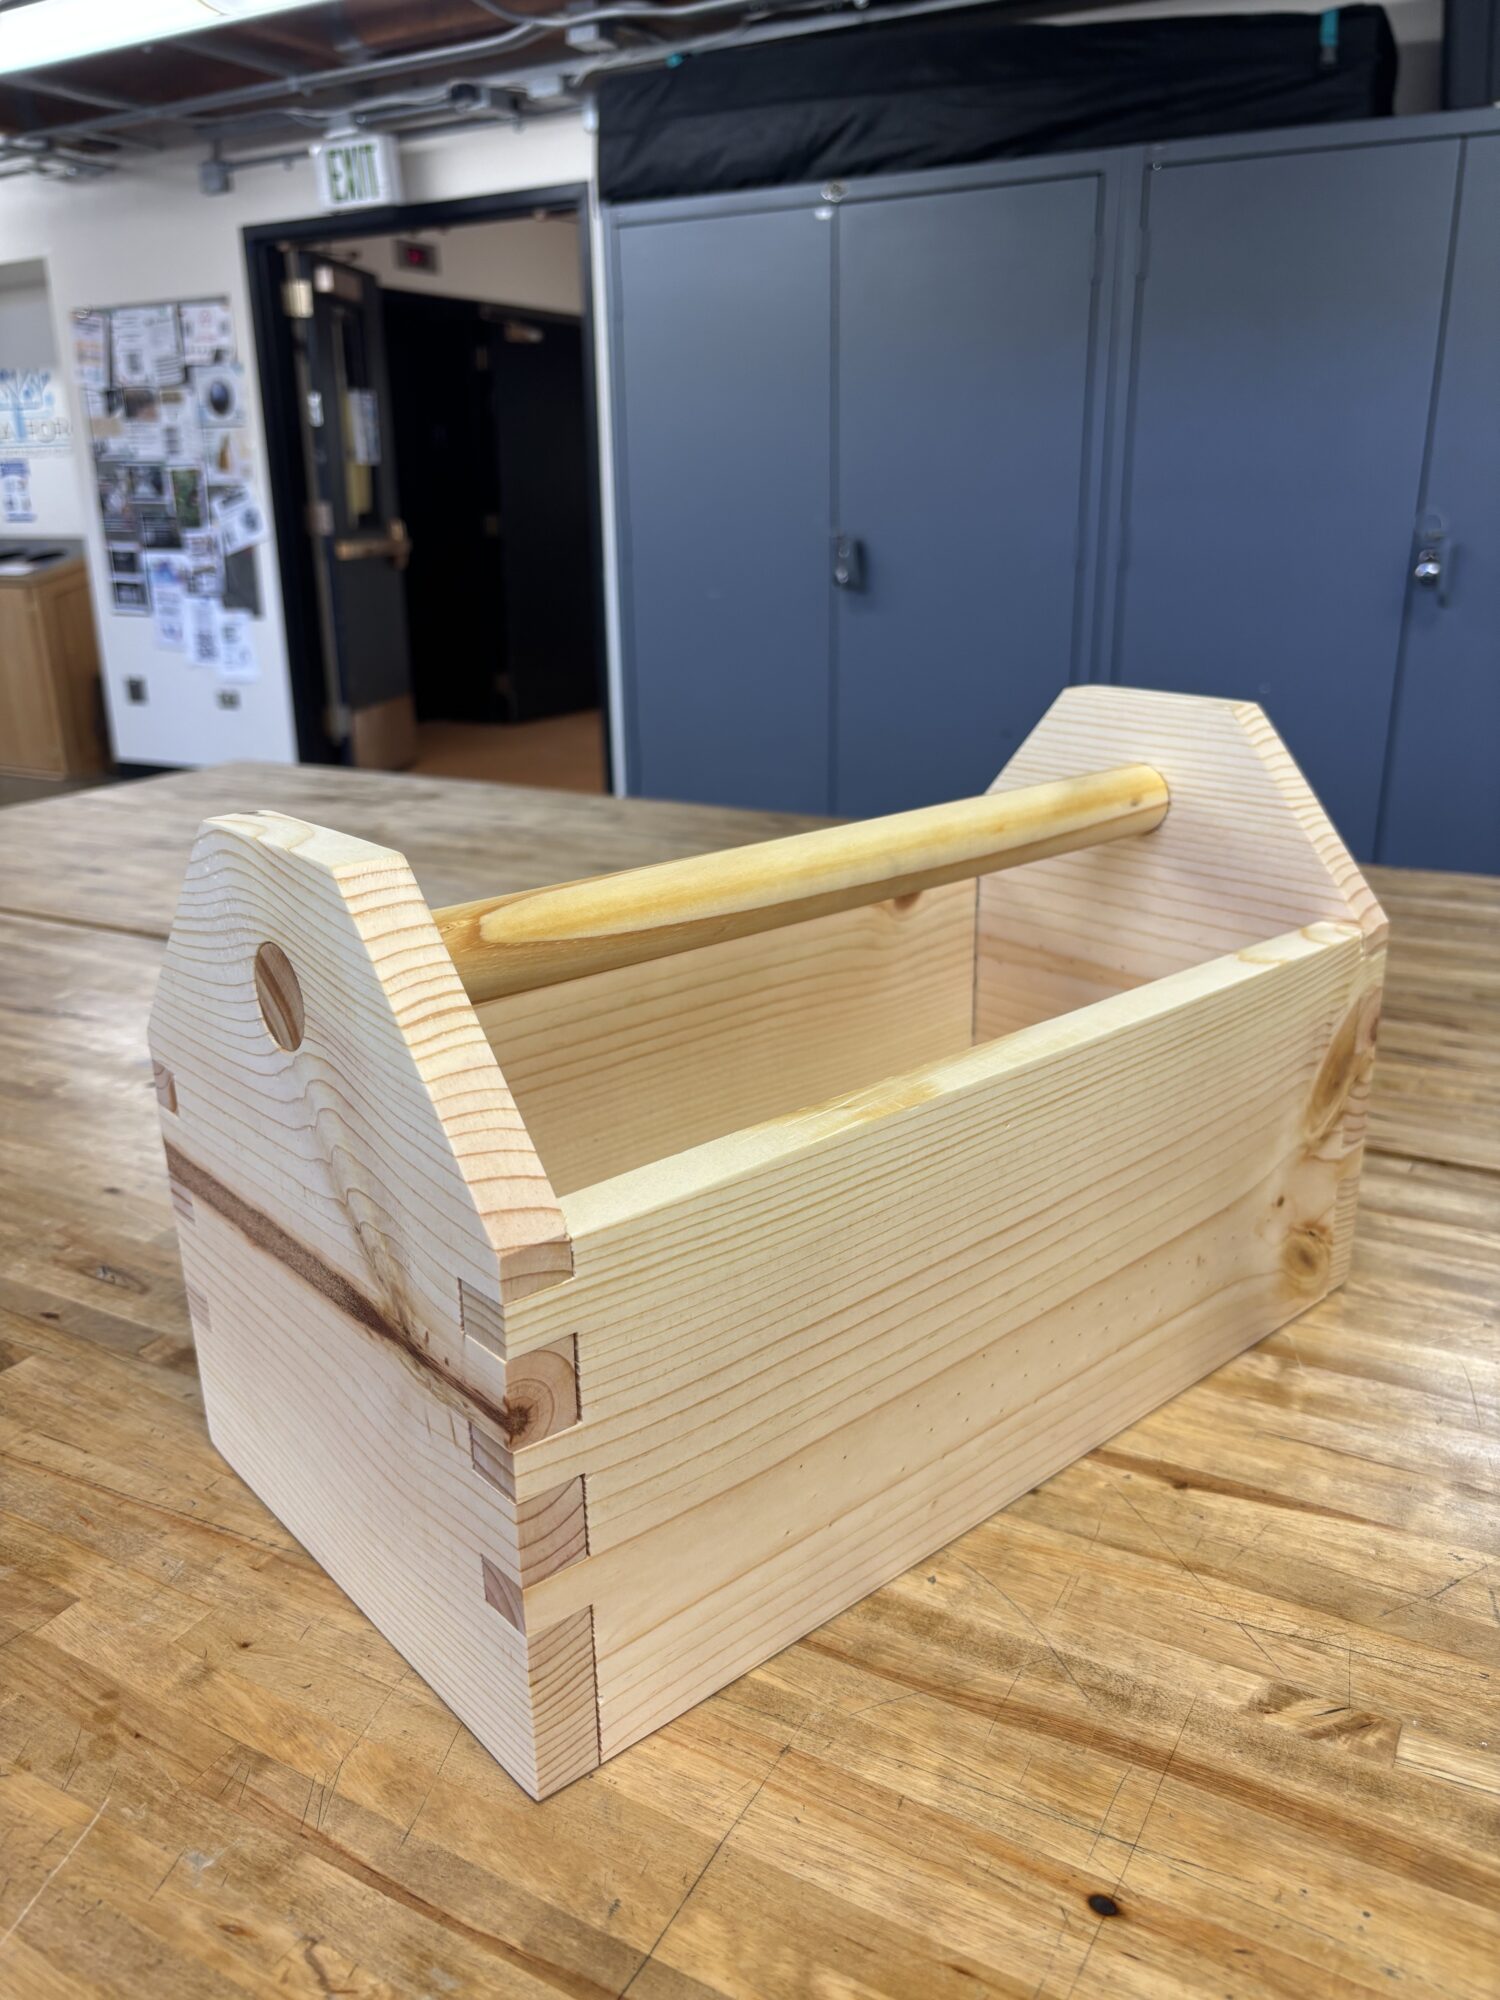
Now it was time to assemble. Luckily, after a little sanding of the joints and a few light mallet taps, the toolbox became a single piece. Once fully assembled, I sanded the whole thing with 3 different grit levels to even out some of the small overhangs and corners. Finally, I applied linseed oil to give it a protective and shiny coat. I originally planned on staining it but I decided against it in an attempt to preserve the color and natural look. See here.
Overall, I’m very happy with how it turned out. I truly believe my obsessive planning before ever making a single cut was the defining factor between a polished final product and having to redo things. As for the joints themselves, they fit great with minimal gaps. I had a great time doing the final project.