
Inspiration
For this up-cycle project I took old books and made them into decorative storage. My inspiration for this is from a product that I had when I was about 8 years old. It was a book-safe that had the appearance of a book, but also allowed for storing valuables. The first few pages were real, while the back of the book was a plastic shell for storage. This inspired me to take actual books and make them into small storage devices, but that kept the appearance of the original book.
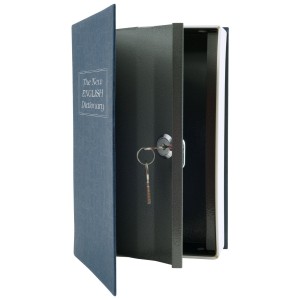 Figure 1: Example of a Book Safe [1]
Research, Vision Ideation, and Goals
After doing some research, I found a number of different methods of up-cycling books in order to put things in them. For example, I found images of books being used as handbags, electronic device storage, safes, and laptop bags. In addition, they were made using various add-ons such as cloth, wood and elastic bands. These examples can be seen below.
 Figure 2: Up-cycled Laptop Cover [2]
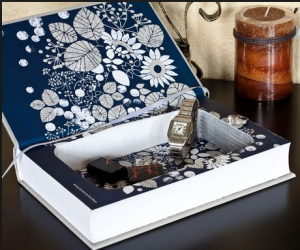 Figure 3: Simple Square Storage [3]
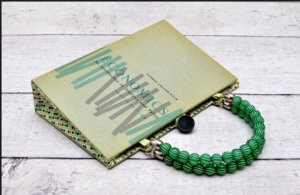 Figure 4: Handbag Made from Up-cycled Book [4]
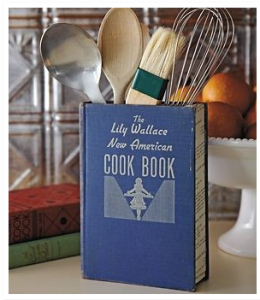 Figure 5: Cook Book used to Store Utensils [5]
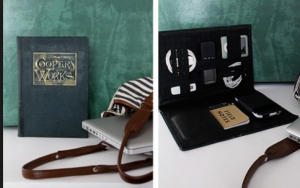 Figure 6: Holding Electronics using Bands [6]
Looking at all these variations it helped me get a better vision of what I wanted to make with mine. I wanted to make them seem as natural as possible from the outside after the changes that had been made. I want to be able to put these on a bookshelf, without anyone being able to tell that they are even any different. In addition, I didn’t want to store just random things, I wanted to be able to take them to class or help me find things that I often misplace. For this reason I decided on making a cd case to help me sort my CDs, games, and DVDS, making a remote holder so I won’t lose them in the couches, a pencil box to bring with class, and an IPod/lock holder for the objects I bring to the gym.
In terms of aesthetics, there were a couple of things that I had in mind. First, like mentioned earlier, I wanted to have a natural book appearance. Something you would see in a library or on any typical bookshelf. Second, this idea somewhat reminded me of a spy movie. I feel like I have often seen hollowed out books used to hide guns, money, or passports where nobody would ever think of looking. It also reminded me of the national treasures movie where a secret hint or clue could be found in the book. This somewhat made me change my idea from just having a large square cut out into the book where everything would just go to having everything cut out in the exact shape of the item being stored.
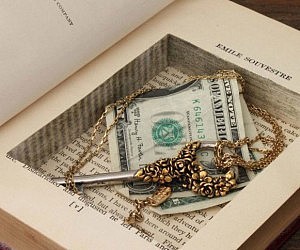 Figure 7: Storing Valuables [7]
 Figure 8: Spy Movie Hiding Gun [8]
Creating The Books
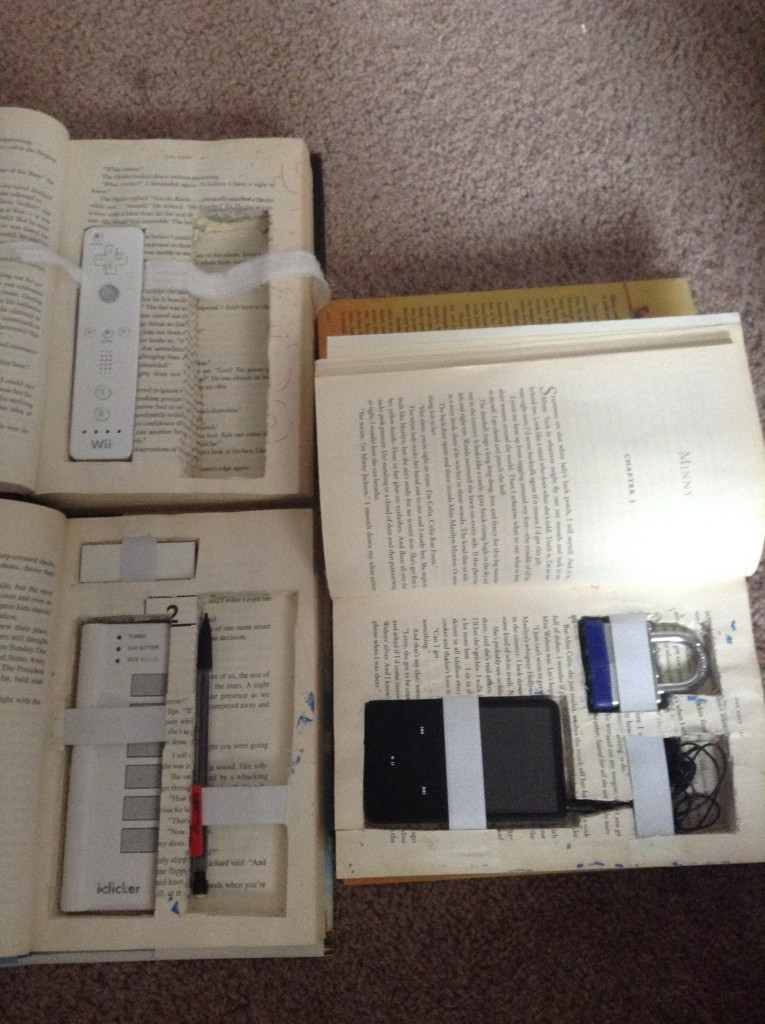
At this point in time, I had made my way through the first steps of the design cycle, determining a need, doing research, and determining my pretotype. At this point, it was time to start creating the prototypes. For my first book I used it to store my IPod, headphones, and my lock. This way I could just bring the book with me whenever I go to the gym and everything that I often forget to bring will be in one place. Although I was relatively happy with the appearance of the book, it was much more difficult than what I had expected. I started by gluing the pages that I would be cutting together. However, once I started cutting into it, it took nearly 50 passes to get to the depth that I wanted and the corners often weren’t cut to the same depth as the rest of the pages. In addition, I realized I did a horrible job designing the positions of the elastic bands. For example, it is very difficult to take the headphones out of their position while leaving them plugged into the IPod.
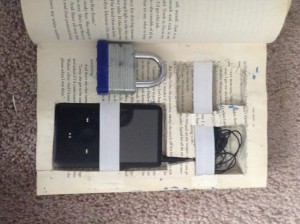 Figure 9: Book 1 – IPod and Lock
For the second book, I decided to store some of the major components that I would bring to class such as my pens, pencils, erasers, and my clicker. This worked slightly better because I didn’t have to deal with the difficulty of the headphones, and it allowed implementation of multiple items being stored in one compartment. However, I did still have difficulty getting the items out of the holes meaning that either the elastic had to be moved to be more off centered, or removed all together.
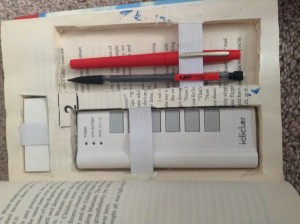 Figure 10: Book 2 – School Storage
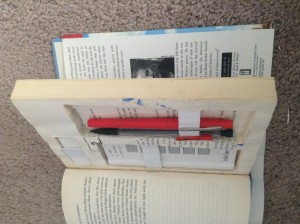 Figure 11: Book 2 – Side View
For the third book I planned on storing my CDs. I bought some CD sleeves that I had planned on attaching to the inner edge similar to a regular CD case. This concept led to more difficulties than anticipated. In order to get the CDs to rotate without resistance, I would need to attach them to a ring system. However, this would lead to the CDs to extend through the edge of the page for it would be too large. For these reasons, I decided to focus on the remote idea as opposed to the CD idea. In addition, I wanted to take some of the previous problems that I had and improve on them. For this third and final book I decided to glue the pages after I had cut the holes out. This way cutting the deeper depths would be easier. I also got rid of the elastic bands so that the items would be easier to take out. In order to keep them from falling out, I made the holes slightly tighter. Plus I added a piece of cloth underneath to lift them up and out. This ended up being potentially the most successful of the three.
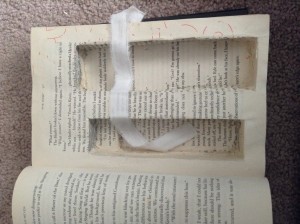 Figure 12: Book 3- Empty

Figure 13: Book 3- Holding Remotes
Design Process and Potential Changes
This proved that our design process was relatively correct. It gives an illusion of structure, but it is truly important to go back in your steps and continuously update your design ideas. I ran into countless problems and still have a number to work out. It was also very important to test the products to make sure that the idea in your head would accurately be represented in your real life product. If I were to continue this project, I would allow for more loops to be gone through making a better product at the end. This way a few more ideas could potentially be implemented. A couple more design changes that I had considered were to make the cuts in the center of the book and have holes on both the left and the right side so that there will be glued pages on both sides to attach clasps to. It would be interesting to allow for objects to slide so that the elastic band could still be implemented without blocking the object. Notches could potentially be used so one would be able to get a finger underneath the object and lift it up. Finally, I would have liked to add a sense of irony to my project. I didn’t think of this until I actually looked at the books that I had used a little closer, but it would be really cool if I had related the books to what they stored. For example, if I had put the IPod in a book about music, or the remotes in a book that had a theme of control.
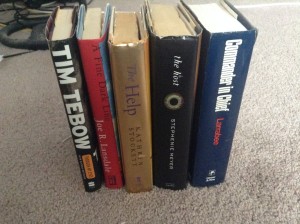 Figure 14: Exterior of Books
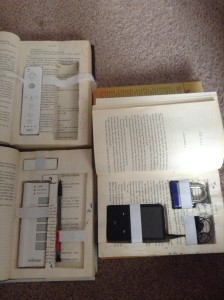 Figure 15: Interior View of Books
Expectation Analysis and The Future
Now that the project is complete, my final product meets my vision on some, but not all levels. It does have the original aesthetic I was going for. They do give the appearance of that spy concept I had mentioned earlier and the exterior does not give away the fact that it’s not a normal book. The objects I hid aren’t as important or as secretive as those in such films, but they seem more important because of their location. However, the functionality is not as good as I was hoping. Getting the objects in and out of the books without letting them fall out is much more difficult than I had expected. I do plan on keeping these to hold things in and I especially will use the remote control one, but I do hope one day I will try and work on a similar project with enhance functionality.
Sources:
[1] http://www.amazon.com/Trademark-Home-Dictionary-Diversion-Metal/dp/B003TOBM1K/ref=sr_1_2?ie=UTF8&qid=1453692977&sr=8-2&keywords=book+safes+for+kids [2] http://upcycleus.blogspot.com/2012/01/upcycling-old-book-to-protect-notebook.html [3] https://www.ohhellofriend.com/keyword-upcycle-books/ [4] http://www.absolutebodo.com/?p=4722 [5] http://dishfunctionaldesigns.blogspot.com/2011/12/artfrom-pages-of-book.html [6] http://www.designsponge.com/2011/08/diy-project-vintage-book-travel-tech-organizer.html [7] https://splashyourcash.com/listing-143-hidden-book-safe.html [8] http://www.seattlemet.com/articles/2014/1/2/one-sentence-stories-january-2014
40 Comments. Leave new
I see you’ve touched on your inner spy side. Very cool project and well executed
Really nice work I like how you tried to make the strips work and your iterative process overall was interesting. Your idea aesthetically is very appealing but hard to implement but I liked your improvements on it, nice work! Maybe next time you just secure the cover instead of trying to secure the inside. Also I liked how you left few pages at the beginning to complete the look!
I have seen these before and they turned out really well. It might be cool if you cut out the majority of the page and had separate inserts that hold the various components so you could change them out in the future.
I can see people using this to smuggle things, haha. While it sucks to see good books destroyed, you’ve managed to make something much more useful out of them!
I’ve always wanted some of these. I was just about to suggest theming the books towards what is going inside them so only you know what book holds that item, I love it.
Like the spy aesthetic and the use of multiple compartments, would be great for storage on coffee tables or shelves, how did you cut out the pages? Wonder if a laser cutter would be an option to cut specific sizes.
Reminds me of old detective stories and james bond movies hiding guns and devices in books. Great idea!
Cool idea! I like the final product. It might be cool to look into a finish for the cavities to make them look more clean.
Nice work! I’ve always wanted to do this and hide a flask inside a book
I really, really like this. I will probably build one at some point. Seeing as you had to make cuts every 10 pages or so, do you have a recommendation on how to get a uniform wall? Any wisdom you’d like to pass down? I wanna take it to the next level and actually felt line the interior. Also, did you get these books at Goodwill or did you just have them lying around?
This is a cool way to use old books. Now you just have to remember which objects are stored in which book! Nicely done!
Cool! I’ve seen a few of the plastic ‘books’ with the lock on the inside, but you idea is so much better. While you may not be able to lock stuff up inside the books, they would blend in to any book shelf. Maybe you could laser cut the pages in future? That might lead to fires, but it could be faster than cutting a few pages at a time by hand. I like the way you glued the pages together, very neat.
i like seeing where you inspiration came from. Have you thought about gluing/securing the pages to the lid of the book so that the front pages don’t flap around? I really like your aesthetic.
The functionality is spot on. In terms of aesthetics, I think there’s many more ideas you could implement. Maybe you could make the storage arrangement able to move to accommodate different objects or create more or less storage spaces through the use of embedded dividers.
These are really neat. You should come up with a code to decipher which books hold secret things on your bookshelf. How did you decide which books to sacrifice?
I had one of these when I was little that a friend had made, but this is way cooler! Nice job customizing each book for its use!
These turned out great, I like the idea of actually using these as cases for personal items in everyday use.
I think that this is a cool idea. I think that the idea of hiding valuables is a good idea.
Love the idea of making the books used thematically tied to the items stored within. You could even go the ironic route with it, like storing flash drives in a book about how technology is ruining the world. So much potential hahaha
I really like the idea of storing the remote controls in a book – keeps them in one place, and it’s a classy way to store them on a coffee table and out of plain sight. Nice!
Awesome design. I’m so glad you turned stuff in the spy movies into reality! It’s actually a great idea to store money or something important in one of these. I like how you glued all the pages so that it’s more secure
That’s a super cool way of storing things! What all do you plan on storing in them?
I like how you made multiple design iterations and that it did get better each time.
I’ve always been a big fan of cutout book storage. One good way to protect the pages is to add some light upholstery to the cutouts.
This was a really clever idea. Having way too many remotes and never finding the one you need is always a problem in my house. I like disguising them in a book to store them in plain sight.
That is a unique idea. It seems fun and I would like to have a book like that. It would be fun to have a mini book that you could use as a wallet. It seems as if it would be heavy to carry around.
Cool concept, I like how clean the edges of the pocket are.
I love how you would have no idea that the book is actually a safe! Really great idea solid design! I love the ideas you have to further this project! Themed books are perfect and would really help you know which book you need/want.
I’ve always liked the idea of books as secret storage. Nice job cutting out the contours. It would be cool in implement magnets and a piece of steel to keep them closed.
Nice idea. Funny to know that you got inspired by the spy’s in the movies hiding stuff in the book. Where did you get the book from? Who did you have clean cuts on the pages? Good Job!
It would be such a neat look to have a bunch of “books” with electronic equipment hidden inside next to the location where you would use it. I like your example of the Wii remote hidden inside – video game equipment hidden in a library is an interesting idea.
Nice personal spin on a Classic! Did you mill all the pages at once or one at a time?
I wonder if it would be possible to laser cut the pages. You could run multiple passes, and remove the ones that have been cut between ear run. The storage shapes limit what you are able to fit inside. This would be a great way to hide valuables in a real bookshelf. Cool idea!
This is such a cool idea! I like how your inspiration came from spy movies. I love secret ways to store your valuables. this is a great idea for taking your things to the gym.
It’s a really cool idea, do you think you’ll continue to use the books for a while?
This is awesome! I really love the inspiration and think this is such a cool idea. I like that you cut the books to fit your needs and what you need to carry around with you. It’s like a vintage purse for guys:)
Good work! I like the way the finished product came out. Its a clever way to conceal valuables, and I like your idea of adding labels or having a system so you know what is in which book. One thing I did notice is that the cuts aren’t very smooth. While it does go with the tattered book aesthetic, it might be nice to have clean compartments for your valuables. What did you use to cut it? It might be good to consider using something like a Dremel tool or a rotary fabric cutter to cut your slots. You might consider using Velcro to attach your objects instead of the straps, which almost would give the objects a look of floating in the books when you opened them vertically.
I really like the aesthetic of what you have chosen to do. It really has a “mystery house” feel to it, where things are hidden in books on shelves and such. It’s really nice to hear your background motivation for this project, as well as inspiration. It shows in your work. The thought of irony to your books and what they contain is great. Definitely something to try to keep an eye out for next time. It might help to take the objects in and out of your design if you glued pages together, as well as cutout slots for your fingers to reach in and better grab the object. Awesome project.
I really like using old books for things like this. They provide plenty of space to consolidate loose items. I like how you implemented straps for this project, it makes it much more useful than simply having loose storage. To make this idea work better, maybe label each book so you know which items are located where.
This is an cool concept. Pretty convenient way to hide your valuables.