
Reinforcing with Fiberglass


This process took place over a couple of days. The basic idea behind fiberglass and resin is to make the part stronger, and it makes it easier to work on when I apply the Bondo filler and start sanding. The mixture for the ‘glue’ is 1 oz. of fiberglass resin and 10 drops of resin hardener. The optimal temperature to work at is 70 degrees F, but due to the weather lately, the drying process takes longer than usual. I found that two layers of fiberglass gave pretty good strength to the part. I made sure to use gloves, safety glasses, and a half-mask dual cartridge respirator that does a good job keeping out odors and fine particulate such as fiberglass.
Bondo Filler
After cleaning up the edges and assembling the two parts together with fiberglass and resin, I applied the first layer of Bondo filler, which is a mixture of the Bondo filler itself and a cream hardener. The basic idea of this process is to start achieving a nice surface finish and to cover up the cardstock paper. The underside won’t receive this treatment since it will not be seen anyway.

Sanding and Fixing Asymmetry
I started sanding the surface with 80 grit paper and basically tried to achieve the final result of this project. I can’t believe how much time it took to do this portion, and it’s not even done yet. Lesson learned, 3D print and call it a day. I ran into a lot of issues of things not being symmetrical or flat, which could’ve been avoided had I taken my time in the earlier stages of this project. It’s still not perfect but it’s good enough for me. I still have one more round of Bondo to go before I do the final sanding. *fingers crossed*

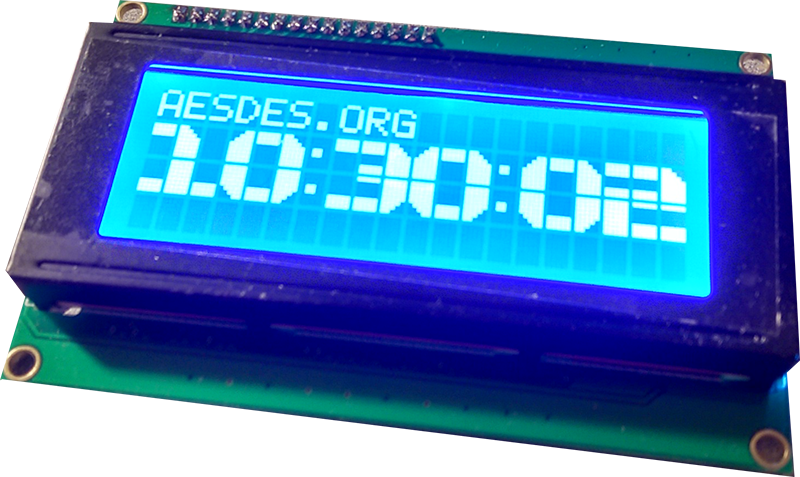
Electronics
I got the display to work at least. The only issue I have now is that the characters are coded as a string and not a number. This means I haven’t gotten the clock to work yet, and I need to figure a way to convert time into a string format. I’m not too concerned though about getting this to work by expo, I think I’ve gotten the idea across regardless if the clock ticks or not.

2 Comments. Leave new
Can’t believe that you spent so much time in this project. It is great to see the electronic parts works! I guess the layer asymmetry might caused by: 1. The printer belts are not well tightened. 2. One of the rods in the Z axis is not perfectly straight. Good luck on your project!
You might be able to use any remaining roughness/bumpiness/not-flatness to your advantage within the Borderlands aesthetic. I’d guess that since it’s a post-apocalyptic game that most objects get pretty beat up and wouldn’t be perfectly smooth anyways. 3D printing is certainly easier, most of the time, but I think you’ll get a better surface finish doing it with the fiberglass and Bondo. Great to see your electronics working, too!