
Introduction
I began the upcycling project by brainstorming different ideas, and they were:
- Cardboard structure
- DVD/CD Sculpture
- Acrylic casting using silicone mold
I picked the last option which was to create a silicone mold and melt down acrylic to cast. As I did more research on how to melt down acrylic and create silicone molds, I found that the cons outweighed the pros. Acrylic produces toxic fumes when heated and burns instead of melting. However, making silicone products turned out to be easier than I thought.
Silicone can be produced using a mixture found in stores or it can also be cheaply produced using silicone caulk. My brother had leftover silicone caulk from remodeling the house, so I was in luck.
Gathering Materials
Materials used:
- Silicone Caulk
- Caulk Gun
- Paper Plates
- Mixing Stick
- Food Coloring
- Corn Starch
For safety, uncured silicone gives off pungent fumes so a safety mask was used.
What I wanted to create was both molds and sculptures. I picked out a poker chip and a flame game piece to make a mold out of. I also used my phone to create a phone case.
Creating Silicone Putty
Step 1: Mix Silicone and Food Coloring
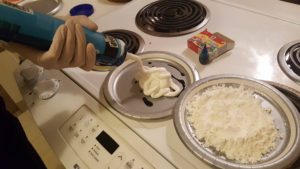
Step 2: Stir
The silicone used is 100% Silicone and starts to cure when exposed to water. The catalyst in this project is the food coloring. Once they both start to mix, the silicone will completely set in 10 to 15 minutes.
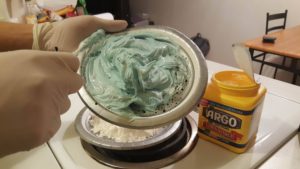
Step 3: Mix with Cornstarch
Uncured silicone is gooey and sticky. This makes uncured silicone hard to work with. To be able to work with the silicone, cornstarch can be added to the mixture until it turns into a putty like substance. This allows the silicone to be held and formed with hands.
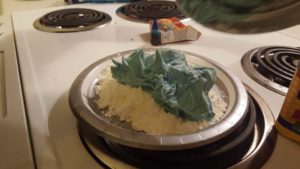
Step 4: Form the Putty
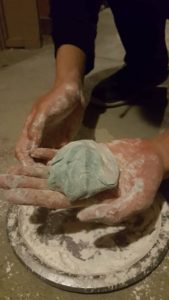
After the putty has been created, the mold or sculpture has to be formed in 10-15 minutes.
Step 5: Silicone Mold
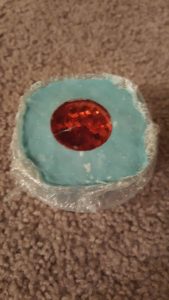
The mold is set with the flame game piece on top and a poker chip at the bottom. The flame piece ended up being difficult to remove from the silicone and resulted in an unusable mold. I should have chose an object that would come out of the mold easily or made the mold thinner so that it could be cut out efficiently.
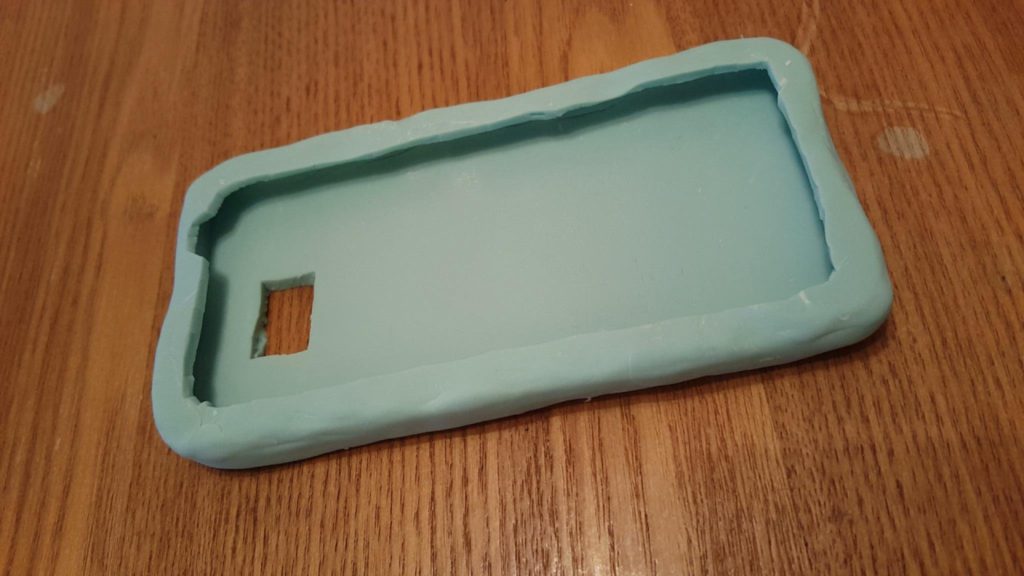
Step 6: Silicone Product
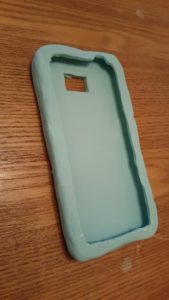
The last thing I made was a silicone phone case. I didn’t want the phone case to be damaged, so I wrapped it in saran wrap before enclosing it in silicone. This phone case turned out really well. The only downside to this was that the silicone was not as stretchy as I hoped it would be. I hypothesize that the silicone looses its elasticity as more cornstarch is used. Next time, I can try using less corn starch to increase elasticity.
Video Presentation
Credits
Special thanks to:
- Photography: Kabita Ghale
- Silicone Idea and Information: Grant Thompson
7 Comments. Leave new
Very creative project. Never would have thought you would be able to make a phone case with silicon sealant. You iterated throughout your project which was nice. The end product looked great even if it wasn’t overly practical.
A really neat and unique project that I have never thought about! I really liked that he used a picture of his design loop so the audience could see his thought process. I also thought the addition of food dye for coloring added to the aesthetic. I wonder if you could play with the food dye in order to make a more colorful product in the future? Overall great project!
Your phone case actually turned out very well and your design process was very well documented. Your presentation was clear and concise and very easy to follow. It would be interesting to see a streamlined manufacturing process to get the phone case to have cleaner edges and a thinner profile. Awesome job!
What I like about this project is that there was a lot of different iterations and task changing. He realized that his first idea was not going to work and was able to go back again and re do it. I like that he also used the blue food coloring, because it made the phone case even more aesthetically pleasing than it already was. He also had a time constraint of 10 minutes, which made this project interesting and challenging.
It was great to see the process that you employed to create these molds. the idea to create a phone case out of it was awesome and your idea to cover antlers out of it would be a great follow up. Especially filling the the mold with acrylic afterwards.
Your presentation was very detailed and well-formed, while unrelated the aesthetics of your design, this allowed the audience to understand your process very well. If you were to revise how to do the molding process we discussed a couple unique spins on the design that could be useful to include in your final blog post.
I like the presentation of the design loop. The process made sense and was informative. It was interesting to hear how the first iteration of the idea was not feasible, and how you chose to find a new project focus. I like how you explained the process of preparing the silicone mold, and how you created the final shape. Hearing about the challenges providing interesting perspective in how to create the mold on a future occasion. Is there a way to add additional color or create a smoother finish for the outside of the case? Great job!!