
My dad and I have always been thinking of new products to develop, whether it is for our outdoor recreation business or just for convenience. When thinking about a main project, I decided that I wanted to try and kill two birds with one stone and develop a product that we could use in the mountains that would also be convenient, even if it never gets mass produced.
One of the hardest thing about owning a family business where you take people into the mountains is the assurance that each client will be safe. One factor that adds to this safety is to have bear spray (pepper spray) on you at all times when in the wilderness. Fun fact: my father and I were horn hunting once and actually came 20 yards away from a grizzly! Thankfully it was during the daylight so if we needed the bear spray, which thankfully we didn’t that time, we could see where to get it. A picture of the area where we encountered this Grizzly is shown in Figure 1 below.

Figure 1: Square Top Mountain in the Wind River Range, Wyoming (Picture courtesy of: Pinterest)
But what happens when it is dark outside and you don’t have time to look for a flash light and bear spray? Well that is where my idea comes in. I want to 3D print a lighting device that can be attached around the bear spray with velcro. Not only will you save time by only needing to find one item, but you can even use the light to aim and shoot the bear spray if it ever gets that close!
When starting to design this, I wanted to have 5 constraints that would help provide direction for making a prototype and eventually a 3D printed model. My first constraint is to ensure that my final design has modernistic type of aesthetic. This will be incorporated into my prototype by the use of bubbly-type balls and will have many curves implemented in the design of the lights and the design overall. In addition, the fixture needs to have a sleek profile, which can be done by adding a clear finish over the 3D printed part or making it out of metal. For my prototype, I am accomplishing this look by the use of a sparkling acrylic paint coat over the entire device.
My second constraint will be that it needs to be small enough that the bear spray contraption can still fit in your backpack side pocket or even hook onto your jeans.
My third constraint is that the light fixture needs to use batteries that can be found at normal convenience stores, such as Wal-Mart or Safeway.
My fourth is that my light fixture needs to have three different light settings. In my mind, these will include a bright light straight ahead, a light that encompasses 180 degrees and even a red light. My idea for this comes from your typical head lamp. A picture of this can be seen in Figure 2 below.
My last and final constraint, for now, is that my project is durable. I don’t need fragments of glass breaking easily when you are already flustered if you see a bear!
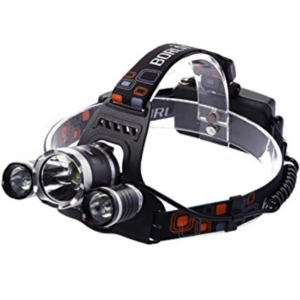
Figure 2: Head lamp with three light variations which is an inspiration for my light idea (Picture Courtesy of XSOURCE)
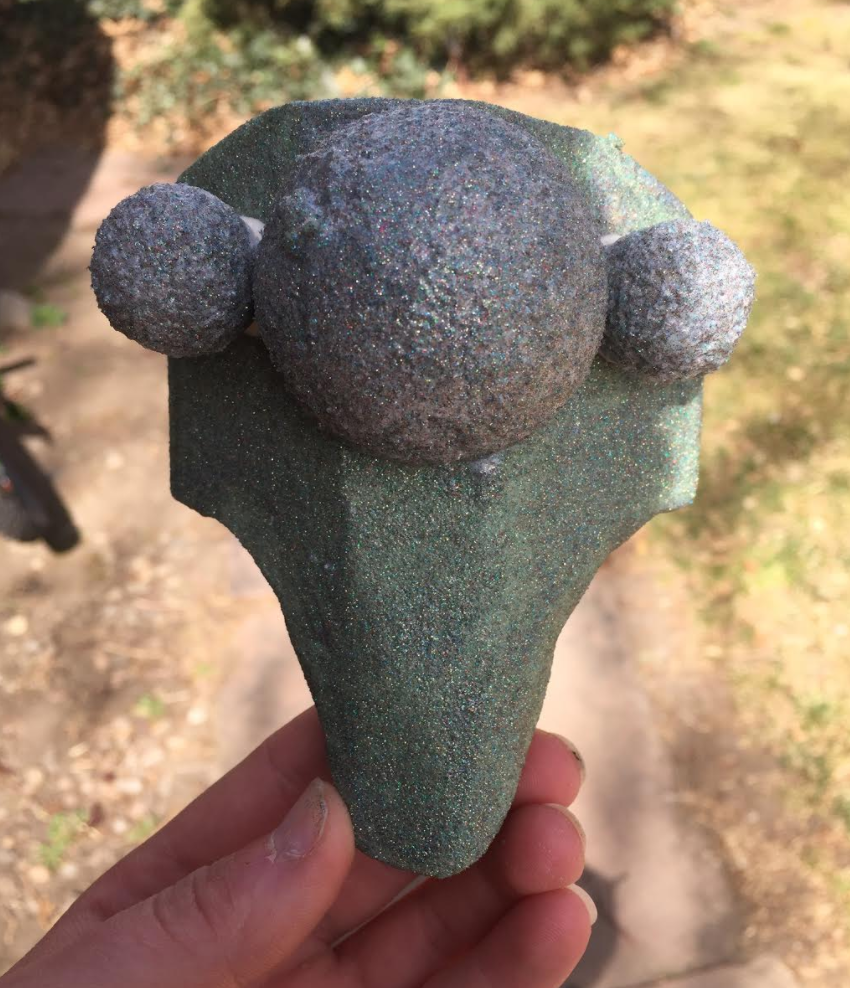
When it came time to build my prototype, I wanted to create it with the intent to test the size and feel of the lamp device. To do this, I bought material from JoAnn’s where I could carve out a curved base of the device (see Figure 3 below). In addition, I painted these white styrofoam balls and glued them to the top of that. Finally, I painted over this fixture using a sparkling acrylic. A picture of the final prototype design can be seen in Figure 4 below.
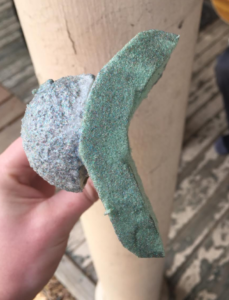
Figure 3: Curvature of the base of the device (Photo by Emily Pearson)

Figure 4: Final Prototype picture (Picture by Emily Pearson)
Now that I have a feel for the size that I want, which I determined I do want it a little smaller than this, I can start working on the circuitry. I will obtain these materials from Home Depot. In addition, the next iteration will be 3D printed and will therefor satisfy the durable constraint more so than this current prototype.
Eventually, my dad and I also want to develop a beeping mechanism that will go off if the bear spray is unsealed because getting sprayed by that stuff, even as an accident, is one of the worst pains I’ve ever had!
My presentation can be seen through this link: https://drive.google.com/a/colorado.edu/file/d/0B3PYkaDeD-Z6MnF0M1FQUlFhR0U/view?usp=sharing
Resources:
Figure 1 picture url: https://www.pinterest.com/pin/402861129138274530/
Figure 2 picture url: https://www.amazon.com/XCSOURCE%C2%AE-5000-Lumen-HeadLamp-LD272/dp/B00HD5D5C0
8 Comments. Leave new
This is an interesting project that stems from a very practical experience. If you want to make it functional then perhaps check out Sparkfun for some robust LEDs. As we discussed you may consider how to achieve your intended aesthetic with the 3D printed materials available to you. You can get a spool of some cool materials with textures like wood or metal.
This is a great idea that has quite a bit of practicality. I would encourage you to think quite a bit about using fairly strong lights for this if you plan on using it down the road. Some lights don’t do a lot in terms of providing visibility and you don’t want to not be able to see a bear if there is one! Overall, nicely done, can’t wait to see the final product.
Great and interesting project! It would be nice to see two useful objects combined to help increase the performance of the bear spray. Cant wait to see the outcome.
This is a really great idea! If this actually became a product, I would definitely buy a few of these, one for each bag. I’m curious though how the lights and bear spray are going to interact. Mainly if the lights are going to be above or below the spraying portion.
Like the idea! Something super functional that you would actually use is great. The prototype helped to solve a problem. Just be weary that 3d printing actually takes a while, something the size you’re working with would probably take 3 or 4 hours of actual printing. You can also use other colors for the actual print material.
I love how your inspiration comes from a childhood memory of you guys going hunting as a child. This is a crazy story of a life and death situation. I like the bubbly aesthetic you are using because it will look good as a head lamp. Your constraints are all very reasonable and I think you will be able to accomplish this. I like how your prototype is 3d and really shows what you are going for. Also, good job making your prototype to size, to see if the size is to big or not. I am excited for your final product! I recommend giving it a cool color.
Really cool idea. I like how it is something that could help you in your adventures. I was kind of confused on the different light settings and how they would work, I’m sure I’ll understand better once your final project is done. Good job though!
Very cool project idea! I like the prototype you created to validate the size of the overall project, as well as the Solidworks model you created to visualize the design. You also provided a thoughtful consideration of the constraints that relate to building the final device. Great job!