
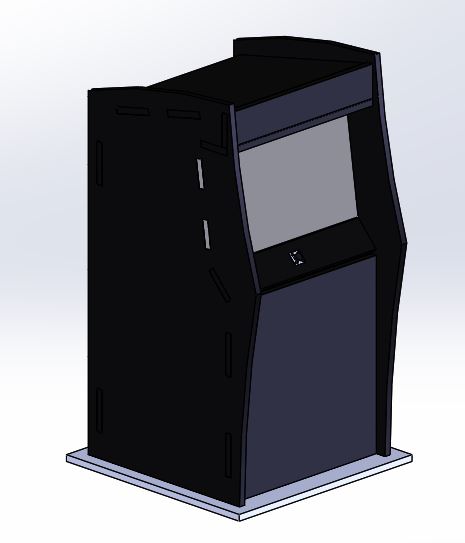
So far, I have recently finished the overall design of the arcade outside case. I have also programmed the arduino to play the Galaga theme song at the push of a button. There is still a lot of work to be done to finish this project.
Having finished the overall design of the case I was able to lay it out flat, to see how much space it would take up, and how much acrylic I would need to buy:

Knowing this I can now move forward with the rest of the construction of the final product.
4/4 – Purchase Acrylic
4/5 – Laser Cut the pieces
4/5 – 4/7 Plan the outer paint job, and acquire paints
4/8 – 4/12 Finish programming the Arduino with a light pattern, do any soldering necessary to fit all the components
4/8 – 4/15 Work on the painting, and permanently fitting the pieces together
4/15 – 4/20 Finalize any remaining details
With this Schedule, the project will stay manageable and be able to be completed by the end of the semester.
3 Comments. Leave new
Hi Max! Really good work so far, it is clear you have put in a good amount of thought to your timeline. The only thing I would suggest is padding your timeline with some redesign time in case something does not go according to plan, if you haven’t already. Good luck!
I was wondering the same thing as Jared, what’s the size of the arcade? It is a very cool project and your construction timeline is very clear. Good luck on the project
How much space did you determine it would take up? It’s nice that you already have the electronics working. Hopefully you can stay on schedule!