

Alright, Ill be honest I finished this product very quickly and did not take many photos in the process, so what I will be doing is showing my setup and the steps that I took to make this final product, going based off materials and dimensions as well as the one video I used to help me figure it out.
The first thing that I did was gather all my materials, this consisted of 7 different skis, a chop saw, 3 8-foot 2x4s, 100 wood screws around 1-1/4 and 1-3/4 in length, and a drill with a drill bit made from hard metal (this is important).
![]()
The first thing that I did was cut the 2x4s into 2 20” and 2 15” pieces to make the square sitting portion of the chair I then screwed them together from the sides.

The next step that I did, due to the video I watched recommending was I cut two pieces one was 33” with a 35-degree angle cut into both ends of it and the other was a 22” piece that had a 5-degree cut on both ends. These were then attached together to create a v shape. This was repeated for the other side of the chair. This allows the V to sit at an angle that is overall flat to the ground as well as moving the center of mass of the chair and the support more towards the back.
http://https://vimeo.com/29798472
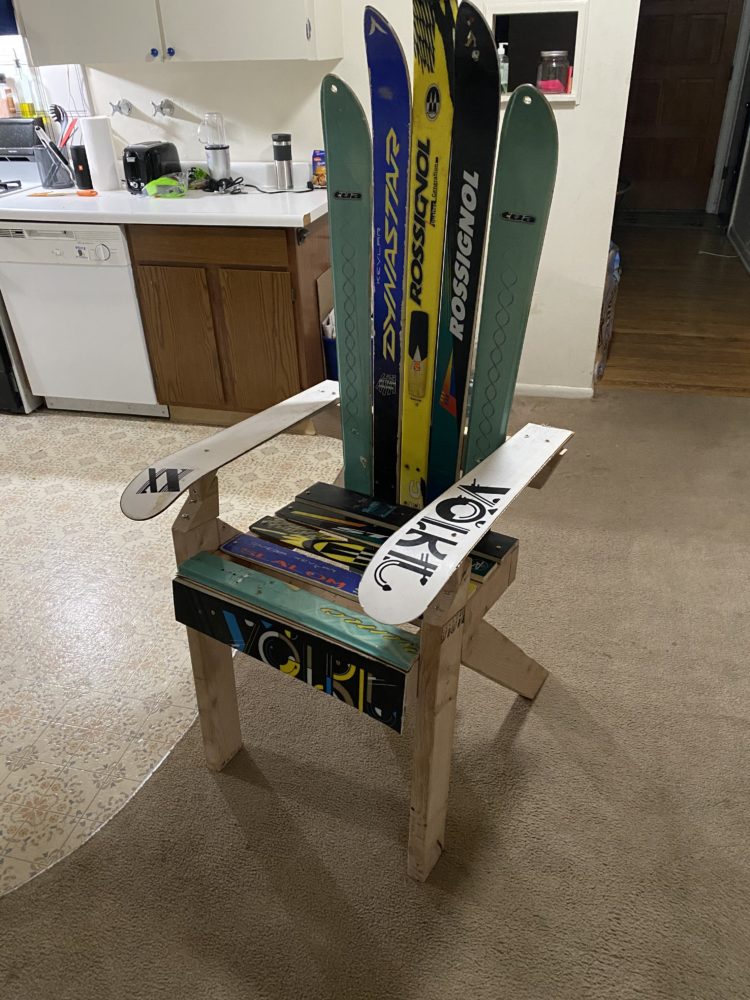
The next thing that was done was I laid my skis on the ground and guessed their height for the chair back, once marked on the ground I took them to the chop saw and sawed them. Something I learned in the process with using skis is that they have a metal edge, and it is important to cut through that edge on the outside of the skis and then flip the ski in the saw so that it does not blow out the edge (This happened a couple times). I then affixed the skis to the back of the square, and the angled Vs to the side of the square. Granted this was more easily said than done.
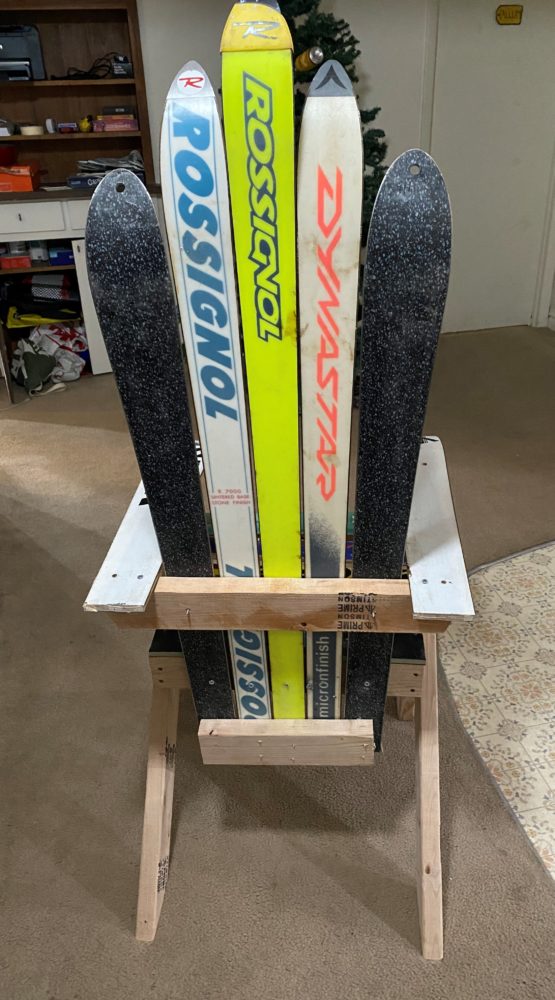
Once the main chair form was assembled, I began cutting the remaining parts of the skis to 20” pieces so I could run them length wise across the chair so that the chair could be sat on.
As a final touch I cut the curved ends off my last set of skis and used those as arm rests by connecting them to a piece of wood that was screwed into the skis used as the backing for the arm rest. These skis were then also connected to the top of the V style 2x4s.
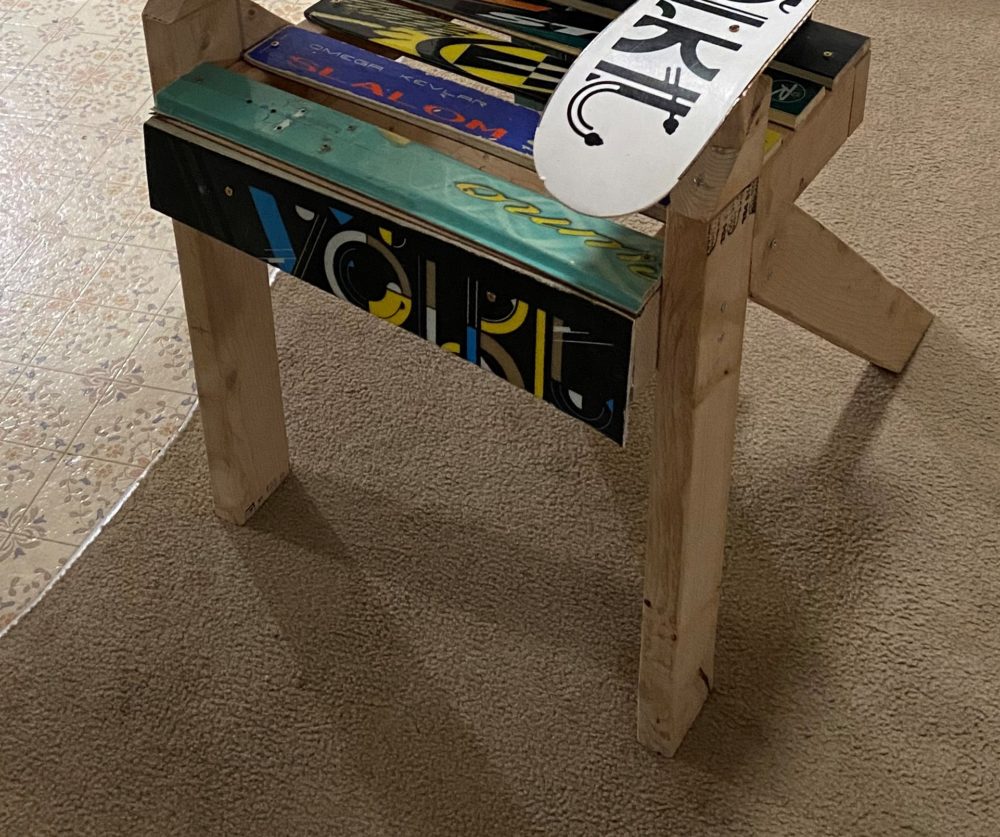
As a finishing touch to the chair, I took a remaining large piece of ski and screwed it into the front of the chair, I currently am missing stain for my project since I used untreated wood. This means that it is for now and indoor chair and as soon as I can protect it I plan to take it up to my cabin in the mountains!
Video Link: https://vimeo.com/29798472 (Used for inspiration for making this chair)
4 Comments. Leave new
Hey Josh!
This chair looks great, I’m thrilled that it turned out so well, and I’m glad I got to see the progress! That is so cool that you have plans to stain the wood, and the perfect place to keep the chair. I assume the skis will wear well outside, since they’re meant for that kind of weather. Do you know what color you want to stain/seal the wood to? The current color looks awesome, but I’m sure you could make a great combo with another choice. Is the chair comfortable? I could see the curve of the skis hitting someone’s head, but I can’t be sure how tall they are. Do you have plans to add any cushioning? The chair looks way cool as is, but I could see how a cushion could add functionality, and create space if the backrest was curving into someone’s head.
Phenomenal work, this looks awesome!
Not sure on the stain color, probably a darker varnish. The chair is comfortable enough haha but has some hidden screws that make it slightly dangerous. I measured the skis so that anyone who is less than 6’4″ wont hit their head on them. no plans for cushioning. Thanks for commenting I liked the things you said the way that you said them.
This is so awesome!! I’ve always wanted to make a chair like this, or a bench out of my old snowboards. I really like how the top of the chair back is curved. I could see the wood getting a really cool look to it over time as it sits outside. Do you plan to do any finishing to the wood, or leave it completely raw/unfinished? Nice Work!
You must not have read the part of my report that explicitly said that I was probably gonna stain/finish the chair. So for recapping purposes “I currently am missing stain for my project since I used untreated wood. This means that it is for now and indoor chair and as soon as I can protect it I plan to take it up to my cabin in the mountains!”