

https://vimeo.com/user134296562/review/515596643/2d35099ce2
https://vimeo.com/user134296562/review/515596643/2d35099ce2
Presentation Video: https://vimeo.com/user134296562/review/515596643/2d35099ce2
Did you know that recycling is bad for the environment? It takes a lot more time, energy, and resources to recycle a plastic bottle, aluminum can, or glass jar than it does to produce new ones out of raw materials. Even after the tedious sorting, transporting, and distributing of recyclable materials, many of these items end up in the landfill anyways due to contamination which deems seemingly recyclable materials unrecyclable. Upcycling, on the other hand, takes discarded materials, products, and components and repurposes them into new, useful entities without going through the extensive and inefficient recycling process; it turns trash into treasure. Through this upcycling project, I managed to make a treasure of my own.
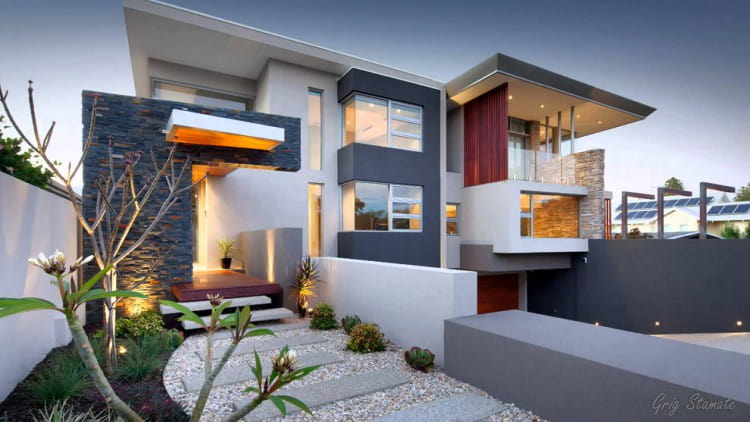
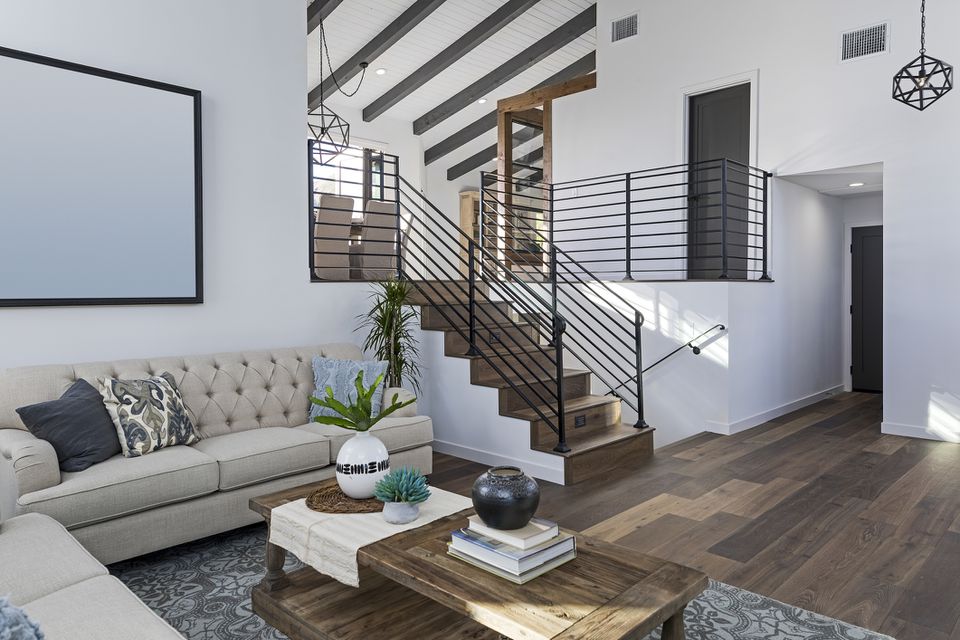
I chose a modern aesthetic to guide me through my upcycling journey. The modern aesthetic showcases simple, but cutting geometries; a variety of coordinated, well-balanced colors; a mixture of modestly used textures; and a conglomerate of natural materials. I am drawn to the minimalist, dynamic aesthetic that is modern design. While this aesthetic has a very “less is more” and “function over beauty” backbone, the dynamic accent features that are incorporated through mixed colors, textures, and materials create lots of opportunities for visual appeal. The sense of calm and openness that you feel when you sit in a room with modern interior decor is a strong selling point as well. In essence, modern design incorporates dynamic, but coordinated features all in moderation.
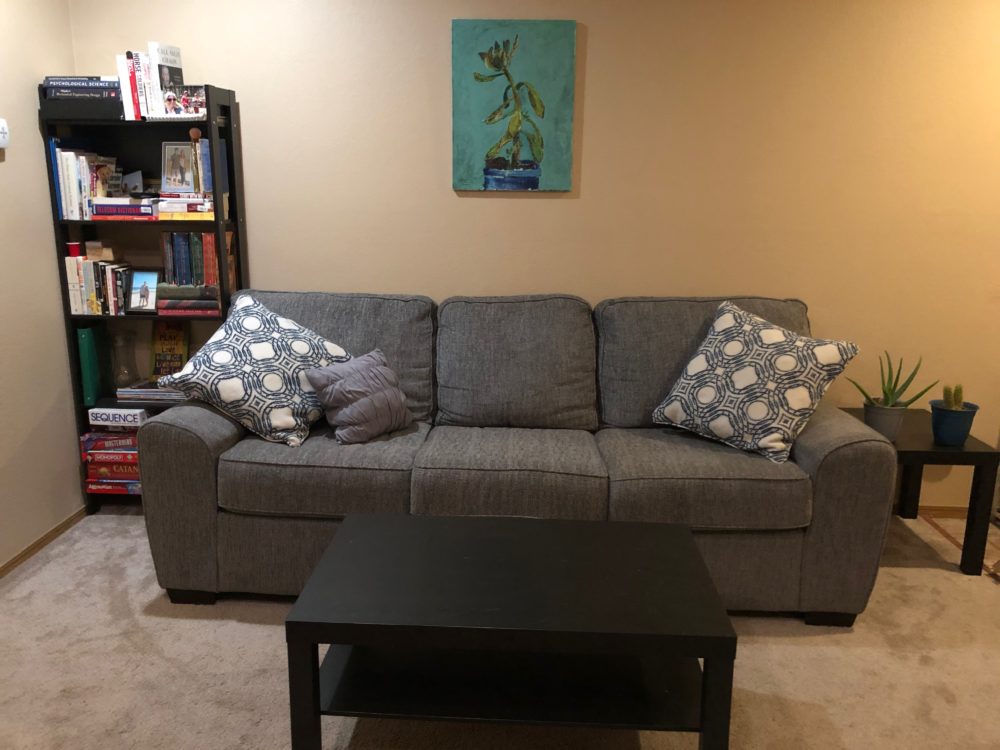
I chose the modern aesthetic for my upcycle project because it’s an aesthetic that I’m striving for in my own living space. If you walk into my living room you’ll see a speckled grey couch with blue accent pillows, dark finished wooden coffee and side tables, a dark brass fireplace toolset, a painting of a succulent with a textured teal background, and a bookcase filled with an arrangement of books, photos, and knick-knacks. While decoration and furnishing is still a work in progress, the space currently contains a mixture of grey, black-brown, and blue-teal colors dispersed throughout. It also has a variety of wooden, textile, and metal features, adding dynamic through differing materials and textures. As I continue to add to the furnishings and decor in the rest of my home, such as my mostly bare dining area, I’m hoping to build off of the modern-like aesthetic that’s already making it’s way through my house.
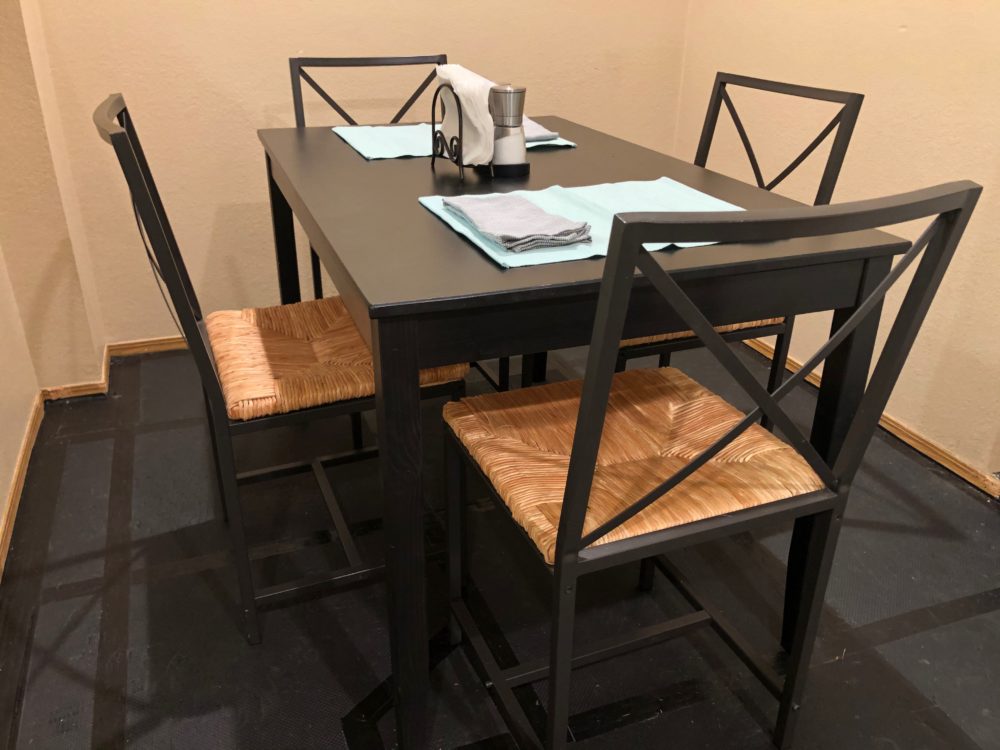
For this upcycling project, I chose to make an accent table for my dining area to help fill the currently blank wall space. Keeping with the modern aesthetic, I wanted to use a mixture of wood materials with metal accents. My functional goal was to fill a considerable amount of wall space while minimizing the floor coverage, and still having the final product work as a stable, functional table. Aesthetically, I wanted to create a sense of dynamic and openness through a mixture of colors, textures, and materials, while still looking coordinated and cohesive.
Before making sketches of a design, I wanted to gather some materials. This may seem like a backwards approach, but I wanted to know what my design constraints were from a material aspect before committing to a specific design and dimensions. As this was an upcycle project, I wanted to focus on gathering free or low cost materials. On a garbage pick-up day towards the beginning of the project, I was lucky enough to come upon an old wooden chair that my neighbor put out for trash. I quickly adopted the chair as my own, thinking that the variety of wood components would be useful one way or another. That weekend I continued my material hunt at an Arc Thrisftstore in my neighborhood, where I found three unopened packs of build-it-yourself black-brown IKEA cabinets, all for the low price of $6. In each pack, there was a solid square board that I thought might work well for components of the table top, so I added these to my material collection.

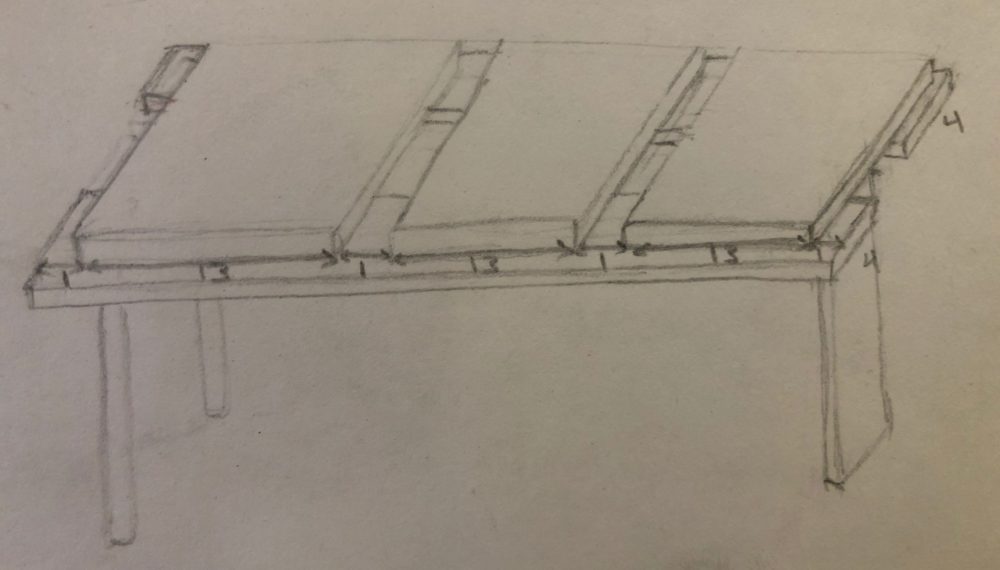
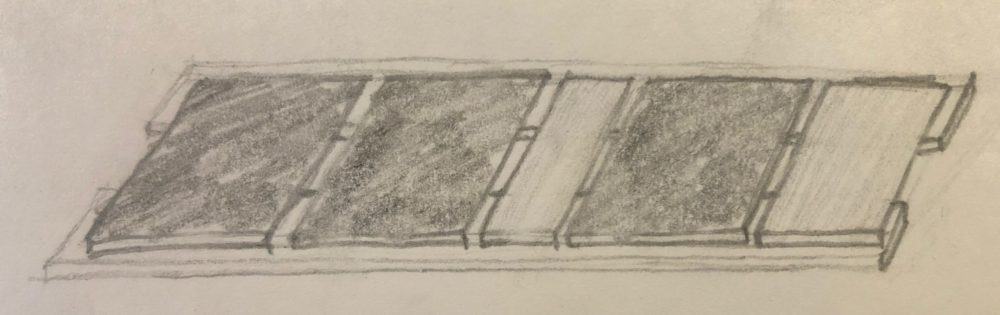
After gathering these initial materials, I decided to make sketches to solidify my plans for the accent table and determine what supporting and fixture materials I needed. I sketched a few concepts, but decided to craft my table based on the legs sketched in the left image below and the table top shown on the right. This design consists of five boards for the table top, which would be constructed from the three square IKEA boards and two boards that I would make out of pieces from the wooden chair. These boards would be arranged asymmetrically to provide dynamic to the design. The boards would be supported by two, 5’ long planks, which would also provide a 1” boarder around the table top pieces, adding some width to the table. Wanting to create an additional element of visual interest and dynamic, a 3’ long board would be used for the leg on one side of the table and two metal poles would be used for the legs on the other side. This leg trifecta would add a unique feature while also providing the necessary stability for the table to stand on its own.
Once my sketches were complete and I determined the final dimensions to build to, I went to Home Depot to purchase the remaining support and fixture materials I needed to start construction. After buying two 8’ long 3 1/2”x1 1/2” pine boards, two 3’ long aluminum poles, some 90 degree corner brackets, and screws, my material collection was complete.
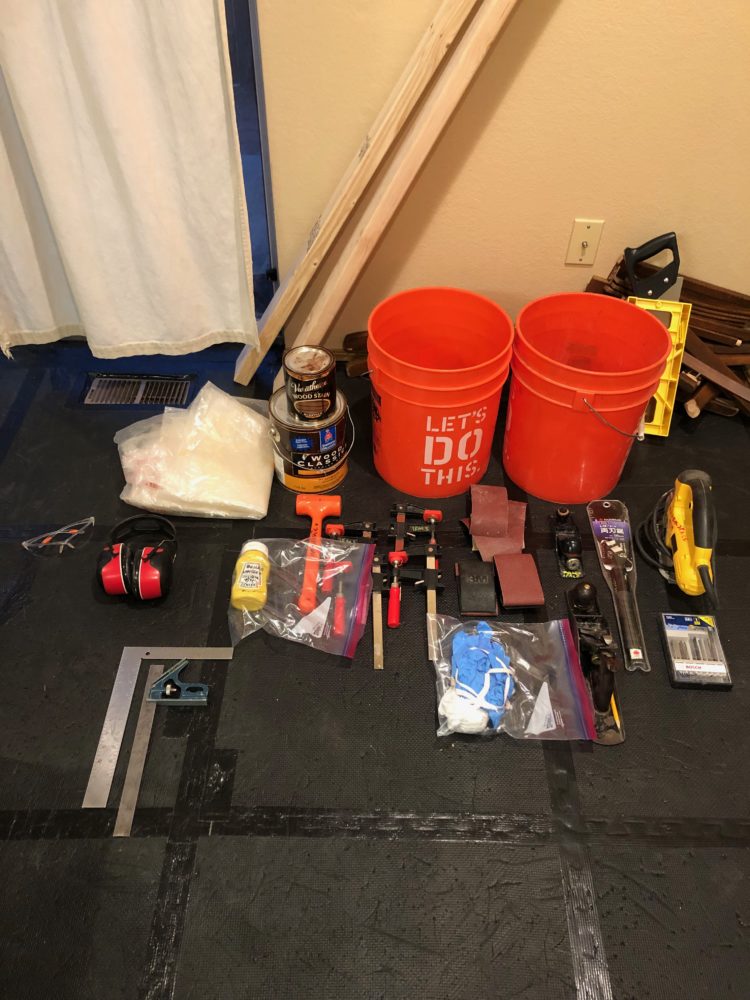
Before I could begin working with the materials I gathered, I needed to get my hands on some woodworking tools. I decided to schedule a consultation with the CU Boulder woodshop to discuss my table design and see if they could help me with tooling. Employees at the woodshop ended up filling two work buckets full of hand tools and supplies for me to borrow while constructing my project. They gave me a variety of equipment including a jig saw, drawer liners, wood stains, and even a sharpened #2 pencil, among other supplies. After picking these tools up from the university, I was set to start shaping and building my table.

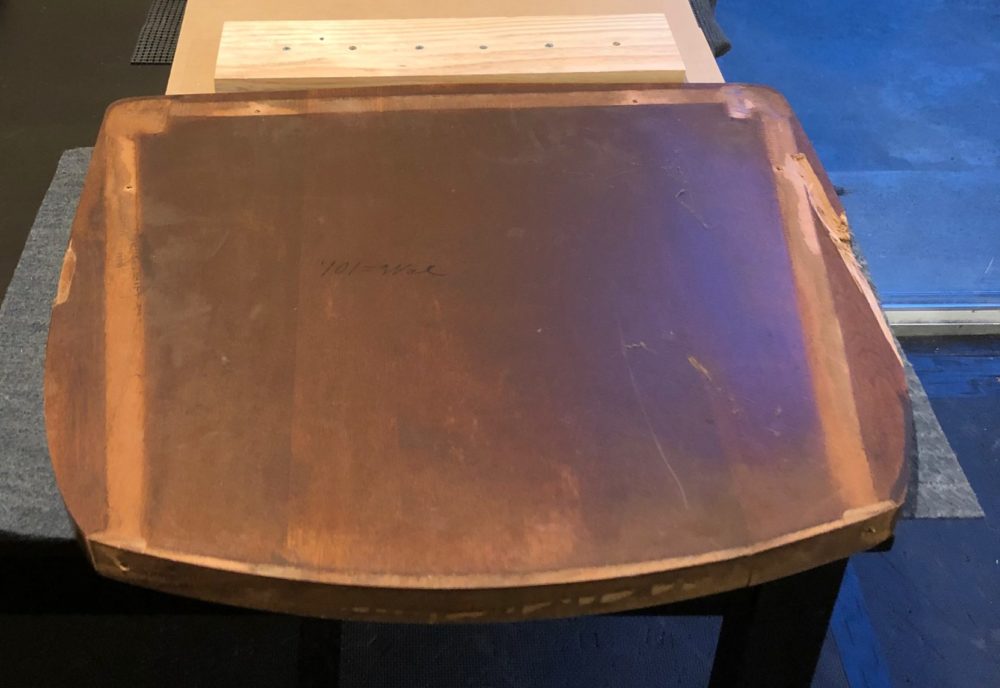
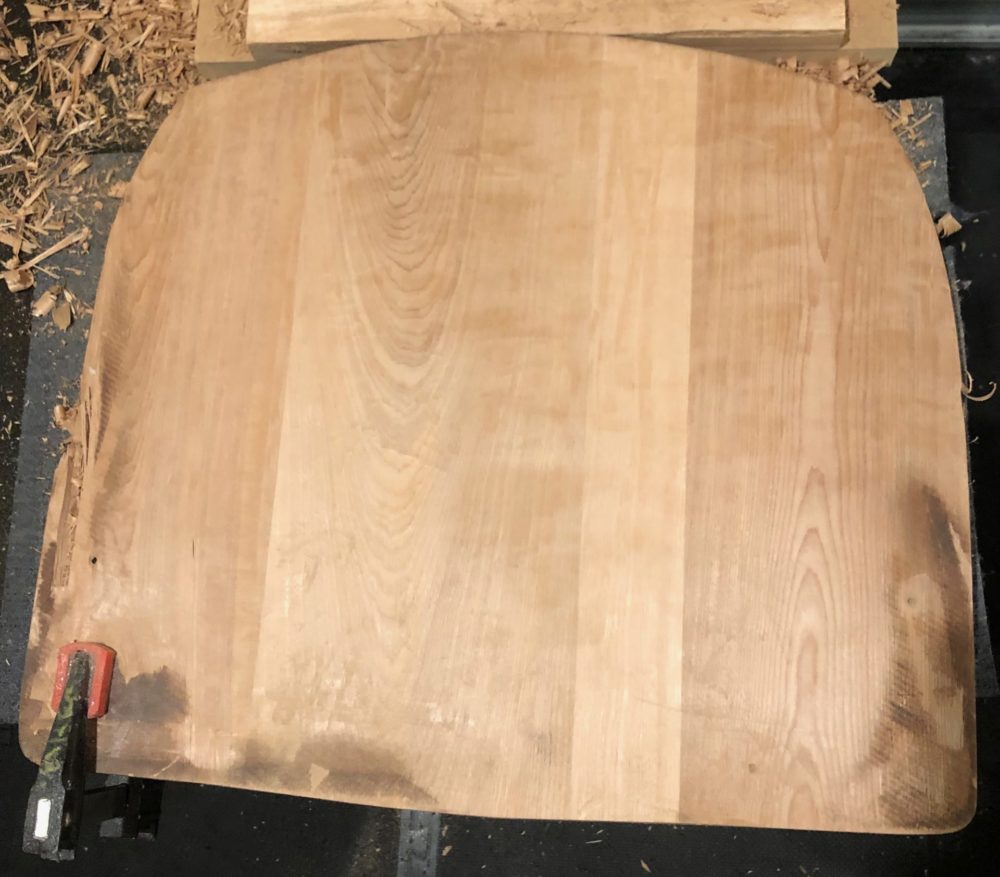
To begin, I deconstructed the wooden chair with plans to utilize the chair seat for components of my table top. I carefully unscrewed bolts and broke the dowel pins holding the various wood pieces together until the chair was completely broken down. Once break down was complete, I started the long and tedious endeavor of planing the chair seat down to 5/8”, which was the thickness of the boards I got from Arc Thriftstore. I started by planing the bottom of the chair to remove the old finish. I then cut the seat into a 9”x13” and 6”x13” board, as planned in my original design. Once the length and width were to my liking, I worked on planing the boards, which were over an inch thick in some areas, down to the desired thickness. A few blisters and several hours later, the boards were finally planed down to the correct size.
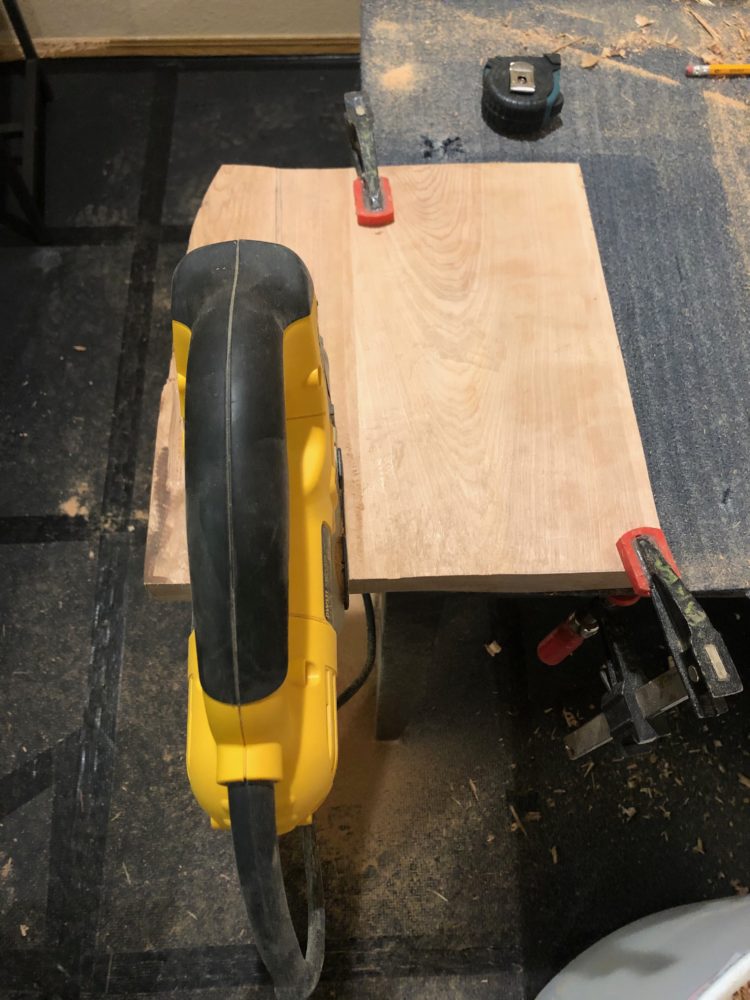
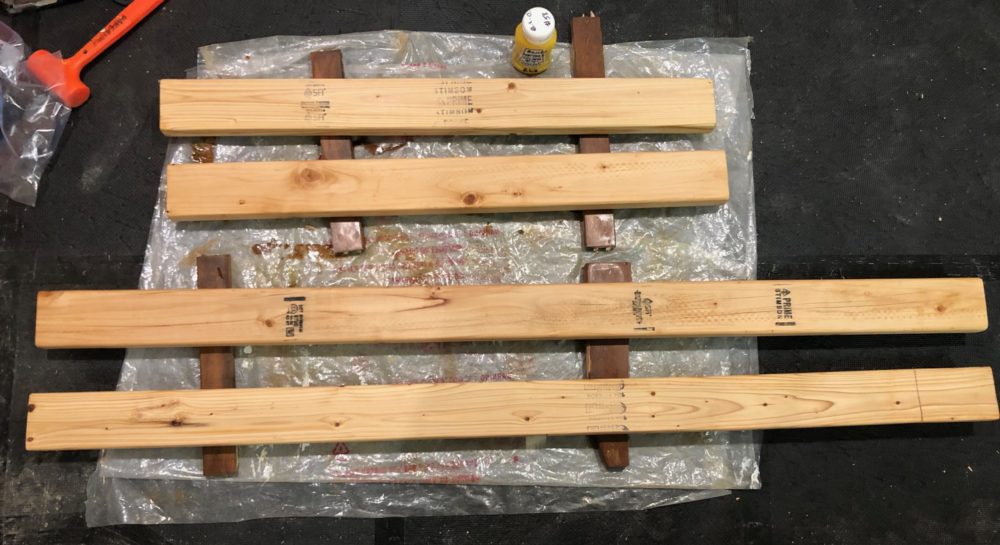
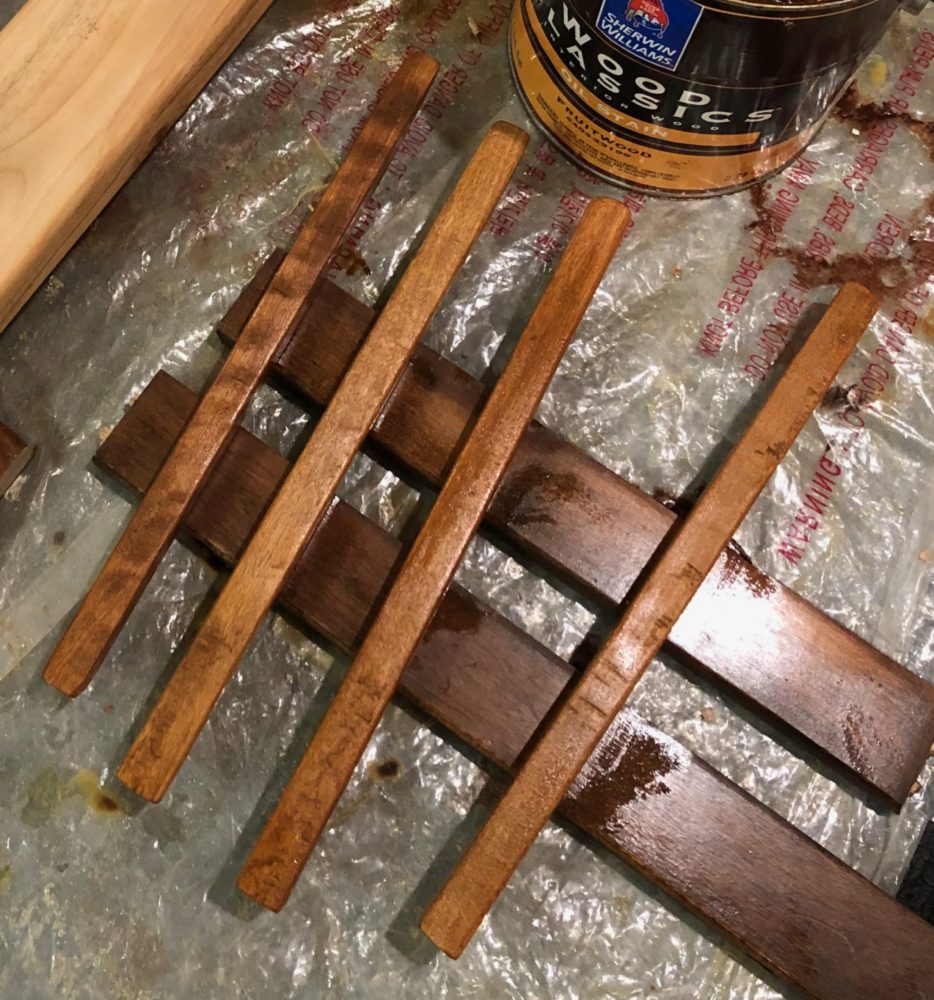
Next, I cut the two 8’ pine boards down to two 5’ and two 3’ boards. I then carefully sanded all of my raw wood materials until they were smooth and ready to be stained and finished. The CU Boulder woodshop supplied my with a couple stains to choose from, but I ultimately decided to stain the boards made from the chair seats with Fruitwood oil stain and then finish them with a water-based polyurethane finish. I finished the pine boards with boiled linseed oil, which gave them a shiny, clean appearance.

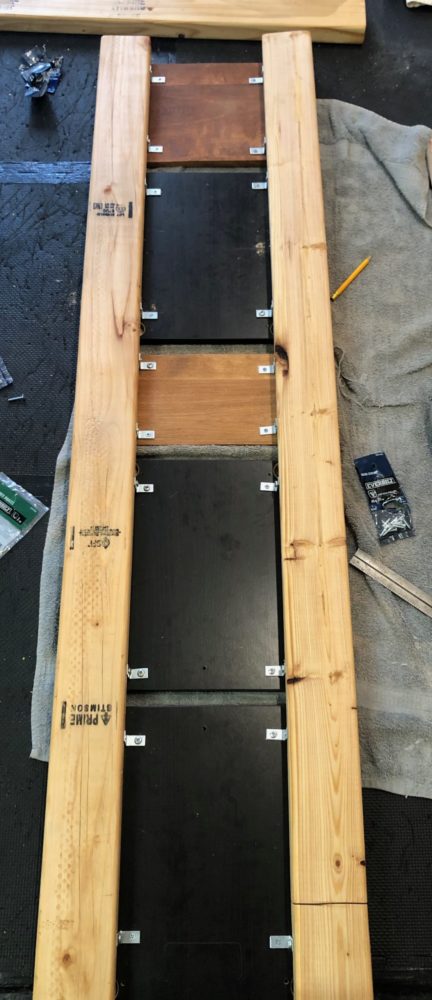
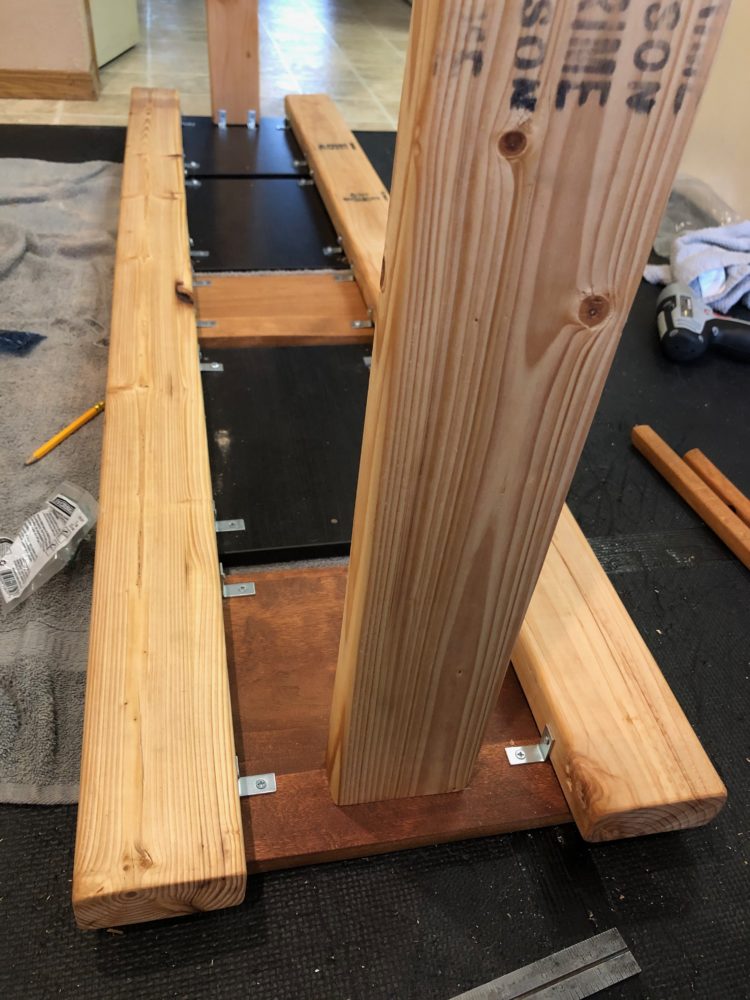
With all of the components cut to size and finished, all I had left to do was construct the table. I carefully laid all of the table top pieces face down on a towel, measuring an inch between each board. I then placed the 5’ pine boards on top of the table top pieces and measured the placement to ensure that they were square with the table top boards. Once the placement was adequate, I fixed each of the five table top boards to the pine supports with four 90 degree corner brackets and appropriately sized screws.
With the table top complete, I started to work on the table legs. Based on my sketches, I wanted to use one of the 3’ long pine boards and the two aluminum poles to make the table legs. I attached the pine leg to one side of the table top using 90 degree corner brackets and screws. I needed to trim the metal poles down an inch before connecting those to the table. To do this, I clamped them down to my dining table and carefully cut an inch of material off each pole with a dremel. To attach them to the table top, I used the dremel to cut two 1/2” deep holes in the pine table support to fit the metal poles in. I then inserted the metal poles in their holes and used some cardboard to fill extra space between the poles and their wooden holes. I secured the poles, I’ll admit not very well, with hot glue. With that, I had a functional table.
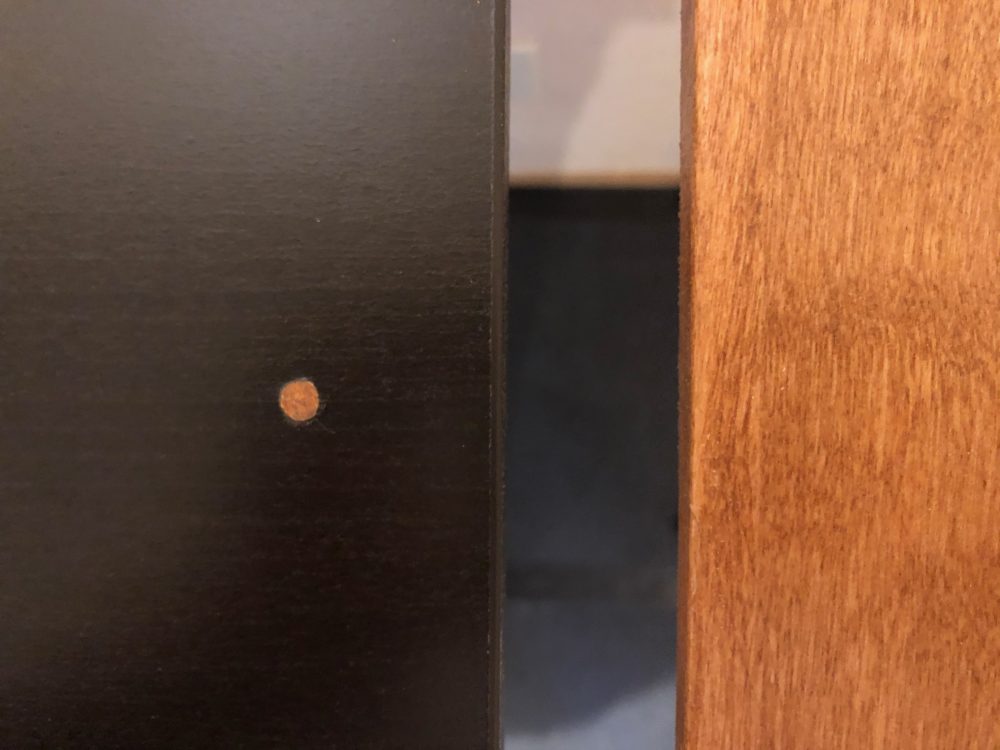
The last thing to do was add some finishing touches. Each of the three IKEA boards I got from Arc Thrisftstore had a small hole to fit a knob into for their original purpose. I decided to fill those holes with leftover material from the chair. To do this, I cut small pieces of wood with a saw and sanded them with a dremel until they were round and just small enough to be press fitted into the holes in the boards. This resulted in a nice contrast between the dark boards and the rich brown fillers. I then decided to utilize some left over pieces from the chair to make additional table leg supports. To do this, I cut four square wooden poles down to a foot in length, planed off the old finish, sanded and refinished them, then screwed them onto either side of the table legs to provide increased stability and support. After that, my table was complete.
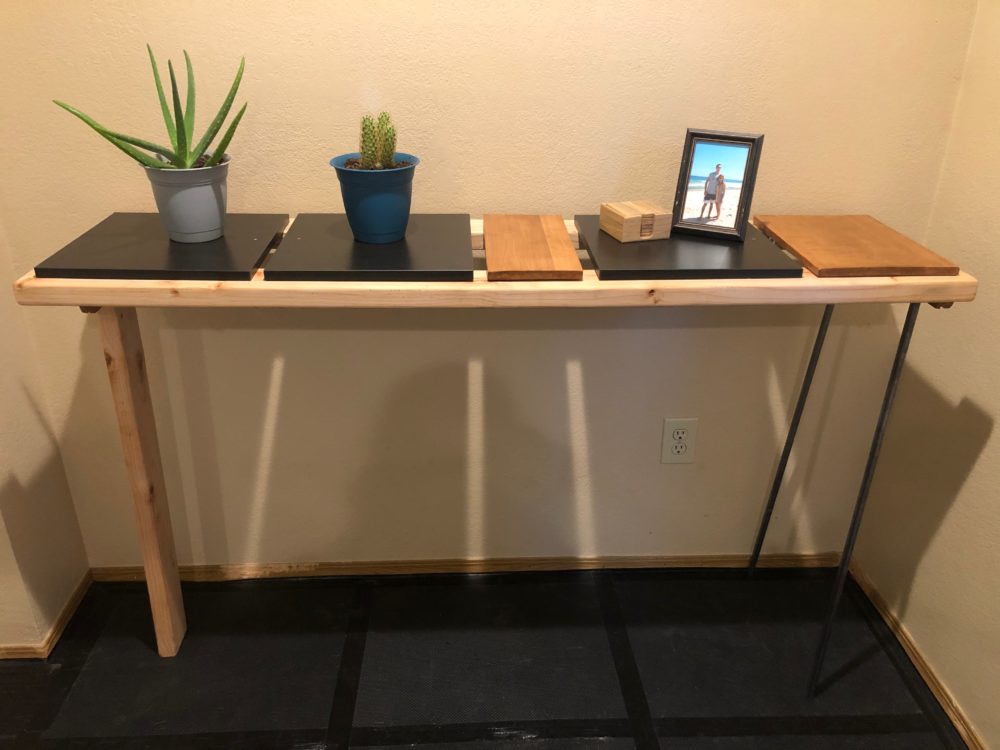
The finished table is by no means perfect, but I do think it came out rather well. Functionally, it is indeed a table and it fills the space I placed it in well. The table matches the long, tall, skinny shape that I was hoping for, ensuring that it functions as an accent table while taking up minimal floor space. Artistically, it comes close to the modern aesthetic I was aiming for, including dynamic elements through various colors, textures, and materials. I purposely designed the table to be asymmetrical to add additional visual appeal, while using the different material elements (mostly) in moderation.
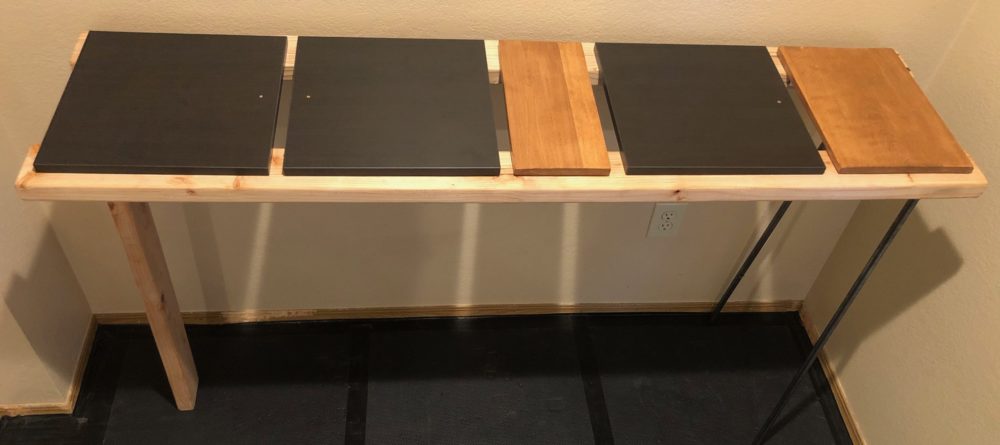
There are a few low quality features in the final design. The legs ended up being somewhat unstable, primarily on the side with the metal legs, due to a poor effort to properly affix them to the table top. The metal legs are also very greasy, leaving quite a mess on anything they touch. Additionally, the boards I got from Arc Thriftstore were originally from IKEA, so the material quality is fairly poor. While these boards look nice in the design, using real wood for those portions of the table top would have resulted in a more sturdy and higher quality table. Also, I started to make a premature cut in the wrong location on one of the pine table top support boards, leaving a cut mark that is a bit of an eye sore. I’ve chosen to have this side of the table face the wall to minimize the cut mark’s visibility.
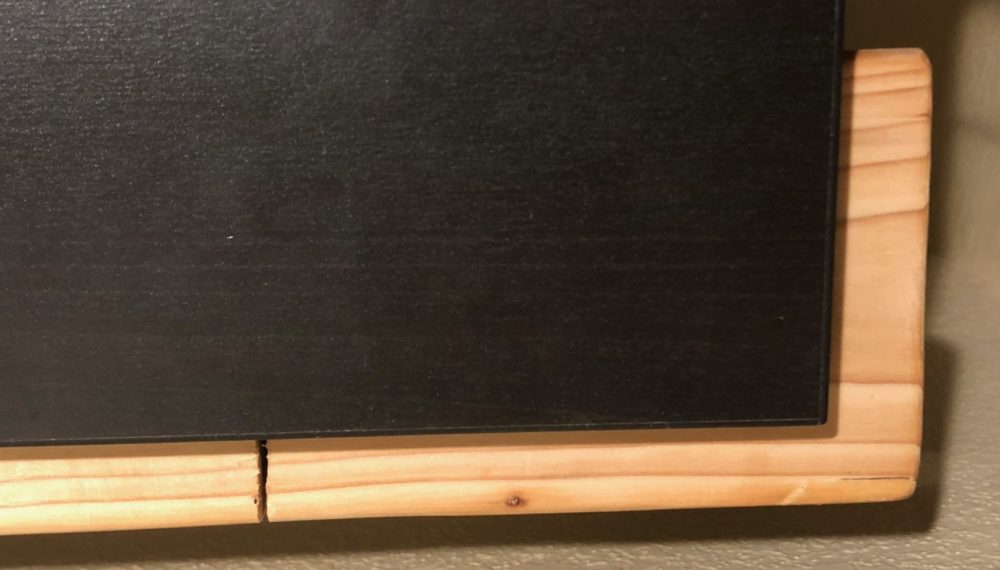
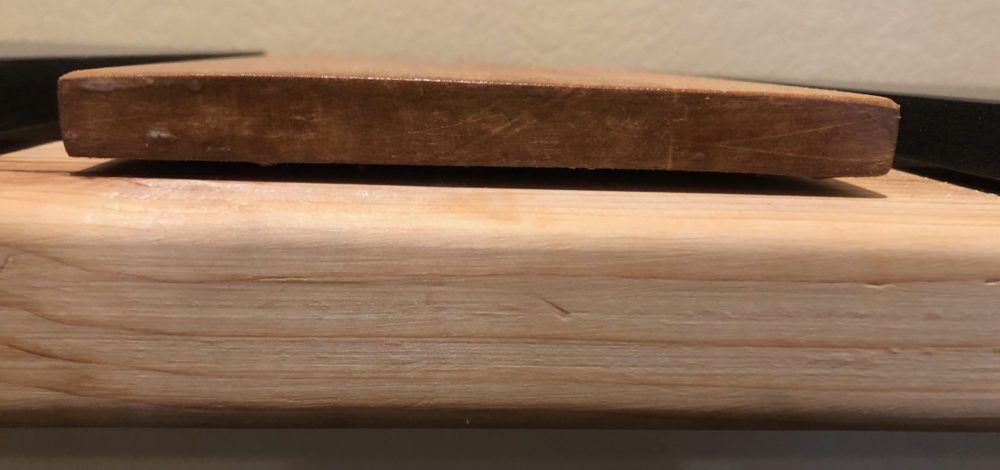
There are also several changes I would like to make before officially declaring my table complete. Looking at the current table, the pine leg seems to throw the design off balance and takes away from the clean modern aesthetic I was aiming for. I’d like to remove the pine leg and instead use some remaining pieces from the wooden chair to construct a new leg that matches the color and feel of the wooden table top boards. I think this will result in a cleaner, more balanced final product. I would also like to enhance the overall stability of the table, finding a sturdier way to affix the metal legs to the table. Additionally, the table top boards don’t sit completely flush on the pine board supports, leaving a slight gap between some of the boards and the supports. I would like to work towards removing those gaps and ensuring that the table top is flat and level.
This upcycling project took me on quite a journey from exploring a modern aesthetic, to transforming my dining room into a wood shop, and ultimately to having a functional accent table to provide some functional flare to my home. I’m excited to continue improving my work and embarking on more upcycling adventures in the future.
Images:
Modern Home: https://www.trionds.com/10-ways-give-home-modern-aesthetic/
Modern Home Decor: https://www.thespruce.com/decorating-in-the-modern-style-452457
2 Comments. Leave new
I enjoy the modern look you were able to add to the table with the various square tops and I find it interesting that you added different legs for supports on each side. I am curious as to why some pieces of wood are finished with the coating and others are not, I know you decided to change certain pieces so I’m wondering if time was a limiting factor.
I really liked how your final project turned out, it looks really nice and my favorite part has to be the variation in table top with the squares and varying colors. Another thing that I like is that it fits the space that it was put in and I’m curious if that was on design consideration for the project?