

For my final project, I decided to create something that I would keep for a long time. Since I play and stream for the Call of Duty Esports team here at CU, I decided to make a neon sign of my username so that I could use it as decoration in my room. On the CU Esports Call of Duty team my user is “Bugz” so that is what I wanted my sign to say.
Source: https://twitter.com/BoulderEsports/status/1356704747080675328?s=20
An example of a neon sign that drew my inspiration is shown below but I wanted to capture a different aesthetic than the one shown below.

Source: https://www.ellumiglow.com/blog/how-to-make-a-diy-led-neon-sign-with-pixel-free-led-trim/
I wanted to capture a glow wave aesthetic. A glow wave aesthetic has bright neon lights usually shades of pink or blue, and a deep black background to contrast the bright colors. This aesthetic has always been appealing to me so I wanted to replicate it in my neon sign. To give a better picture of what this aesthetic is, the following image is shown.
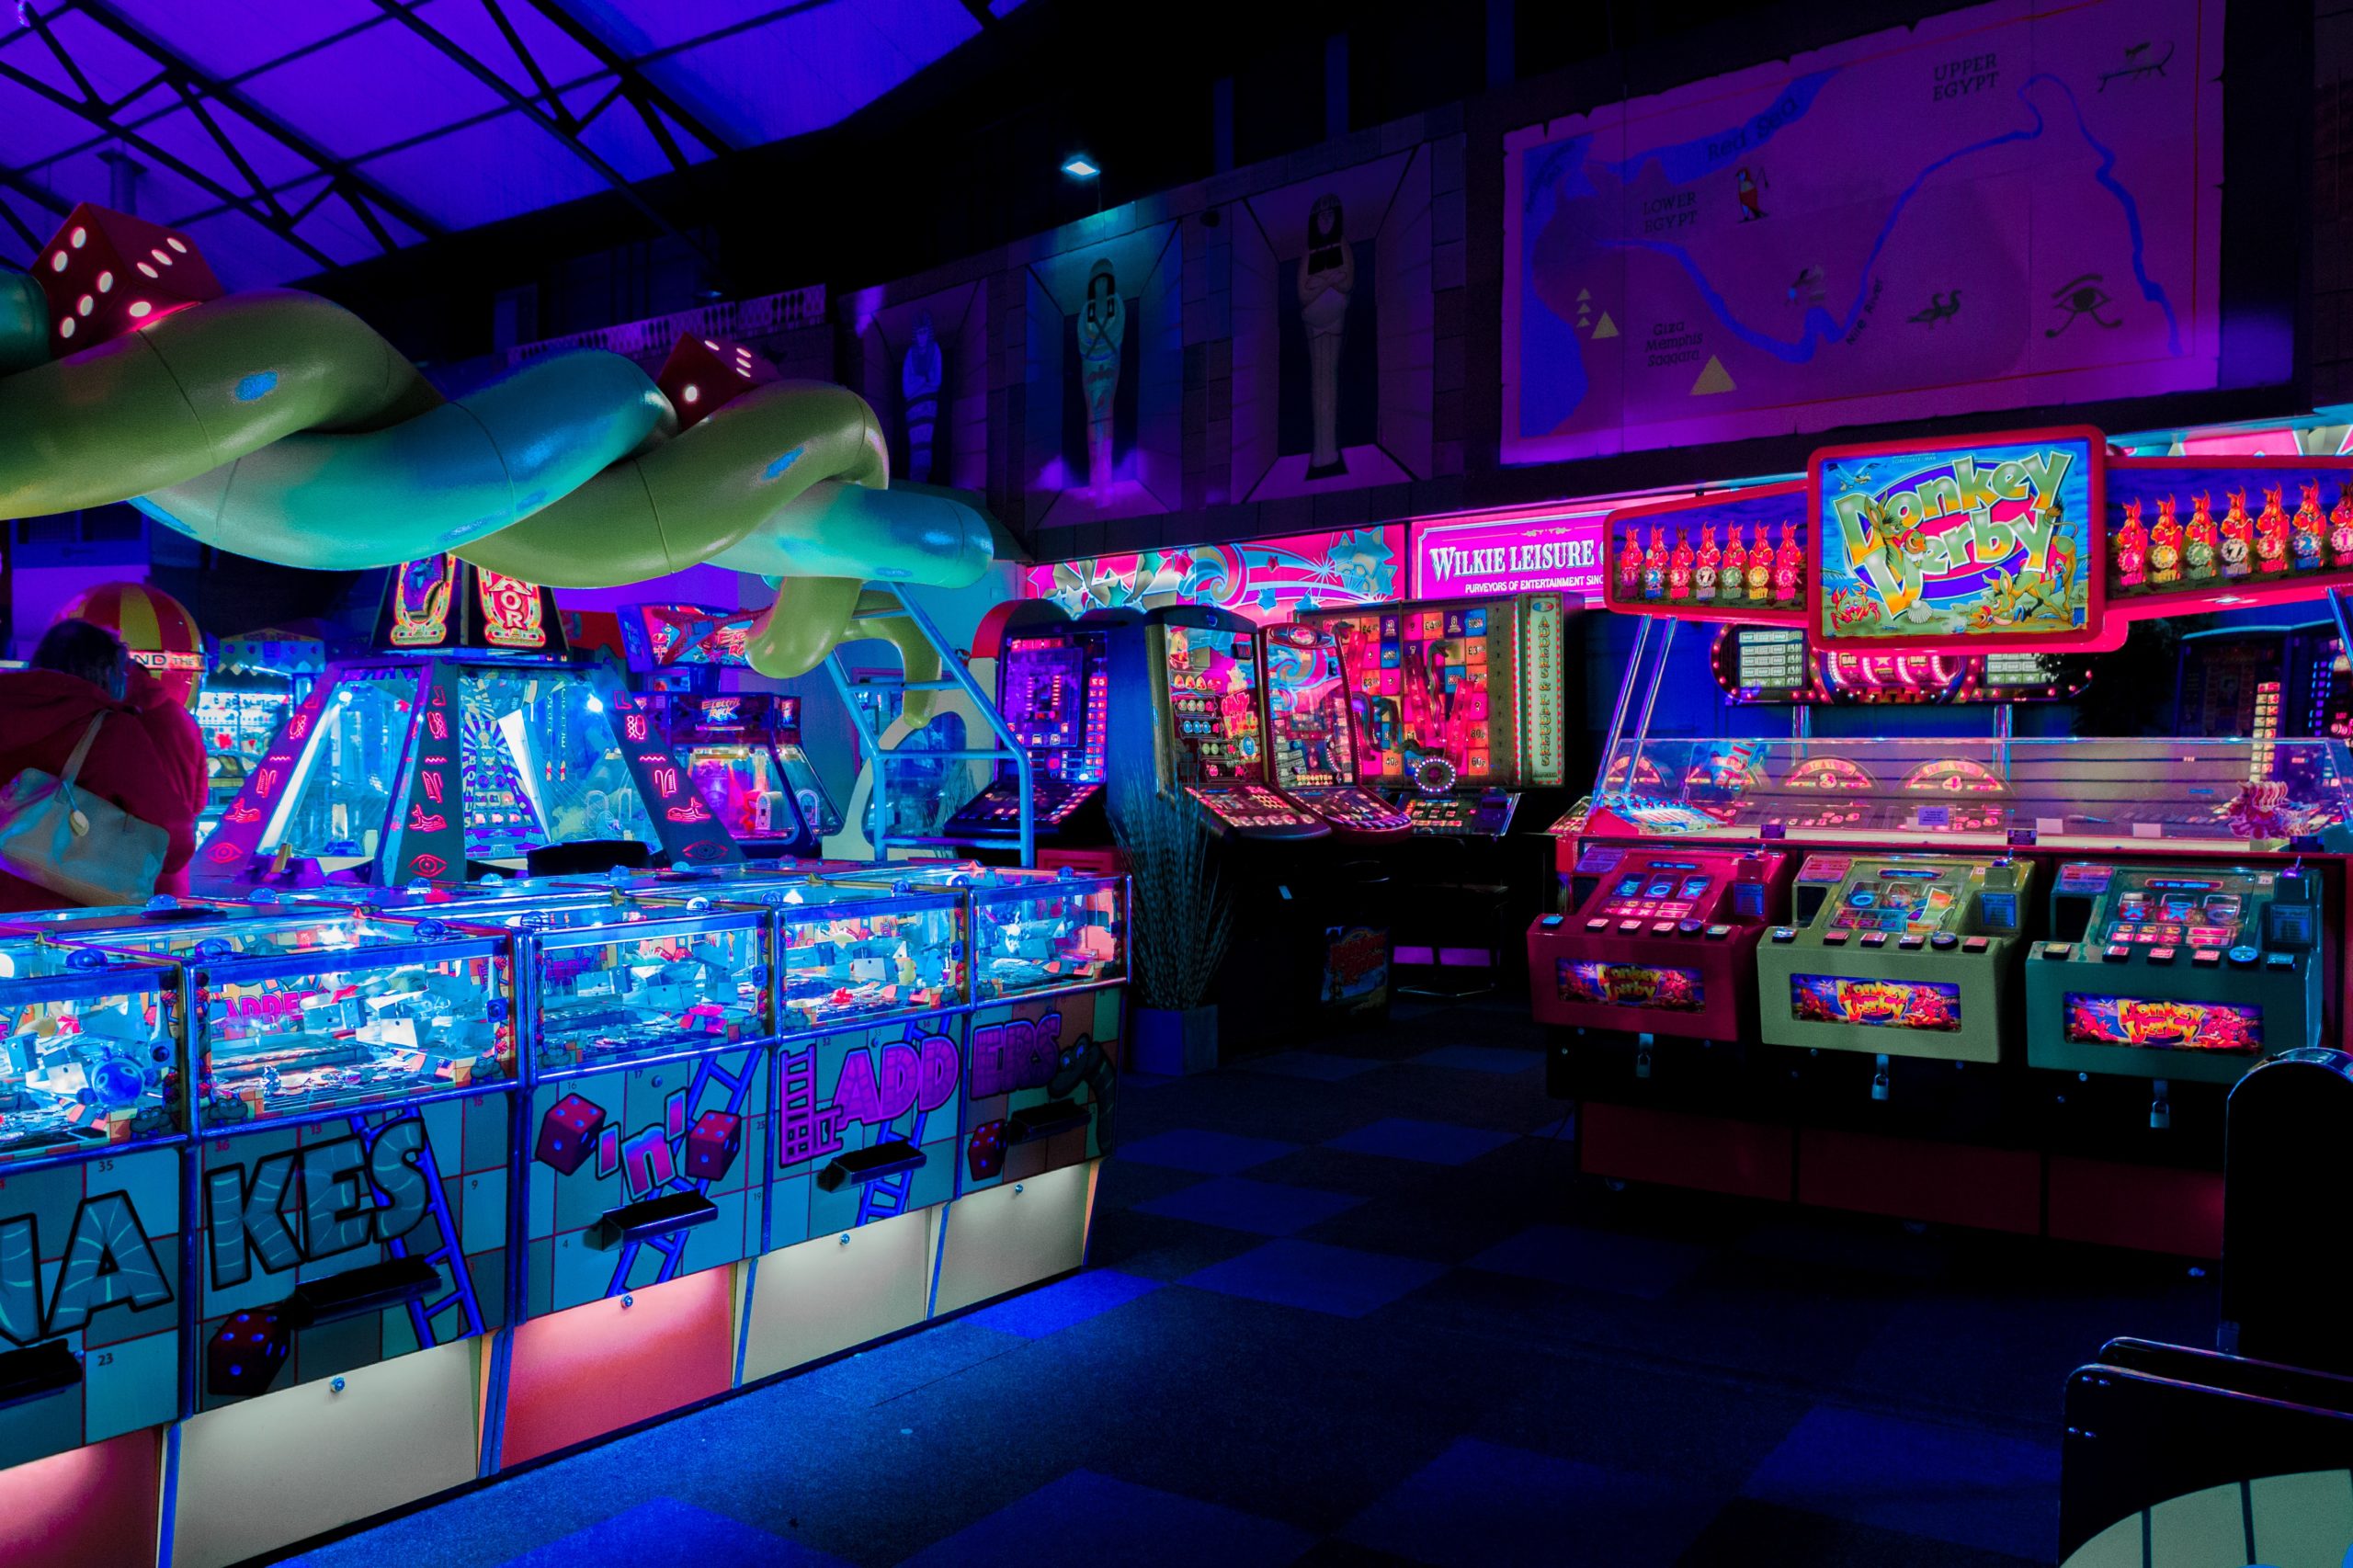
source: https://unsplash.com/photos/8Gdayy2Lhi0?utm_source=unsplash&utm_medium=referral&utm_content=creditShareLink
I think this aesthetic was really prevalent in arcades in the ’90s and stems from that, the neon colors at arcades are what comes to my mind. Gaming and neon colors go hand in hand and I think it is to capture a bigger audience and give a great experience. The dark black with bright lights really captures your attention to the games and machines.
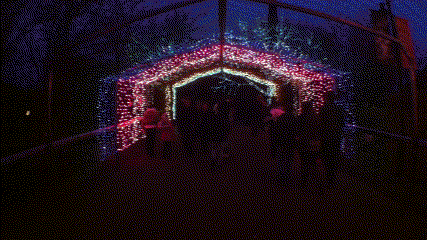
With the aesthetic in mind, I decided to give my sign a function. I wanted to create a glitching effect so that the lights become animated. An example of what I mean by animated is when zoo lights create an on off function for the lighting to make animals appear as if they are moving. Two examples of this are shown below.

Source Lion: https://itsnothouitsme.com/2014/12/22/10-things-you-need-to-know-before-you-go-to-the-houston-zoo-lights/
As you can see above, the gifs show how lights can create an illusion for movement. This is something I wanted to replicate in my neon sign. I wanted to create a flickering of the light to create a glitch effect.
So I began by creating my sign digitally to get a sense of what I was looking for. This was the result of what I wanted to create and I was satisfied with the digital version.
A few key factors of the digitally imaged sign, is that the lighting is visible on the inside and outside of the sign. The deep black contrasts the bright neon lighting around it. I decided upon pink and blue as those were most appealing to me and I felt that would capture the glow wave aesthetic better.
However, I was going to use the laser cutter at the ITLL so I needed to make my sign manufacturable. I decided to change the font slightly and connect the letters so that it could be manufactured in the ITLL laser cut. The modified sign is shown below.
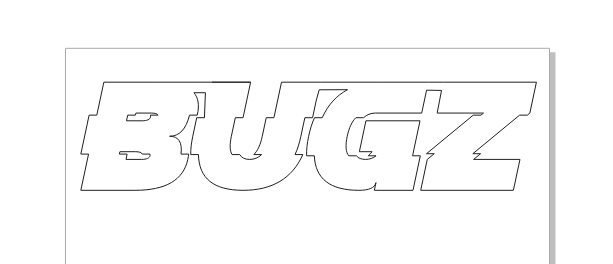
The font still created a glitch like effect and the letters had to be connected so that it could be one sign together. I created this design with a free trial of CorelDraw. Unfortunately, I could not document the manufacturing process as the ITLL only has fabrication requests and I could not laser cut the device myself in their lab. However, this was a bit more convenient due to pricing with only using the stock that they provided. Since the ITLL stock was a clear acrylic, I then bought black spray paint to paint my sign after fabrication. This proved to be more cost effective than buying a black acrylic stock.
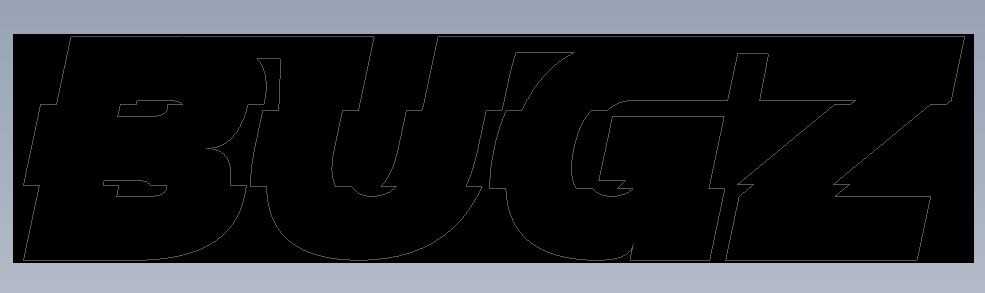
The dxf file used to laser cut the sign is shown below.
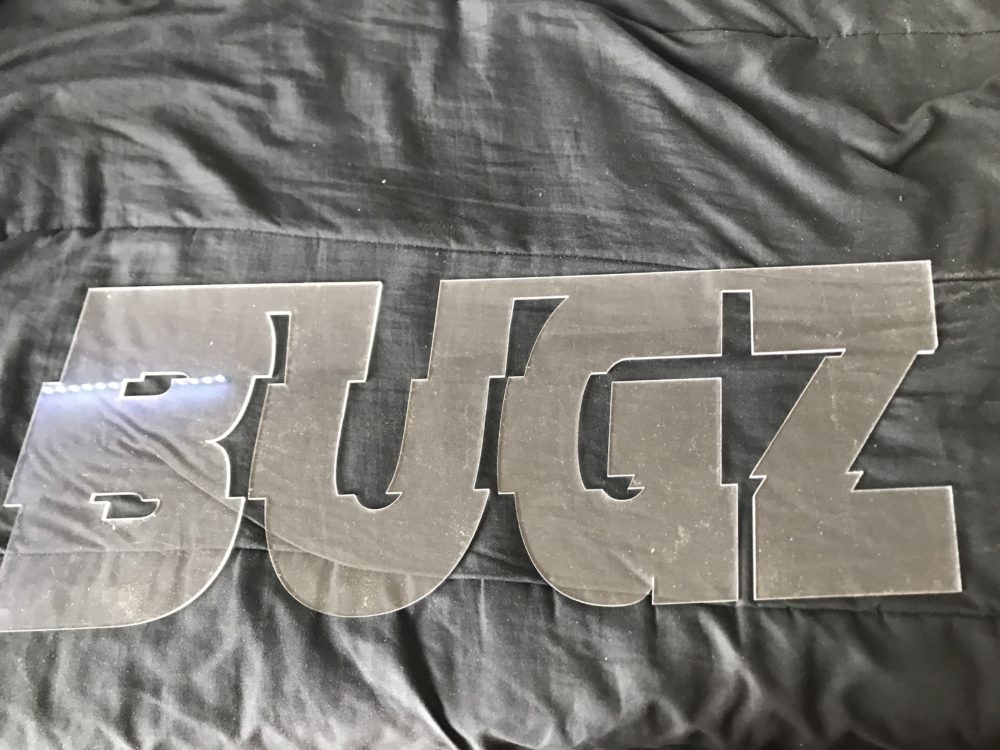
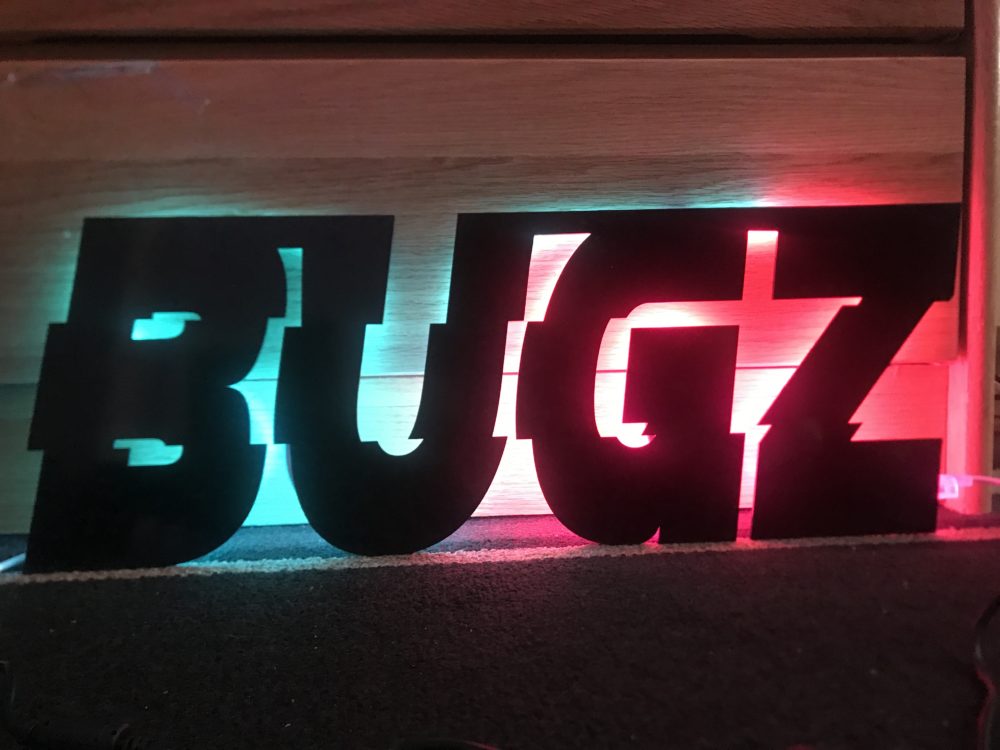
The fabricated sign is shown below, the dimensions are 22″x8″x1/8″
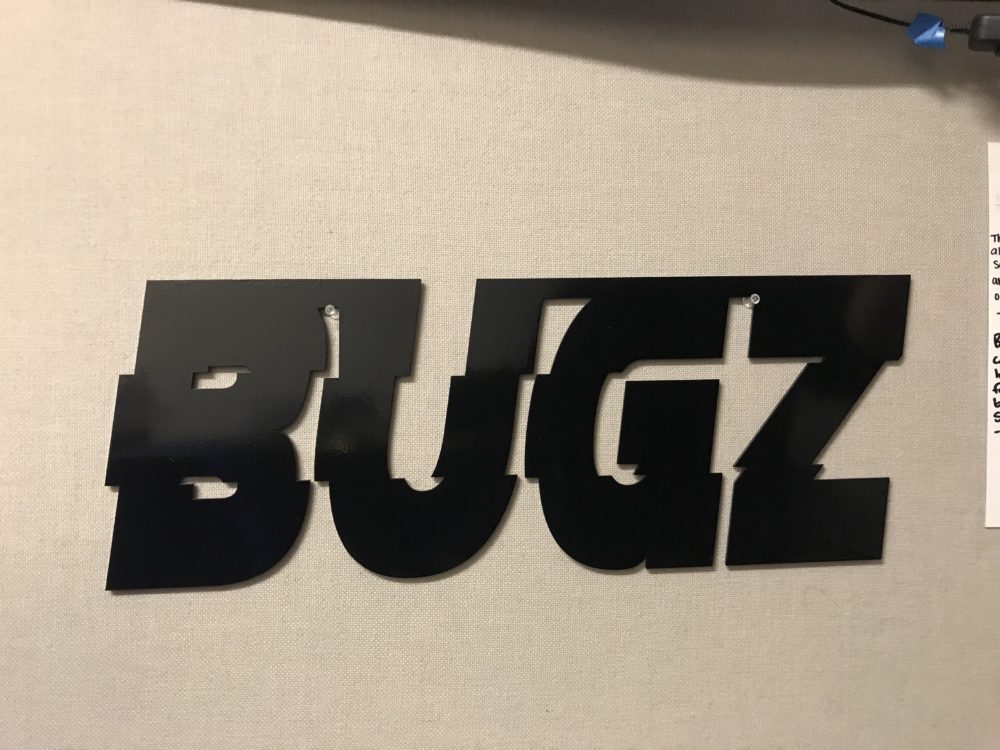
The next step was to spray paint it, the spray paint was not glossy which I was grateful for as the matte would add to the glow wave aesthetic with the deep black.
My final step was to attach the lights to see how the sign looks! This is the final result with the lights attached.
Now you may be wondering, where is the effect? That is currently in the works, as it turns out the LED Neon lights are powered by 12V and the Arduino can only output 5V. Thus a more complicated circuit is required with relays to control the lights. This circuit building is still in progress however, I have been working on translating the effect I want into a code for Arduino IDE.
I created a simple circuit with LEDs to simulate the neon lighting. I have successfully made the lights flicker on and off randomly for different amounts of time. The simple circuit is shown below.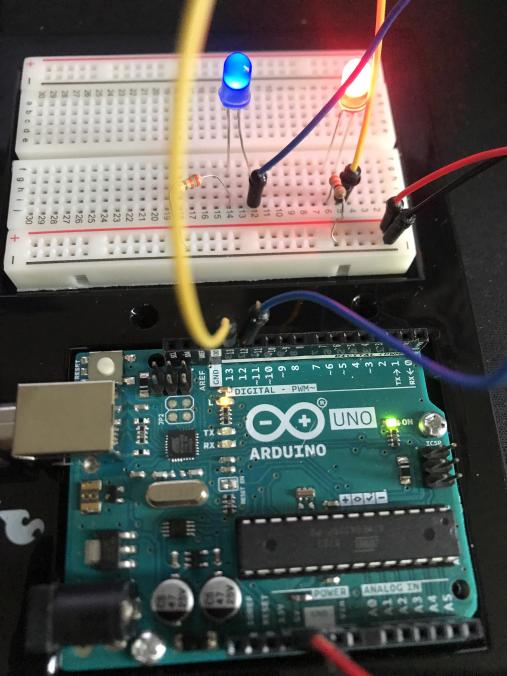
All that is left is to create a circuit that will allow the Arduino to control the LED lights. I am confident in my ability to create this and will be continuing to work on this project until I complete it. Overall I feel that the aesthetic has been captured by my design and lighting. The deep black and bright neon definitely shows in my project. All that I need now is the functionality aspect to my project!
Thank you for reading my final project post! I made a quick presentation for class about my project and the link is below.
2 Comments. Leave new
This turned out great! The glitch effect you made with the text really sells it and the connection at the top is a clever but seamless way to keep it all together. I think that would look great hanging up, especially for streaming! It seems like it will give a really professional look to your streaming events. I’d be interested to see some in between steps of adding the LED’s or show the back so we can see what it looks like. Nice Job!
Hey Alex,
Great job overall with your project and being able to capture the aesthetic you were going for. Your overall design looks like something you could get from a store and looks very well finished. I hope you end up being able to get that glitch affect to work. One thing that you might want to keep in the back of your mind is maybe putting an epoxy clear coat on your username so the spray paint doesn’t scratch off.