
If you’ve been following along with my posts, you will know by now that I wanted to create bikepacking bags for my final project. If you are unfamiliar, bikepacking bags are bags that attach to your bike frame so that you can go camping and riding for days at a time, completely unsupported. That means that I needed to find a way to attach my tent, sleeping bag, sleeping pad, food and water, and extra clothes/supplies all to my bike. Ultimately, I found that making custom bags with complex geometries to be too much of a challenge, but I did put together a setup that conforms to my aesthetic.
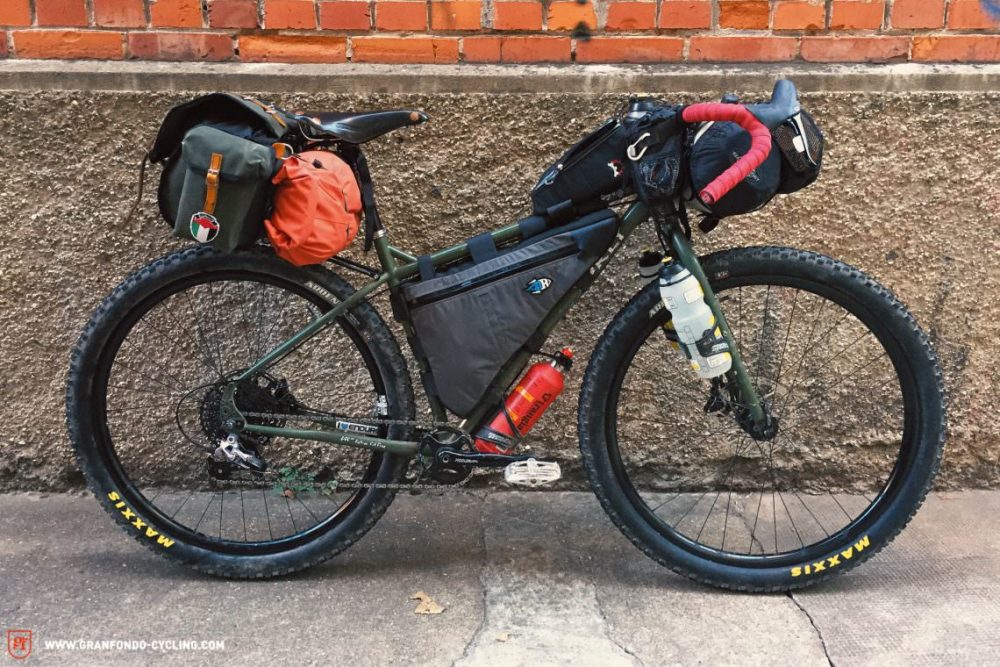
[1] Bikepacking bag setup from granfondo-cycling.com
So what is my aesthetic anyway? This is an aesthetics class afterall. I explored several aesthetics for my bags in the early phases of this project. I thought about a minimal cubist design for a handlebar bag or a streetwear design that could use scraps of fabric from old clothes. These ideas all seemed fun and unique, but sometimes in performance gear unique isn’t practical. Whether it is aerodynamic considerations of strapping a giant cube to my handlebars, or not being able to get waterproof fabric in the loud colors necessary for streetwear, everything I came up with seemed to be impractical or impossible.
Sketch of streetwear bag
I was stuck in a rut. I guess it’s the designer’s version of writer’s block. Would that just be called designer’s block? Anyway, I had given up on trying to be creative one evening before I had put my bike away. I sat down to have a drink and unwind while I was staring at my bicycle. That’s when it hit me. The reason that I didn’t like any of the ideas I came up with was because I was ignoring the built-in aesthetic of my bike! Sure, I could’ve gone out and bought some steel tubes, a welder, a bunch of 80-20 rail to make a jig, and then just make any bike frame I want (trust me I’ve thought about it). But that would cost significantly more than the budget I had for this project.
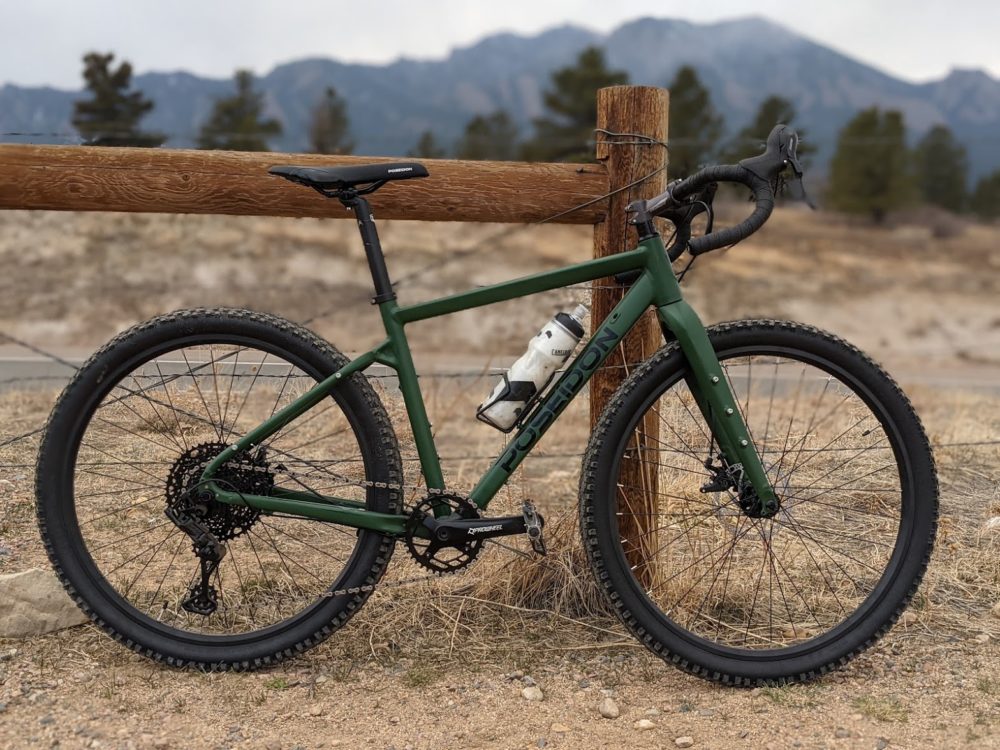
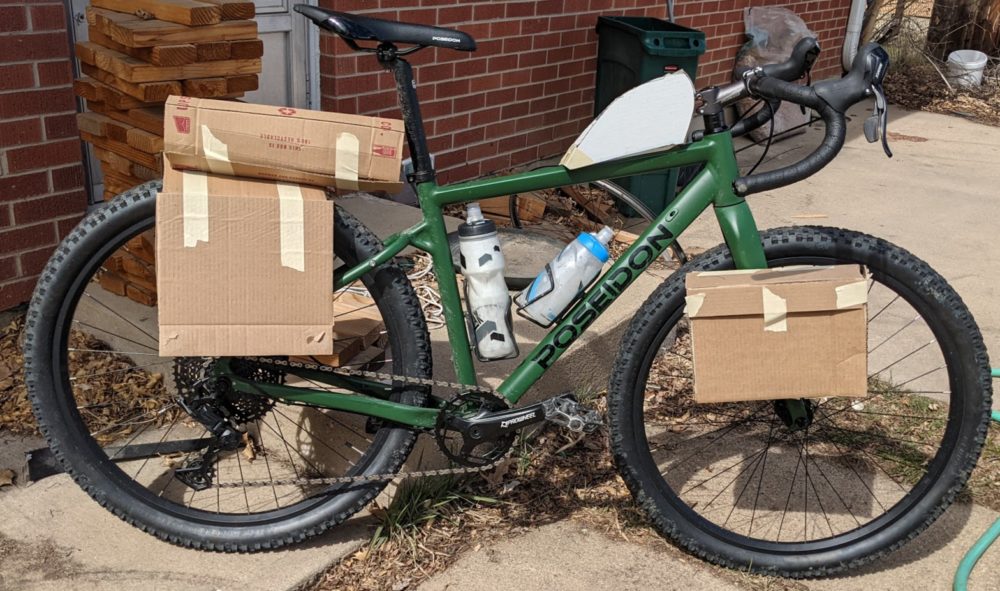
“Before” picture of my bicycle
As you can see in the image above, the bike I was starting with has a green paint job, wide knobby tires, and a somewhat ‘overbuilt’ feel to it. The company logo, Poseidon, is on the side, and an image of the model’s namesake, a redwood, is on the bottom. These details all gave me plenty to work with. I could use the green and the bike’s redwood inspiration to try to make my design all natural in appearance, maybe even biomimicry. I considered embracing the company name and making my project honor the god of the sea (I think I would need to carry a trident).
No, this bike feels too manmade for either of those aesthetics. It’s overbuilt frame and knobby tires, with a green paint job all reminded me of military vehicles. Specifically, I thought of WW2 army motorcycles. After a little bit of digging on the internet, I found out that the motorcycle I was thinking of was the Indian Motorcycles 741.
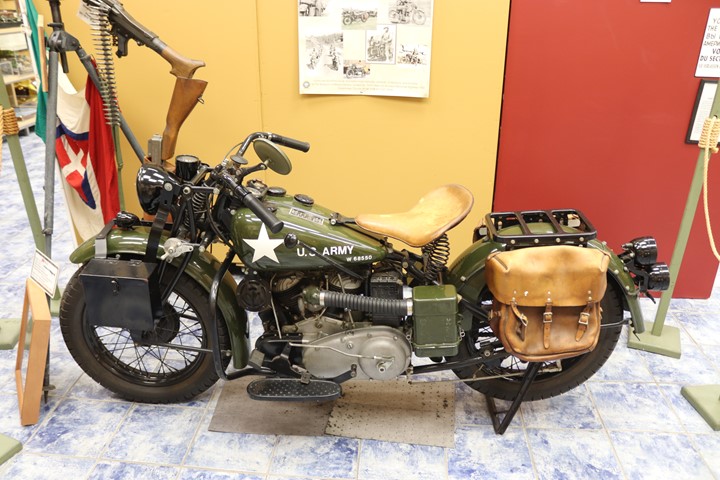
[2] Indian 741 from WW2 hosted on usautoindustryworldwartwo.com – David D Jackson
While Harley Davidson also made motorcycles for the war effort, Indian exclusively focused their production on making motorcycles for the Allied forces, and didn’t sell any to consumers. Indian actually lost money on these motorcycles due to poor contract negotiations. Despite being bad at business during this time, one thing is for certain, Indian made one hell of a pretty motorcycle!
Okay, so now that I had an inspiration, I needed to start with the specifications. As part of the course, I had to come up with 5 specifications and 5 constraints for this project. While this was a valuable exercise, I think that my project only really needed 5 specifications/constraints total in order to be successful.
Specifications/Constraints for my bikepacking setup
- Waterproof
- Lightweight
- Green, brown, or gray color scheme
- Canvas, leather, or metal materials
- White 5 point star
The list above can be grouped into 2 categories, function and form. The first 2 items are strictly functional. When riding a bike for days at a time, you will curse yourself every pedal stroke for each gram of weight you’ve added to the bike. Additionally, when you finally get off that bike and are ready to lay down for a night’s rest, you definitely want your sleeping bag to be dry. Then there were the aesthetic considerations. I wanted it to look like an army motorcycle, and that means it had to conform to army colors and materials. Finally, the star seemed necessary to really tie everything together.
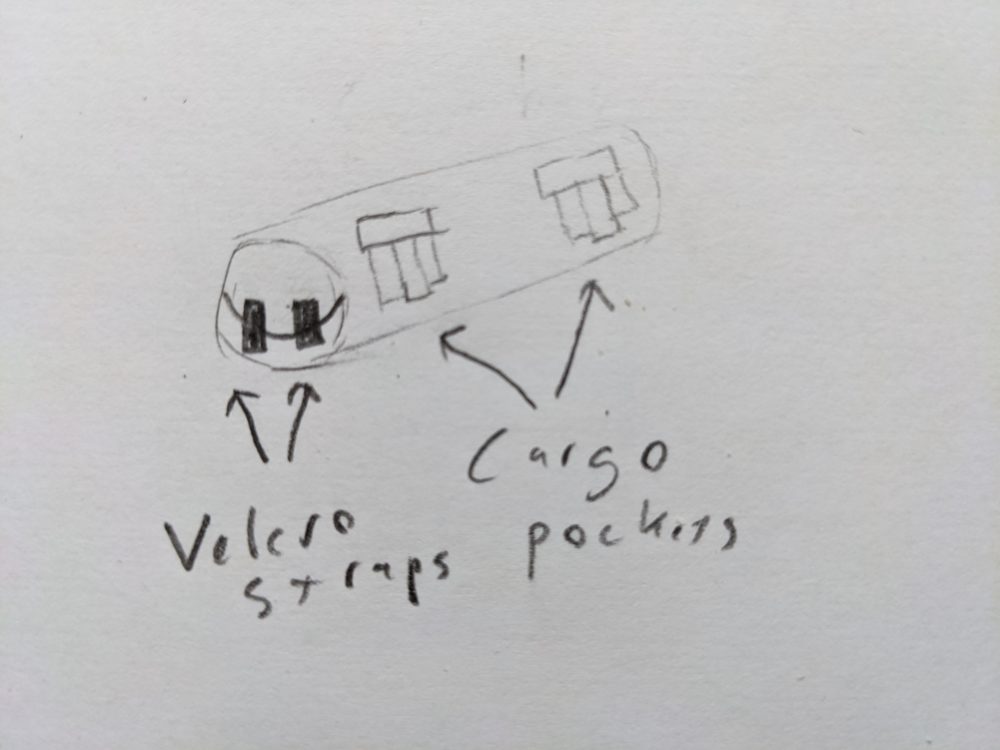
With all of that in mind, I started sketching to get a feel for how to mold the shape of my bicycle to look more like a motorcycle. Luckily, the bags used on motorcycles are very similar to the bags that people put onto bicycles.
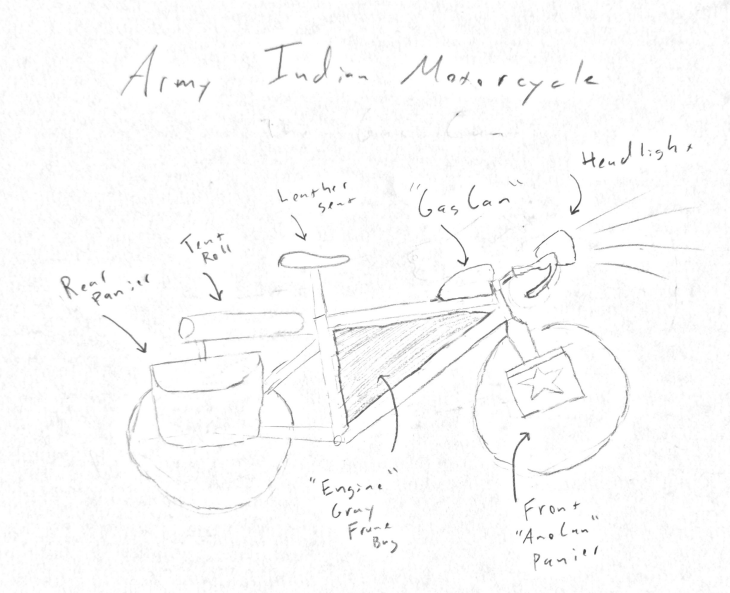
Original design sketch
In my sketch, you can see several callouts to different features that I considered. Typically, bikepacking avoids the use of a rear rack, and instead opts for a bag attached to the back of the seatpost, but for my needs a rear rack seemed more suitable. The rack would allow me to shape the rear triangle of the bike to look more like the 741 with its leather pannier bags. It would also give me a platform for my tent roll. Moving to the right in the image, the next elements were a leather seat, a gray frame bag to mimic the color of the engine, a top tube bag to create the profile of a gas can, and then ammo cans on the front fork. The last element in the sketch, the headlight, seemed like a nice touch, but ultimately, I forgot about it.
Cardboard mockup
Once I had an idea on paper, I wanted to get a real life feel for how it would actually look, as well as try to get some dimensions figured out. Since I am not familiar with soft goods or what CAD software is available for visualizing them, I decided to go with a low cost cardboard model approach. In the picture above, you can see that I made a tent roll, panniers, a top tube “gas can” and front fork “ammo cans”. In this mockup I decided to play with water bottles filling in as the 2 cylinder heads visible in some images I found of 741s.
With the information I gained from the cardboard mockups, I started getting materials. The first purchases were a rear rack, some new tires (I was planning on swapping tires before starting this project, but the aesthetic informed the purchase), and some new handlebar tape. Then I stopped by an army surplus store to get some actual army materials. This consisted of old laundry sacks that I could cut down for the fabric, and some old ammo cans. Using actual ammo cans was inspired by Josh Negry (in my pod for the class), and really made a big difference in the overall aesthetic. After that I just needed materials for the panniers. I talked to a coworker of mine who is a knowledgeable leatherworker, and he gave me the basic tools and information I needed to make a bag. I hadn’t intended to use leather when I began the project, but he made it so easy that I couldn’t say no. This led me to Tandy Leather in Westminster where I bought a “double shoulder” of leather (I guess it makes sense that this is how leather is sold, but I was really expecting some sort of dimensional breakdown).
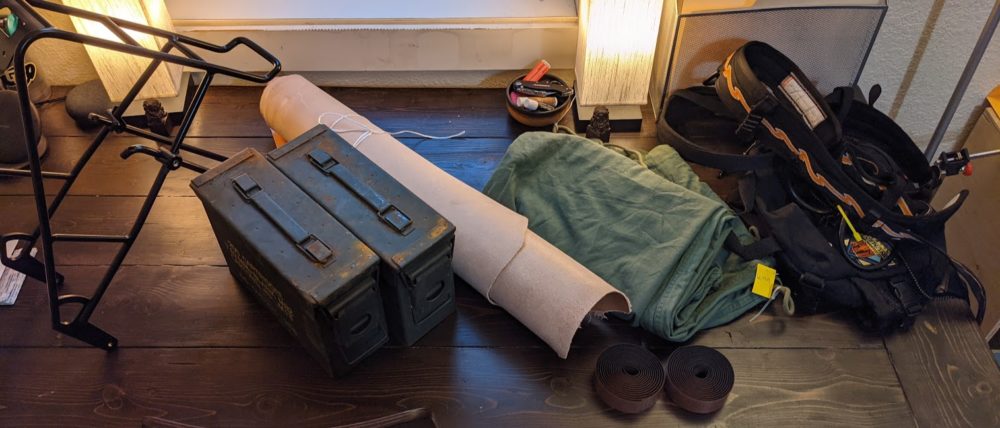
Most of the supplies for this project
After acquiring all of my materials, I needed to start making. The first order of business was to get familiar with the sewing machine. I had never used a sewing machine before, and it was fairly intimidating. I started with the tent roll. It seemed like it would be the easiest shape to make, a tube. I took a long rectangle of fabric and sewed it into a cylinder. Then I measured the circumference of the cylinder to make an end piece. Sewing this circle onto the end of the cylinder was extremely challenging.
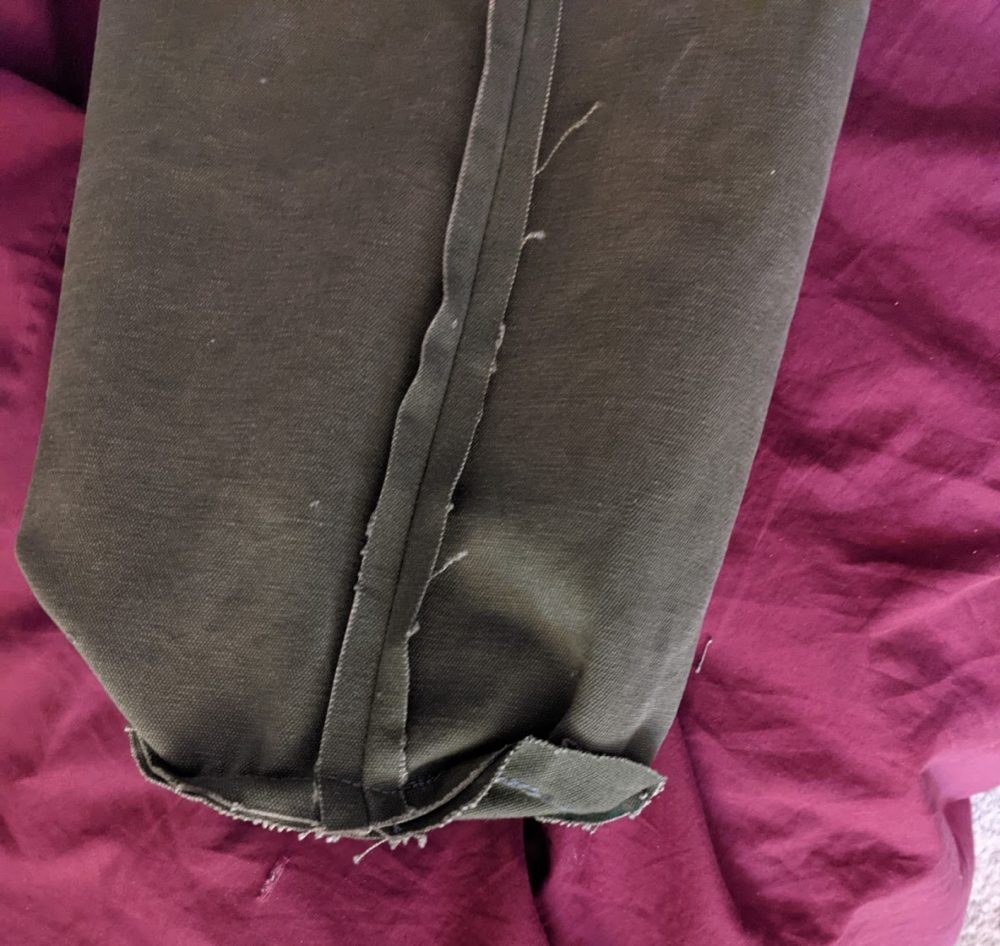
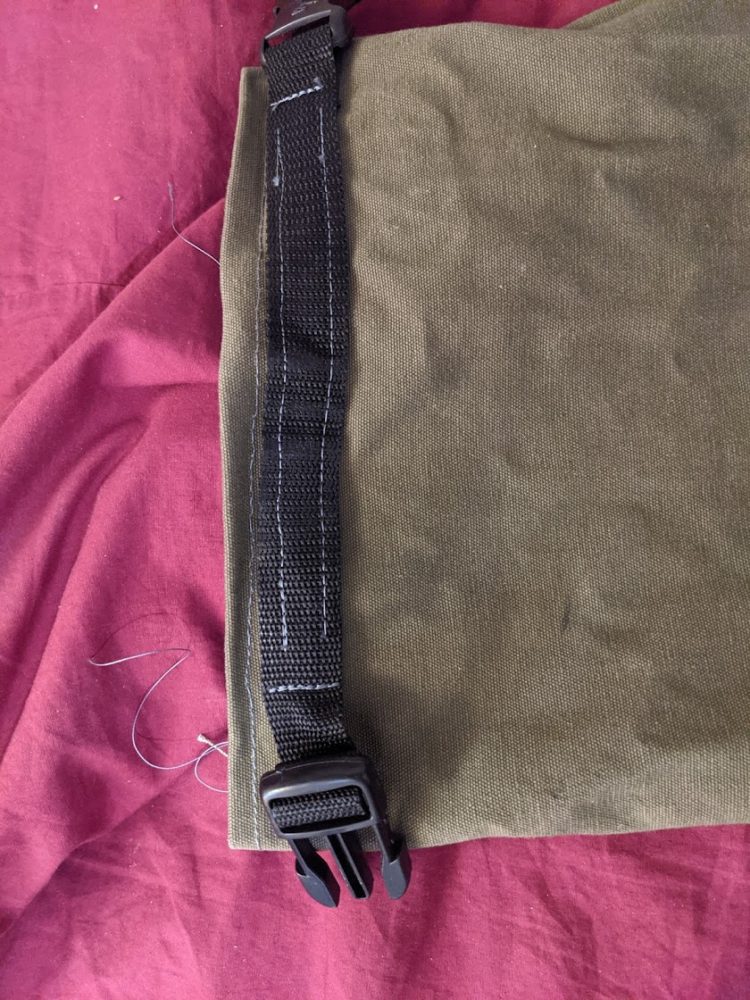
Left: the seams for my tent roll. Right: The closure for my tent roll
To seal the bag, I sewed a nylon strap with buckles onto the open end for a roll top closure. At this point I realized that I was not going to be able to sew the rest of the bags that I had planned. Luckily, I already had a stuff sack for my sleeping bag that I could strap to the handlebars that was the right color and a top tube bag that was about the correct shape. I realized that I was just going to have to bite the bullet and buy a frame bag, but REI makes one in the correct size and color.
The next step was mounting the ammo cans. To do this, I used a magnetic level on top of the can and lined it up about where I wanted it to be. Then I marked out the first hole with a sharpie around the mounting hole on my fork. I used a cordless drill to bore out a hole and a file to clean it up. Once the first hole was in place, I screwed the first screw through that, put the level back on top and marked\drilled out the second hole. Finally, I placed the can back onto the fork, and marked then drilled the final mounting hole. Once the first can was finished, I placed it next to the second, and put my sharpie through the holes to mark the locations on the second can.
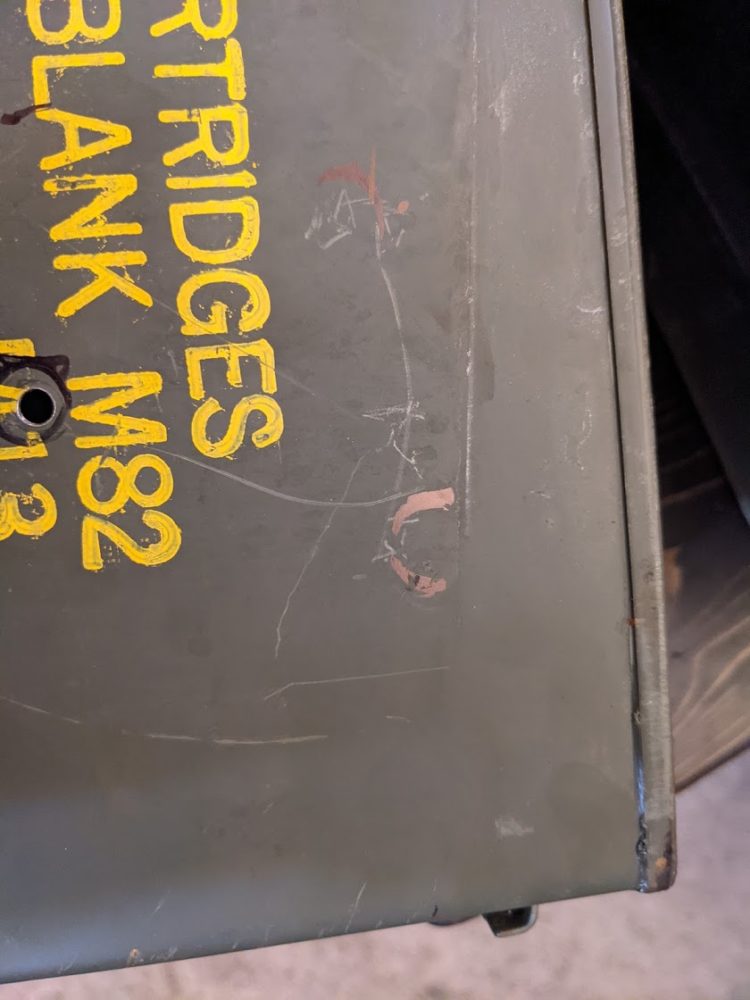
Ammo can mounting hole process
The leather pannier was another… learning experience (that’s a nice way to put it). With my limited tools and knowledge, I am sure that I made every mistake there is to make. I cut my sides too small, my pricking iron kept getting stuck in the leather, I tore the material between holes in my stitching. Despite all of these mistakes, I kept working and eventually made a bag that works.
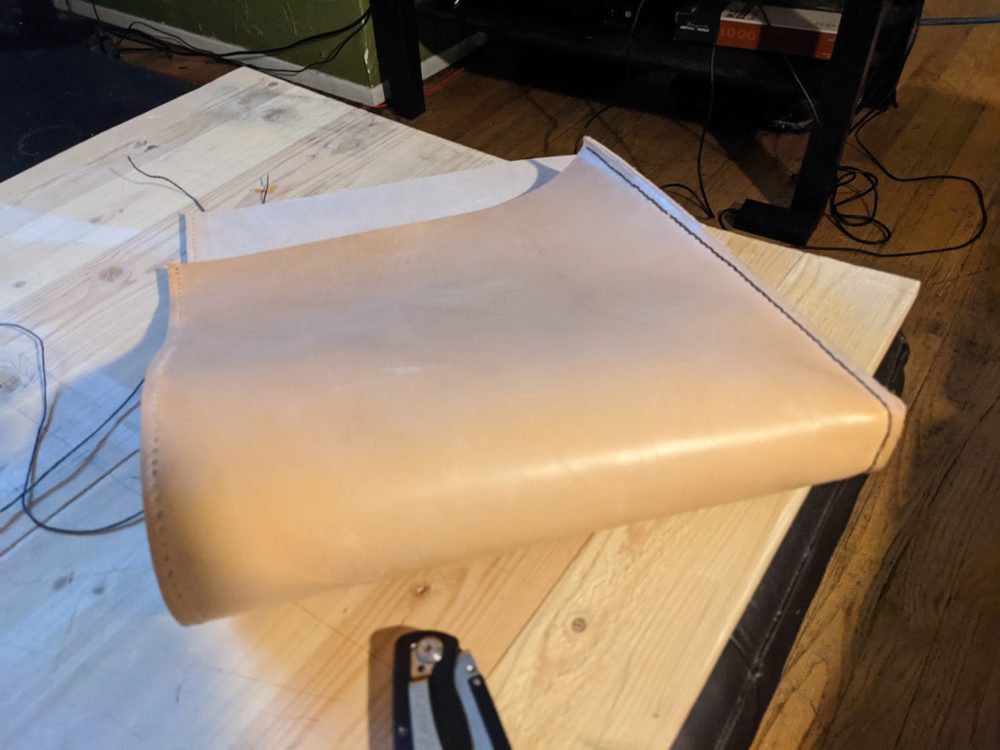
Leather pannier in process
Somehow, that whole ordeal didn’t quite completely turn me off from leather, and I decided to make all of my straps out of leather as well. These can be seen holding the tent roll and sleeping bag sack onto the rack and handlebars respectively.
The final step of this project was to paint a star onto the side of an ammo can. I didn’t want to do this step, but I showed a picture to my brothers and they gave me such a hard time about not having the star that I wouldn’t be able to get away without it. After watching a youtube video, the technique wasn’t that difficult, but trying to figure it out on my own was. Taping it off took some time, but painting is almost always 90% prep work.

Star taped and ready for paint
In the end, I made a bike that I am quite proud of. I managed to stick to my color scheme, use all the correct materials, and really match the aesthetic I was going for. One of the other guys in my pod even let me borrow an old Brooks saddle that matched the old motorcycle vibe perfectly. I actually taped it on for pictures to get the super low seat profile that you see on motorcycles. Putting it all together made a bike that looks quite nice.
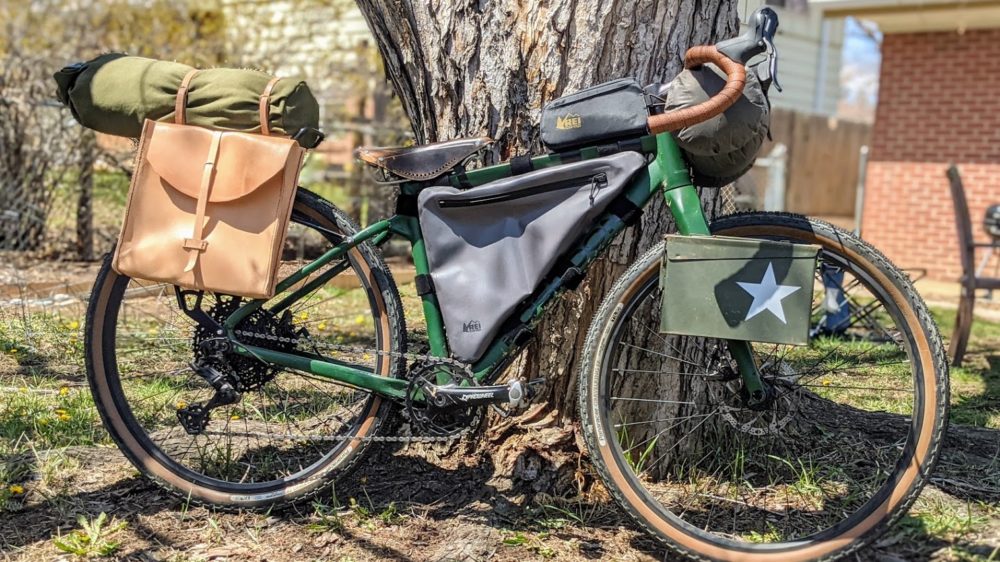
The final product
This project pushed me out of my comfort zone. I am pretty good at making solid things. I have been working with wood since I could walk, and have been learning the ins and outs of metal for my entire college experience. Soft goods definitely do not behave the same way as those mediums that I’m comfortable with. I learned that I quite enjoy leather work and don’t really have much interest in pursuing sewing as a hobby. The best part is that after this project I now have a bikepacking setup that is trail ready! Right?
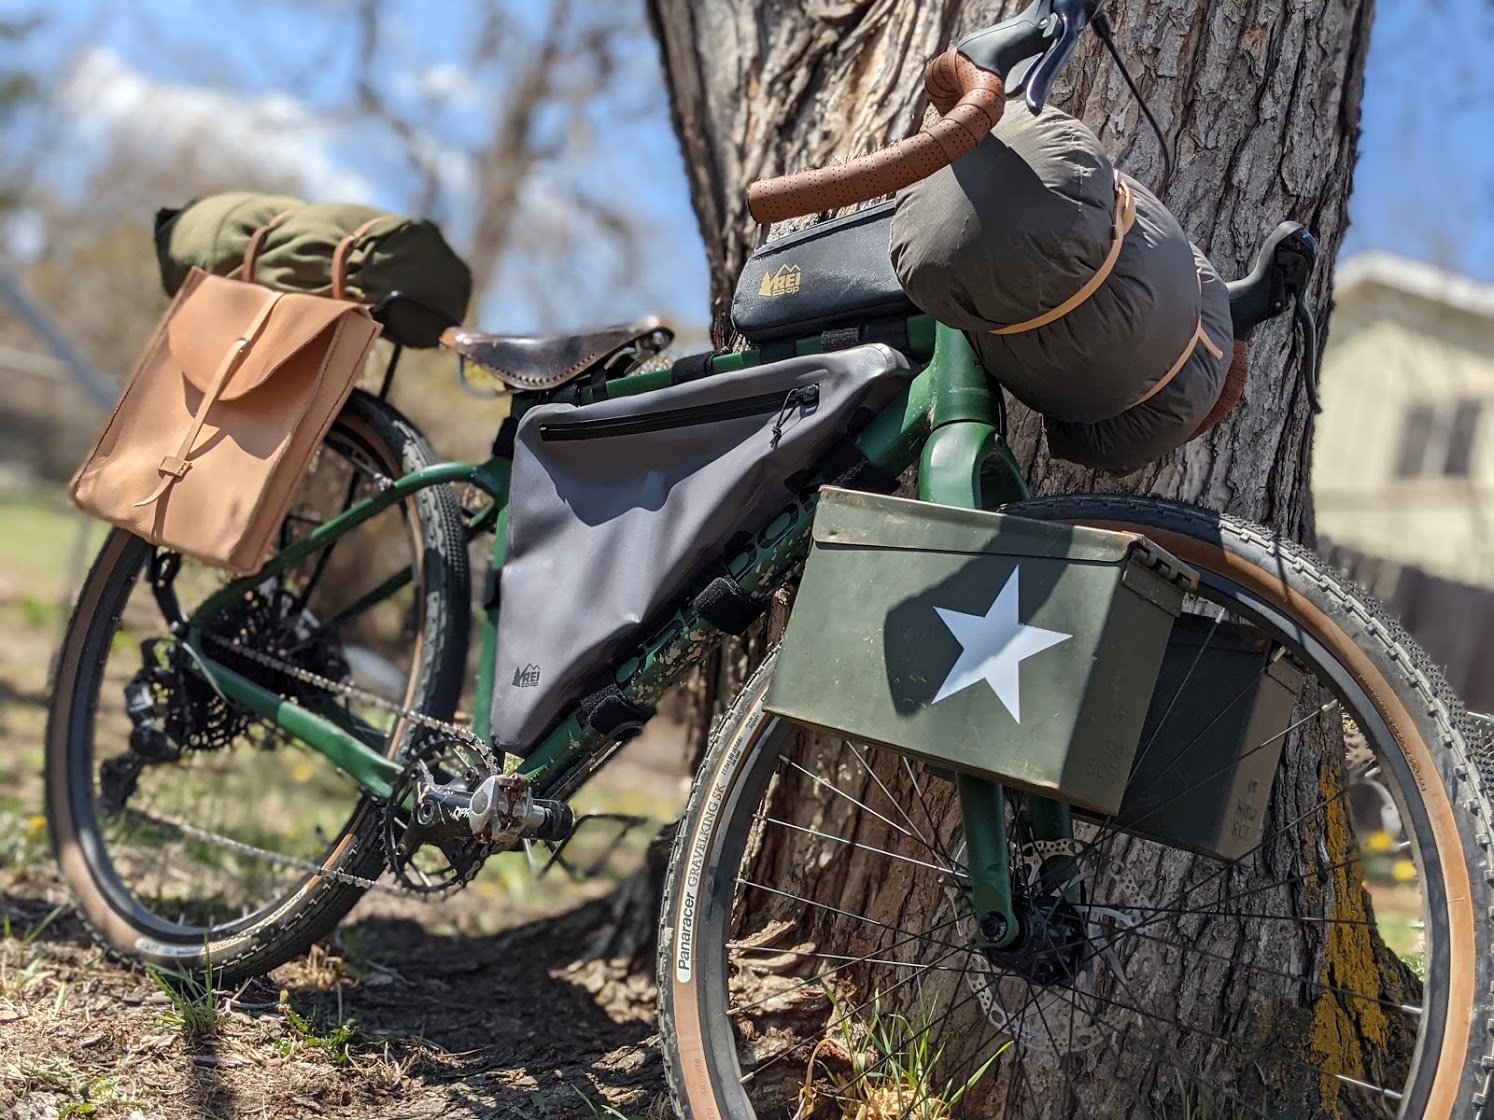
Well, not really. This setup is way too heavy and not really waterproof. I think with a little work I could make everything watertight, but even then it would still be too heavy. It did enable me to purchase and make some of the components that I’ll need for bikepacking though. In the final picture you can see how I would actually run this bike for a short trip. The pannier and ammo cans have been taken off. I prefer not to have my bike be too wide, since trees can get a bit narrow on the bike. Additionally, any mass on the sides of the bike make its steering a little less stable since it moves the center of gravity.
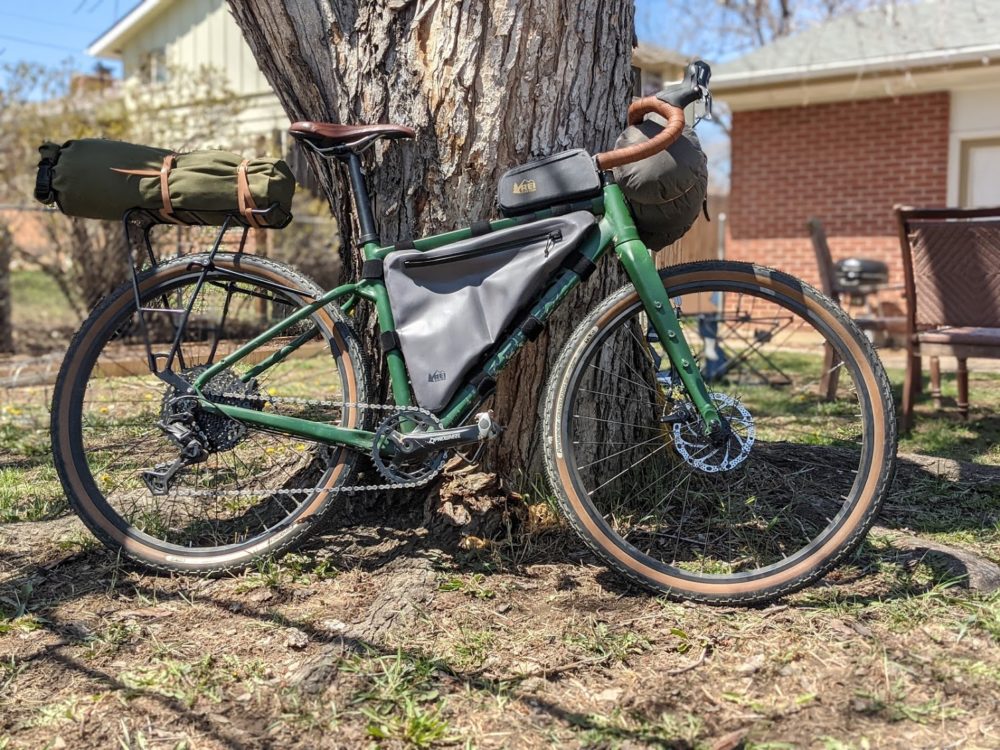
Bike set up for real trail use
Thanks for reading!
[1] https://granfondo-cycling.com/the-best-bikepacking-bag/ [2] http://usautoindustryworldwartwo.com/indianmotorcyle.htm
3 Comments. Leave new
Great design and execution!
Could I possibly find out which rear rack you purchased for this build?
Thanks peddle on!
Hey James,
I think your final product looks absolutely fantastic. I can definitely tell that you put a lot of effort and work into making the bike look nice. I 100% agree that you hit your aesthetic goals with the project. It’s a shame that it’s a bit too heavy to ride around on, but maybe it can be used for shorter trips. I also think its pretty cool that you learned how to work with leather. It’s a material I’ve never worked with before but it looks interesting. Awesome job!
James,
Great work this semester and especially on this project. Cycling has always been one of my passions and I was really pumped when you said that you were going to be creating this design. I think it’s really cool that you learned an entirely new skill in sewing to be able to do this. I think the bags turned out really well. Maybe I’ll have to find your social media so I can follow along with your upcoming adventures!