
For my final project, I decided to make a PC stand, to keep my PC off the carpet and improve overall airflow, as well as build on the overall aesthetic of my setup. I took my initial inspiration for this project from a few PC stands I found on Amazon while looking to buy one. As I was browsing through my options, I decided that I didn’t really like any of the designs offered, so I might as well attempt making my own.
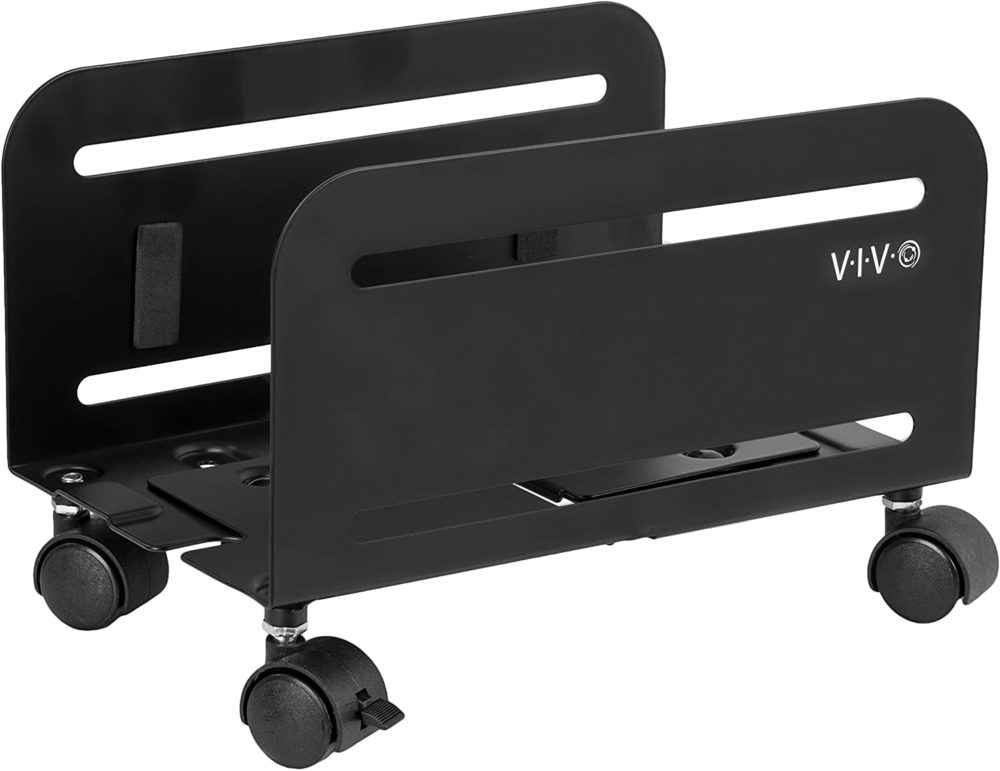
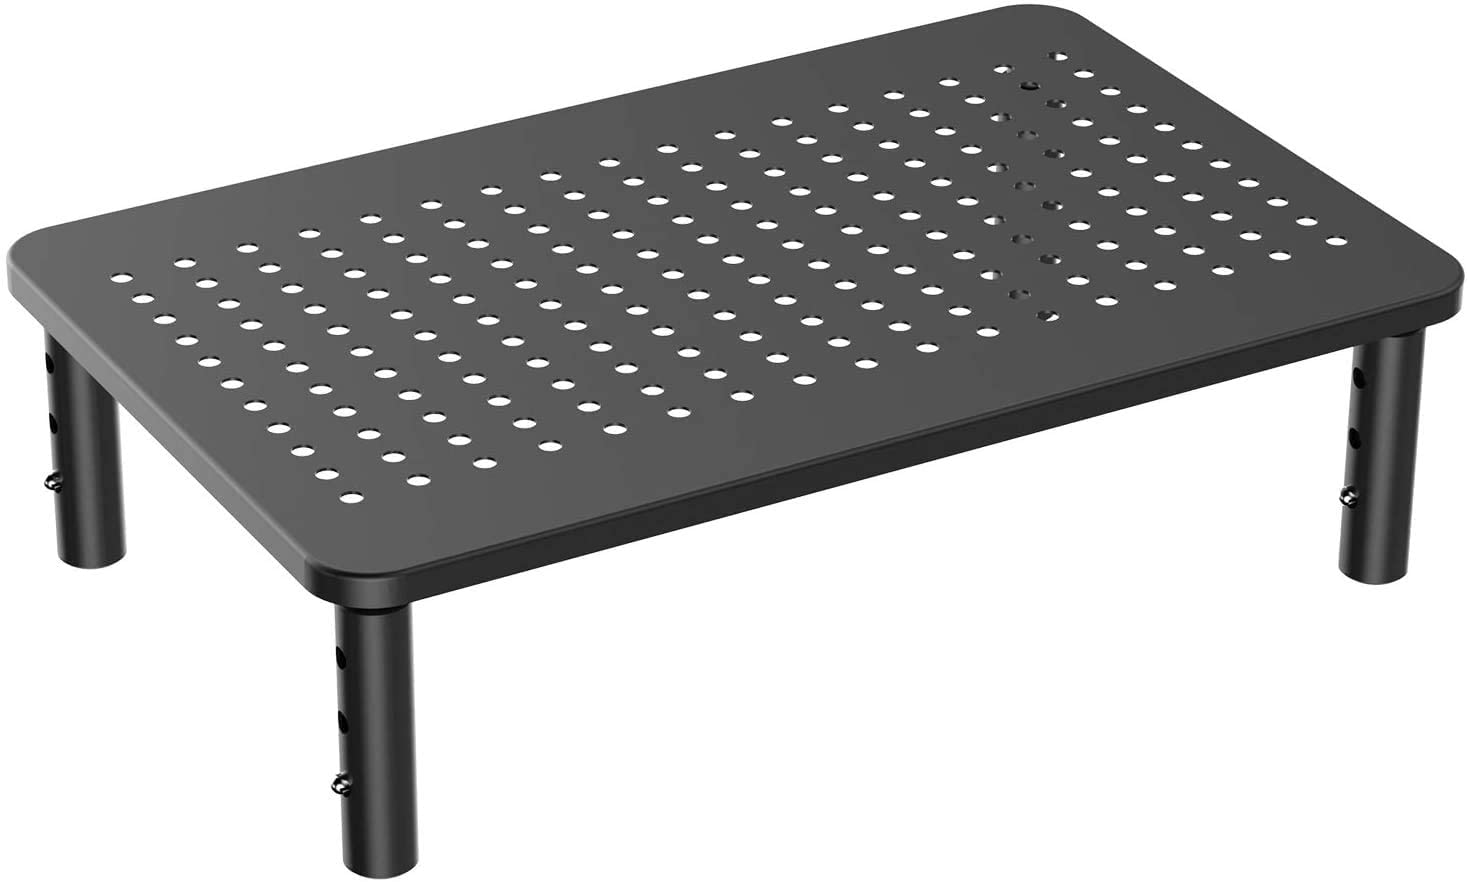
From Left to Right: A rolling stand design found on Amazon, A stationary stand design found on Amazon
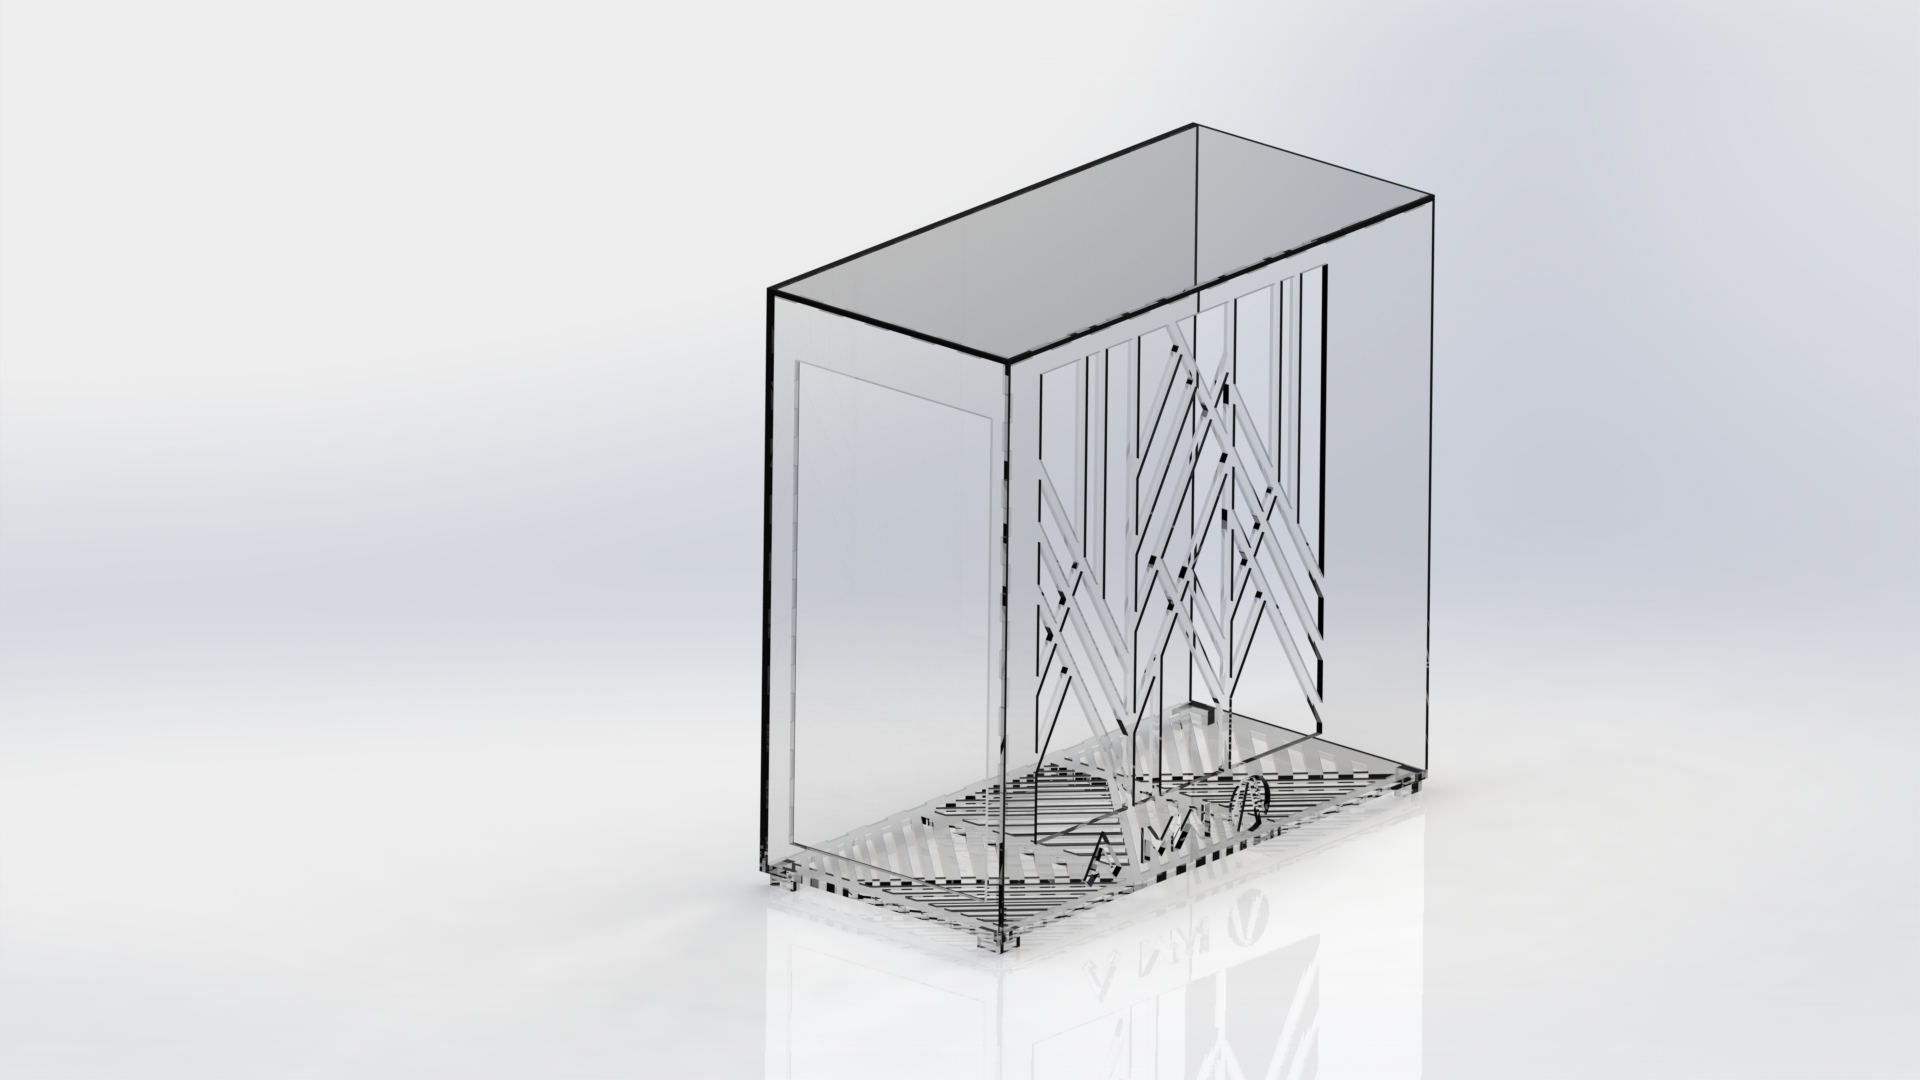
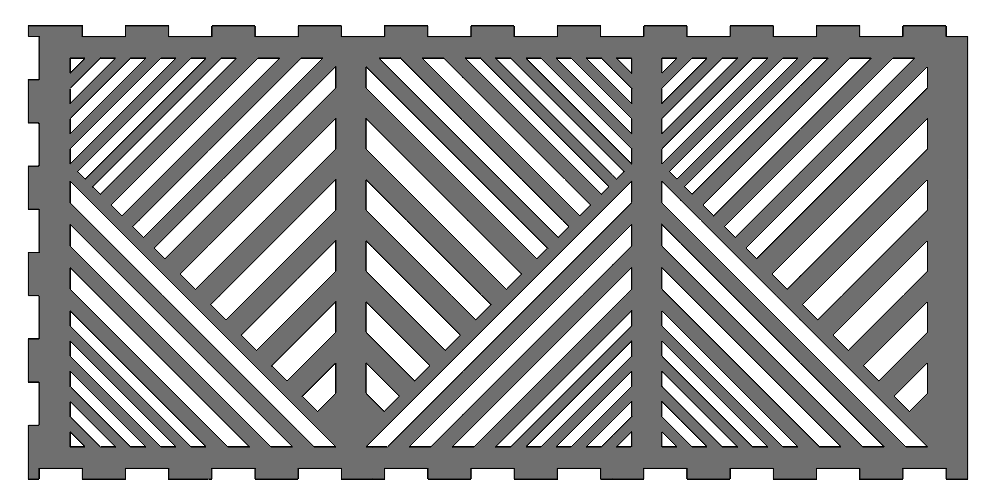
Instead of this smaller design that simply sits under the PC, I decided to make a stand that fully surrounds the computer. By making the stand bigger, it allowed me to incorporate more design elements that contribute to the overall aesthetic. In order to enhance the gaming aesthetic my PC already has, I wanted to incorporate Art Deco into the design as well, since there are some very interesting geometries that I believed would enhance the look of the stand. I wanted to have cutouts of these geometries on the front panel of the stand, since it is the most visible, and the bottom plate, for improved airflow. Since my PC has RGB lighting and a clear side panel, I was hoping that the light from the PC would shine through the geometric patterns on the stand, illuminating them from behind.

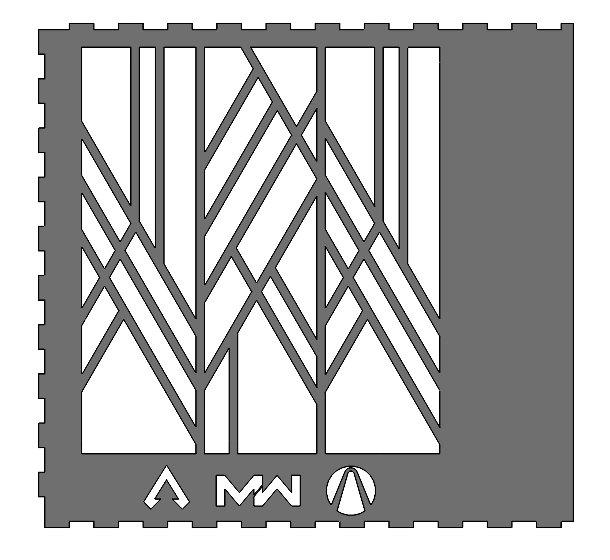
From Left to Right: The Geometric Design I wanted to incorporate into my design, The front panel of my final PC Stand Design
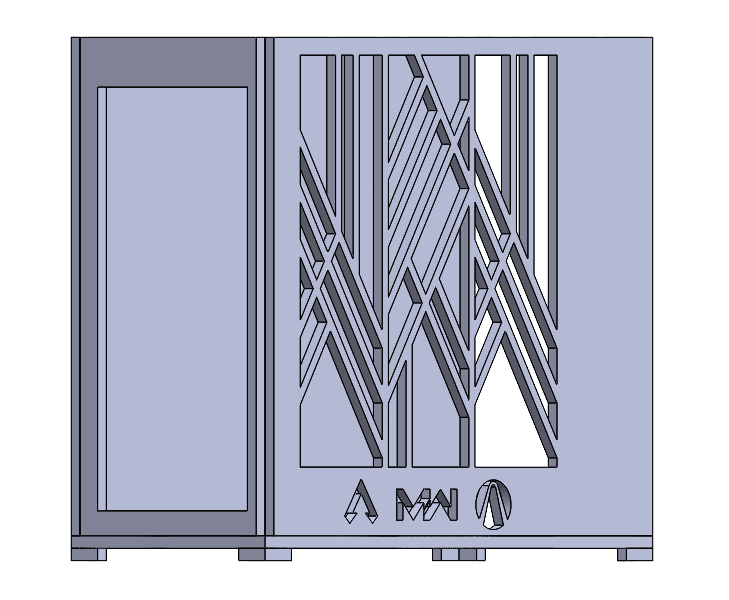
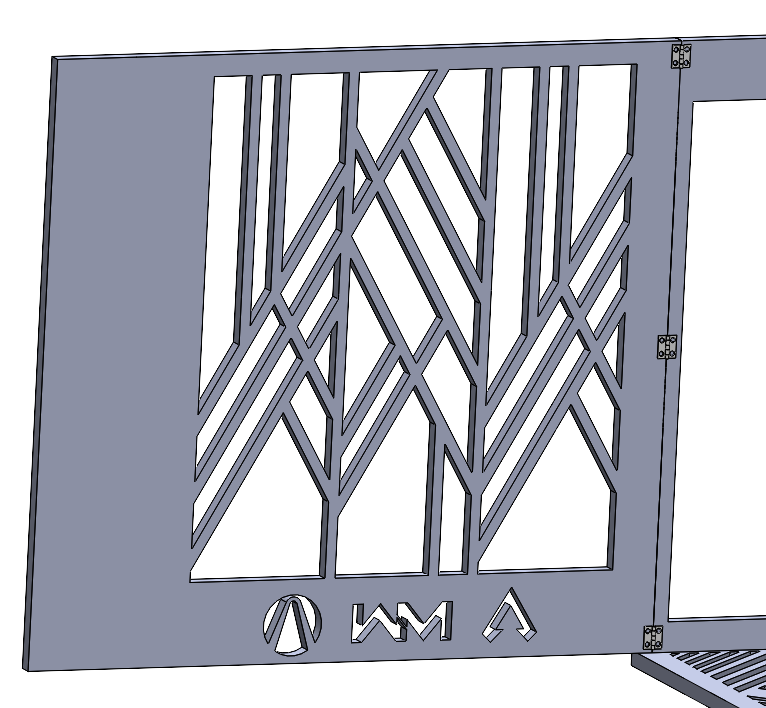
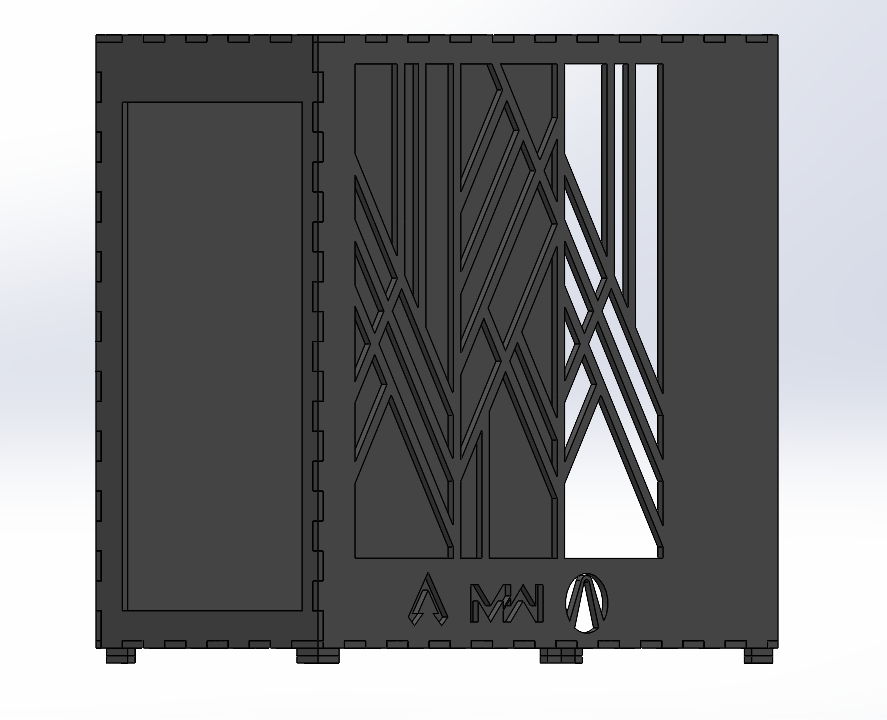
In addition to the geometric pattern, I also incorporated some of the logos from my favorite video games into the front panel. These games include Apex Legends, Call of Duty: Modern Warfare, and the Borderlands Trilogy. I also incorporated a much smaller and simpler geometry into the baseplate of the stand, to increase the airflow to the PC.
The baseplate of my final PC Stand Design
I did not include any special geometries or patterns into the back plate or connection plate, as these parts either had functional uses or simply would not be seen. The connection plate, for example, had to have a cutout large enough to accommodate all the cables coming out of my PC, so it was difficult to find enough space to include any notable design elements. Once I had all of the pieces designed, I designed some small corner stands that attach to the baseplate, to keep it off the carpet. A preview of my full initial design can be seen below.
My Complete Initial Design for the PC Stand
I was initially planning on using wood to build this design, so I was just going to use wood screws to assemble the pieces. In addition to the screws, I was going to have the front plate on hinges(below) for easy access to the PC itself. In the end, neither the Idea Forge nor the ITLL was able to cut the size of wood I initially had desired. Because of this, I ended up pivoting my design to use 1/4″ acrylic instead, as not only can the ITLL cut this material, but they also provide it.
From Left to RIght: The Old Hinge Design, The new “Zipper” Design
Because of the new acrylic material, my previous idea for method of construction would no longer work. Instead of using screws, I decided that I would make a “zipper” pattern on the edge of each individual pieces, such that each piece links together to form the final structure. An image of this new construction can be seen above. This is a method that I have used on smaller scales in the past, and it has typically worked very well for me. If the laser cutter doesn’t cut away too much of the material, the pieces fit together quite nicely, and don’t need any additional adhesive. I also added a top plate, which the initial design did not have. I figured that this piece would hold the whole thing together better. While this design change did remove one dynamic aspect of the stand, the opening front panel, it decreased the complexity of the design significantly.
When I was still planning on using wood, I was also planning on painting it black, as my desk is also black painted wood and I wanted it to match. With the change to acrylic rather than wood came the decision to paint it or not. I wasn’t sure how receptive acrylic is to paint, or if it would look the same as it would have with wood. Because acrylic is clear, I saw it as an opportunity to enhance my aesthetic. I decided that I would assemble the stand with the raw acrylic pieces before painting anything, to see how it looked. I liked the idea of the new material showing off more of the RGB lighting from my computer, but I feared it would defeat the purpose of having the cutouts at all.
Unfortunately, as I was waiting for my parts to be returned from the ITLL, I got an email saying that their acrylic stock is not large enough to cut the pieces I needed, so I have not been able to assemble the final product. Because I was not able to see the stand for myself in person, I decided to make some SolidWorks renders in an attempt to decide which aesthetic I liked more.
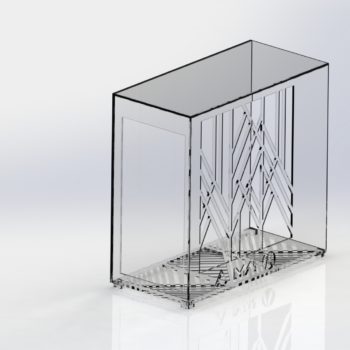
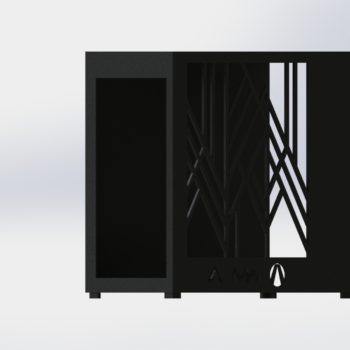
From Left to Right: A render of the PC Stand with clear acrylic, A render of the PC Stand with black painted acrylic
As I am still fairly inexperienced in setting up SolidWorks renders, you can barely tell that the black spray painted version is even a render, but I still found the comparison helpful. After seeing the render of the stand with raw acrylic, I think I might end up liking it more than I initially thought. I think the sharp edges of the cutouts will still refract the RGB light in interesting ways, possibly even creating another dynamic element of the aesthetic.
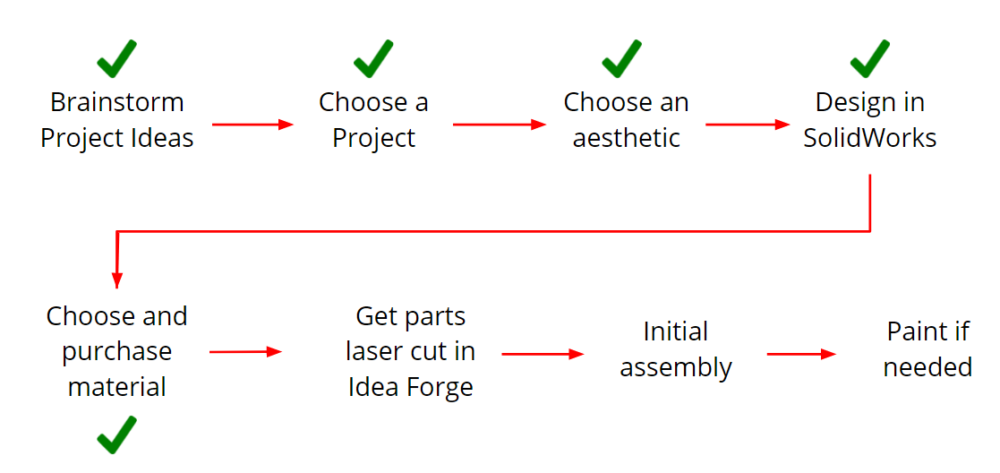
My Project Timeline
Moving forwards, I absolutely intend to complete this project, even though the course will be over. I spent so much time designing this project, that I have to see it through. Although the ITLL did not have acrylic sheets big enough for the front and back plates of the stand, they are big enough for the rest of the stand. I decided to have them cut the pieces they could, while I ordered appropriately sized material to finish the last few pieces. At the time of writing, I have not received any pieces of the stand, nor have I received my additional material. The next steps for the project once this material is received is to drop it off at the ITLL and submit a new work order. Once all pieces are complete and I have them in hand, I will try to assemble the stand as is. This will help me determine how well the pieces fit together, as well as helping me to determine if I want to paint it or not. If the pieces are too tight, I will sand them down until they fit. If they are too loose, I will try to get as accurate an idea of the aesthetic as I can and decide if I want to paint before the final assembly, as I would have to use some sort of epoxy to hold the final product together and it would not come apart easily.
While it is quite disappointing that I wasn’t able to finish my project before the expo, I am quite happy with how the design turned out, and I am excited to see the finished product. I think the Art Deco Geometry ended up being the perfect aesthetic to complement the gaming aesthetic, at least from what I can tell based on looking at the renders. I think no matter which option I end up picking, the RGB lights will shine through in an interesting way. I completely anticipate this stand being something that I use from now on, so I really hope the actual build process goes smoothly.
Video Link: https://vimeo.com/544358551
1 Comment. Leave new
I really love the geometric design of the final case and I’m curious if you are going to add gold accents such as found predominantly in the art deco aesthetic?