
I’m already a fair way into my project, but during planning and as I’ve been working I’ve developed a range of specifications and constraints for my project. I review the top 5 of each below.
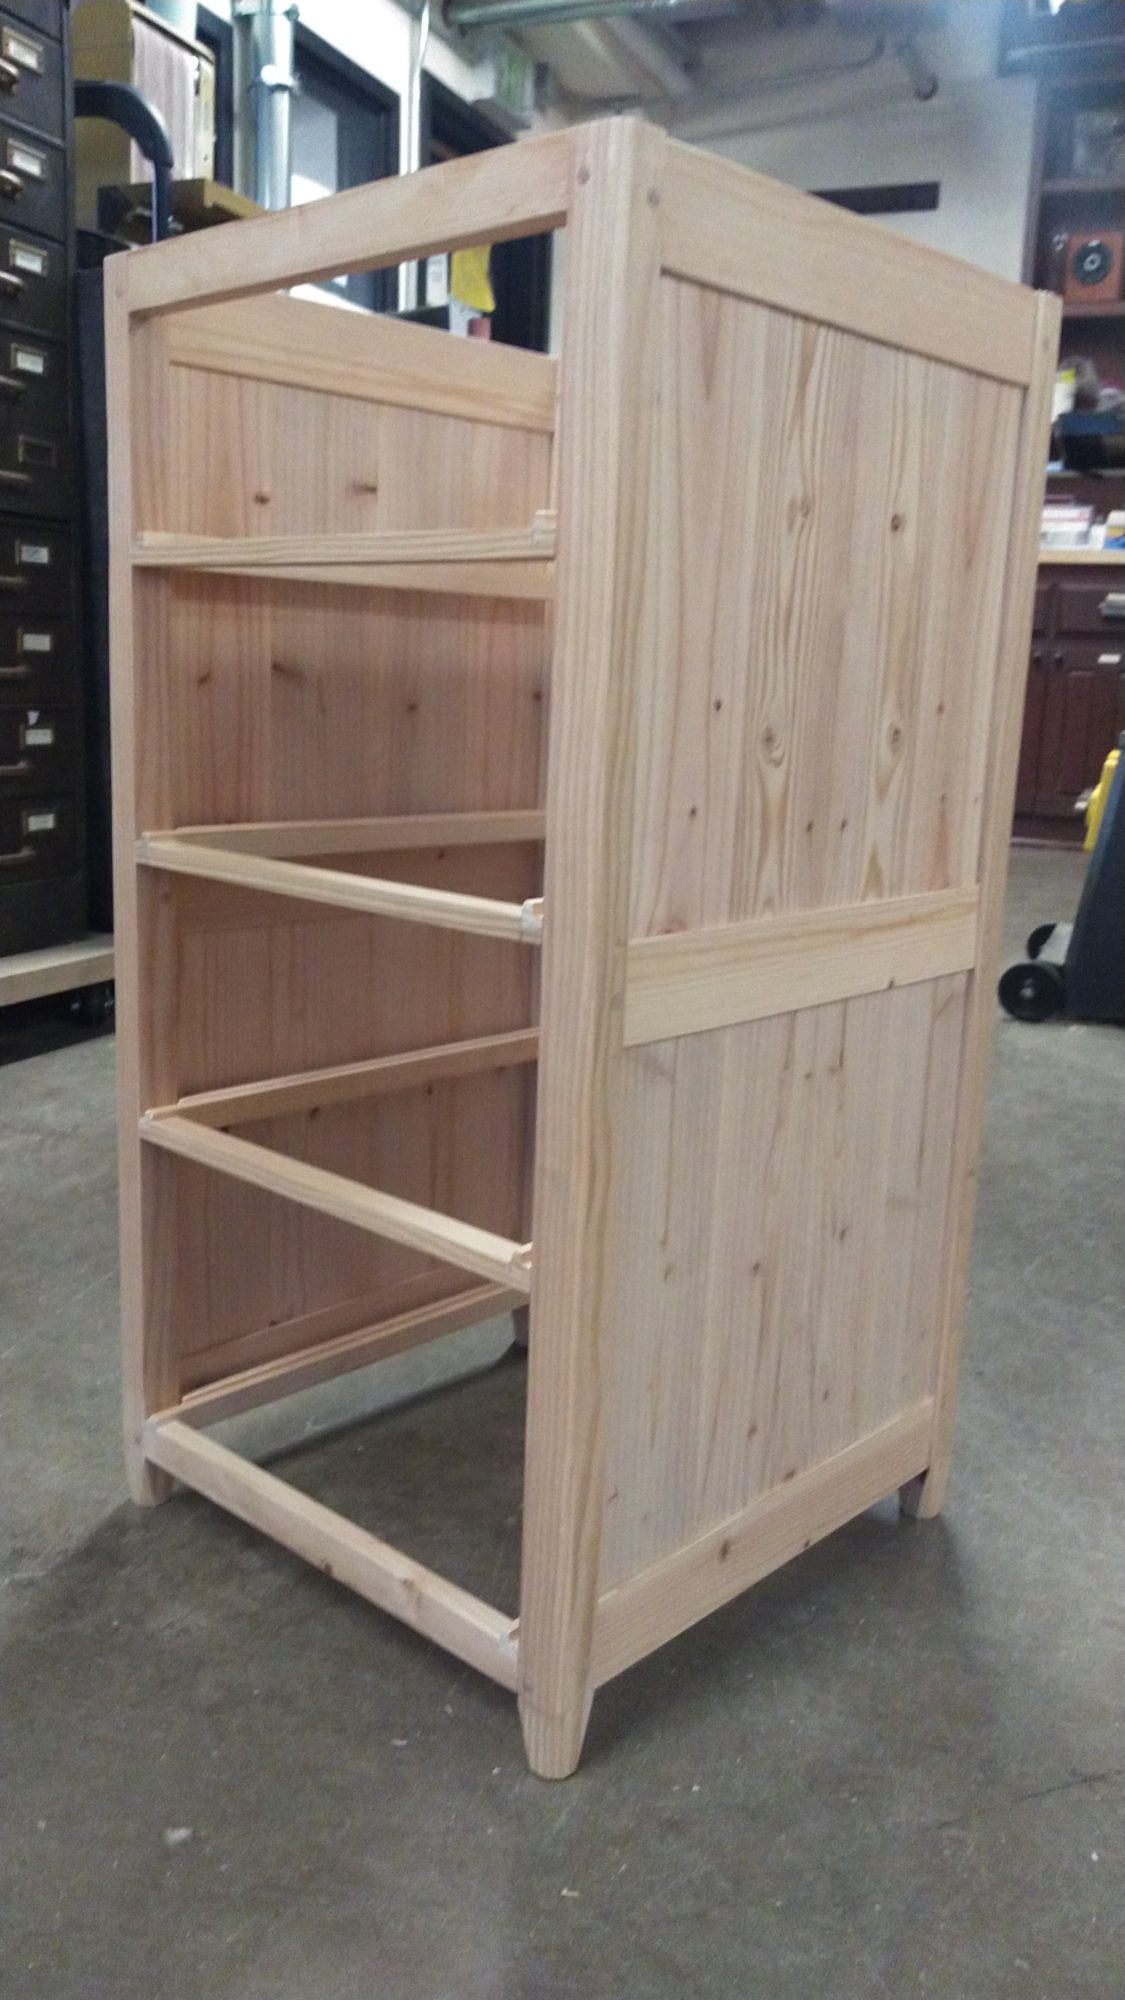
My project is an ornamented mortise and tenon nightstand with drawers.

My progress up to this point
Specifications
Size:
The nightstand should fit in a roughly 16”x16”x32” window and should maximize use of that space. Firstly, I find those to be reasonable dimensions for a nightstand in a modestly sized bedroom. Secondly, that would allow it to fit a space I have available in my current room. Though its primary purpose for this class is aesthetic, I also want it to be a practical piece of furniture with ample space in the drawers and on its surface.
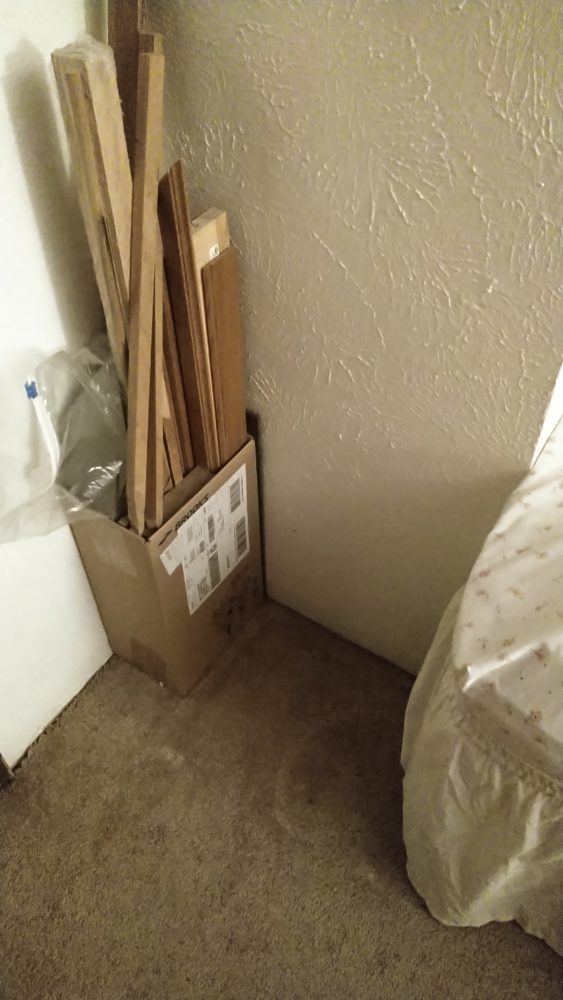
The available space in my room. Right by the hardwoods!
Strength/Rigidity to Weight Ratio:
The nightstand should also be strong and rigid. It should be resistant to breakage, splintering, racking, twisting, and other failure modes, but not at the cost of being bulky. I want to engineer the piece to be as strong as possible for its weight (within the constraints of the project)
Joinery:
A rather unique specification for my project is that I want it to be made with only glue and joinery, so no fasteners! This is partially because fasteners can rust or loosen over time, and because they can compromise the strength of the materials they’re in, but honestly it’s mostly to show off. I want you to be able to run this nightstand through a metal detector and not hear the faintest hint of a beep. I want it so free of metal that you could give it to Magneto when he was in that special prison and he couldn’t do a thing with it. Except, of course, use it as a nightstand.
These mortises and tenons hold the piece together!
Durability and Longevity:
I want this nightstand to last 100 years. Maybe 500 years if it’s really well taken care of. Long after I die and possibly when human civilization is but a distant memory, I want it to still be hanging around and still being a fully functioning nightstand.
Aesthetics:
The design I’ve chosen lends itself to showing off the natural beauty of the wood. I want it to be the main attraction, with simple ornamentation augmenting, not detracting from it. Pine is often overlooked as a material, or when it is used, it’s painted or stained to look like something it’s not. I want to give this discarded pine a chance to shine for what it truly is, which to me is a beautiful wood worthy of respect. I’d also like the joinery to be clearly visible as well so that it’s evident how the piece was made.
Constraints
Time:
My most limiting constraint is time. If I had all the time in the world, I’m sure I could make the best nightstand there ever was that perfectly meets all my criteria. Or at least comes close. But the farther into this project I get, the more I realize that chasing perfection will only lead me to never getting anything done. When I’m done with it, I’m sure I’ll have a long list of improvements (I already have several), but I’ll have to wait to implement them until I do another project.
Skills:
Because I’m trying out so many new things in this project, I’m bound to make mistakes, do things the hard way, and be faced with many moments of indecision. However frustrating these hurdles may be, they’re just the fair cost of learning by experience.
Materials:
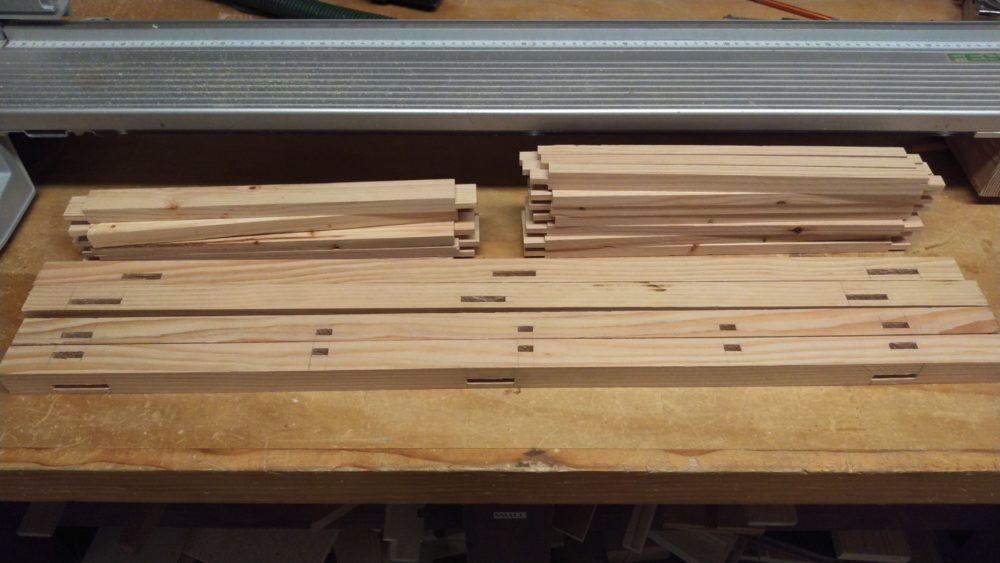
Since I’ve decided to use discarded construction lumber for my project, I’m going to have some additional hurdles in making a usable, polished end product. I can’t make it quite as thin as I’d like in some places because the wood will fall apart in manufacturing or in use. Construction lumber also comes in (fairly) standard sizes and with rough edges I’d like to not leave on show faces. So some of the design of this project has been based around what I can feasibly extract from the boards I have. I’ve also done some material selection, saving the best quality wood for critical locations and allowing lower quality wood in other places.

These panels are .23″ thick. That’s about as thin as I can take the wood without it breaking apart.
Tools:
My available tools also constrain the design. For example, the mortises will be easiest to chop if they are the width of the chisel that cuts them. Since the chisels at the Idea Forge are ⅛” increments ranging from ¼” to 1½”, it makes the most sense to use those sizes for widths. There’s also certain things that would be quite challenging to achieve with the tools I have, like short, deep mortises. Also, anywhere I can use a power tool instead of a hand tool, I’ll save a lot of time and gain a greater level of consistency.
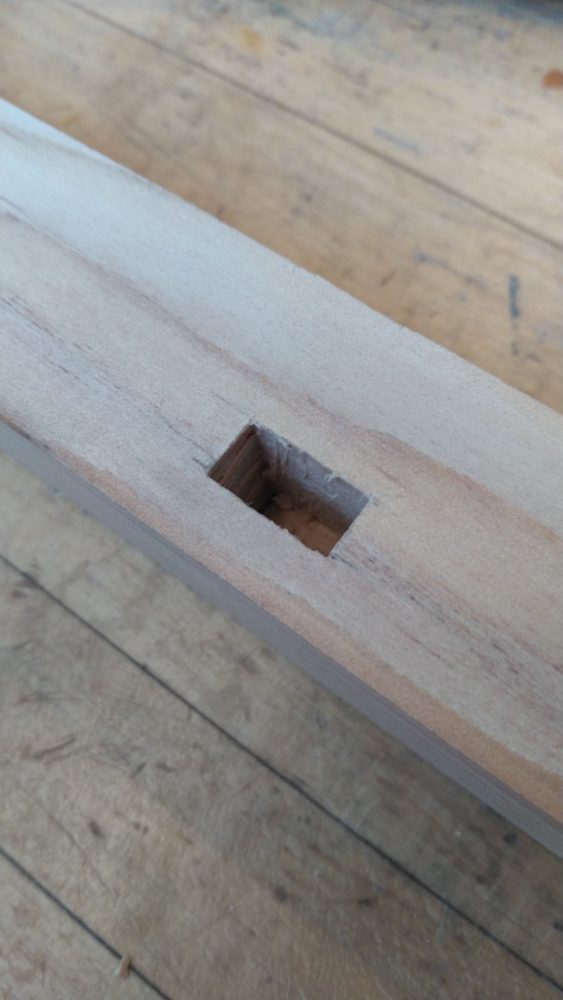
This mortise is 1/4″ wide by 1/2″ long x3/4″ deep. It was difficult to dig it out.
Ideas:
Lastly, (but not leastly!) I’m constrained by the scope of my own ideas. And not just in what I can imagine, but in what I can actually figure out how to make. Once I finish the piece, I’m sure I’ll have many ideas for how to do it better, or other cool variations of the project I could do in the future. But since I don’t yet have that hindsight, I need to do the best I can with what I currently know!
3 Comments. Leave new
[…] I wanted to create a nightstand with traditional joinery techniques for this project. I wanted it to be durable, strong, and lightweight, using zero (not a one!) fasteners and solid mortise and tenon joints. I wanted the piece to showcase the natural beauty of the wood with light ornamentation to compliment it. I discussed my specifications in greater detail in my last post. […]
Hi Anna, this is amazing how far you are into your project! You seem to not be letting your time constraint hold you back because your project looks to be going great so far! I’m surprised you were able to find all of that discarded lumber…where are you sourcing it from?
Hi Holly, thanks!
I’ve been busting my butt I guess. I got a lot of it from a construction site. I walked to the edge of the premises, asked a guy if they had any scrap wood, and he just let me have at a giant pile. It was honestly way easier than I thought it would be. I’ve also been using off cuts laying around in the Idea Forge maker space wherever possible. My philosophy is to use up the worst wood whenever possible.