
For my project I am creating a wooden escapement mechanism modeled after the aesthetics of antique clock internals and wooden kinetic sculptures. I really wanted to work on my mechanical design skill in parallel with my aesthetic design skills. I also wanted to create an interesting artifact that could be displayed as a kinetic sculpture. I chose the aesthetic of antique clock internals and wooden kinetic sculptures because they both generally have a celebration of gears, linkages, and mechanisms. To this end, I wanted something that can act as a good portfolio piece in terms of aesthetics and functionality, which I think this aesthetic and topic will allow me to do.
I began working on conducting research and generating the initial escapement mechanism for the device. Since I wanted it to be able to stand on a desk, I wasn’t personally very interested in the typical vertical pendulum, which led me to to research more kinetic sculptures. Some kinetic sculptures instead use a weight attached to a lever arm on a gear to induce kinetic motion. However, after conducting more research and attempting to design such mechanisms in CAD, I was coming up short. Especially since I wanted to implement a large planetary gear system to function as the background to the piece, this solution seemed potentially impractical due to space constraints.

However, after conducting more research, I came across Dolf Perenti who has experimented with more organic escapement mechanisms. His Organic Escapement #4 (below) really stood out to me for its interesting motion in a way that seemed feasible and achievable for the timeframe of the project.
I then used his design as inspiration when creating my own linkage based escapement mechanism. I started with designing and iterating on the escapement mechanism itself since it is going to be central to the artifact and must be both aesthetic and functional. After several iterations, I was able to create a working escapement in CAD. From there, I began to implement the gearing systems to hold the weight and transfer the rotation to the planetary gear system which was designed to allow all three sets of gears to rotate. From here, I added support structures. Below is the current CAD of the project missing the required brass rods which will eventually hold everything together.
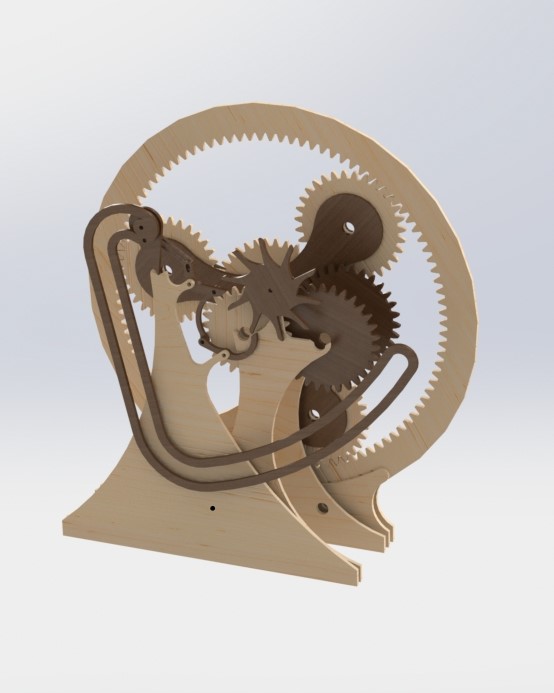
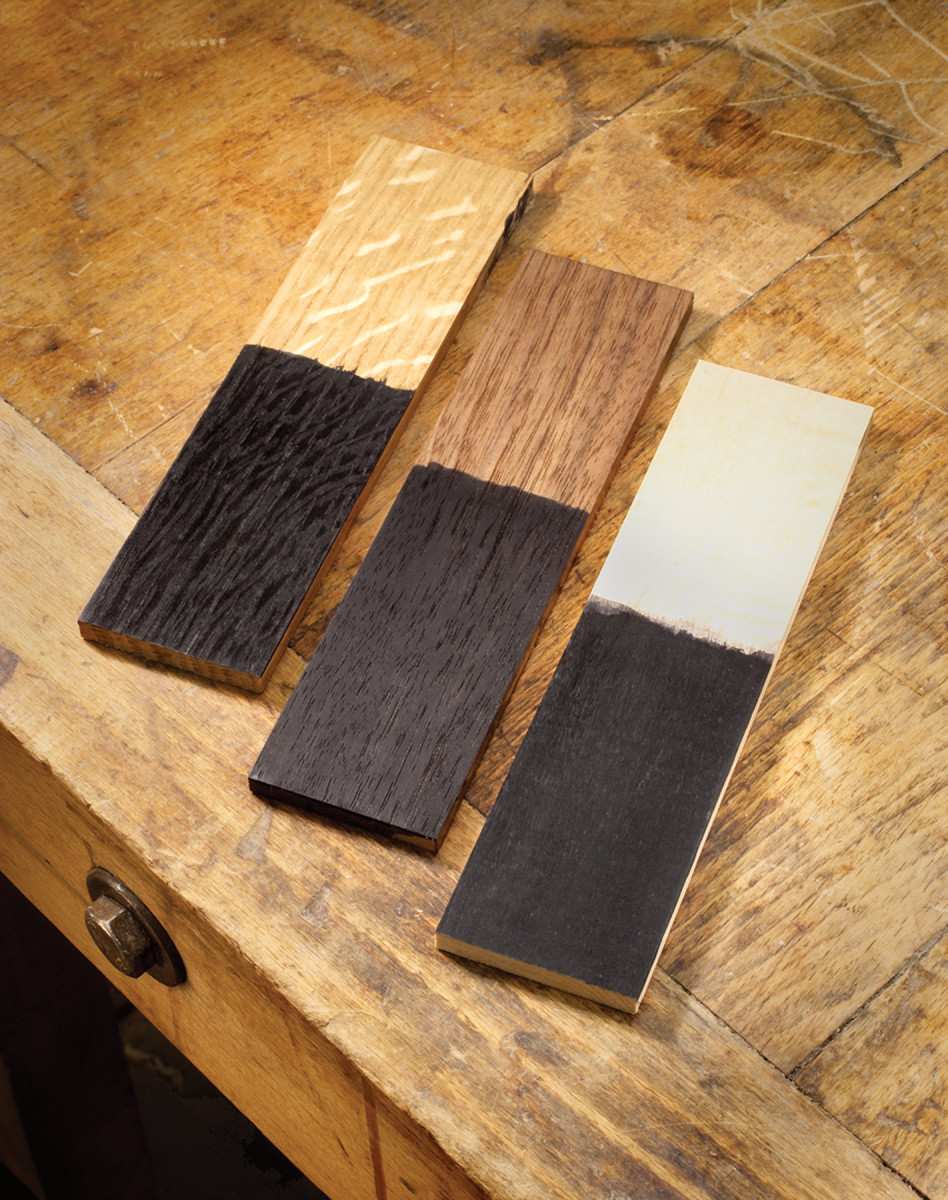
I still need to finalize the base and add artistic motifs to the gearing systems, but I wanted to make sure that I was happy with the overall form before I started to add stylistic elements. I will also decide which components will be a darker wood, most likely walnut, and which elements will be the typical pine or other light toned wood. Depending on the timeframe of the project, I may consider ebonizing the darker wood to further increase the contrast and add a finish that could help preserve the wood. Since I don’t plan to iterate on the design much after creating a physical artifact, I want to spend as much time on the CAD to get it to a place that I am satisfied with as I can.
Looking to next project steps, I will order materials or source them locally. After this, I will complete the stylistic and artistic motifs for the support structures and the gear systems. This will mostly include making cutouts and hollow areas where the gears and other parts of the artifact can be seen from the front. After this has been completed, the pieces will need to be cut on a laser cutter and then the project will need to be assembled and tested. I feel like I am in a fairly good spot, but I have a feeling that unforeseen problems will arise that will delay the project.
Timeline
- (4/9) Order or locally source materials
- (4/10) Finalize stylized CAD
- (4/12) Fabricate all pieces on a laser cutter and cut rods to length
- (4/16) Initial testing
- (4/20) Assembly and finishing
- Excess buffer time to allow for process time variations.
4 Comments. Leave new
This is an awesome project – one that really blurs the line between mechanically and aesthetically well-made. I bet some component design knowledge was heavily used, our professors would be proud! Where do you plan on doing the woodworking? I know there is something on campus that does laser engraving – have you thought about putting a logo or a picture on your final product?
Hi Sam, thank you! I am planning on cutting out most of the pieces in the ITLL or the Idea Forge and will most likely use the ITLL machine shop to help cut any brass pieces that I plan on using. I haven’t really thought about putting a logo or picture on the final product but that is a good idea! I will need to see how I can integrate it into the aesthetic!
I like how intricate this project is. It seems like with that many small pieces it will be very important to pay close attention to small details. I’m very excited to see the finished project.
Hi Lucas, thank you! I am agree that I will need to be careful when I am cutting it out and assembling it because it would be easy to misplace or loose a piece! Especially since I will need multiple lengths of brass rods to be able to connect everything.